
Weapons
Weapon selection on Talos I ranges from primitive to high-tech. Getting the most out of each weapon requires a greater understanding of its functionality and capabilities. Some weapons can be upgraded by applying Weapon Upgrade Kits (upgrades improve a weapon’s baseline stats). However, not all upgrades are readily available. Advanced upgrades require the Gunsmith I, Gunsmith II, Lab Tech I, and Lab Tech II abilities. Also, duplicate weapons can be dismantled to retrieve spare parts or recycled to acquire mineral and synthetic materials.
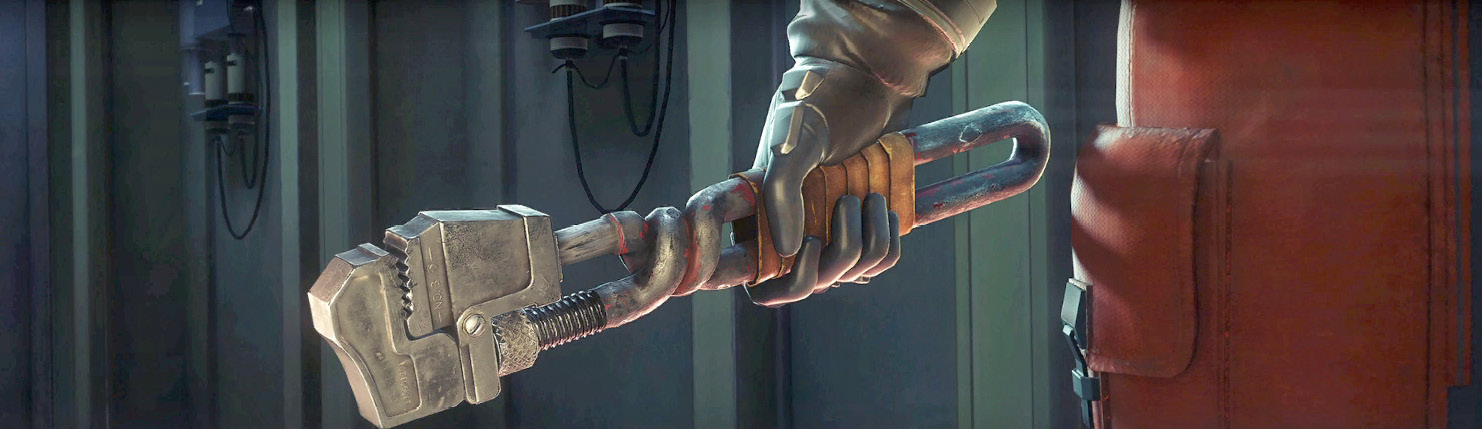
Wrench
| Damage | 11-22 |
| Weapon Size | 2 Inventory Slots |
| Description | |
| Hephaestus “Hefty” Twist and Loop Handle Industrial wrench. A flexible and indispensable tool for various engineering jobs. Also an effective improvised bludgeon. | |
Field Notes
The wrench is arguably the most versatile tool aboard Talos I. Not only can it be used to repair electrical junctions, turrets, and other mechanical objects, but it can also be wielded as a particularly effective melee weapon. Damage dealt by each strike of a wrench is dictated by the power of the swing—hold down the Attack button to wind-up for a powerful swing. Or simply tap the Attack button for faster, but weaker, melee attacks. Repeated swings will deplete your stamina, so make each hit count to avoid getting winded—stamina recovers steadily over time. The wrench can also be used to break items, such as display cases. This allows you to grab items behind glass, such as Neuromods and flowers.
This tool is first acquired in the Simulation Labs, found next to Patricia Varma’s body. This tool is instrumental in escaping the lab and fighting off Mimics. Deploying the wrench as a weapon requires you to get close to enemies, putting you at risk. As a result, use it against enemies that charge toward you, such as Mimics and Greater Mimics. In a pinch, it can also be used against Phantoms—but it’s best to immobilize a Phantom (and other enemies) with GLOO before moving in for a melee attack. GLOO Cannon/wrench combos are extremely effective for taking out weaker enemies during early Typhon encounters. Unlike some weapons, the wrench cannot be upgraded.
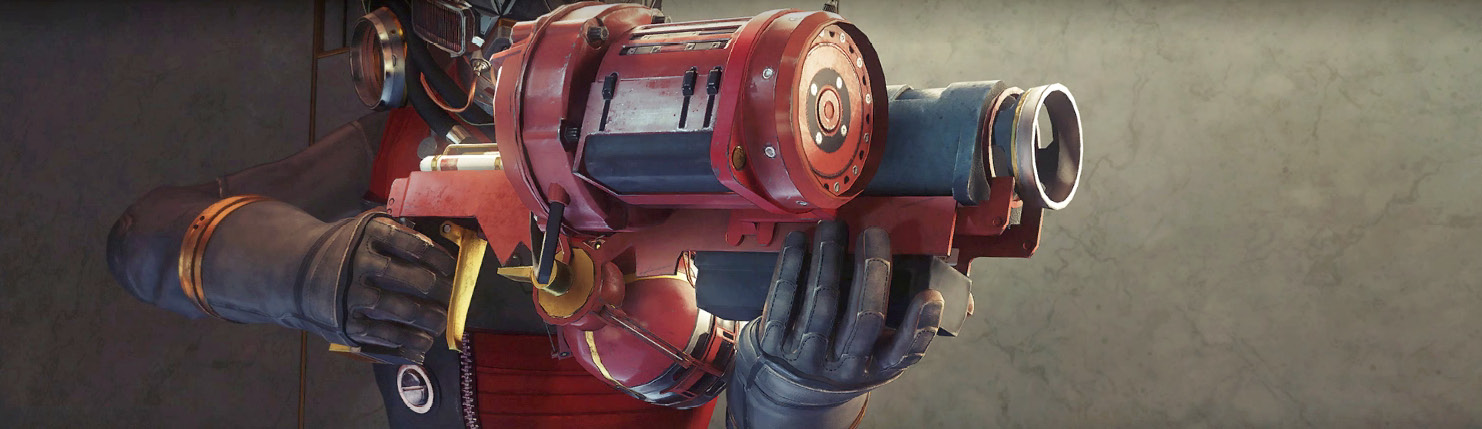
GLOO Cannon
| Incapacitation Rate | 100% |
| Handling | 33% |
| Range | 9 meters |
| Reload Speed | 100% |
| Ammo | GLOO Canister |
| Weapon Size | 3 Inventory Slots |
| Description | |
| The Gelifoam Lattice Organism Obstructor fires a quickly stabilizing stream of incapacitant foam that can block or subdue targets. | |
Upgrades
Given the GLOO Cannon’s versatility, it’s well-deserving of your acquired Weapon Upgrade Kits. Focus on upgrading the weapon’s incapacitation rate, range, and reload speed first. At your earliest convenience, use Neuromods to acquire the Lab Tech I and Lab Tech II abilities. This allows you to access the weapon’s advanced upgrades. The same abilities are required to upgrade the Q-Beam, making it well worth the investment in Neuromods.
| Requires Lab Tech I | |||||
| Incapacitation Rate |
120% |
150% |
180% |
225% |
|
| Handling |
45% |
60% |
75% |
||
| Range |
12m |
15m |
18m |
21m |
24m |
| Reload Speed |
120% |
145% |
175% |
||
| Requires Lab Tech II | |||||
Field Notes
The GLOO Cannon fires a proprietary foam-like substance which immediately hardens upon making contact with any object. As a result, this weapon has a variety of applications ranging from immobilizing enemies to creating climbable geometry, useful for reaching elevated areas. Fed by a canister, the weapon fires individual GLOO deposits in rapid succession—simply hold down the trigger to unleash a barrage of GLOO. Initially, the GLOO Cannon has very limited range, making it most effective in close quarters. Targeting Typhon organisms with GLOO greatly reduces their mobility, and in some cases, freezes them entirely, albeit temporarily. GLOO can also be used to smother damaged electrical junctions, temporarily preventing them from spewing arcs of lethal electricity—this buys you time to pass the hazard or conduct repairs.
First obtainable in the Neuromod Division’s foyer, next to Veer Singh’s body, the GLOO Cannon proved vital during the early moments of the Typhon outbreak on Talos I. Station personnel used GLOO Cannons to immobilize Typhon organisms and create makeshift barricades. Ultimately, the GLOO Cannon lacked the lethality necessary to stop the Typhon threat from spreading. Therefore, use the GLOO Cannon to immobilize threats like Mimics and Phantoms, then follow up with lethal attacks from other weapons—or simply run away while the Typhon organism is encased in GLOO.
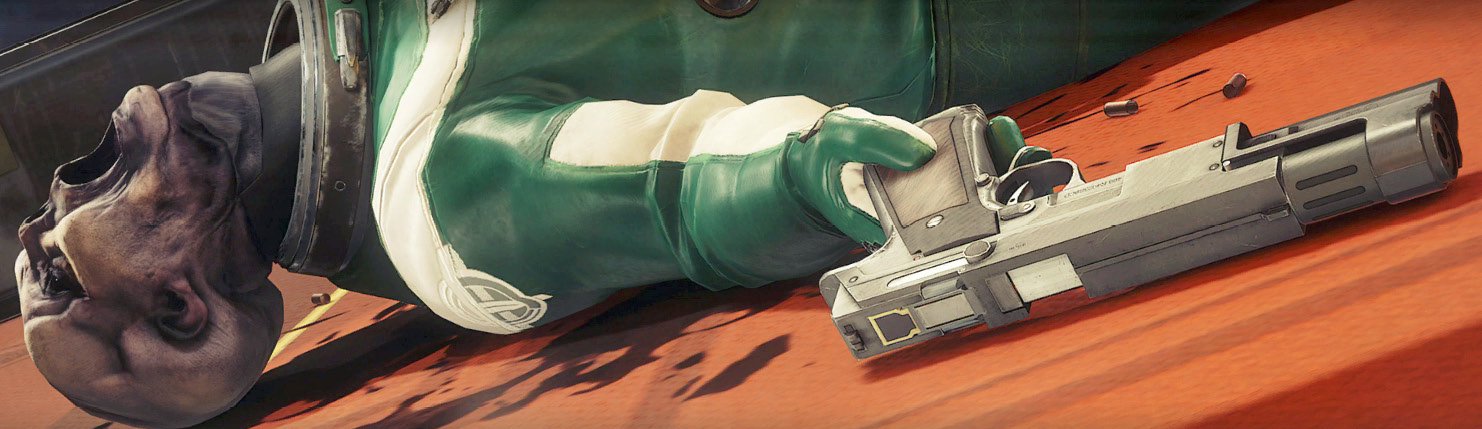
Silenced Pistol
| Firepower | 11 |
| Magazine Capacity | 15 |
| Range | 15 meters |
| Accuracy | 60% |
| Ammo | 9mm Bullets |
| Weapon Size | 2 Inventory Slots |
| Description | |
| Throne PPN light-duty pistol fires 9mm rounds and features an integrated noise suppressor. | |
Upgrades
Don’t use too many Weapon Upgrade Kits on the Silenced Pistol. It’s best to save these kits for other weapons, like the superior Artemis Golden Pistol. Consider upgrading the weapon’s firepower and magazine capacity once. Upgrades to the weapon’s range and accuracy are less noticeable given tight confines of the station. The Gunsmith I and Gunsmith II abilities are required for more advanced upgrades.
| Requires Gunsmith I | |||||
| Firepower |
12 |
13 |
|||
| Handling |
17 |
20 |
23 |
27 |
|
| Range |
20m |
25m |
30m |
35m |
|
| Reload Speed |
65% |
70% |
75% |
80% |
85% |
| Requires Gunsmith II | |||||
Field Notes
The Silenced Pistol is the standard-issue duty weapon carried by all Talos I security officers. As a result, it is the most common firearm found on the station. The pistol fires suppressed 9mm rounds designed to harm (and potentially kill) human targets. However, the PPN has proven rather ineffective against the Typhon scourge—complaints of the weapon’s poor stopping power are common among surviving Talos I personnel. But what the pistol lacks in damage output it somewhat makes up for in stealth, rate of fire, and diminished recoil. The weapon’s integrated suppressor significantly reduces the audible report of each shot, ideal when attempting to avoid detection. Light recoil allows for quick and surprisingly accurate follow-up shots.
This weapon is first encountered in the Talos I Lobby, next to Elias Black’s body in the Teleconferencing Center. It is later found on (and next to) the bodies of other Talos I security officers and within most security booths. The weapon is most effective when engaging Typhon organisms with limited health, such as Mimics and Cystoids. Its large magazine capacity and high rate of fire also make it handy for dispatching elusive Poltergeists—hit these enemies repeatedly, even after they disappear.
Huntress Boltcaster

| Ammo | FlexiFoam Bolts |
| Weapon Size | 2 Inventory Slots |
| Description | |
| Harke, traveller! Thine olde enemie, the knave, stands no chance against thee now! For thou hast the trusty Huntress at thine side! Yea, verily, any who wouldst challenge thee shall be slain in hasty fashion, when the Huntress lets fly her FlexiFoam bolts with truest aim! Go forth, intrepid hero! (feedback/problems email mmalinaro@transtar.talos). | |
Field Notes
Life aboard a space station can get dull and repetitive. Enter the Huntress Boltcaster, a foam dart-firing toy gun which has garnered a huge following among Talos I’s crew. These colorful toy crossbows can be found scattered around the station, along with their FlexiFoam Bolt ammo. While not a serious weapon, the Huntress Boltcaster can still be useful for hitting buttons and touch-screens that are out of arm’s reach. If you prefer a stealthy approach while exploring the station, fire FlexiFoam Bolts to distract enemies, allowing you to sneak through infested areas undetected.
While these weapons are rather ubiquitous, you can first acquire the Huntress Boltcaster in the Sales Division office on the third floor of the Talos I Lobbby. Mary Malinaro, from Psychotronics, has created and distributed fabrication licenses for the weapon and its ammo. These licenses can be downloaded from various workstations throughout Talos I. Avoid targeting Typhon organisms with this weapon, as you’ll only draw their attention, prompting them to attack.

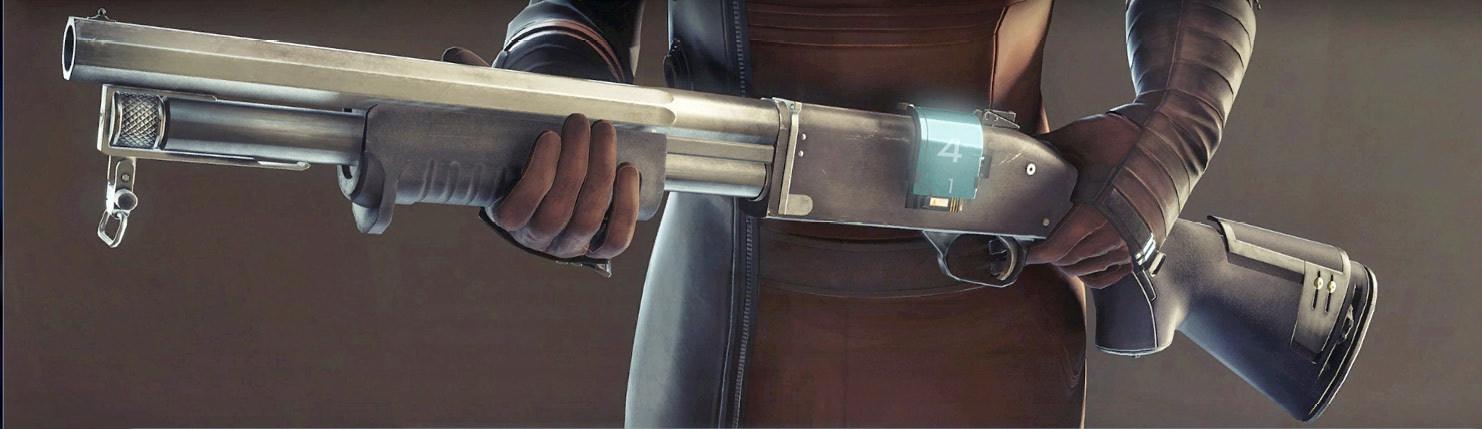
Shotgun
| Firepower | 44 |
| Recoil | 100% |
| Ammo Capacity | 4 |
| Reload Speed | 100% |
| Ammo | Shotgun Shells |
| Weapon Size | 3 Inventory Slots |
| Description | |
| Throne S4 Tactical Pump Shotgun is designed to be used by security forces for maximum efficacy in close quarters. | |
Upgrades
Nearly all of the Shotgun’s deficiencies can be addressed by applying Weapon Upgrade Kits. Start off by upgrading the weapon’s low ammo capacity and reload speed. As you encounter tougher enemies, apply upgrades to firepower. If you continue to use the Shotgun regularly, invest in the Gun Smith I and Gun Smith II abilities. The upgrades available with Gun Smith II turn the Shotgun into an extremely deadly weapon capable of dishing out enormous damage. However, no upgrades improve the weapon’s limited range.
| Requires Gunsmith I | |||||
| Firepower |
48 |
53 |
59 |
65 |
71 |
| Recoil |
75% |
50% |
10% |
||
| Ammo Capacity |
5 |
6 |
8 |
10 |
|
| Reload Speed |
120% |
145% |
175% |
||
| Requires Gunsmith II | |||||
Field Notes
When it comes to close-quarter fighting, no weapon compares to the Shotgun. This is a standard pump-action tactical shotgun with a fixed, tubular magazine running beneath the barrel. Firing standard 12-gauge high-velocity shells, the weapon blasts lead shot over a wide area, dealing extreme damage at close range. However, damage drop-off is significant at ranges beyond a few meters. Furthermore, in its stock configuration, the weapon exhibits harsh recoil, making it difficult to keep the Shotgun on target when attempting a follow-up shot. Initially, the weapon also suffers from a relatively small magazine capacity and slow reloads—the weapon must be loaded manually, one shell at a time. Despite its shortcomings, the Shotgun is a top contender when it comes to taking down durable threats.
Like the Silenced Pistol, the Shotgun is a common firearm deployed by Talos I’s security officers. Initially this weapon can be found in Sarah Elazar’s office, in Talos I’s lobby. But other Shotguns can be found throughout the station, usually stored in lockers within security booths. At close range, all it takes is one direct hit from the Shotgun to kill a Mimic. The weapon is also effective against Greater Mimics, Phantoms, Poltergeists, and Corrupted Operators. However, it’s best to immobilize more durable enemies with GLOO before attacking with the Shotgun.
Disruptor Stun Gun
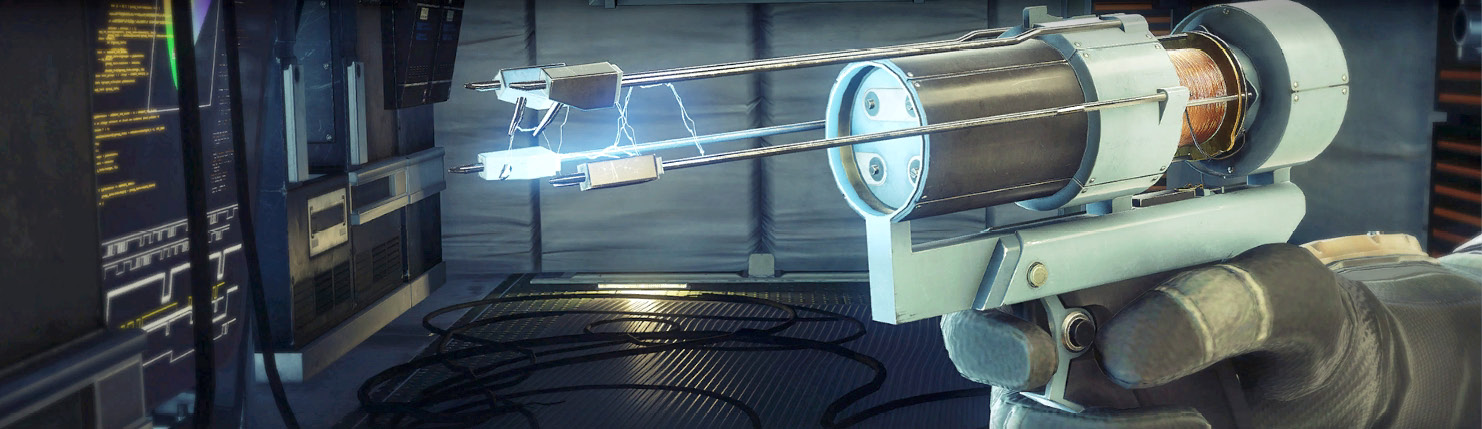
| Power | 4 seconds |
| Range | 7.5 meters |
| Shots | 4 |
| Recharge Rate | 1.5 seconds |
| Ammo | Disruptor Batteries |
| Weapon Size | 2 Inventory Slots |
| Description | |
| A hand-held electroshock weapon developed by Throne Tactical. The Disruptor immobilizes security threats by delivering a short-range electric current which is able to knock out human targets and temporarily disable organic enemies. Robotic enemies are damaged and temporarily disrupted. | |
Upgrades
The Disruptor Stun Gun is a specialized weapon, with limited application. So take that into consideration before applying Weapon Upgrade Kits (you should prioritize upgrades for other weapons first). When you do begin upgrading this weapon, focus on its range and shots—think of shots as the weapon’s ammo capacity. Once you’ve acquired the Gunsmith I and Gunsmith II abilities, consider upgrading the weapon’s power and recharge rate.
| Requires Gunsmith I | |||||
| Power |
4.5s |
5.25s |
6.25s |
7.5s |
9s |
| Range |
10m |
12.5m |
15m |
||
| Shots |
5 |
7 |
10 |
15 |
|
| Recharge Rate |
1.25s |
1.0s |
0.75s |
0.5s |
0.25s |
| Requires Gunsmith II | |||||
Field Notes
This is a unique electrical-based weapon capable of delivering an immobilizing jolt, effective against both organic and mechanical threats. Utilizing a compact, pistol configuration, the Disruptor Stun Gun is powered by replaceable batteries—search destroyed Operators for ammo. Hold down the weapon’s trigger to charge the weapon and watch the meter on the back of the pistol to determine when the weapon is fully charged. Once charged, release the trigger to fire a bolt of electricity. Initially, this weapon has extremely limited range, requiring you to get dangerously close to targets. Furthermore, the time it takes to charge the weapon makes it a liability during dynamic combat situations. Therefore, it’s best to use the Disruptor Stun Gun when sneaking up on unsuspecting enemies.
The Disruptor Stun Gun is less common than the Silenced Pistol and Shotgun, but remained popular with Talos I security forces prior to the Typhon outbreak. You can find these weapons on (or near) the bodies of fallen security officers—there’s also one hidden in the Simulation Labs’ debriefing room. The weapon is vital for incapacitating mind-controlled crew members, victims of Telepaths. It can also damage, and temporarily disable, Corrupted Operators and turrets.
Q-Beam
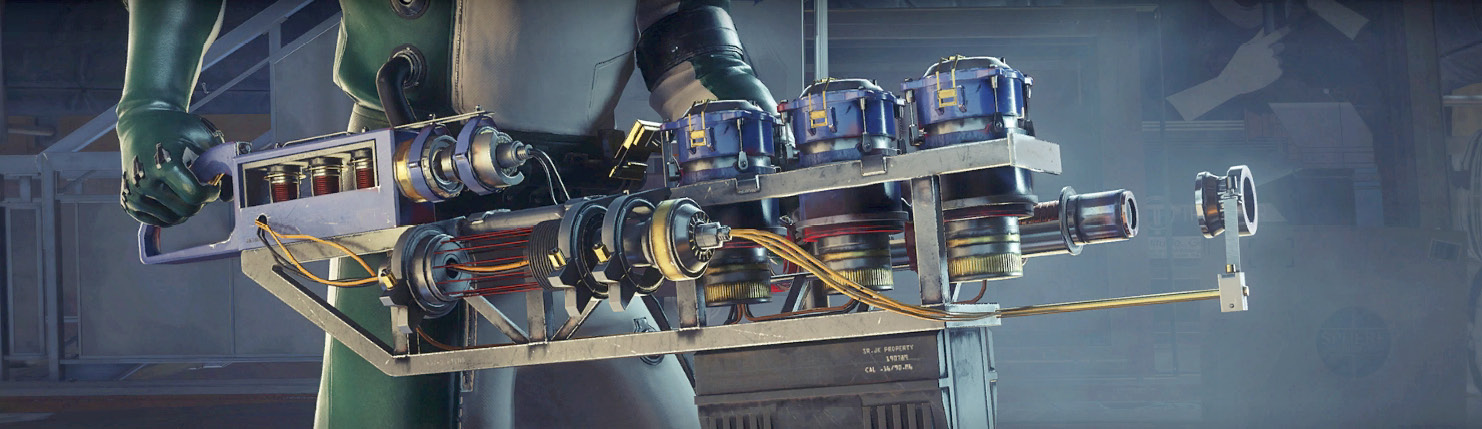
| Power | 55 kW |
| Handling | 15% |
| Firing Time | 5 seconds |
| Reload Speed | 100% |
| Ammo | Q-Beam Cells |
| Weapon Size | 4 Inventory Slots |
| Description | |
| The TS-QPB-S11 Quasiparticle Beam is a prototype directed energy weapon. A stream of volatile quasiparticles causes rapidly cascading excitations in energetic systems of matter to the point of rupture. | |
Upgrades
As the most powerful weapon in your arsenal, waste no time upgrading the Q-Beam. Start by upgrading its power and firing time—this allows you to inflict more damage before a reload is necessary. Invest in the Lab Tech I and Lab Tech II abilities once you have the necessary Neuromods. This allows you to access the more advanced upgrades. Max out power and firing time before upgrading the weapon’s handling and reload speed.
| Requires Lab Tech I | |||||
| Power |
60kW |
71kW |
82kW |
96kW |
110kW |
| Handling |
30% |
50% |
75% |
||
| Firing Time |
5.6s |
6.7s |
8s |
10s |
|
| Reload Speed |
120% |
145% |
|||
| Requires Lab Tech II | |||||
Field Notes
The Q-Beam is a powerful experimental weapon developed in Talos I’s Hardware Labs. While the weapon is somewhat unwieldly in this prototype state, there’s no denying its awesome power. Hold down the trigger to fire a green, concentrated beam of unstable particles into a target, eventually causing it to explode. While firing, make note of an enemy’s health meter at the top of the HUD. As an enemy takes damage from the Q-Beam, their health meter fills with green energy, representing the unstable particles filling their body. When the health meter is completely green, the target explodes. Initially, the Q-Beam Cells used to power this weapon are extremely rare. They can sometimes be found on destroyed Operators. So use the Q-Beam sparingly until you can fabricate your own Q-Beam Cells. A fabrication license is located in Deep Storage, within the Command Center’s safe.
Still in a prototype phase, Q-Beam weapons are quite rare aboard Talos I. Initially, one can be retrieved from the Beams and Waves Lab in the Hardware Labs. Once acquired, reserve the Q-Beam for the toughest Typhon threats you encounter, including Voltaic/Thermal/Etheric Phantoms, Telepaths, Technopaths, and Nightmares. Always make sure the weapon is fully loaded, then initiate attacks on these enemies by tossing a Nullwave Transmitter or EMP Charge before unleashing the power of the Q-Beam.
Artemis Golden Pistol
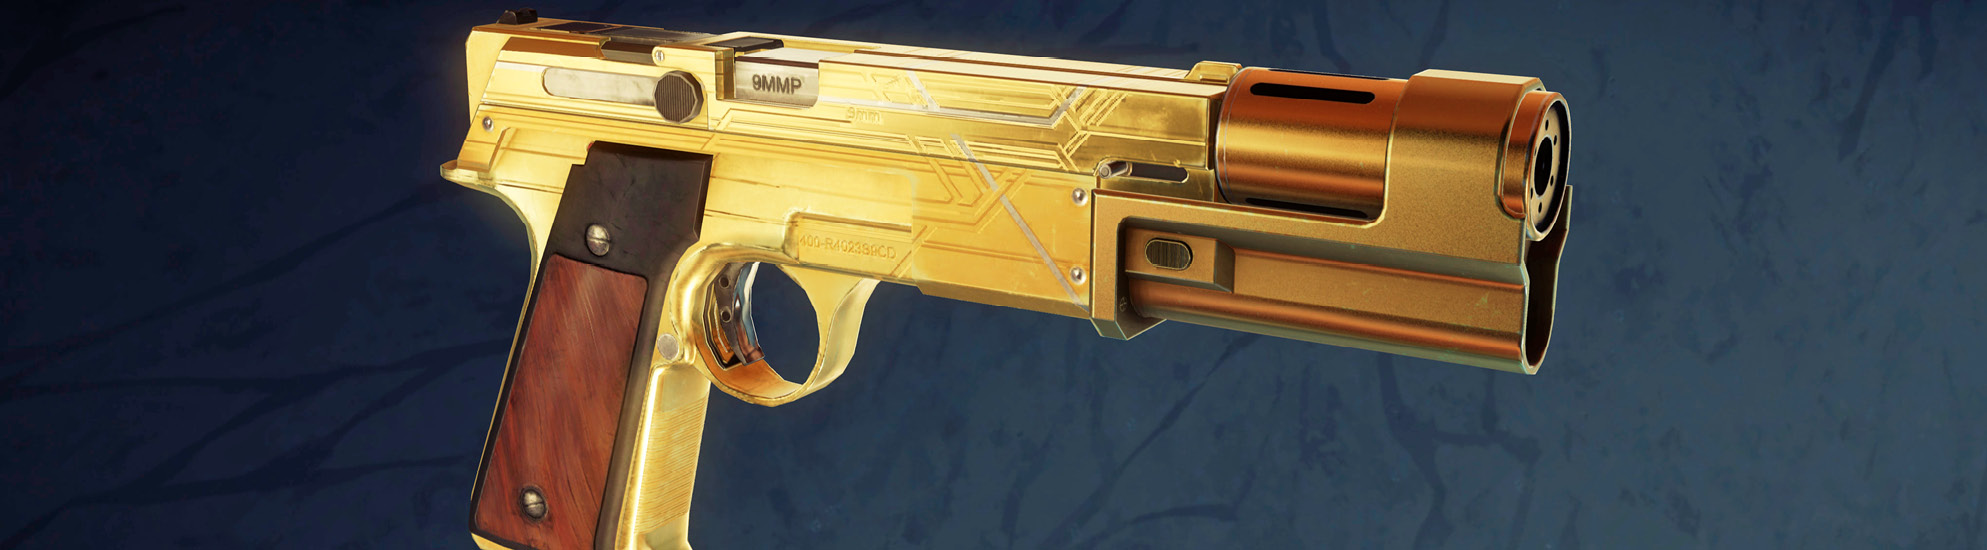
| Firepower | 12 |
| Magazine Capacity | 15 |
| Range | 15 meters |
| Accuracy | 60% |
| Ammo | 9mm Bullets |
| Weapon Size | 2 Inventory Slots |
| Description | |
| A gold-plated trophy pistol once belonging to the four-time world champion sport shooter, Seleth Rain. The champion visited Talos I to capture a connectome of his brain in the Neuromod Division. During his visit he was moved to present the pistol as a gift to Captain Jada Marks. | |
Upgrades
Any Weapon Upgrade Kits saved for the Silenced Pistol should be applied to the Artemis Golden Pistol instead. While both weapons are nearly identical, the Artemis Golden Pistol has greater firepower, both stock and when upgraded. In addition to focusing on firepower, upgrade the weapon’s magazine capacity—the weapon can hold an impressive 27 rounds when fully upgraded. But you’ll need to invest in the Gunsmith I and Gunsmith II abilities to access the weapon’s advanced upgrades.
| Requires Gunsmith I | |||||
| Firepower |
13 |
14 |
|||
| Magazine Capacity |
17 |
20 |
23 |
27 |
|
| Range |
20m |
25m |
30m |
35m |
|
| Accuracy |
65% |
70% |
75% |
80% |
85% |
| Requires Gunsmith II | |||||
Field Notes
This gold-plated trophy pistol is essentially a modified version of the same PPN carried by Talos I security personnel. It benefits from slightly higher damage output and a shiny gold finish. Other than that, it performs identically to the Silenced Pistol. Once acquired, make this your primary sidearm and consider ditching the Silenced Pistol to save space in your inventory. Like the Silenced Pistol, this weapon is equipped with an integrated suppressor, perfect for staying stealthy.
The Artemis Golden Pistol belongs to Jada Marks. She keeps the weapon stashed in her cabin’s safe, located in Crew Quarters—complete The Golden Gun optional objective to retrieve this unique weapon. Like the Silenced Pistol, this flashy weapon is most effective for taking out low-health enemies like Mimics and Cystoids. Once upgraded with a larger magazine capacity, it can also be used to take down Phantoms and Poltergeists.
EMP Charge
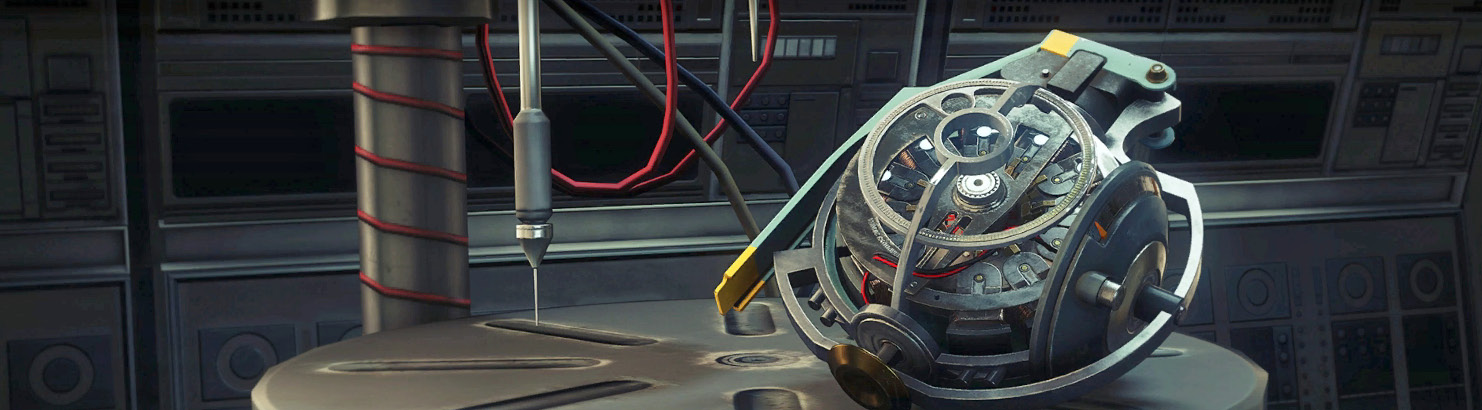
| Weapon Size | 1 Inventory Slot |
| Description | |
| Releases an electromagnetic pulse when detonated. Can be thrown or attached to surfaces. | |
Field Notes
The EMP Charge is a hand-thrown device with a time-delay fuse. It does not explode upon impact, allowing it be rolled or bounced off surfaces. Upon detonation, the charge emits a powerful electromagnetic pulse. While this pulse is completely harmless to organic entities, it wreaks havoc with electronic and mechanical equipment. This makes the EMP Charge ideal for temporarily disabling hostile turrets and Operators. The weapon is also effective against some Typhon, including the Voltaic Phantom and Technopath, temporarily preventing them from using their abilities. EMP Charges are rather common aboard Talos I, usually stored in labs—you can first acquire this device in the Hardware Labs.
Recycler Charge
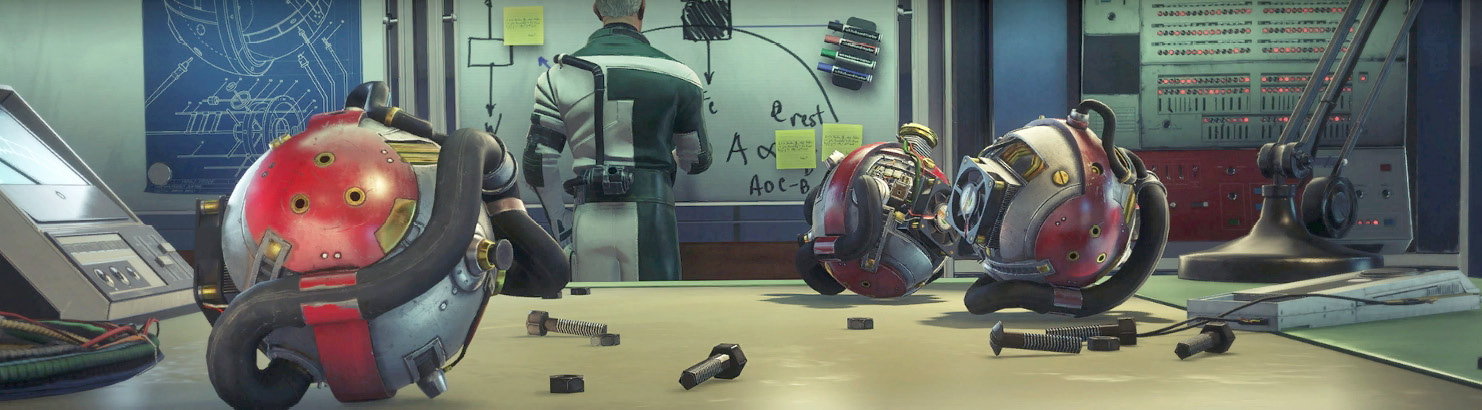
| Weapon Size | 1 Inventory Slot |
| Description | |
| A dangerous prototype device that attracts all objects within a short radius and recycles them into material fragments. Can be thrown or attached to surfaces. | |
Field Notes
Ongoing research in the Ballistics Lab (within the Hardware Labs) has led to the development of this unique and devastating weapon capable of converting objects into organic, mineral, synthetic, and exotic material fragments—think of it as a pocket-sized Recycler. Upon detonation, the Recycler Charge creates a miniature singularity, pulling nearby objects towards its center before exploding in a blinding light, leaving behind various material fragments. The singularity created by this device is powerful enough to pull in small objects and enemies, like Mimics, Cystoids, and Greater Mimics. But objects and enemies with greater mass can often escape the singularity’s pull. Still, the resulting explosion has a large blast radius, breaking down anything caught within. Needless to say, exercise extreme caution when tossing these devices, particularly when operating near allies and friendly turrets—they have a tendency to bounce, so make sure it doesn’t bounce back at you.
Nullwave Transmitter
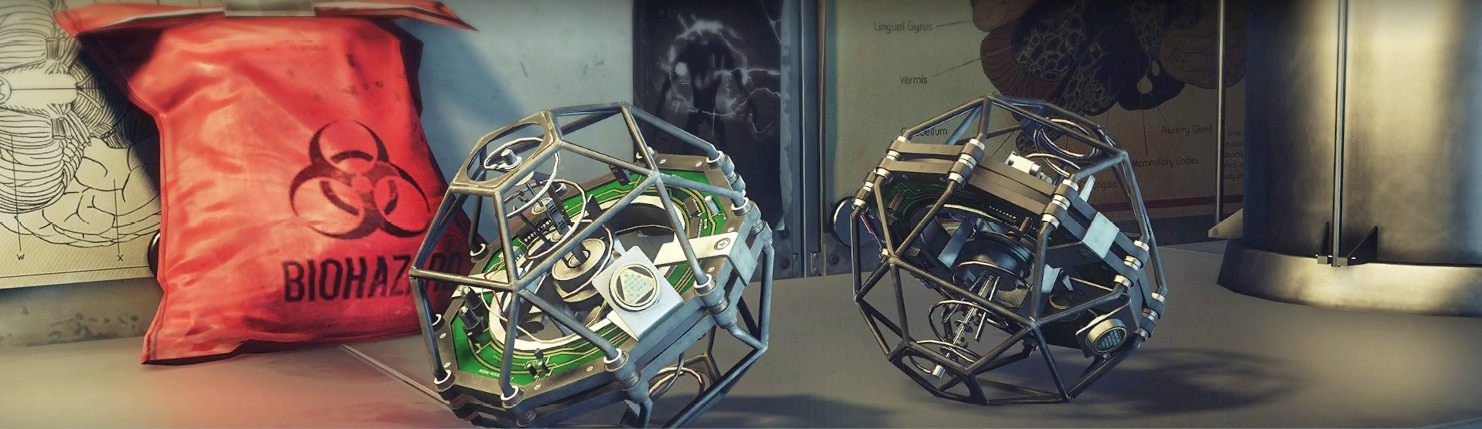
| Weapon Size | 1 Inventory Slot |
| Description | |
| An experimental device developed in the Psychotronics lab which discharges a Psi-nullifying pulse when detonated. Can be thrown or attached to surfaces. | |
Field Notes
The Nullwave Transmitter was created out of a need to counter powerful Psi abilities exhibited by Typhon entities within containment. Experiments in Behavioral Biometrics have shown Nullwave pulses are capable of temporarily suppressing these Psi abilities. This hand-thrown device emits a powerful Nullwave pulse upon impact, temporarily nullifying the Psi-based abilities of anyone (or anything) caught in its large blast radius. The device is particularly effective against Etheric Phantoms, Voltaic Phantoms, Telepaths, and Weavers. But it’s important to note that this device inflicts no damage—it simply prevents Typhon from using their Psi abilities—so be ready to follow up with more lethal attacks. Robbed of their Psi abilities, Typhon tend to find other ways to attack, so stay on your toes. Just make sure you’re clear of the Nullwave Transmitter’s blast radius to prevent nullifying your own Psi abilities.

Typhon Lure
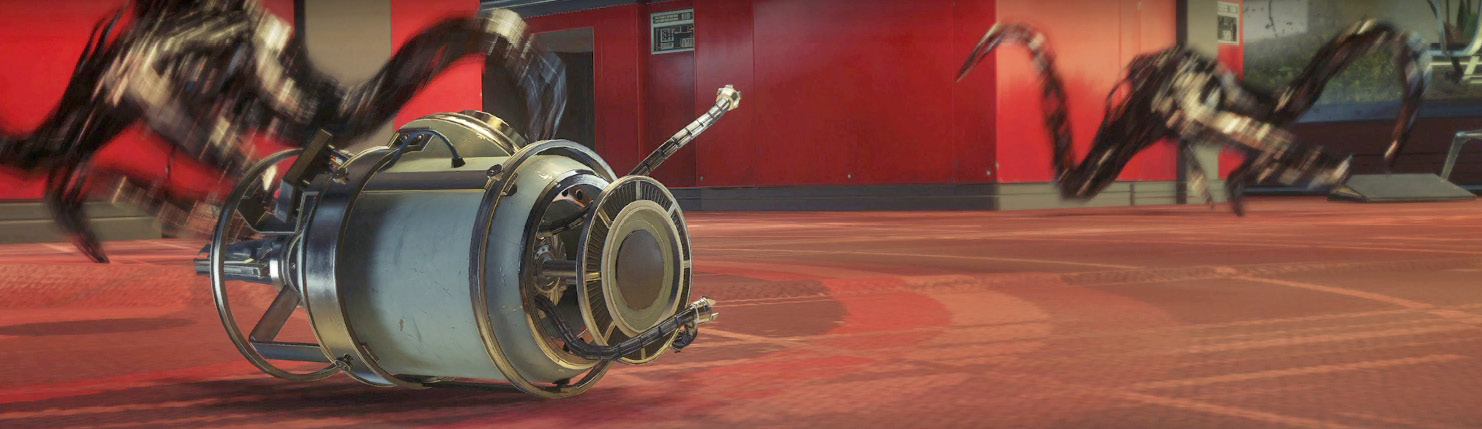
| Weapon Size | 1 Inventory Slot |
| Description | |
| An experimental device developed in the Psychotronics lab which releases a psycholuminescent “nightlight” that attracts Typhon organisms. Can be thrown or attached to surfaces. | |
Field Notes
This device has been nicknamed the “Nightlight” by researchers in Behavioral Biometrics due to its soothing glow. When deployed, the Typhon Lure emits a visible pulse capable of attracting Typhon organisms. The pulsing light remains active for approximately 20 seconds, buying you ample time to sneak past distracted enemies. The device is also ideal for luring multiple Typhon organisms into ambushes. Use it to lure Mimics and other enemies toward turrets. Or toss a Recycler Charge at a large group gathered around a Typhon Lure to score multiple kills.