
Mega Man 11 Guide Robot Master Impact Man
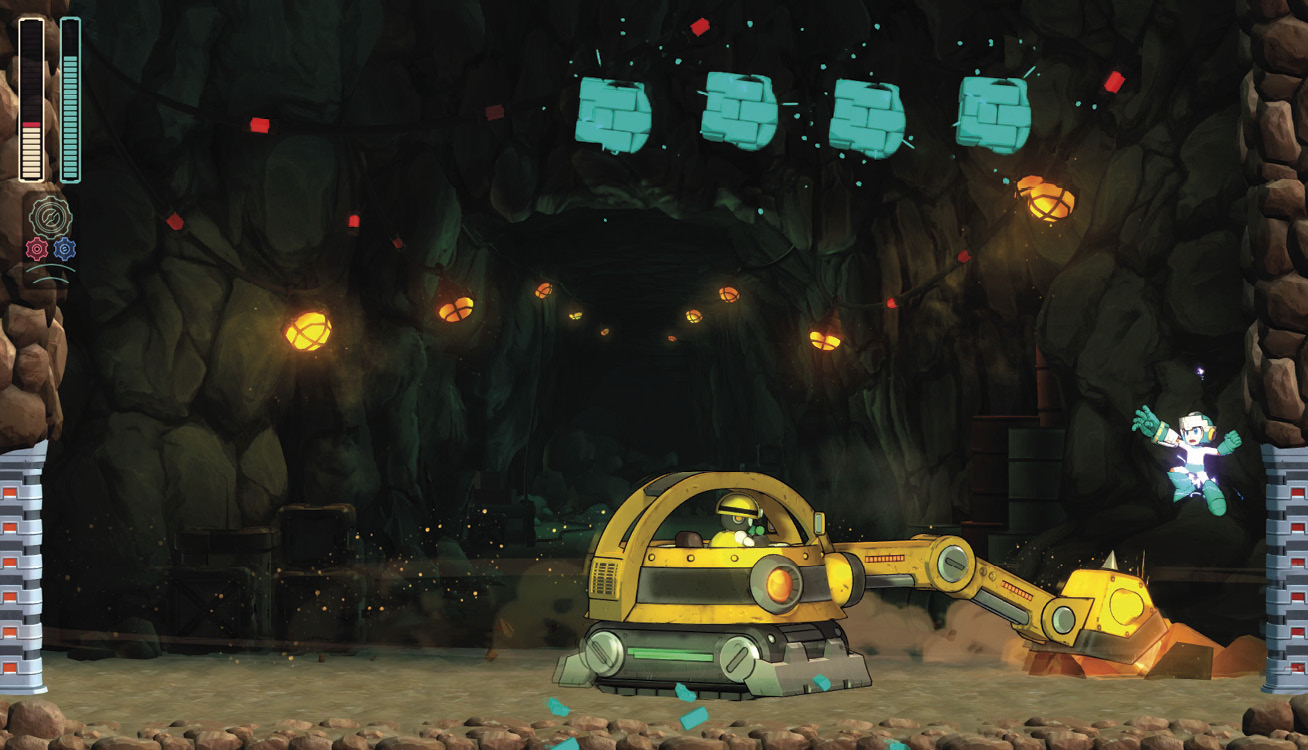
Mid-Boss: Pickman Digger
HP: 72
Weakness: Block Dropper x4, Chain Blast x3
The Pickman Digger is a Pickman-operated excavator that attacks with its hydraulic arm. The only weak point is the cab, which is severely vulnerable to the Block Dropper.


If it backs you into a corner, you’ll be in serious trouble, so you want to end this fight quickly. Turn on the Power Gear and nail it with a few Block Dropper attacks to destroy it before it can harm you.
 The post mid-boss room is another recovery opportunity. Grab the pickups. If you don’t have the Energy Balancer Neo, make sure you select Acid Barrier before picking up any weapon energy. From this point on, you can use the Block Dropper at your discretion.
 You’ll be in a very large room with cargo lifts. There is no floor in this room—just a bottomless pit. Make your way to the right while avoiding enemies and projectiles. While the Acid Barrier would be useful here, you need it for Impact Man. Try using the Block Dropper instead, assuming you have any juice left for it.
 Take out the Pickman and the Metall below.
 There are some pickups on the small platforms below. The next Metall opens up as you get close to it, allowing you to blast it.
 As you rise to the top, there is a Missile Cone. Jump up and take it out quickly.
 Shortly after the Missile Cone, you come into range of a Pickman to the far right and another Missile Cone below you. Hit them with the Block Dropper, or take them out individually with the Mega Buster.
 The Metall you destroyed at the bottom of the cargo lift track respawns, but it won’t bother you if you keep to the right side of the cargo lift. Grab the collectibles below if you’re in need.
 At the room’s far end is a Missile Cone. Kill or be killed!
 Above is the Pickman you destroyed earlier; it has now respawned. Unlike the Metall, this enemy will continue to bother you, so dispose of him as you please and head toward the exit in the upper right.
 Fire a Charge Shot as you drop down to eliminate all three Missile Cones. Avoid or destroy the Mawaru C, then collect the Large Weapon Energy before moving on.
 Because this room has spikes all along the floor, consider using the Block Dropper to dispose of the lower Missile Cone. Use the Mega Buster to destroy the Metall and the far right Missile Cone; then climb up the ladder.
 Hop over to the Metall and take it out before jumping onto the cargo lifts. The screen shaking indicates you’re about to encounter the Impact Bros. ahead.
 Once the cargo lift begins to rise, the Impact Bros. launch their assault. Use the Speed Gear to control the situation and avoid getting knocked off the cargo lift.
 Each time the cargo lifts are parallel to each other vertically, you can use Rush Coil to skip sections of this room.
 There are two Missile Cones at the top of the room. Destroy them and grab the Energy Tank in the upper left corner using a Rush Coil on the cargo lift.
 A Gabyoall patrols the small platform below a Pickman, who is guarding a Large Screw. Proceed as you wish and drop down the shaft to the right.
 The Impact Bros. shoot upward at you as you descend the shaft. Use the Speed Gear to avoid them.
 In the final room, you face five Missile Cones. You can destroy the highest one before dropping down. Take out the other four in a single Charge Shot.
 Clear out the shockades, grab the Large Energy at the top of the screen, and move forward to take on Impact Man.

