
Mega Man 11 Guide Robot Master Bounce Man
Recommended Gear
Your best friend for both mobility and combat in Boing-Boing Park is the Pile Driver, so anything you can do to keep its energy full (Capsule Catcher, Energy Balancer, Weapon Tanks) will help greatly. Having a full supply of Beat Calls wouldn’t hurt either.

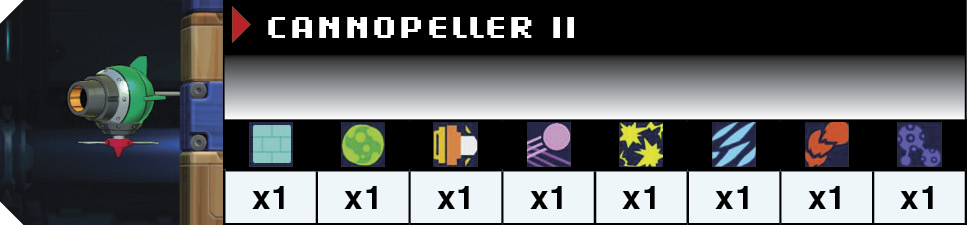
 At the beginning of the stage, a Cannopeller II shoots an explosive shot harmlessly over your head and into the wall, then floats upward off the screen. When it reaches the lowest point of its patrol, jump up and take it out with a Charge Shot.

You’ll see a trampoline that you can bounce on. Don’t worry about it for now; you’ll come back to it soon enough. Climb up the ladder, avoiding the Gabyoall as you jump to the next ladder. You can destroy Gabyoalls now using the Pile Driver, if you wish.


 The platforms ahead are colorful bouncy balls. Bounce up to the set of two bouncy balls (using jump to increase your bounce height), then bounce up again to the next platform and climb the ladder. Destroy the Wall Blaster with a Charge Shot as you ascend. If you stay just under its line of fire, you can hit it but it can’t hit you. You can also move during its slow shots to line up your own shots or keep moving past it.

 Jump off the platform below and follow the air down to the trampoline from the start of the stage. The trampoline will now send you flying back up, allowing you to reach the ladder to the next room. The Cannopeller II will have respawned, but it shouldn’t cause you any trouble.
 In the next room is a Bunby Balloon. If you destroy the Bunby (such as with a Charge Shot), the balloons float away a small distance and persist, potentially creating hazards for Mega Man. If you destroy the balloons holding the Bunby up, the Bunby plummets to its robotic demise. Note that the balloons are curiously immune to the Block Dropper, so a Charge Shot is the best approach. If you have a Mega Tank, you can also get six easy 1UPs.


Bounce up the balloons on the room’s left side. Take out the Bunby and its balloons, then high-bounce to the ladder above.
Achievement/Trophy
 Playtime’s Over
Destroy all balloon enemies once and reach the boss. (Excludes Challenge Mode)
 In the middle of the room is a contraption called a “slapper.” Upon being shot, the timer visually counts down from 3 to 1. The slapper spins around and physically assaults Mega Man, launching him forward. Use the arrow displayed in its default state to see which direction the slapper will go.
Take out the Lyrics and use the slapper to reach the ladder in the upper left corner. If you’re in a hurry, the Pile Driver or Rush Coil can get you to your destination faster than the slapper.

 This room is nothing but bouncy balls and Poyorns. Damaging a Poyorn causes it bounce away and potentially off the environment, so try to shoot them from a distance. They’re also weak to the Pile Driver.
When they’re gone, high-jump toward the ladder and exit the room.
 A Poyorn drops down and begins bouncing toward you. Take it out before leaving the ladder; otherwise you’ll start bouncing too.
 Bounce up to the pink slapper. While the timer counts down, take out the Cannopeller II. You can destroy its shots with the Mega Buster.

 After being slapped to the room’s right side, bounce up to the green platform. You can shoot the Bunby Balloon on the way up, but it’s also fine to leave it be.
 Reach a 1UP by jumping down and using the Pile Driver. If you left the Bunby Balloon alone, it will patrol back and forth away from the 1UP. Just wait for your window of opportunity. When you’re ready to proceed, use the slapper to reach the ladder across the gap.
 Two more Poyorns bounce your way. Pop and proceed.
 The three slappers in this room actually hit Mega Man to the right—the wrong direction. Clear the room of enemies and shoot all three slappers; then use them as platforms to jump across to the left. The Lyrics respawn over time.

 This is the first large room requiring mastery (or luck) over the bouncy balls. Proceed to the right, past the Gabyoall, and bounce to the top of the room. You should get bounced out of the small bouncy ball shaft and downward again.
 Take out the Wall Blasters and Lyrics; then carefully and calmly head left, using controlled bounces. The Block Dropper is useful here if the bouncing is affecting your aim. If you want the Weapon Capsule at the top, there are three solo bouncy balls leading to it. This also allows you to destroy the final Wall Blaster more easily. High-bounce out of the room.
 Destroy the Poyorn and use the slapper or Rush Coil to exit the room to the right. Collect the items by jumping off the edge of the slapper platform and bouncing to the upper left platform.
