
The Sims 3 Guide Essentials Creating a House
Build Mode
So, you’ve decided to build your own place in Sunset Valley. Construction day is here and you are ready to break ground. Erecting a house in Sunset Valley is much easier than real life because the only contractor you need is your mouse.
Let us take you through the process of building a basic, single-story house. While building a house, you should be acquainted with these two buttons, located near the camera controls right on the main section of the toolbar:
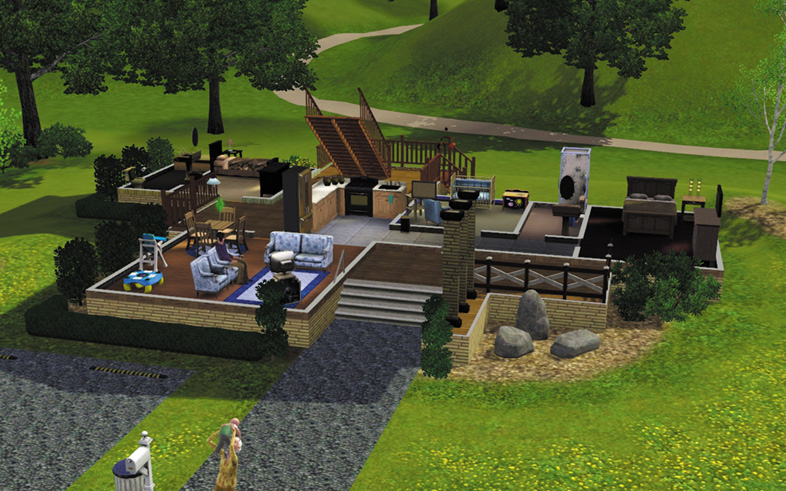

Change Wall Mode Home and End : Toggle through three different views of your house—walls down, cutaway walls, and walls up.
 Change Floors
Pg Up
and
Pg Dn
: Scroll up and down the different floors of your house with these two buttons.
Change Floors
Pg Up
and
Pg Dn
: Scroll up and down the different floors of your house with these two buttons.
Walls down view
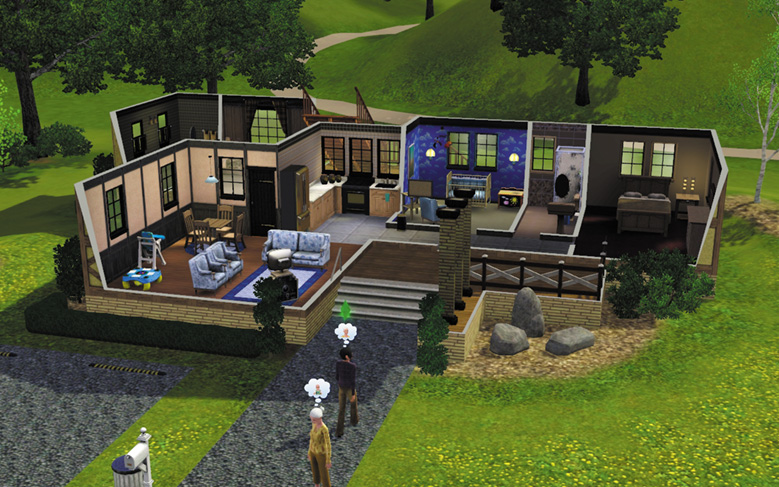
Cutaway walls view
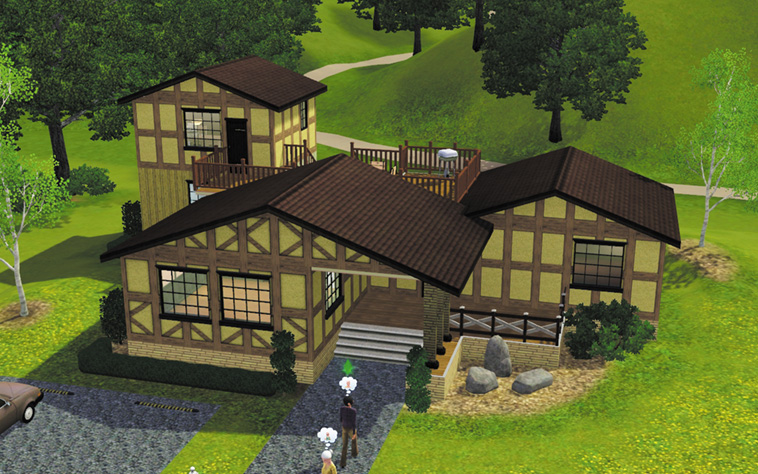
Walls up view
Laying Down a Foundation
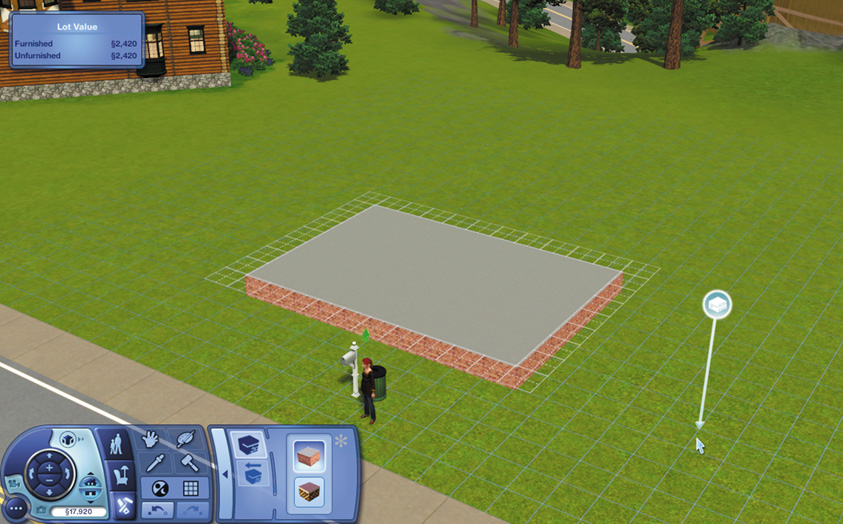
Once you purchase a lot, it’s time to plan out your house. If this is your very first house and you are working with the Simoleons afforded at the beginning of the game, you need to think small.
Frugality is a beneficial state of mind when planning your first house—if you blow all of your Simoleons on a monstrous foundation right away, you won’t have an adequate amount of money left over to fill the house with essential objects. So, throttle back those mansion-sized dreams (for now) and lay down the foundation for a modest house. Foundation is just §4 per square.
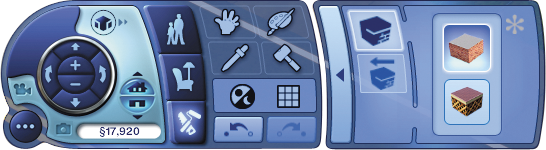
To lay the foundation, click on the actual foundation pictured under the house in the Build Mode menu. This turns the cursor into an arrow tool for creating the foundation.
To stretch the foundation across your lot, hold down the left mouse button. When you have the foundation set up, release the mouse button to instantly pour the cement. You can extend the foundation is different directions by laying down extra pieces. You absolutely do not have to make the foundation a rectangle.
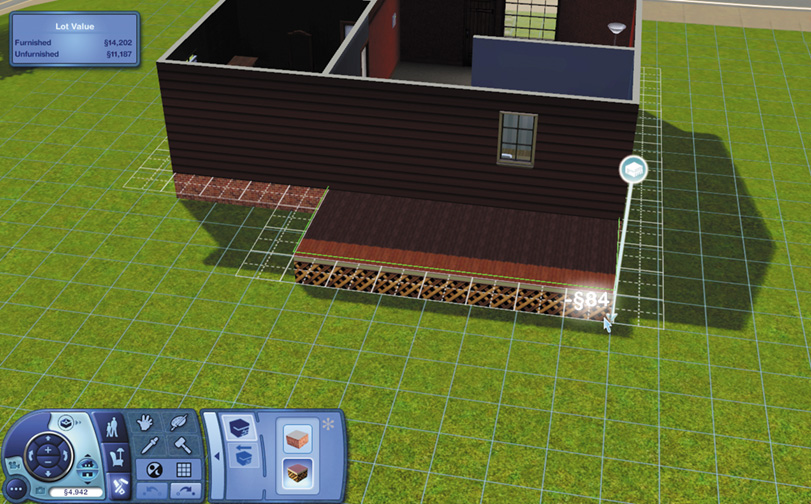
There are two types of foundations, too. The second is the deck foundation. Use this foundation to create simple or elaborate outdoor decks for your Sim’s house. You can use the diagonal tool to create walkways through a garden or around a uniquely shaped pool.
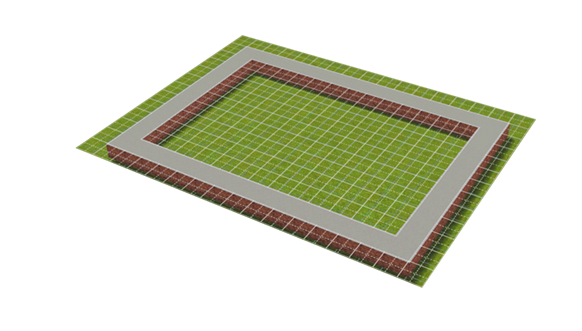
Both the regular and deck foundations can be used to create a flat surface over uneven terrain. Use the Change Floor button to raise or lower the working level when laying foundation. If you have a drop-off on your property, foundations are perfect for building houses overlooking a bluff. Multi-layered decks are quite attractive, too. Just make sure you connect the multiple stories with a set of stairs.
Walls
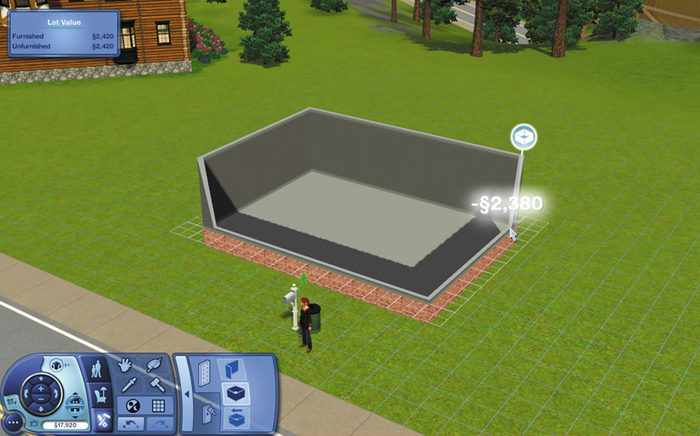
After laying the concrete, it’s time to put up some walls. Return to the main Build Mode tab by clicking on the arrow to the left of the foundation options. Now, click on the wall of the house in the Build Mode menu. The cursor changes to an arrow with a small wall icon on top. You now have three ways to erect walls:
 Create Wall:
Create walls manually by dragging the cursor along the edges of a foundation or directly across it.
Create Wall:
Create walls manually by dragging the cursor along the edges of a foundation or directly across it.
 Create Room:
Erect four walls to instantly create a room. Drag the cursor across the foundation to expand the pre-made room.
Create Room:
Erect four walls to instantly create a room. Drag the cursor across the foundation to expand the pre-made room.
 Create Diagonal Room:
This option creates a whole room, but does so along the diagonal of the square grid. Use this option to create unique rooms.
Create Diagonal Room:
This option creates a whole room, but does so along the diagonal of the square grid. Use this option to create unique rooms.
Don’t forget to install some stairs leading down to your basement. Once you have built the ground floor on top of your basement, connect the two stories with stairs.
Switch to the Terrain tools in Build Mode (more on those in a moment) and sink the terrain as deep as you want the basement.
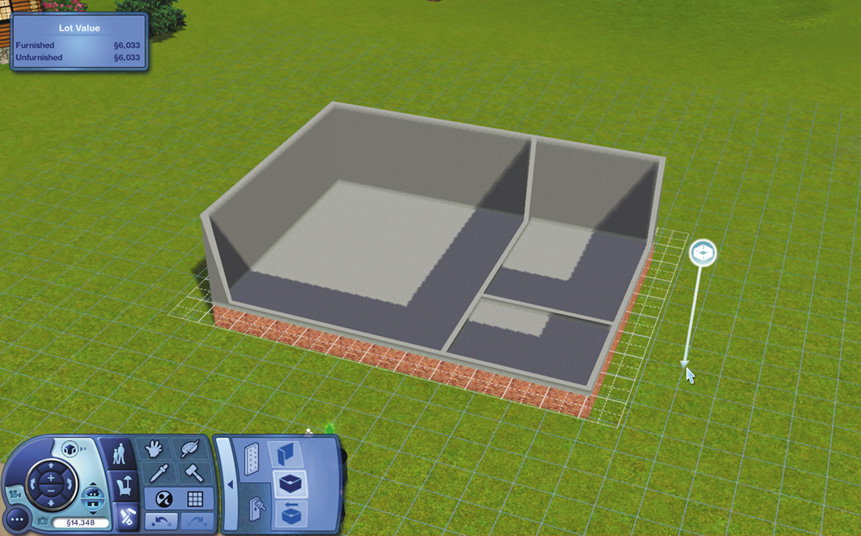
For this basic house, let’s just create three separate rooms. Later, we’ll make a wall to divide the kitchen from the living room.
There is no limit to the number of walls you can create—only your pocketbook controls that. Walls are §70 per panel. However, you need to create rooms large enough for a Sim to actually function inside. Shuffling your Sims into a broom closet will make them unhappy in record time. You need to make rooms large enough to fulfill needs, such as a bathroom that can fit a tub, sink, and toilet, or a bedroom that can at least host a bed.
Walls are required to build additional stories on to your house. To build a story or room on top of an existing story, you must have enough load-bearing walls to support the upper story. You cannot build a story on top of a room that’s too big to support the weight of the upper floor. If you meet resistance while building an upper story, add an extra wall or column to the lower floor to increase support.
Wall Coverings and Floors
No Sim wants to live in a house with exposed cement slabs and naked drywall, so decorate these surfaces with wall coverings and flooring. (In fact, there is a negative moodlet called Unfinished Room that docks your overall mood.) Dozens of wall covering options range in price from §4 to §12 a panel. There are both interior and exterior wall coverings, but nobody is going to tell you that you cannot put siding in your living room. The wall coverings are divided into the following categories:
Paint
Wallpaper
Tile
Paneling
Masonry
Rock & Stone
Siding
Misc.
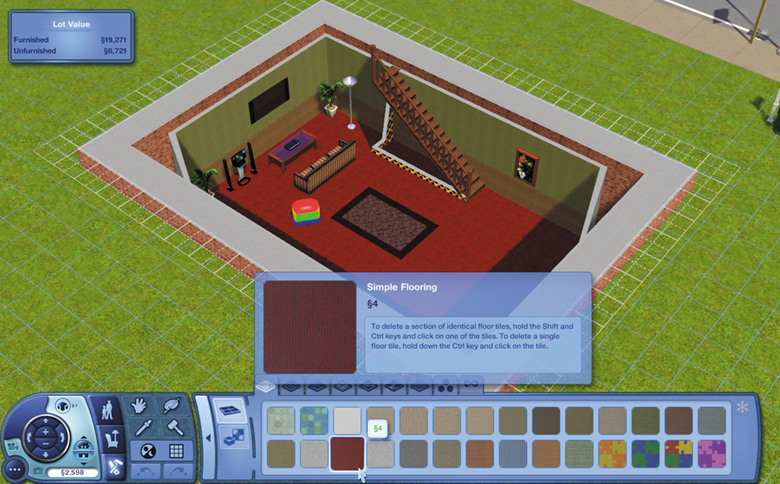
Click on a swatch of wall covering to see a larger sample of the texture.
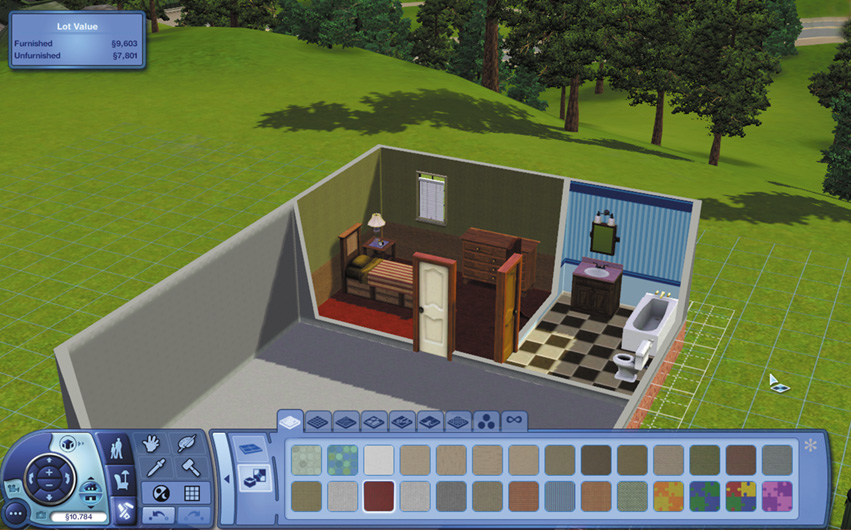
Floor coverings are priced between §4 and §21 per square. There are multiple flooring categories that span carpeting to stone. The categories for floors are:
Carpet
Tile
Wood
Stone
Masonry
Linoleum
Metal
Misc.
Doors
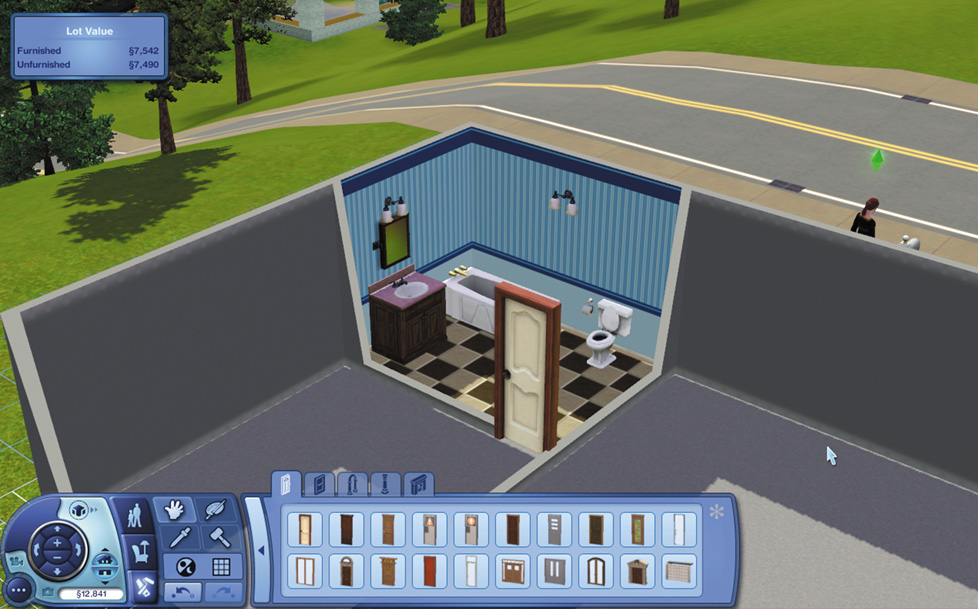
Once you create the outer walls of a house or a room, you need to give your Sims access. You can either install a door or place an arch. Always place a door leading from the exterior to the interior of the house to discourage burglars or overly curious Sims from just wandering into your humble abode.
To install a door or arch, click on the door or arch picture in the Build Mode tool. Select the desired door or arch from the list of available options and then place it on the wall you desire.
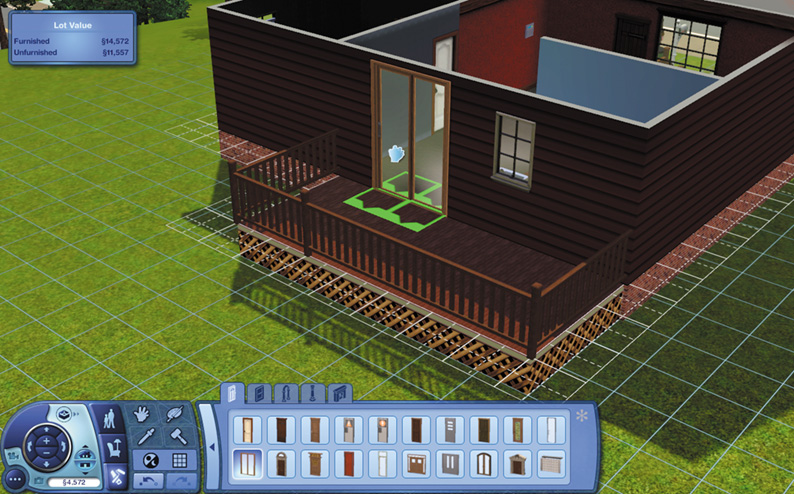
Glass doors serve two purposes. Not only do glass doors allow access to a room or house, but they also allow in outside light, which many Sims find pleasing.
Windows
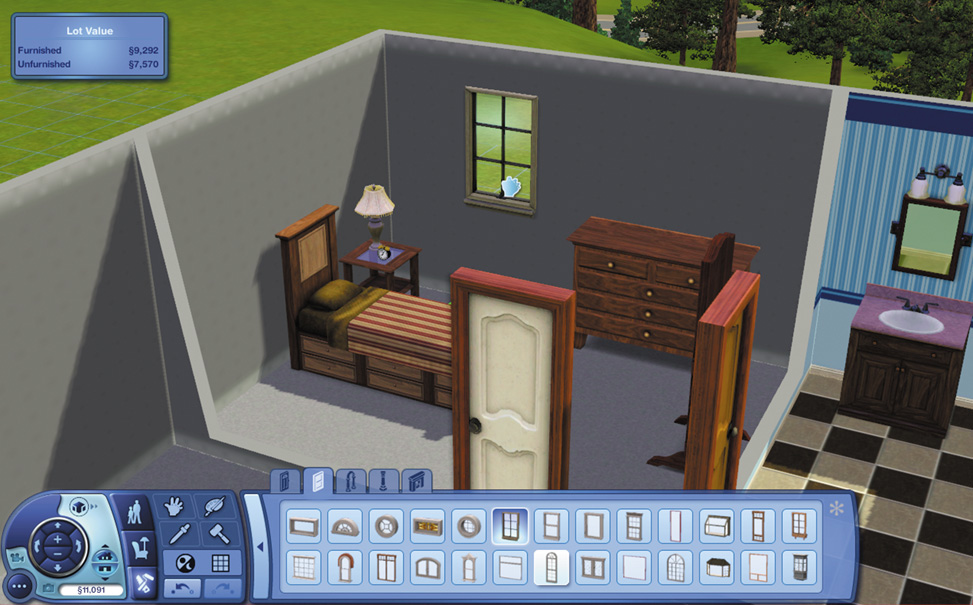
Windows are more than just decoration; they allow daylight into a house, which cuts down on the need for electrical lights. Sims can read by daylight if a couch is placed close enough to a window, for example. There are many window options in Build Mode, including massive windows the size of entire wall panels. These windows let in a lot of light, so if you have a Sim attuned for the outdoors, consider placing sizeable windows like this in your house so they can at least appreciate the greenery just beyond the four walls.
Stairs and Railings
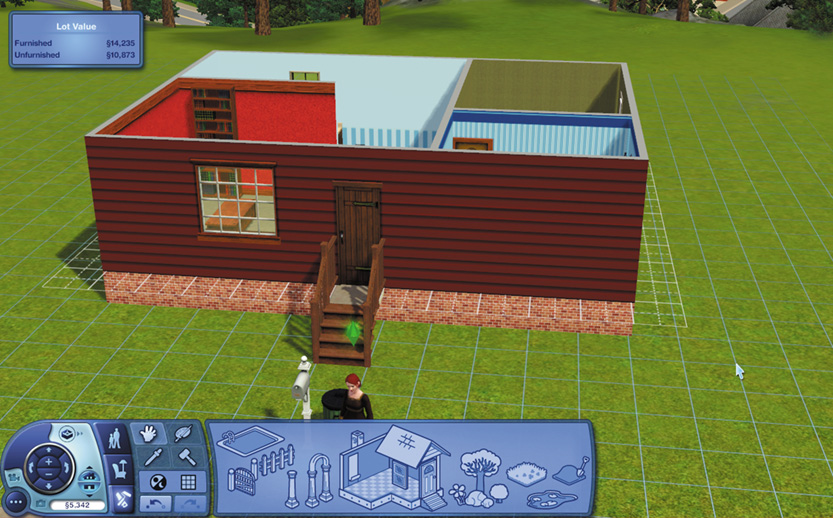
The primary function of stairs is to connect two separate levels inside a house or connect an upper story (deck, etc.) to the ground outside a house. Stairs cost between §10 and §120 per segment. To create stairs, click on the stairs in Build Mode and then click on the place you want to start the staircase.
Inside a house, the stairs will automatically “clamp” to the next level up. There must be sufficient room for the stairs in order to successfully purchase and install them. If the marker around the base of the stairs is red, there is not enough room for the stairs or they are not correctly connected to a landing on an upper story.
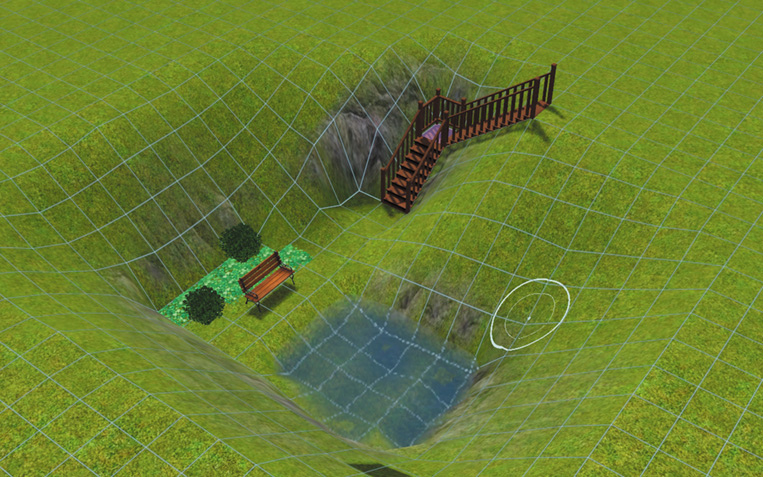
You do not have to build stairs in one single set when building on terrain. You can create connected stairs that make turns at landings by dragging in one direction on the terrain, then dragging in another direction without letting go.
Outside, stairs automatically alter terrain to fit. If you have a lot on uneven ground, installing stairs on a slope is an attractive way to give your Sims easy access to all levels of the sloping surface. You can also use the “Stair Width” slider to determine how many tiles wide you’d like the stairs to be when you place them.
Columns
Columns are both attractive and functional. An artfully placed column can really class up a room. However, columns are incredibly practical for load-bearing purposes. If you want to create an outdoor balcony on your house, use columns to support it. Columns can also be used inside a house to support an upper story above a large room. (Maybe you want a small ballroom on the third floor of your house?) Different columns support different areas of upper floors. The cheapest column, Column Contempo, can also support a four by four grid of flooring above it. The Column de Mish can support five by five.
Roof
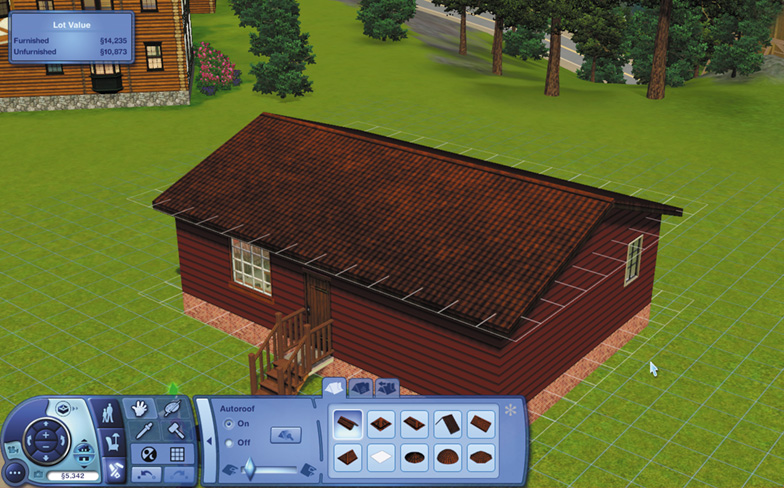
No house is complete without a roof. When you first select roofs from the Buy Mode menu, you are dropped into Autoroof, which will place your desired roof on your house with a single click of the mouse. However, you can turn Autoroof off and manually place the roof on top of your dwelling as well as adjust the height with the slider bar.
There are 10 roof types (from flat to dome) and a host of roof textures. You can also choose diagonal roofs, such as a gabled roof. Roofs are free to put on your house, so experiment without worry of losing any Simoleons with roofing decisions you later regret.
Fireplaces
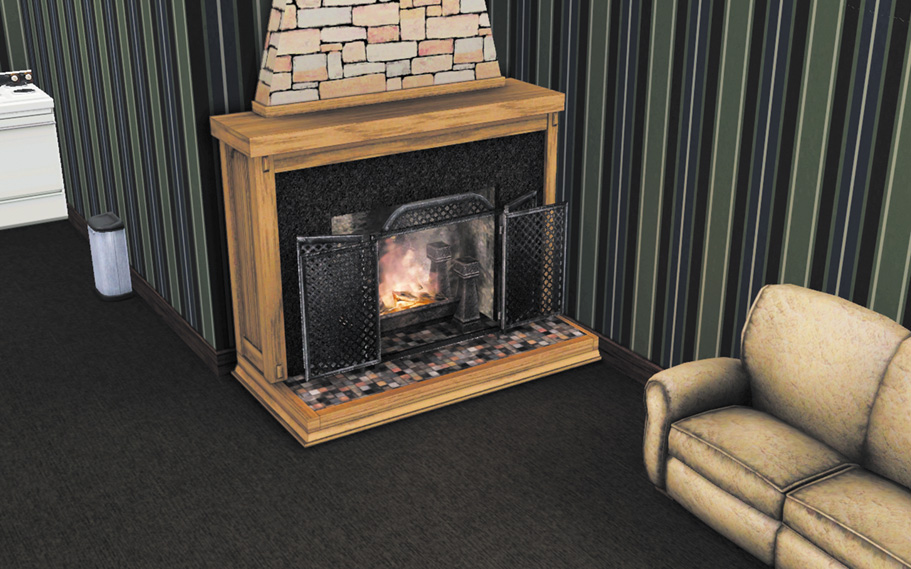
Like columns, fireplaces are both decorative and functional. Some fireplaces must be installed next to a wall, but there are freestanding fireplaces like the Combustion Junction. Installing a fireplace in your house automatically runs a chimney up through the roof. You can share a chimney by installing fireplaces directly above and below each other on different floors of a house. Fireplaces can also be installed outside, too. They are attractive centerpieces of decks or outdoor sitting areas.
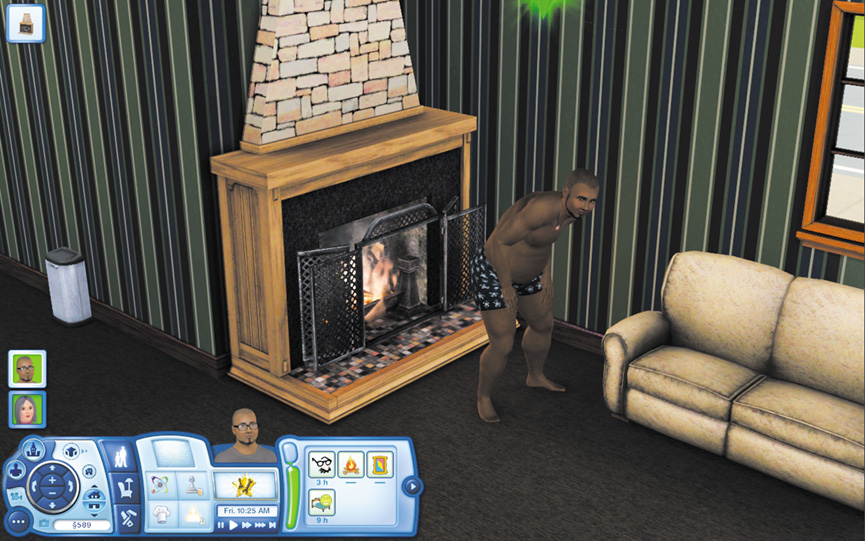
Fireplaces add Fun to a household and provide new interaction options (expensive fireplaces even have the ability to customize the color of the flames!) that affect your Sim’s mood. To start a fire, click on it and choose the Light Fire option. When the fire is going, you can poke the fire to keep it going, which amuses your Sim. You can also warm your Sim by the fire for a comforting mood lift.
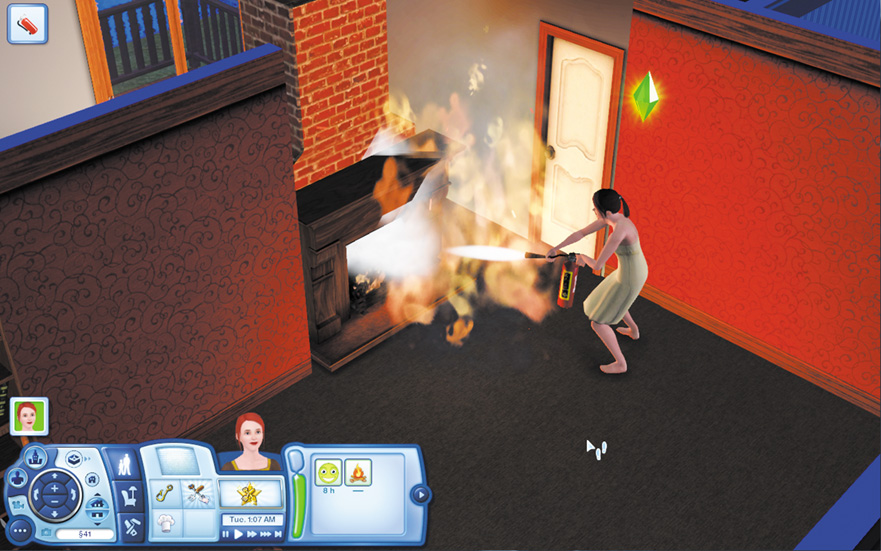
Before your Sim leaves home, make sure you put the fire out. If you leave a fire going while you are out, you risk setting the house on fire.
You can try to extinguish the flames yourself, but if you have installed a smoke alarm, the fire department will show up to help put out the fire.
Gates and Fences
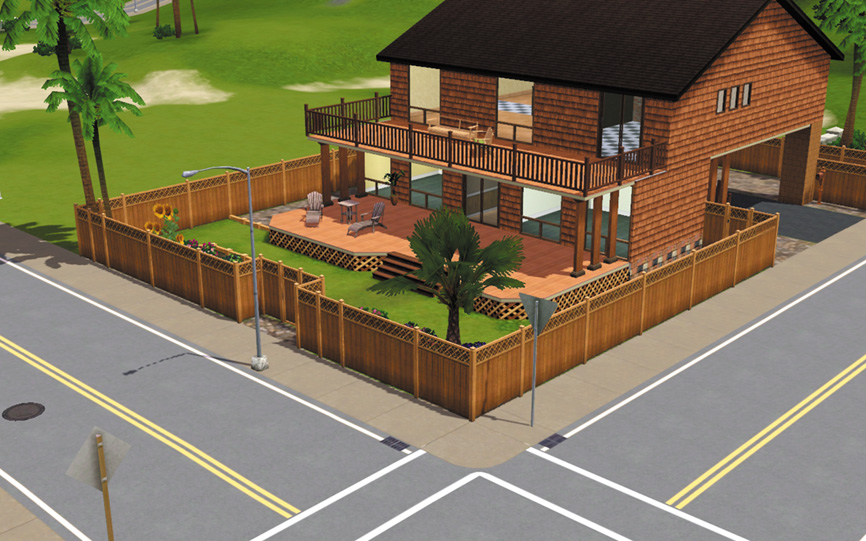
Fences make good neighbors. To add a fence to your property and create a yard or designated gardening space, choose the Fence tool from the Build Mode menu. There are several types of fences to choose from, priced from §5 to §165 per panel.
Fences are as simple as small rails on the ground (which a Sim can easily step over) to elaborate brick walls with a touch of dignified ivy. Fences can be laid out just like walls, including the ability to select the Create Yard option to automatically create a four-walled area by stretching the cursor across the ground.
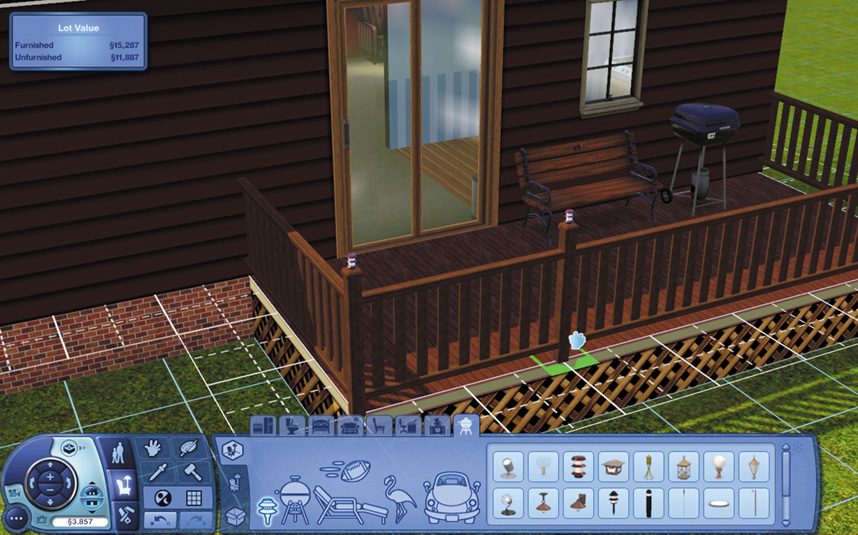
Decorate fences with outdoor lighting from Buy Mode. Lights can only be placed on fence posts, though.
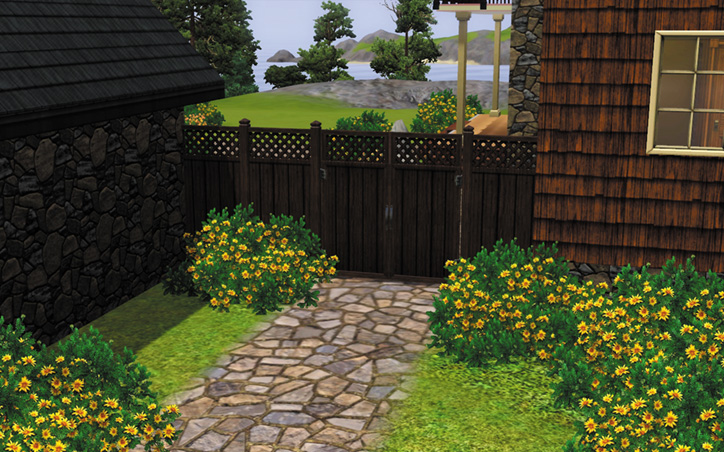
You can also add gates to give Sims a way in and out of yards and gardens with tall fences. Gates cannot be placed on uneven terrain. There is also no rule about a fence needing to match a fence, although Sims definitely have an appreciation for complementary decor.
Swimming Pools
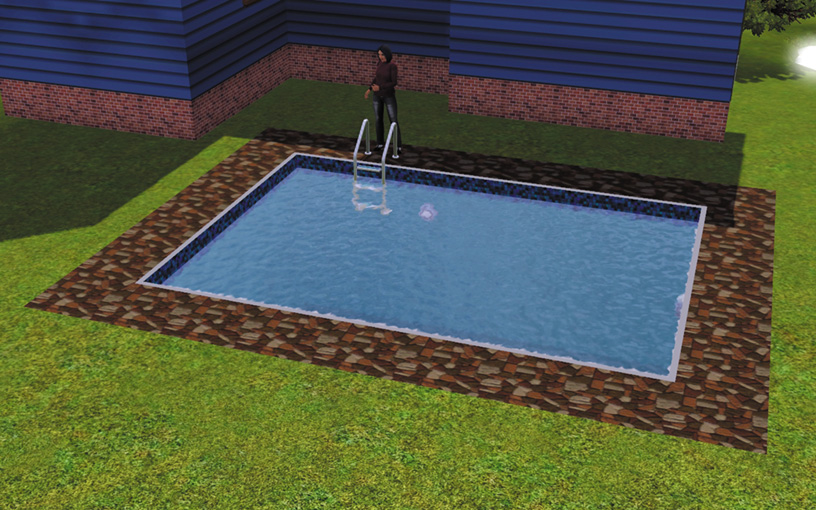
Swimming pool = instant party. Or, if your Sims love the outdoors, a good swim will increase their good mood. To build a swimming pool, choose the pool from Build Mode and stretch it across the ground just like you were laying a foundation.
The swimming pool costs §80 per square, making it an expensive addition to a house, but the pool is a great way to meet people or give friends something to do in the sunshine.
Once you build a pool, you can install a ladder, which is selectable from the Pool Objects menu just below the Create Pool option. The Aquatic Ascent Ladder costs
§315, so make sure you have sufficient funds in your budget or else your pool will remain an attractive body of chlorinated water until you have §315 to spare.
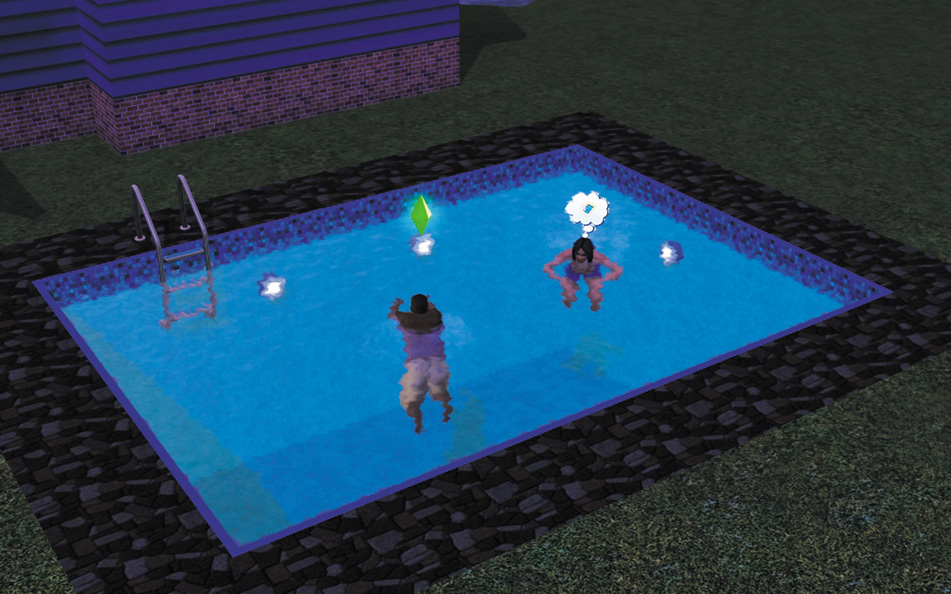
The Sea Underwater Pool Lights let you safely swim after dark. Which can be very romantic, by the way...
Terrain Tools
Terrain tools let you perform effortless landscaping that would normally require use of a bulldozer and earthmover over on our side of the screen. These tools let you sink ground, build mounds, and create ponds with just a click or two of the mouse. To use Terrain tools, select them from the Build Mode menu.
Raise Terrain
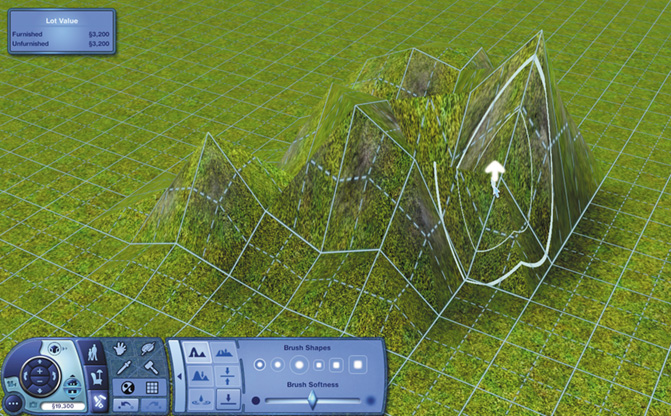
The Raise Terrain tool lets you lift the ground and create mounds, berms, or other inclines on your property. After selecting the Raise Terrain tool, choose the brush shape (circle or square, then size) as well as the brush softness, which affects the level of jaggedness on your newly created peaks. After selecting the shape and softness of your Raise Terrain
tool, run the new cursor over the ground and click the left button to lift the ground. Hold the button to keep pulling the terrain upward.
Lower Terrain
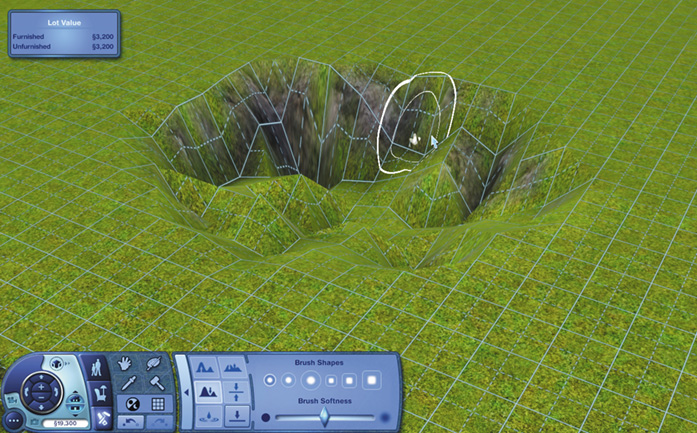
The Lower Terrain tool works exactly like the Raise Terrain tool, except this option sinks the ground to create holes or declines on your property. Like the Raise Terrain tool, you select the shape and size of your cursor and then adjust the softness of the terraforming.
Soften Terrain
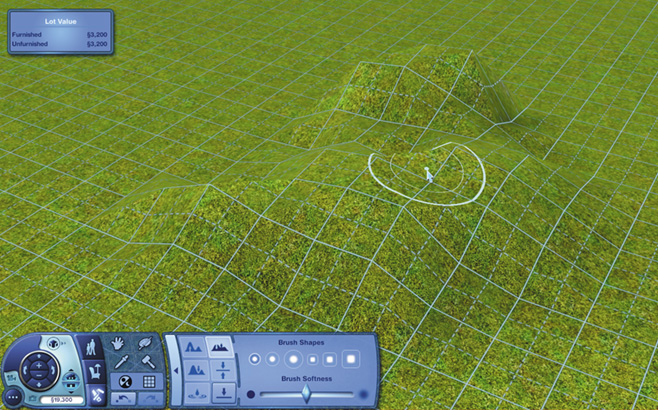
Shifting terrain up and down can result in some pretty harsh-looking landscapes. To smooth over the rough edges and create a more inviting yard, run the Soften Terrain tool over your raised or sunken ground.
Level Terrain
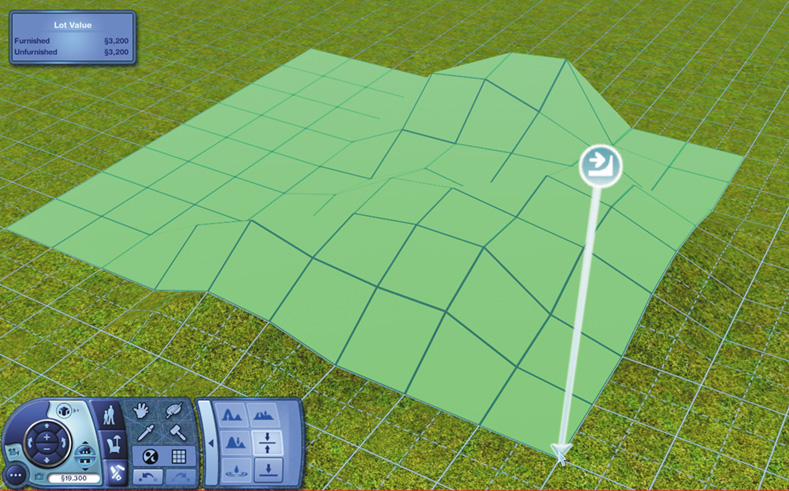
Want to flatten the surface of raised or lowered terrain? Use the Level Terrain tool. After selecting this tool, use the Change Floor button to raise or lower the “level” you are working on. Then, drag the Level Terrain tool over the landscaping you want to flatten out. Terrain that appears green will be leveled once you release the left mouse button.
Water Tool
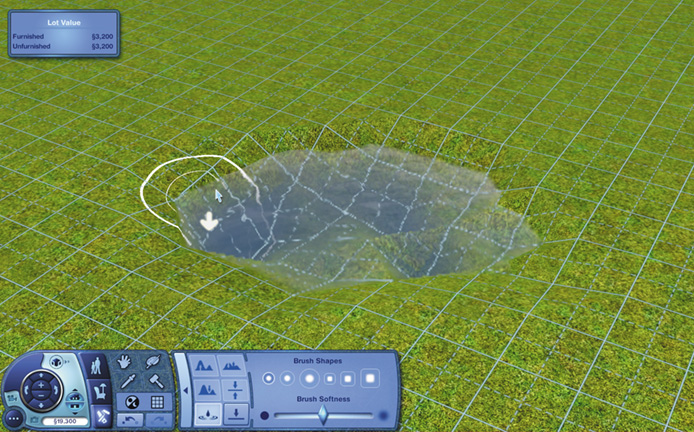
The Water tool works similarly to the Lower Terrain tool, except that the hole created in the ground automatically fills with water. This is the easiest way to build a pond on your property. Hold the mouse button down to keep sinking a pond or move the cursor around your property while holding the left mouse button to increase the size of the pond.
Flatten Lot
Need to undo any of your terrain-altering landscaping? Hit the Flatten Lot tool to completely zero out any inclines and declines, turning the lot into a perfectly flat surface.
Terrain Paints
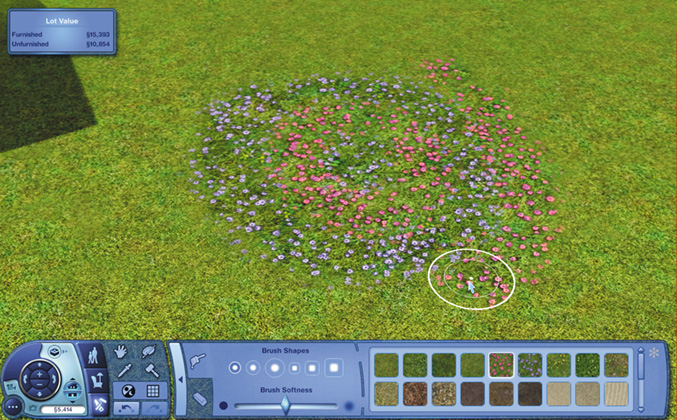
The default terrain on the ground is grass. However, you can easily change that with the Terrain Paints tool on the Build Mode menu. This tool lets you replace grass with basic flowers, gravel, sand, and other ground textures.
After selecting Terrain Paints, choose the size and shape of your brush and the
softness of the edges around the brush. Then, select the desired texture. Once these are chosen, sweep the brush cursor over your property and press the left mouse button to lay down the new terrain.
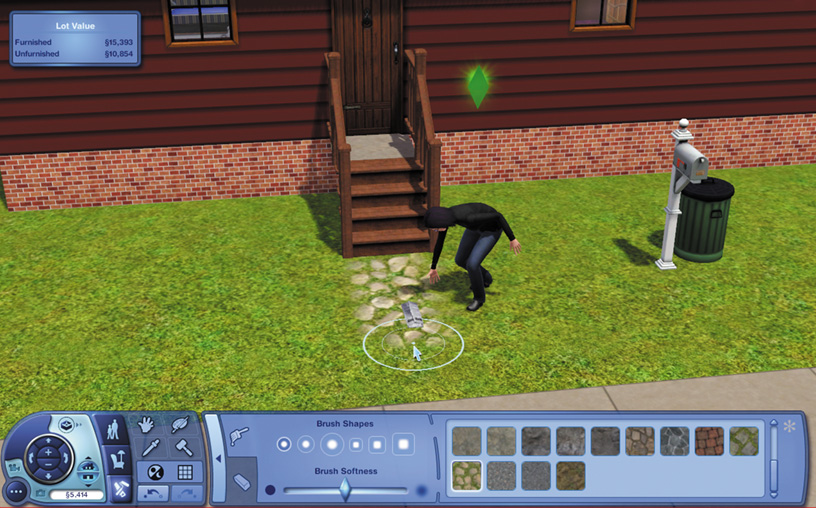
Create a nice path to your front door with the Slate Stones texture.
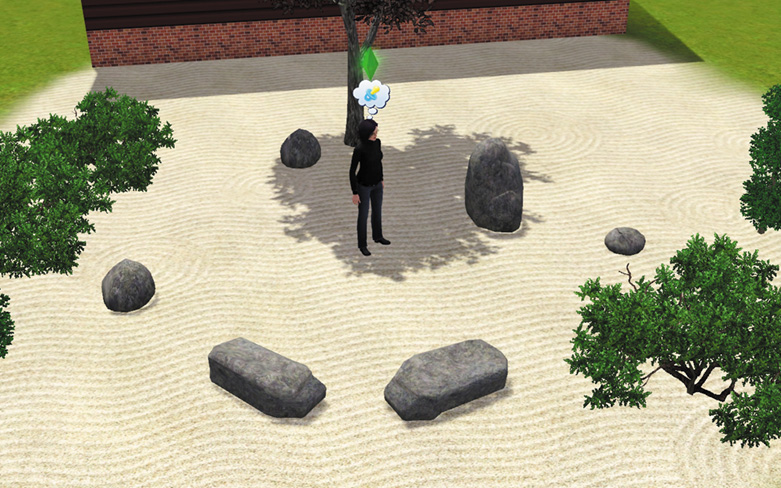
The Raked Sand texture turns your backyard into a zen paradise.
Foliage
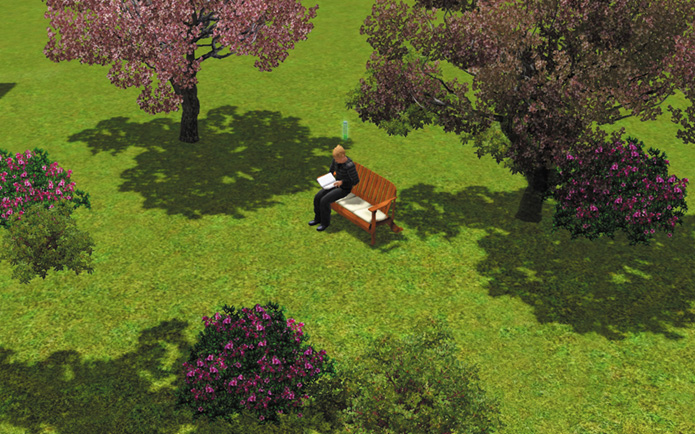
The exterior of your house can be further beautified by foliage such as trees, shrubs, and flowers. You can also buy rocks to place around your property to create a serene scene—or maybe a mystical stone circle? Trees cost between §65 and §400.
Shrubs run between §5 and §95, making them much more affordable than trees. (They also take up much less room.) Flowers retail between §1 and §45. Any of these features can be arranged into artful landscapes or randomly placed on a lot to replicate the wild.
Buy Mode
There’s just no way around it: everybody loves stuff—and in The Sims 3, there is a lot of it you can buy and place inside and outside your house to make your Sims happy. Buy Mode is where you go to instantly shop for your Sim’s furniture, appliance, and decorating needs.
When you enter Buy Mode, the action is temporarily paused so you can browse without penalty. Your Sims are more than happy to wait while you shop for them. When you buy an object, the Simoleons are not automatically deducted from your account.
It’s not until you place the object on your lot that the Simoleons disappear from your account.
Now, while you are in Buy Mode, you can return an object without losing any Simoleons by using the Sledgehammer tool. However, the moment you step out of Buy Mode and back into life, you must factor depreciation into the sell-back value of your objects.
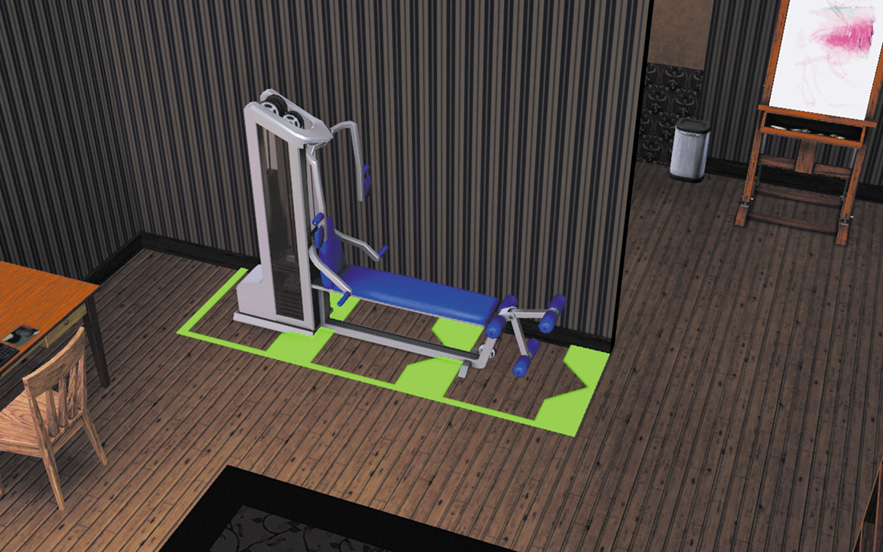
When you’re placing an object in the house, the space needed to properly interact with the object appears around it. If the markers around the object are green, the object can be placed. If the markers are red, you cannot place the object there.
Rooms
You can have as many rooms in your house as your Simoleons allow, but some rooms are essential for your Sims to have a happy life: bathroom, bedroom, and kitchen. There are, of course, other rooms that would be absolutely appreciated by your Sims, such as a living room, dining room, or study, but these three are required for your Sim to live a functional life.
Bathroom
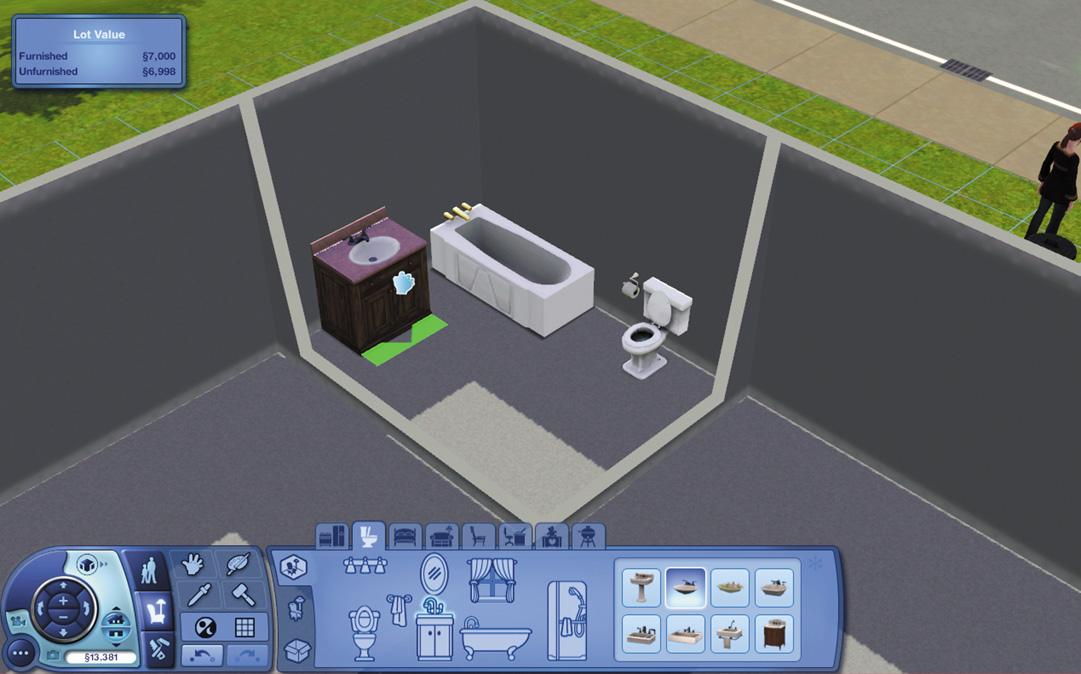
The bathroom is positively critical for your Sims’ well-being. Without a place to attend to hygiene and bladder needs, your Sims will not be able to function properly in polite society. You must install a toilet so your Sims can relieve themselves in a timely manner.
A bathtub or shower is also essential for keeping clean.
If your Sims do not wash on a regular basis, not only with their overall mood suffer, but relationships with friends and work will also take a hit. Install a sink and mirror in the bathroom, too, so your Sim can brush teeth as well as primp and pose. Looking good is often akin to feeling good, you know.
The Objects Catalog chapter contains examples of each type of room and a full list of all objects associated with different rooms, such as kitchen, bedroom, and study.
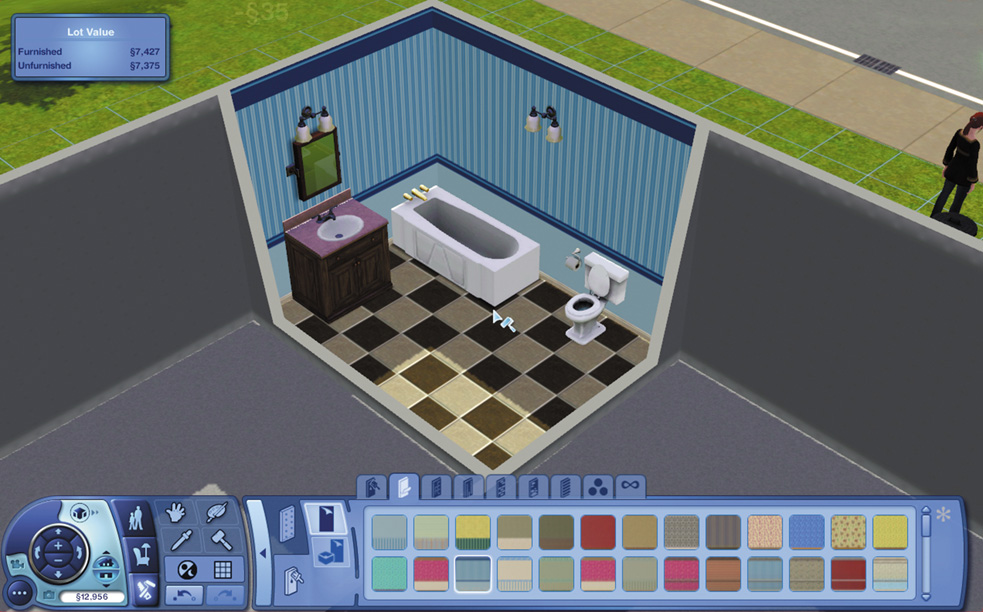
When you create a bathroom, make sure you leave enough room along the side of the bathtub for a Sim to bend over and turn on the faucet.
If you put something too close, like a counter, just use the Hand tool to move it over and create the needed space.
Bedroom
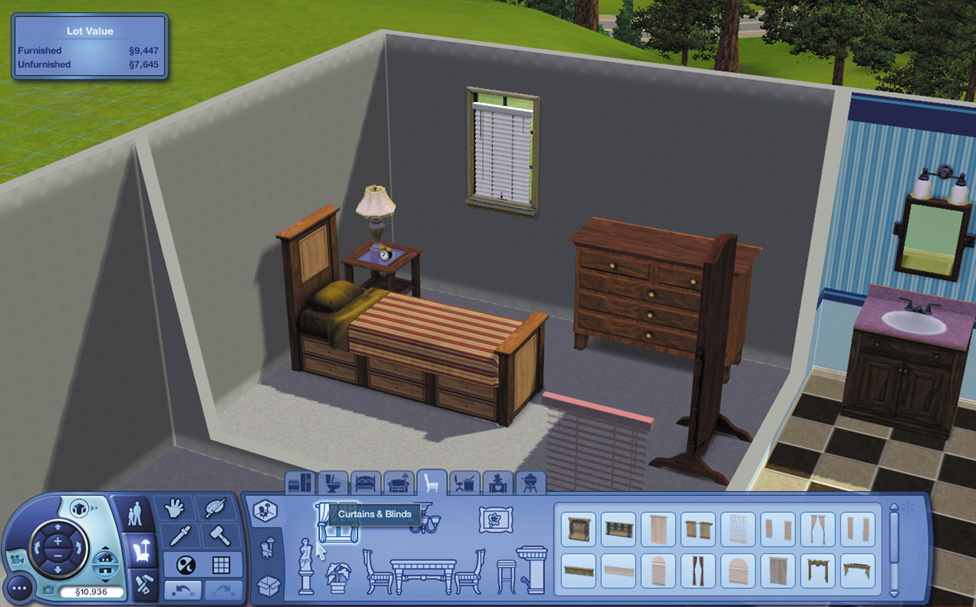
Sims need their beauty rest. After a long day of work or play (or, hopefully, a nice combination of both), Sims get sleepy. While a Sim can take a catnap on a couch, to get the kind of rejuvenating rest needed to greet a whole new day and effectively perform at work, Sims need a bed. A modest bed will do the trick at first. You can place other useful objects in the bedroom, such as a dresser, but the bed is your top priority.
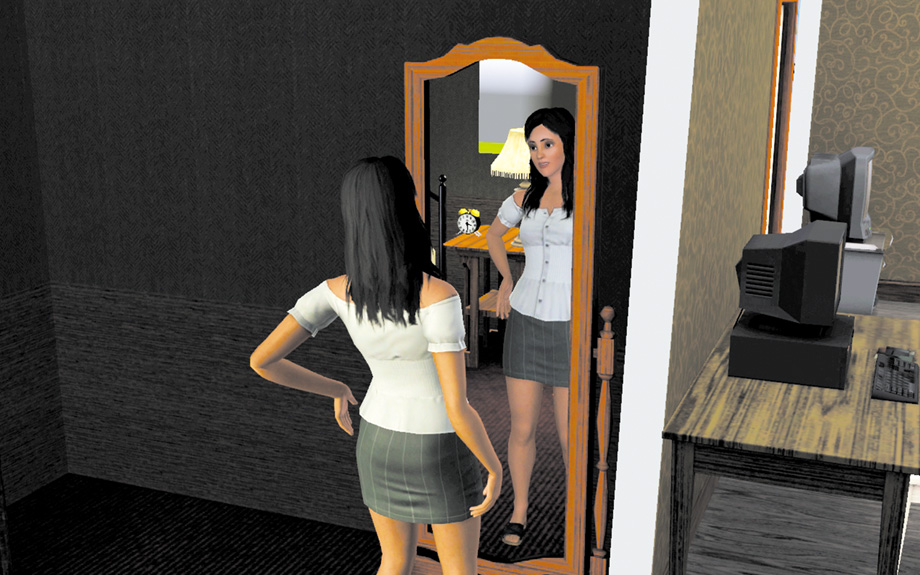
Sims do fancy checking themselves out. If you have a little money to spare, put a mirror in the bedroom. A dresser is useful, too, because it lets Sims change their outfits.
Kitchen
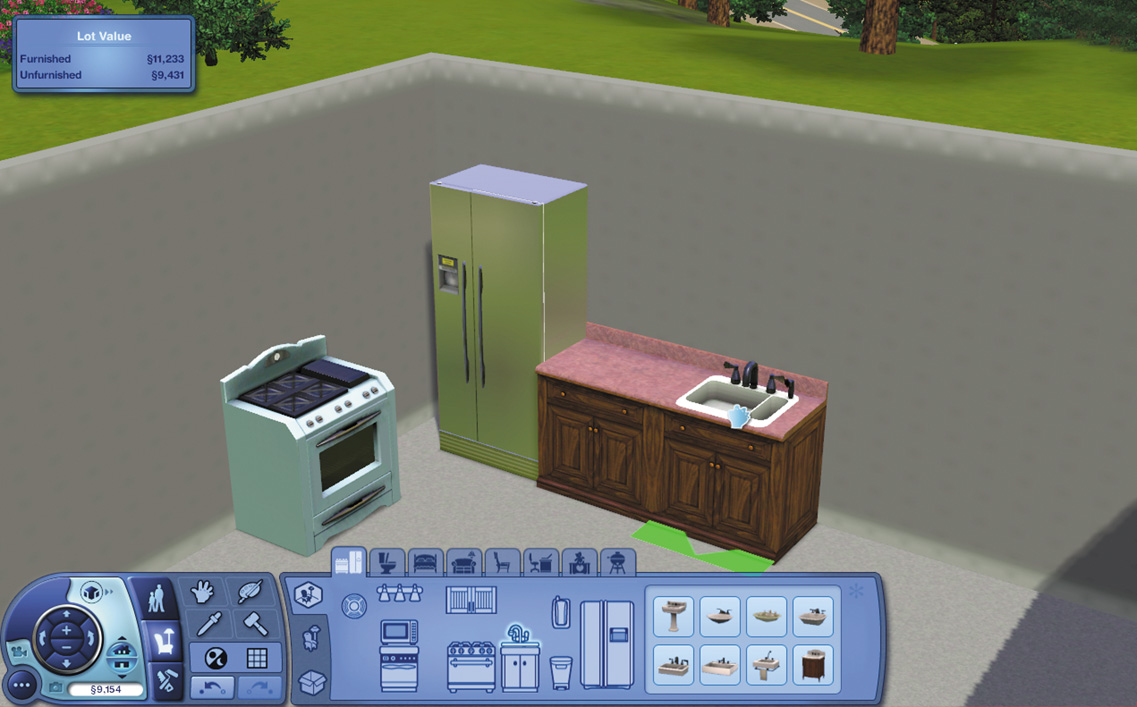
Sims need to keep hunger at bay to function, and that means they need to eat food. If Sims get too hungry, not only does their mood greatly suffer, but they can eventually pass out and lose valuable time recovering. Build a small kitchen for starters, with a refrigerator, stove, and sink.
A dishwasher is useful to be sure, but dishes can be easily cleaned in the sink at first. A fridge by itself is not exactly helpful after a few days, so make sure you hit up the grocery store for food, especially if you plan on being a cook. You can also dine out, but it is much cheaper to eat at home.
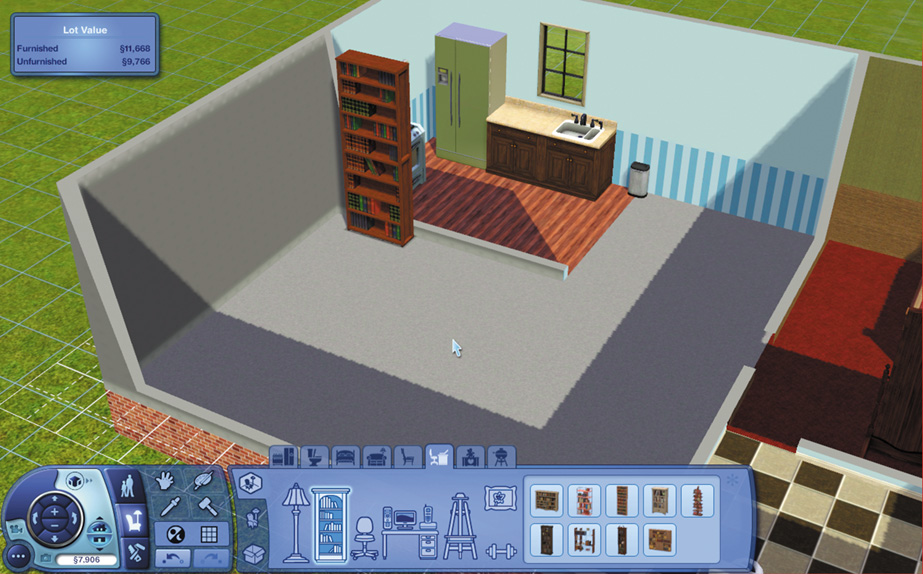
The kitchen does not need to be its own room with a door. It can just be a small nook off the living room to save money and space. However, noise from the kitchen will wake Sims within earshot, especially Sims who are light sleepers.
Other Rooms
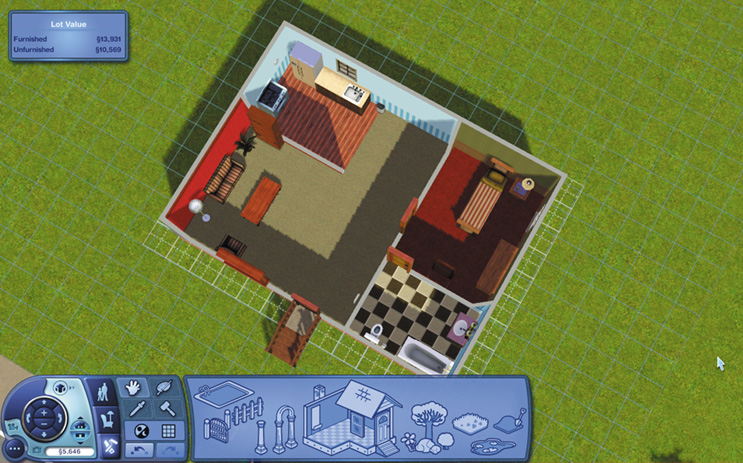
As mentioned, there are several other rooms to create in a house, as indicated by the different categories of objects for sale in Buy Mode. If your Sim is going to be a writer, a separate study with a bookcase and computer is particularly useful.
If your Sim household has children, build rooms for the wee ones so they have a place to call their own. A dining room is not a necessity, but for larger households, it is a great place for the household to come together and socialize.
You can also mix furniture from different rooms in Buy Mode—there is no hard and fast rule about a bookcase from the study collection having to be placed inside an actual study. Preserve money and space in the beginning by fusing rooms. A single Sim can afford to have a bookcase and computer in the living room.
Design Alternatives
When you click on an object category and start browsing through available objects, don’t get too fixated on the immediate appearance or color choice of the objects. Most objects have several different design options, which appear in a small box when you left-click on a specific object. To choose one of the design alternatives, just left-click on that particular color scheme and it will be applied to the object when you place it on your lot.
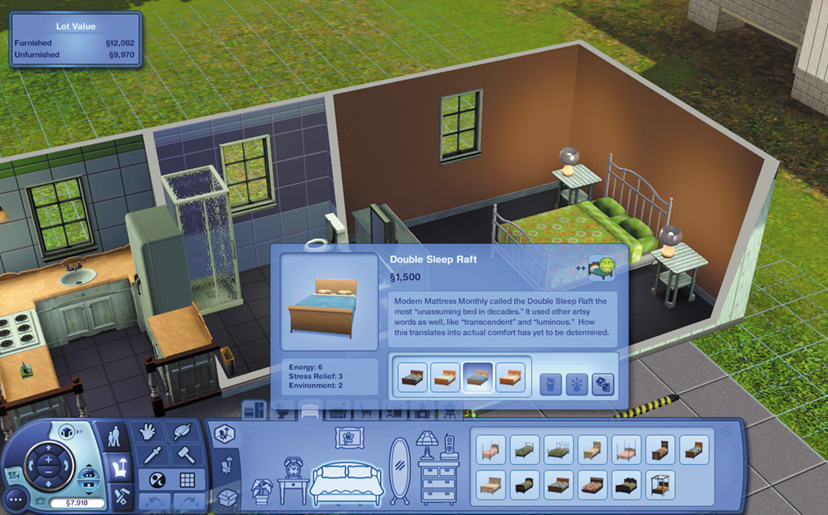
Scroll through all the different object designs before settling on a purchase. And if none of these designs please you, then use the Create a Style tool to customize it to your liking.
Create a Style
So, you just bought a bed for your house, but you want to change the color of the duvet cover? It’s easy to accomplish this design feat with the Create a Style tool. The Create a Style tool for changing the appearance of an object works quite similar to making adjustments to a Sim’s clothes in Create a Sim. To change the colors or textures, left-click on the Create a Style button (the palette). Now, left-click on the object you want to alter.
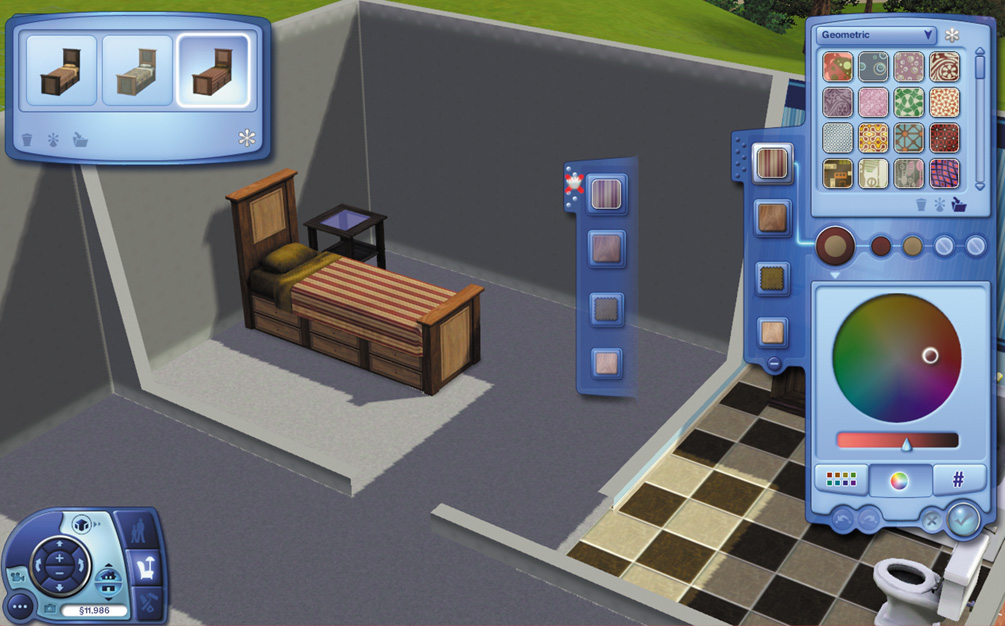
When the Create a Style toolkit appears on the screen’s right side, you see the current colors and textures used in the currently selected object. In the case of this bed, the pattern for the duvet cover, the wooden frame textures, and the metal knobs on the bed all appear on the pane to the right.
To make changes to any of the textures, left-click on the desired texture. Now, you can either adjust the color with the color wheel or color palette or select a different texture from the texture box in the top-right corner.
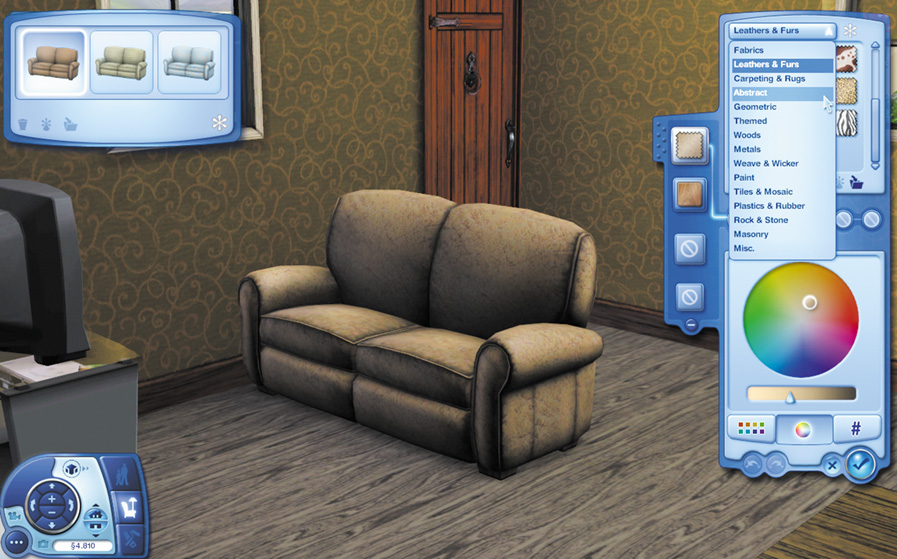
The textures are divided into several categories, such as wood, metal, abstract, and geometric.
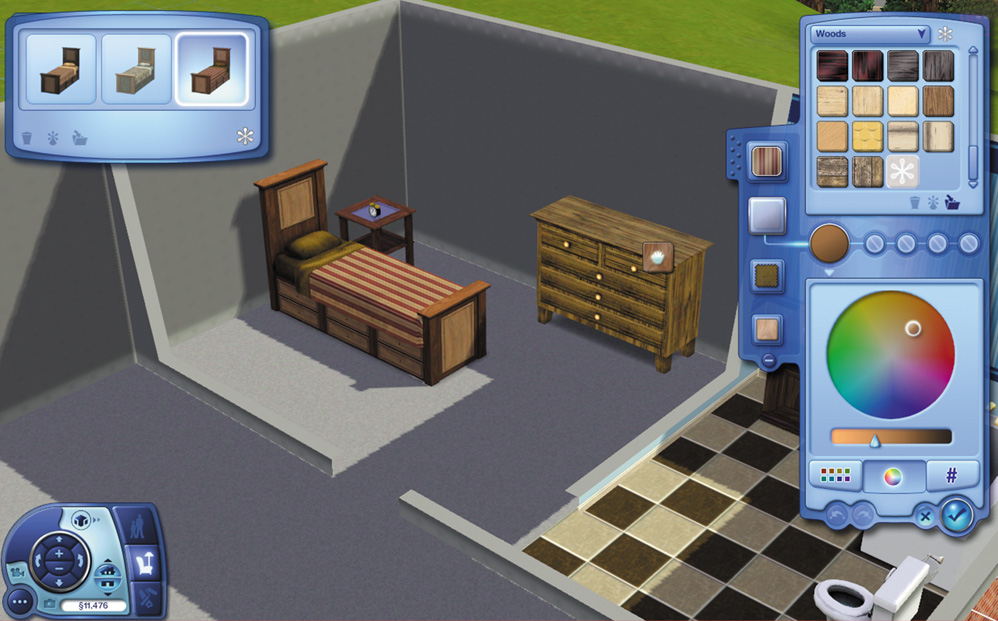
If you want to make objects in a room match, you can easily apply the same textures and patterns from one object to another by grabbing the texture pane and dragging it on to the object you want to match.
You can either pull the entire set of textures on to the new object or grab a single texture (such as the wood from the bed frame) and then drag it on top of the piece of furniture you want to match. In this case, pulling the wood texture from the bed onto the dresser changes the pattern so the set now matches.
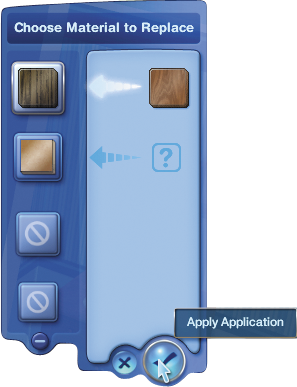
When you drag a pattern onto another object with multiple textures, you must designate which pattern you want to replace.