
Super Mario 3D Land Guide How to Play
Items and Objects
Power-Ups
Super Mushroom

The Super Mushroom turns Small Mario into Mario. You’ll find a few of these in predetermined locations, but they have a real knack of showing up when Mario is at his most vulnerable. When you’re playing as Small Mario, Blocks that would otherwise contain more advanced power-ups usually provide Super Mushrooms.
1-Up Mushroom

The 1-Up Mushroom is among the most important power-ups you can find. Instead of granting new abilities, a 1-Up Mushroom provides you with an extra life. These valuable items are spread all throughout the game, so make sure you grab each one you find.
Fire Flower
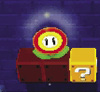
The Fire Flower turns Mario into Fire Mario. This useful power-up is fairly rare, so take full advantage when you’re lucky enough to find one.
Boomerang Flower

This power-up grants Mario the Boomerang Suit. You’ll find Boomerang Flowers throughout the game, and they’re always worth collecting.
Super Star

When collected, Super Stars make Mario temporarily immune to all damage. While under the Super Star’s effect, Mario can defeat enemies simply by running through them. These rare power-ups cannot be stored, so make sure you’re ready to use one before you collect it.
Super Leaf
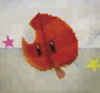
When Mario collects a Super Leaf, he becomes Tanooki Mario. The Super Leaf is one of the game’s most important power-ups—fortunately, it’s also one of the most common. When you come across a Tail Wheel, chances are there’s a Super Leaf in the area.
Statue Leaf
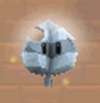
This power-up grants Mario an enhanced Tanooki transformation, allowing him to become Statue Mario at any time. Once you reach the Special Worlds, the Statue Leaf is a very common—and very welcome—power-up.
Propeller Box
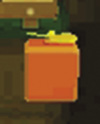
When you find a Propeller Box, it’s fairly likely you’re going to need it. Since these items can only be used within the level, make sure you search each area for ledges and objects high above the ground.
Pick-Ups
Coin

You’ll find coins scattered throughout every level. Whether they’re hidden in Blocks or out in the open, coins are the most common pick-up you’ll find. Each time you collect 100 coins, you earn an extra life.
Star Medal

Star Medals are, hands down, the most important pick-ups you’ll come across. Each level has three Star Medals, and you’ll need to collect all of them to earn the maximum Star Rating. Locked levels can only be accessed after you’ve collected the required Star Medals. You’ll have to do a lot of footwork to track them all down, but your effort will be rewarded.
Red Coin

Red Coins appear after you pass through a Red Ring. They vanish after a short time, so you must move quickly if you hope to collect them. If you manage to get them all, you’ll be rewarded with a power-up.
+ Clock
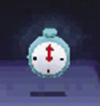
Mario is always racing against the clock, and + Clocks allow him to stay one step ahead. Blue + Clocks grant 10 additional seconds, while green + Clocks provide a whopping 100 seconds.
Objects
Block
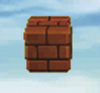
Blocks are common objects in nearly every level, but they serve a variety of purposes. Some Blocks form platforms or ledges to help you reach new areas, while other Blocks form obstacles that slow your progress through a level. Most Blocks can be smashed, but occasionally you’ll find one that contains a pick-up or a Tail Wheel. You won’t generally have enough time to check every Block in a level, but small groups of Blocks are usually worth a look.
? Block

? Blocks always contain an item of some kind. Most ? Blocks contain coins, but they’re also the most common source of power-ups. As a rule, you should never pass by a ? Block without checking its contents.
Roulette Block
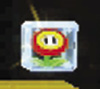
A Roulette Block quickly cycles through a number of power-ups. When you hit a Roulette Block, it rewards you with its current contents.
Note Block
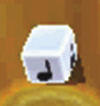
Note Blocks put a little extra spring in Mario’s step. Note Blocks are usually located below items and platforms that can only be reached with a well-timed bounce.
Super Note Block
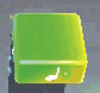
Super Note Blocks always lead to secret areas, so never pass one by without hopping on.
Directional Block

Directional Blocks can be used to reach objects and platforms that would be otherwise inaccessible. When you hit a Directional Block, it moves in the direction indicated by its arrow. A single hit causes the Directional Block to move a short distance. Use additional hits to gradually move it into the desired position.
! Block
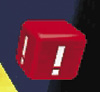
Each time you hit a ! Block, a face block pops out of it. Hit the ! Block until all of its face blocks are in place to create a temporary path. ! Blocks reset after a short time, so it’s important to move quickly.
Warp Box
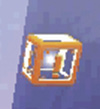
When you touch a Warp Box, you’re whisked away to a predetermined location. Although some Warp Boxes allow you to move freely between areas, others disappear once you use them. If you’re not sure where a Warp Box leads, take care of any unfinished business before you enter it.
Baddie Box
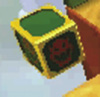
When you approach a Baddie Box, an enemy pops out of it. Baddie Boxes contain an endless supply of willing foes, so it’s usually best to run right past them.
Rock

When Mario runs up to a Rock, he kicks it into the air. When the Rock lands, it cracks open and reveals a coin. If you manage to kick a Rock into a pipe, you’ll be rewarded with a 1-Up Mushroom.
P Switch
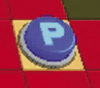
Step on a P Switch to uncover secret coins, reveal hidden trails, or move platforms into place. Most P Switch effects are temporary, so make sure you move quickly!
Red Ring
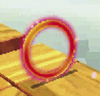
Before you pass through a Red Ring, make sure you check for nearby enemies. After you trigger the Red Ring, you have a short time to collect the revealed red coins. In some levels, Red Rings are your only source for vital power-ups. If you find an unusable Tail Wheel at the start of a level, check the path ahead for a Red Ring.
Flip Panel
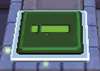
Step on a Flip Panel to create a temporary path. Flip Panels reset after a short time, so make sure you’re not standing on the path when they do.
Checkpoint Flag

Touch a Checkpoint Flag to mark your progress through a level. If you lose a life later in the level, you’ll be returned to the Checkpoint Flag. This is a real time-saver, so make sure you have plenty of extra lives on hand to be able to start from the Checkpoint Flag if needed.
Goal Pole
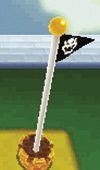
The Goal Pole signals the end of a level. To claim victory, you must jump onto the Goal Pole before time runs out. If you manage to jump to the very top of a Goal Pole, you’re rewarded with an extra life.
Binoculars
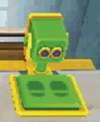
Binoculars can provide useful information about the path ahead of you. Occasionally, you’ll find valuable items and alternate routes that can’t be seen from the main path. Whenever you’re looking through Binoculars, keep an ear out for Toad. Toad calls out if he’s in the area, so he’s fairly easy to find. When you zoom in on Toad, he always rewards you in some way. Toad is eager to give gifts, so you can usually count on a power-up of some kind. Every so often, however, Toad will reward you with a valuable Star Medal.
Pipes
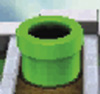
Pipes offer a quick and easy way to move between areas. Some pipes simply allow you to proceed through the level, but many of them lead to secret rooms. Every pipe leads somewhere, so make sure to keep an eye out for them.
Tail Wheel
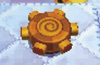
When you spot a Tail Wheel, there’s probably a valuable item somewhere above you. Tail-whip a Tail Wheel to raise yourself up to a secret area. Of course, only Tanooki Mario can do this, so you’ll have to find a suitable power-up.
Switchboard
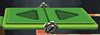
When you find a Switchboard, hop on to go for a ride. When you step onto a Switchboard, it activates one of two switches. Each switch moves the car in the corresponding direction. The trip is rarely a smooth one, however. Always be ready to reverse direction or jump to safety.
Cannon
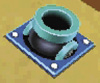
Some levels contain special cannons that you can use to reach new areas. After you climb into a cannon, use the reticle to choose your trajectory. When you do, keep in mind that the obvious target is not always the best one. Before you fire off a cannon, always check the area for valuable pick-ups and alternate routes.