
Super Mario 3D Land Guide Enemies
Enemies
Goombas
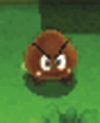
Goombas are one of the most common enemies you’ll encounter. These grumpy little creatures generally patrol small areas, waddling toward Mario whenever they spot him. To defeat a Goomba, simply hop onto its head—one jump, and it’s done.
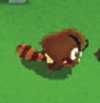
If a Goomba has a Tanooki tail, a little more caution is advised. Tail Goombas jump toward you, and a midair collision can be a painful experience. When it lands, the Tanooki Goomba performs a tail whip. Jump over the attack to safely land on its head.
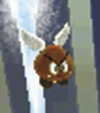
When a Goomba has wings, it’s known as a Paragoomba. These enemies are just as vulnerable to your jumps, but they’re generally a bit harder to reach. Paragoombas don’t usually react to Mario’s presence, so it’s often easier to slip right past them.
Biddybuds
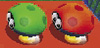
Biddybuds aren’t particularly aggressive, but that doesn’t mean they aren’t dangerous! These creatures usually appear in groups, circling platforms or marching in formation. Jump on a Biddybud to defeat it.
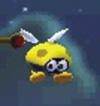
Winged Biddybuds, or Para-Biddybuds, follow predetermined paths as they patrol the skies. Like their earthbound counterparts, Para-Biddybuds can be defeated with a simple jump.
Koopa Troopas
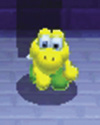
When you jump on a Koopa Troopa, it tucks into its shell. Once this happens, you can kick the shell into nearby enemies. Position yourself so that the shell is directly between you and your target, then run straight ahead to launch a powerful projectile along the ground.
The Bros
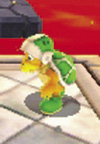
These dangerous enemies may look similar to Koopa Troopas, but their projectile attacks make them much more formidable. Hammer Bros can be identified by their green outfits. When they spot you, they attack by throwing hammers.
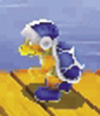
Boomerang Bros don blue outfits. As you can probably guess, they attack by throwing boomerangs. After two throws, a Bro usually jumps to a new location before resuming his attacks. To defeat a Bro, get in close and jump on his head.
Stingbies
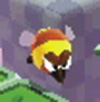
When you’re traversing precarious platforms, few enemies pose a larger threat than the Stingby. Stingbies are extremely territorial, and they’re always prepared to deal with trespassers. Jump on these enemies to defeat them, but make sure you avoid their stingers. Stingbies can chase you over long distances, but they aren’t able to change their altitude. If you’re just looking to avoid a fight, make your way to higher ground or drop down out of their paths.
Piranha Plants

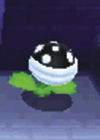
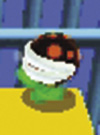
Throughout your adventure, you’ll encounter a variety of Piranha Plants. The color of each plant indicates its specific attack. Red Piranha Plants wait for you to get close, then they lunge forward and snap their jaws. Inky Piranha Plants are black with white spots. These enemies spit out globs of ink that temporarily obscure your vision. Fire Piranha Plants, which are black with orange dots, begin spitting fireballs as soon as they see you. All three varieties are vulnerable to your jumps. As long as you remember to dodge their attacks, they shouldn’t give you much trouble.
Cheep Cheeps
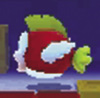
Cheep Cheeps are common enemies found in underwater areas. These wide-eyed fish are usually content to let you swim right past them, but you’ll take some damage if you brush up against one. If you’d rather not take your chances, use an underwater ground pound to attack a Cheep Cheep from above.
Bloopers
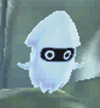
Bloopers are another common aquatic enemy. These sneaky squids are more aggressive than Cheep Cheeps, so it’s usually best to keep your distance. The Blooper’s erratic movements can make it hard to dodge in tight spaces, so they’ll put your swimming skills to the test. To defeat one of these enemies without the aid of a power-up, use an underwater ground pound to attack them from above—just watch out for the Blooper’s charge! After a Blooper winds up to attack, it swims upward with a sudden burst of speed.
Porcupuffers
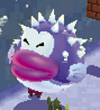
Porcupuffers aren’t aggressive, but their large size often makes it difficult to swim past them. The Porcupuffer’s spikes protect it from standard attacks, but a single fireball is enough to take one out. If you find yourself without a suitable power-up, however, you’ll have to rely on precision swimming. Porcupuffers usually follow a predetermined path. As long as you keep your distance, you should be able to pass right by them.
Spike Eels
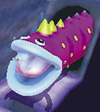
Spike Eels are big, durable, and always ready for a meal. These giant creatures are spread throughout most underwater areas, waiting in their dens for a tasty snack to swim by. Luckily, Spike Eels are usually very easy to spot. When you approach a Spike Eel, it swims about halfway out of its den. After a moment, it pulls back into its den and repeats the process. If you have a suitable power-up, you can hit a Spike Eel with a few projectiles to make it back off. If you keep attacking, you’ll eventually defeat it. This takes a fairly long time, however, so it is usually best to swim past them.
Thwomps
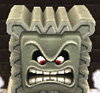
Thwomps are immune to all standard attacks, so don’t bother trying to harm them. When you approach a sleeping Thwomp, its eyes spring open and it slams to the ground. As long as you stay near it, the agitated enemy slams down at regular intervals. Between each attack, you usually have just enough time to dash through the impact zone.
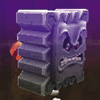
These creatures are most commonly found in Bowser’s castles, but you’ll encounter them in a variety of other levels, too. On rare occasions, you’ll even find Thwomps equipped with Tanooki tails. Tail Thwomps are much more mobile than their wall-sliding counterparts, but they use a similar slam attack.
Wallops
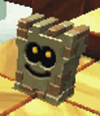
Despite their size, Wallops are incredibly nimble creatures. When you approach one, it blocks your path by mirroring each of your movements. Hop up to bait the Wallop into doing the same, then slip past it while it slams to the ground. Like Thwomps, Wallops are immune to standard attacks, but these enemies can often be used as mobile platforms.
Draglets
Draglets may not be the fastest-moving enemies, but their fireballs make them fairly effective guards. When you approach one of these creatures, it takes a deep breath to build up an attack. Dash in and jump on a Draglet’s head to finish it off quickly.
Dry Bones
These enemies may seem fragile, but Dry Bones are one of the game’s most resilient creatures. When you jump on a Dry Bones, it crumbles to pieces. Unfortunately, your victory is short lived—within moments, a downed Dry Bones is back in the fight. You can repeat the process as often as you like, but the result is always the same.
Magikoopas
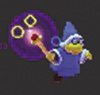
Magikoopas can be a handful! These enemies appear out of thin air, conjure a magical attack, then vanish from sight to start the whole process over. If you can reach one of these elusive enemies, you can defeat it by jumping on its head. A Magikoopa is most vulnerable just before it casts a spell, so that’s your best opportunity to attack. It’s not always possible to get in close, however. If a Magikoopa proves particularly troublesome, it is usually best to simply move on.
Lava Bubbles
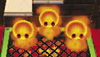
Lava Bubbles are living fireballs that can be found in most of Bowser’s castles. These creatures can’t be destroyed, so it’s best to move past as quickly as possible. Lava Bubbles aren’t particularly hostile, but they do have a knack for springing into your path when you least expect it.
Magmaarghs
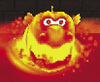
Magmaarghs are large lava-dwelling monsters. After a Magmaargh emerges, it moves straight ahead, passing through any obstacles in its path. These enemies are immune to all attacks, but they’re fairly easy to avoid. Just wait for the Magmaargh to pass by, then continue on your way before the next one emerges.
Monty Moles
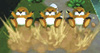
These sneaky little critters are generally found in underground areas. Monty Moles burrow out of sight, only to spring up when you approach. After they emerge, they usually follow a predetermined path. Monty Moles almost always appear in groups, but as long as you survive the initial ambush, they aren’t particularly difficult to handle. Step aside to let a Monty Mole walk right past you, or jump on its head to defeat it.
Morty Moles
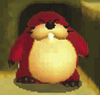
Morty Moles can be found in underground areas, but they venture up to the surface on occasion. They don’t react to your presence, but these oversized enemies can still be a handful. You must jump on a Morty Mole two times to defeat it. As they tend to appear in narrow passages, this may not always be an option. When you don’t have enough space to jump, look for a power-up, or find a route that takes you around them.
Rocky Wrenches
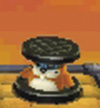
Rocky Wrenches are commonly found on airships, but you’ll have to deal with them in a variety of levels. These crafty moles show themselves just long enough to throw a wrench at you before dropping back out of sight. To defeat a Rocky Wrench, dodge its attack and jump on its head.
Bullet Bills
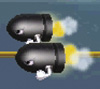
These fast-moving enemies mean business! Once fired, Bullet Bills travel in a straight line, ready to take out anyone unfortunate enough to be in their path. You can jump on a Bullet Bill to defeat it, but it is usually best to simply stay out of its way.
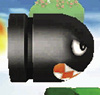
Banzai Bills are much larger than Bullet Bills, but they’re fairly similar in most respects. Like Bullet Bills, Banzai Bills are vulnerable to your jumps. Of course, it’s much more difficult to get above these massive enemies.
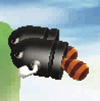
Every so often you’ll spot a Tail Bullet Bill. This enemy performs tail whips as it travels along its path, so use caution if you try to slip past one.
Bob-ombs
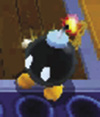
Bob-ombs may be small, but they pack quite a punch. When left alone, a Bob-omb wanders aimlessly around a small area. If you get too close, however, the Bob-omb scrambles toward you as it prepares to detonate. Kick flashing Bob-ombs away from you, or use a projectile to cause an instant explosion. When you stumble upon a group of these enemies, it’s generally best to retreat until they explode.
Fuzzies
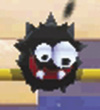
Fuzzies are usually found on tightropes, but these odd little guys often travel along special tracks. Fuzzies rarely work alone. If you find one, chances are there are more in the area. These critters are immune to your attacks, so you’ll generally have to find a way around them.
Sandmaarghs
Sandmaarghs lurk underground, just waiting for the chance to spring to the surface. Watch the shadow as it approaches. When the Sandmaargh is directly below you, the shadow disappears. When that happens, jump away to dodge the beast as it breaks through the surface. To defeat the Sandmaargh, hop on its head before it dives back underground.
Pokeys

Pokeys may sport friendly grins, but these prickly foes are best avoided. However, if you have an appropriate power-up, you can use boomerangs, fireballs, or tail whips to take down these opponents a piece at a time. Damage a Pokey’s head to defeat it.
Spinies
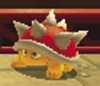
With their spike-covered shells, Spinies are able to fend off most attackers. These bulky turtles are fairly aggressive, so it’s usually best to keep your distance. Their tops are well protected, but they’re still vulnerable from the side. A fireball, boomerang, or tail whip is all it takes to dispatch a Spiny. If you don’t have a suitable power-up, however, Spinies are best left alone.
Flophoppers
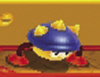
When it comes to dealing with the Flophopper, it’s all about choosing the right moment. One half of its body is covered in deadly spikes; the other half is completely unprotected. The Flophopper moves by flipping end over end, regularly exposing its vulnerable underbelly in the process. When its spikes are safely out of the way, jump onto a Flophopper to take it down.
Prongos
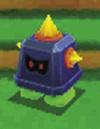
Prongos are protected by heavy armor, so there’s no sense in facing them head-on. Instead, wait for your enemy to make the first move. When a Prongo attacks, it jumps in the air and dives toward you. If you step out of the way, the overeager enemy drives itself into the ground. Jump onto its flailing legs to defeat it.
Prongos can deflect fireballs and boomerangs, but the Tanooki Suit’s tail whip is capable of knocking them off their feet. You still have to finish them off with a jump, but it certainly speeds up the process.
Blokkabloks
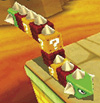
Blokkabloks often contain useful power-ups, so it’s usually worth having a look. The top of a Blokkablok is covered in spikes, so you have to attack from below. As a Blokkablok circles an area, it usually alternates between floating in the air and sliding along the ground. These enemies always follow predetermined paths. Watch a Blokkablok as it circles an area, then move into a suitable location along its path. Crouch down and wait for the enemy to return, then jump up to hit each Block in its body.
Fake Blocks
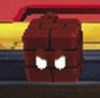
Fake Blocks blend right into the environment, waiting for a chance to pounce. When you approach a Fake Block, it blinks its eyes and springs into action. Stay clear of its attack, then jump on it and smash it from above.
Chain Chomps

Chain Chomps are fast, tough, and downright ferocious. When you approach a Chain Chomp, it lunges at you with startling speed. If you manage to avoid the attack, it’s only because your enemy is securely fastened to the ground. Chain Chomps are immune to your attacks, so nothing short of a Super Star can overcome their snapping jaws. These enemies are often used to guard important objects. When you need to venture into a Chain Chomp’s territory, bait it into attacking before you move into range. After it lunges, the Chain Chomp takes a couple of seconds to recover—make sure you’re back out of range before it does!
Boos

Boos are about as sneaky as it gets. These devious little ghosts only approach while your back is turned. When you face a Boo, it covers its eyes, hoping you won’t notice it. Boos are immune to all standard attacks, so unless you find a Super Star nearby, you don’t have much choice but to play along. More common power-ups won’t defeat these enemies, but they can allow you to escape dangerous situations. When you hit a Boo with a fi reball, boomerang, or tail whip, it temporarily disappears.
Tail Boos are a little more aggressive than standard Boos. When your back is turned to one of these enemies, they move in with a series of tail whips.
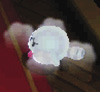

Big Boos behave exactly like the smaller versions, but these massive enemies are completely immune to projectiles and tail whips.
Peepa

Peepa aren’t aggressive, but their eerie gaze can be a little unnerving. These grinning ghosts usually appear in large groups, twirling gracefully as they circle the area. Like Boos, Peepa temporarily vanish when you hit them with a fireball, boomerang, or tail whip.
Coin Coffers
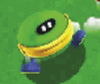
Coin Coffers aren’t easy to find, but they’re well worth tracking down. When you stumble across a Coin Coffer’s hiding spot, it attempts to flee. Jump on its head five times to defeat it. If you land all five jumps without touching the ground, you’re rewarded with an extra life.