
Mario Kart 8 Guide The Drivethrough The New Tracks
Rainbow Road
Racing in low orbit is a fitting way to end the Special Cup. In what has become a Mario Kart tradition, many long stretches of Rainbow Road have no protective walls. Combine that with the slippery antigravity sections of the track, and you can be in for a rough race, particularly on higher difficulties.
Kart of Champions
Nintendo’s Best Time Trial: 2:15.895 |
|||
Player: Jeff C. M. |
|||
 |
 |
 |
 |
|
Racer: Wario |
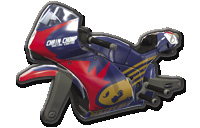
Body: Sport Bike |
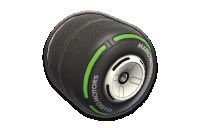
Wheels: Slick |
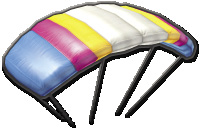
Glider: Parafoil |
Grand Prix


The first two big turns can be a doozy. The antigravity panel before it makes your controls more slippery, and there’s no retaining wall throughout the turns. Watch your flanks when passing through this turn—a rival racer can send you off the side!

A glide ramp sends you flying towards the space station. Don’t miss collecting some Coins while in mid-flight.


The conveyor belts inside the space station will change their direction with every lap. Stay on the belt with green arrows pointed in the direction you need to go.

Dash panels will propel you towards one of two glide ramps leading to alternate roads to follow. You can adjust what road you follow, but the rings around the glide path will try to force you onto a designated route.


The split roads have no walls for the majority of their length, and are dotted with Spin Boost pillars to boot. Always know if you’ve got racers close by. During harder-difficulty GP races, these two paths can be a boulevard of broken first-place ambitions. It’s very easy to get knocked off!


An amazing shortcut is available if you take the right-side glide ramp onto the lower route of the split course section. Marked by a lone Spin Boost pillar, if you drive straight off the track behind the pillar, you’ll land on another piece of the track looking right at the final hairpin of the track, and you’ll have cut a good chunk of the course to boot! No Mushroom is required for this stunt.


The final hairpin turn before the finish is a doozy. If you’re not in a particularly maneuverable vehicle, sticking to the inside line might be hard. You can drift further to the outside and use the dash panels there to make up for taking the longer racing line. Whatever you choose, if you have Bananas, this turn is a particularly cruel place to deploy them, as you can easily make racers fly off the sides of the track!
Time Trial Mode


Rainbow Road Time Trials are all about getting the most out of every single drift you make and cutting your turns as tight to the inside racing line as possible. The first two turns have five Coins to collect on the inside of the track, and six on the outside. It’s worth staying on the inside line for all three laps. After Lap 1, you should take these two turns with drifts that have your front wheels literally hanging off the side of the track!
For all three laps, when gliding over this chasm, try to collect at least one Coin while lining up to take on the upcoming space station.


Landing on the station near the M platform should give you another chance at more Coins. Make sure you Jump Boost off the ramp onto the conveyor belts, and aim for the belt on the inside of the right turn up ahead. If that belt has red arrows pointed at you, use a Mushroom to power through the belt.


Always choose the glide ramp on the right, as it leads to the lower route in the split course section, which also leads directly to the big shortcut of the track. Both routes feature multiple Coins to collect. By the time you get to this point in Lap 1, you should be at or close to ten Coins.


The shortcut, marked by a lone Spin Boost pillar, at the center of a curve to the right, is vital to take if you’re trying to break records. As you go off the seemingly blind jump to the track below, aim yourself slightly to the left so you land on track, and not on speed-sapping rough terrain!


The last hairpin is tough, but for maximum speed should be taken as tight as possible on every lap in a Time Trial. Hang those front wheels over the edge of the course while drifting!
TM & © 2014 Nintendo.