
Mario Kart 8 Guide The Drivethrough The New Tracks
Dolphin Shoals
A wet and wild course, Dolphin Shoals will test your abilities to race underwater, sending you through a dangerous cavern and racing over, or under, a monstrous Unagi. This can be a rough race to win, particularly on higher difficulties when mistakes are so much more costly, and the COM racers are so much more vicious.
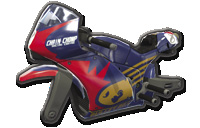
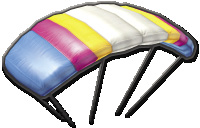
Kart of Champions
Nintendo’s Best Time Trial: 2:09.590 |
|||
Player: Jeff C. M. |
|||
 |
 |
 |
 |
|
Racer: Wario |
Body: Sport Bike |
Wheels: Slick |
Glider: Parafoil |
Grand Prix


The first turn leads into a wide open area with several ramps you can Jump Boost off of. The rings behind each ramp also add a little speed, but it’s actually faster to weave around the ramps entirely while maintaining as straight a path as possible.

After a long spiraling turn to the left, you’re presented with a cave filled with water jets shooting from pipes. There are four distinct routes to take.

The center is most direct, but there is the greatest chance of getting knocked into the abyss by other racers, or simply failing to clear each gap the water jets try to launch you over.

The right-hand route bypasses a lot of the danger of the cave, and even provides a dash panel that helps boost you into position to tackle the next challenge.

To the left of the route on the far right is another that is arguably faster. It can be reached by driving between the blue and purple pipes near the start of the cave, aiming for a pipe.

The left route requires almost as much faith as the central route, as multiple water streams will try to push you across the cave. If you’re misaligned, you could end up in the abyss.


At the end of the cave is a ginormous Unagi. He’s friendly to racers so long as you don’t fly directly into his mouth. The dash panel in front of him launches you onto his back, and you can Jump Boost off his spine repeatedly to gain speed. The spine is also a good place to set Bananas to throw off the COM racers—they’ll be trying to Jump Boost too! If you fall off, there’s ground under him, but you’ll lose out on the Jump Boosts and likely lose a few places on higher difficulties.


The exit to the caves is just behind the Unagi, a long easy right that allows you to build up multiple Mini-Turbos. Watch out for heavyweights in this section if you’re in a pack of racers. There are no walls to protect you from falling!


After a short flight over the water, the final S-curve stands between you and the finish. Racers with Mushrooms will try to cut most of this turn. If you only have Bananas, you can try to mine the entrance to the shortcut with Bananas in hopes of slowing a rival down.
Time Trial Mode


It’s tempting to take two of the ramps and Jump Boost through the rings. This is will actually slow you down more than speed you up! Only aim for the center ramp during Lap 1 to collect the two Coins in front of it. Don’t Jump Boost off it to avoid getting launched out of the water, which will slow you down. On the two following laps, just weave smoothly around the ramps entirely.

This long curve to the left has a total of six Coins to collect. An optimal run here should place you at eight Coins before you exit the turn for the upcoming cave.


While there are four paths in this cave, the right-hand path is arguably the fastest and should be traveled for every lap. Don’t forget to Jump Boost off the water current leading into the right path for some extra speed! As you race across the dash panels here, two Coins can be collected on the lower left side of the track, just before the dash panel ramp that launches you to the next section of the cave. Ideally, you’re now at ten Coins.


Jump Boost up the water currents onto the supermassive Unagi’s back. This part of the lap rests on your ability to score multiple Jump Boosts off the spine of the Unagi while also racing forward as quickly as you can. It’s not easy, but the fastest laps on Dolphin Shoals depend on it!


Exit the cave with a Jump Boost off the ramp, then drift through the next turn to the right. If you haven’t hit ten Coins yet, you can snag another during the turn itself, with more to be found in mid-air when a glide ramp launches you over the water to the final turns of the course.


The shortcut used by some during the Grand Prix is essential for a fast Time Trial here, and you’ll need to use it for every lap. As you land from the short glider trip, turn left and align yourself to the rocky ground to the right of the actual course, and aim straight for the finish. Cut loose with a Mushroom the moment your front wheels hit the rocks, and jet to finish line!
TM & © 2014 Nintendo.