
Lego Star Wars: The Complete Saga Guide Walkthrough Episode VI: Return of the Jedi
Chapter 4: The Battle of Endor
It’s a good thing that the Rebel friends had C-3PO with them. Those furry Ewoks think he is some kind of god, and they actually like to hear him talk. At least somebody does.
Otherwise, our heroes would have ended up as the main dish at an Ewok barbecue. As the Rebels prepare their final plans, Luke must leave to find Vader on the Death Star. So much for the happy reunion.
Luke might be gone, but you still have to carry on with the mission. You start high above the forest in the Ewok village in the trees. Show your thanks and blast the pots against the wall behind you.
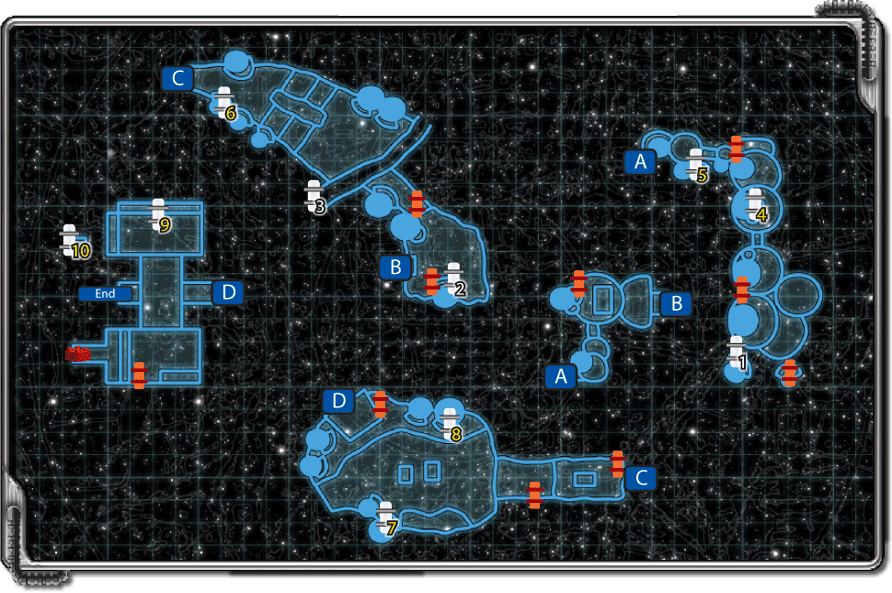
Collect the studs and shoot the boards that cover the doorway so you can shoot the blue pot inside. Shoot the container in the other doorway and grab the valuable goods that spill out.
Now follow the path and run around behind the doorway where you just shot the pot. While you’re out of view, grab some valuable studs. Follow the path until you loop back around to where you started.
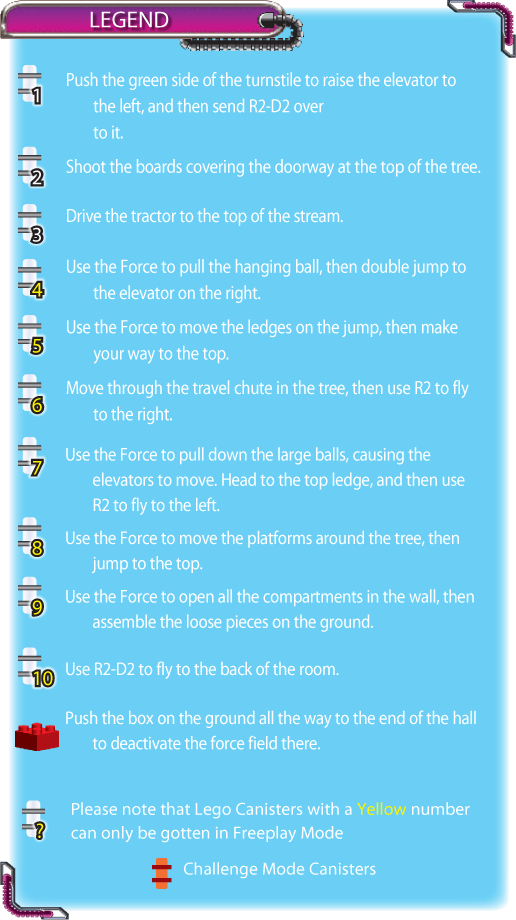
Move to the left of the village and smash more pots for more goodies. Break the purple box to find some loose LEGO pieces to assemble. Assembled, they form a turnstile; as before, push the green side to spin it.
Keep pushing to make an elevator platform along the giant tree to the northwest raise to a horizontal position. Send R2-D2 over to the new elevator; it raises him up to a platform above.
He can collect the LEGO canister and some studs there. There’s nothing more to do here, so fly back to the main part of the village.
Move to the right and you’ll find another pile of loose LEGOs. Put the pile together to create a barbeque and collect the studs that are released.
Continue moving to the right, shooting more pots and collecting more studs. Blast the brown boards blocking the doorway, then blast the blue pot behind them to get another blue stud.
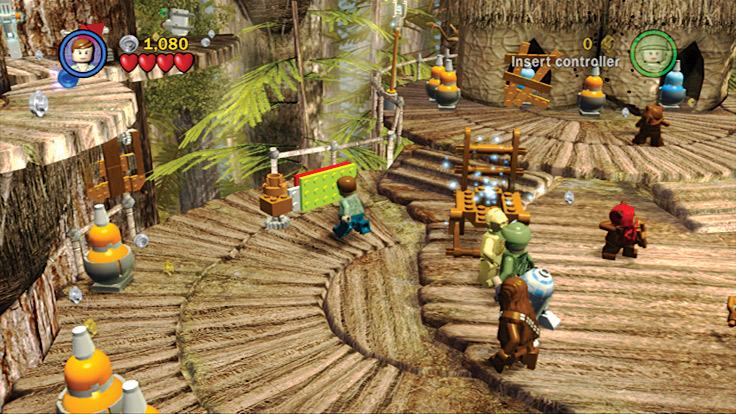
Push the turnstile to raise the elevator on the tree nearby.
The path to the right eventually leads to a small chute in the wall. Switch to Wicket and hop inside the chute. It takes you to a walkway on another tree to the right. Assemble the loose LEGOs you find to the left of the chute exit.
This fixes the controls for a bridge that rises up and connects to the walkway from which you just came. Your friends can now run across and join you.
Now follow the village walkway to the right. As you move, continue shooting all the pots and boxes along the path to find hidden treasures. An elevator to the north takes you to a ledge above.
Switch to R2 and fly to a ledge on the left, and from there, fly to another ledge on the left to get some valuable studs. Go back to the village and continue moving to the right. When you see some boards covering a doorway, blast them apart.
Use C-3PO to access the activation panel in the doorway. This causes a crate to drop to the walkway and shatter into tiny pieces.
Assemble the loose pieces from the crate that broke on the walkway to create a red circle swirl pad. Use your ascension gun and grapple to the ledge overhead. Pull the lever on the tree trunk.
A bridge rises up below you. Drop back down to the village and run to the right to cross the bridge. On the other side, break all the pots to add more studs to your collection.
Continue following the walkway through the village. It eventually starts to wind down to a lower level. When you get to the lower level, smash more pots and follow the walkway to the right.
As soon as you run down a small ramp, shoot the equipment in the center of the area to find a power up. Some stormtroopers grapple up the sides of the village to greet you.
Fight them off and then run along the fence of the village, blasting all the grappling hooks you see. After you destroy the last one, no more troops can come up to shoot you in this area.
When the coast is clear, continue to destroy all the equipment on the checkerboard pattern in the center of the walkway. Some of the equipment leaves behind some loose LEGOs that you can assemble.
Put them together to form a piece of equipment that you can push all the way to the left until it fits into the slot in the floor. This raises a large platform to the south.
Now use Wicket to jump into the travel chute in the large tree nearby. This chute takes you to a platform above, where you pull a lever attached to the tree.
This causes a crane to lower and grab that piece of equipment you just pushed along the floor below. The crane deposits it on a checkerboard pattern on a small platform to the right.
Push this piece of equipment into the slot in the tree to the right of the larger tree. Doing so raises up a platform with some red floor switches in the south.
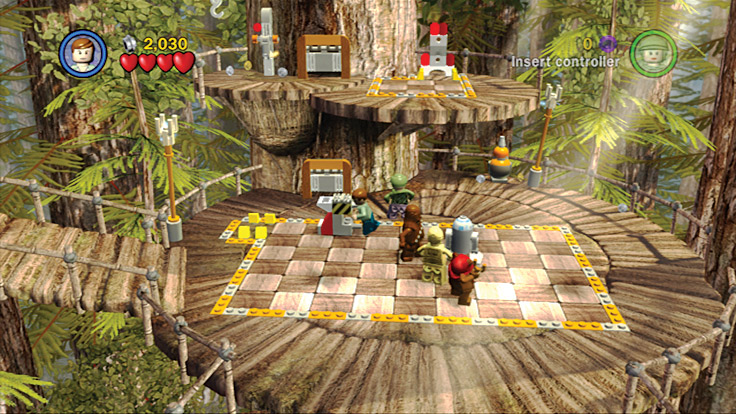
Push the equipment you put together across the checkerboard pattern on the floor.
Drop back to the village walkway and run to the south. Stand on one of the red floor switches to turn it green. The rest of your party does the same.
After all the switches turn green, the platform you’re standing on lowers to the forest floor. Shoot the guards standing around in the south, then blast the ones on a walkway to the right.
When the coast is clear, run to the left of the clearing. Shoot all the vegetation and collect the stud on the ground. Destroy a purple box nearby and then assemble the LEGOs it leaves behind to create a circle swirl pad.
Use your ascension gun while standing on the pad to grapple to a platform overhead. Destroy all the pots you see and collect the goodies that spill out.
Shoot the boards covering the doorway and collect the LEGO canister that is hidden behind them. Drop back to the forest floor and move to the right.
The rest of the trail is too high to get to for now, so destroy all the vegetation on the ground and snatch the studs that litter the ground. Put together some loose LEGO pieces from under the plants to form a red and green turnstile.
Push the green side to raise a platform against the cliff wall to the right. After the platform rises as high as it can go, use Wicket to get in the travel chute in the wall.
The chute takes you to a ledge directly overhead. Once you get there, step on the red floor switch. This causes a hook hanging nearby to move to the right, and a red circle swirl to appear on the ground below.
Continue to stand on the switch while another character uses the circle swirl to swing to the next part of the trail on the right.
Once that character gets there, they will pull a lever to raise a ramp so that everybody can get up to the next part of the trail.
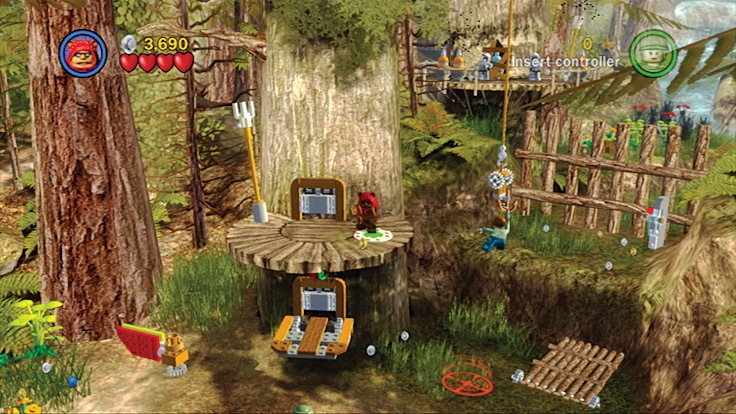
Keep standing on the red floor switch so someone from your party can use the ascension gun to swing to the next part of the trail.
Now blast the stormtroopers who are in your way. Move to the left and destroy all the plants you see. You’ll find a red circle swirl pad on the ground. Stand on the swirl and grapple to a platform overhead.
Destroy all the pots you see and blast the boards covering the doorway. Hidden behind them is a blue pot that you can turn into junk, then collect the studs inside.
Now drop back down to the trail and follow it as it crosses a small stream. The current is strong, preventing you from going too far upstream for now, but you’ll be back later.
When you get to the stream’s other side, blast any guards that you see, then get to work destroying the plants on the right side of the area.
While you’re on the right side, destroy the wooden fence as well as the purple boxes that were penned up. Then get the loose LEGOs on the ground. Put them together to make a tractor. Lots of valuables spill out for you to grab.
Drive the tractor you just created to the left side of this farm. Drive the tractor over the tops of the carrots that are planted in the ground to make them grow. After everything sprouts, some studs pop up too.
Keep moving over the carrots until every last one has sprouted from the ground. When all the vegetables are above ground, chop them down for even more goodies.
Now drive the tractor into the water and head upstream. When you get to the waterfall at the end, jump off and grab the LEGO canister you find.
After you get the canister, go to the back of the farm. In the center of the area is a tan box. Blast it apart. It leaves behind some LEGOs that you can assemble into an activation panel.
Move C-3PO over to this panel and have him access it. This causes some red floor switches to be revealed to the left and right of the gates nearby.
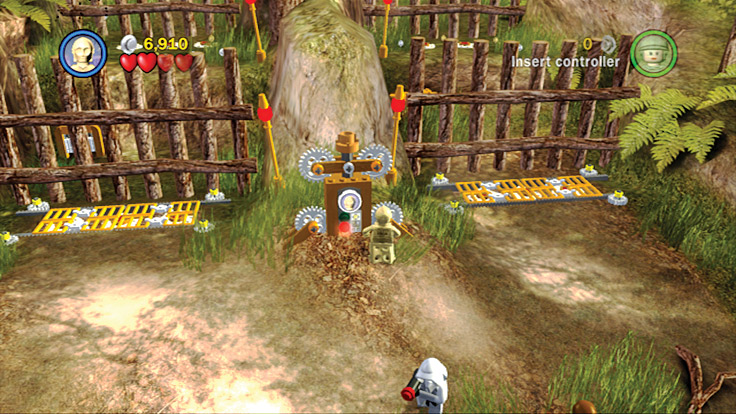
Use C-3PO to access the activation panel to open some red switches on the ground nearby.
Move to the right of the activation panel and step on the red floor switches; the rest of your party does the same. After all the switches turn green, the gates in front of you rise up, opening the path ahead.
Run forward and assemble the loose LEGOs on the ground to create a small wooden ramp. This ramp is perfect for the droids to use to get up to the walkway’s next level.
Run around the activation panel that C-3PO used and head for the open gate on the left. In the wall beyond the gate is a travel chute that Wicket can use to get to a platform in the trees above.
Pull the lever on the trunk to make a crate drop to the floor below. Drop down and assemble the pieces into a red circle swirl pad. Use your ascension gun to swing to the next part of the trail that is too high to reach otherwise.
Step on one of the red switches on the ground. The rest of your party follows suit. When everyone is standing on a floor switch, the gate in front of you lowers into the ground, opening the trail ahead.
Move forward down the next part of the trail and blast the stormtroopers charging you. When they’re dead, destroy all the vegetation on the area’s left side. Doing so uncovers a travel chute hidden on the large tree trunk nearby.
Have Wicket jump into the chute to arrive at a platform above. From there, jump to another platform to the left and shoot the pots for some hidden loot.
Drop back down to the ground and head to the area’s right side. Blast all the plants you find and collect the goodies that litter the ground.
Some purple boxes are also here, so break those apart to be rewarded with even more hidden treasure. Once the area is loot-free, follow the trail farther to the north.
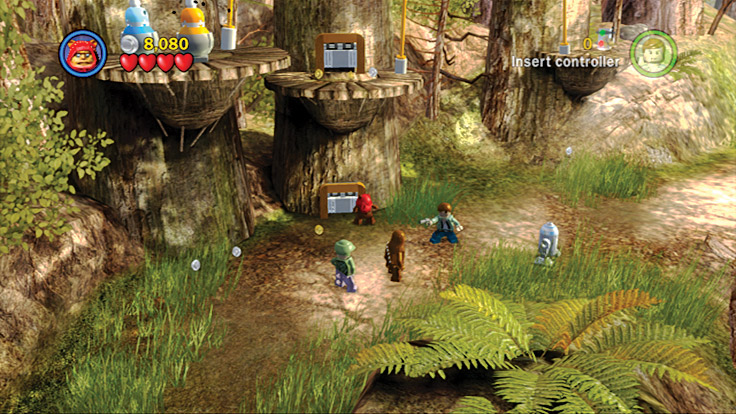
Clear the plants away from the tree trunk to find a hidden travel chute.
In the next area, start shooting the vegetation on the ground to find some hidden studs. As you do so, be sure to take out the stormtroopers that come rushing in to stop you.
When the area is enemy- and plant-free, head down the path until you find a catapult. Jump into the controls and starting firing at the debris that blocks the path in front of you.
After a number of hits, the debris shatters into tiny pieces, spilling studs all over the ground.
Don’t leave the controls of the catapult just yet because an AT-ST comes charging at you. Fire a direct shot at the body of the AT-ST to knock its driver out of the controls.
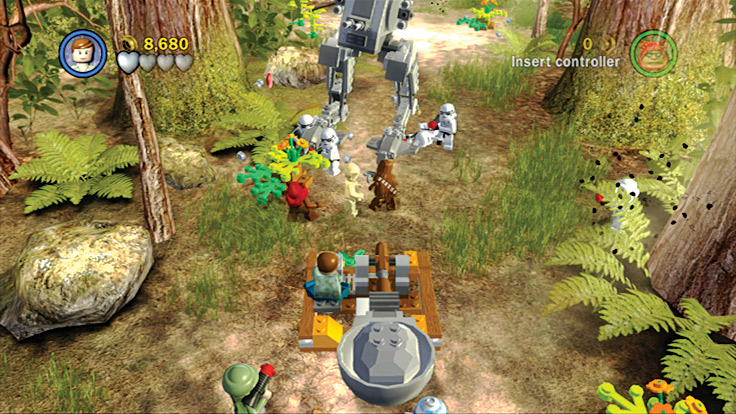
Use the catapult to take out the AT-ST’s driver before it hurts you too much.
When the walker is lacking a driver, quickly exit the catapult and jump into the AT-ST. Now that you have control of it, blast all the nearby stormtroopers who were trying to shoot you.
Continue along the path ahead and shoot all the plants along the trail to find some more valuables. The trail is eventually blocked by a flimsy fence. Use your AT-ST to turn it into garbage.
Continue advancing past the broken fence. You’re in a large clearing. Use your AT-ST to blast all the stormtroopers running around the area trying to kill you. Move into the clearing and follow the left cliff wall.
Be sure to destroy all the vegetation as you collect more studs. You eventually get to some destructible purple boxes on the ground. These boxes leave behind some LEGOs for you to put together.

Once assembled, they form a turnstile. Get out of your vehicle and push the green side. As the turnstile spins, a platform comes down on the tree nearby.
Blast the vegetation to the left of the boxes and you uncover a red circle swirl pad. You can’t do anything there yet, so get back in your AT-ST.
Now walk to the north of the clearing. When you get to the end, jump out of your walker and blast all the vegetation to find some more studs.
Get back in the AT-ST and blast the large pile of debris to the right. After a few hits, the pile explodes, leaving behind many valuable studs. Jump out and grab them.
Jump back into the walker, and from there, jump to a platform in the trees nearby. Step on the red floor switch you find to make a red circle swirl pad appear on the ground below.
Someone in your party uses the ascension gun to grapple to another platform to the right. That character pulls the lever on the tree trunk. A crate drops to the ground and shatters into pieces.
Jump to the area where the crate fell and assemble the loose pieces on the ground to create a red circle swirl pad. Use your ascension gun to grapple to a platform in the tree to the right.
Then step on the red circle swirl pad and swing to the roof of a building to the right. Blast all the vents you see and collect the loot that falls to the ground. Two of the broken vents leave some LEGO pieces behind.
Assemble the leftover pieces to finish the checkerboard pattern on the roof. Now push the box you find up there along the pattern and over the edge of the building to shatter on the forest floor below you.
Jump off the edge of the building and blast the plants to the left. Collect anything that drops to the ground. Then assemble the loose LEGOs on the right side of the building. These pieces turn into an access panel that only R2-D2 can use.
Head to the south of the panel and put together a few more LEGO pieces to form a ramp. Now the rest of your party can join you in front of the building.
Before you do anything else, run down the path to the right, blast any plants that are still alive, and collect any studs scattered about the area.
When the area is clean, use R2 to access the panel on the building’s side to open the door and head inside.
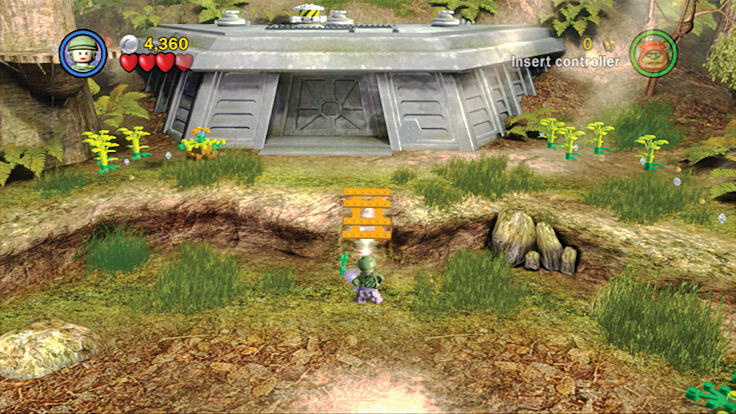
Assemble the LEGOs in front of the building to create a ramp that your friends can use.
Upon entering the building, shoot the wall panels and the white containers on the ground. Be sure to collect any studs that spill onto the floor as you go. Follow the walkway inside and go down the ramp until you get to a locked door.
Fire your blaster pistol at the red lights in the center. After a few hits, the doors open and Imperial troops rush out to greet you. Keep your weapon ready and shoot them down as they get close.
When the coast is clear, go through the open doors into the next room. Blast all the white equipment lying around and any guards that might still be alive.
There are doors to blast open both on the left and the right, and the pathway ahead is blocked by a force field.
For now, go to the back-left corner of the room and pull the lever on the wall. This undoes one of the four locks holding the force field in place.
Because the walkway ahead is still blocked, move to the door in the left wall. Shoot the red lights at the center of the door until they are gone, then head into the room beyond. As soon as you enter, you are fired on by a swarm of enemy troops.
Blast all the guards at floor level, then hit the guys that are on the walkways above the room. When the coast is clear, assemble the loose LEGOs at the center of the room to create a model of a TIE interceptor.
Now move around the room, blasting all the white containers and grabbing anything that drops to the floor. Hidden beneath two of these containers are red floor switches.
Step on both switches to make two platforms drop into place along the left wall. Shoot the wall panels in the back-left corner of the room and you’ll discover a third floor switch.
Step on this last switch to make a third platform move into place between the last two you created.
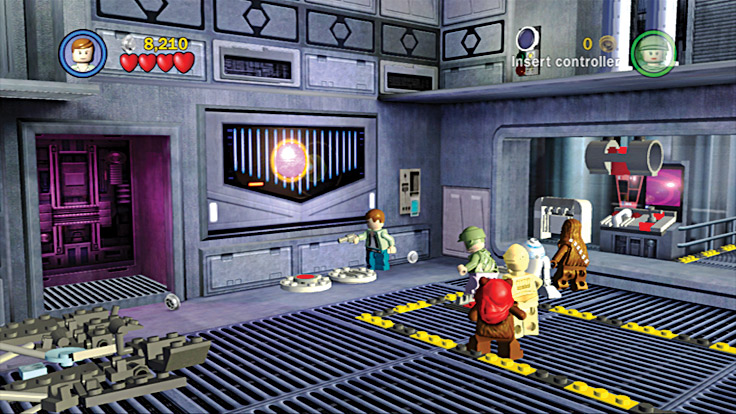
Step on the red floor switches to create a platform you can climb on the left side of the room.
Jump up the platforms until you reach the narrow walkway at the top. Shoot the panels on the wall, and you’ll find a piece of movable equipment behind them.
Jump behind the equipment and push it south and then to the left into a slot in the wall. This causes those platforms you just climbed to tilt and become a ramp.
Now the rest of your friends can come up and join you. Switch to C-3PO and access the activation panel on the wall.
This causes a force field on the right to disappear and a lever on the wall to become accessible. Pull the lever to destroy another lock on the large force field in the other room.
Go back to the main room and run to the locked door on the room’s right side. Shoot the red lights at the center of the door, then head into the room beyond. Inside, blast all the Imperial troops trying to mow you down.
After your enemies have been eliminated, shoot all the white containers on the room’s right side. One of them has a red floor switch for you to step on. As soon as you do that, a trap door drops you down to a hidden tunnel under the floor.
Collect all the studs you find under the floor, and when you’re ready to go back up, follow the tunnel to the north. When you reach the end of the tunnel, a small elevator lifts you back to floor level.
On the floor level, shoot all the wall panels in the back of the room and collect the studs that drop to the ground. Next, use R2 to access the activation panel against the back wall. This activates a small elevator to the right of the panel.
Ride the elevator to the ledge above the room and exit to the right. Assemble the loose LEGOs on the ledge to fill in the gaps in the path so the droids can get across. Switch to C-3PO and follow the walkway to the right.
Use him to access the activation panel with his picture on it. This opens a lever in the wall to the right. Pull the lever to make a third lock on the large force field in the other room bust apart.
Switch to R2-D2 and follow the upper walkway to the room’s left side. When you get to the end, follow the wall and fly across the room to the left. You eventually reach a small ledge on the other side of the room.
Use the activation panel on the wall. A plug in the wall opens, spilling loose LEGOs onto the ground. Assemble the loose pieces to create a travel chute in the wall. Use Wicket to move through the chute to get into a room to the left.
Once you get to the new room, drop the stormtroopers guarding the area, then pull the lever to the right. This destroys the last lock on the force field in the main room.
Go back to the main room and move to the center of the area. Now that the four locks have been destroyed, the controls at the room’s center are functional again.
Pull the lever on the center control; the force field blocking the path ahead disappears. Head down the path and kill any stormtroopers that enter the room to stop you.
When you get to the new area, you see four piles of LEGO pieces on the ground. Assemble each pile to create an explosive device on the wall. After you build the last bomb, your plan is set in motion.