
Lego Star Wars: The Complete Saga Guide Walkthrough Episode I: The Phantom Menace
Chapter 1: Negotiations

Jedi know when something is wrong, and something is definitely wrong around here. Maybe it’s the blank stare of the droids that is giving you an uneasy feeling. Or maybe it’s the empty room you’re waiting in.
Or maybe it’s the fact that your ride just got blown apart! The Trade Federation is up to something fishy, and it’s time to investigate what’s going on.
You start in a room with a large conference table and several chairs. Run across the table to collect the studs on the surface. Use the Force on every chair to reveal hidden studs and hearts for you to collect.
White gas is seeping into the room—it’s time to leave. Head for the locked door heading out of that place and use the Force to demolish it.
Collect the valuable studs from around the room, then use your powerful lightsaber to destroy the equipment to the left of the door. Keep hacking the equipment until it is destroyed; collect all the studs hidden inside it.
When you get into the hallway beyond the door, battle droids move in to destroy you. Use your lightsaber to deflect their shots back at them after they fire at you. Add a few slashes with your weapon to finish off any stragglers.
After you turn the battle droids into scrap, use the Force to move the broken door parts to the side walls, revealing more studs to collect.
In the hall, turn into the first room on your right. Use the Force on the machinery at the room’s end for some major token spillage. Collect the goods, then stand near the platform to the walkway’s left and use the Force to fix the gears.
Immediately jump on the fixed platform as it rises into the air high enough for you to double jump and grab the blue token above your head. Do the same for the other platform on the other side of the walkway.

Use the Force on all the furniture in the room to get lots of LEGO studs.
Return to the main hall and get ready to face more battle droids. Use your lightsaber to deflect their shots back at them to make short work of those walking machines!

The hallway is crawling with enemy battle droids. Use your lightsaber to deflect their shots back at them.
The other doors in this hallway are locked for now, but you come back shortly. As you walk through the main hallway, use your Force powers to open all the secret compartments to get the hidden studs and hearts.
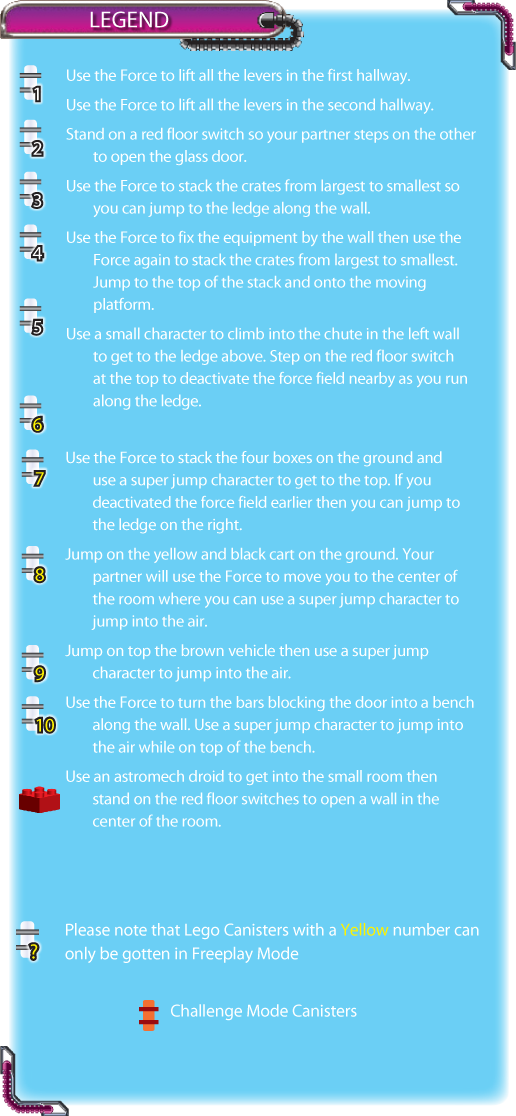
Also located along the hall’s walls are six blue switches. Activate all of them to make a LEGO canister appear where the hallway bends to the right in the distance.
More enemy battle droids await you after the hallway bends to the right. Head down the passage and turn all of them into scrap LEGO parts. When the area is secure, use the Force to open more secret compartments for hidden studs.
You must also activate six purple switches in the hall to reveal another LEGO canister at the hall’s end. Smash the equipment on the floor to get even more valuable studs.
At the hall’s end, you find TC-14 ready to join your team and assist you. Switch to your new team member and waddle your way back to the hall’s beginning. Use TC-14 to unlock the first door you skipped.
After you open the door, use Obi-Wan Kenobi to collect all the studs on the ground. Use the Force to put the gears lying on the ground back on the lifter in the corner. With gears in place, step on the crate next to the lifter.
Use the Force on the machinery to have it grab the crate and lift you into the air high enough to get the blue studs floating overhead. Another LEGO canister is also in this room, but it is behind a protective shield.
Step on the red floor switch to the shield’s left and your partner automatically steps on the other one.
After both switches are activated, the shield disappears, but some battle droids next to the LEGO canister come to life. Put them down with your lightsaber and add another LEGO canister to your collection.
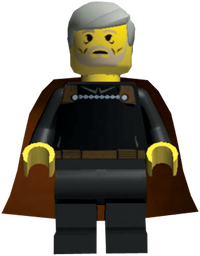
Use TC-14 to open the locked door at the hall’s bend, then enter the room with Qui-Gon Jinn and collect the studs scattered about the floor. The other areas in the room are off limits for now, so you must come back at another time.

After the shield is gone, the battle droids come to life and the fun begins.
Head back to the hall’s end to find TC-14 once again waiting for you; use him to open the next door. The short hallway beyond has a few compartments that only the Force can open.
Assemble the LEGOs that spilled on the floor into an activation panel for a protocol droid. When the area is loot free, have TC-14 open the next door.
Inside the next room, smash the equipment in the corner and collect all the studs on the floor. Use the Force to open the grate in the wall and form a ledge next to the wall.
Get your lightsaber ready and destroy the two battle droids that run through the open grate.
With the area clear, enter the dark grate. Drop into the next large room and get your lightsaber ready for some battle droids. Deflect incoming blasts and make short work of those guys.
Another battle droid from the side wall fires down at you. Deflect his shot back at him, and you’re temporarily safe to collect the studs scattered about area.
Grab the two blue studs on the lower walkway across from the open vent you came through.
With studs collected, switch to Obi-Wan Kenobi and use the Force to stack the three crates in the middle of the area, starting with the large one.
After you stack all three, jump to the top and then double jump to the ledge against the wall for some studs. Double jump straight into the air and another LEGO canister is yours.
Use the Force to move the equipment in the corner from under another ledge. After you move the equipment, jump on it to reach the studs above. The door is locked and only R2-D2 or R4-P17 can open it; you must move on for now.
Run down the ramp to the lower level where you must face your biggest challenge yet. A large squad of battle droids is making its rounds when you’re spotted. Some quick lightsaber hits will do the trick.
Two droidekas roll in to fight you as well. Their protective shield makes them an even more dangerous enemy. Move in close to get them to fire at you. Bring your lightsaber up to deflect their shots back at them.
After a few hits, the shield disappears; after a few more hits, it breaks into LEGO pieces. Take out both droidekas the same way.
Use the Force to stack more boxes on the lower level. Start with the large box first, then add the three smaller ones on top.
With the crates stacked, use the Force to activate the nearby switch on the ground and the switch on the wall; this causes a ledge above your head to move.
Scale the stacked crates and jump to the moving ledge; ride it until you collect the LEGO canister floating in the air.

After you stack the crates and activate the switches, ride the platform to pick up another LEGO canister.
On the area’s other side is a conveyer belt. As you run across the area, assemble the pieces on the ground to make a small vehicle that you can ride.
Then continue to the right and smash the orange bricks on the conveyer belt and collect the studs above it. Next to the conveyer belt is a broken-down vehicle.
Use the Force to shake loose all the studs hidden inside the vehicle; jiggle a switch inside the vehicle for even more loot.
Use the Force to move the debris on the ground to form a ledge next to the wall nearby.
A short ramp leading to the next area is blocked by a shield. Use the Force on both sides of the shield to create ledges you can jump on and over to reach the other side.
When battle droids charge in and fire at you, deflect their shots to take them out. Secure the area, then step on one of the red floor switches near the small ramp.
Your partner automatically steps on the other switch and the shield blocking the way disappears, allowing TC-14 to enter.Scour the area for studs. Jump on the brown transport vehicle to get valuable studs.
Collect all the studs in the area, and use TC-14 to activate the switch next to the brown vehicle. The hatch opens nearby for you to enter.