Prima Games eGuides
primagames.com Browse Redeem a code Help
Lego Star Wars: The Complete Saga eGuide
Sign in My Guides

Sign in or create an account

We'll email you a link. No password needed, and if you don't have an account yet, the link makes one.

By creating an account or signing in, you agree to our Terms of Service and Privacy Policy.

Have a password?

Had an account on the old eGuides site, or a code from a printed guide? Help and troubleshooting

Sign in with a password

By signing in, you agree to our Terms of Service and Privacy Policy.

Check your email

A sign-in link is on its way. It works once and expires in 15 minutes. Open it and you're in, with an account if you didn't already have one.

Contents

  • Essentials
    • Gameplay Basics
      • Introduction
      • Game Modes
      • Special Abilities
      • Weapons and items
      • Environment
    • Characters
      • Introduction
      • Jedi
      • Sith
      • Small characters
      • Activation panel droids
      • Super jump characters
      • Bounty Hunters
      • Ghost characters
      • Blaster characters
      • Other characters
    • Vehicles
      • Transportation
    • Super Secret Star Wars Stuff
      • Power Up Pick Up Locations
      • Achievements
      • 100 Percent Completion
  • Walkthrough
    • Mos Eisley Cantina
      • Cantina
    • Episode I: The Phantom Menace
      • Chapter 1: Negotiations
      • Chapter 2: Invasion of Naboo
      • Chapter 3: Escape from Naboo
      • Chapter 4: Mos Espa Podrace
      • Chapter 5: Retake Theed Palace
      • Chapter 6: Darth Maul
      • Episode I Bonus
    • Episode II: Attack of the Clones
      • Chapter 1: Bounty Hunter Pursuit
      • Chapter 2: Discovery on Kamino
      • Chapter 3: Droid Factory
      • Chapter 4: Jedi Battle
      • Chapter 5: Gunship Cavalry
      • Chapter 6: Count Dooku
      • Episode II Bonus
    • Episode III: Revenge of the Sith
      • Chapter 1: Battle Over Coruscant
      • Chapter 2: Chancellor in Peril
      • Chapter 3: General Grievous
      • Chapter 4: Defense of Kashyyyk
      • Chapter 5: Ruin of the Jedi
      • Chapter 6: Darth Vader
      • Episode III Bonus
    • Episode IV: A New Hope
      • Chapter 1: Secret Plans
      • Chapter 2: Through the Jundland Wastes
      • Chapter 3: Mos Eisley Spaceport
      • Chapter 4: Rescue the Princess
      • Chapter 5: Death Star Escape
      • Chapter 6: Rebel Attack
      • Episode IV Bonus
    • Episode V: The Empire Strikes Back
      • Chapter 1: Hoth Battle
      • Chapter 2: Escape from Echo Base
      • Chapter 3: Falcon Flight
      • Chapter 4: Dagobah
      • Chapter 5: Cloud City Trap
      • Chapter 6: Betrayal over Bespin
      • Episode V Bonus
    • Episode VI: Return of the Jedi
      • Chapter 1: Jabba’s Palace
      • Chapter 2: The Great Pit of Carkoon
      • Chapter 3: Speeder Showdown
      • Chapter 4: The Battle of Endor
      • Chapter 5: Jedi Destiny
      • Chapter 6: Into the Death Star
      • Episode VI Bonus
    • Bounty Hunter Missions
      • Bounty Hunting
  • Multiplayer
    • Multiplayer and Bonus Missions
      • Multiplayer
      • Bonus Missions

Lego Star Wars: The Complete Saga Guide › Walkthrough › Episode III: Revenge of the Sith

Chapter 5: Ruin of the Jedi

You’re back on Coruscant, hoping to find more Jedi who might have survived Palpatine’s trickery and the attack of the clones. Well, if you want one Jedi by your side, Yoda is a good one to pick.

He is a master of the Force and a good ally. You can trust his instincts when he says those hooded figures are not Jedi.

Get your lightsaber out and follow the walkway to the right toward those people. Yep, Yoda was right. They were disguised clones, and they start shooting at you when you get close.

Use your weapon to deflect their blaster shots until every rotten clone is scrap parts. Run under the building to the side and collect the multiple piles of studs and a LEGO canister.

Return to the area where you fought those clones, and smash the container near the building for more hidden goods. Use the Force on all the LEGO debris along the edge for more studs.

Freeplay Area

The ledge across from the building is busted and LEGO pieces stick out. Pull them out of the wreckage with the Force, then stack three chunks next to the building. Jump to the stack’s top; switch to Jar Jar and grab the LEGO canister.

Continue along the walkway to the right and pass the main stairwell for now. Smash the containers to find hidden loot, then go under the building and pick up the loose studs.

Freeplay Area

A container you smash near the building has a red circle underneath it, which means there is a hook somewhere above. Use a character with an ascension gun to get to the ledge above.

Once there, follow the ledge to the back wall, collecting studs along the way. Use the dark side of the Force to open the window then toss in a thermal detonator.

This breaks the equipment inside and creates loose pieces on the ground for you to assemble into a LEGO canister. Exit the room and drop down to a lower ledge to the left to find more valuables.

Drop down to the right of the stairs and use a thermal detonator on the shiny debris to uncover lots of hidden loot.

Caution

Be careful when you walk along the edge of the path. If you fall off, you die.

Head for the stairs. Use your lightsaber to deflect enemy shots back at those disguised clones, then pick up the studs on both sides of the stairs.

Use the Force to pull the giant doors off these hinges and lay them on the ground. Smash them to bits and collect the loot, then head through the door.

Run down the broken hallway and collect the studs as you go. Use the Force to move debris out of your way, and smash the gray LEGO posts, revealing hidden loot.

When you reach the hall’s end, chop up the clones. Use the Force on the red LEGOs at the hall’s end to create stairs to the next level.

Freeplay Area

Use thermal detonators on the shiny tops on some of the posts to create some loose black LEGOs on the ground. Assemble the pieces to create a mouse droid that explodes, leaving behind lots of studs. Repeat this process for each shiny post top.

Before you climb the stairs, grab the loose studs to the right. Then head onto the platform to the left and get more loose studs.

Use the Force to move some debris in the back to reveal some valuables, and use the Force on the gray LEGO beams sticking out of the floor to the left to find studs.

Stand as far back as possible; with your lightsaber ready, use the Force to lift the giant sphere. As soon as the three training balls underneath become active, drop the sphere and block the lasers coming from the balls.

After you destroy each training ball, continue moving the giant sphere with the Force until you place it on the broken pillar and collect all the studs that spill out. Run up the stairs and drop the clone before grabbing the valuables on the ground.

Create some stairs out of the loose LEGO studs.

Freeplay Area

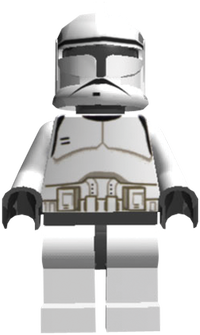
Use a stormtrooper to access the activation panel. Head through the open door in the wall to find a room filled with enemies. Deflect the shots back at most of the shooters and chop down the rest.

When the room is clear, search for hidden treasure. Grab the LEGO canister in the back of the room. Use the Force on all the items on the ground to reveal lots of studs; pick them up, then exit the way you came in.

Follow the upper walkway until it ends, then drop back down to a lower one. Run to the right and take out those clones. Use the Force on half the sphere behind you, and your partner will use it on the other half.

Together you make it whole again; use a double jump attack underneath it to break it into tiny pieces.

Grab the studs at the end of the hall to the right, and use the Force to remove the red LEGO knob caps to the side. Use the Force on the knobs and a doorway opens in the wall to the right.

Freeplay Area

The red caps you pull off turn black. Use the dark side of the Force to stack them on the wall nearby. Use a super jump character to jump up the steps for some blue studs.

Before you go in, turn around and head down the stairs and down another hallway. Grab the loose studs and use the Force to move the debris for even more loot, then head into the open door.

Freeplay Area

The LEGO canister to the right of the door is just out of reach. Use an astromech droid to hover out there and get it, then make it back safely to the ledge.

This room is where the Jedi Council used to sit. Kill the clones in the back of the room, then clear the floor of loose studs. Next, use the Force to stack all the chairs into a high pile.

Climb the stack of chairs to reach a LEGO canister. Backtrack out of the room, down the hall, up the stairs, and through the door you revealed a second ago.

Stack the chairs in the room so you can reach the LEGO canister above.

Walk down the hall to the first intersection where clones come out to greet you. Hack them to pieces, then head into the area on the left and right.

Smash any small containers on the ground, then return to the hallway and collect the studs littering the ground. As you do so, more clones come around the next intersection and start shooting at you.

Deflect their shots and take them all out. Collect the studs on the ground, then smash the box in the hallway to get a power up.

Freeplay Area

Head into the left area of the second intersection to find a red circle on the ground. Switch to a character with an ascension gun and grapple to the ledge overhead to collect some major studs.

Drop to the ground and head to the area across the way; use your ascension gun again to reach a ledge high above. Fill your pockets with studs before going on.

Use the dark side Force powers to pull out the red shelves you find along the way. This reveals some more hidden loot. Quickly jump on the shelves to get valuable studs in the air above them.

Use the Force to pull platforms out of the wall to jump on.

After you head down the hall again, more enemies come around the corner of the next intersection. Once again, use your weapon to deflect their shots back at the shooters to take them out.

Collect the studs on the ground, then smash the box around the corner to the right for more valuables. Return to the hall and follow it into the next room.

When the hallway widens, look to the left and right for valuable blue studs on the ground. Run into the room and smash all containers on the ground for hidden goods.

Head into the room in the back right. Use the Force to pull out all the shelves and collect all the studs that fall to the ground.

After you clean the room, use the Force to pull out the two bottom rows of shelves. Jump on the first shelf and pull out the next highest shelf closest to the back wall.

Quickly jump to it before the shelf you’re standing on goes back into the wall. From the second shelf, jump to the platform in the back of the area and use the Force to pull the switch.

Use the Force to pull out the shelf in the wall at your level. From there, jump the ledge above the switch to get a LEGO canister.

Drop to the ground and run to the room next door. Use the Force to pull out the first set of shelves and jump on top of them. Use the Force to pull out the next set of shelves above, and jump across the room to the shelf on the opposite wall.

Use the Force again to pull out another set above you, then jump to the shelf above you on the opposite wall. Continue to pull out shelves until you can jump to the top platform against the back wall.

Step on the red floor button to get rid of the shield on the platform below you. With the shield gone, drop to that platform and use the Force on the switch.

Head into the third room and use the Force to pull out the shelves in the wall; collect the loot hidden inside. Now pull out the shelves again and jump from the one on the bottom to the higher one on the opposite wall.

From there, jump to the platform in the back wall and use the Force to pull the switch. Pulling all the switches opens a door in the main room.
Freeplay Area

The LEGO canister above your head is too high to reach; use a super jump character’s great leaping ability.

Freeplay Area

After you’ve pulled the first three switches, a small platform lowers near the first room with shelves you entered. Switch to a super jump character and jump on top of it.

From there, jump to the walkway on the left. Follow the walkway to the end and collect the studs as you go.

Jump on the railing at the walkway’s end, then jump over the shield blocking the room to the left. Use the protocol droid in your party to access the control panel on the wall and deactivate the shields in the area.

Switch to a Jedi and pull the shelves out of the walls. Now use a super jump character again to jump to the shelf and then to the platform on the back wall. Use the Force again to pull the switch there.

Move into the next room and use the Force to pull out the shelves in the wall for hidden treasure. Switch to a character with an ascension gun, and use the red circle on the ground to grapple to the ledge above.

Switch to Jar Jar and jump to the next ledge; step on the red floor button to deactivate the small shield below you. Drop back down to the previous platform and use the Force to activate the switch on the wall.

Run into the last room and use the Force to pull out the shelves for even more loot. While the shelves are still out, use Jar Jar to jump from there to the platform in the back wall.

Use the Force again to activate the switch on the wall and lower a platform in the area where you jumped over the shield.

Backtrack to the upper walkway, then use a super jump character to jump to the new platform and into the air to grab a red power brick.

After you clear out the room, head through the open door. In the next room, you are immediately greeted with enemy blasters.

Deflect the shots back at those clones, giving them a little taste of their own medicine. Head to the room’s right and use the Force on the control panel.

Freeplay Area

With the room enemy-free, run to the left wall and use a thermal detonator on the cage on the wall. Use the dark side of the Force on the black cage to the right of that last one.

After both cages are gone, step on the red floor switch that was hidden underneath and your partner will step on the other one. This opens a compartment in the wall nearby.

Use a thermal detonator on the shiny metal debris in the compartment, then assemble the LEGOs left on the ground to create a lever on the wall.

Use the Force on the lever to open another compartment to the right where you can grab a LEGO canister.

Keep reading with a free account

The first 3 sections of Lego Star Wars: The Complete Saga are open to everyone. An account opens the rest of it, and every other guide in the archive. It's free, and there's nothing to buy.

Bought guides on the old Prima Games site? Your account and every guide you own moved here, so there's nothing to buy again. Sign in.

Create a free account Or browse our free guides

PreviousChapter 4: Defense of Kashyyyk NextChapter 6: Darth Vader