Lego Star Wars: The Complete Saga Guide Walkthrough Episode IV: A New Hope
Chapter 3: Mos Eisley Spaceport

Mos Eisley isn’t a nice place. It’s not someplace you would normally take a young moisture-farm boy. But desperate times call for desperate measures.
The droid and his secret plans must get to Alderaan, and that means finding a ship and an ace pilot to get you there.
You have no time to waste because the Empire knows the plans are on Tatooine somewhere and it will stop at nothing until it finds them.
It’s dangerous to stay out in the open too long, so get going and find your pilot. Run to the left and smash the container in the corner, then follow the back wall all the way to the right.
Break open the containers to the left of the locked door and collect the loot that spills out. With your trusty double jump, get on the awnings overhead for a valuable blue stud.
Drop to the ground and bust open some debris under the awning with your lightsaber for more loot.
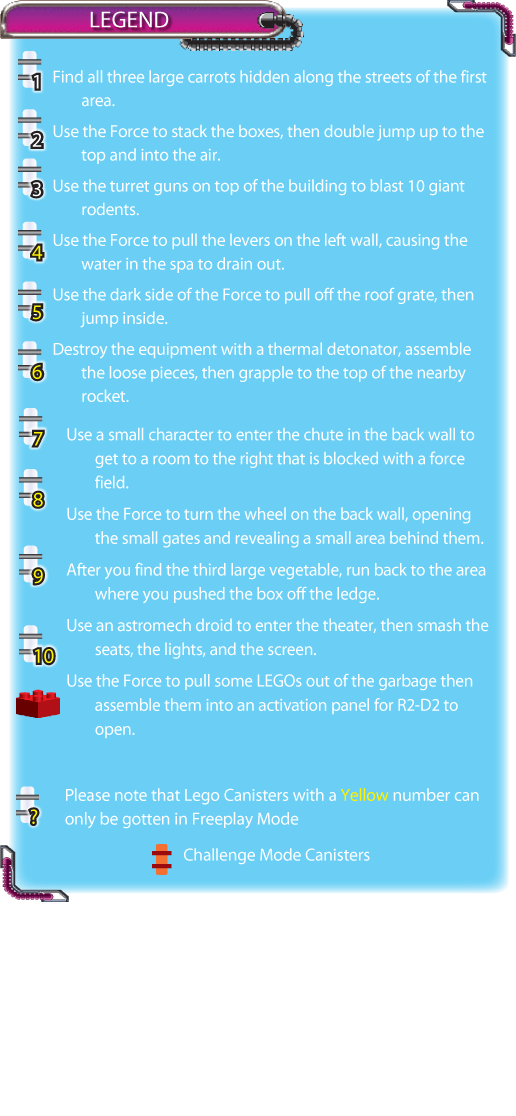
To the left of the awnings, you’ll find more debris to chop up. Hidden underneath are not only studs but one of three large carrots hidden along the street.
Use the Force to stack the green LEGOs next to the carrot to turn them into a potted cactus that young Luke’s blaster can quickly destroy. Run up the stairs nearby. You’re now in a double score zone filled with studs to collect.
Follow the path upstairs to the left and double jump over the gap in the bridge to get to the other side and more goodies.
Return to the bottom of the stairs you just climbed and assemble the loose LEGO bricks at the bottom for some hidden studs. Bust open the debris behind your creation to scatter some orange pieces into the street.
Use the Force on these pieces to make pretty flowers sprout from the dirt. Collect the studs as you proceed across the street to a small white door. Use the Force to open the cans to the right of the door, then destroy them with your lightsaber for even more loot.
Next to the cans is a covered awning with studs on top. The awning can be reached with a simple double jump. Under the covering, use the Force to move the blue LEGOs out of the basket and onto the street.
Use Luke’s blaster to destroy the line of bricks you just made, as well as the debris to the left of the basket. To the right of the awning you’ll find more containers to crack open and more studs on the ground to the right of those containers.
Head across the street to a yellow awning with a yellow stud on top. Double jump to get the treasure up there, then put together the pile of LEGOs nearby to create a box. Use the Force to move the box up the street.
You can use the Force again on another nearby box so that the two are stacked on top of each other. Climb the boxes and jump to the building nearby for two blue studs. From the top of the building, jump to the black tent on the left. Get the gold stud, and slide to the ground below.
When you get back to the ground, enter the large hut nearby to gather the goodies lying on the ground. Smash the dark gray container to the left of the hut. Next, use the Force to scatter the blue LEGOs in the bowl on the ground onto the dusty street.
Use the Force again to turn each LEGO into a pretty plant and many studs. Climb the stairs in back of the bowl and collect all the goodies on the roof at the top.

Stack the boxes so you can get to the building nearby and some blue studs.
Return to the base of the stairs and quickly run across the street. Smash the large container at the corner of the building. Inside is the second large carrot that you must find on this street.
Use the Force to raise it out of the ground, then grab the blue stud on the ground under the building. To the right of the giant carrot is a giant vent hidden under the sand. Return to the starting area and drive the landspeeder over to that location.
The wind created by the landspeeder will clear away the dust so that you can jump on the exposed vent and ride the draft into the air for a blue stud.
With the stud in hand, follow the buildings along the left as you head north until you get to some small garbage cans. Use the Force to open each one, and then again to pull the LEGO contents out and onto the street.
Put the pieces together to create a door with an activation panel showing the picture of an astromech droid. Use R2-D2 to open the door and grab the red power brick inside. When you have the brick, destroy all the cans outside the door.
Follow the road to the north, collecting all the studs you find along the way.

Putting the loose LEGO pieces together builds a door with a hidden power brick inside.
Run back to the set of stairs you were on earlier (on the opposite side of the road). Head north and smash the can next to the building. Inside is the last hidden carrot.
After you find this third carrot, a LEGO canister appears high above the broken bridge you jumped across earlier.
Continue to move north down the street and smash the containers in the corner. After you collect the contents that spill out, use the Force to create a bicycle out of the loose LEGOs that are on the ground.
Run up the stairs nearby to get to the roof, where you find a small chute in the wall and more studs on the ground. Jump on the brown awning and slide back down to the ground.
Use the Force on the stairs you just climbed to turn them into a ramp against the wall ahead.
Run to the base of the ramp and blast open the containers you find. Next, ascend the ramp and take out all the sandtroopers trying to drop you with their blasters. The ramp takes you to the building roof and many studs.
Follow a ledge at the top to the left, past an activation panel, until you get to a wall. Double jump to get to the top of the wall, and follow the rest of the ledge down the street, collecting studs as you go.
After everything has been collected, jump to the street and walk C-3PO to the activation panel you just passed on the ledge. This opens a gate below you so you can move down the street.

Run along the ledge over the city to find hidden loot.
When you get to the next part of the city, blast the containers to the left for some hidden goods. Continue north along the city wall until you see a part of the city that is blocked off with debris.
Because you can’t get through there just yet, follow the city wall to the left, collecting studs as you go. Enter the white door for some loot, then use the Force on the garbage cans outside before you smash them to bits.
Collect any treasure that falls to the ground.
Continue to follow the city wall until you get to three boxes on the ground, then take out all the sandtroopers that move in to greet you. When the coast is clear, use the Force to stack the boxes up ahead.
Scale the stack until you can jump to the roof of the building. Add a LEGO canister to your collection. Return to the ground.
Search the room nearby to collect some hidden loot, then smash a container next to your stack of boxes for a valuable blue stud and a power up.
Smashing that last container left some pieces on the ground for you to assemble. Putting them together forms a ramp up the step. Walk C-3PO up the ramp to the door in front so he can use the activation panel.
Inside are a lot of loose LEGO pieces that Ben Kenobi can quickly put together to form the head of something. Be sure to grab the valuable studs that appear after construction is complete.
Smash the two large containers on the left to reveal some studs and more LEGOs. Put the two piles together to form the feet of something. Continue along the wall to the left. The road leading down the street is blocked with more debris.
Because you can’t go that way for now, use R2-D2 to open the door to the left of the debris. With the door open, Ben Kenobi can pull the objects out using the Force.
These objects land next to some more loose LEGOs that you need to assemble.
Now, on the dusty streets of Mos Eisley, you have all the parts to construct your very own AT-ST walker.
Before you do anything though, move along the left wall and use the Force to empty all the trash cans you find, then use your lightsaber to smash them apart. Grab all the studs along the way, including a valuable blue one.
Now it’s time to construct the parts you left on the ground. Use the Force to move the feet, then the legs, then the base, and finally the head. Congratulations—you’ve made an AT-ST!

Parts litter the dusty street. What could they make?
You don’t get very long to celebrate your construction because a sandtrooper runs out of a nearby building and hops into your AT-ST.
Use the Force on the vehicle to bring that sandtrooper to the ground where you can cut him down with your lightsaber. Now that the walker is free again, jump in.
Ignore the blocked street next to you and head back to where you first entered this street and saw the first blocked road.
Move the AT-ST to the building next to the roadblock and jump to the roof. Put together the loose LEGO bricks you find to create two turret guns.
After the guns are complete, collect the studs on the ground and jump into the turret to take control of it. As soon as you do, some giant rodent creatures come out of the holes in front of you.
Blast them with your gun. Drop 10 of these critters, and a LEGO canister appears on the roof. Nab it.

Use the turret guns you created to dispatch those rodents.
Drop to the ground and return to your AT-ST. If another sandtrooper got in while you were away, use the Force again to get him out and dispose of him. It’s time to test out the power of this vehicle and blast the roadblock.
After the roadblock is blown to pieces, collect the studs on the ground and shoot the sandtroopers in the courtyard on the other side.
You found a double score zone! With the sandtroopers gone, get out of the AT-ST and assemble some loose LEGOs near the entrance to the courtyard. Blast your construction, then follow the right wall around the courtyard.
Collect all the studs in the area: They can be found on awnings, in doorways, or on ledges that you have to double jump to reach. For even more hidden loot, break all the containers you find. As you follow the courtyard wall back to the entrance, you’ll see some blue brushes leading to a landspeeder washer.
Test it out. Run back to the starting area and grab your landspeeder again. Avoid enemy trouble and drive it back to the courtyard. Park it on the gray pad on the ground directly in front of the blue brushes.
As soon as the speeder is on the pad, a lever appears to the left of the washer. Pull it. This activates the landspeeder wash, scrubbing your vehicle till it’s shiny and new.

Wash your vehicle in the super duper landspeeder washer.
Get back inside the AT-ST and return to the other roadblock where you first assembled the AT-ST. Blast the second roadblock to bits and head down the street. There are many things to pick up down on the street level, but stay in your walker.
Blast the enemy soldiers on the ground as you keep moving. When the street bends to the right, you come face to face with another AT-ST.
Blast it with your lasers until you knock the other driver out of the cockpit. Then shoot him so he can’t get back in.
Continue to move around this part of the street after the roadblock, picking up floating studs out of the air. Shoot the antennas on buildings for even more loot.
If another trooper gets in the other AT-ST, stop what you’re doing and knock this powerful enemy out of commission before you move on. Continue collecting goods in the area until you walk all the way back to the roadblock.
Now that everything up high has been handled, you can search the ground. Near the former roadblock, you’ll find a blue stud on top of an awning and some more studs scattered on the ground.
Destroy the LEGOs along the walls for even more loot. As you head farther down the street, use the Force to open garbage cans and destroy containers along the way.
Follow the bend in the road to the right, where you can smash more LEGO pieces and containers for hidden loot. Be sure to collect the blue stud tucked away in the corner along the right wall.
Once the area is stud-free, advance through the opening in the wall to the cantina.

Use the AT-ST to get the hard-to-reach studs.
The room you enter has devices to keep droids out. Because you want your buddies to follow you, you have to eliminate the devices. Use Luke’s blaster to destroy each one. Head into the room and collect all the studs on the ground.
The next door in the room is closed, so simply step on one of the four red floor buttons. When the rest of your party steps on the other buttons, the door opens to you.
Luke and Ben Kenobi take off for the ship, so it’s time for Han and Chewbacca to join them. Before you leave the cantina, scour the area for loose studs, including a blue one behind the table to the far right of the bar.
Blast all the chairs for even more hidden loot. After you’ve had enough creature watching and have soaked up enough ambience, it’s time to join the others, so go to the door where the large green arrow is pointing.
Once outside, shoot the four large containers to find many valuable hearts and studs. One of the containers even has one of three new vegetables hidden around this part of town.
Search the nearby doorway for valuables, and collect more items along the wall. Shoot the debris under the awning to find even more treasure. When the courtyard has been cleared, step on the red circle swirl and grapple up.
On the roof, you find a sandtrooper and the Imperial spy who ratted you out. The spy runs off, but you can blast the sandtrooper. Next, put the loose LEGOs together to form a red circle swirl pad, then collect all the studs on the ground.
Follow the spy through the doorway and blast the antenna on the other side for more goods. Return to the circle swirl and grapple to the next rooftop to blast more antennas. Collect all the goods on the ground, including a blue stud.
Run through the open doorway and move from rooftop to rooftop until you get to the red circle swirl platform and can grapple to the building across the street.
Pull the lever on the wall and when a box rolls off the conveyer belt nearby, push it over the edge of the platform. Before you drop down from the end of the ledge, jump on the ledge nearby so you can collect a blue stud.

Push the box to the ground before you get the goodies in the area.
When you get back to the road, scour the walls and doorways for loose studs in the small courtyard. Smash all the containers, garbage cans, and debris you find to uncover more treasure.
Be sure to blast the debris hidden under the awning as well. Return to the box you pushed to the ground and push it along the checkerboard path.
As you push the box along the path, be sure to stop and collect LEGO studs from along the walls and in the doorways. Also, blast the debris and garbage cans along the way for even more hidden goods.
Continue to push the box all the way along the path until you get to the closed gate. Shoot the box. It explodes, blasting open the gate and showering the path with studs.
The courtyard on the other side of the door is swarming with stormtroopers, and you see the Imperial spy escape through the area. Using Han Solo, quickly run to the base of the stairs after the door and drop any enemies that try to stop you.
From the base of the stairs, start shooting into the courtyard. You might not be able to see the enemies in the distance, but shots from your blaster will find them. As you fire, your auto defense ability will keep you from taking any shots yourself.
Once the courtyard is enemy free, move along the left wall, shooting garbage cans and collecting studs and a power up as you go. The next wall is lined with huge doors you can blast apart.
Collect the goods hidden behind the doors, then blast the brown seeds on the ground. LEGO studs explode from the ground and little plants sprout up.
Follow the next wall and collect more studs on the ground and in the doorway. Blast open the container you see to find another large vegetable in this area.
In the doorway to the right of the vegetable are more seeds that you can shoot to uncover buried valuables. Also to the right of the vegetables is the entrance to a movie theater.
Hey look, LEGO Star Wars is playing at 8:30! Unfortunately, there’s no time to watch a movie now, so follow the last wall of the courtyard and grab the blue stud on the ground.
Push the box on the ground to the end of the checkerboard path. Jump from the top of the box to the ledge above.
Run to the courtyard’s center and get on one of the riding beasts that are standing around. Ride it to the corner of the courtyard next to the movie theater. Jump off its back and into the air to get a valuable blue stud.
When the beast is ready again, jump on its back and ride it to the large vegetable on the ground. Jump off the beast’s back to land on the roof above. There, you can grab a blue stud and pull the lever on the wall to get a new hat.
When you have the new fashion in hand, jump to the ground and ride the beast to the wall that had the giant doors.
Jump from the beast to the roof, where you can check the doorways and floor for anything of value. Run through the archway and down the stairs to get to the next area.

Yee-Haw! Ride that beast to get to the rooftops above.

If you found the third large vegetable in the area, then a LEGO canister appears back in the area where you pushed the box down to the road.
Backtrack along the checkered path and get back to the ledge where you pulled the lever to get a new box. From there, jump on the ledge along the wall. Follow the ledge to the end. Add that canister to your collection.
You finally get to the hangar where Luke, Ben Kenobi, and the Millennium Falcon have been waiting for you. Unfortunately, that Imperial spy has led the sandtroopers right to you.
He runs for cover along the walkway over the hangar as the sandtroopers swarm in to blast you. Stay near the entrance to the hangar and start blasting the fools that rush you.
While you shoot your enemies, let your auto defenses protect you from incoming fire.
After the last enemy falls, the spy runs to another safe spot and sends in more troops. Take out this wave of enemies just like the first. After the second wave is destroyed, the persistent spy calls in even more reinforcements.
Blast this third wave of sandtroopers, including the spy on the ground. You need to hit the spy four times to take him out.
If he runs away from one side of the hangar, it means he’ll appear on the other side, so meet him there and blast him.
After the spy is dead and the last sandtrooper is toast, the entry platform to the Falcon opens on the left side. Enter the ship.