
Lego Star Wars: The Complete Saga Guide Walkthrough Episode IV: A New Hope
Chapter 1: Secret Plans
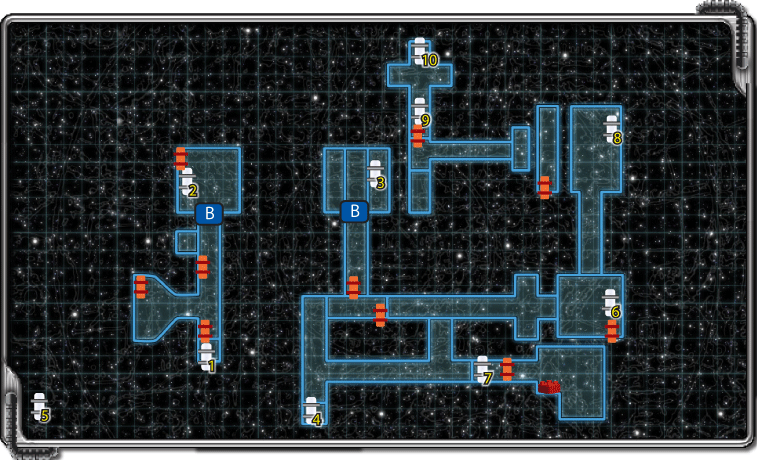
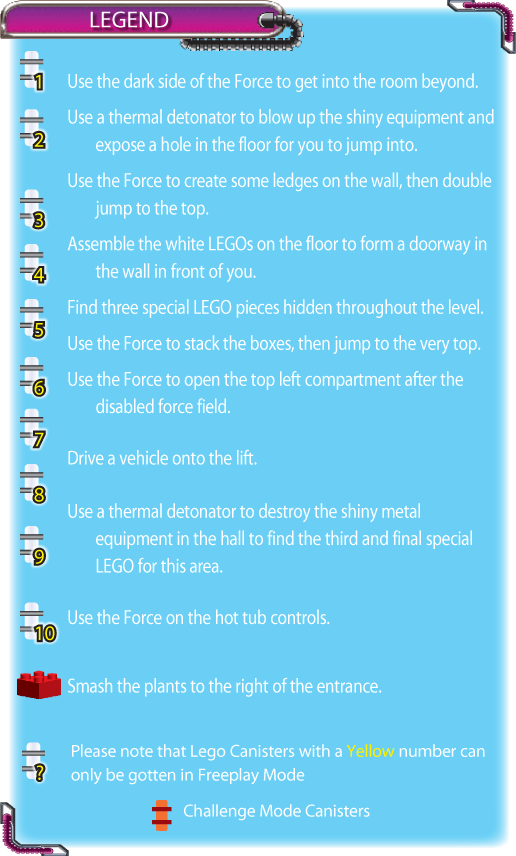
Smuggling stolen plans is no easy business for Princess Leia. That sort of job is best left to professional smugglers. Maybe she’ll meet one someday, but for now, it’s her responsibility to get the plans somewhere safe.
They must certainly be kept out of the hands of Darth Vader and his stormtroopers, who just boarded her vessel. Time to dump the evidence!
It’s lucky for Leia that she doesn’t have to do this on her own; trusted Captain Antilles is right by her side. Before you get moving, explore the room you are in. In front of you are two large piles of LEGOs bouncing on the ground.
Put them together to form the control panels nearby. After you complete each panel, LEGO studs spill onto the floor. Collect all the studs you find. This also opens the door in the distance.
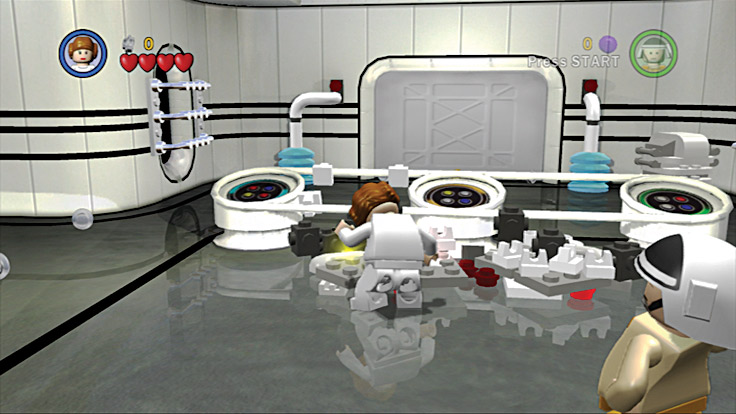
Putting together the loose LEGO pieces to form the control panels not only produces hidden LEGO studs, but it also opens the door in the distance.
Before you charge through the open door, finish exploring the room. Move to the right and collect the studs on the ground. While you’re there, blast open the equipment you find for some more hidden LEGO studs.
Move to the other side of the room and destroy more equipment for other goodies. When the floor is clear, pull the switch on the wall for a few more studs. On your way out, blast the equipment to the right of the door and collect anything that spills out.
The next room has more of those gray equipment pieces for you to destroy. Shoot at the wall panels that have red and yellow lights and a blue sparkle to them. Shoot the top and bottom of each panel and collect the studs that litter the ground.
Pull the lever to one side of the door, while Antilles pulls the other lever next to you at the same time.
In the next hall, Rebels guard the left passage. Before you go past the Rebels, destroy the wall panels in front of you and down the right hall. As you knock out those panels, pick up the LEGO studs that spill out before they disappear.
Grab the valuable blue stud across the hall, opposite the door. After the wall panels are gone, you see that one of them was hiding a lever. Pull the secret lever to get a new look for Princess Leia.
Unfortunately, Captain Antilles likes his hat just fine and won’t put on a new one.
Go toward the small group of Rebels guarding the hall. When you get to them, a door opens in the distance and stormtroopers pour into the hall. Help those Rebels and blast any white-masked goon that charges you.
As you fire, stay close to the Rebels and use them for cover from incoming blaster fire so that you don’t take damage.
After you cut through the enemy ranks, the Rebels rush down the hall to the open door. With the coast clear, you can follow behind them and destroy more wall panels and equipment in the hall for hidden loot.
A door in the left wall can be opened only by C-3PO, so you’ll have to come back later to open it.
Advance down the rest of the hall and into the next room. When you get there, go to the red circle swirl against the side wall and use your ascension gun to get to the walkway above you.
Follow that walkway to another red circle swirl where you can grapple to the ledge above you. At the top, assemble the loose LEGO pieces to form machinery to extend a bridge between both pieces to the wall’s other side.
Follow the new bridge through the doorway on the other side.
After you move through the doorway, you’re greeted by a long hall and...Darth Vader! Luckily, he is at the hall’s far end. An invisible force field prevents you from getting too close, but he sends his goons in to try to take you out.
Blast the fools who rush you, as well as the equipment that lines the hall. When the coast is clear, pull the four levers on the sides of the hall. Stop and shoot any more guards who charge you before you finish pulling the levers.
Pulling the levers causes explosive equipment to be placed on both sides of Vader. In between dropping the stormtroopers who rush you, fire at the equipment next to Vader. A hit to each piece of equipment turns it more and more orange.
After the equipment takes enough blaster hits from you, it explodes and Vader is gone. Take out any surviving enemies and collect any loose studs on the ground. Before you move through to the end of the hall, grab the two blue studs on the ground nearby.
The next room has many containers on the ground for you to shoot. Loose studs spill onto the ground. A container to the far right has one of three special LEGOs for you to collect.
Shoot the wall panels for more goodies. Don’t forget to shoot the top and bottom halves of the wall.
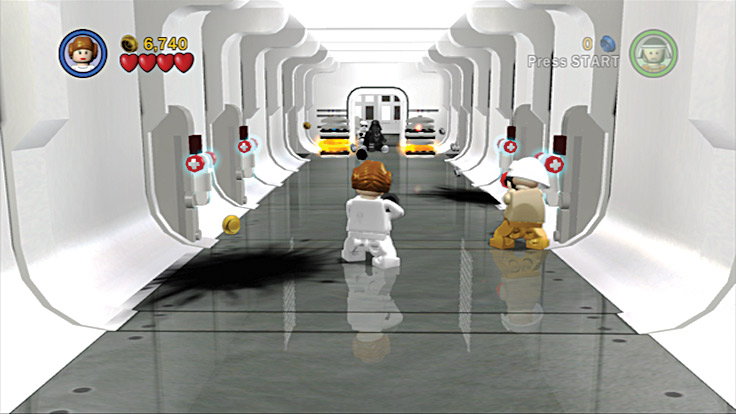
After you pull the levers to place the explosive equipment next to Vader, fire at the equipment to clear the hall’s end.

After you clear the room of LEGO studs, move into the next room, where there is more fighting. Assist the Rebels in taking out the two waves of stormtroopers so you can explore the hall in peace.
After you secure the area, destroy the containers and wall panels for some hidden studs. Destroy the items before joining the Rebels down the hall.
When you get to the Rebels at the hall’s intersection, go to the dead end on the left. Pull the levers on the wall to open the window and reveal pretty flowers along with some hidden studs.
On the ground are some glowing red tiles. Run across them to turn them all green and cause some valuable LEGO studs to drop from the ceiling.
Across the hall is another closed window and what sounds like heavy breathing and cracking. What could that be? Run across the glowing red tiles on the ground in front of the window to turn them all green. This causes studs to rain from overhead.
After you gather the studs, pull the lever on the wall to open the window. The heavy breathing you heard was Darth Vader and that cracking sound was him using the Force to turn some poor Rebel into pieces!
There’s nothing you can do from here, so move down the hall past the Rebel troopers. As you move, blast open any containers you find, as well as all the wall panels. Collect any spilled studs and continue through the doorway at the hall’s end.
The next room has plenty to do. On one side of the room is a locked door, and on the other side are small black gates. Move along the gates, blasting them as you go to collect a massive number of studs.
At the end of the line of gates is a valuable blue stud for your collection. Move around the area and destroy the containers for more loot.
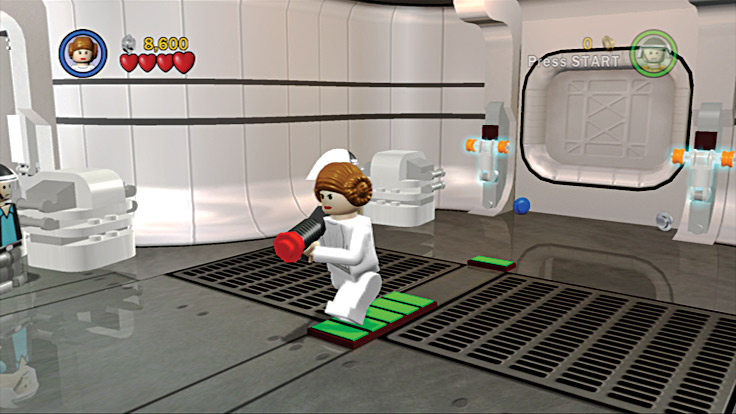
Run across the red glowing floor panels to turn them all green. A surprise falls from the ceiling.
On the ground near the room’s center are checkerboard patterns and boxes with yellow and black striping. Push the boxes along the floor until they fall into the nearby red slots.
When both boxes have been pushed into their appropriate slots, the locked door opens and three stormtroopers rush in to greet you. Drop them with your blaster.
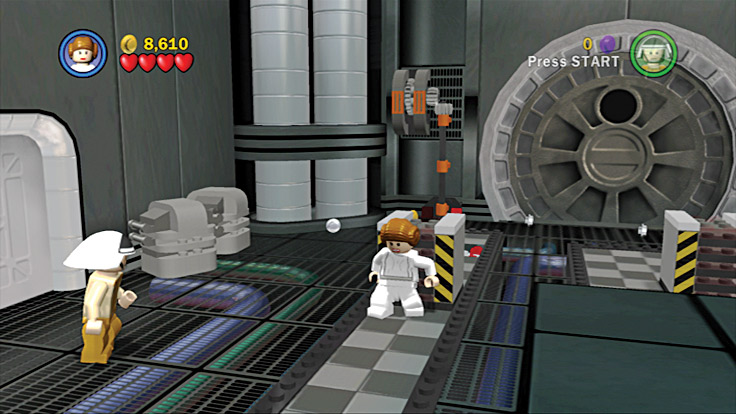
Push the boxes along the floor until they fall into the red slots nearby.
The door you recently opened leads to a hall where you find C-3PO on one side of a red force field, and R2-D2 on the other side. Luckily for you, this protocol droid is just the droid to get you through this.
Switch to C-3PO and activate the door panel to the right to make the force field disappear. When the barrier is gone, Princess Leia shoves a disk into R2-D2 and runs off. Those must be the valuable Death Star plans that Vader is looking for.
It is up to the rest of the gang to get those plans to safety. Before you go any farther, go near the level’s beginning and use C-3PO to open the locked door with his picture next to it.
Inside is a small room that has containers for you to smash. Collect the goodies inside, then return to where you found the droids.
Move to the end of the hall and collect studs on the ground as you go. Switch to R2-D2 and activate the door panel to unlock the door.
Ignore the gun battle going on in the distance for now, and concentrate on shooting the containers and gates around the room to collect valuable studs.
When the room is free of studs, run to the center of the room and use Captain Antilles to jump into the crane. Now you have control over a giant blue claw in the back of the room.
Use the crane to pick up each stormtrooper and drop him over the side of the ledge into the darkness.
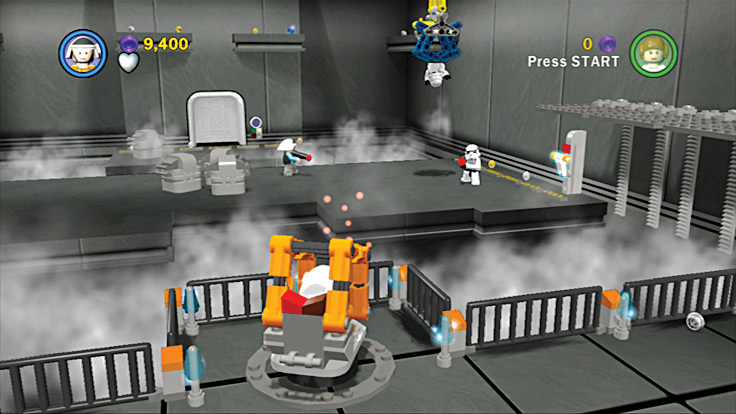
Use the crane to pick up the bad guys and drop them over the edge.
Now that the Rebel doesn’t have anyone shooting at him, he can lower a bridge connecting the two sides of the room. After the walkway is lowered, wait in the crane for C-3PO to get to the other side.
Use the crane to pick him up and drop him in front of the door on the room’s other side.
With C-3PO safely across, run to join him. Blast any containers along the way. The container to the far left leaves behind a red circle swirl for you to use at another time. Jump across the small chasm near the door to get to the ledge in front of it. Use C-3PO to open the door.
The doorway leads to another long hall where you see some Rebel troops being taken prisoner. It’s lucky for them you showed up just in time. Stay behind your friends and blast the enemies at the end of the hall.
Continue to stay close to your buddies as you fight off multiple waves of enemy troops.
When the threat is gone, move down the hall, destroying wall panels and collecting studs and a power up as you go. A panel near the center not only gives you studs, but also contains the first of three special LEGO pieces you must find.
In the next section of hall, more Imperial troops run out to greet you, so blast them to pieces. The walkway leading to the rest of the passage has a small break in it. Stand next to the edge and put the scattered LEGO pieces together to form a small bridge.
Cross to the other side, destroying containers and collecting studs as you go.
Follow the rest of the hall as it bends, and destroy more containers containing studs. Another break in the path means that you can assemble more loose LEGOs on the ground to form another walkway.
On the other side are three doors. Use R2-D2 to open the door on the right. Behind it are Rebel prisoners and a wall lever for Captain Antilles to pull.
With the prisoners free, use R2-D2 to open the center door where there are...two stormtroopers in a hot tub! Geez, it’s hard to find good help these days!
Use Captain Antilles to blast them before they have time to grab their weapons. With the coast clear, pull the lever behind the hot tub.
After you pull this second lever, a wall panel that C-3PO can access becomes available near the last door. Use R2-D2 to move through the last open door. Have him access the panel in the back of the room to get into the escape pod.