Lego Star Wars: The Complete Saga Guide Walkthrough Episode VI: Return of the Jedi
Chapter 2: The Great Pit of Carkoon
Jabba’s plan to feed Luke and his pals to the great Sarlacc beast in the Pit of Carkoon didn’t go exactly as planned.
Instead of walking the plank and falling into the mouth of the giant beast, Luke (with the help of R2-D2) is able to get his lightsaber back and take control of dabba’s skiff.
With the others free, it’s time to teach Jabba and his thugs that it doesn’t pay to make a Jedi mad.
You start this level out on a small skiff high above the desert floor. In the distance is the large barge that Jabba is on and that’s where you want to go.
As soon as the mission begins, you see an explosion on the barge behind you and an endless supply of skiff guards rush out on the deck. Once they spot you, they relentlessly try to shoot you off the skiff.
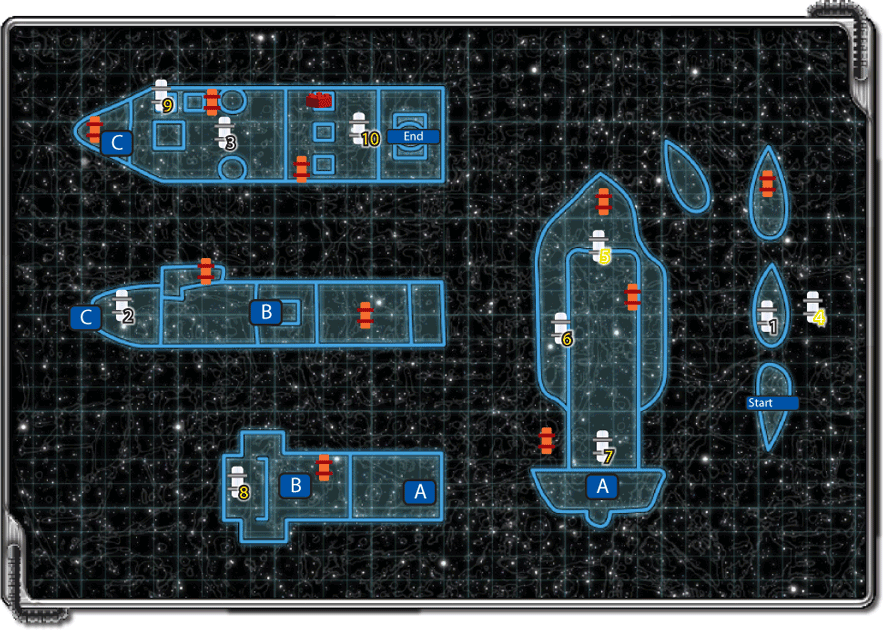
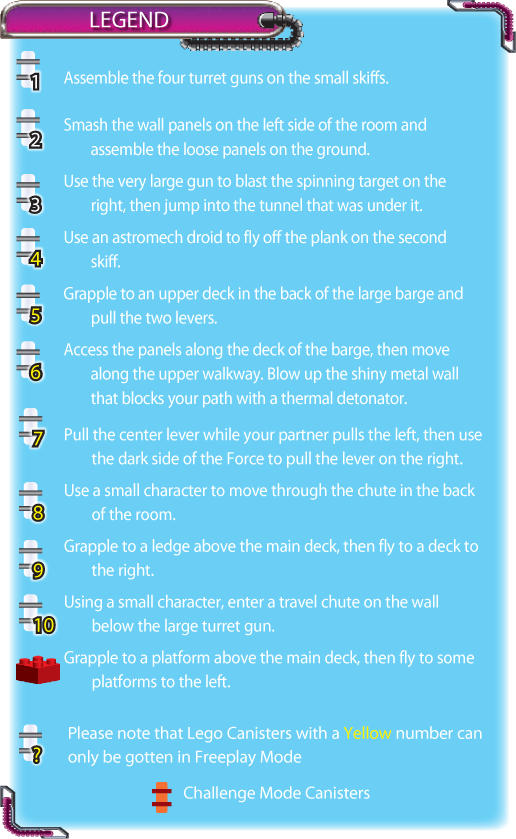
Break the railing around the skiff and collect all the studs on deck. Break the two boxes on the side of the boat that’s facing north to find some loose LEGOs.
Assemble both piles of LEGOs, using the Force on one and your hands on the other, to make two turret guns on the side of the craft that you can use to shoot the skiff guards across the way.
The guards’ onslaught is nonstop, so when you get tired of blasting them, move to some loose pieces on the ground to the right. Assemble these LEGO pieces to form levers.
Pull the levers to make a ramp extend from the right side of the skiff you’re on to the right side of the nearby skiff. Grab more studs on the ground and run across the ramp to the back of the next skiff.
When you get there, you find that Han and Chewy are safe, but they have company. Drop the guards who were watching them, then stand at the back of the craft. Use the Force to lift the LEGOs from the floor and turn them into a tall pole.
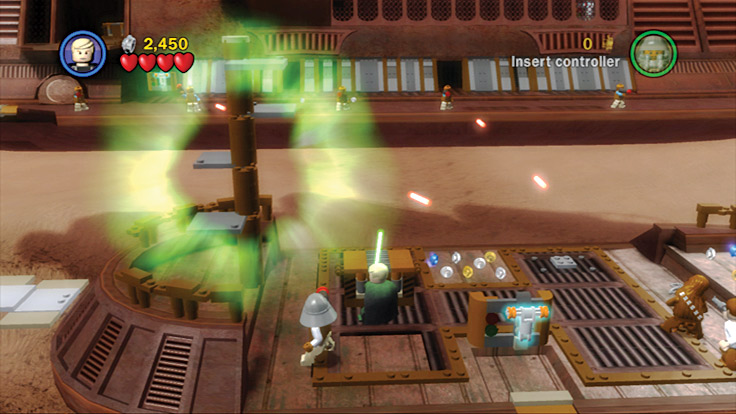
Use the Force to create a pole extending into the sky
Run to the back of the skiff and pull the lever to raise a box out of the floor on the left. Push this box all the way to the front until it explodes into little LEGO pieces.
Assemble these pieces into a turret gun to shoot the guards on the large barge in the distance. Return to the lever and pull it again to bring up another box.
Push it along the path all the way to the right and then to the north until it explodes, leaving some LEGOs behind. Use the Force to put these pieces together to form another turret gun that you can use to take out more guards.
After you have assembled all four turret guns, a LEGO canister appears at the top of the pole for you to collect. Move to the right and use the Force on the pieces on the ground to turn them into a lever.
Pull the levers to make a bridge extend from the front of this craft out to the next. Follow the bridge to the next boat, where you are greeted with more guards and Boba Fett!
Use your lightsaber to hack apart the skiff guard and then the Gamorrean guard. Boba Fett is a little bit harder to fight. Chase him down and hack him with your weapon when he lands.
This causes him to fly around some more, so follow him. When he drops down to the floor of the skiff, hit him again. Keep hitting him until his jet pack ruptures.
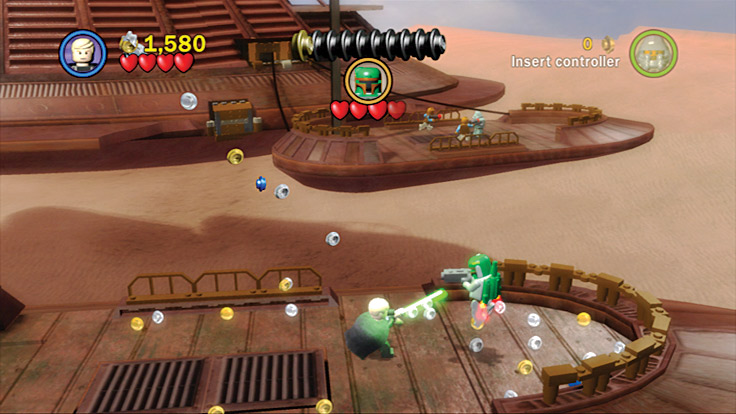
Hit Boba Fett with your weapon every time he lands.
Now that the bounty hunter is out of the way, run to the right of the skiff. Jump from the front of your ship to the front of the fourth skiff.
Use your double jump to take out the two skiff guards, then use the Force to dispose of the Gamorrean guard who gets too close.
Run to the back of the craft to get a closer look at Jabba’s barge nearby. Use the Force to pull some LEGOs from the barge and create a floating platform. Jump onto this new platform, and from there, to Jabba’s barge.
On the deck of the barge, kill any guards you see and collect all the studs on the floor. Use the Force to lift up the panels along the barge wall to reveal a walkway and more studs.
Most of these panels eventually fall back into place, but a few explode when you lift them. Continue to use the Force to lift up the panels until you find a lever hidden behind one of them.
Pull the lever to make a platform extend out from the barge farther to the left. Continue lifting panels until you find a second lever to pull. This one extends another platform out from the barge to the left.
Use the Force to lift the panel next to the last lever you pulled. While the panel is still raised up, use Luke to double jump on top of it. From there, double jump to the ledge nearby.
Move into the small alcove of the barge and get behind the box you find. Push the box along the path and over the ledge, causing it to smash on the deck near your friends. Assemble the LEGOs that the box leaves behind into a red circle swirl platform.
Use a character with an ascension gun and grapple from the circle swirl to a walkway high above the deck. Grab any studs on the ground, then follow the walkway to the right behind the walls of the barge.
At the end of the walkway is a lever for you to pull. This extends a third platform from the barge, near the other platforms you extended. There’s nothing else to do up here, so return to Luke down on the deck.
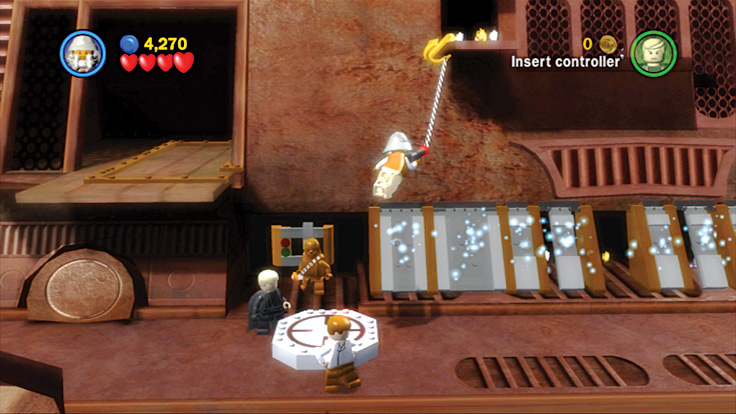
Use your ascension gun to get to a walkway high up on the barge so that you can pull another lever.
Jump across all three platforms that you extended from the barge’s hull to the left. You’re now on a deck at the back of the barge and skiff guards start to drop from the sky to fight you.
As you fight them off, you’ll see two sets of lights on the back of the ship. After you defeat a wave of enemies, quickly use the Force on each set of lights to fix them.
After you fix the second set of lights, a turnstile rises from the deck in between the two. Your goal is to make the right set of lights look like the left set of lights. Push on the green side of the turnstile to move it.
You’ll see the bottom color of the right set of lights start to change. Keep pushing the turnstile until the bottom light turns blue. Return to the right set of lights and use the Force to turn the middle light yellow.
When the right set of lights matches the left set, a door opens into the barge in between the two sets. Enter it.
You finally made it into Jabba’s barge! The first thing to do is celebrate by smashing the equipment lining the right and left walls.
Collect all the studs on the ground, then assemble the loose LEGOs on both sides of the room that were left behind from the equipment. Both piles of LEGOs turn into a turret gun. Jump into the controls of the gun and blast the gate in the north wall.
Once you destroy the wall, guards try to rush in from the next room. Stay in the gun and mow them down with your laser fire until the coast is clear.
In the next room you find your old friends C-3PO and R2-D2. You also find more of Jabba’s stuff to mess up.
Break the container to the left of the door to leave it in pieces, then use the Force on some equipment on the right to move it to the left wall. Now use the Force again to combine all the pieces along the left wall into more equipment.
Follow the left wall until you find more LEGOs on the ground. Assemble these pieces into an activation panel and collect the studs that spill out. Have C-3PO access the panel to make a lift in the center of the room rise and fall. Jump on the lift and ride it up to the next room.
Move to the room that’s on the right of the lift you rode earlier. As soon as you enter, use the Force to pull some LEGOs from the left and turn them into some equipment near the back of the room.
To the right of that equipment are some loose LEGOs for you to put together to make a jukebox. After you make your sound machine, shoot all the brown pipes along the walls and collect the studs that were hidden from view.
Destroying some brown pipes on the right wall enables you to use the Force to pull some white half-circle LEGOs from the wall and place them on the floor.
This creates a red circle swirl nearby that Han Solo can use to grapple to the walkway overhead.
Assemble the loose LEGOs to form a bracket on the ceiling. Push the box to the left until it falls over the ledge and breaks into tiny pieces on the ground.
The shattered box leaves behind tiny LEGO pieces for you to assemble into another jukebox in the corner of the room. Now return to the white half circle LEGOs you pulled from the wall and switch to Luke.
Use the Force to move the disco ball up to the bracket on the ceiling. This opens a panel on the floor, revealing blue and pink lights. Step on one of the two pink lights on the ground and one of your friends steps on the other.
The pair of pink lights turns green and another pair of blue lights turns pink for you to step on them. Continue to step on all the pink lights until the whole floor is nothing but green lights. Once that happens, the door in the north wall opens.
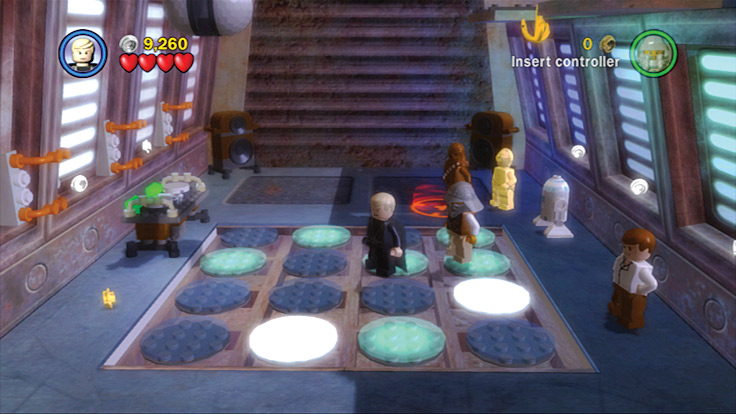
You and a buddy must step on all the pink lights on the floor to turn them green and get the dance party started.
As soon as the door goes up, some Gamorrean guards come rushing in to check out the scene. When they hit the dance floor and hear that music, they just have to rock out; all thoughts of killing you go away.
While they are distracted, run into the room from which they came. As soon as those guards realize you’re gone, they come after you, so use the Force to crush them. Then crush the wooden paneling on both sides of the room.
Pick up any studs that drop to the ground, then assemble the LEGOs that are lying along the left wall. These turn into a LEGO canister that floats in the air nearby.
Use Luke to double jump in the air and make it part of your collection. After you get the canister, go through the door in the back.
You’ve finally reached the top of Jabba’s barge. Even though Jabba is dead, he still has guards running about, so drop them whenever they get close. Smash the brown circular grate on the deck nearby.
Then use the Force to move the pieces underneath and attach them to the large pole on the left. Run past the pole to the rear-left side of the barge and smash the gray panel on the ground.
This brings up a movable box for you to push along the path on the deck. Push it along the path all the way to where you see a large spinning target trapped in a see-through casing. A similar target is directly across from it on the left side of the ship.
Move around to the back side of the target on the right. As you do, some Gamorrean guards drop in to say hello. Use the Force to break them apart as you go.
On the other side of the target, push another box along the path on the deck until it rests next to the target. Once both boxes are next to the target, a huge explosion happens.
The casing around the spinning target is now gone and you can collect any studs on the ground.
Switch to C-3PO and move to the other target on the barge’s other side. Access the activation panel on the side to make the casing over that target explode as well.
Return to the area where you originally found the second movable box. Nearby is a large brown box on the deck. Blast this explosive box to make a hole in the deck.
Jump in the hole and follow the attached tunnel as it winds under the deck to the right. Follow the passageway until you get to the end, where a tiny elevator lifts you up to a locked cabin.
Pull the lever on the wall and the blue door of the cabin leading back to the deck opens up. Skip the exit for now and move to the gray wall in the cabin. Chop it with your lightsaber to destroy it and find a movable box hidden behind it.
Get behind the box and push it along the path on the floor and out the door to the cabin. Continue to push until it stops against the side of the vessel.
Construct the LEGOs nearby to form part of a ramp. Now use the Force on the box you pushed out of the cabin to finish the ramp leading to the next deck.
Climb the ramp and collect the valuable studs on the ground of the next deck. Run to the south, find the box there, and smash it to reveal some loose LEGO pieces.
Assemble the pieces to form a red circle swirl pad, then use an ascension gun to grapple to a platform high above the area for some hard-to-reach studs.
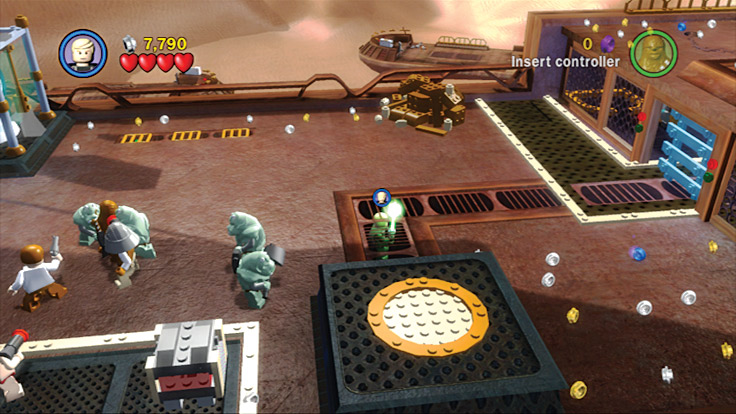
Follow the passageway under the deck to get to hard-to-reach areas.
At the center of that deck you’ll see some targets on the floor. Blast them into little bits. Use the Force to pull out the boards that were underneath and turn them into part of a ramp.
More targets are on the wall to the right. Blast each target, then use the Force on the LEGOs between the two destroyed targets. This completes the ramp leading to the next deck.
More guards run down to greet you. Use the Force to dispose of the Gamorrean guards, then slash at the skiff guards. When the coast is clear, run to the very top deck and pick up all the studs you find.
There, you’ll also find a very large turret gun. The green lights under the gun indicate how many shots you have left: each one turns red after each shot. Have R2 access the activation panel on the gun if you need to reload.
Jump into the controls and use the big turret gun to fire at the right spinning target first. Now run to the lower deck where the gun used to be, and stand on the platform it was on.
The floor drops you down into a secret tunnel under the deck. Follow the tunnel to the south where you can add a LEGO canister to your collection. Return to the hole in the floor where you came from, then go back to the upper deck.
Run back to the big gun and destroy the second target. Destroying these targets takes down Jabba’s floating barge.