
Lego Star Wars: The Complete Saga Guide Walkthrough Episode VI: Return of the Jedi
Chapter 1: Jabba’s Palace
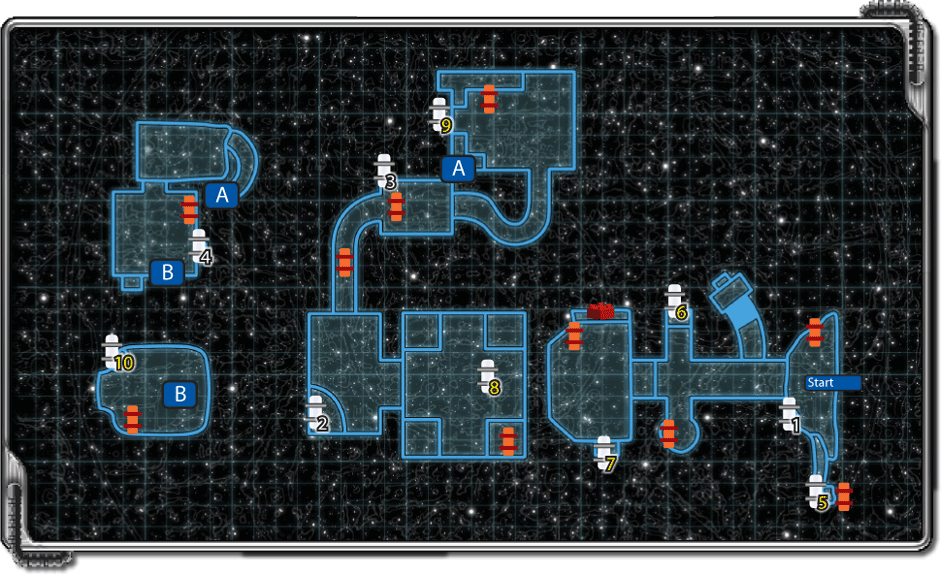
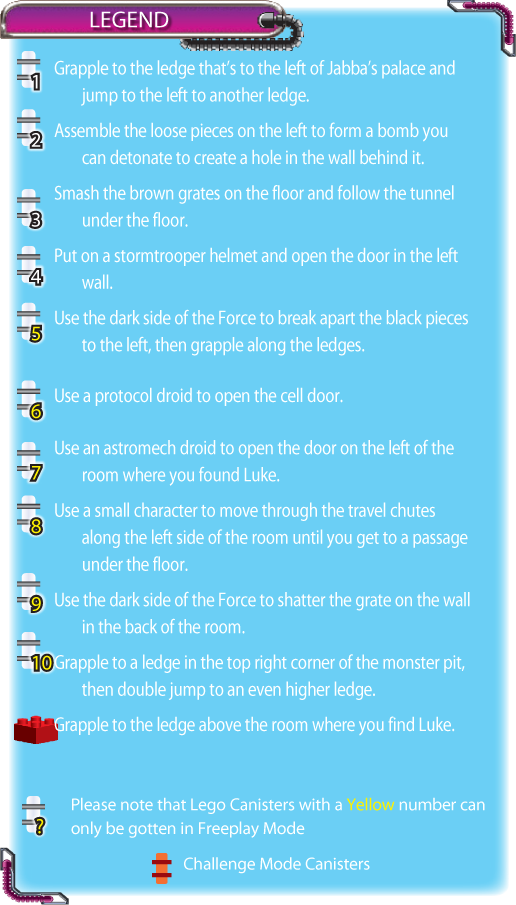
Luke had better know what he is doing back here on Tatooine at Jabba’s palace. He sends the droids in first, and then Leia and Chewbacca, to get Han Solo back!
That is some friend. Hopefully everything will go according to plan because Jabba and his friends are a dangerous bunch and somebody is likely to get killed.
For now, stick to the plan for getting inside Jabba’s palace. From your starting location, follow the narrow path to the left and collect the blue stud at the end.
Search the rest of the ground around the area for more studs to add to your collection. Be sure to shoot the brown LEGO piles for more hidden goods.
The shiny metal piles of LEGOs can only be destroyed with thermal detonators, so you’ll have to come back later.
Run at the huge door in the distance and grab the gold stud inside the left-hand alcove in the door. Grabbing the stud opens a small window behind it and a turret gun comes out to shoot at you.
Retreat back to where you started and fire at the turret from a distance while avoiding its fire. After the gun is destroyed, repeat the process with the gold stud on the right.
Now return to the door and assemble the loose LEGOs you find there. Collect any studs and hearts that appear and jump on top of the platform you made.
From there, grab the last gold stud in the door. Another turret appears; destroy it like the others. After it blows, the door opens for you.
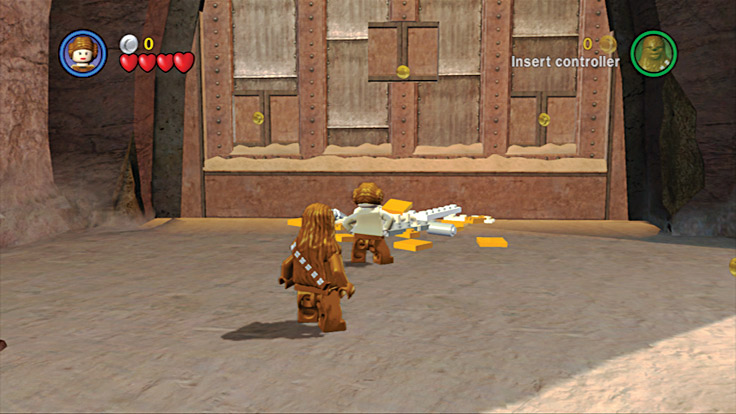
Grab only one stud from the door at a time because you have to take out a turret gun behind each one.
On your way into Jabba’s palace, shoot the platform you put together for a few extra studs. As you enter the palace hallway, some Gamorrean guards drop through chutes into the palace to greet you.
These guys are tough and take three shots before they die! Each one deflects your first blaster hit with his axe, but two more direct hits drop each guard to the ground.
Clear out all the guards from the area near the entrance, then grab the power up along the right wall.
With the immediate threat gone, you have to act fast. Near the entrance to the palace, quickly assemble the LEGO pieces on the ledge to the left of the hallway. The loose pieces form a jukebox that starts to play music.
When more guards slide down chutes into the hallway, they immediately start to rock out, playing air guitar on their axes.
While they rock out, pull the lever on the wall under each chute to close them so no more guards can slide down. With the chutes closed, you can finish off these rockers.
Move down the hall and be sure to shoot the lights on the walls for some hidden loot. The gate at the end of the hall is closed and only a bounty hunter can open it.
Run into the room to the right and find two more guards who need to be taught a lesson. Assemble the loose LEGO pieces on the ground near the cage door to form an access panel that only a protocol droid can use.
Only a bounty hunter can open the large door at the end of the hall. Head into a room to the left and eliminate the guard that slides down the chute in the ceiling. Then pull the switch under the chute to close it.
Dispatch any additional guards that might have dropped down to stop you. When the coast is clear, pull the other lever in the room to get a new helmet. Now you look just like a bounty hunter.
Return to the locked door outside the room and access the control panel to the left of the door. Because you look like a bounty hunter, the door opens for you. Open the door to find Luke waiting for you.
Once he joins your party, run back outside and use your thermal detonator on all the shiny pieces of metal outside. After you destroy the pile to the left of the main entrance, you see a red circle swirl on the ground.
Grapple to the ledge above, then run to the left corner. There you can jump to another ledge to the left and grab a LEGO canister in the process.
After you blow up all the metal pieces outside, run back to the room where you found Luke. Some Gamorrean guards are waiting for you, so take them out quickly.
Pull the levers on the wall in the back of the room to close the two guard chutes in the ceiling. Be sure to blast any more guards that get too close.
Now that the guards are gone, you can safely explore the room and shoot any light fixtures for hidden loot. Move to the right of the door you came through and put the LEGO pieces together to form a movable box.
Slide the box until you cover up the red flashing button on the ground. As soon as the button is pressed, a red circle swirl appears on the ground next to you, so use your ascension gun to grapple to the walkway above.
Follow the path above to collect studs and a red power brick.
Near the red circle swirl on the ground is a cover in the wall that only the Force can move. Use Luke to move it to the ground nearby, then open the newly moved cover in the ground. Once the cover is open, jump inside and grab some blue studs.
With all the studs in hand, move to the big door in the back of the room and put the loose pieces together to form an activation panel. With your bounty hunter disguise on, access the panel, open the door, and run inside.
At the entrance to the new room is a bounty hunter helmet dispenser that you’ll use later. The back wall of the room has a large brown gate, and the room corners each have a locked cell.
The room also has alcoves on the left and right walls. The first thing you need to do is run to the alcove in the left wall to find a chute coming out of the ceiling.
Dispatch Gamorrean guards that tumble out, then quickly pull the lever on the wall nearby to close the chute.
Run across the room and use the Force to break the pieces of an old droid on the ground to uncover hidden studs.
Next, run into the small alcove to the left of the droid. Shoot the equipment on the ground, then assemble the loose pieces into a platform. Jump on the platform, and Luke uses the Force to lift you high above the ground.
When you stop moving, jump to the ledge that runs along the wall next to you. Follow the ledge to the left and drop into the small room below you.
Take out the guard who’s waiting for you. Now pull the levers on the wall. This opens the large gate in back of the main room.
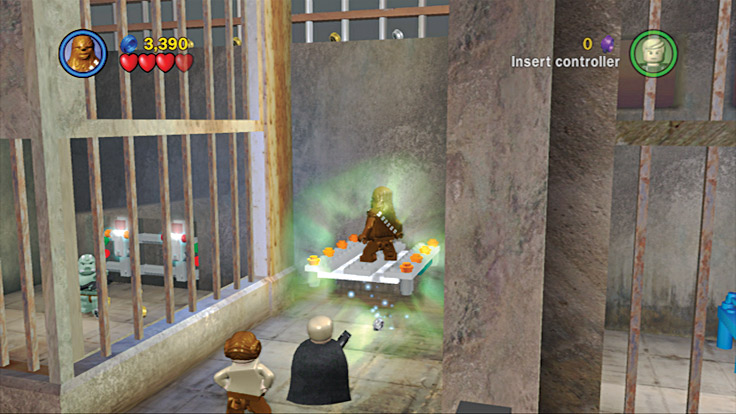
After you assemble the platform, Luke uses the Force to give you a boost up
Behind the large gate you opened is a lot of silvery debris blocking your path. If you don’t already have a bounty hunter mask on, return to the room’s entrance and put one on.
Now that you look like a bounty hunter, toss a thermal detonator at the blockage. When it explodes, the whole thing crumbles to pieces. Now you can run into the next room.
Immediately run to the lever in the back of the room and pull it to close the guard chute coming out of the ceiling. Put down any guards that made it into the room before you continue.
Next, assemble the LEGOs along the left wall to create an explosive bomb. Shoot it a few times; it turns orange until it explodes and takes a chunk of the wall with it. Grab the blue stud it leaves behind, then move inside to get the LEGO canister.
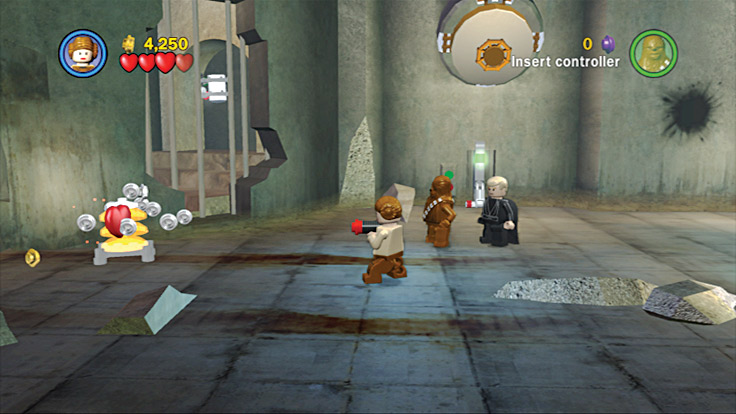
Destroy the wall so you can get the canister inside.
Run to the right wall to find a closed gate. Shoot the orange LEGOs on both sides of the gate until they are completely destroyed. After the last one is gone, the gate rises up.
Follow the hallway beyond the gate until you get to a spot where you see white grates on the floor. Continue forward while avoiding the grates—they drop out of the floor when you touch them.
When you get to the end of the grates, shoot the two guards waiting for you. After they fall, run past the gate and follow the hallway to the next room.
Take out the set of guards in the back. When they rush you, shoot them before you get hurt. After eliminating them, use your lightsaber to smash the brown grates on the floor near the entrance.
Jump under the grates and follow the tunnel as it leads to the left and to a hidden LEGO canister. After you grab the canister, a platform below you raises you back up to floor level.
Then use the Force to move the LEGOs on the wall over to the floor nearby. Assemble the LEGOs into a step platform. Use the Force on the droid parts scattered about the room to find even more studs.
Now pull the two levers located on the equipment to the right to deposit more LEGOs on the ground. Assemble all the pieces to create four red buttons on the floor.
These floor buttons are the controls to the step platform you made earlier. Step on the button pointing up to move the platform to the north until it sits next to the tank holding C-3PO.
Jump on the platform, then double jump into the enclosure with your golden pal. With your added weight, the floor drops, allowing both of you to escape.
Return to the buttons on the floor and step on the one on the right. Move the step platform all the way over to the enclosure holding R2-D2. Jump on top of the platform, then into the tank with your other droid.
Once again, the floor of the enclosure drops, setting you both free. Now use C-3PO to access the activation panel to the left of the door, and use R2-D2 to access the panel on the right. After you activate the panels, the door opens so you can continue.
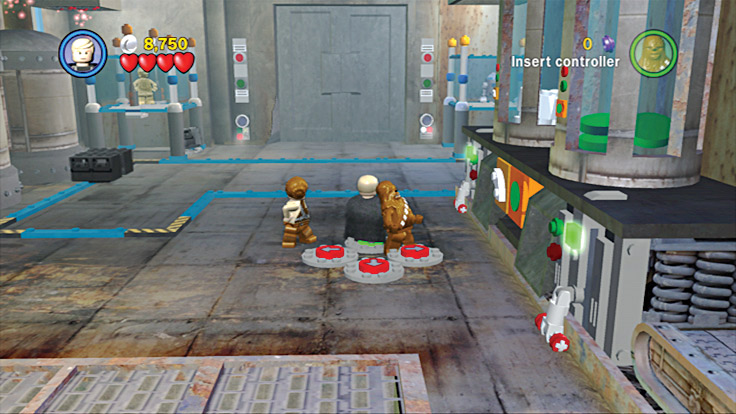
Step on the red floor buttons to move the step platform where you want it to go.
Follow the hallway behind the door as it snakes upward. Pick up the studs on the ground as you go, and assemble the loose LEGOs that you find to turn them into another jukebox.
Go up the hallway to find some Gamorrean guards playing air guitar to the music you created. Give them a beat-down to secure the area, then use R2 to access the panel on the wall to open the door. Move into the next room.
You enter the room from a doorway in the left wall. Immediately run across the room to the right corner and pull the lever on the wall to close the guard chute in the ceiling.
Use the Force to break apart any guard foolish enough to try to stop you. To the left of the lever, on the wall, are some movable boxes of various heights.
Push the tallest box along the floor and over the holes in the ground next to the upper walkway on the left. Then push the medium-size box next to the first. Finally, push the smallest of the three boxes next to the medium one.
After all three boxes are lined up, use the Force to unfold the top of the boxes and create a ramp leading to the walkway above you.
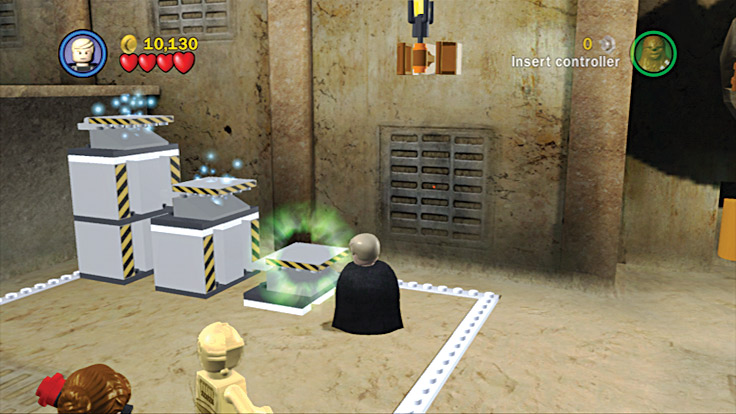
Push the boxes against the wall in descending order.
Run up the ramp and follow it to the upper walkway; smash the equipment and assemble the LEGOs you find into a platform. Use the Force to move the platform you created against the wall nearby to form half a bridge.
Stand on the bridge and use the Force again to pull some LEGOs off the wall in the distance, and turn them into the other half of your bridge.
Eliminate the guards on the other side, then smash the equipment and pull the lever on the wall to ensure no more enter the area.
Follow the walkway around the room to the left until you get to a drop-off point. Use R2 to fly along the wall to the left until he gets to another walkway.
Access the panel on the wall; a bridge extends and connects the walkway you’re on to the one you came from, allowing your friends to cross. Follow the new walkway until you find some equipment to smash, leaving some LEGOs on the ground.
Assemble them to create an activation panel on the wall. Have C-3PO access the panel to open the nearby door, then go through it.
Follow the stairs opposite the door down to a dimly lit room. When you get there, use the Force to crush the guards, then run to the left wall and pull the lever to close the guard chute in the ceiling.
Quickly run to the back wall and pull a second lever to close another guard chute. After you close the second chute, a door in the left wall opens.
Before you go running into the next room, search along the walls of the room you’re in for some valuable studs, including a blue one in the back-right corner.
Next, assemble the LEGOs in the back-left corner to create another jukebox. After you get the music going, head into the next room.
As you enter it, use the Force on any guards rocking out to the music. Follow the left wall, breaking lights and collecting studs as you go.
When you get to the back-left corner, pull the lever on the wall to close the guard chute in the ceiling. Quickly run across the area and pull another lever on the right corner wall to close yet another chute.
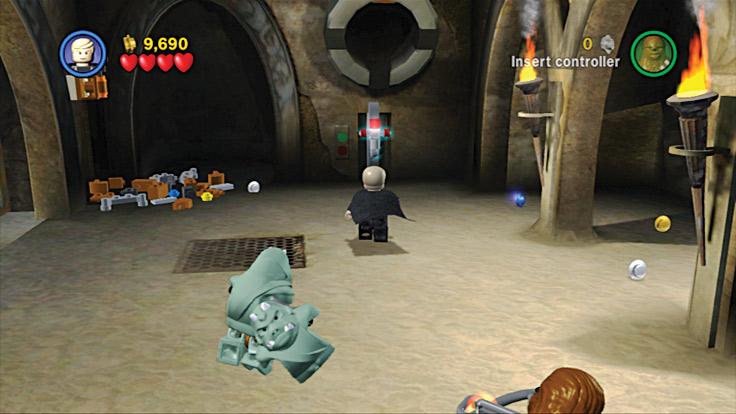
Pull the levers in the back of the room to stop the guards from entering.
A door in the left wall can be opened only by a stormtrooper. Run to the gate that’s to the right of where Han is frozen in carbonite. After it opens, run inside and pull the lever on the wall to get a stormtrooper helmet.
Now you can access the activation panel on the wall on the left side of the room and open the gate that is to the right of the panel. Eliminate the guard inside, then add the studs and LEGO canister to your collection.
The back wall displays Han Solo frozen in carbonite; only a bounty hunter can get him out. Access the activation panel to the right of your frozen buddy with a bounty hunter helmet on your head.
You’re dropped into the monster’s small lair and it’s hungry! As soon as you hit the dirt floor, the monster charges in to make you its snack, so run for it to stay safe.
To the south is an alcove; it has many sharp spikes on the ground that can kill you instantly. To the north is a giant, locked gate that prevents you from escaping.
The left wall has an activation panel with a picture of a protocol droid; the right wall has a panel with a picture of an astromech droid.
Run to the left wall and switch to C-3PO, who stands nearby. Have him use the activation panel to make a Gamorrean guard fall from the guard chute in the ceiling. The monster can’t resist the fresh meat and chases down the guard.
With food in hand, the monster retreats to the back-left corner to enjoy its meal. As soon as it gets there, use Chewy or Princess Leia to blast the explosive container at its feet and hurt it.
The monster drops its snack and comes after you again. Use R2-D2 to access the panel on the right wall to make another guard slide down the chute into the area.
The beast grabs the guard and moves into the front-right corner to munch on its new treat. When it gets there, blast the explosive container at its feet to cause some massive damage.
Switch back to C-3PO so that he can use his activation panel one more time to release another guard.
The beast once again grabs the helpless guard, but after suffering two hits already, it heads this time for the large locked gate. As soon as it gets there, pull one of the levers on either side of the gate.
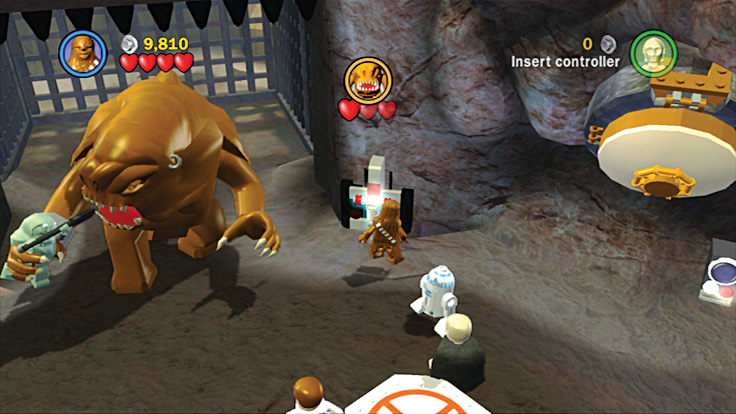
When the beast finally retreats toward the large gate, pull one of the levers on the sides of the gate to crush it.