
Build, Discover, Survive! Mastering Minecraft, Revised and Expanded Guide You Can Do Anything with a Little Practice
Landscaping
Landscaping is the act of shaping the world around you. These acts range from tiny actions, like digging holes in the ground and clearing out trees, or they can be as grand as blowing up a mountain with TNT or reshaping an island in Creative mode. If it changes the way the world looks, it’s landscaping!
Groundskeeping
One of your earliest experiences with landscaping is clearing the area around your house. You can do all sorts of landscaping projects to make your region safer and more convenient.
Trees are useful, but having them close to the house is dangerous. The shade they provide allows Skeletons and Zombies to survive the sunlight, so they can attack during the day. Clear the trees to make sure you can watch the monsters burn when the dawn comes.
Now that you’ve made the immediate area safer, it’s time to flatten out some space to prepare for farms and animal pens. You might not do any farming or animal raising until much later, but flattening the area also makes it easier for you to get around and see incoming enemies. This is a great opportunity to evaluate the area and decide what to do with irregular holes and random cave entrances. You can seal cave entrances with Doors, widen the openings into proper mines, or even remove the top layer of dirt and rock to expose them to sunlight for easier mining. If you have any small water holes nearby, flatten the area around them for later farming, or start planting crops right away around the edges!
Moving Mountains
You can clear the area around your house quickly, but some projects require more effort. Mountainous terrain, for instance, is very annoying to navigate; it tends to be full of sudden drops, sheer cliffs, and lots of climbing. This can result in complex paths as you move from place to place. Winding through the landscape is a good way to get lost, so why not change it?
Tunnel through large obstacles to reduce travel time. This is useful in exploring, as it reduces the need for excessive landmarks. If you expect to return to a certain place, such as a Village, make a more permanent roadway. Trails of landmarks are great for exploring new territory, but sometimes you want something more permanent. A roadway lets you follow an obvious path instead of playing hide and seek with Signs!
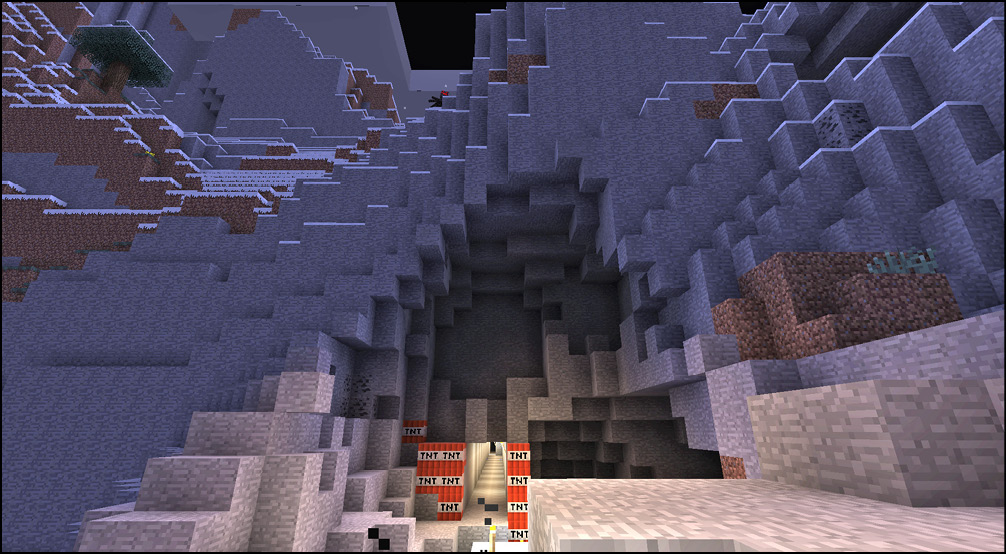
With hand tools and time, you can make any tunnel you want. Pickaxes and Shovels are fine for most situations, but if you want to go through a really large obstacle, like a mountain, there are other options. Try blasting through heavy blocks with TNT—it lets you blow stuff up! Hissing like a Creeper is optional but highly recommended.
Getting Gunpowder can be dangerous, as it involves killing Creepers before they explode. Once you get a good Sword (Iron or Diamond), killing Creepers becomes much easier, and you get Gunpowder more frequently. If you have Gunpowder stockpiled in a Chest, why not put it to use?
Gunpowder forms an explosive block called TNT when mixed with Sand. You can place TNT like normal blocks, and then ignite them to produce violent explosions. Place a string of TNT blocks to make a chain reaction and blow large craters into the landscape, or place them one at a time to gradually blow through walls. No mountain can stand up to explosives!
Island of doom, an example in world shaping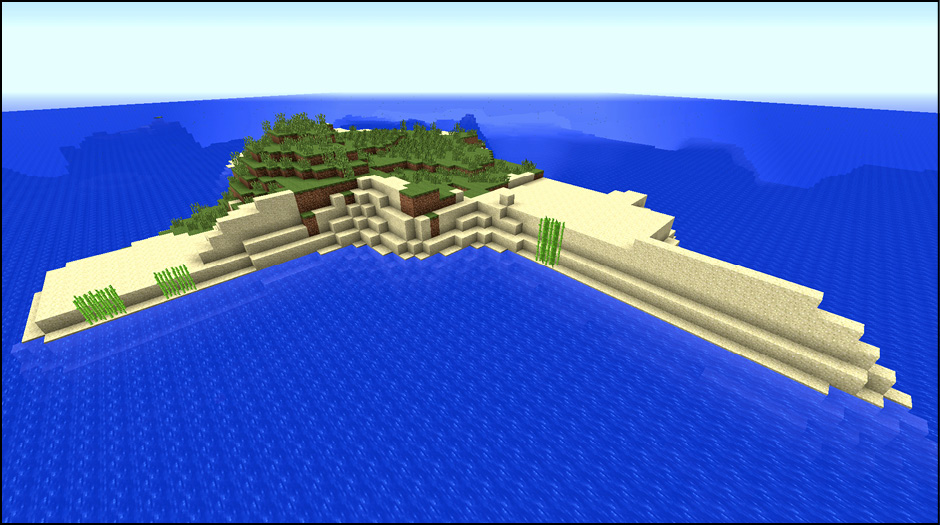
Some starting locations are very tough for beginners: for example, tiny desert islands. They don’t provide many resources to start with or easy terrain to manipulate. We’ve talked about landscaping in terms of making your world nicer, but now it’s time to think big. Make a copy of the world in Creative mode, and let your imagination run wild! It’s time to break out the Obsidian and Lava, and turn this pretty little island into a fortress of doom! In Creative mode, you have unlimited access to every material in the game, you can break blocks with a single touch, and you can fly. When you work with Obsidian, you can correct mistakes in a second instead of having to bring out the Diamond Pickaxe and spend time breaking a misplaced block. Grab an Obsidian block (in the Building Materials tab, or you can search for it) and go to work turning the island’s Sand and Dirt into Obsidian. Turning the island into an Obsidian reflection involves replacing every Dirt or Sand surface block with an Obsidian one. Work around the edges at the water line, and then move steadily up. You can replace large, flat patches quickly, but the small hills and contours require more patience. While you’re flying, look for places that would make interesting locations for a tower, a pool of bubbling Lava, or anything else you can imagine! Monsters don’t attack in Creative mode and you never get hungry. You can work through the night, or save the eyestrain of placing black blocks at night by grabbing a Bed from the Decorations tab and sleeping. In the morning, jump twice rapidly to start flying. Get an aerial view of the island and see the progress you’ve made. Holding the Jump button makes you go higher, and double-jumping again makes you fall like a stone—you don’t take damage! Once the island is coated with Obsidian, make some holes and fill the nooks and crannies with Lava for some splashes of color (and evil). Remember that flowing Lava makes Stone blocks when it hits the water. So if you make a mistake, it might take some cleaning! Use a Bucket to remove a Lava source block until everything is clear, and then break the Stone. The sea rushes back in to fix itself, but if there are any problems, use a Water Bucket to bring the sea back to normal. Once the island is fitted with pools of fiery death, it’s time to build your fortress. Nether Bricks are a traditionally evil fortress construction material, but they’ll be dark against the Obsidian. Besides, if you want to see a standard evil fortress, you can go to the Nether! Experiment with available blocks to find one that contrasts well with the black of the Obsidian, the blue of the water, and the orange of the Lava. In this case, Iron blocks go well as neutral gray. Iron also happens to be a very traditional tower material for evil types. Build up and away! Placing Glowstone at regular intervals keeps the tower illuminated and makes it look good. Flying and jumping let you build up very quickly. Falling has no effect, so dust yourself off and return to the air if you happen to plummet. Once you complete the central tower, add embellishments like Iron Doors, crenellations on the roof, and channels for Lava to flow to the ground below. A prison at the tower’s base shows the monsters who is in charge of the island. Use Monster Eggs to spawn Skeletons and other creatures inside the prison to serve as examples to the others. Be sure to mock them mercilessly when the sun comes up! For the final touches, add secondary towers for your nefarious activities. Be sure to build plenty of space for gloating, cackling maniacally, and reading ancient scrolls of power! Now that your doom tower is complete, rule the island with an iron fist! 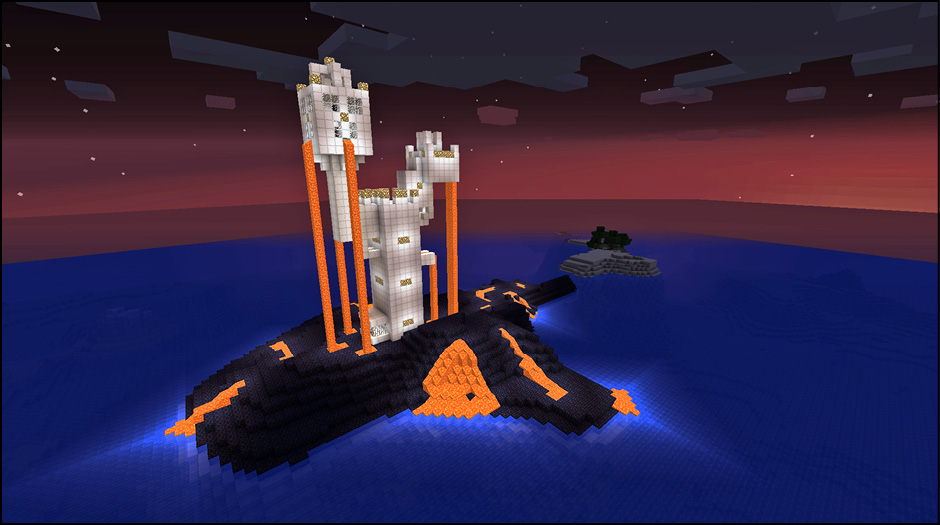
|