
Medal of Honor Guide Multiplayer Multiplayer
Mazar-I-Sharif Airfield
Map Overview
Combat Mission: Coalition forces are preparing to assault the northern airfield of Mazar-i-Sharif. OPFOR fighters have set up a strong defensive perimeter among wrecks of Russian tanks and airplanes.
Intel indications that a high value target is hiding somewhere by the airstrip makes the need for surgical precision all the more crucial.
Python 1 prepares to enter what looks like a graveyard.
Coalition forces must first gain entry to the airfield by destroying a barricade and then fight their way through hangars and wrecks before they can reach the air tower at the end of the airstrip.
Along the way, OPFOR marksmen have dug in deep to wait for the attackers.
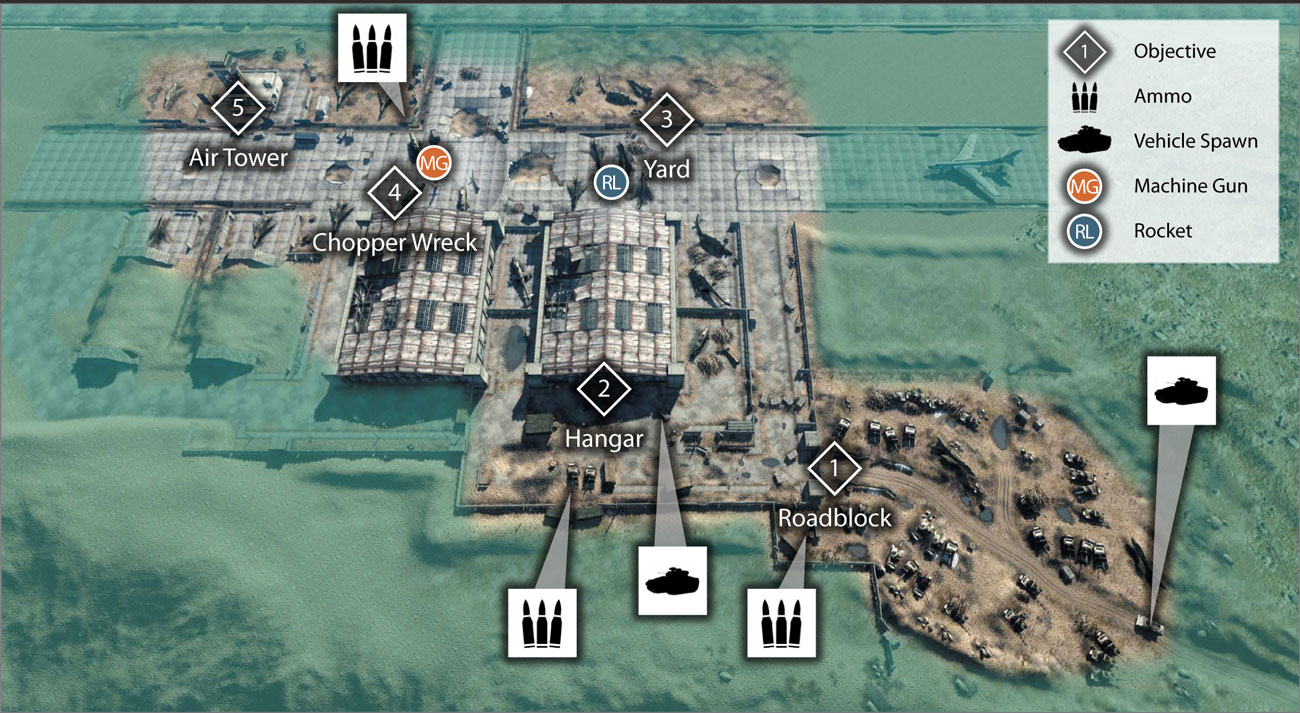

Roadblock
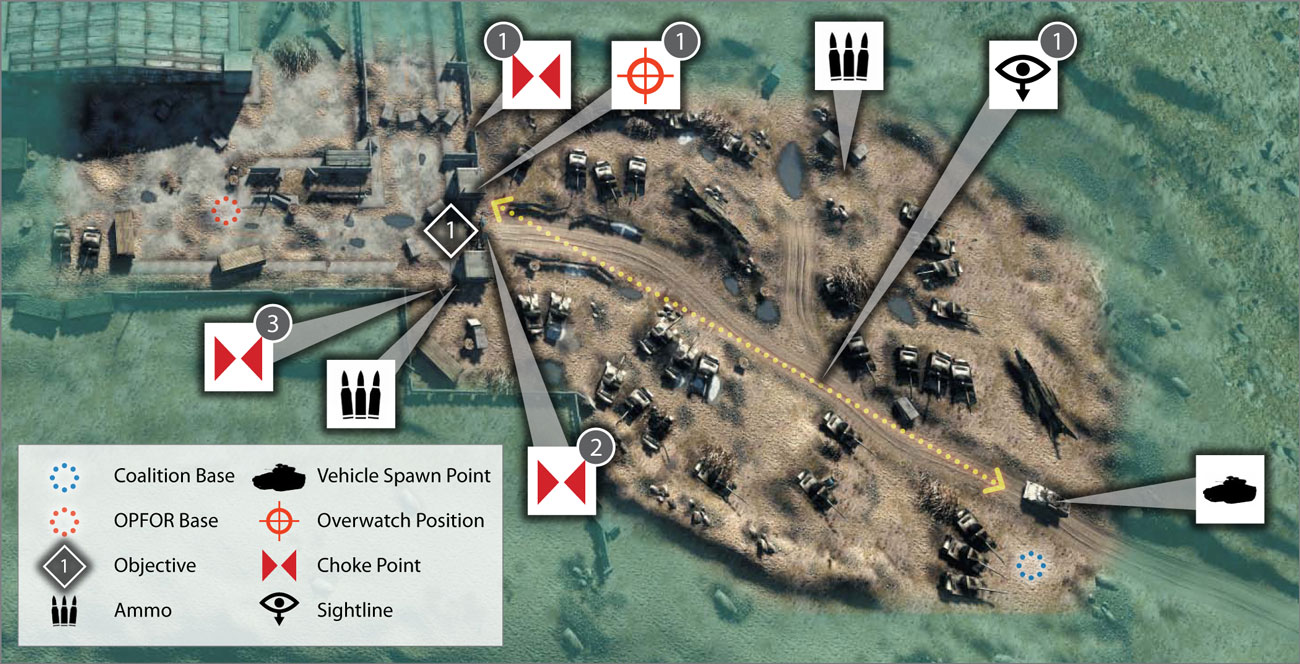
Map Features
Overwatch Positions
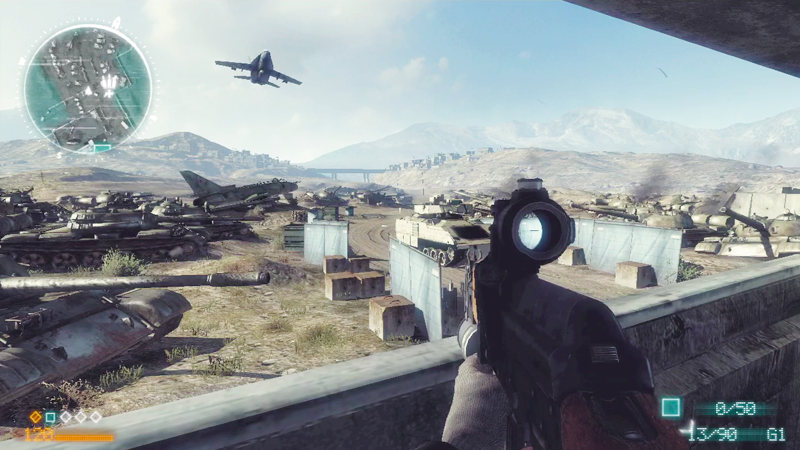

The two concrete guard towers flanking the roadblock are ideal overwatch positions for the OPFOR team. While they don't provide much elevation, these short towers do offer excellent protection from incoming fire.
Stand on the step in front of each forward-facing window for a clear view of the junkyard.
If you come under fire, simply crouch to take cover.
Spotting enemy movement among the graveyard of tanks may be difficult, but any advances along the road are easily countered—be ready to blast the coalition light tank as it approaches. But keep an eye on the objective, too.
From this elevated position you can easily pick off coalition troops attempting to plant a charge at the roadblock.
Choke Points
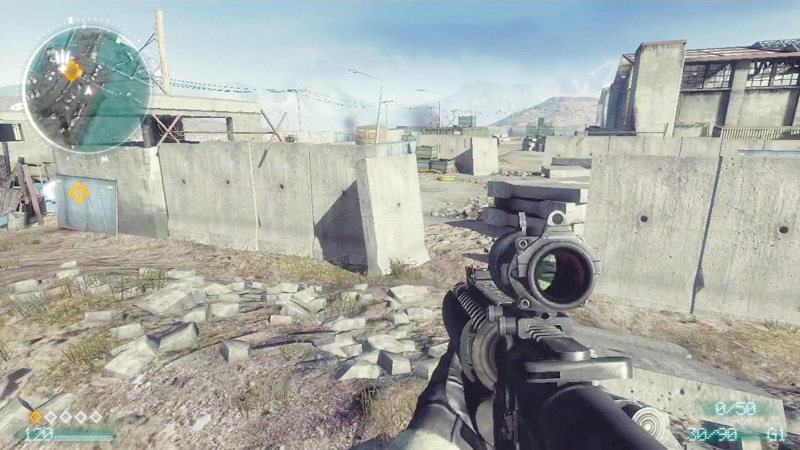

When attacking as the coalition, this breach in the wall to the right of the roadblock is a perfect infiltration point, allowing you to flank the OPFOR defenders gathered around the objective.
However, be mindful of enemies camping around this area. Defenders can easily cover this narrow hole in the wall with automatic fire and explosives.
Always conceal your advance with smoke grenades and then consider taking cover in the nearby guard tower.
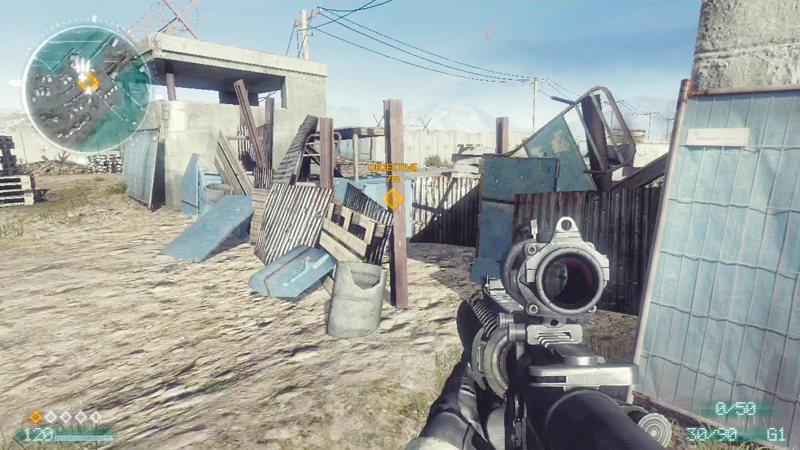

The roadblock itself is another obvious choke point—one that coalition troops should avoid until the airfield is properly infiltrated.
As long as the OPFORs hold the area around the roadblock, including the two guard towers, this area is an absolute kill zone.
However, if the coalition light tank provides support fire at close range, it may be enough to distract the defenders, allowing coalition troops to sneak in and plant a charge on the roadblock.
But it's much safer for the coalition team to sneak in through the holes in the perimeter wall before attempting to destroy the objective.
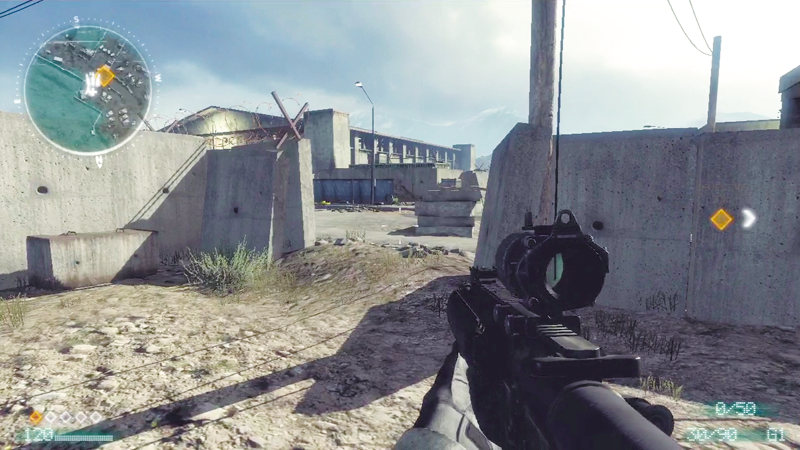

Here's another entry point in the airfield's perimeter wall. When playing as the coalition, stay to the left of the roadblock to sneak through this narrow passage.
OPFORs should always keep any eye on this entry point as it gives the coalition team a dangerous flanking angle on defenders surrounding the objective.
Coalition troops bunched up in this area near the ammo crate are very vulnerable to offensive support actions, so look for some opportunities to score some easy kills.
Still, this is the preferred path of attack for coalition troops attempting to secure the objective from both sides.
Sightlines
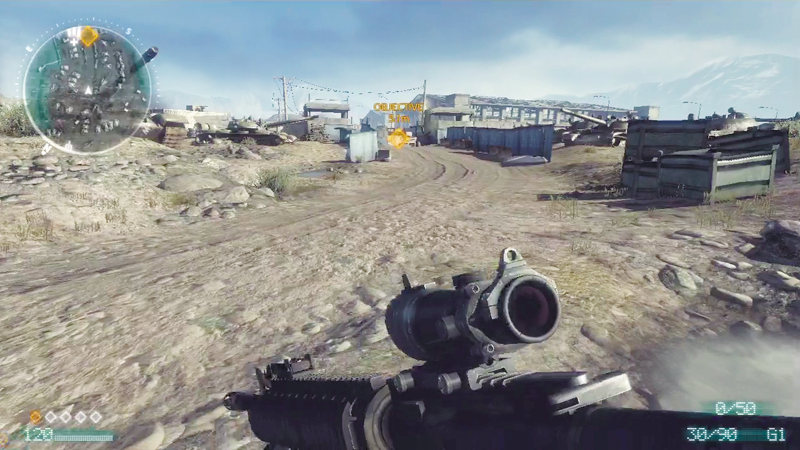

Given the plentiful cover provided by the scores of abandoned Russian tanks in the junkyard, there's no reason to charge down the middle of the road unless you're driving the coalition light tank.
The road offers absolutely no cover and is a kill zone for snipers positioned at either end of the map.
Do yourself a favor and stick to either side of the road where there's plenty of places to hide. The light tank, on the other hand, can score some easy kills by pounding enemies dumb enough to charge out into the middle of the road.
Coalition Tactics
The coalition team starts in the junkyard outside the airfield. Fortunately, the old Russian tanks provide excellent cover during this advance.
But instead of charging straight for the roadblock, perform flanking maneuvers, infiltrating the airfield through the holes in the walls on the objective's flanks.
Meanwhile, keep the light tank back near its spawn point and use it to provide suppressive fire on the two short concrete guard towers on either side of the roadblock.
Keeping the enemy out of these guard towers makes it easier on the infantry to get in close and flank the roadblock. Once the roadblock's rear has been secured, plant explosives at the objective and defend it until it explodes.
OPFOR Tactics
Don't make the mistake of waiting for the coalition to come to you. Take the fight to them in the junkyard, ambushing them with shotguns and carbines at close range.
While half the team goes on the offensive, keep some teammates back near the objective, particularly near the perimeter wall choke points.
It's vital to keep the coalition troops pinned in the junkyard as long as possible.
Once they attain a foothold inside the airfield's walls, it is increasingly difficult to halt the roadblock's destruction as they can spawn closer to the objective than you can.
An aggressive and prolonged defense here can greatly increase the OPFOR team's chances of winning the battle.

Hangar
Map Features
Overwatch Positions
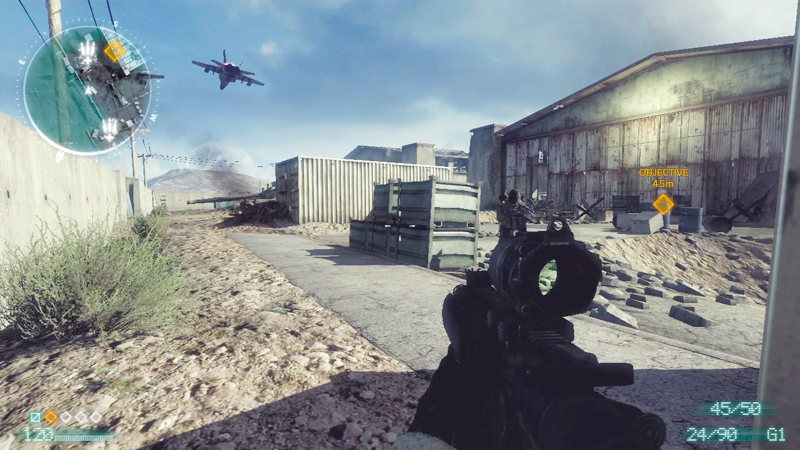

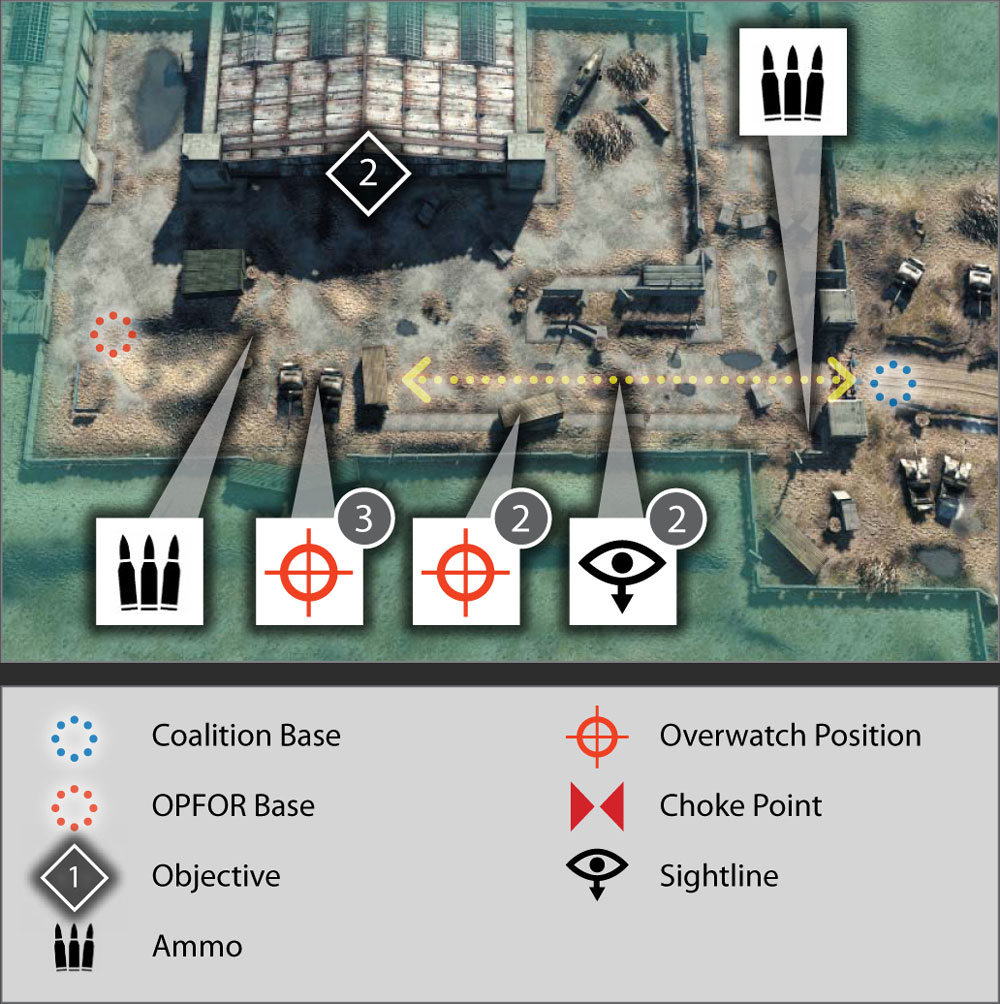
When playing as the coalition, the corner of this shipping container offers decent protection and some good sightlines.
Aim along the perimeter wall to spot OPFORs near their base spawn point—this is a great way to score some kills as the OPFORs rush toward the objective.
The hangar door is also visible from this position, allowing you to provide supporting fire to teammates attempting to set a charge.
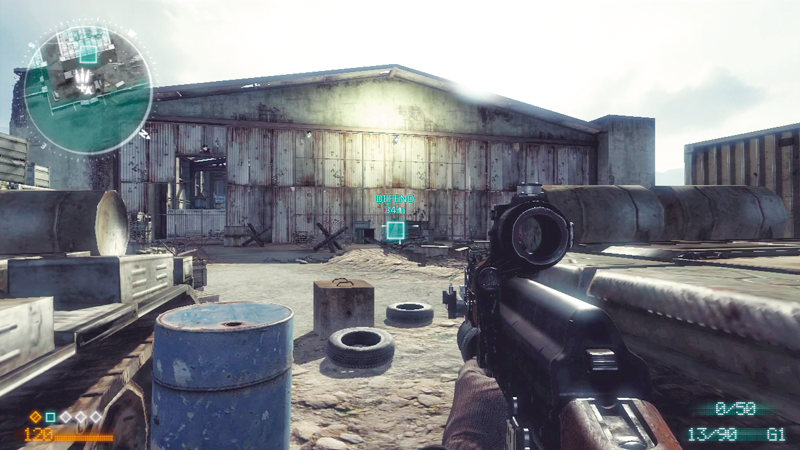

For the OPFORs, defending the hangar doors is difficult as there aren't too many safe positions near the objective.
However, if you duck down between these two tanks, you have a clear view of the doors, allowing you to pick off any coalition troops moving in to set a charge.
However, your back is completely exposed. Turn around periodically to ensure you're not being flanked, otherwise you may get a knife in the back.
The coalition team can also benefit from this position when it's time to defend the charge on the hangar door.
Sightlines
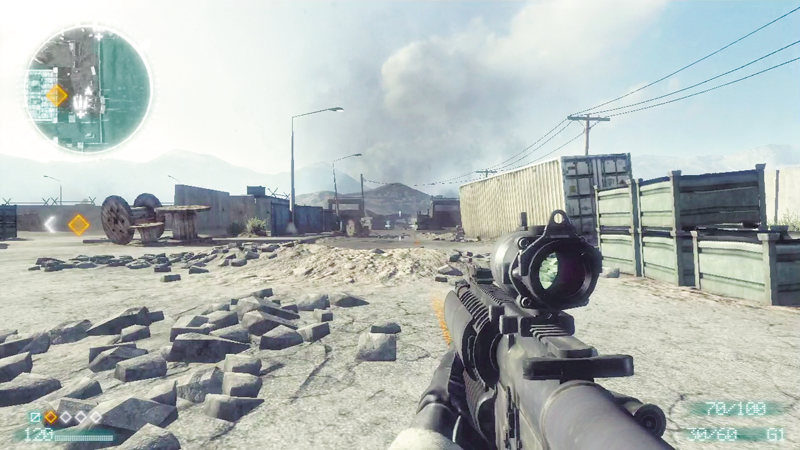

The road leading from the roadblock area, where the coalition team spawns, to the hangar is fairly open and unobstructed, allowing for a very long sightline.
Coalition troops advancing along this road are vulnerable to OPFOR sniper fire. Likewise, coalition snipers positioned near the coalition base can also engage distant OPFORs setting up defenses near the hangar.
Coalition Tactics
In this engagement, the coalition must blow open the hangar doors to continue their advance through the airfield. The area around the hangar doors is relatively open, with little cover.
Therefore, bring the light tank (spawned back in the junkyard) forward and use it as a mobile shield for your team's infantry to hide behind while advancing and setting the charge on the hangar door.
Even if the light tank is destroyed, the wreck remains in place for a few minutes, giving your team a chance to set the charge.
If the light tank is unavailable, the rifleman's smoke grenade is your best bet at approaching the hangar doors without getting cut to pieces by the OPFOR defenders camped near their base—you cannot enter the area where they spawn.
OPFOR Tactics
As in the previous engagement, have half of your team defend the objective directly from fixed positions near the OPFOR base while the rest of the team aggressively attacks the advancing coalition troops.
Although the area around the objective is devoid of cover, there are plenty of hiding spots between the hangar and the coalition base. Look for opportunities to ambush unsuspecting opponents as they race toward the hangar.
Also, if the coalition tank is active, try to take it out with rockets or IEDs before it can provide fire support (and cover) near the hangar.
Planting IEDs near the objective is also a good defensive measure when it comes to stopping coalition troops from setting the charge on the hangar doors.

Yard
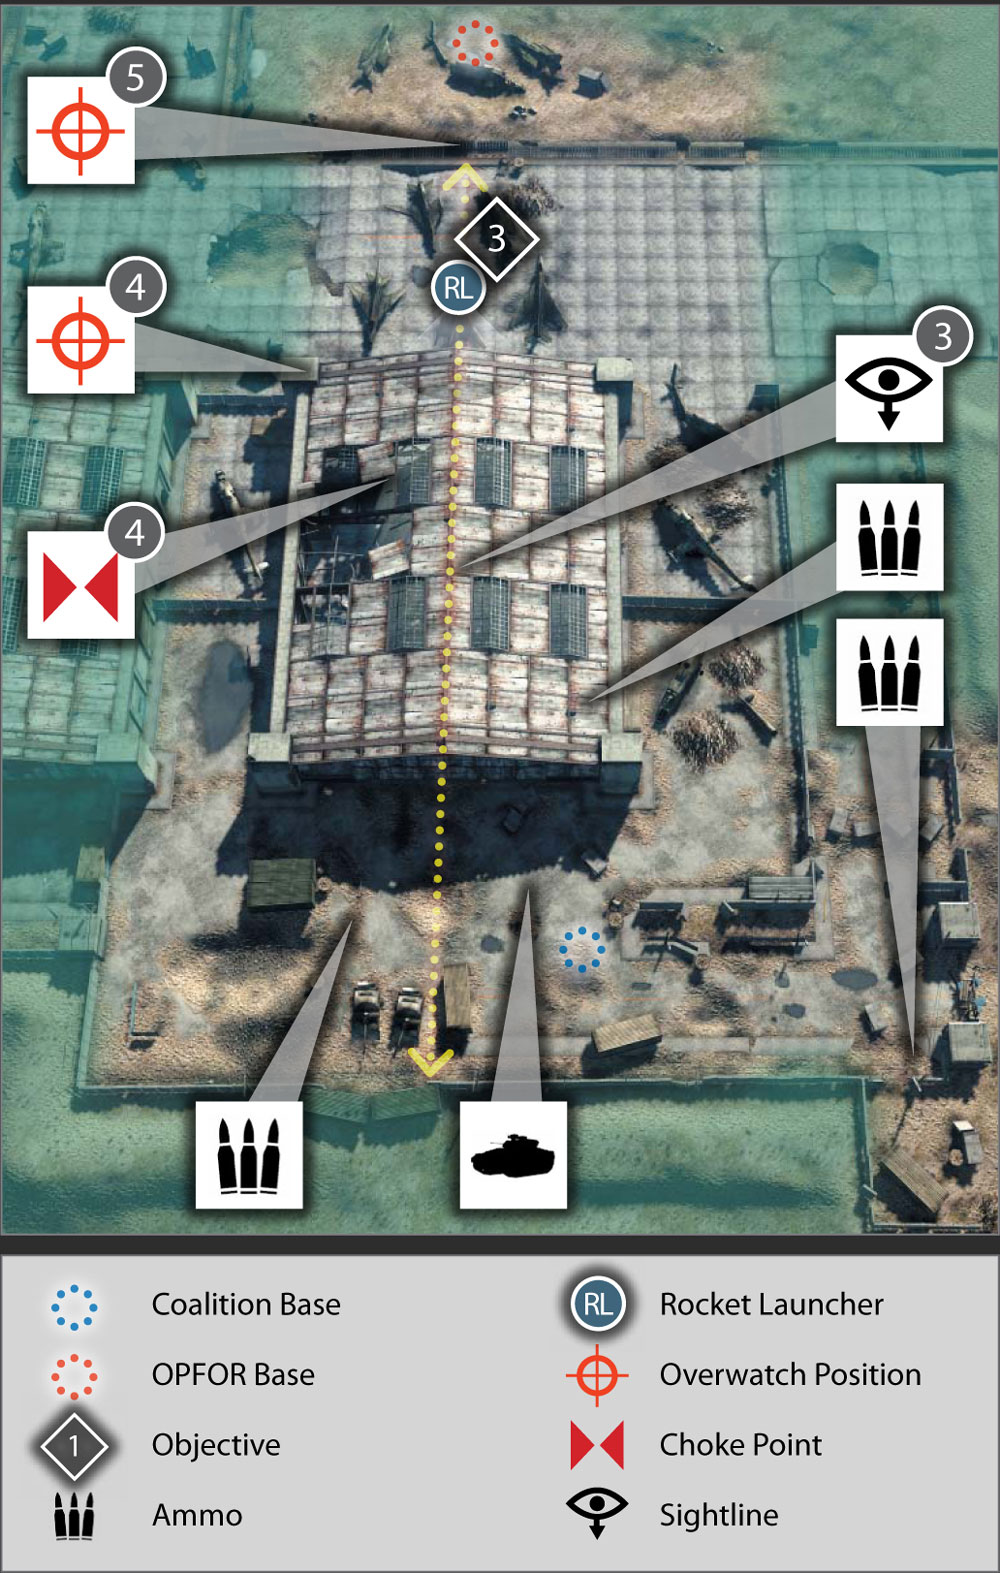
Map Features
Overwatch Positions
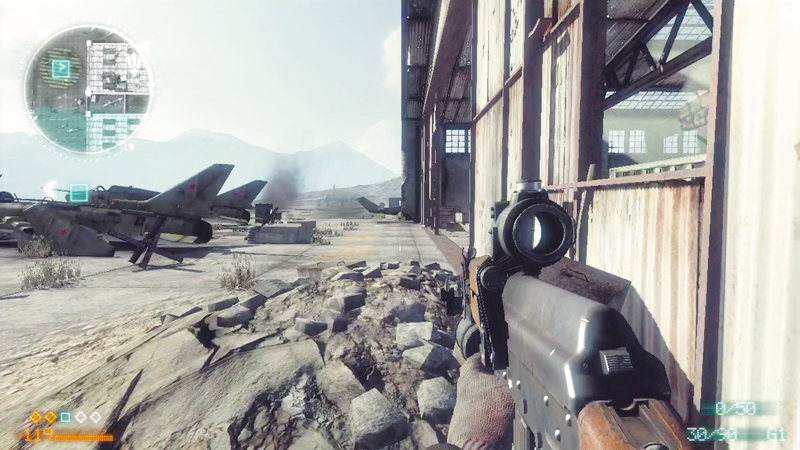

The hangar's entrance and exit are major choke points ideal for ambushes. This spot outside the hangar's exit is a great place for OPFORs to intercept coalition traffic heading for the objective area.
Simply crouch near this pile of rubble and mow down any opponents who race out of the hangar. Teammates positioned on the opposite side of the door can join the fun too, since you don't have to worry about friendly fire.
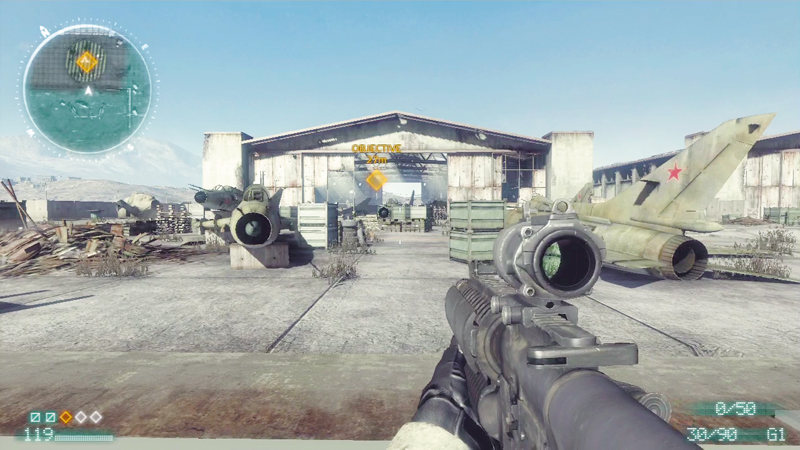

When playing as the OPFORs, take cover behind this grate and engage coalition troops gathered around the objective.
The grate doesn't offer much in the form of cover, but it does make you harder to see, especially if you're crouched.
For best results, attack with a suppressed weapon to avoid giving away your position. You can fire through the grate, but it reduces the damage dealt by your bullets.
Likewise, your opponents can shoot through the grate too, so be ready to move to more suitable cover once your location has been revealed.
Choke Points
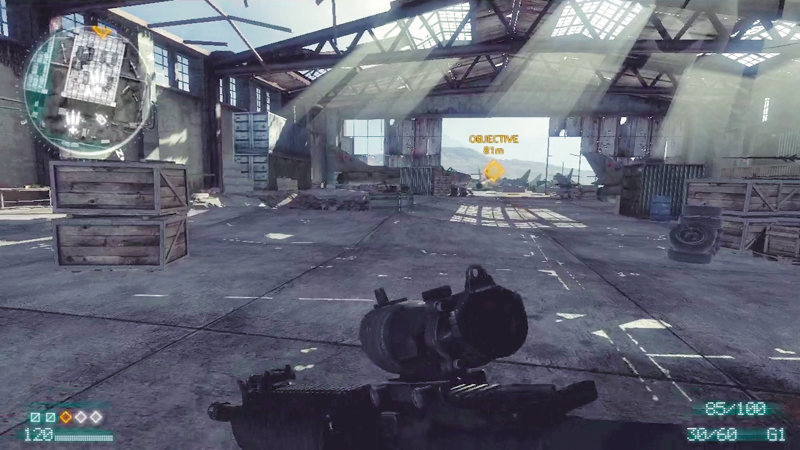

During this engagement, the coalition team must advance through the hangar to reach the next objective. There are no other routes available, making the hangar a crucial choke point.
The hangar is dark and filled with tons of cover in the form of old airplanes, barrels, crates, stacks of tires, and shipping containers.
The OPFORs can seriously hamper the coalition advance by camping in the hangar and staging ambushes.
Coalition troops should utilize smoke upon entry and work their way up the sides of the hangar where there is more cover.
Sightlines
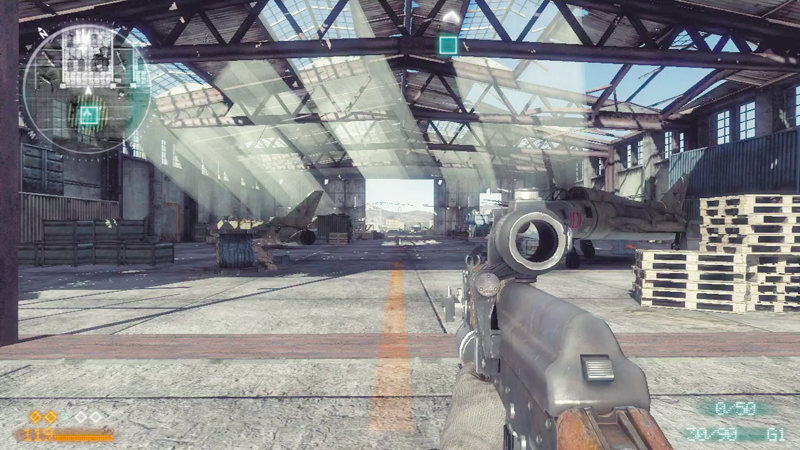

Players on both teams should avoid moving through the center of the hangar as it is a popular kill zone for snipers positioned on both sides of the map.
Coalition snipers can hit OPFORs near the objective (or rocket launcher) while OPFOR snipers can engage coalition troops near their base.
Expect these long-range sniper duels to persist throughout this engagement and make sure you're never standing motionless while in the crossfire.
Coalition Tactics
This is the toughest objective the coalition team faces in this battle because they're forced to stage a frontal assault on the OPFOR position and maintain a fixed position in the objective's capture radius while withstanding counterattacks.
As soon as the hangar doors are open, enter the hangar and quickly make a move for the objective, slipping along the sides of the structure.
The light tank can offer some welcome support during the hangar advance, but be aware of the enemy's stationary rocket launcher at the objective point.
Once at the objective, take cover among the wrecked MiG fighter jets within the capture radius.
Get as many teammates in this area as quickly as possible to secure the objective, but watch out for OPFOR counterattacks originating from their nearby base.
OPFOR Tactics
The yard is the OPFOR team's best chance at stopping the coalition team once and for all. As the coalition advances through the hangar, throw everything you have at them.
Still, make sure at least one teammate holds near the objective and mans the rocket launcher, but only when the coalition light tank makes an appearance—otherwise the player manning the rocket launcher is an easy target for enemy snipers.
The bulk of the team should take the fight into the hangar, hiding in shadowy corners and engaging the coalition attackers at close range.
If the objective icon begins to flash on the HUD or minimap, coalition troops are in the capture radius.
Instead of counterattacking directly from the base's spawn point, circle around the wrecked fighter jets and try to take your opponents by surprise.
A powerful offensive support action can also be effective at completely clearing the objective area.

Chopper Wreck
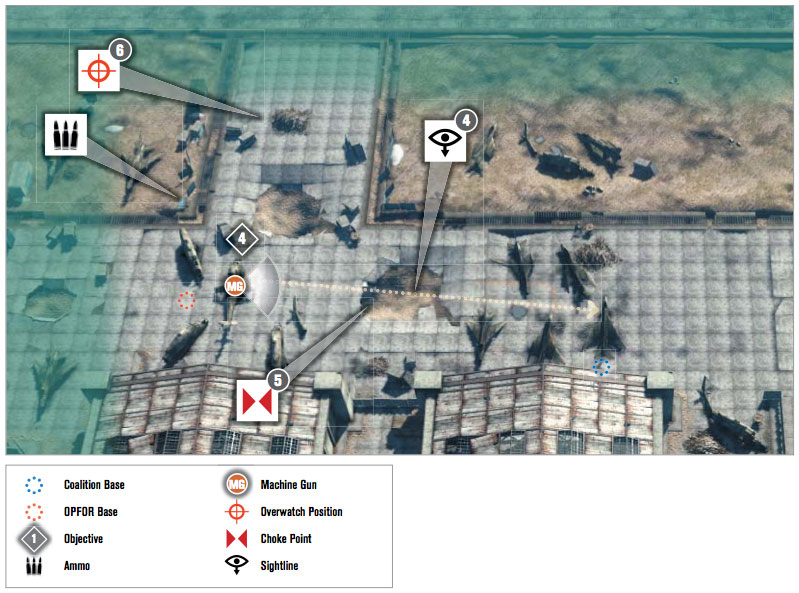
Map Features
Overwatch Positions
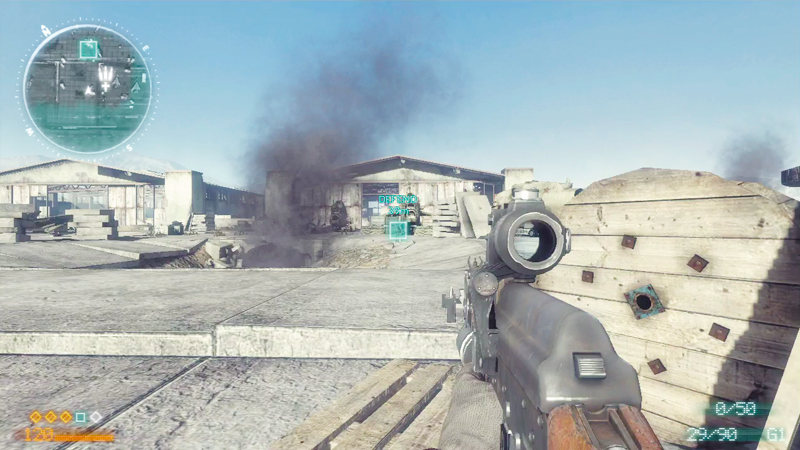

Crouch near this pile of rubble while aiming at the nose of the wrecked chopper.
This gives you the perfect vantage point of the objective, allowing you to pick off opponents that rush in to set (or disarm) a charge—you also have a clear view of the tunnel exit.
The pile of rubble offers great protection and concealment as long as you stay crouched. But be mindful of enemies creeping over the pile to knife you.
Consider equipping a suppressor to keep your position from appearing on your opponents' minimap.
Choke Points
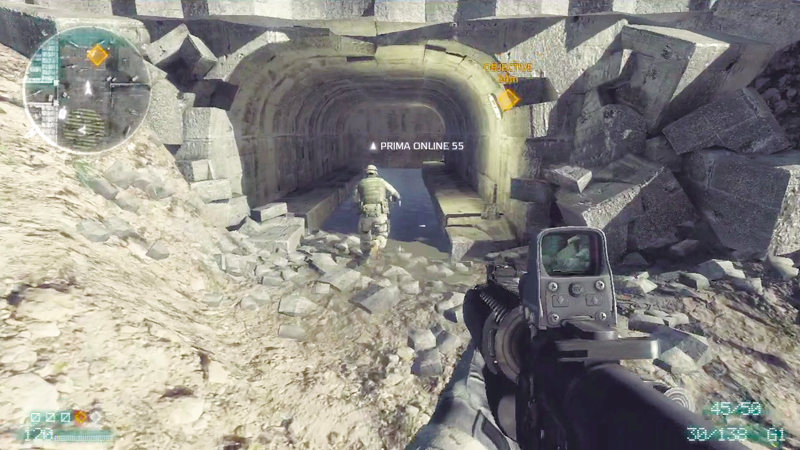

There's an L-shaped tunnel running beneath the ground in this area, offering the coalition team a less direct route to the chopper wreck.
Coalition troops often opt for this path as it's less exposed and allows them to flank the machine gun inside the chopper.
However, it's also a narrow passage ideal for OPFOR booby traps. OPFORs should line the walls of this tunnel with IEDs and camp the exit near the objective.
Direct attacks in the tunnel are equally effective, especially when armed with a shotgun or submachine gun. The blind corner at the tunnel intersection is a perfect place for defenders to camp.
Sightlines
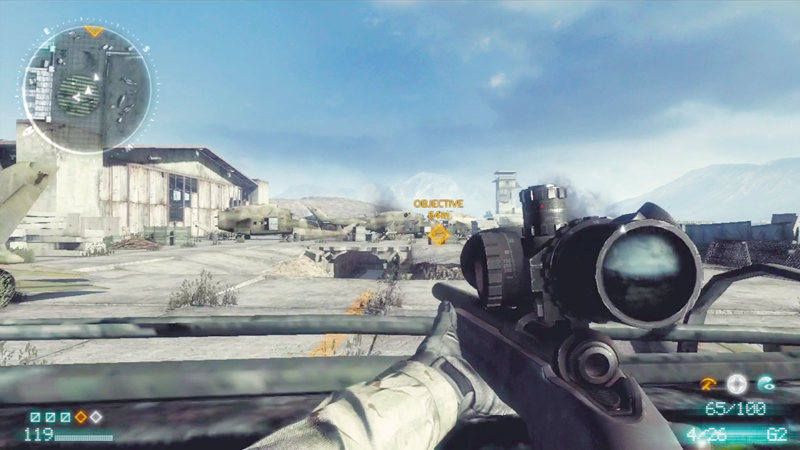

The area between the coalition base and the chopper wreck is relatively open with several long sightlines. Most notable is the OPFOR machine gun, capable of mowing down anyone dumb enough to attempt a direct attack.
Coalition snipers can easily suppress the machine gun—simply fire through the view slit on the gun's front armor to kill the gunner. Rocket attacks can eliminate the gun entirely.
Coalition Tactics
Now the coalition team must plant another charge at the wrecked chopper. Although this objective is relatively close to the coalition base, don't get lured into taking a direct approach.
There's a fixed machine gun in the chopper's cargo compartment aimed directly at the coalition base.
Take out the gun as early as possible (preferably with rocket attacks) to remove the threat. Offensive support actions are also very effective.
Still, even with the machine gun out of the picture, avoid a direct assault. Instead, circle around the left and right flanks of the chopper.
The subterranean tunnel is a quick way to reach the objective without exposing yourself to the chaos above. Once the charge is placed, form a defensive perimeter and prevent the OPFORs from disarming your explosives.
OPFOR Tactics
This isn't an easy objective to defend as the coalition can attack from multiple directions.
First of all, don't put too much faith in the machine gun positioned inside the chopper wreck as it can easily be destroyed by rockets or suppressed by coalition snipers.
Instead, fan out and cover the flanking approaches. Pay particular attention to the short tunnel system by camping the interior and the exit.
Meanwhile, use the nearby wreckage for cover while defending the objective located at the nose of the chopper.
If the coalition team is pinned, look for opportunities to counterattack, engaging them closer to their base. The more casualties you can inflict here, the greater the chance of pulling off a win.

Air Tower
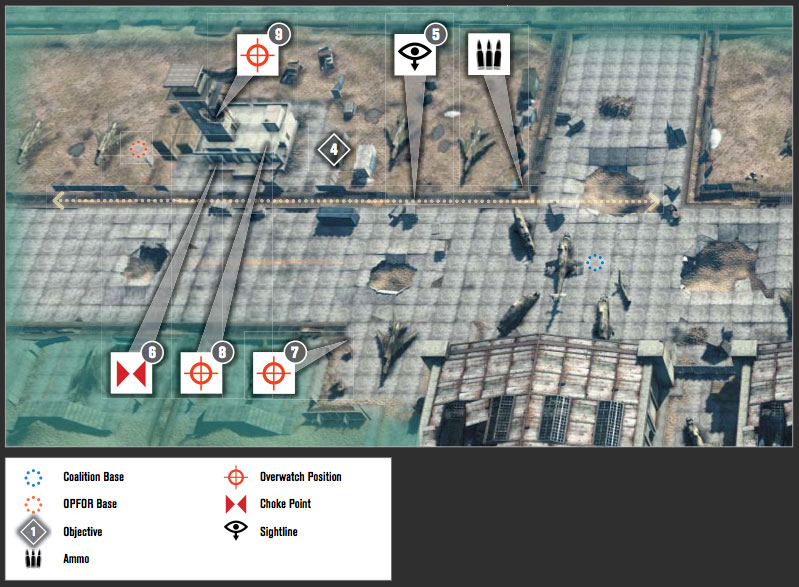
Map Features
Overwatch Positions
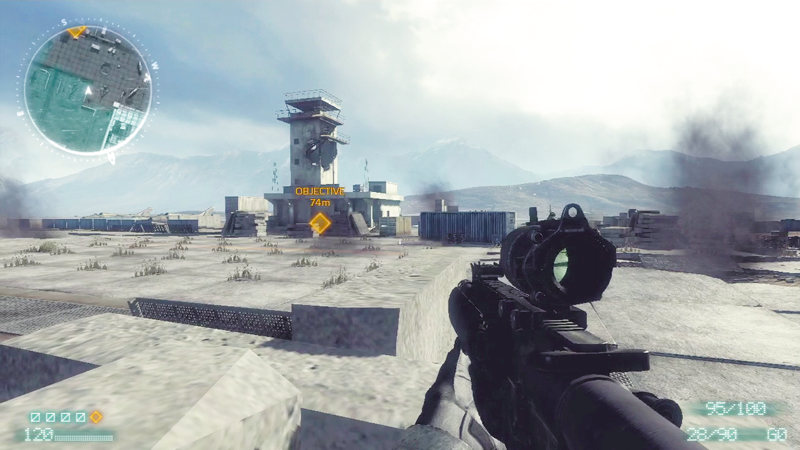

Stand on the block near the concrete wall in this corner of the tarmac to gain great firing position on the tower.
While standing, only your head is exposed. But if you take fire, simply crouch to duck behind the concrete wall.
Since your whole right side is exposed, this position benefits the coalition team the most. Consider using this as a countersniping position when engaging OPFOR marksmen in and around the tower.
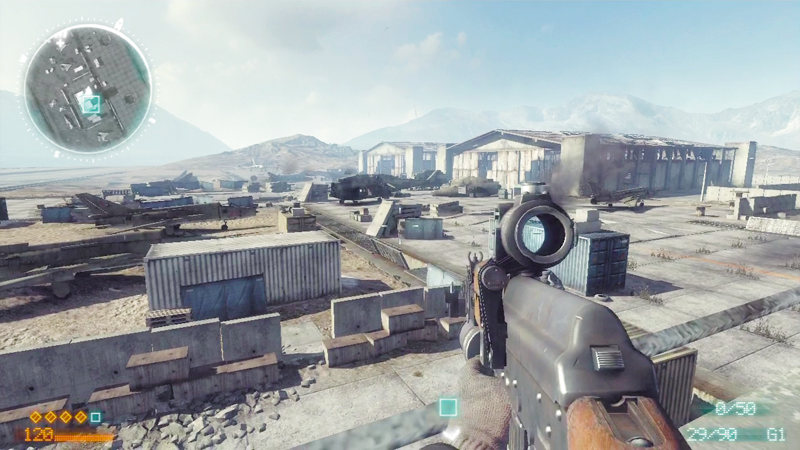

The sweeping view of the airfield offered by this low rooftop at the tower is great for OPFOR defenders looking to halt the coalition advance.
However, there is very little cover on this rooftop and you're easily silhouetted against the sky for opponents on the ground. So don't linger in one spot for long or else you're likely to catch a sniper's bullet in your teeth.
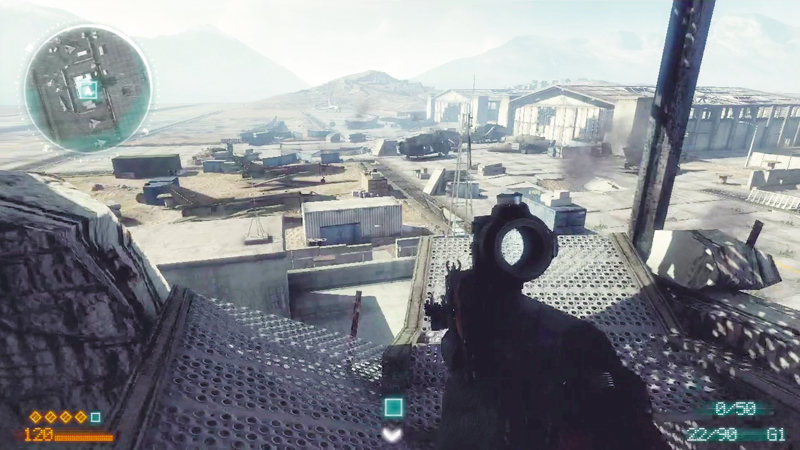

A damaged staircase prevents you from climbing to the top of the tower. But this gaping hole in the stairwell's wall provides the map's highest vantage point, ideal for OPFOR snipers.
The dark, shadowy stairwell offers great concealment but there's virtually no cover, so stay back way from the damaged wall in an effort to remain hidden within the tower.
The high elevation makes it easy to spot coalition flanking maneuvers snaking through the wrecked planes and other obstacles.
As the highest point on the map, this is a very predicable sniper position and is likely to draw lots of fire. Don't make a habit of camping here very long and never crowd the tower with more than two players at a time.
Choke Points
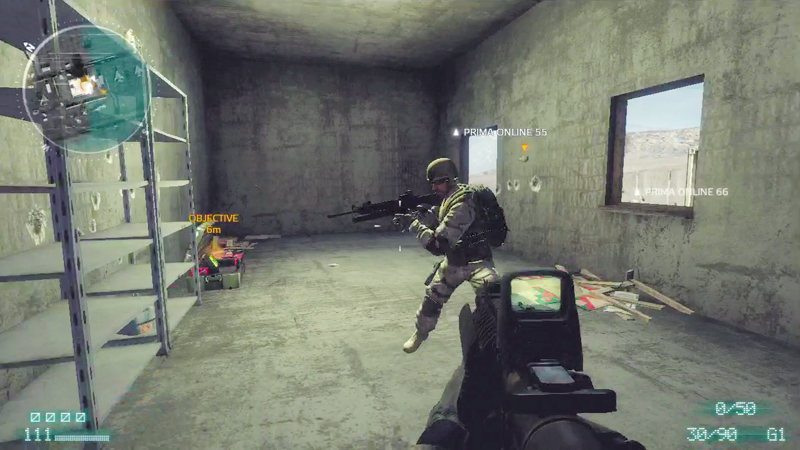

Some the battle's fiercest fighting occurs in the room containing the final objective. This is located on the ground floor of the tower, not far from the OPFOR base. There are two doorways here.
The exterior doorway, at the back of the building, is often used by OPFORs while the interior doorway leads to a hallway that is often frequented by coalition troops.
When guarding this room, it's a good idea to cover both entry points with a buddy as it's impossible to tell where an attack is coming from.
Watch out for grenades coming in through the doors and windows and take evasive action as necessary.
Sightlines
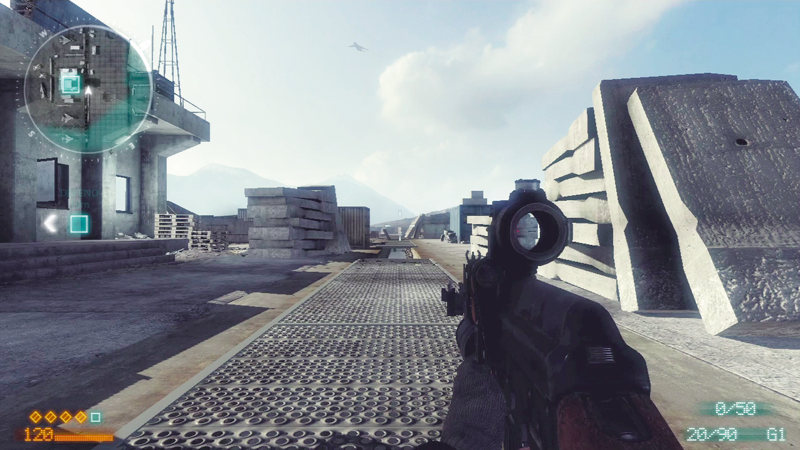

The partially covered drainage trench running between the tower and tarmac is a very long sightline exploited by snipers on both teams.
While you can duck inside the trench to avoid incoming fire, as soon as you stand up and try to get out to the trench, you're completely exposed.
For this reason it's best to avoid this area completely. Coalition snipers have the best cover from their end of the sightline, but OPFOR snipers positioned near the tower can also score some quick kills before seeking cover.
Coalition Tactics
For the final objective, the coalition team must infiltrate the ground floor of the tower and download some data before calling in a JDAM strike on the structure.
Expect stiff opposition from the OPFORs as they take up elevated positions in the tower.
A few friendly snipers are essential for suppressing these threats, but the majority of the team should make an aggressive push toward the tower using the nearby wrecked planes for cover.
Once you've gained a foothold on the tower's interior, spread out among the rooms to avoid getting wiped out by OPFOR booby traps near the objective.
Continually spawn in the tower until you can download the data at the objective point then defend the area until you've achieved a victory.
OPFOR Tactics
This is the OPFOR team's last stand, so it's important to take a diverse approach to defending the objective.
While the tower's elevated positions make sniping tempting, your team is better off crowding around the objective on the tower's first floor—cover all the building's entry points.
Once the tower is secure, look for opportunities to ambush the coalition team among the wrecked planes and drainage trench outside.
The opposing team often moves in a straight line from their base toward the tower, so look for spots where you can flank their advance.
By applying some offensive pressure you can often catch the attackers off-guard, potentially buying your team enough time to secure a tight win.