
Medal of Honor Guide Multiplayer Multiplayer
Kabul City Ruins
Pillars of smoke rise high from the ruins in the ancient city of Kabul. On the outskirts, coalition soldiers try to rid the area of OPFOR activity.
Warriors on both sides dart between piles of rubble and burning car wrecks as rooftop snipers take pot shots at anyone daring to move in the open.
Sector Control and Team Assault
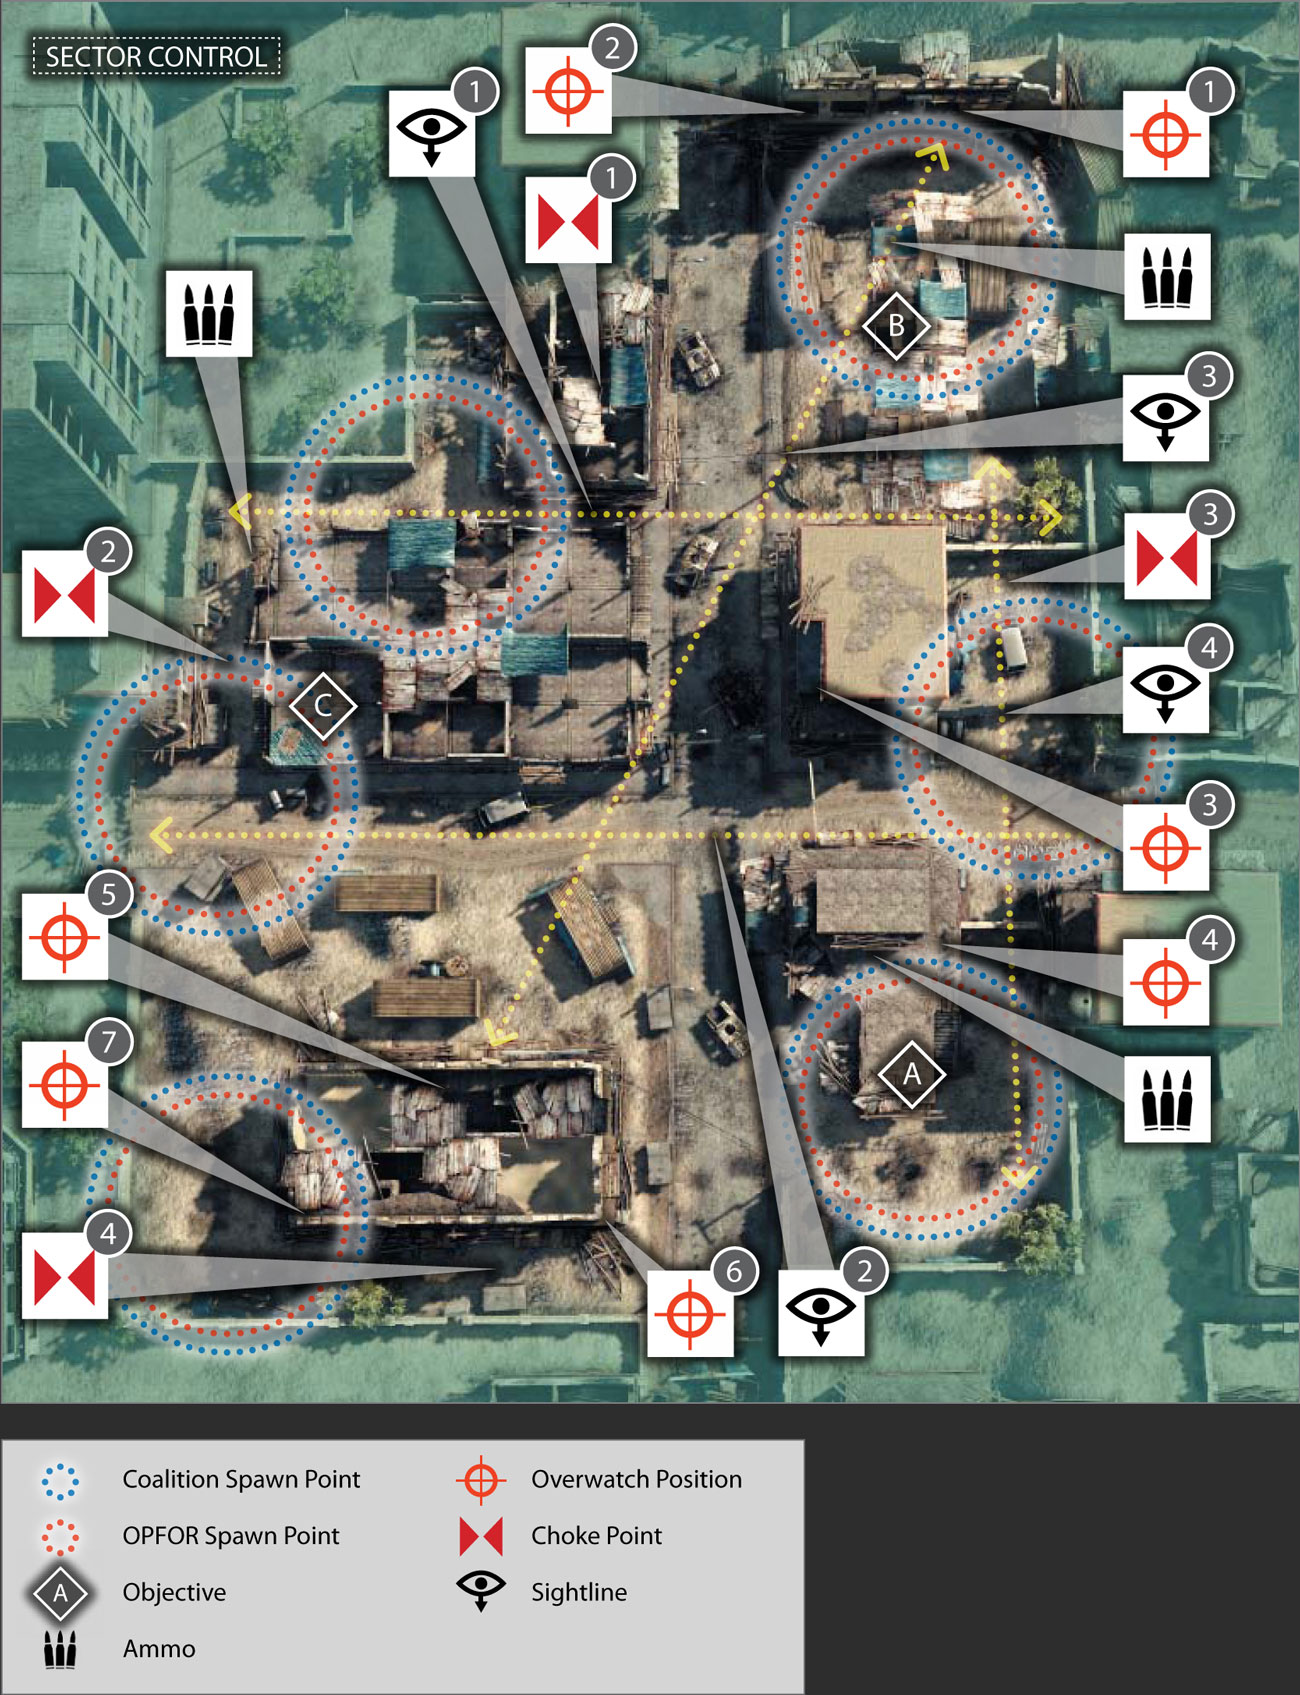
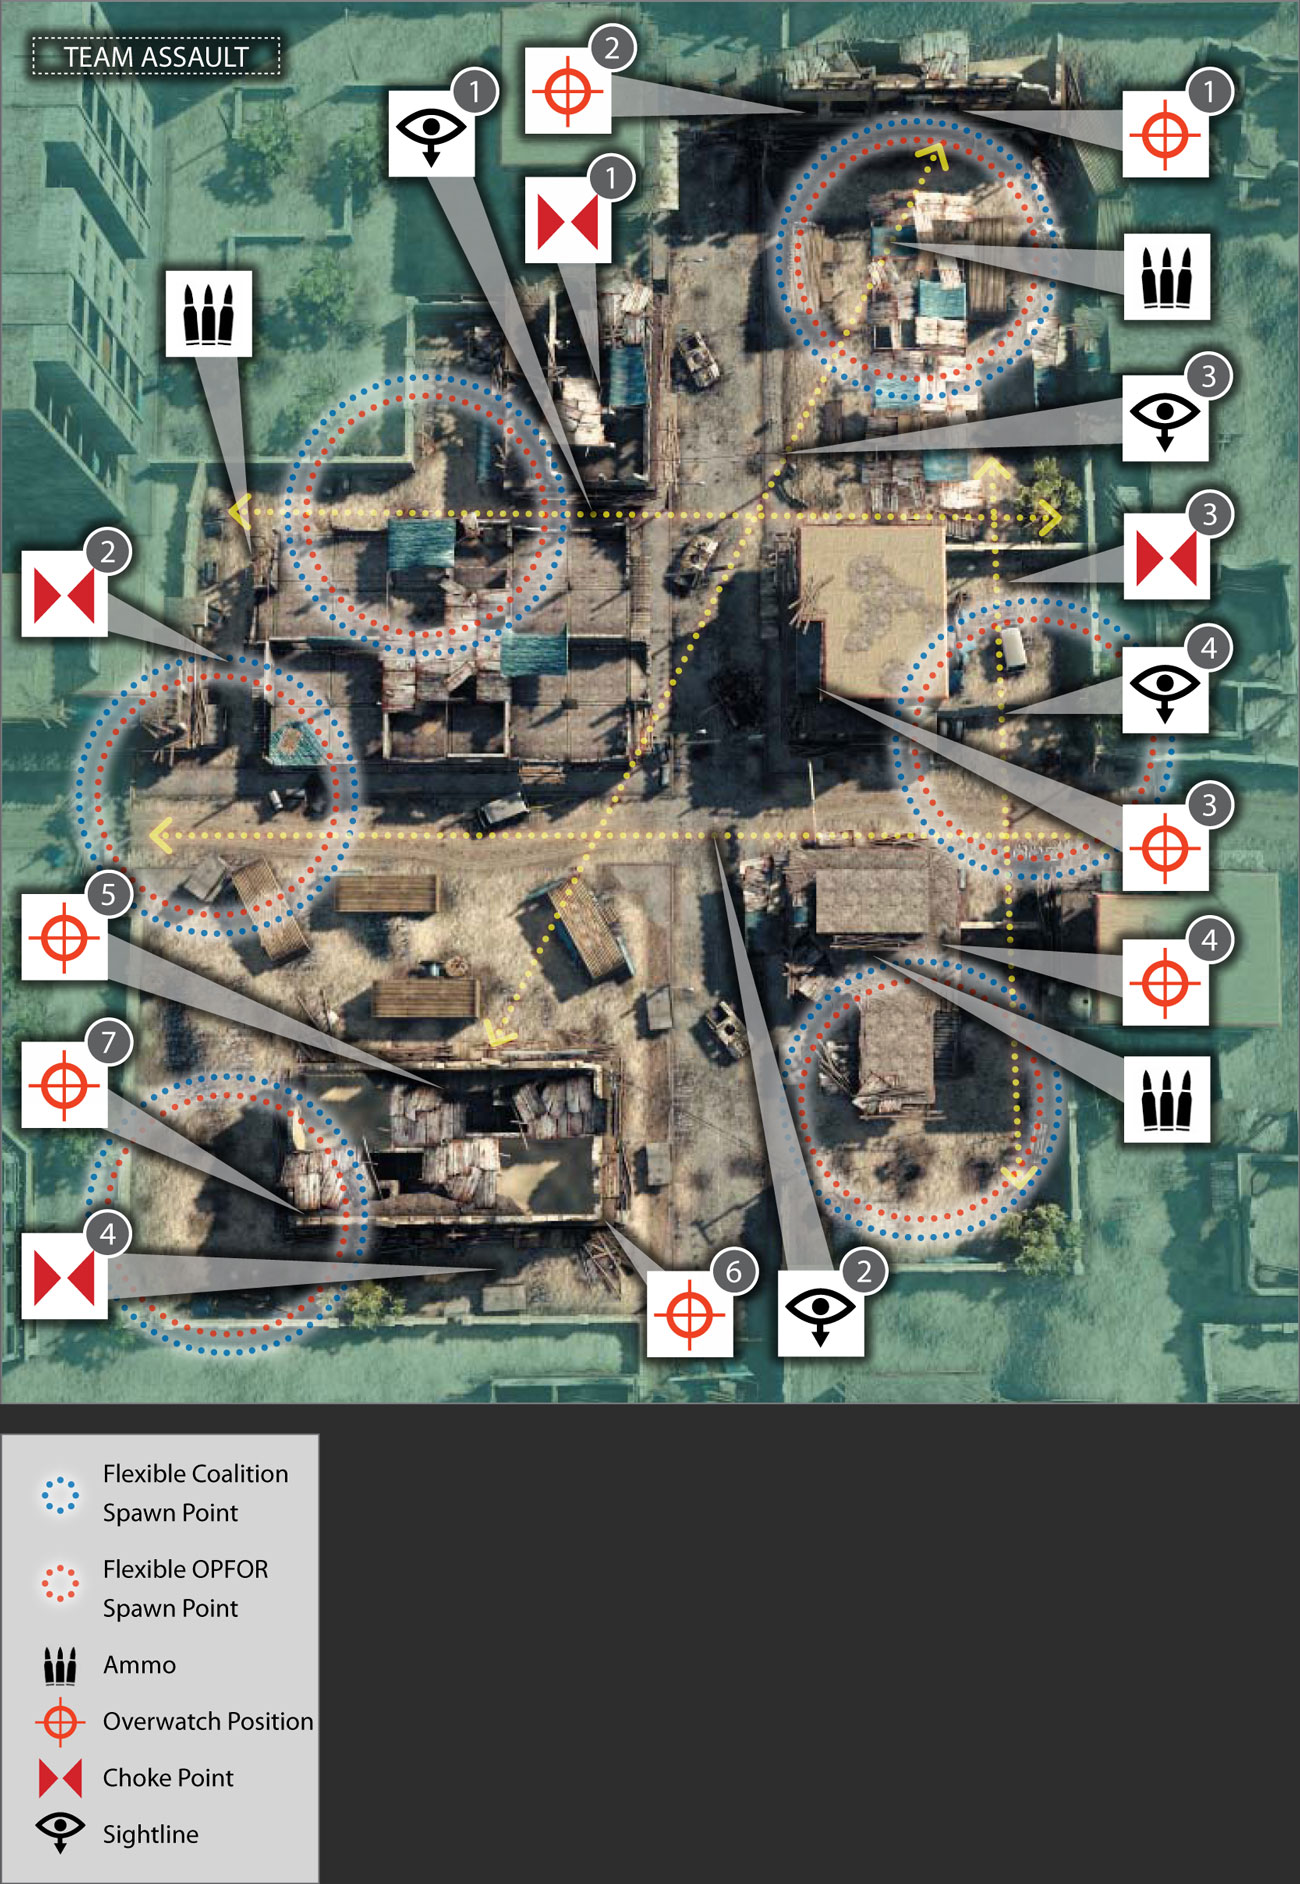
Map Features
Overwatch Positions
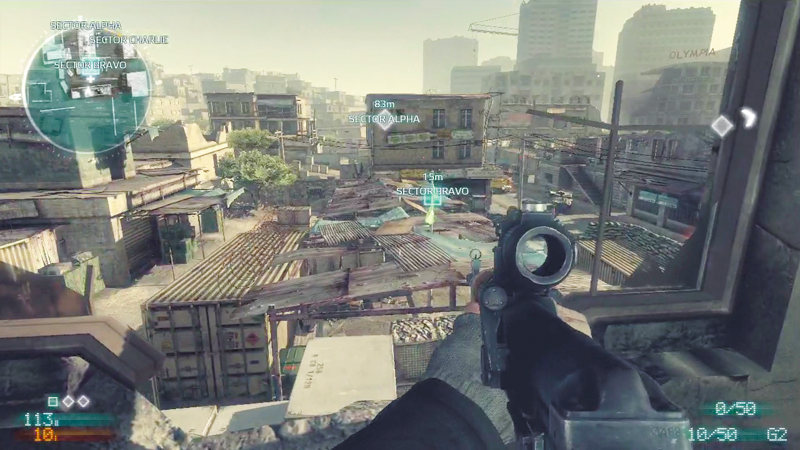

Sector Control: This second-story window near Sector Bravo is a popular but somewhat obvious sniper spot. From here you can cover the flag and narrow alley at choke point 3.
Step back from the window for better concealment and be ready to side step behind a wall (or back down the stairwell) if you take heavy fire.
When assuming a position here, make sure teammates are nearby to watch your back, otherwise knife-wielding enemies can easily sneak up the stairs and surprise you from behind.
Counter-snipers in the building at overwatch position 5 also pose a serious threat.
Team Assault: During these chaotic matches, never hold this position alone. At the very least, check your minimap to ensure teammates are nearby.
If you don't see any friendly units, pick up camp and move out. It really takes two players to secure this position—one to snipe from the window and one to cover the stairwell.
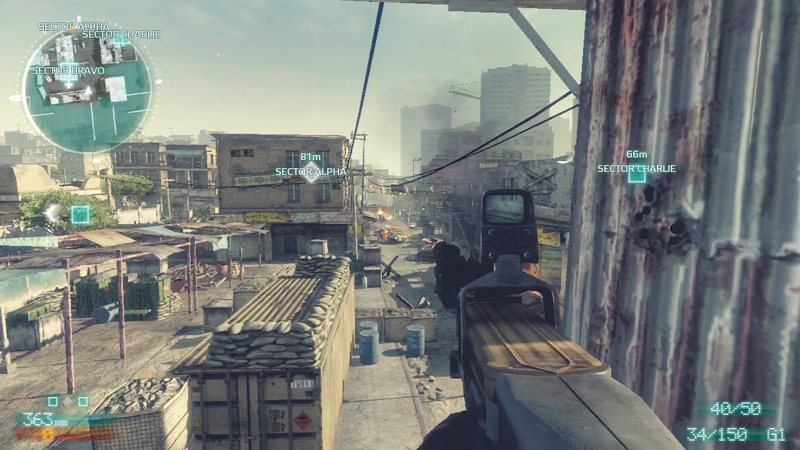

Sector Control: Step out of the window at overwatch position 1 and onto this corner ledge for a great view of the street. This street is an obvious kill zone and as such does not see much foot traffic.
However, enemies may wander down the street bounding from one wrecked vehicle to the next. This spot puts you in a great location to pick off any hostiles brave (or dumb) enough to charge down this street.
However, crouching on this ledge gives you no concealment or cover. If you're spotted, quickly drop to the ground and find a place to hide before attempting to return fire.
Team Assault: This is a particularly dangerous position due to its complete lack of cover.
However, if your team has the area around the marketplace locked down, this can be a very advantageous sniper position with an unobstructed view stretching to the opposite side of the map.
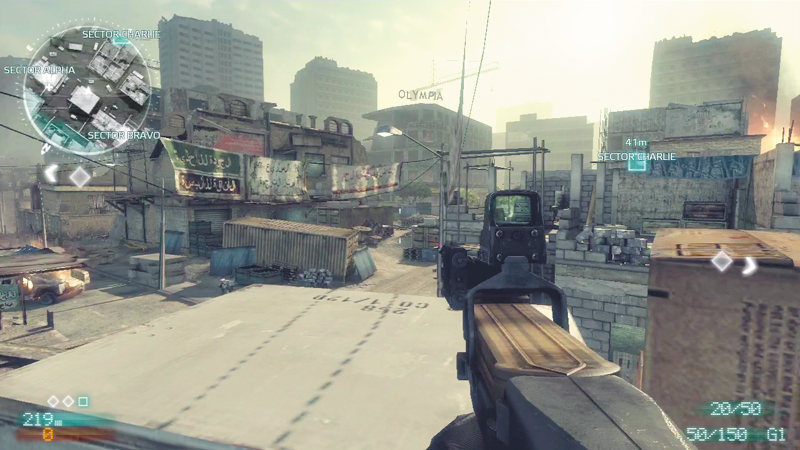

Sector Control: Climb the staircase in the marketplace between Sector Bravo and choke point 3 to reach this upper-level walkway.
The shaded balcony and pillars offer excellent concealment when firing down on enemies rushing through the intersection as well as the rooftop where Sector Alpha is situated.
This is also a good spot to pick off enemy units occupying the second floor of the unfinished building across the street. For best results, equip a suppressor to eliminate muzzle flash and reduce the report of your weapon.
There aren't too many long sightlines available from this walkway, so be prepared to engage enemies at close to intermediate ranges.
Team Assault: This is a popular spot for engaging traffic at the intersection as well as in front of the building near overwatch position 5. Use the shadows for concealment and the crates and concrete pillars for cover.
But don't hide behind the rug hanging over the balcony—it won't block bullets.
However, keep an eye on the minimap to monitor the positions of your teammates.
If you have no teammates in the marketplace, there's a good chance an opponent can climb the same staircase you used to get up here and knife you from behind.
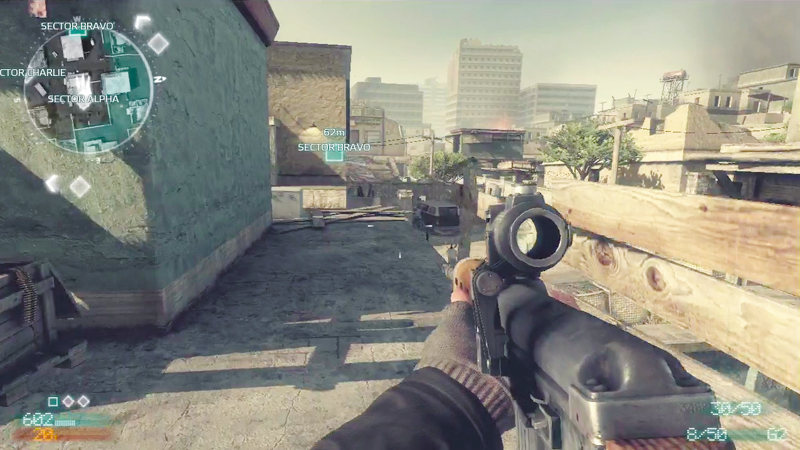

Sector Control: This rooftop perch near the ammo crate at Sector Alpha is ideal for covering the alley at choke point 3. This spot also offers a clear view into the second floor window at overwatch position 1.
Unfortunately the rooftop here is completely exposed, so don't make a habit of camping here long. Instead, step into position, scan for targets, then move away.
If you're not playing as a sniper, this is also a good spot from which to launch grenades and rockets at incoming troops advancing through the narrow alley below.
Team Assault: When engaging targets at choke point 3 or overwatch position 1, crouch behind the ammo crate and slowly step out to the right to peek around the corner.
This prevents you from exposing your entire body, making you a tougher target to see and hit.
However, don't get tunnel vision peering down this alley. The situation is always fluid in this game mode with enemies potentially swarming all around you. So if you don't see any teammates nearby, it's time to move on.
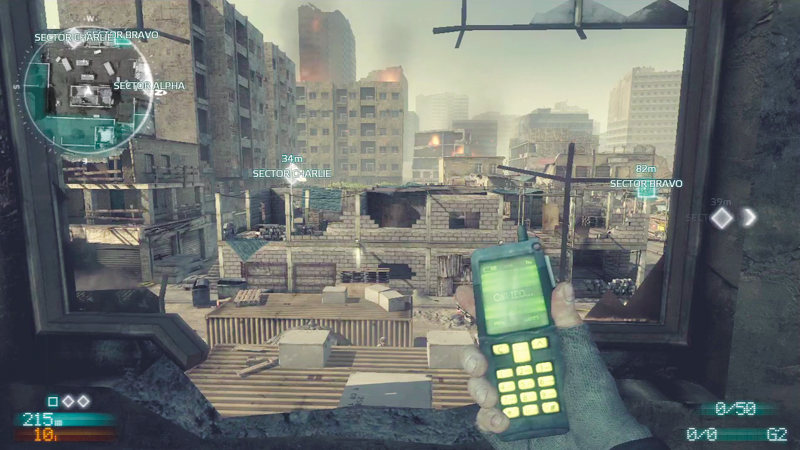

Sector Control: This upper-story window is much like the one at overwatch position 1, but on the opposite side of the map. So always watch for enemy snipers in the opposing building before getting too comfortable up here.
This is the perfect spot for defending Sector Charlie, located on the second floor in the unfinished building across the street.
Defending this flag can be as simple as sniping opponents that move into view, or you can get creative by planting explosives around the flag and triggering them once your enemies attempt to capture it.
Team Assault: Just like overwatch position 1, it's best to hold this spot with a buddy.
If you become too fixated on sniping through this window, it's only a matter of time before an opponent sneaks up the stairwell and knifes you in the back.
If you want this to be your sniper post, enlist a friend to provide rear security or take turns sniping and defending this location.
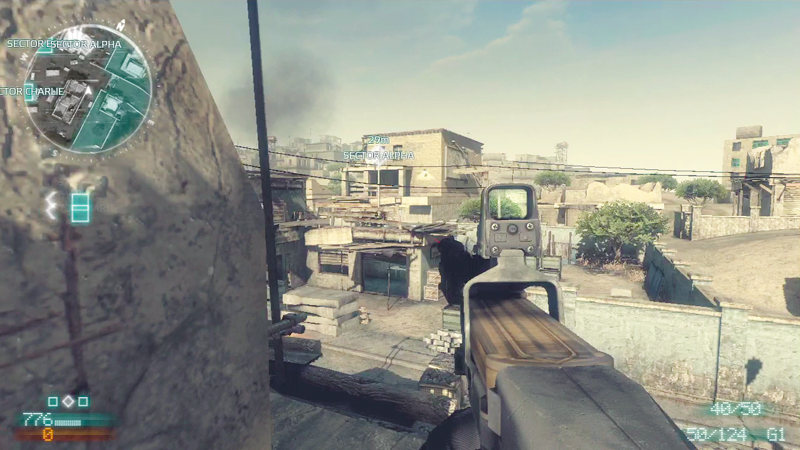

Sector Control: The damaged awning on the back side of the building serves as a ramp that you can climb to reach this narrow concrete ledge, ringing the entire structure.
This is a great spot for defending Sector Alpha from a distance. There's minimal cover around Alpha, allowing you to hit anyone positioned near the flag.
But there's not much cover on this little ledge either. You're particularly vulnerable to enemies moving through the alley below at choke point 4. Make sure a few teammates are nearby before getting too comfortable here.
Team Assault: In addition to covering the rooftop across the street, you can also peek around the building's corner to engage opponents in the intersection or as far away as the opposite side of the map at overwatch position 2.
Still, this is a risky place to remain for very long, so make sure your teammates have your back.
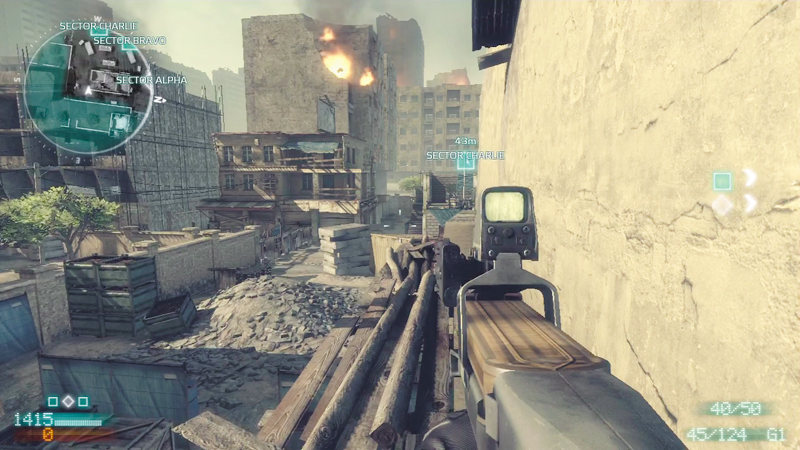

Sector Control: This ledge is easiest to access via the ramp at overwatch position 6. Follow the ledge to this corner and aim toward Sector Charlie.
Not only is this a great cover point for Charlie, but you can also engage enemy traffic moving through the alley at choke point 2.
But just like overwatch position 6, you're vulnerable to enemies passing through the alley behind this building.
Team Assault: During these frantic matches, traffic is always heavy in the alley at choke point 2, making this one of the best spots to counter enemy movement through this bottleneck.
Assault, battle, or sniper rifles are all very effective at picking off targets at this range. Of course, you're quite exposed up here, so don't expect to hold this spot indefinitely. Score a few easy kills and move on.
Choke Points
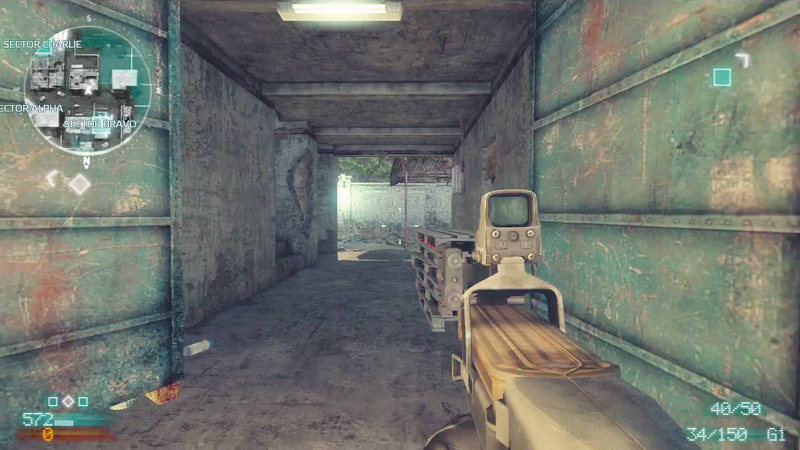

Sector Control: Always be ready to fire when moving through this narrow hall near Sector Bravo. This is a high traffic area often frequented by players moving between Sectors Charlie and Bravo.
Avoid sprinting, otherwise you won't have enough time to bring your weapon up to fire should you encounter an enemy at close range. This can also be a very effective ambush point, so watch for enemies hiding on the stairs here.
Team Assault: As in Sector Control, this is also a very high-traffic area during Team Assault matches. Shotguns and submachine guns rule in these tight quarters, so if you're carrying something else, consider finding another route.
But even if you survive moving through this hall, there may be more opponents camped near the exits. Watch your corners when exiting.
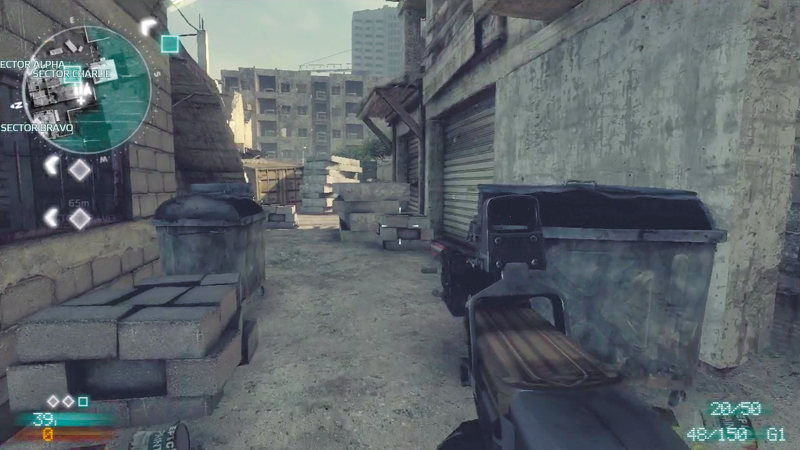

Sector Control: This alley near Sector Charlie is another notorious kill zone. The stairs in this alley are the quickest way to access the flag at Charlie, but this area is often watched by opponents at overwatch positions 5 and 7.
Always deploy smoke when moving through this area, and especially when attempting to make a move on Sector Charlie via the exterior stairs. The building's interior staircase is a much safer path to the building's second floor.
Team Assault: Players moving through this alley are at a constant risk of both long- and short-range attacks. The alley itself offers some decent hiding spots, particularly behind the dumpsters.
Watch out for enemies camped here, or take up these sneaky positions yourself.
But the biggest threat in this alley comes from opponents at overwatch position 7. When entering this alley, always peek toward this position to make sure the path is clear before exposing your entire body.
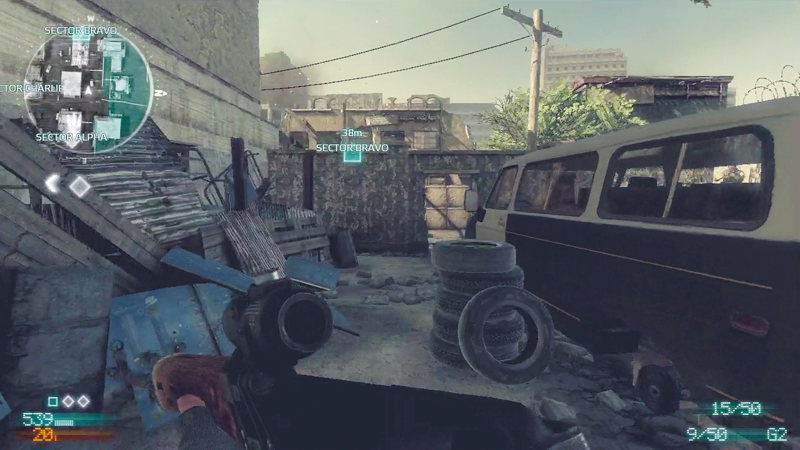

Sector Control: This alley between Sectors Alpha and Bravo is an absolute kill zone made even more dangerous by the narrow gate-like passage leading to and from the marketplace.
If you must move through here, do so slowly and while crouched.
The van in the alley offers decent protection, so stay behind it to avoid giving snipers at either end of the alley an easy kill. Dropping a smoke grenade can greatly increase your chances of getting out of here alive.
Team Assault: While moving through the narrow passage by the van is always dangerous, it can also benefit a bloodthirsty camper. There are plenty of hiding spots in this alley, ideal for staging ambushes.
Hide behind the van or one of the dumpsters and blast the cross-traffic with a shotgun or submachine gun. Explosives are also very effective in this confined space—just be careful not to blow yourself up.
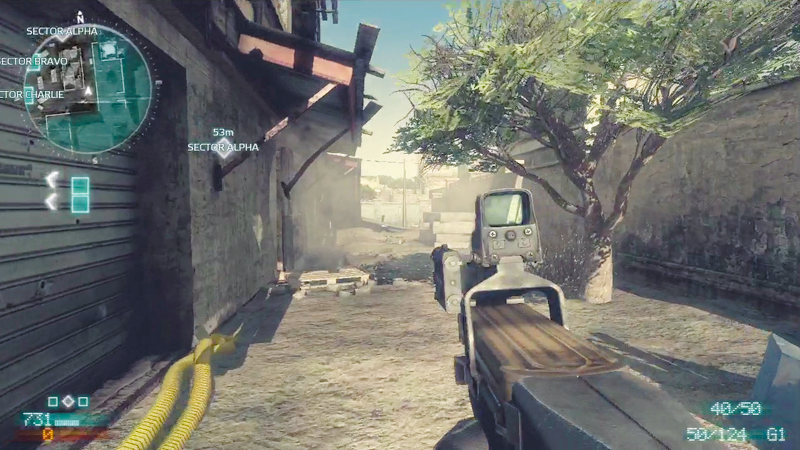

Sector Control: The alley behind this building is another high-traffic area, especially for players attempting a more indirect approach between Sectors Alpha and Charlie.
While it is one of the wider alleys on this map, enemies positioned on the ledges at overwatch positions 6 and 7 always pose a threat, not to mention enemy cross-traffic.
For this reason, never sprint here. Keep your weapon raised and ready to fire.
Team Assault: As one of the perimeter pathways, this alley sees a lot of traffic during this game mode. Although cover is minimal, it is available, especially near the corner spawn point.
If you're looking to intercept traffic moving through here, you're better off doing it from the ground where you have more cover and concealment. The nearby building's elevated concrete ledge offers neither.
Sightlines
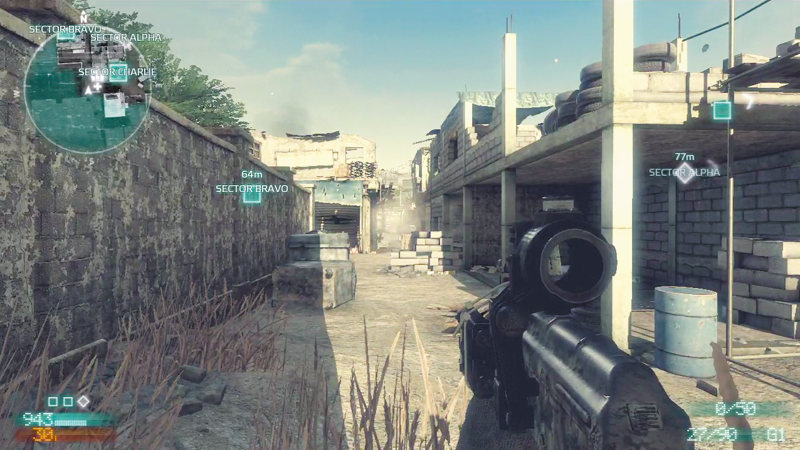

Sector Control: This sightline spans the width of the entire map, perfect for engaging opponents moving between Sectors Bravo and Charlie.
Players positioned near the marketplace, by Bravo, can aim down through the nearby stairs and hit opponents as far away as choke point 2.
Meanwhile, players positioned in the alley near Sector Charlie can kill enemies passing through the narrow passage at choke point 3. Such long-range shots are easiest with a battle rifle or sniper rifle.
Team Assault: Since there are no defined defensive locations in this game mode, it's never wise to camp at either end of this sightline.
However, when passing through, take a moment to scan down this path and search for targets of opportunity. There's always plenty of traffic in this area, so you're likely to find something to shoot.
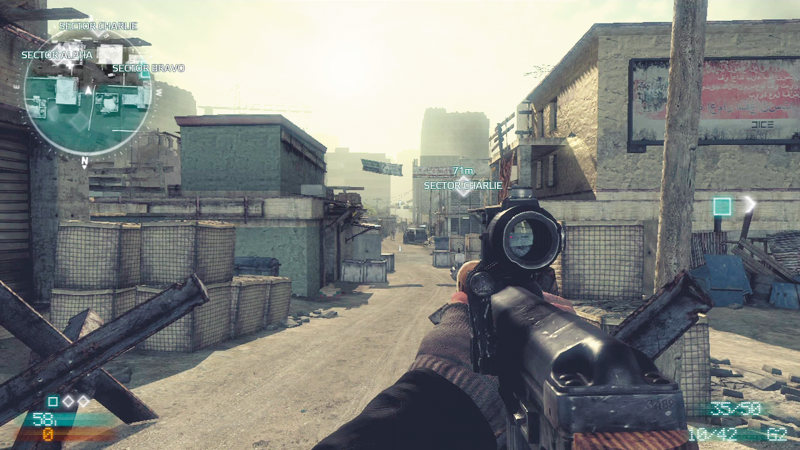

Sector Control: This is another long sightline, perfect for engaging the cross-traffic between Sector Alpha and the two other flags. At some point, every player must cross this street.
So why not camp at either end of the sightline? Traffic rarely flows down this street, so you'll need to hit your targets as they dash across.
This doesn't give you much time to aim and fire before your target moves out of view. That's why sniper rifles are so effective here. All it takes is one hit to bring down any sprinting target.
But if your prefer a weapon with a higher rate of fire, then go with an assault rifle.
Team Assault: This is one of the most effective and under-utilized sightlines in this game mode. Granted, it does take a certain level of skill to score a kill from these positions.
But once you have the proper optics and firepower, this can be a very lucrative camping spot.
It's best to hold near the map boundary by choke point 3, taking cover behind the dumpster and steel obstacles. The opposite end of the sightline offers much less cover for campers, so don't make a habit of loitering there.
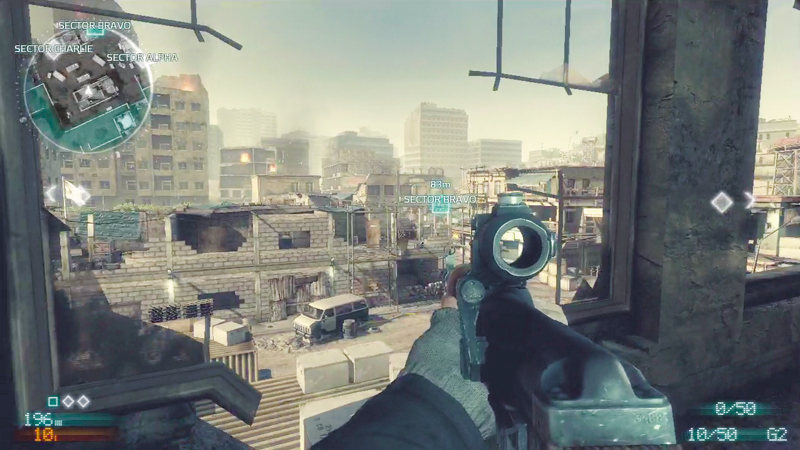

Sector Control: The areas between overwatch positions 1 and 5 are almost constantly watched by snipers. For this reason, it's best to avoid the streets as snipers at either end of this elevated sightline can easily pick off targets here.
Furthermore, snipers at these locations can also cover Sectors Bravo and Charlie.
Always be mindful of these two second-story windows on opposite sides of the map. If a team can occupy both of these spots, they can control a large portion of the map while effectively locking down Bravo and Charlie.
Team Assault: If you're not occupying one of the windows at overwatch positions 1 or 5, at least be aware of what areas snipers in these windows can see.
As a rule, it's safest to stay in the alleys and buildings where the sightlines are short.
If you must move out into the open, do so while sprinting. Snipers in either window can also be suppressed (or outright killed) by firing rockets or grenades into these small elevated rooms.
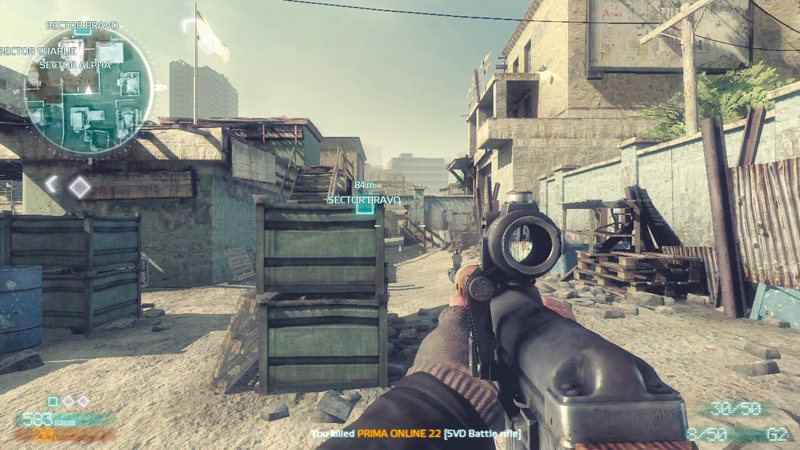

Sector Control: The alley at choke point 3 offers another long sightline useful for engaging traffic moving between Sectors Alpha and Bravo. Players positioned at either end of this sightline can score some long-range kills.
But this line most benefits players positioned near Sector Alpha. Crouch near one of the crates and aim past the van and through the narrow passage at choke point 3 to hit targets near the marketplace by Sector Bravo.
Team Assault: Traffic in this area is equally heavy during Team Assault matches as players from both teams rush along this perimeter pathway. Still, regardless of which side of this line you're holding, your flanks are completely exposed.
Don't get distracted by constantly peering through your scope and only take up these positions if you have teammates around to serve as a defensive buffer.
If you're all alone, sighting down this line can leave you open to embarrassing melee kills.
Sector Control: Tactics
This is a very large map, so it's difficult to lock down all the flags. Therefore, it's best to capture and hold two, so set your sights on Sectors Alpha and Charlie.
These two flags are closest to each other, allowing your team's defensive efforts to overlap. When defending these positions, the building at overwatch position 5 is vital.
From this building and its ledges your team can cover both flags from long range. Supplement your long-range defenses by positioning skirmishers near the flags to intercept attackers at close range.
If one of the flags is captured, quickly recapture it to maintain overall supremacy. If your team manages to hold Alpha and Charlie for most of the match, you have a very good chance of pulling off a win.
Team Assault: Tactics
On a map this large, it's difficult to keep your team together as one cohesive unit unless you identify a suitable rally point. Consider setting up a location for your team to defend.
The buildings at overwatch positions 1 and 5 are ideal locations for such a rally point. Concentrating your team at either of these locations makes them virtually untouchable.
Study the position of your teammates on the minimap and make sure all approaching angles are covered.
If the opposing team isn't expecting you to be holding a fixed position, the balance of power can quickly swing in your team's favor.
At the very least, a strong defensive action early in a match can give your team the score boost they need to secure a victory.
Objective Raid
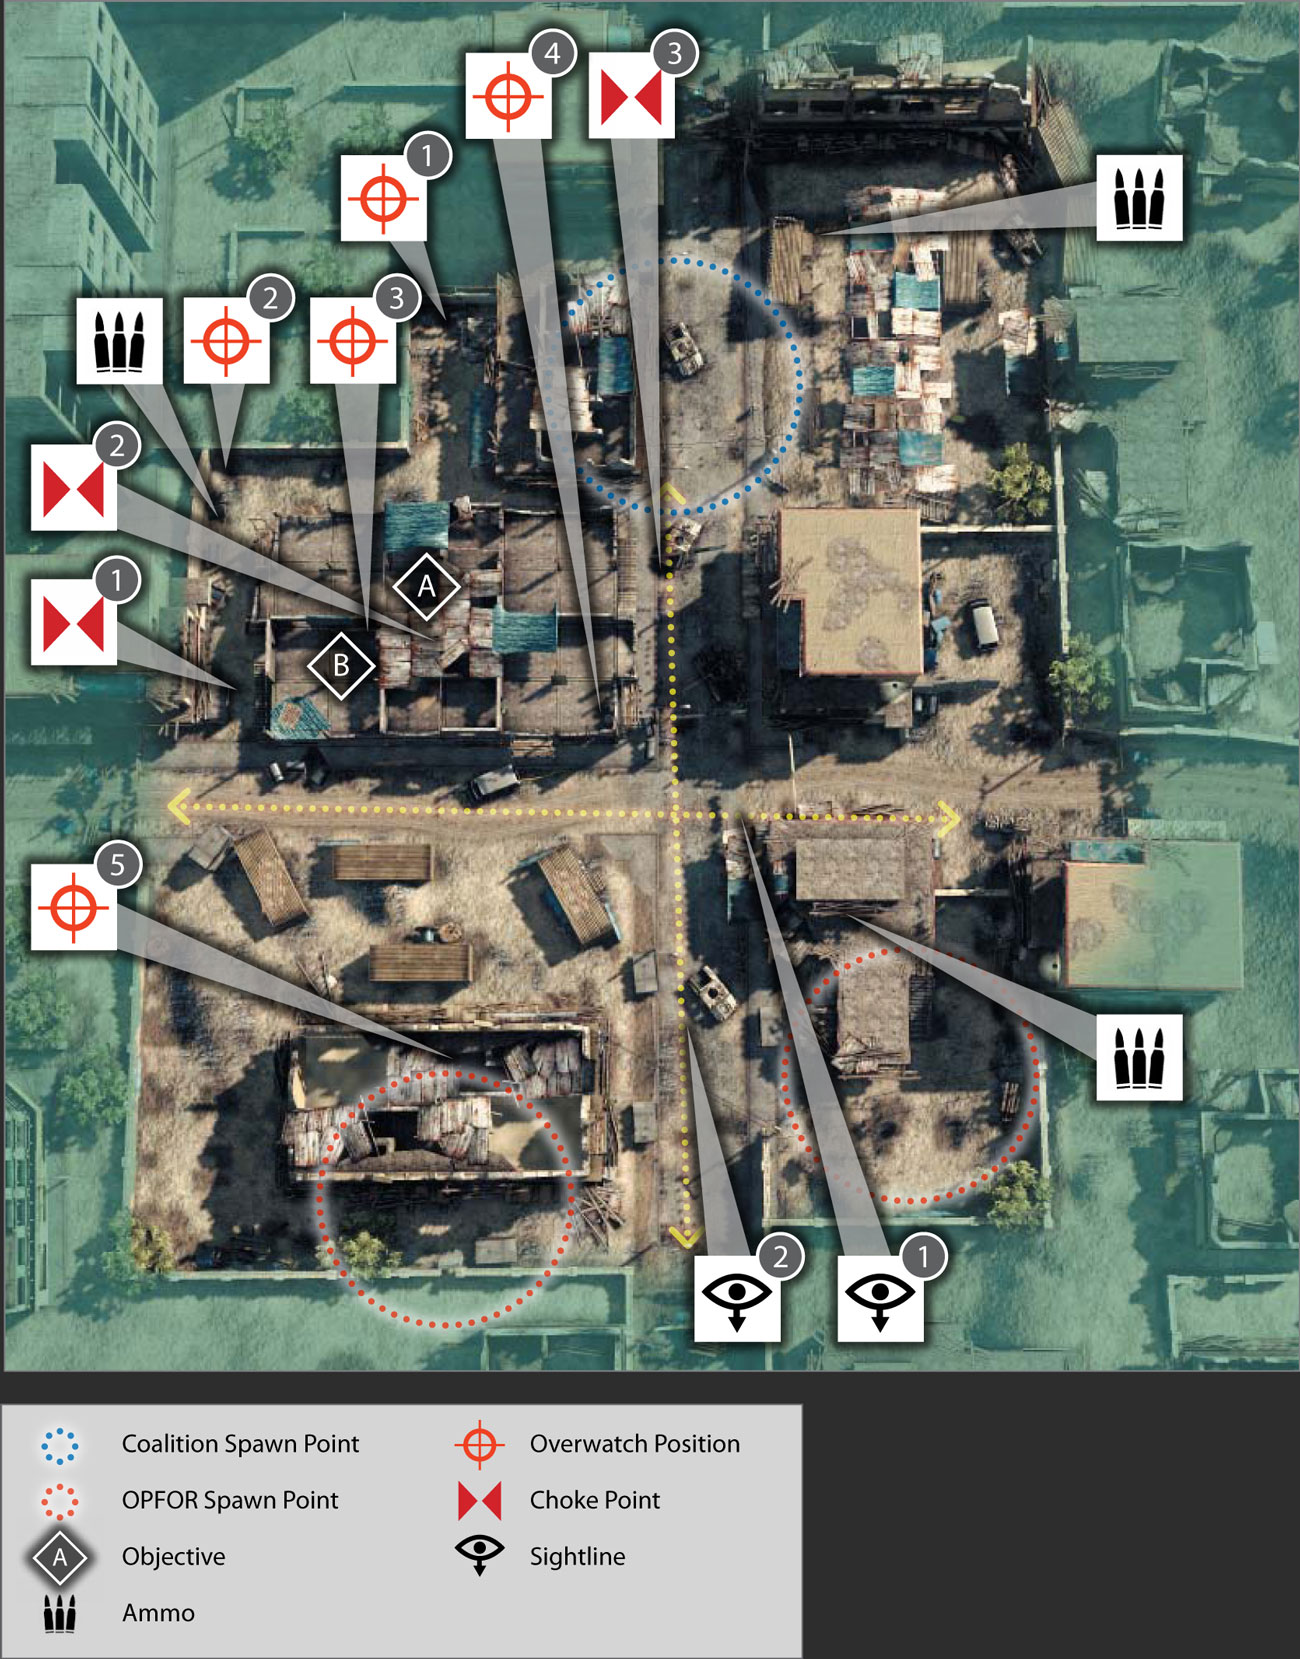
Map Features
Overwatch Positions
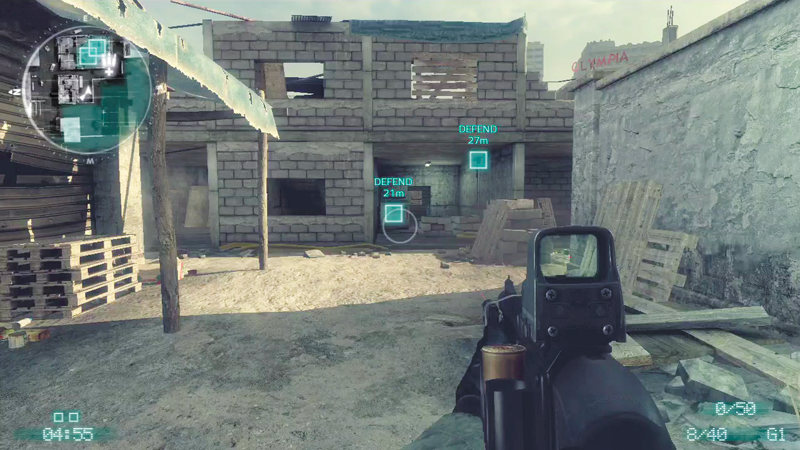
This is the perfect coalition camping spot for defending Objective Alpha on the first floor.
This section of the alley is completely off limits to OPFOR players, so you don't have to worry about being flanked.
Instead, aim straight ahead and blast anyone tampering with Alpha. An assault rifle or carbine works well from this range, but a shotgun with slugs is equally effective if your aim is true.
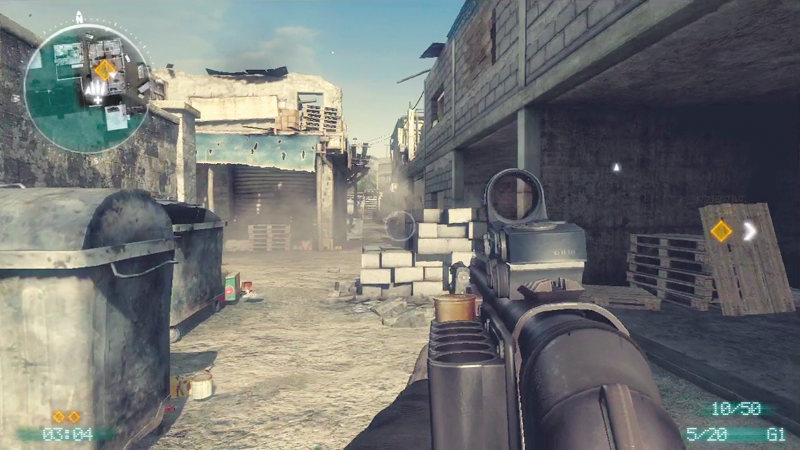
For the OPFORs, this corner in the alley is a great flanking position for hitting coalition troops rushing toward the objectives.
Intercepting the coalition defenders in this alley can alleviate some much needed pressure on the objectives, giving your teammates time to set charges and form defensive perimeters around each.
Consider equipping a light machine gun when holding here as you'll need to expend a great deal of ammo to keep this alley filled with flying lead.
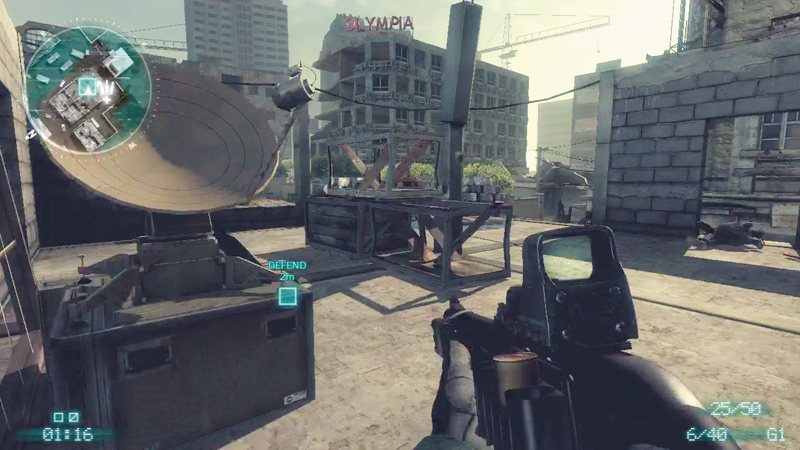
There are very few direct positions for defending Objective Bravo on the second floor. So consider hunkering down in this corner, right next to the objective.
From here you can easily spot anyone entering this exposed room, including those moving up the nearby exterior staircase—a popular attack route for the OPFORs.
At this range, shotguns are most effective. Just stay low and out of sight to avoid giving OPFOR snipers at overwatch position 5 a clear shot.
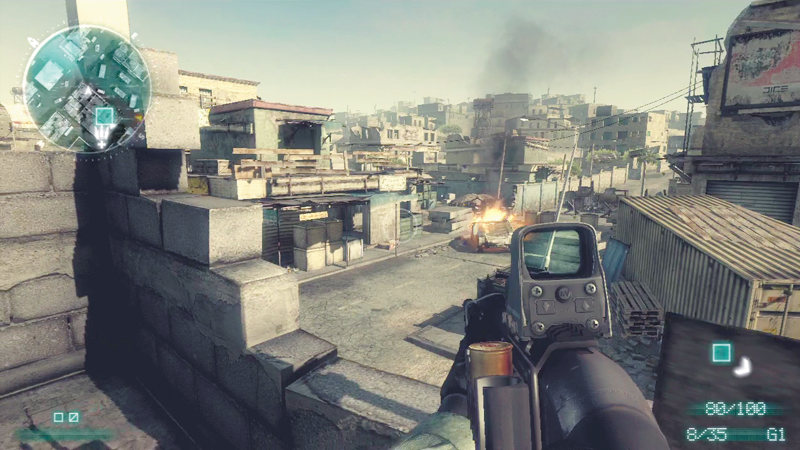
This second floor position is an ideal defensive location for coalition defenders attempting to halt the infiltration of the objective building.
From here you have a clear view of the street below. Also, the room below is a popular entry point for OPFOR attackers. Surprise them from above with a blast to the face before they can sneak into the building.
Stopping the attackers in the street below is much easier (and safer) than facing them inside the building.
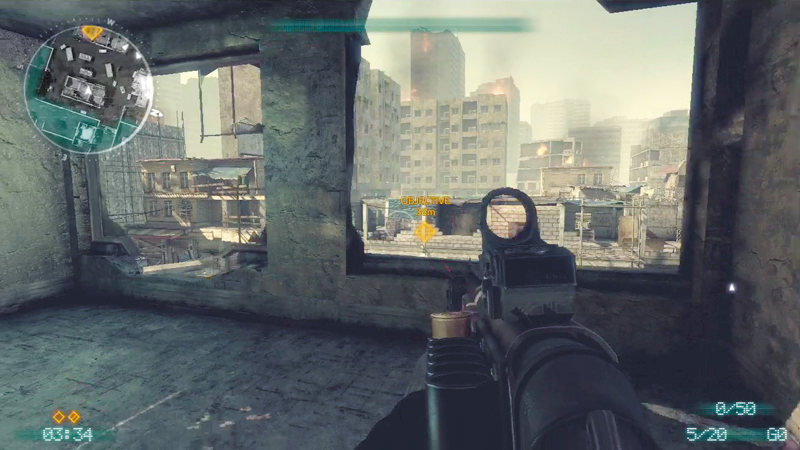
Only the OPFOR team can enter this building across the street from the objectives.
While it's difficult to attain a solid line of sight on any of the objectives from this location, it's still possible to hit coalition troops moving in and around the target building.
Providing support from this location can help your teammates gain a foothold on the building's interior.
Choke Points
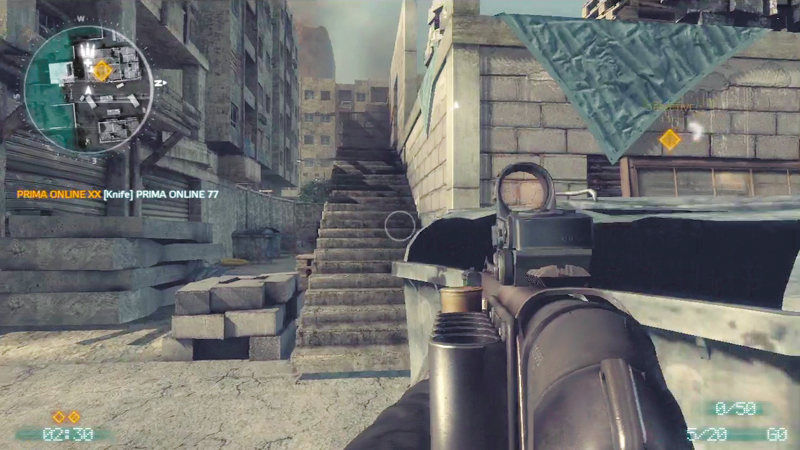
This exterior staircase is a popular attack route for OPFORs looking to rush Objective Bravo on the second floor.
As one of three access points to the second floor, coalition troops should take action to defend these steps. Planting explosives on or near the steps is effective, but so is camping overwatch position 3.
In any case, don't let the attackers rush up these steps unchallenged.
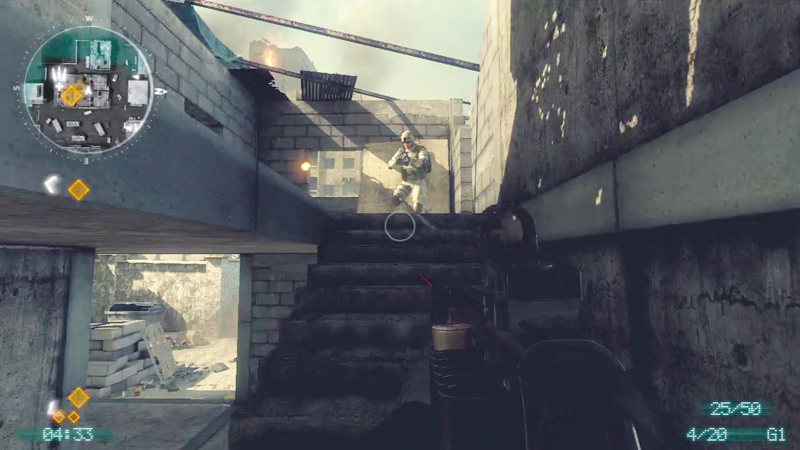
The interior staircase at the middle of the building is a high-traffic area likely to see some heavy action. Coalition troops should camp this staircase from the second floor.
The height advantage and blind corners upstairs make this a relatively easy spot to defend. OPFOR attackers are better off utilizing one of the two exterior staircases.
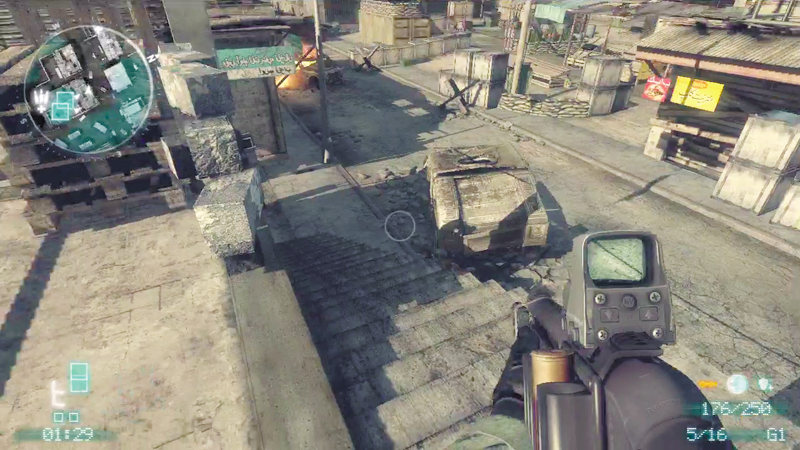
The second exterior staircase sees the least amount of traffic, but should still be guarded by coalition troops.
If left unguarded, defenders at overwatch position 4 are compromised, along the with entire second floor. Whenever possible, OPFOR attackers should use this staircase as it's relatively isolated and often forgotten by the coalition team.
Sightlines
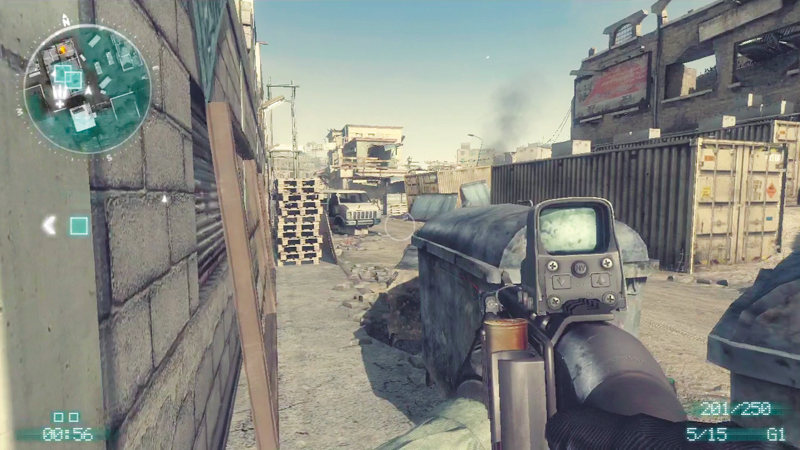
Most OPFOR attackers must cross this street to reach the objective building, so it only makes sense for the coalition defenders to take advantage of this long sightline.
Applying pressure on the attackers before they can even reach the building is very effective, and may even slow their advance, buying your teammates more time to fortify the objectives.
But sightlines go both ways, so OPFORs should quickly counter any attempts to camp this street.
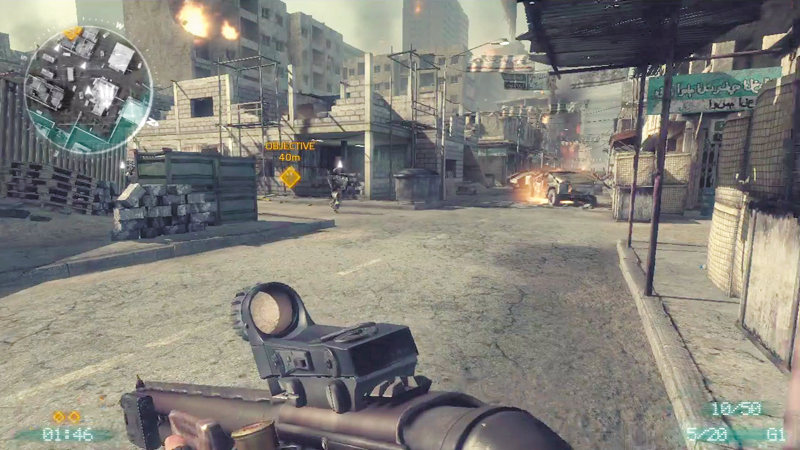
Both teams should post at least one sniper at each end of this long sightline. Players posted at the other end can pick off enemies shortly after they spawn. OPFORs have an almost perfect view of the coalition spawn area.
From their side of the line, coalition snipers can intercept enemy traffic in and around the street intersection. The team that exploits this sightline to its fullest has a good chance of tilting the odds in their favor.
Coalition Tactics
Coalition defenders often make the mistake of centering their defenses too tightly around the objectives. While covering the objectives is critical, it's equally important to halt the OPFOR attack before OPFORs can even enter the building.
While half of the team camps Alpha and Bravo, the rest of the team should aggressively attack the invaders, taking the fight to the streets outside the target building.
Suppressing the OPFOR advance in the streets prolongs the battle, increasing your team's chances of pulling off a win.
Remember, you only need to hold out for five minutes, so do everything possible to keep the OPFORs out of the building.
If manpower isn't available to properly defend both objectives, make your stand at Objective Alpha, downstairs. It's closer to your team's spawn point and is much easier to defend than Bravo.
OPFOR Tactics
Speed is the key to securing a quick victory here, so waste no time and make an aggressive push toward the building where both objectives are located.
Instead of heading upstairs, stay on the ground floor and swarm Objective Alpha while the coalition team's defenders are split.
It's important to take Alpha first, otherwise the coalition team will have an easy time defending it by concentrating their whole team at this cramped location.
Save Bravo, on the second floor, for last. Bravo is the furthest from the coalition spawn point, plus they have to defend all three staircases to effectively lock it down.
Furthermore, your team's snipers can provide fire support at Bravo from overwatch position 5, across the street.