Assassin's Creed: Revelations Guide Walkthrough Side Quests
Templar Dens
Liberating Templar Dens is the only way to enjoy the full benefits of the Mediterranean Defense and Rebuilding Constantinople metagames, or to play the twelve Master Assassin Missions. Before we begin, a few tips and observations:
As revealed in the final Memory of Sequence 02, you must kill the Templar Captain in the Restricted Area surrounding a Den before lighting the Signal Fire to conquer a region. There are four distinct types of Captains: Some are cowards and will flee if they spot Ezio; if they reach an escape point before he can kill them, they will remain hidden for twenty minutes. Other Captains are bold and will gladly lock blades with Ezio. Finally, some Captains are marked, with their positions revealed by the corresponding icon the moment you enter the Restricted Area. Others are unmarked, and must be identified with Eagle Sense.

A full stock of Throwing Knives and Poison is essential for each attack on a Templar Den. The Poison Dart weapon is extraordinarily efficient. Rooftop sentries in Templar Dens are extremely vigilant, and will frequently move to investigate even a brief sighting of Ezio. Use this to your advantage, luring Gunmen to positions where you can safely ambush them.
Marksmen booths in Templar Dens make frontal assaults extremely inadvisable. Marksmen are removed immediately once the local Captain has been killed.
Take the time to purchase buildings in other districts before you liberate a Den. As the Templar Awareness Meter is automatically set to Aware when you light the Signal Fire, this will save time spent tracking down Heralds and Corrupt Officials. However, avoid attacking a Den while at full Aware status: this will almost always trigger a Den Defense scenario.
Imperial North Den
Captain Type: Bold, marked.
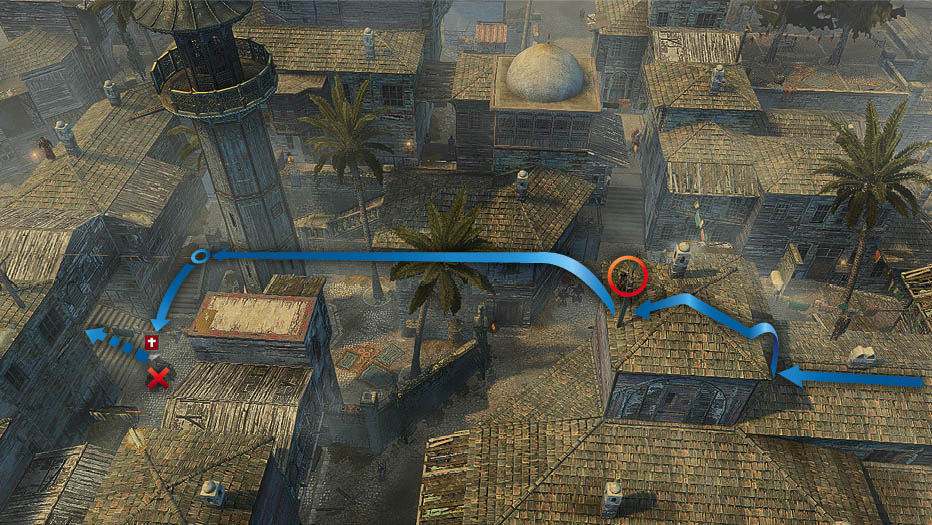
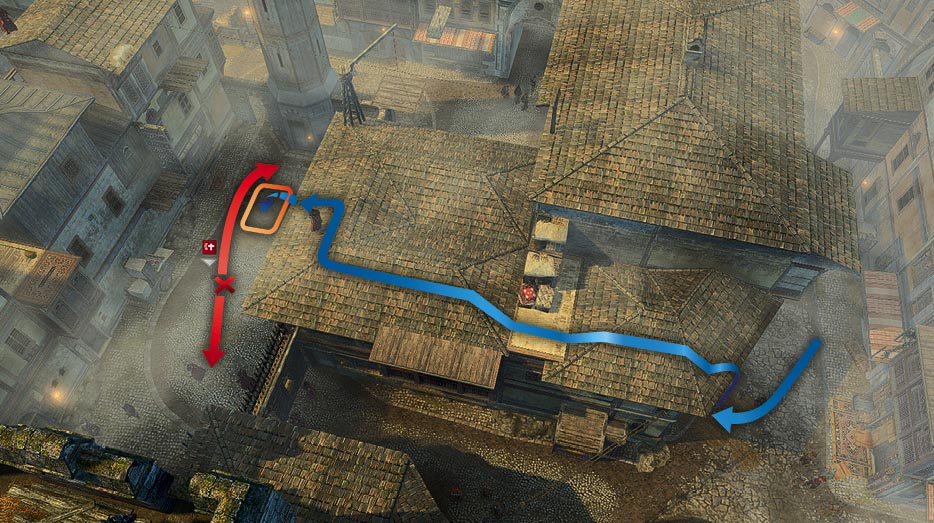
Strategy: Though Ezio liberates this Den at the conclusion of Sequence 02, it can fall back into Templar hands if you fail a Den Defense here at any time after Memory 04 of Sequence 03. The strategy required to kill the Captain is broadly the same as the one we suggested in the Walkthrough chapter for the earlier, story-mandated assault, but with one key difference: he will now stay under the cover of the building marked in the screenshot.
Approach the Restricted Area from the south and kill the two nearby sentries. You now need to lure the Captain into the open. A Cherry Bomb will achieve this immediately, but you can also throw one of the slain Gunmen to the ground. Punish the Captain’s curiosity with a Poison Dart, then climb the tower and light the Signal Fire.
Imperial South Den
Captain Type: Bold, initially unmarked – and there are actually two of them. One holds a rifle, while the other favors a sword.
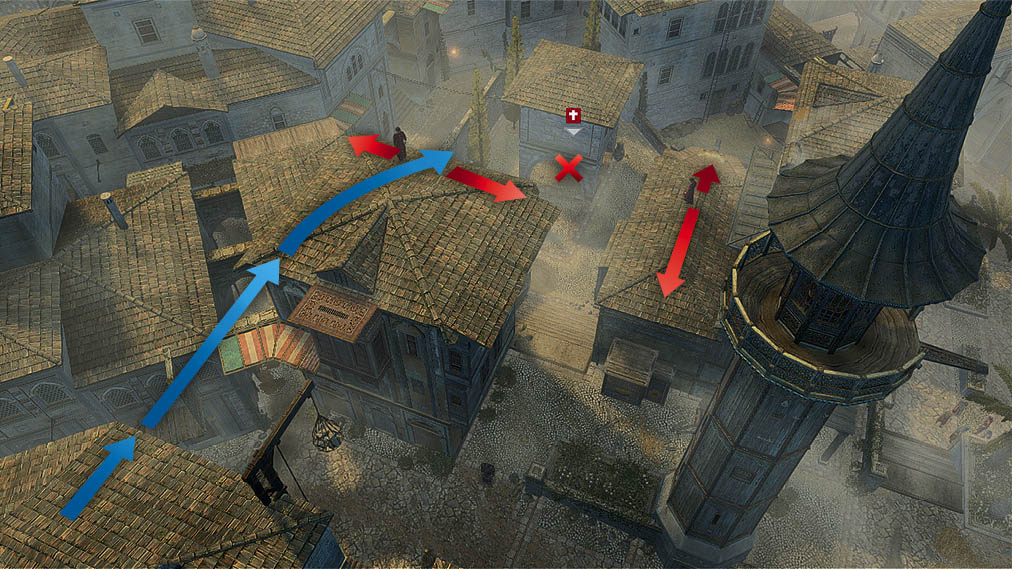
Strategy: The arrangement of Marksmen booths makes it difficult to approach the heart of this Den. Use a Tunnel Entrance to reach the South Port destination, then approach the Templar Den from the southwest and climb the building marked here. Kill the sentry on the rooftop above, then quickly move onto the ropes and use Eagle Sense to watch the path to the north.
The patrol route of the two Templar Captains will take them past this position, so ready your Poison Darts and hit both once you have them in range. Climb to the top of the building to your right, and you can leap straight over to the Signal Fire tower to await their demise.
Bayezid North Den
Captain Type: Coward, unmarked.
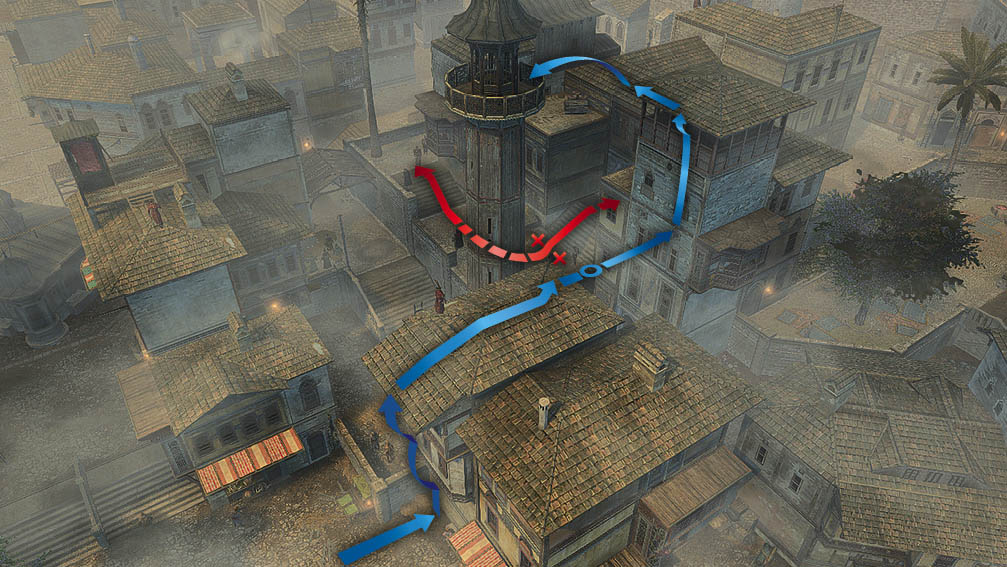
Strategy: This Coward is particularly vigilant, and has the ability to detect Ezio from a fair distance. Approach the Den from the south, and stand on the rooftop marked here; there may be an Ottoman Gunman that you must deal with first. The Captain’s patrol route will take him past this position; he will be walking with a bodyguard. Identify him with Eagle Sense from a safe distance, then quickly drop down and target him with a Poison Dart when his back is turned.
If he moves out of range before you open fire, you can run on top of the covered walkway and ambush him at the far side. In the event that he flees, you have a moderate chance of catching him in a footrace to his bolt-hole: use ranged weapons once you have a clear shot at his back.
Bayezid South Den
Captain Type: Coward, marked.
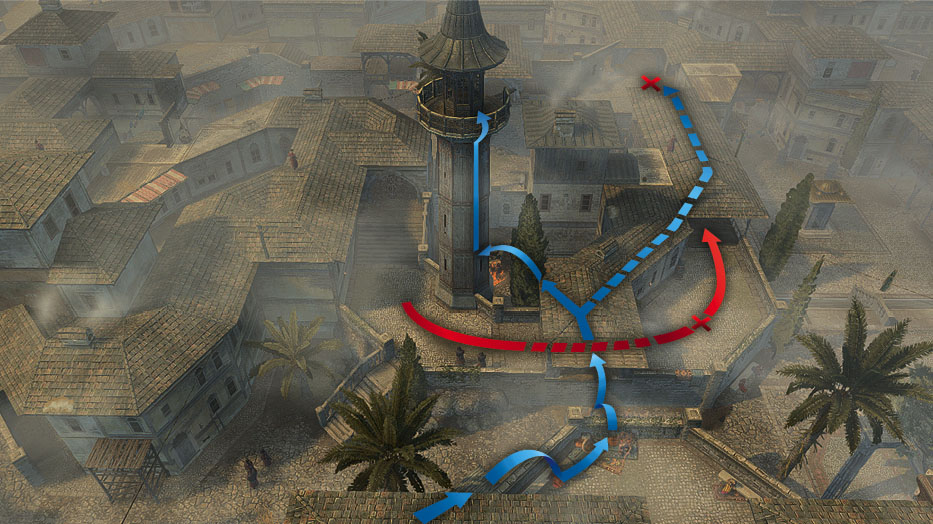
Strategy: Approach the southeast corner of the Restricted Area and climb the building shown here; there is a group of four Templars nearby that you may wish to distract, or you can start your initial climb further north, out of sight. On the rooftop, kill the Gunman without attracting attention.
The Captain can be found walking around the central area, inspecting his troops. Wait until he moves to the south then, when he is facing away from you, hit him with a Poison Dart. There are Gunmen on the west side of the street, but you should be able to poison the Captain before they react. An alternative strategy is to perform a short Leap of Faith into the hay cart, then lie in wait and assassinate your target as he walks past.
Constantine North Den
Captain Type: Coward, marked.
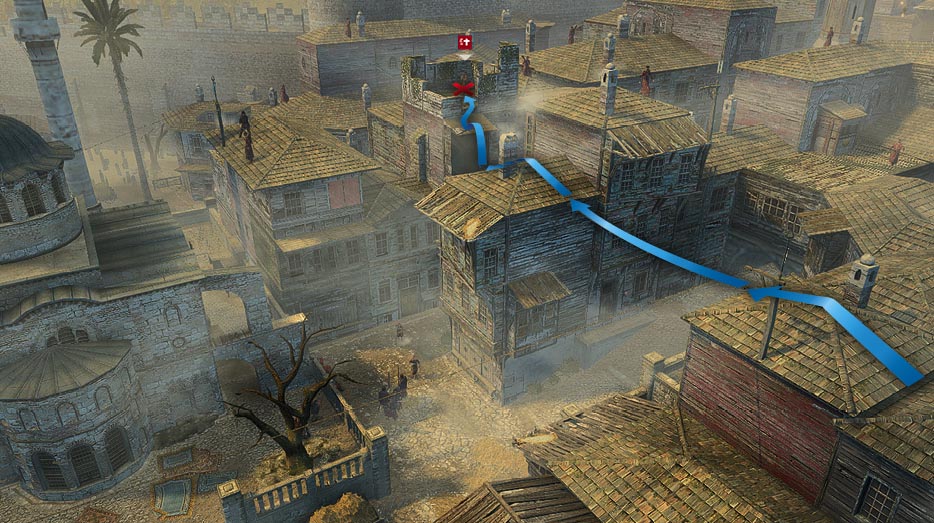
Strategy: This Captain can be found on a rooftop in the south of the Restricted Area, and his tendency to stroll around can make it hard to catch him unawares. For that reason, a direct and aggressive strategy works best. We recommend that you wait until you have six Assassins free to perform an Arrow Storm before you begin.
Follow the route highlighted in the accompanying screenshot, then jump straight over to the Captain’s building and climb up. If he sees Ezio, use your Arrow Storm; if not, simply run over and perform an assassination.
Constantine South Den
Captain Type: Bold, unmarked.
Strategy: Approach the Restricted Area from the east, and kill the Ottoman sentry and a Templar to reach a zipline. Ride it at full speed, then perform a zipline assassination on the individuals marked here – one of whom, fortuitously, is the Captain you seek. Like all best laid plans, there is a slight chance that this one can go awry: there are two Varangians who occasionally stop close to the Captain, and Ezio may target these instead.
Should this occur, retreat to the nearby steps marked here: this provides cover from Marksmen, and therefore a place to finish off your target in a straight fight – or, of course, to incapacitate everyone with a bomb and end the conflict with a simple assassination.