
Assassin's Creed: Revelations Guide Walkthrough Side Quests
Desmond's Journey
These unique optional adventures reveal elements of Desmond’s life via a first-person perspective, with a specific focus on action-oriented puzzles.
They are unlocked by collecting Animus Data Fragments as Ezio, and can be accessed via the giant portals on Animus Island, entered from left to right in order of story progression. Select the Return to Animus Island option in the Pause menu to return there whenever you are not engaged in a Memory.
Use d to move, f to control the camera, and the Legs button to jump. Desmond acquires the ability to spawn surfaces to walk on during the course of Part 1, a feature that becomes a mainstay from that point onward.
Toggle between the two different types of surface with the Assassin Signal or Weapon Selector buttons, and press the High Profile button to spawn them. Facing a spawned surface, press the Primary Attack button to delete it.
Though the abilities at Desmond’s disposal seem limited, it’s how you apply them that matters. Once you can spawn them, platforms are flat surfaces used to cross open space, or descend without injury; ramps are sloped surfaces, used to gain altitude. Confused? Don’t be. The best way to understand how they (indeed, this entire set of minigames) work in practice is to try them for yourself. And so, without further ado…
Part 1: Doubts
Requirement: Collect 5 Animus Data Fragments.
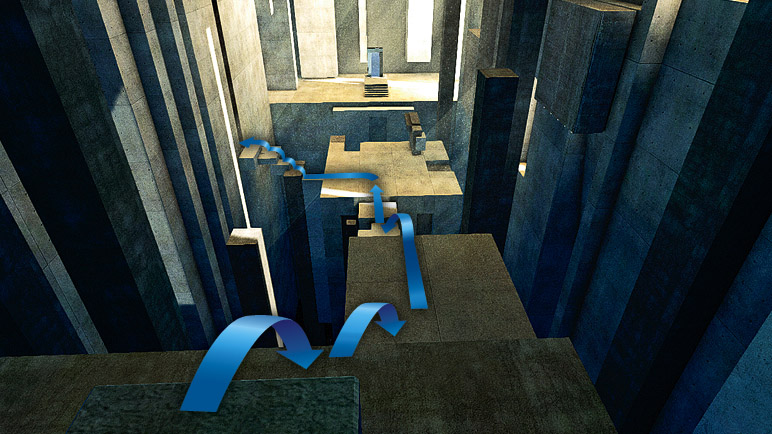
I: Walk directly ahead to open the way forward, then follow the route in the screenshot to reach a room with an impassible barrier and a glowing switch. Activate the latter with the Empty Hand button, then pass through the newly opened exit.
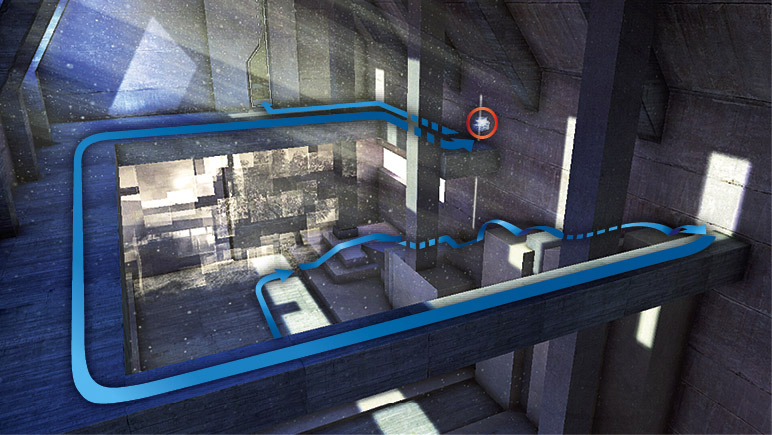
II: Listen to Desmond’s recollections, then follow the route pictured here to reach a switch. Activate it, then leave via the new exit. In the next room, walk up the slope and through the opening, then walk to the back of the black monolith and drop down. Use the moving platforms to reach an opening in the far wall, then continue on until you come to a large chamber.
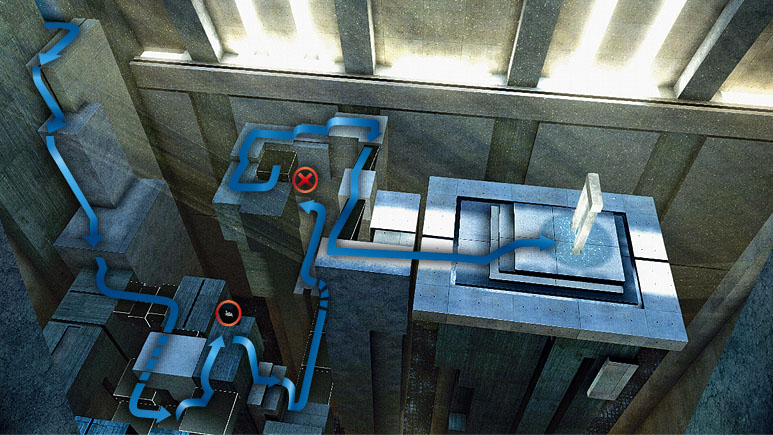
III: Move to the switch, then activate it to create a new bridge (). Walk over this, then use the moving platform to reach a second switch. After pressing this, ride the moving platform to the top and follow the path to get to the portal. Pass through it to open the way forward.
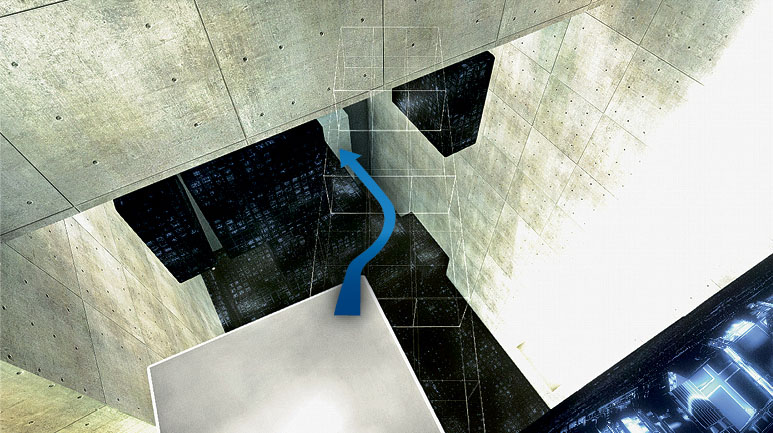
IV: Desmond now acquires the ability to spawn surfaces at will; see the top of the page for guidance. Use flat platforms to navigate around the black Data Nodes; contact with these surfaces will return you to the previous checkpoint, so pay them a wide berth. The trick to successfully using platforms and ramps is to pay attention to the camera position, as this determines their precise placement and height ().
Though your first steps will be a little tentative, you will soon master the art of spawning them swiftly, creating bridges or slopes to travel at great speed, or improvised surfaces below you as you’re falling. On the far side, pick up the glowing cube to unlock Multiplayer Emblem 1, then switch to ramps and head up through the opening to the left of the collectible. This leads back to the chamber pictured in entry I. Walk through the portal to end the first Journey, or refer to V if you would like to pick up the second secret collectible in this area.
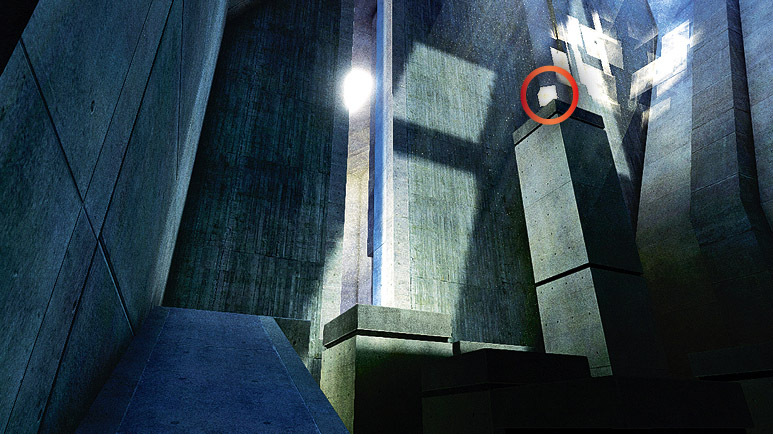
V: Instead of heading straight through the portal, retrace your steps to reach the chamber just beyond the room with the projection of The Farm on the wall. Collect Multiplayer Emblem 2 from the top of the column (), then retrace your steps back to the exit portal.
Part 2: Training
Requirement: Collect 10 Animus Data Fragments.
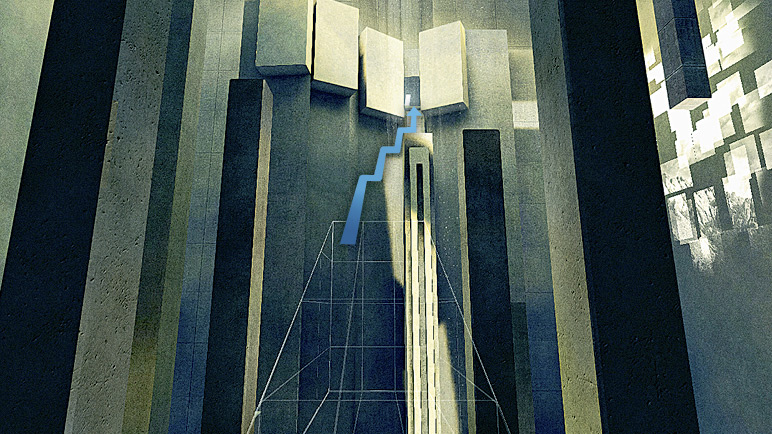
I: Walk along the corridor, then use ramps to reach an opening high on the opposite wall; you will be moving against the Particle Stream, so a little speed makes it easier. In the tunnel, walk into the vertical Particle Stream and spawn a platform beneath Desmond to ascend. In the next chamber, use ramps to reach the opening pictured here.
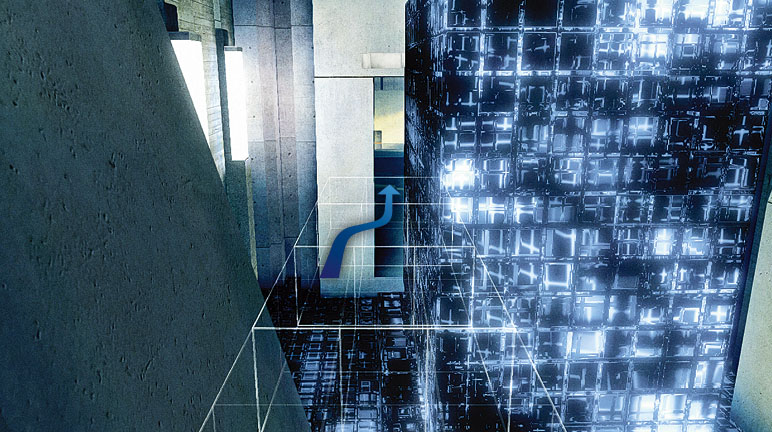
II: Travel through the Data Nodes until you reach the final, irregularly shaped Data Node moving downwards. Wait until a large Data Node descends, then quickly use platform blocks to drop down and pass through the opening on the other side (). In the next room, you will encounter the first Containment Fields. After passing through the first, you will find that the second covers a sheer drop. Face down, then drop over the edge; wait a fraction of a second, then spawn a platform beneath Desmond to arrest his fall after you pass through the effect radius.
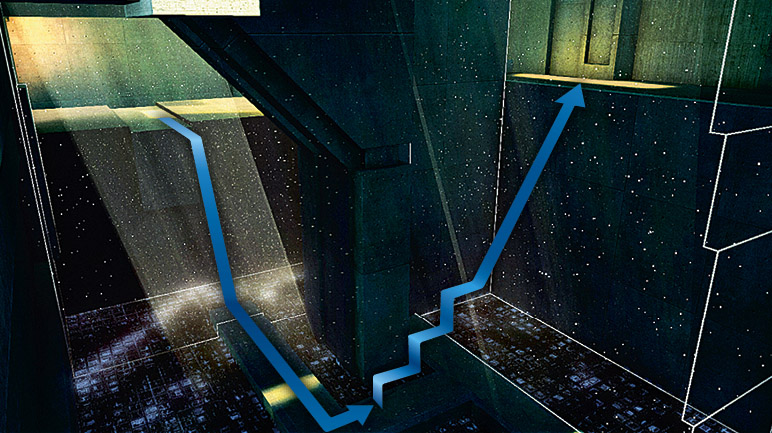
III: Move down to the walkway, then rapidly create and walk over ramps to ascend through the Particle Stream (). On the other side, turn around to find Multiplayer Emblem 3 on a ledge above. Continue forward until you reach a darkened chamber; use ramps to reach the opening.
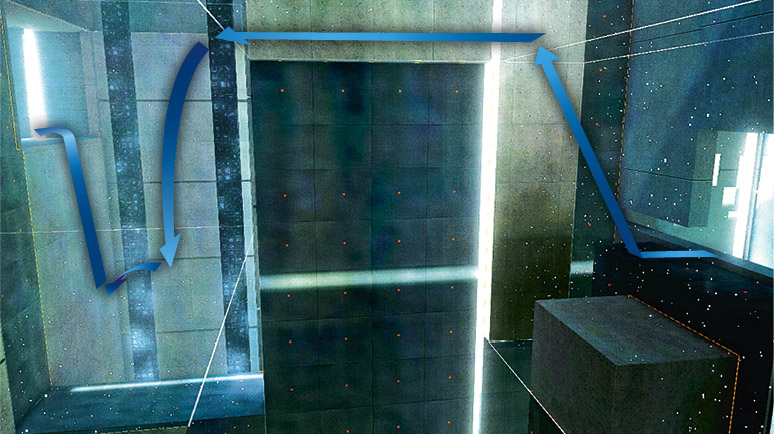
IV: This chamber combines Particle Streams and Containment Fields to create a puzzle. Use ramps and platforms to reach a narrow ledge (), then leap into the next Particle Stream area; even if you miss it and hit the ground to (temporarily) fatal effect, you will respawn at a checkpoint here. As you move inside the final Particle Stream, create a platform before you plummet to the ground. This Particle Stream moves diagonally, so quickly create platforms to reach solid ground.
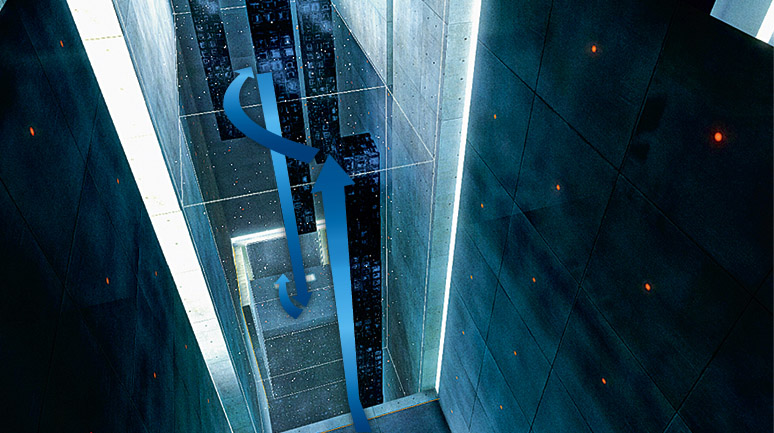
V: The same principle applies in the next area: use Particle Streams to ascend, then drop through the Containment Fields to reach the next Particle Stream and spawn a platform to stop your descent ().
The final Particle Stream in this sequence veers left and right. Use ramps to ascend, then spawn a platform to ride up to reach the opening above. In the next chamber, you can find Multiplayer Emblem 4 behind the walls where scenes from Desmond’s childhood are projected. When you are ready, fall into the hole and spawn platforms to navigate the gaps in the Data Nodes as the Particle Stream conveys you downwards at speed.
It may take a few attempts to memorize the course, but there is a checkpoint midway through the descent. Be economical with your movements and platform spawns, and this shouldn’t be too much of a trial. At the bottom, follow the only available path to reach the exit portal.
Part 3: Escape
Requirement: Collect 15 Animus Data Fragments.
Note: This third Journey section introduces orange “Containment Grids”, moving barriers that destroy platforms and ramps.
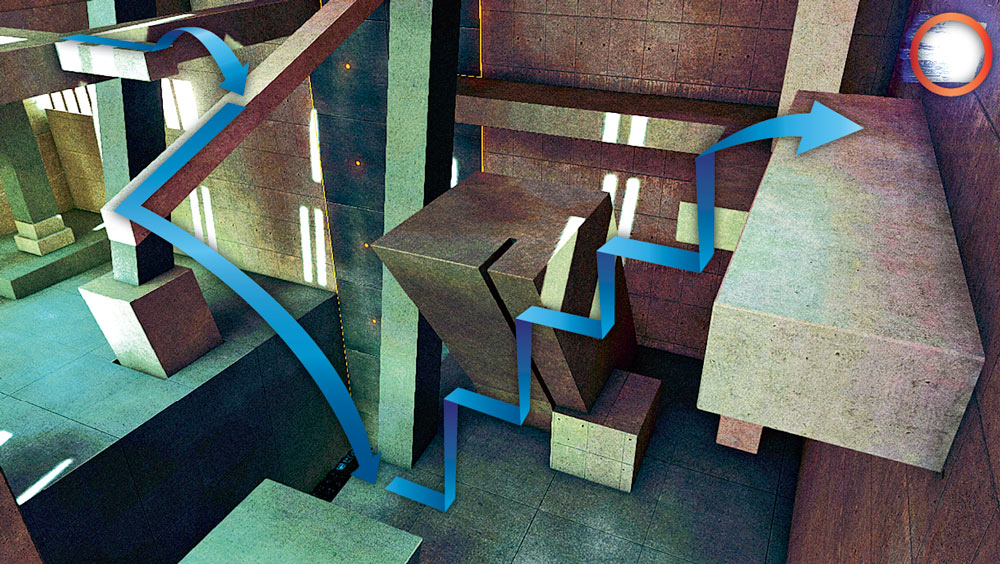
I: Cross the initial gap with a platform or two and, when you reach the Containment Field, drop straight down and spawn a platform as soon as you pass through the effect area. Collect Multiplayer Emblem 5 from the upper reaches of the chamber, then head for the panel shown in the accompanying screenshot. There is a Containment Field that prevents easy passage, but you can reach the other side with a jump from the beams. When the barrier has been disabled, use ramps to ascend to the rafters and travel to the opposite side of the room.
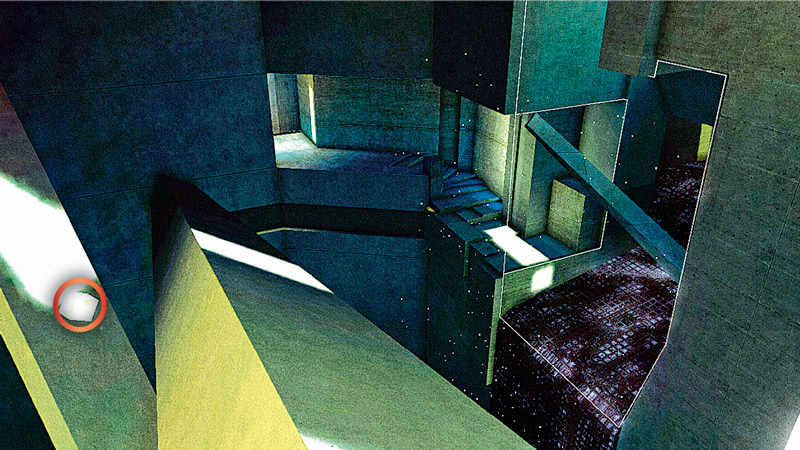
II: Create platforms over the Data Nodes below to safely get to the next chamber, where you will encounter a Containment Grid. Wait for it to move away from Desmond, then create platforms to reach solid ground on the left-hand side of the room before it returns. The next challenge is a room filled with Containment Grids.
Though you might think that there is a need to find a particular path through them, you can actually just power through the center by creating platforms at speed. On the other side, ride through the Particle Streams in the tunnels; each solid surface you encounter in the Data Node rapids represents a restart position.
When you near the end of the stream, quickly create platforms to reach solid ground to your right before you hit the Particle Stream “waterfall”. Collect Multiplayer Emblem 6 from its place of concealment () before you continue forward.
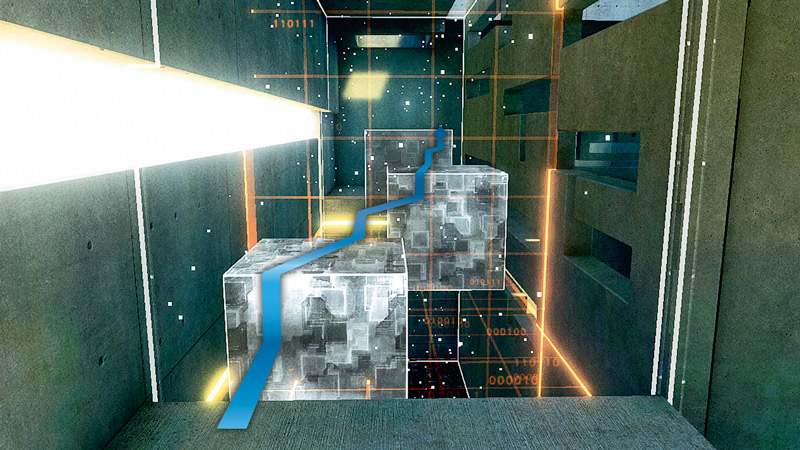
III: Drop down the shaft and use a platform to break your fall. Use the solid surfaces to reach the far side of the corridor filled with Containment Grids, then quickly use ramps to arrive at the exit. In the next room, wait until the lower Containment Grid moves towards Desmond, then spawn platforms to cross over it; once it passes beneath, descend quickly, then use ramps to reach safety on the opposite side.
For the next run, just wait for the Containment Field to approach, then power through it at speed; take the Particle Stream into account as you move. The third trial adds two Containment Grids, a Particle Stream and three Data Nodes. Wait for the vertical Containment Grid to descend, then start your journey with a ramp or two, then immediately switch to platforms to finish the crossing (). Walk into the portal to exit.
Part 4: Metropolis
Requirement: Collect 20 Animus Data Fragments.
Note: Part 4 introduces “Containment Arrays”, red beams that destroy spawned platforms and ramps, and will send Desmond back to the previous checkpoint on contact.
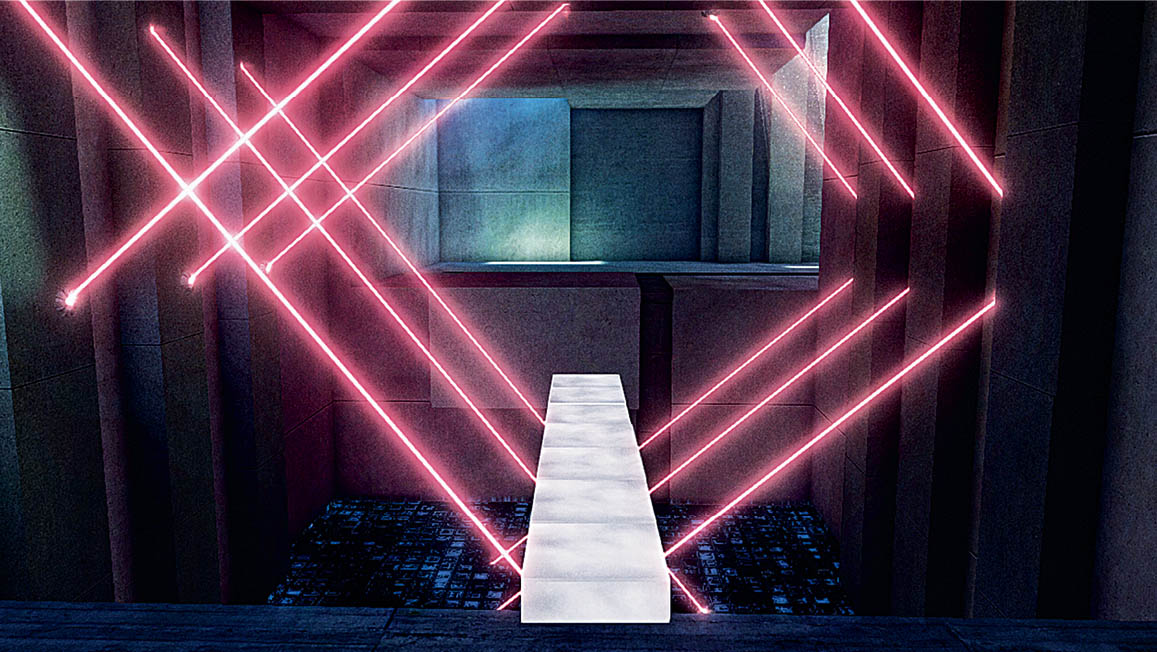
I: Create platforms to approach the center of the Containment Array pattern; when it opens up, quickly pass through. The next Containment Array is slightly more difficult. Wait until it opens up in the pattern pictured here, then spawn platforms at speed to negotiate it. By the third of these hazards, you should have the confidence to just stroll right through on platforms when the pattern opens up.
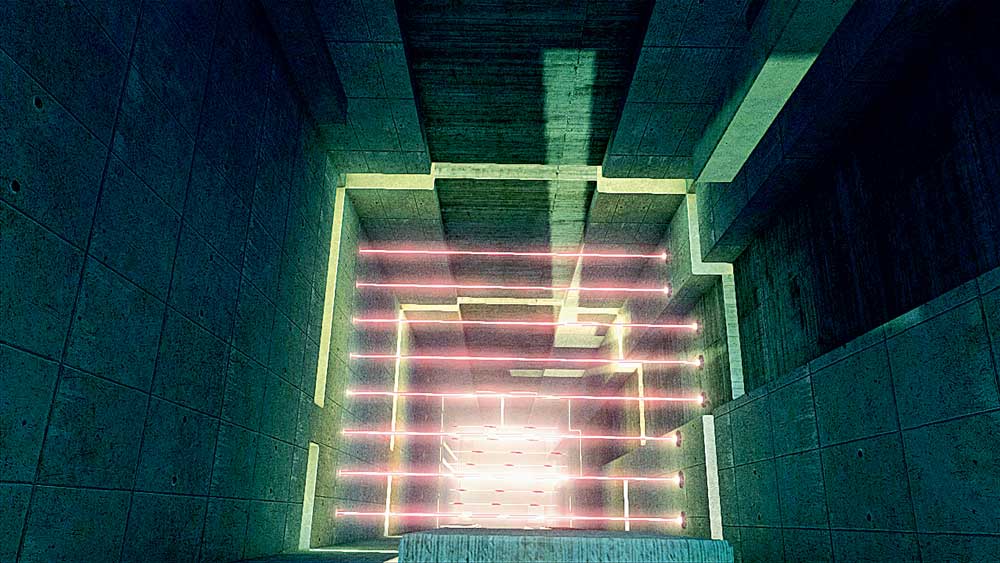
II: When you enter the room with the static Containment Arrays, look to your left to find Multiplayer Emblem 7. Make your way through the maze until you reach an intermittent Containment Array, then run through when it flicks off. Look down the deep shaft and wait for the Containment Array to activate (), then drop and create a platform beneath just before you reach it. When it deactivates, drop through. Repeat this process for those that follow, then head through the narrow opening at the bottom.
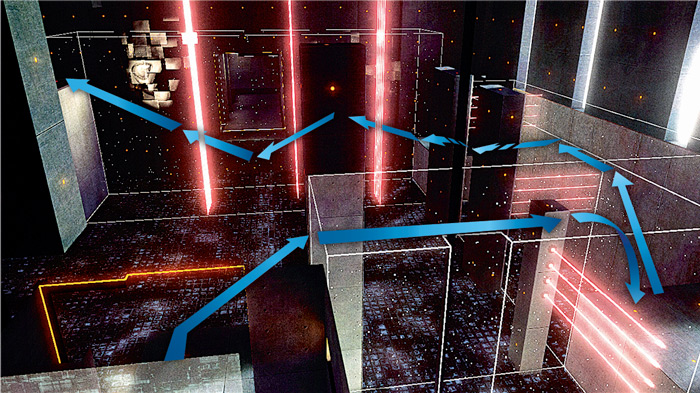
III: Walk over the light bridge to the far side; when Desmond’s path is blocked, you must move around the chamber in a counterclockwise progression to reach the switch. The Particle Streams are less of a hindrance than you might expect – the important thing is to identify the route to each crossing in advance, then move purposefully ().
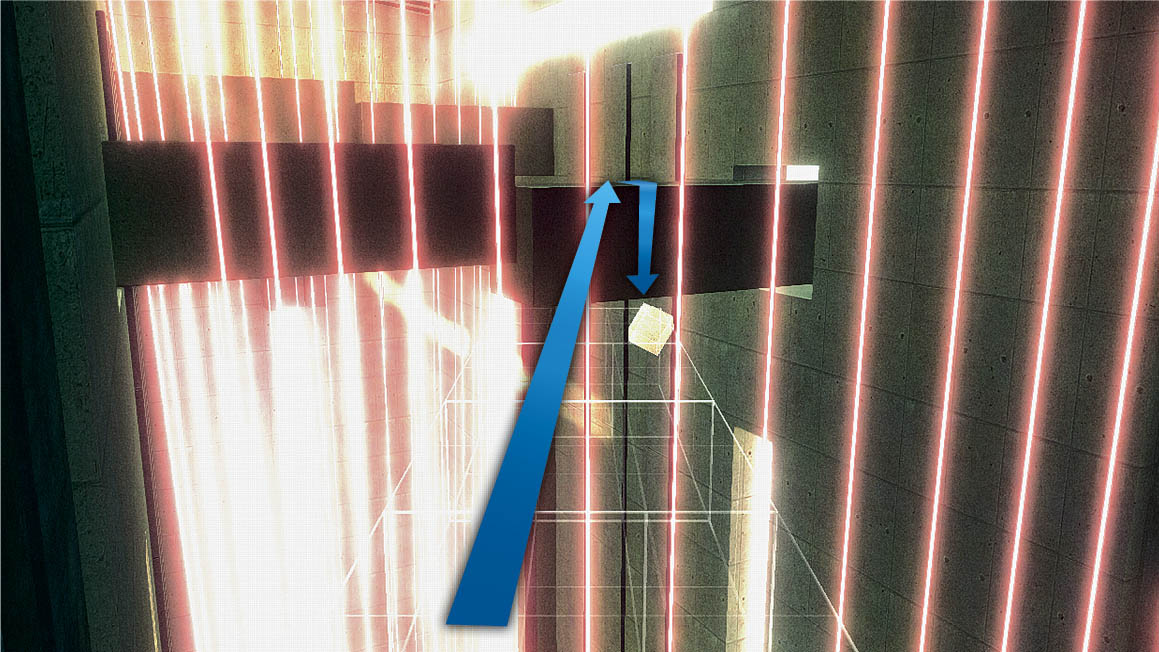
IV: In the next room, you encounter an unusual new form of Containment Array. Spawn platforms to reach a position on your left, then wait for the beams to part by the solid surfaces; quickly run through, then drop down to collect Multiplayer Emblem 8 from beneath (). This will almost certainly lead to a restart, but you only need pick it up once.
The trick to completing the crossing is to move between the solid surfaces whenever gaps appear; while the movement of the Containment Arrays is hypnotic and disorienting, there’s a knack to a quick crossing that you will soon acquire. In the final darkened area, you might suspect that you need ramps to cross the “traffic”, but that’s not the case: just stroll straight over and enter the portal.
Part 5: Regret
Requirement: Collect 30 Animus Data Fragments.
Note: Completing all five parts of Desmond’s Journey unlocks the Desmond “avatar projection”, which you can equip via the Outfits menu. This is a purely cosmetic skin change: he will still act and speak as Ezio.
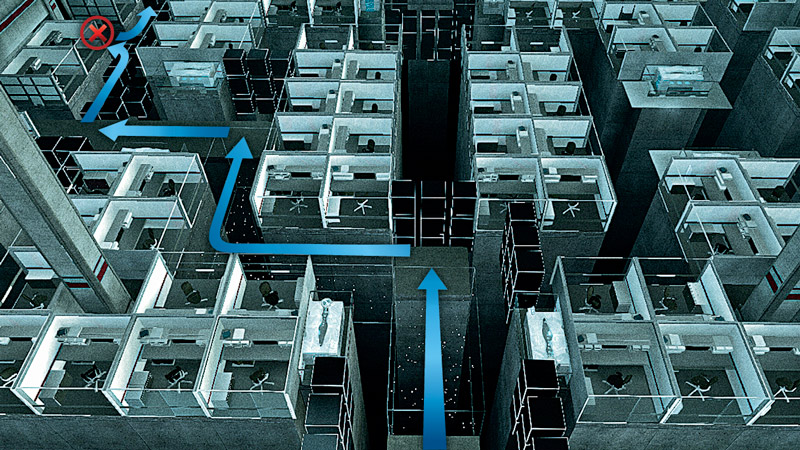
I: Approach the doors and press the switch to activate a vertical Particle Stream; spawn a platform beneath your feet to ascend. At the top, use platforms and then ramps to proceed through two Particle Stream zones. After these, use the blocks that appear to cross the next chasm; look to your left to find Multiplayer Emblem 9 ().
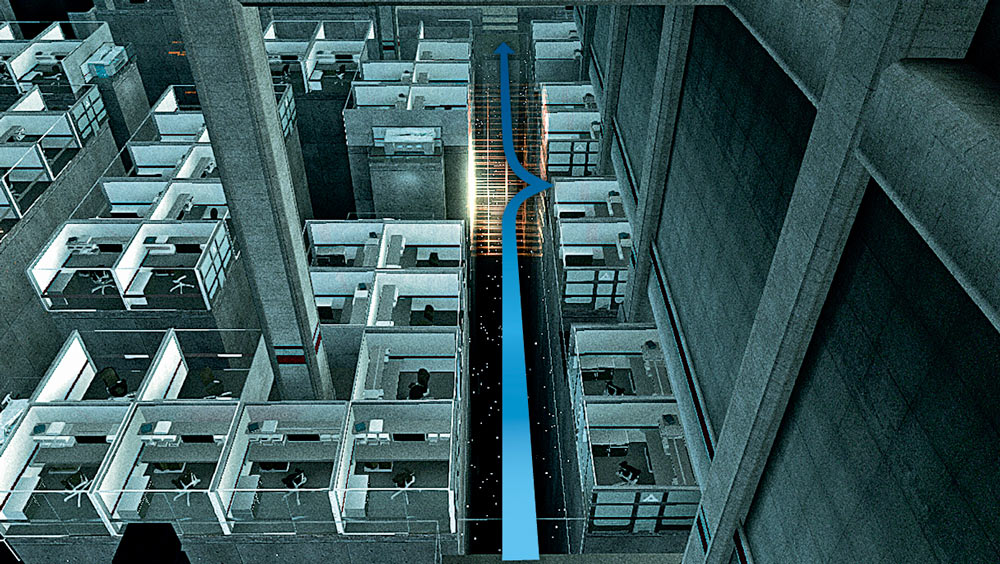
II: Use platforms to cross the next Particle Stream area, dodging the Containment Grids as they move towards you. Press the switch on the other side, then use platforms (and occasional ramps) to negotiate the moving blocks while fighting against the continual descent caused by the Particle Stream. The next hazard is a wall of Containment Grids that is too dense to penetrate. To cross safely, wait until the grid approaches, then follow it closely; towards the end of the corridor, take a right and wait for it to pass ().
III: Walk into the elevator and activate the switch; once again, ride the Particle Stream to the top. Head right from the elevator, then take a left. Cross the floor and bypass the Containment Grids by creating a platform path against either wall. In the next corridor, two Containment Grids mimic the classic “slamming gate” hazard; time your approach carefully to pass through safely.
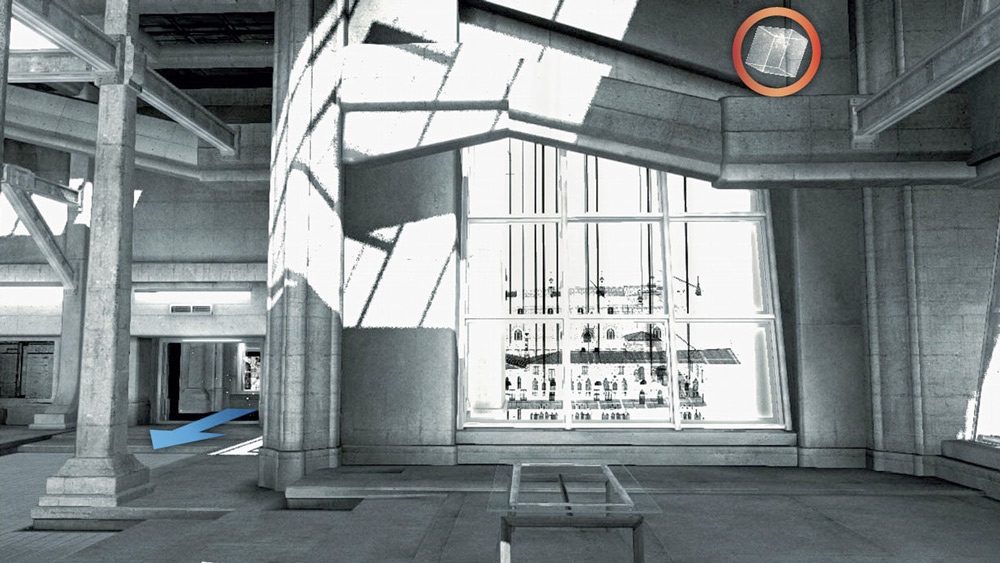
The remaining corridor is routine by comparison. When you reach the Abstergo laboratory, collect Multiplayer Emblem 10 from the position pictured here, then head through the portal.