
The Wonderful 101 Guide Training Advanced Training and Tactics
Advanced Training and Tactics
Now that you’re familiar with the arsenal available, it’s time to go into some basic and advanced tips and tactics you can use to put GEATHJERK to the Valiantium Blade. The best feature of The Wonderful 101 is that it accommodates creative thinking during combat. You’ve got so many tools at your disposal that it’s possible to pretty much play how you want on any difficulty setting, provided you’re skilled enough to get away with it.
First Play-Through Wonderful Mart Tips
Your first run through the Story mode is challenging primarily because you don’t start off with access to all of the goodies right away, nor does the Wonderful Mart actually show you everything you can eventually get your hands on. If you’re struggling to reach high ranks on the graded missions, or you’re simply not aiming for Platinum ranks, O-Parts will be fairly limited in supply, and buying things from the store will be tougher. We’ve put together a recommended list of items, Unite Morphs, Custom Blocks, and skills to aim for, as they tend to be beneficial in more situations.
Items
- Wonderful Cakes To Go
- Treasure Sensor
Realistically, there’s not a lot of call to buy any items from the Wonderful Mart other than the Treasure Sensor. If you’re diligent about trashing absolutely everything in the environment, hitting up hidden hammer spots, or rejuvenating flower beds, you’ll have more than enough healing items to keep you in the fight. However, we do recommend trying to stock up on Wonderful Cakes To Go whenever you don’t have a major purchase to save up for. Being able to quickly refill your Unite Gauge in the middle of a fight can help keep you on the offensive, rather than running around waiting for your meter to recharge. The Treasure Sensor is mostly optional, but it can help you with hunting down hidden supplies. It also comes in handy during some secret Kahkoo-regah missions. The best part of the light recommended items list is you’re saving up O-Parts for valuable ability upgrades.
Unite Morphs
- Unite Guts
- Unite Spring
- Unite Ball
- Unite Spikes
- Unite Camp
- Unite Drill Spring
- Unite Spike Ball
The most valuable Unite Morphs are easily the top four in this list. Your defensive capability revolves around Unite Guts and Unite Spring, and you need Unite Ball to access some of the collectibles you’ll find throughout the game. Unite Spikes is a solid enhancement to Unite Guts, and will always be useful. Unite Camp is a surprisingly good buy if you’re using it before big fights, which can let you open every battle with fully powered Unite Morphs regardless of the number of heroes you have at your disposal. Drill Spring and Spike Ball are somewhat less vital, but both enhance Unite Spring and Unite Ball, two critical morphs you should have, so they’re worthy purchases.
We don’t regard Unite Tombstone as absolutely vital for a first run-through. While it can be powerful when you’ve got a full team at your disposal, it’s a very situational morph that can get you into more trouble if used improperly. Unite Rocket is somewhat superfluous after you get Wonderful Rising on nearly any of the main seven Wonderful Ones, as a double-jump with well-timed Risings can help you reach greater heights than Unite Rocket can reach.
Custom Blocks
- Speed Charge
- Unite Charge
- Energy Converter
- Hero Time
- Hero Counter
- Hero Sense
- Dodge Mine
- Double Power
Of all the Custom Blocks, Unite Charge is one of the best early purchases you can make. It can make powering up your Unite Morphs in combat much easier to manage, and the cost to your Unite Gauge can be offset by the improved natural regeneration from having Speed Charge equipped simultaneously. Energy Converter can be amazingly useful in tandem with the Attack Liner skill. Later in the game, you’ll gain access to the Hero Time, Hero Counter, and Hero Sense Custom Blocks, and these are real game changers. Hero Time boosts the usefulness of Unite Spring by a huge degree, Hero Counter rewards skilled players with the ability to take no damage from most direct assaults if used properly, and Hero Sense is almost too useful so long as you’ve got the Unite Gauge to trigger it. Between these three blocks, you can get through otherwise dire situations without a scratch, a key component to any Pure Platinum run.
Dodge Mine and Double Power are a bit less vital than the other blocks mentioned here, but they are worth talking about. Double Power ramps up your damage significantly, which can help your fight against tougher opponents. Dodge Mine can be an extremely dirty tactic to use against enemies, in conjunction with Unite Bomb and Unite Spring. It’s quite situational, but it is rather funny to use against enemies like the Doora and its variants.
As for the Custom Blocks we didn’t list? There’s an argument to be made in favor of Safeguard and Auto-Guts. Both blocks work on the same principle as Hero Sense: Immediate danger triggers their effects. However, Safeguard and Auto-Guts both keep you in the immediate line of fire. One involves you taking damage, and the other isn’t infallible and attacks can break it to still cause damage. Neither of these things is conducive to scoring Pure Platinum. Other blocks, like Healing Guts and Item Catcher, have decent utility and certainly can be solid choices for any player, but their usefulness is far outweighed by the sheer effectiveness of the recommended Custom Blocks.
Skills
- Attack Liner
- Formation Charge
There are only three skills to buy, and while they are all useful, Attack Liner, in our opinion, stands head and shoulders above the other two. Very few enemies can flat-out stop a Wonder-Liner traveling through it and causing continuous damage. In conjunction with the Energy Converter Custom Block, you can do damage while recharging your Unite Gauge and health. An amazing amount of utility at a relatively low cost.
The Formation Charge is pretty awesome. However, later in the game you can set up situations that let you get more or less the same effect almost as quickly with standard Team Attacks, thanks to Unite Bomb, Hero Time, or Hero Sense. Despite this, there are specific enemies—Tumeekey, the Diedough-Goo, Gedie Dough-Goo, and the Hah-Gonay—that Formation Charge can stun much faster, since you can throw so many more heroes at them at once, which is important because it takes so many heroes to stun them in the first place. Stunning enemies figures heavily into scoring big combos and keeping yourself safe from harm. This is an expensive skill to purchase, though, and in light of other important purchases to make, Formation Charge is a lower priority.
Speed Liner isn’t worthless. It’s actually pretty useful during action sequences requiring you to draw specific shapes, as it helps max out your O-Parts bonuses during those. Speed Liner really comes into its own during 101% Hard, where you’ve got no fancy time dilation to let you take your sweet time drawing those shapes for your Unite Morphs. However, Speed Liner isn’t nearly as critical to your success on a first play-through.
General Combat Tips
Regardless of whatever it is you’re fighting, there’s a few universal “rules” to follow in any battle:
- Stay mobile: If you’re not actively attacking something, defending against attack with Unite Guts/Unite Spring/an appropriate Unite Morph, or following a counter prompt, there’s very little reason to hang around the same spot, unless you are trying to use Unite Camp to recharge. Many enemies have attacks that will punish those who sit still for too long.
- Know when to use Unite Guts: It’s easy to fall into the habit of using Unite Guts the moment you see an incoming attack. Unfortunately, while Unite Guts does solve a lot of problems, it is not the universal solution to every problem. There’s a lot of attacks out there that don’t respect Unite Guts at all. Use our enemy tables on page 348 to know exactly what you can do to defend yourself against everything every enemy can throw your way.
- Use your healing and Unite Gauge restoration items: Don’t hold on to your Wonderful Noodle Soups and Wonderful Cakes too tightly! They are meant to be used. There is no penalty in using them. Maybe it’ll sting your pride a bit, but that’ll hurt worse if you actually lose a fight and have to continue, which ultimately costs you more.
- Avoid using items that will cost you a rank: This doesn’t contradict the previous advice at all. Unless you’re absolutely desperate to get through a difficult section, the items that cost you a rank at the end of an Operation are never powerful enough to offset that cost.
- Immediately break the special defenses of enemies who possess them: There are many enemies that have special defensive armor that requires you to use specific means to break through it. Barring any external interference, you should focus on using the correct Unite Morph to beat those defenses. Oftentimes this extra layer of armor will protect the enemy from harm until you deal with it.
- Go for the stun: Either through proper counters with Hero Counter or Unite Guts or by using Team Attacks, the majority of enemies you’ll face in the game have some vulnerability to getting stunned. Take advantage of this. Even a number of bosses are susceptible to getting stunned. Stunned enemies are exploitable enemies, allowing for lengthy combos for heavy damage.
- Go toward the long combos: One aspect of your final grade at the end of a mission is your combo rating. To satisfy the Platinum requirements, you need to use multiple Unite Morphs while going on the attack to help boost your combo multiplier. If you take too long in between hits, your combo multiplier will reset.
- Be efficient: Early into any Operation, you don’t have a full Unite Gauge and must max it out by collecting Wonderful Batteries. However, battles will still occur regardless of how much Unite Gauge you’ve got to work with. Keep those limits in mind, and use the appropriate level of Unite Morphs to deal with the enemy. Cutting loose blindly will only leave you out of energy and no longer on the offensive—worse still, it will leave you without the energy to use defensive Unite Morphs when you need them most. Stave this off by using Wonderful Cakes, but early in a first play-through, you’ll not have many of those handy.
Wonderful Combat
Some of these special tactics require the use of Unite Morphs, Custom Blocks, or skills you might not acquire until later in the game. Some of these tactics are basic commonsense tips to get the most out of your various abilities. This section is meant to inspire as much as it is to inform you about the possibilities your Wonderful Ones possess.
Lethal Multipurpose Wonder-Liner
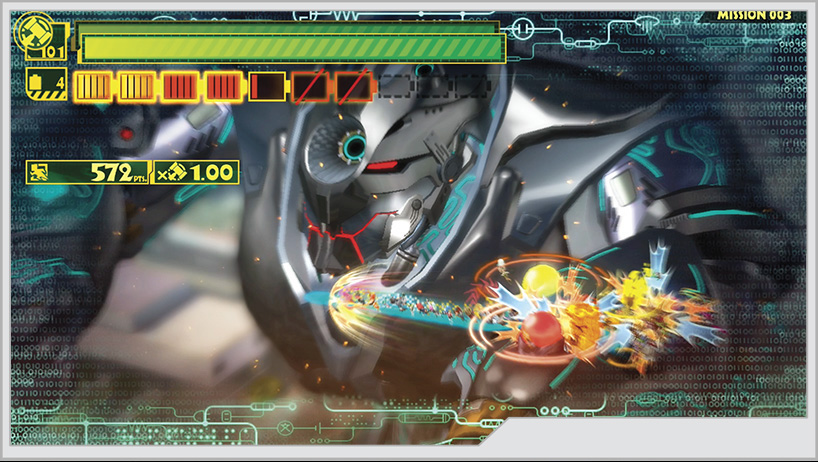
A basic but versatile boost to your capabilities is to purchase the Attack Liner skill and the Energy Converter Custom Block. Hitting enemies with your Wonder-Liner will help recharge your Unite Gauge, and when it is filled, you’ll regain some health.
Near-Endless Juggles
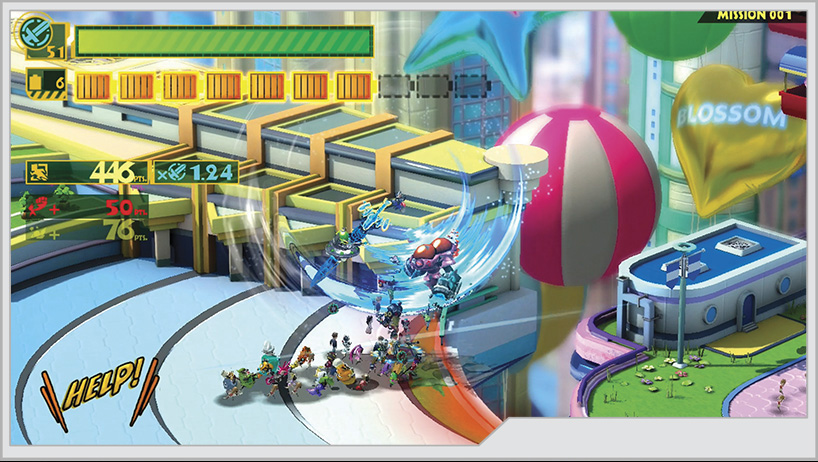
You can do this the moment you get Wonderful Rising for your base Unite Morph attacks. Generally, juggle combos work best with large enemies, like the Diedough-Goo or Hah-Gonay, as they are such large targets it’s hard to miss them.
It’s possible to keep an enemy in the air almost indefinitely with the proper use of Multi Unite Morphs and properly staggered use of Wonderful Rising. First, launch a stunned enemy into the air, follow them up, and throw in some extra hits to keep them airborne. While you do that, send out a Multi Unite Morph, preferably Unite Sword, but Unite Claw and Unite Hand can also work. Your teammates will maintain the juggle but will eventually drop the combo. However, if you let the leader under your control fall back down to the ground, you can leap back into the fray with another Wonderful Rising just as the enemy falls toward you, “catching” them and keeping them stuck in midair, completely at your mercy.
As you get farther into the game, you can expand on this technique as your arsenal improves. For example, if you stand under an enemy you’ve launched, you can toss a Unite Bomb straight up into them. This slows down their rate of ascent or descent, allowing you to land more attacks while the effect lasts. Juggles are your bread and butter when it comes to scoring enough Combo points for a Platinum rating, so be sure to exploit this.
Hero Time/Hero Sense Shenanigans
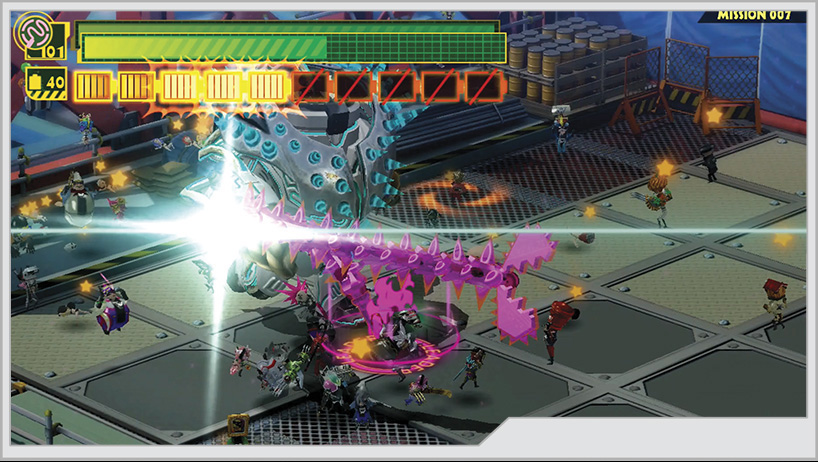
Hero Time and Hero Sense are two of the best Custom Blocks to have equipped. They can slow time if you Unite Spring away from an attack at the last moment or if you are in danger of taking damage. These effects stack.
Certain enemies, like the Gehdown and the Gedie Dough-Goo, have spike armor that damages you on contact. The game registers this as an attack. So, simply approaching the spike armor can trigger Hero Sense. If you Unite Spring away from the spike-armored enemy at that point, you’ll also trigger Hero Time. With the game world slowed down so much, you should have little trouble ripping off their armor with Unite Whip.
In general, any attack you can see coming is ripe for this tactic. Beam attacks are a good example. Since they are a constant threat of projecting damage, merely being close to the laser will trigger Hero Sense, and you can constantly Unite Spring away from the beam, then run back and repeat the process to keep up Hero Time.
The Unite Bomb–Dodge Minefield
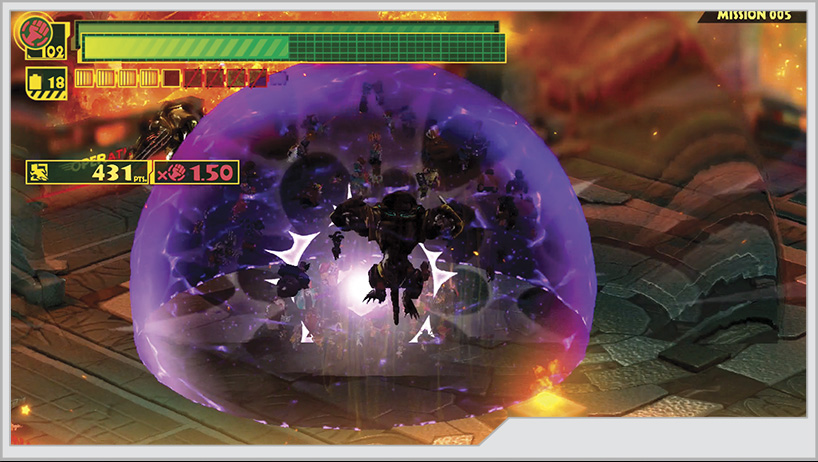
This tactic works best against isolated targets, though it is possible to catch multiple enemies in a small Unite Bomb blast to slow them down. With the Dodge Mine Custom Block, you can set a mine with every use of Unite Spring. With the enemies slowed down by the small Unite Bombs, you can lay down a considerable number of mines using the Wonder-Liner (enhanced by Attack Liner and supported by the Energy Converter Custom Block) to spear the enemies and refill your Unite Gauge to help maintain the Unite Bomb–Unite Spring spam. This is an excellent way to deal with the frustratingly quick Doora series of GEATHJERKs.
Unite Hammer Time
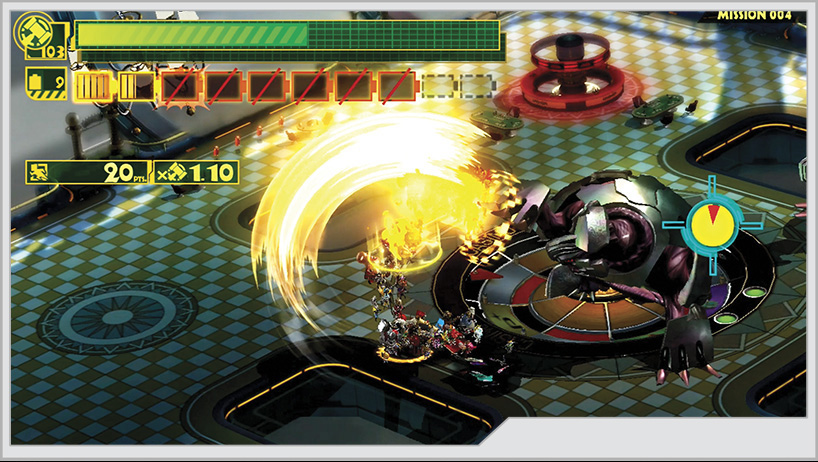
When clearing out a large number of smaller enemies, use Unite Sword early on; make it as large as possible and then swing away. However, this is less viable when armored opponents step into the fray, for when the sword strikes the armor, the Unite Morph will be shattered, scattering your team across the battlefield. You can avoid this by using Unite Hammer. The Unite Charge Custom Block will let you quickly charge up a Unite Hammer to the maximum possible strength. You can then use Wonderful Rising to get a good height over the battlefield, and perform a single downward strike from on high. The ensuing shock wave on impact will damage, if not destroy, smaller foes while also damaging armored ones.
Unite Claw Utility
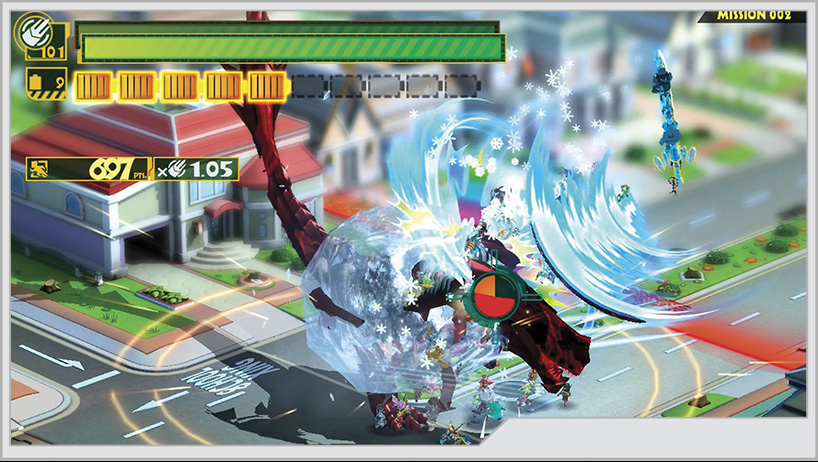
While Unite Claw doesn’t build up your combo multiplier particularly fast, its ability to freeze a target in place is extremely valuable. You can freeze launched enemies in midair, either by leading with Unite Claw yourself or by summoning members of your team to do it. Unite Claw makes an excellent supporting Unite Morph in general for any combos.
In addition to this, there are multiple enemies that require you to use Unite Claw to pry open their defenses to get at their weak points: the Hah-Gonay, the Deah-Kani, and the Die-Rixen. While you are busy prying open these specific enemies, you are effectively invincible! This is especially useful in battles against multiple Hah-Gonay.
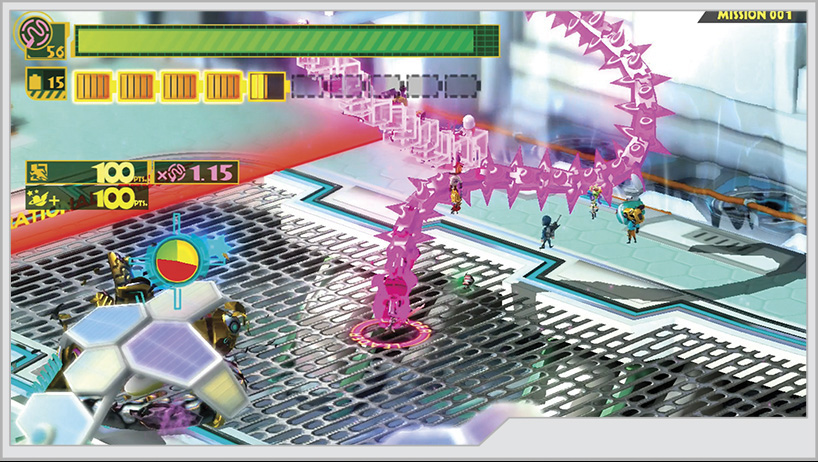
Unite Whip Slam Control
Unite Whip can pick up and slam or throw stunned enemies, most prominently the Orgon, Dahkarts, Hoedown, Raydown, and Gehdown. This attack is heavily damaging, but it immediately ends the stun, so if the enemy is not destroyed, they can still fight back and potentially cause damage. Rather than going for the whip slam, launch the enemy with Wonderful Rising and work on an air combo instead. You can ultimately cause more damage in the end.