
Metroid: Samus Returns Guide Walkthrough Surface Revisited
Proteus Ridley

Just when you thought you were home free, Samus’ old nemesis, who is sporting his fair share of wounds from his last encounter with the bounty hunter, is here and clamoring for the Metroid Hatchling. With all other Metroids dead and gone, this Metroid Hatchling is the Space Pirates’ last chance to utilize them as weapons once again. Needless to say, this can’t be allowed to happen—Samus isn’t leaving until Proteus Ridley’s done for. This is a tough, long fight, so get your game face on! All that sits between you and mission completion is this overgrown pterodactyl.
Proteus Ridley hits like a heavyweight champ, and he’s got more attacks than a toolbox has tools. This fight comes in four phases, and his moves change with each phase. The key to defeating Proteus Ridley is learning his attack tells. Every attack has a distinct animation, so you can see what’s coming as long as you watch him between attacks. As with previous bosses, we list all of Proteus Ridley’s attacks and how to detect them to give you your best shot at victory.
Resist firing your Super Missiles until at least Phase 2 (Phase 3 is best if you can hold out). Power Bombs have no effect on Proteus Ridley, so don’t waste time using them. Your Plasma Beam works, though, so have it equipped and ready to go at the start of the fight. Beam Burst also does wonders, and your Aeion Energy refills at the end of each phase.
Make a point to unload your Beam Burst completely during each phase, but focus on careful, concentrated bursts. Running out of Super Missiles and Aeion Energy during any phase is practically a death sentence—at the least, it drags
the fight out a lot longer, meaning Proteus Ridley has more opportunities to damage you.
Don’t bother using your Lightning Armor during this fight. Proteus Ridley hits so hard that the armor only takes about three or four hits before draining completely—your Aeion Energy is better spent on the Beam Burst.
Also of note: this fight takes place in an open area without a ceiling. With your Space Jump, you can jump higher during this boss encounter than any other, but avoid the temptation. Proteus Ridley follows you no matter how high you go, and the sky is his domain. Even with all of your Power Suit upgrades, your movement in the air is cumbersome and inelegant; Proteus Ridley has little trouble hitting you there. Instead, fight on the ground and only Space Jump to get over and around Proteus Proteus Ridley at opportune moments.
Phase 1
Proteus Ridley is incredibly aggressive. He presses forward as much as you let him and tries to pin you against one of the canyon walls. However, he readily backs off if you walk toward him in between his attacks. Use this tactic to gain some breathing room if he’s got you up against the wall.


Proteus Ridley starts one of his most common attacks by reeling his tail back behind his legs. It shakes like a rattlesnake tail, then launches diagonally at the ground. This move is easy to dodge, but extremely damaging if it hits you. When you spot the tell, Space Jump into the air around Proteus Ridley’s level and stay there while keeping your distance. Once his tail jets forward and retracts, you’re safe to drop back to the ground.
Expect this attack in different forms throughout the fight. The tell is always the same, but how the attack plays out changes slightly.

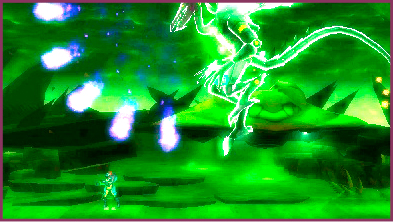
At times, Proteus Ridley’s mouth brims with purple fire. This is a sure sign that he’s about to spit an arc of fire in your direction. To avoid the attack, simply move between the fireballs. You have plenty of time to do this, but it’s easy to take damage if you’re in a frenzy. When you see Proteus Ridley’s mouth turn bright purple, remember to move calmly and carefully.


When Proteus Ridley rises higher into the air in an attempt to get directly above you, that’s your cue to back off. He’s about to come smashing down to the ground, and you don’t want to be there when he does. This attack is easy to dodge, so long as you have plenty of room to move. Run away from Proteus Ridley, and don’t get under his feet if you don’t have to. At a certain point, he stops pushing forward. This is how you know he’s about to smash to the ground.
Deal enough damage, and a cluster of Aeion Orbs pours out of him. A cutscene also plays out, which signals the beginning of the next phase. Keep a close eye on Proteus Ridley’s skin during the entire fight. As with almost every other boss, it changes color to indicate how much damage he’s taken—in Proteus Ridley’s case, his skin goes from its normal purple to a deep crimson color the closer you get to defeating him.
Phase 2
Proteus Ridley starts this phase crawling on the ground; expect him to alternate between flying and crawling for the remainder of the fight. While he’s crawling, you can’t push him back by walking toward him, which means you’re put more on the defensive.


Proteus Ridley raises his arm behind his back, then slashes toward you. Avoid this attack by moving away from Proteus Ridley, or by Space Jumping in the air until he finishes. He can perform a second swipe with his other arm as a follow-up. It comes out equally slowly, so be patient.

While on the ground, Proteus Ridley charges up and spits out a single fireball horizontally. Avoid this attack by jumping over it. It only poses a problem if he performs it while he’s got you cornered. In this case, he spits the fireball diagonally into the air in an attempt to hit you as you escape the corner. Take extra care if you see his mouth fill with purple flames when you’re close to the wall.
Eventually Proteus Ridley hops back into the air. Now the real danger begins.


The tail strike Proteus Ridley performed in Phase 1 is back, but slightly tweaked. The tell is the same: if his tail draws back behind him and begins rattling, start Space Jumping in the air. This time he gets it stuck in the ground for a moment, then pulls it out violently, which causes rocks to spike out and across the ground in your direction. The weather in the background can make seeing these rocks difficult, so your safest move is to stay in the air until the rocks pass by. Every part of this attack can deal a hefty amount of damage, so avoiding the whole thing is a must.


If Proteus Ridley places the tip of his tail straight onto the ground, jump hard and fast. This is one of his toughest attacks to avoid and also his most devastating. The tell signals a charging tackle, in which Proteus Ridley rockets forward in a straight line.
If you’re caught in his path, he takes a huge chunk out of your health. The difficulty here isn’t in the actual dodging; it’s in spotting the tell in time to get out of the way. Proteus Ridley is discreet in telegraphing this attack. If you fail to see the tail touch the ground, you won’t have enough time to dodge. Always watch that tail!
Proteus Ridley still shoots his volley of fireballs in an arc and flies above you in an attempt to smash down on top of you. The difference in the latter is that when he tries to crush you, instead of leaping right back into the air, he transitions into crawling on the ground.
Deal enough damage during this phase to move on to Phase 3.
Phase 3
At the start of this phase, the Metroid Hatchling steals some of Proteus Ridley’s health and gives it to Samus. It’s not a lot, but it makes up for a bit of the damage you’ve likely sustained during the first two phases.
If you’ve managed to avoid using Super Missiles up to this point, feel free to use them now. Make every one count; the longer the fight continues, the more chances Proteus Ridley has to hit you, so time is not necessarily on your side. We suggest you burn through your Beam Burst first, then transition to Super Missiles.
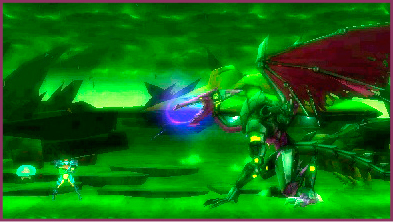

Once more, Proteus Ridley starts this phase on the ground. Most of his attacks are the same, with some slight variations. For example, after he spits a fireball horizontally (or diagonally if you’re cornered), he may follow up by spitting multiple fireballs continuously. Jump over them as you did the single fireball in the original attack. They come out at a slow rate, so you shouldn’t have trouble avoiding them.
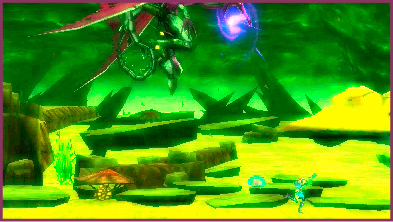

Proteus Ridley has two new attacks to watch out for: the fireball shockwave and the hyper claw slash. You know the fireball shockwave is coming when Proteus Ridley flies overhead and his mouth fills with those familiar purple flames. His mouth points to the ground, which is how you differentiate this new attack from his arcing-fireball attack. When you spot the tell, start Space Jumping away from him. He shoots the fireball straight to the ground, creating a shockwave that ignites most of the ground space visible on your screen.


The hyper claw slash only makes an appearance when Proteus Ridley is on the ground. He pulls his arm behind his back and under his tail, which then begins to glow. After a few seconds, he lunges forward with a devastating slash. The move is easy to avoid, but terribly damaging if it hits you. When Proteus Ridley’s claw starts to glow, Space Jump into the air until the attack concludes.


One of Proteus Ridley’s most devastating attacks (if not THE most devastating) appears in this phase. When Proteus Ridley reels back with his hands out and open, Space Jump hard and fast! He’s about to lunge forward, and if he makes contact with you, he grabs you and smashes you against the wall, dealing incredible damage. The timing is tight, so don’t delay when you see Proteus Ridley pull back. If you catch the tell before the attack comes out, avoiding it is as simple as Space Jumping.
After you deal enough damage, the Metroid Hatchling again saps Proteus Ridley’s energy and transfers it to you. It’s not a lot by any means, but this far into the fight, anything is better than nothing.


Phase 4
This next phase begins with Proteus Ridley immediately performing his counterable attack. This is the first time you see it, but he performs it occasionally from here on out.
His mouth emits the usual white rings indicating a counterable attack, but there’s nearly no time to do anything but counter. If you’re not already in position to do so, there’s no time to get there. He lunges forward a good distance, so if you’re not positive you can land the counterattack, Space Jump and avoid it altogether.
Don’t miss the opportunity to counter Proteus Ridley at the start of this phase. It’s the only time in the entire fight that a counterable attack is guaranteed.
From this point on, the only way to defeat Proteus Ridley is with a counterable attack. Dealing damage until he drops resources doesn’t end the fight, nor does it start a new phase. Instead, Proteus Ridley’s skin reverts to its normal purple hue, and you have to fight through the phase again. Be on the lookout for that counterable attack. When it shows up, landing the counter almost certainly ends the fight. If not, wait for the next one and strike as soon as you see it to finish this fiend for good.
With Proteus Ridley defeated, Samus can finally return to the Gunship and leave SR388 behind. She thinks she can breathe easy, now that the Metroids are practically eradicated. Little does she know that there are other terrors on SR388 that the Metroids were keeping at bay…