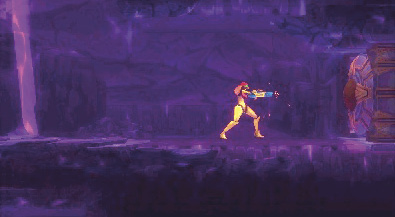
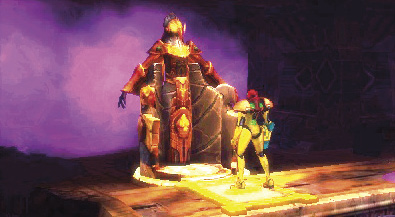
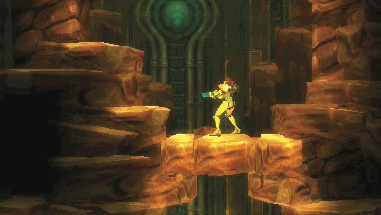
Samus’ quest to destroy all Metroids begins in much the same way as all of her other quests: she stands on her iconic ship on the Surface of a largely uninhabited planet.
There’s not much to do on SR388’s Surface—not yet, anyway. Head to the right to come to what looks like an abrupt dead end.
The path ahead is barricaded by Blocks; shoot them with your Power Beam to destroy them and progress forward. Almost every destructible Block type reforms if left alone. If this happens, shoot them again.
Enemies drop purple and yellow orbs when they die. This is true for every enemy in the game, including bosses. The purple orbs refill your health, while the yellow orbs refill your Aeion Energy, which we explain in further detail later. In addition to dropping these orbs, enemies drop ammunition for weapons like your Missile Launcher.
The goal here is to defeat enemies without taking damage. This becomes more of a struggle the deeper you venture into the planet. Being cautious during this mission keeps you alive a lot longer than rushing in. This is a much harder mission than most others Samus has been on.
Shortly after destroying that first set of Blocks, you come to another dead end. This time the Power Beam doesn’t work, so try something with more firepower: missiles. A single missile is all it takes to destroy the Blocks ahead.
At this point, you’re prompted in-game to use Free Aim to shoot the Block above you. Destroy it, then jump at the platform it was blocking. Samus grabs on to it automatically. While hanging from the ledge, push Up to climb onto the platform.
Jump to the platform on the left, then to the upper platform on the right. There’s nothing farther down the left path except for a Rock Icicle, so don’t worry about exploring.
Two Missile Blocks barricade climbable ledges. Use Free Aim, fire a missile at the first Block, and then fire a second missile while Free Aiming from the first ledge. Or wall-jump your way up there.
If wall-jumping proves too difficult, use Free Aim and missiles to climb this path. Again, you’re never required to wall-jump. We offer a few tips here and there where wall-jumping is particularly useful, but never for the purposes of progressing through the game. For the most part, it’s up to you to find surfaces to wall-jump between.
This next space was created to bolster your Melee Counter efficiency. Gullugs litter the entire area; the easiest and safest way to defeat them is with Melee Counters. Use this technique to make your way down to the bottom-right corner of the room.
Follow the hall until it dead-ends in a pit. Free Aim and shoot the Blocks at the bottom. Head to the bottom-right corner of this corridor to progress.
Continue following the path until you come to a door surrounded by a large red dome. You find a Missile Tank to the left, but it’s unreachable at the moment. Fire a missile at the red dome, which disappears and never reappears. Head on through the door.
As soon as you enter the next room, a cutscene plays, revealing a Chozo Statue holding an Item Sphere. Remember this scenery, because it always marks a new item for your arsenal.
Shoot the Item Sphere to reveal the item inside, then run up and touch it to claim it as your own.
The upgrade in question is a Metroid staple: the Morph Ball. Use it to roll under the Chozo Statue’s platform and progress forward. Shoot through a few Blocks and a Gravitt to clear the way, then you’re free to roll.
Roll under the statue until you drop into the room below, right next to the Save Station, then proceed left.
Upon entering the next room, you see a giant gold medallion with a Metroid carved into its center, and the figure of a Chozo priest jutting out below it. This looks important, but interacting with the ancient device yields nothing of worth at the moment.
Take care not to touch the purple liquid surrounding the Chozo artifact, lest you get burned. Jump over it carefully and head to the left side of the room.
On the far-left side of the room, you encounter a door that doesn’t open no matter how much you shoot it. Jump up to the ledge directly above and follow the path into the next room.
Run until you reach a fork, then continue along the upper path.
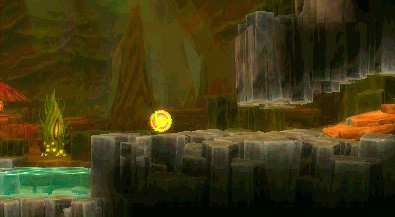
Once on the upper path, take a few steps forward to encounter a massive structure that looks like the gaping maw of a Chozo beast. At the dead center of the maw is an energy orb. Roll up into the Morph Ball and enter the Chozo monster’s mouth to collect the orb.
The orb unlocks your first Aeion Ability, Scan Pulse. Use Scan Pulse to reveal Blocks near you, which, in this case, are the Blocks in the upper-left corner of the room. Shoot them and jump through the passage.
Step onto the platform ahead to fall through to the area below. Head through the door on the right to progress.
As soon as you enter this next room, you’re immediately reminded of your mission. A Hornoad that’s hopping around becomes Metroid food. Your Power Suit begins beeping during this attack, and the Metroid symbol on the bottom center of the bottom screen flashes yellow. This feature of your suit is a Metroid Radar, so remember that beeping during your mission.
Go right and drop down the shaft in Morph Ball form. If you’re angling for another Missile Tank, stop on the center of the platform where the path forks, then read the tip for M-3. Otherwise, drop to the bottom of the room next to the Energy Recharge Station and head left under the column.
As soon as you cross under the column, head to the left. You can go up, but there’s nothing there for you.
Continue to the drop-off at the left side of the room. Drop to the bottom and destroy the Block on the right-hand corner with a missile. The Metroid Radar has been going crazy up to this point, so expect an encounter just beyond this passage.
As soon as you enter the room, you’re faced with a Metroid. It isn’t long before the situation ramps up. The Metroid turns gray and a new form bursts out. Metroids of the variety you’re familiar with represent a larval state. Here on SR388, the Metroids are free to grow to maturity uninterrupted. At least, that was the case until Samus showed up.
1/40
Alpha Metroid
Even though its form and function are different, this Metroid is just as indestructible as its larval form. Power Beam shots don’t work, leaving missiles as your sole means of attack. Thankfully, this little grub is newly hatched, so it doesn’t have much in the way of health or attacks. It simply swoops down at you repeatedly, which is counterable.
Counter the Metroid while it performs this swooping tackle, then unload a volley of missiles on it. If you miss the counter, you take a fair bit of damage, so if you don’t feel confident, jump over the parasite instead of whiffing the counter. A single counter and missile volley should finish this fight, but don’t expect the next fights to be nearly so easy.
With the Metroid defeated, the Chozo artifact back near the planet’s Surface begins flashing on your map. Make your way back there (it’s marked as on the map in this book).
Exit the room to the right and continue until you reach a deactivated door. Head to the platform above it and shoot the red dome blocking the upper door with a missile, then enter.
Inside this next room is another new toy for you to play with: the Charge Beam. You don’t get much use out of it as a weapon, but its utility becomes increasingly handy the farther you venture in the game.
For starters, the Charge Beam opens those deactivated doors. Hold down the Fire button until an orb quickly forms and fades at the tip of your Power Beam, then release to charge the door. It functions like a standard door from here on out.
Exit the room and head up the corridor until you reach the top. You encounter another Charge Door. Shoot it with a Charge Beam shot and go on through. Keep heading to the right until you reach the Chozo artifact. You encounter another Charge Door on the way.
Once you’re back at the Chozo artifact, stand on its center. The DNA strand you picked up from the Metroid is deposited into the device, and the purple liquid lowers, granting you access to parts unknown.
If you use your Scan Pulse in the area below the purple liquid, three separate item locations appear on your minimap. None of these are obtainable now, so disregard them for the time being and head southwest until you reach a Charge Door.
Charge it, go through, and follow the path until you reach a mysterious Chozo device.
Drop under the Chozo Seal. Then, when the path forks, take a left.
Head left until you’re on the platform below the peculiar ice crystals, then jump and fire downward to destroy the floor below you. You’re now at the bottom of the first area of SR388, where another strange Chozo device sits lit and shrouded in mystery.
It’s an elevator that transfers you to a new area. Stand on its center to activate it and venture deeper into the planet.



 Samus’ quest to destroy all Metroids begins in much the same way as all of her other quests: she stands on her iconic ship on the Surface of a largely uninhabited planet.
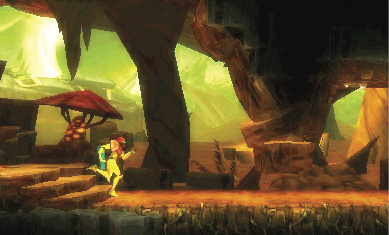


 Shortly after destroying that first set of Blocks, you come to another dead end. This time the Power Beam doesn’t work, so try something with more firepower: missiles. A single missile is all it takes to destroy the Blocks ahead.

 At this point, you’re prompted in-game to use Free Aim to shoot the Block above you. Destroy it, then jump at the platform it was blocking. Samus grabs on to it automatically. While hanging from the ledge, push Up to climb onto the platform.
 Two Missile Blocks barricade climbable ledges. Use Free Aim, fire a missile at the first Block, and then fire a second missile while Free Aiming from the first ledge. Or wall-jump your way up there.
 T his next space was created to bolster your Melee Counter efficiency. Gullugs litter the entire area; the easiest and safest way to defeat them is with Melee Counters. Use this technique to make your way down to the bottom-right corner of the room.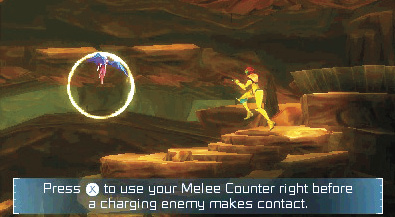


 Continue following the path until you come to a door surrounded by a large red dome. You find a Missile Tank to the left, but it’s unreachable at the moment. Fire a missile at the red dome, which disappears and never reappears. Head on through the door.
 As soon as you enter the next room, a cutscene plays, revealing a Chozo Statue holding an Item Sphere. Remember this scenery, because it always marks a new item for your arsenal.

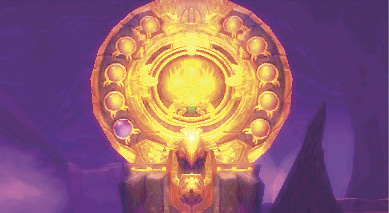
 Upon entering the next room, you see a giant gold medallion with a Metroid carved into its center, and the figure of a Chozo priest jutting out below it. This looks important, but interacting with the ancient device yields nothing of worth at the moment.


 Once on the upper path, take a few steps forward to encounter a massive structure that looks like the gaping maw of a Chozo beast. At the dead center of the maw is an energy orb. Roll up into the Morph Ball and enter the Chozo monster’s mouth to collect the orb.


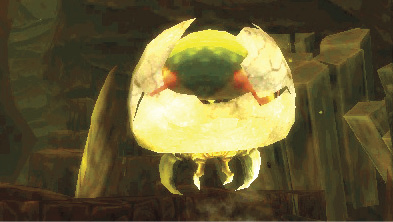
 As soon as you enter the room, you’re faced with a Metroid. It isn’t long before the situation ramps up. The Metroid turns gray and a new form bursts out. Metroids of the variety you’re familiar with represent a larval state. Here on SR388, the Metroids are free to grow to maturity uninterrupted. At least, that was the case until Samus showed up.


 With the Metroid defeated, the Chozo artifact back near the planet’s Surface begins flashing on your map. Make your way back there (it’s marked as
  on the map in this book).


 If you use your Scan Pulse in the area below the purple liquid, three separate item locations appear on your minimap. None of these are obtainable now, so disregard them for the time being and head southwest until you reach a Charge Door.