
Metroid: Samus Returns Guide Walkthrough Area 2
ARACHNUS
ARACHNUS

That wasn’t an Item Sphere! That was the armadillo-like native of SR388, Arachnus! Disregarding the Metroids you’ve fought up to this point, this marks the game’s first full-fledged boss battle, and it’s quite the challenge.
Arachnus can’t be damaged if shot from behind or while it’s rolled up into a ball; only shots to its red-and-yellow flesh have any hope of harming it. Missiles should be your go-to for this fight, so use them wisely. If you’ve followed our Walkthrough so far, you should have plenty of missiles to work with.
Use you Lightning Armor at the start. It doesn’t last more than a few hits, but it gives you a bit of time to get accustomed to Arachnus’ attack patterns.
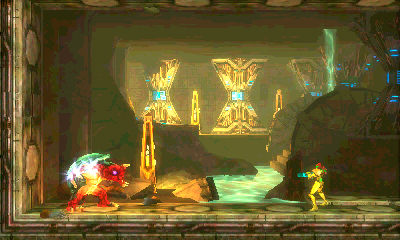

One of Arachnus’ more common moves is its energy wave attack. Its hands begin to sparkle, then it throws out a wave about the same height as Samus. It often performs this attack up to three times, but it may throw fewer waves. The first wave is easy to dodge, but the subsequent waves are trickier. The flashing hands are emphasized on the first wave but largely absent on follow-ups, which can catch even the most self-respecting bounty hunter unaware. The timing between waves is always the same, so focus on getting a feel for it and jumping when your gut tells you the time is right.

Arachnus rolls into a ball to perform a variety of attacks. The first is a speedy dash across the chamber. This attack is easy to dodge. Wait for it to spin up for a few seconds, then jump into the air as high as your Power Suit will carry you. You get enough hang time that even a slightly off jump puts you out of harm’s way. Like the energy wave attack, Arachnus performs this attack three times in a row before stopping. Until it finishes spinning, you don’t have an opportunity to damage it.
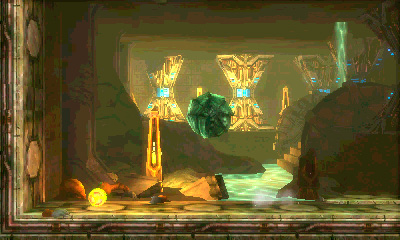
That’s not where the ball-based attacks end. Arachnus also loves to roll into a ball and bounce around the chamber. Your best response here is to roll up into the Morph Ball and wait for Arachnus to approach you, then roll under when it jumps into the air. It continues to follow you around the chamber for several jumps, so race to the other side of the chamber and wait for it to approach, roll under, then repeat. Don’t bother trying to wait this attack out by using the Spider Ball to climb the walls. Every time Arachnus hits the ground, you’re shaken loose and dropped. As with the spinning attack, Arachnus is invulnerable while bouncing around the chamber.

Its third and final ball attack involves Arachnus jumping into the air, pausing for a moment, then slamming down on the ground. This slam creates a shockwave that damages you if you’re caught in it. It’s an easy attack to dodge by running away from Arachnus and jumping when it slams to the ground. It only performs this attack once before transitioning into another attack, but you can’t damage it until it finishes.

Arachnus occasionally launches fireballs from its mouth in an arcing pattern toward your current location. The ground ignites for a second wherever the fireball lands, so expect to jump away from the fireball, rather than above it. Arachnus shoots three fireballs every time it performs this attack. Dodging these can be tricky, but once you have it down, use the opportunity to shoot some missiles at Arachnus’ unarmored regions.