
The Witcher 2: Assassins of Kings Guide Walkthrough
Chapter 3: Loc Muinne (Iorveth)
 For a Higher Cause!
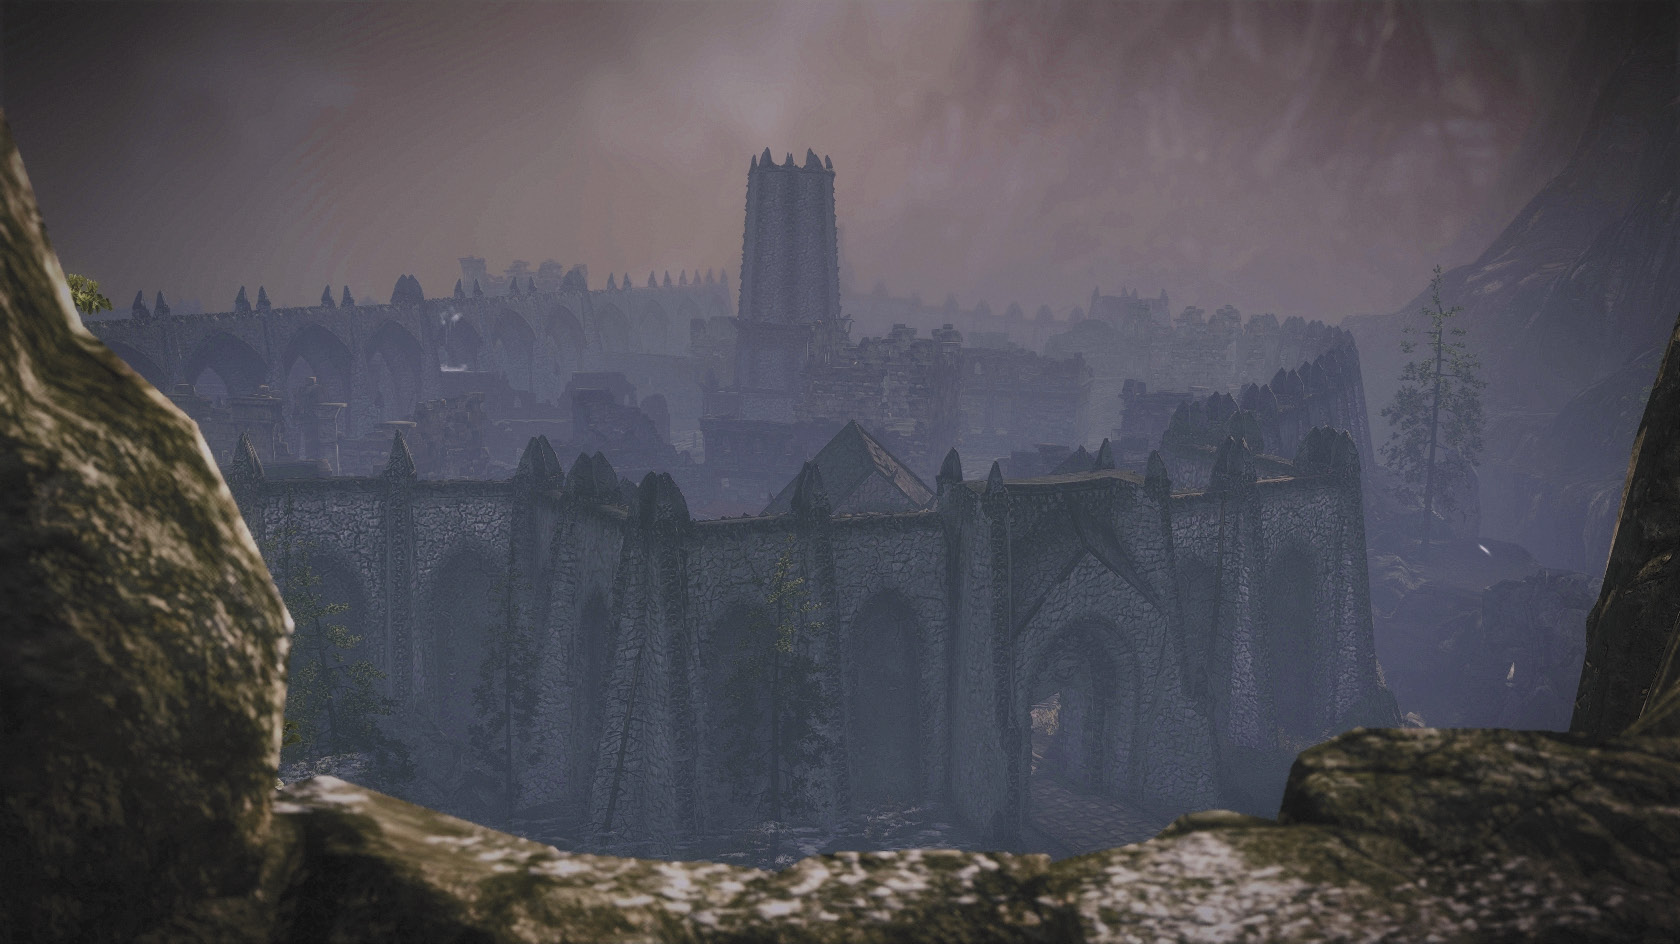
All roads lead to Loc Muinne now. Your first task is to find a way to get into the city, so you can track down Philippa Eilhart and find Triss. Begin by following Iorveth and helping him kill harpies. These fights should be fairly trivial for you, since you finish Iorveth’s version of Chapter 2 at a fairly high level. As you work your way down the winding mountain path, you eventually come within sight of an encampment of knights from the Order of the Flaming Rose.
At this point, Iorveth mentions that the Order of the Flaming Rose is dangerous. This is a problem for you, because they’re camped out right in front of the city’s main gate. Iorveth proposes entering Loc Muinne through a secret path instead, since that lets you avoid dealing with the Order entirely. Now, it may appear here that you face a choice between following Iorveth and dealing with the Order, but in most games (see sidebar) that is not the case.
_opt.jpeg)
If you attempt to approach the order, you initiate a brief dialogue sequence. When the dialogue is over, the Order of the Flaming Rose becomes hostile toward you and begins attacking. Regardless of how powerful your Geralt build is or how skillful a gamer you are, it is not possible to defeat the Order of the Flaming Rose. The Order has an infinite number of soldiers, you may even notice individuals respawning after you’ve killed them. The only way you can enter Loc Muinne and advance the game at this point, unless you are playing the PC version of the game and meet certain requirements (see below), is to retreat from the Order and follow Iorveth toward the secret cave.
For PC PlayersYou have another option for entering Loc Muinne if you are playing the PC version of The Witcher 2: Assassins of Kings Enhanced Edition and have imported a save from The Witcher where Geralt has allied with the Order. If your game meets these requirments, then the Order’s current headmaster is Siegfried of Denesle, who will not be hostile toward Geralt. If Siegfried is alive, then when Geralt speaks with the Order, he will be permitted to pass through their camp and enter the Loc Muinne through its main gates. If you have imported the correct save data for creating this scenario, you also add an additional merchant to Chapter 3, Polycarp of Rinde. If you enter Loc Muinne through the main gates, then remember that you need to find and meet up with Iorveth once you’ve entered the city. Finally, you may wish to obtain the silver sword Deithwen before you enter the city. |
Polycarp of Rinde
| Item | Price | Item | Price |
|---|---|---|---|
| Sun Rune | 376 | Magic Wrap | 235 |
| Ysgith Rune | 501 | Steel Plate Enhancement | 65 |
| Earth Rune | 251 | Diagram: Blue Meteorite Ore | 301 |
| Moon Rune | 376 | Diagram: Red Meteorite Ore | 239 |
| Fire Rune | 501 | Diagram: Yellow Meteorite Ore | 239 |
| Diamond Dust | 29 | Mail Enhancement | 158 |
| Amethyst Dust | 22 | Armor Enhancement | 32 |
| Cloth | 20 | Leather Enhancement | 33 |
| Leather | 20 | Diagram: Amethyst Armor Enhancement | 201 |
| Hardened Leather | 26 | Diagram: Diamond Armor Reinforcements | 276 |
| Studded Leather | 39 | Studded Leather Reinforcement | 64 |
| Diagram: Leather | 176 | Fibre Enhancer | 33 |
| Diagram: Amethyst Dust | 264 | Reinforced Leather Enhancement | 34 |
| Diagram: Diamond Dust | 314 | Iron Ore | 20 |
| Harvall | 1,470 | Silver Ore | 45 |
The Secret Cave
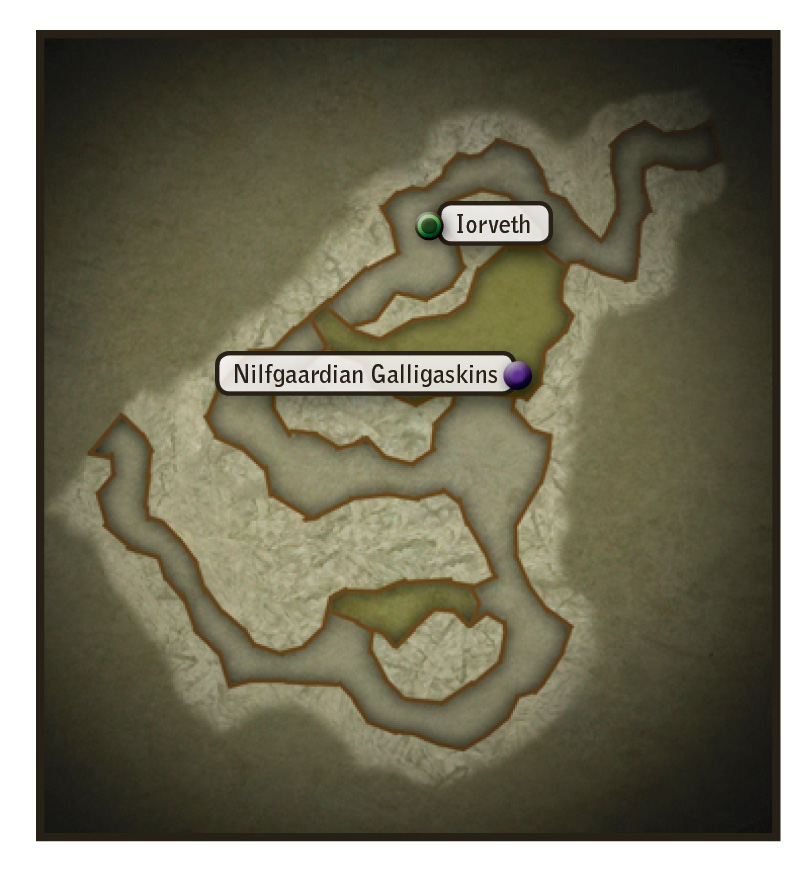
Iorveth immediately enters the secret cave if you move toward him, but don’t follow him inside just yet. Explore the area to the north of the secret cave’s entrance first. You come to a narrow gully patrolled by two arachasae. One spawns on either side of you, so it can be helpful to dodge-roll to try and get on either side of the pair. The arachasae themselves shouldn’t be difficult for you to defeat at this point if you stick to your build’s strengths.
After you loot the arachasae’s bodies, head into the gully’s dead-end area. You should see a wrecked wagon, a pile of bones, and some lost cargo. Scan the area so you can pick up random loot and orens from the cargo. Examine the pile of bones to find the silver sword Deithwen. Deithwen’s +25 percent damage to large monsters and +25 percent damage to gargoyles makes it ideal for completing the tasks that await you in Chapter 3. Equip it immediately and slot it with runes as soon as you have the opportunity.
Head back to the cave entrance and follow Iorveth. The secret cave is a relatively tame area at first, though you do immediately spot an arachas once you step inside. You reach the arachas once you round the first bend. It shouldn’t be a very hard fight with your current equipment and at your current level. The main trick is that, depending on exactly when you enter combat with the arachas, you may also be fighting some endrega warriors and guards at the same time. The path through the cave is otherwise very linear, with the occasional dead body to loot for orens or rare equipment. There’s also a little bit of random loot.
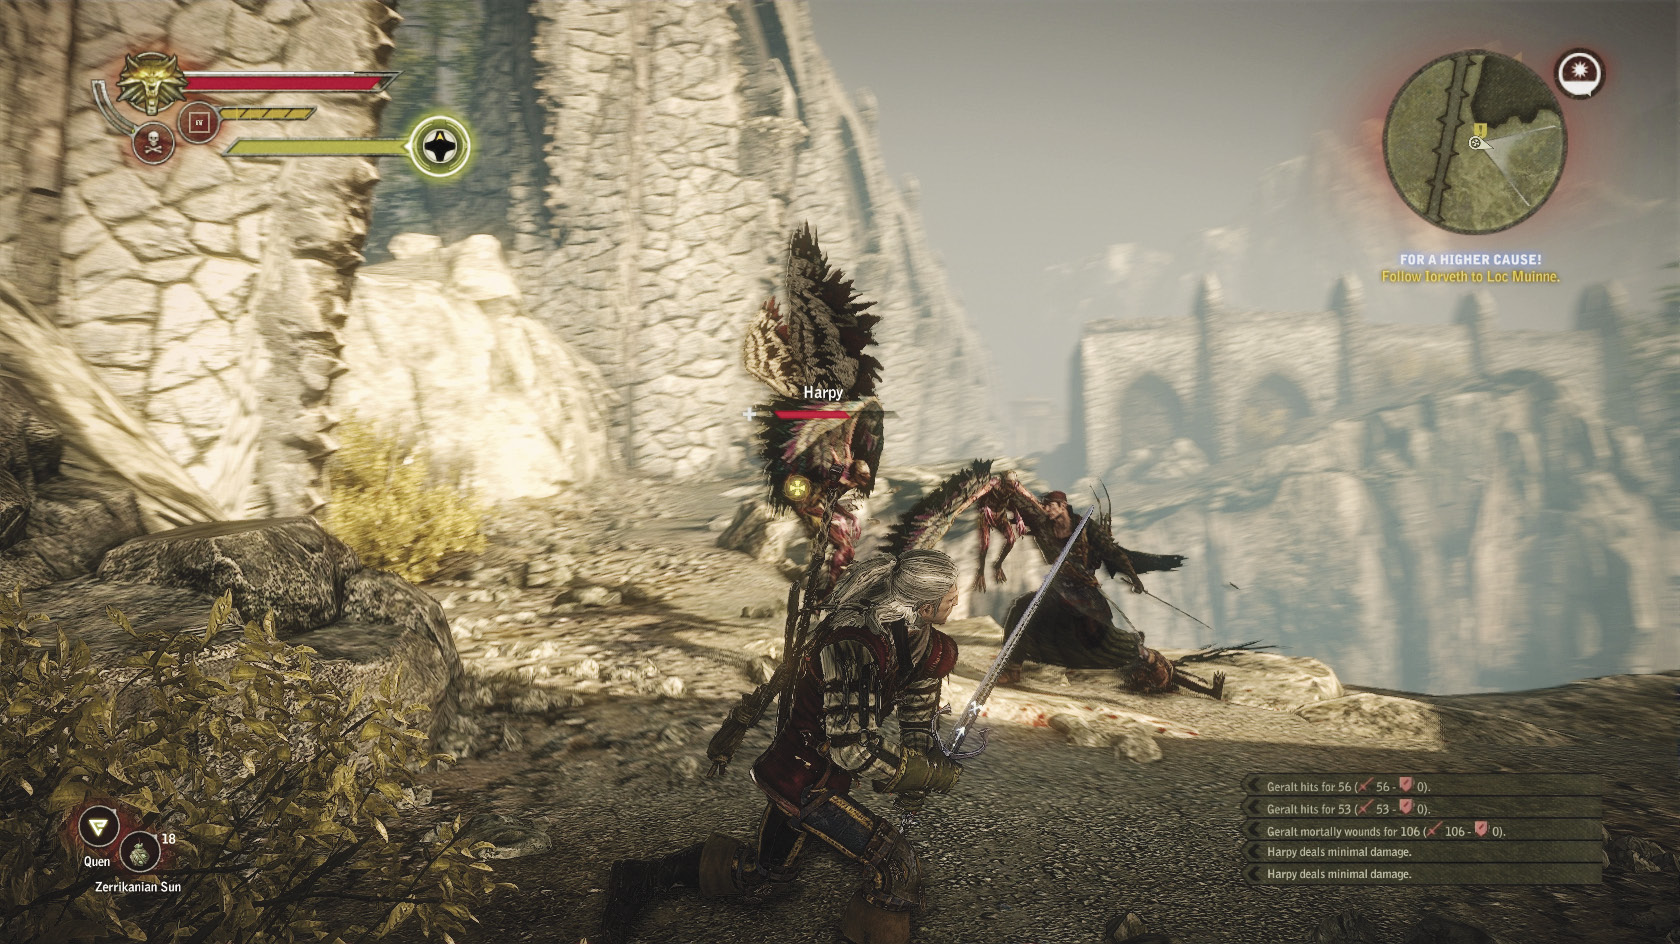
When you emerge from the cave, follow Iorveth down another winding path. After battling more harpies, you come to some rocks you can use to climb over the city’s walls. Follow Iorveth up, and you can eventually drop down over the walls of Loc Muinne into a small courtyard.
Loc Muinne
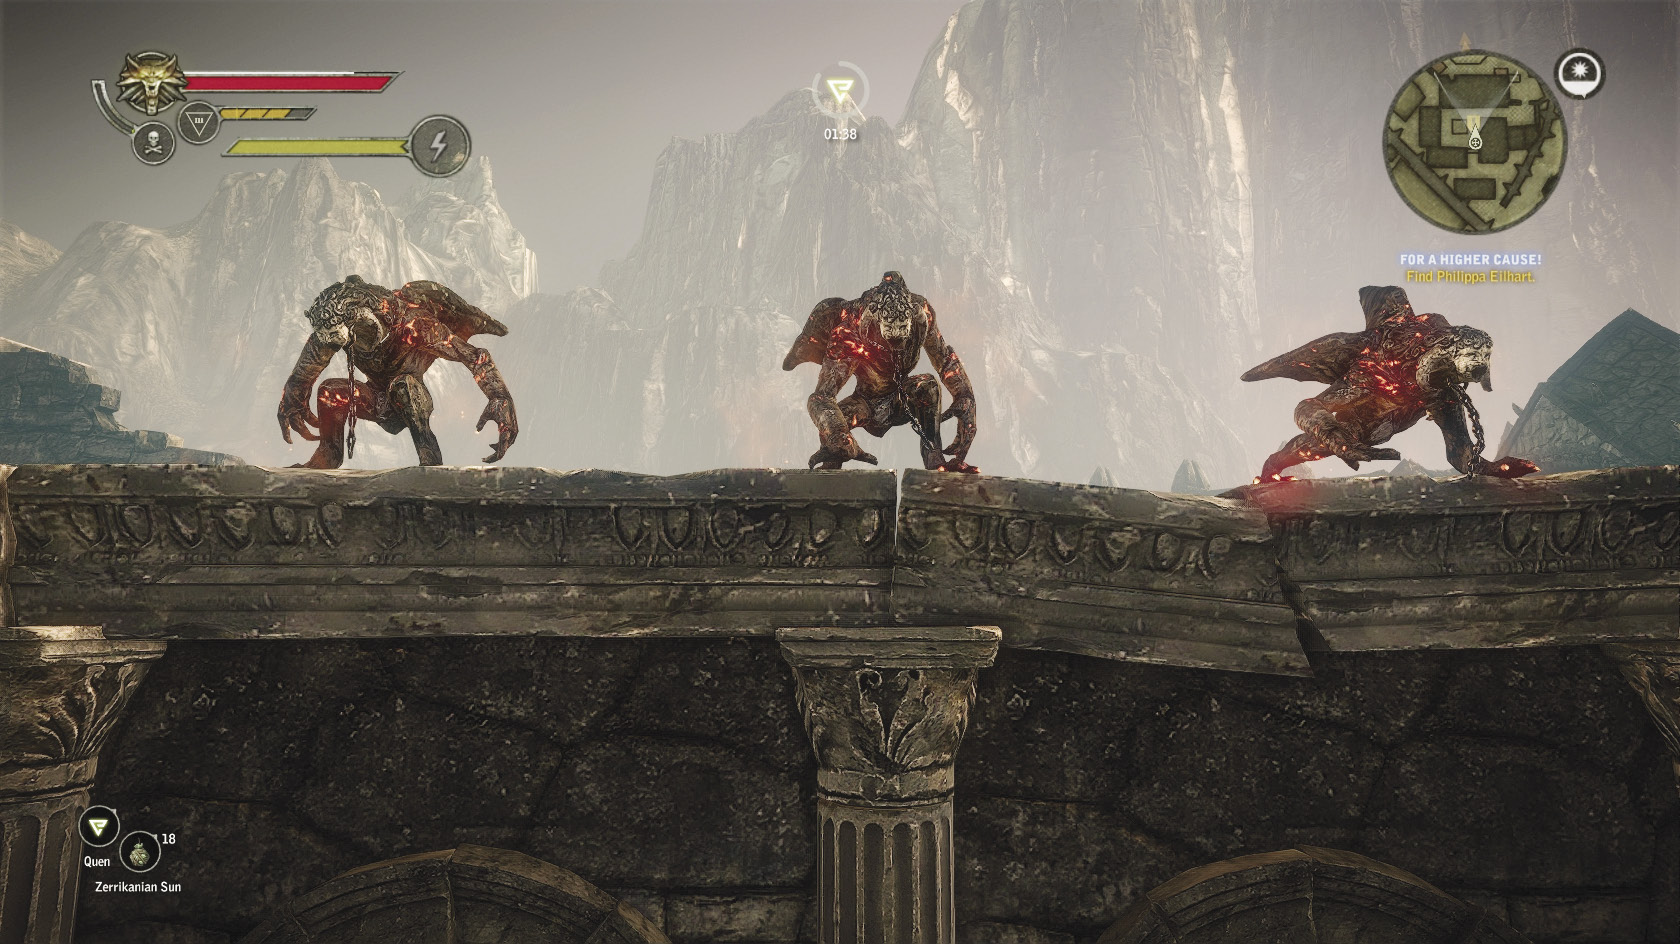
So it turns out the courtyard is patrolled by gargoyles, a type of enemy you’re encountering for the first time. Gargoyles hit hard and tend to spawn in groups of three to five. If you manage to defeat one, it explodes upon death into a rain of fiery debris. This explosion hits much harder than a rotfiend’s death throes and can inflict incineration. This fight can be lethal if you aren’t ready to take it seriously. Gargoyles hit hard, and in such a small area, they can easily get behind you and deal pretty serious damage. Even a build with maxed Quen may find gargoyles overwhelming. If you are careful not to get surrounded, you should be able to get through the battle using your build’s usual strengths.
After you defeat the gargoyles, follow Iorveth on a circuitous route around the various royal encampments to an area just outside the Temerian camp. At this point you need to make another choice. You have to find a way to get into the dungeons where Philippa Eilhart is being held. You have two options: You can try to find a way in through the sewer system beneath the city, or you can attack the nearby Temerian camp and get yourself arrested. Regardless of what you say here, you aren’t committed to that course of action. Actually, you can ignore all of the main storyline for this chapter now and go do some side quests. This is highly recommended.
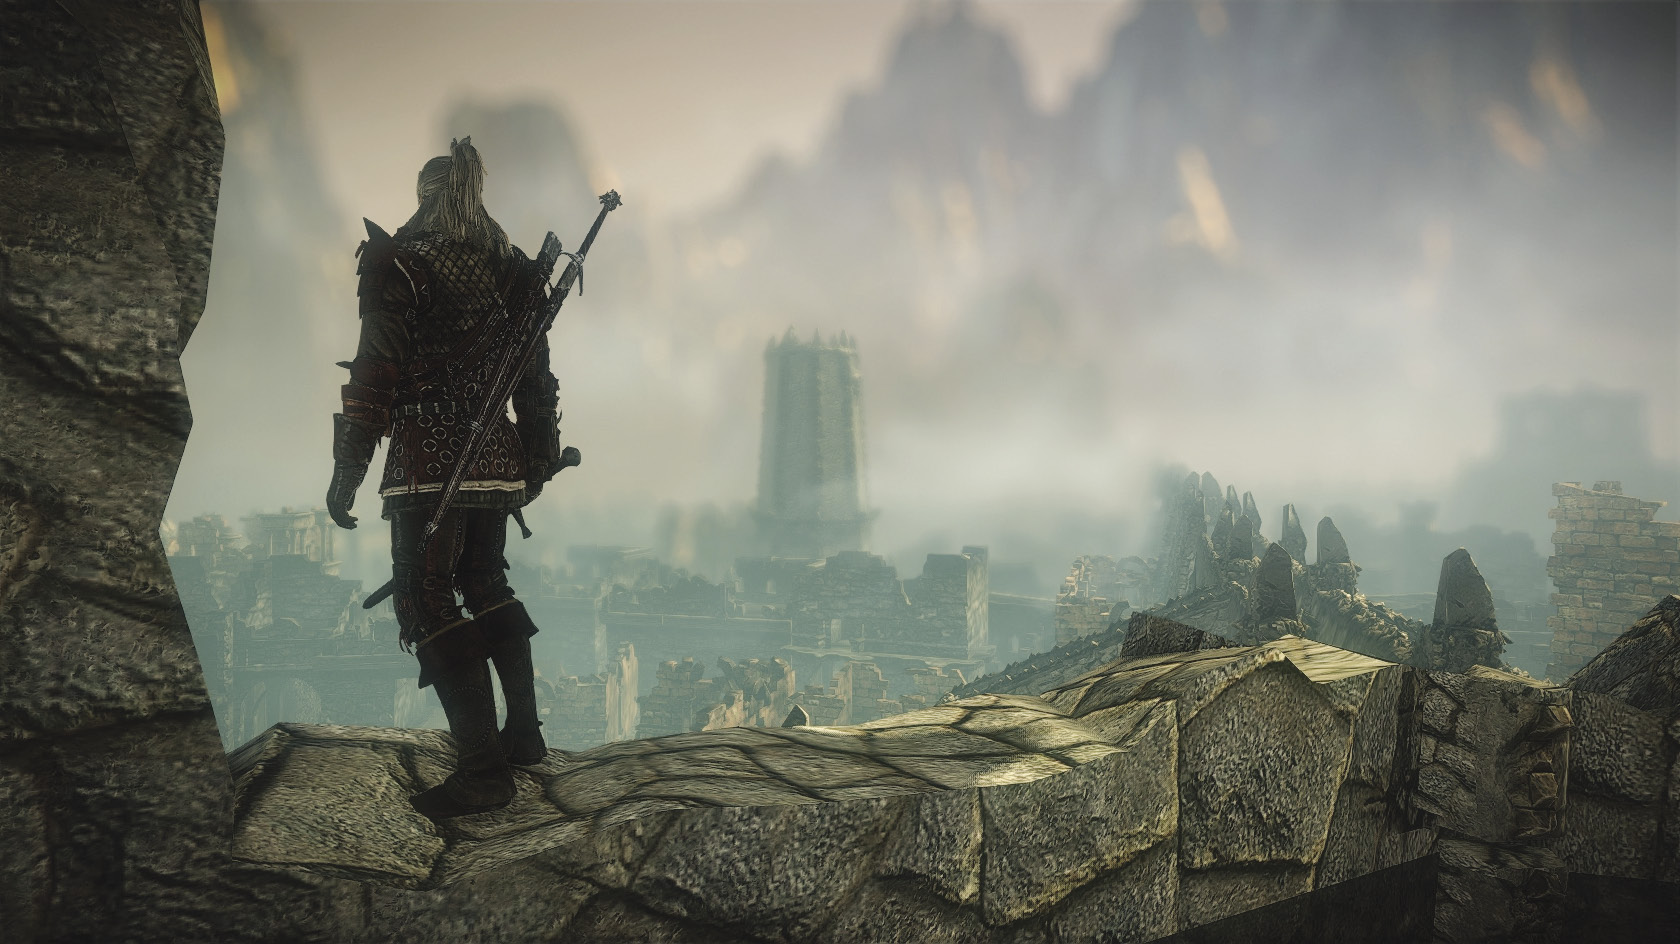
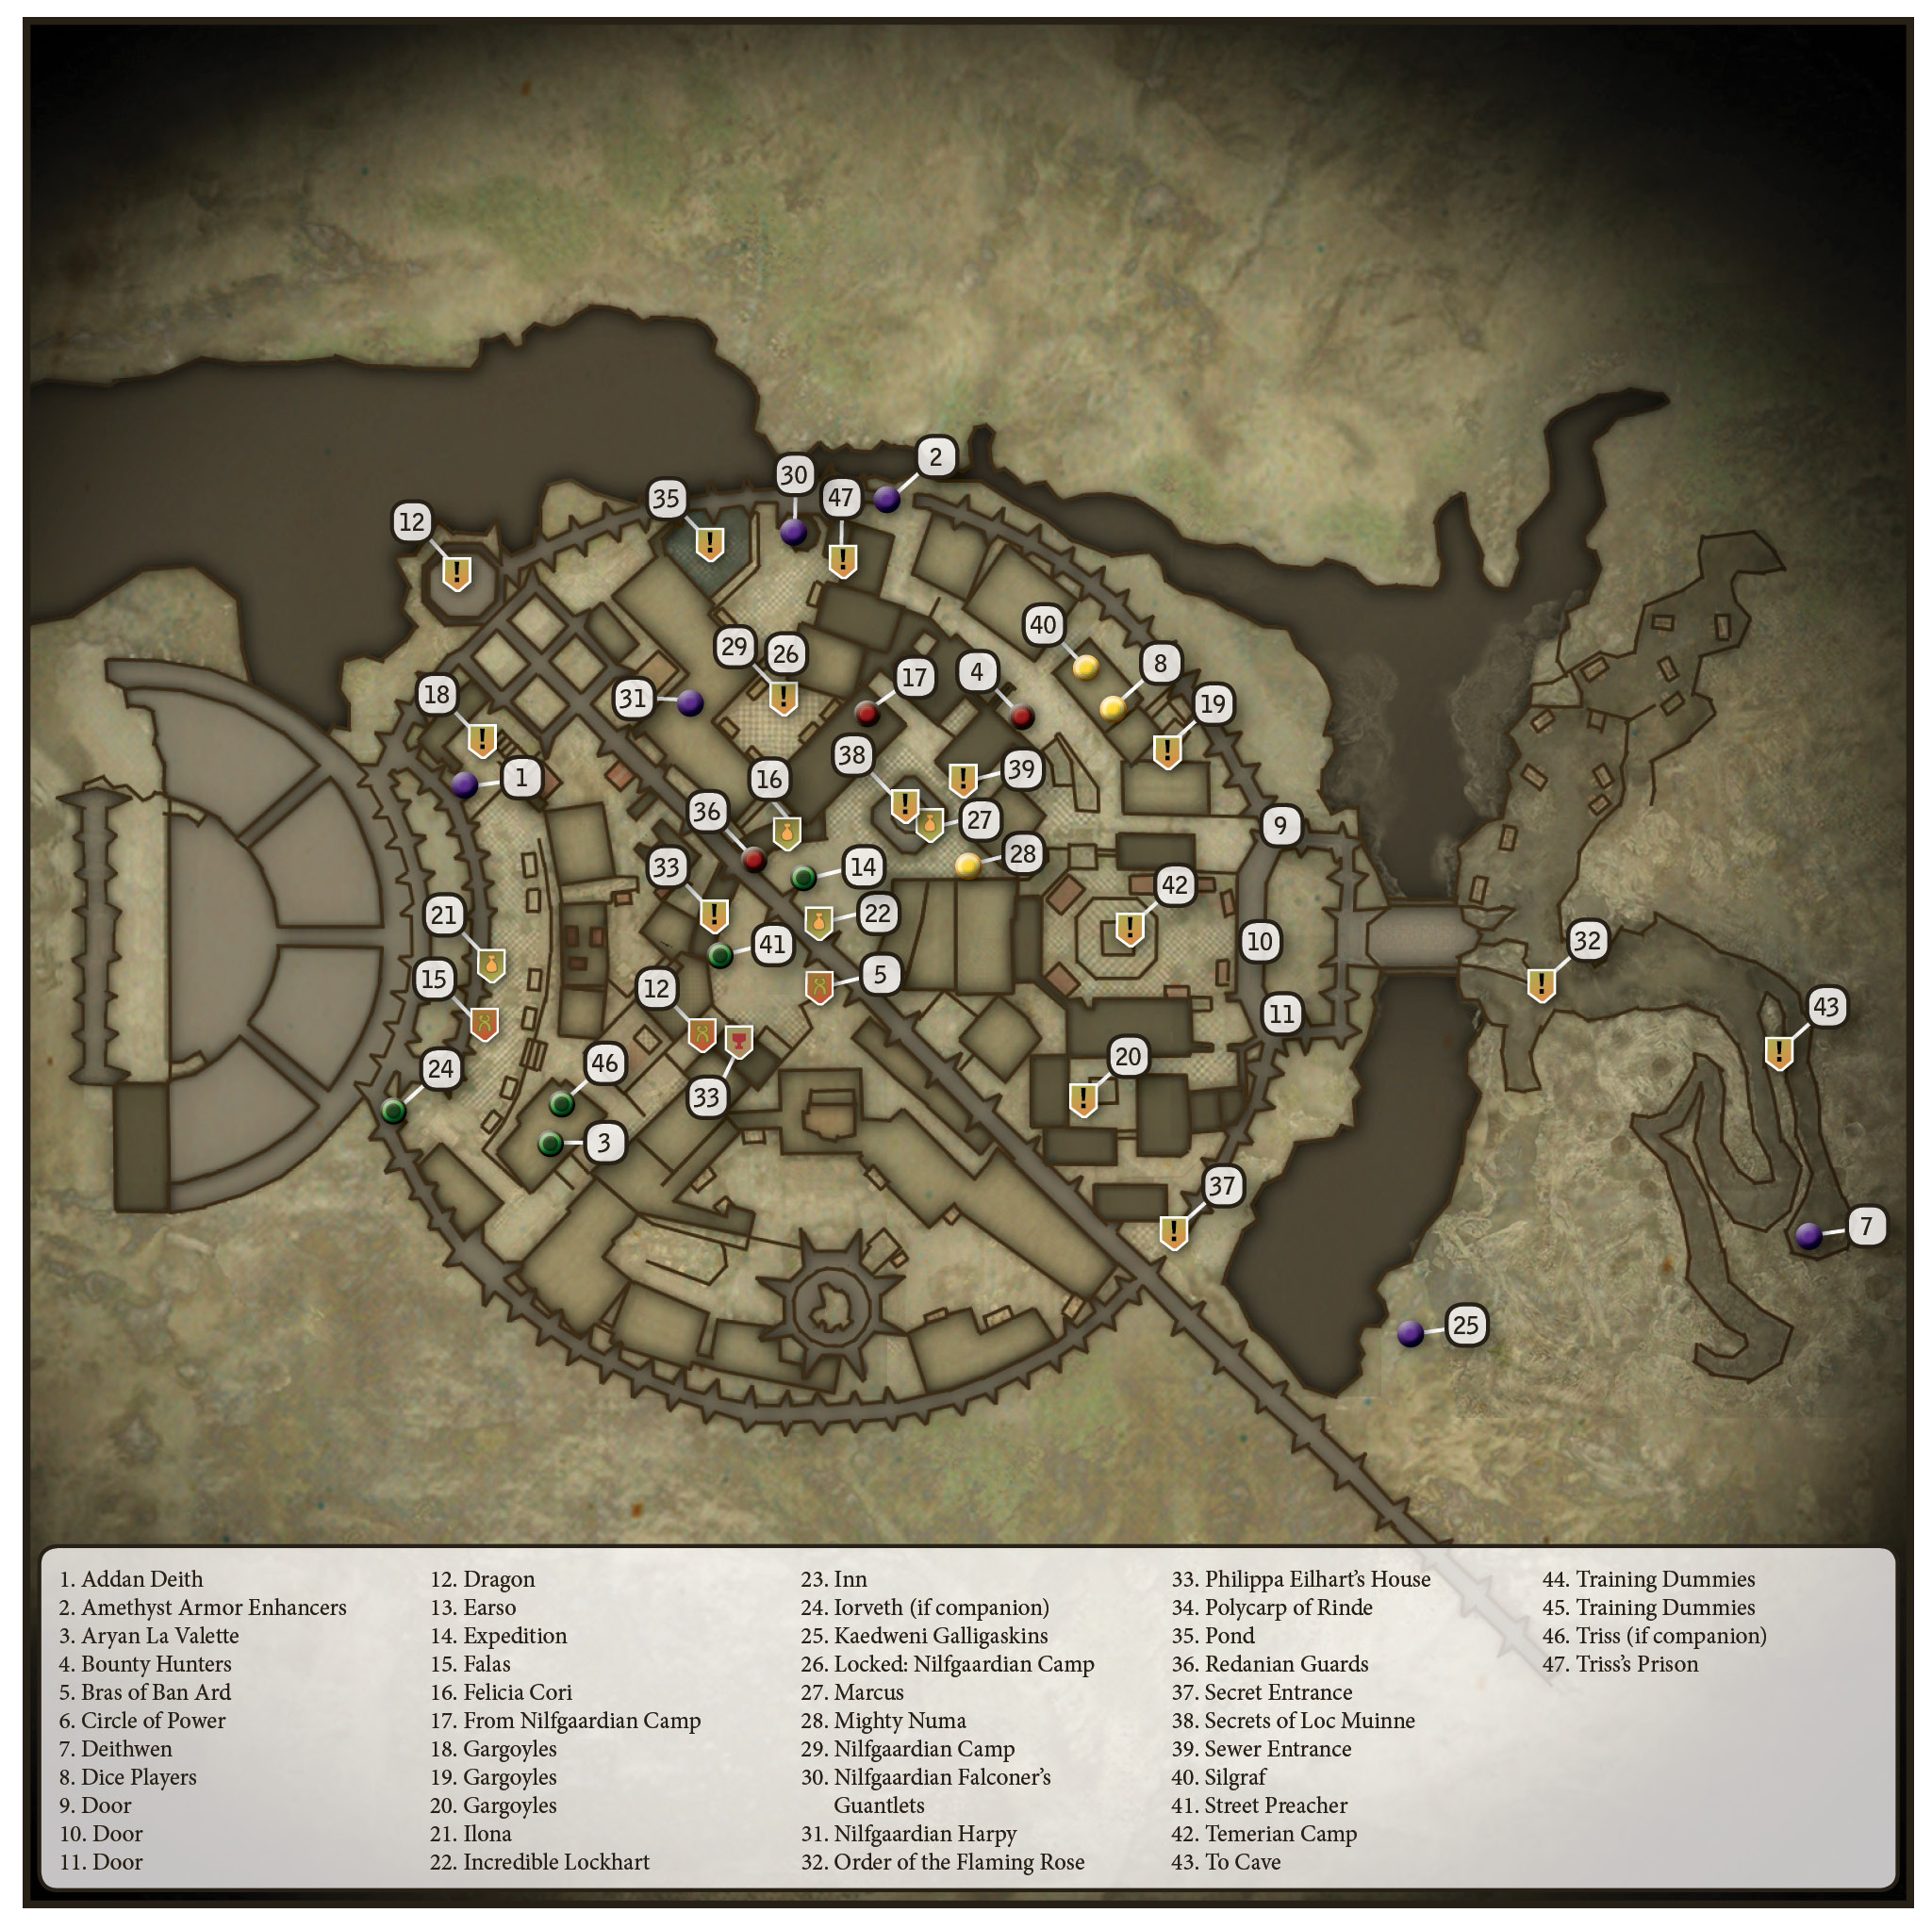
Now that you can take a breather to explore, you discover that Loc Muinne is unlike any of the prior environments you’ve explored in the game. It’s a massive area, easily the size of both Flotsam and its surrounding forest. Parts of the city are crowded and teeming with life, while others are infested with monsters. While exploring Loc Muinne, you can rapidly go from being perfectly safe to being assaulted by irate guards, harpies, or a throng of gargoyles. Most of the city’s points of interest are divided between the town square and amphitheater areas, with everything else often serving as hostile (or at least dangerous) territory.
Amphitheater
This is actually the area just outside the massive amphitheater where the summit is being held. You arrive before deliberations begin, so the air is full of anticipation and a carnival-like atmosphere. The main attractions are NPCs and merchants, but at the far north of the area you can find one of the three gargoyle courtyards you need to fulfill the side quest The Gargoyle Contract.
Falas
Craftsman / Dice Poker
| Item | Price | Item | Price |
|---|---|---|---|
| Sun Rune | 376 | Diagram: Yellow Meteorite Ore | 239 |
| Ysgith Rune | 501 | Mail Enhancement | 158 |
| Earth Rune | 251 | Armor Enhancement | 32 |
| Moon Rune | 376 | Leather Enhancement | 33 |
| Fire Rune | 501 | Diagram: Amethyst Armor Enhancement | 201 |
| Diamond Dust | 29 | Diagram: Diamond Armor Reinforcements | 276 |
| Amethyst Dust | 22 | Studded Leather Reinforcement | 64 |
| Cloth | 20 | Fibre Enhancer | 33 |
| Leather | 20 | Reinforced Leather Enhancement | 34 |
| Hardened Leather | 26 | Iron Ore | 20 |
| Studded Leather | 39 | Diagram: Superb Yellow Meteorite Silver Sword | 339 |
| Diagram: Leather | 176 | Diagram: Superb Blue Meteorite Silver Sword | 551 |
| Diagram: Amethyst Dust | 264 | Diagram: Superb Red Meteorite Silver Sword | 314 |
| Diagram: Diamond Dust | 314 | Koviri Sword | 910 |
| Diagram: Ceremonial Sword of Deithwen | 626 | Novigradan Sword | 1,576 |
| Diagram: Dearg Ruadhri | 1,751 | Superb Temerian Jackboots | 698 |
| Gynvael Aedd | 1,402 | Superb Kaedweni Jackboots | 808 |
| Magic Wrap | 235 | Temerian Falconer’s Gauntlets | 302 |
| Steel Plate Enhancement | 65 | Kaedweni Falconer’s Gauntlets | 577 |
| Diagram: Blue Meteorite Ore | 301 | Superb Temerian Leather Breeches | 426 |
| Diagram: Red Meteorite Ore | 239 | Kaedweni Galligaskins | 306 |
Falas is a craftsman and has a really good shop list, despite not being listed as a merchant in your in-game mini-map. The most notable things he sells are diagrams for the various colors of meteorite ore, a few unique weapons, some really good armor enhancers like the steel plate enhancement, and magic wraps. He also sells the diagram for the diamond armor reinforcements, which offer +2 and are relatively easy to make at this point in the game.
Ilona
| Item | Price | Item | Price |
|---|---|---|---|
| Fish | 14 | Potato | 14 |
| Apple | 14 | Cucumber | 14 |
| Old Cheese | 14 | Plum | 14 |
Ilona is basically a trash merchant, and not one in a convenient location for selling stuff off. The real point of interest with Ilona is her day job as the bearded she-elf. Ask her about her beard and she offers to grow it in for 200 orens. (You can pay her up to 281 orens if you want, but there’s no real point to this.) After you give her the money, go talk to her again to see a truly magnificent beard.
Near the area where Ilona does business, you should find two other merchants with basically identical “trash merchant” shop lists. Both are women with randomly generated names. After you complete either the main quest The Spellbreaker or the main quest Where Is Triss Merigold?, these two merchants disappear. There’s no particular reason to deal with these women over Ilona, who is far more entertaining.
Aryan La Valette
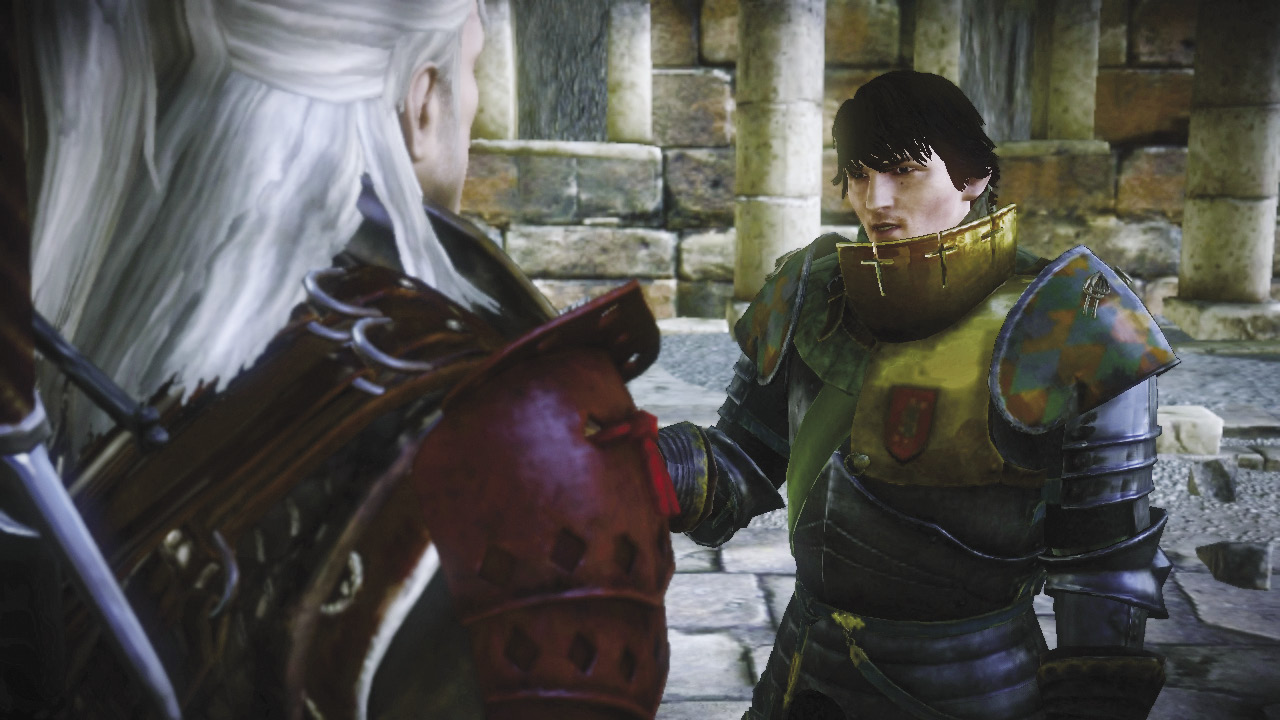
If you rescued Aryan La Valette earlier in your game, you can encounter him in an area just southwest of the amphitheater. You can have a conversation with him and get a little information about the summit and its importance. If you didn’t save Aryan La Valette, then obviously, he doesn’t appear here.
Town Square
To the east of the amphitheater lies the beating heart of Loc Muinne, such as it is. In this area you can find most of Chapter 3’s best merchants, as well as the inn. To the north of the town square lie most of the NPCs who indulge in mini-games, as well as the entrance to the sewers. While there’s more to do in the town square part of Loc Muinne, it’s also far more dangerous than the amphitheater. You’re very close to Nilfgaardian and Radovingian guards who attack you the moment you draw too close, and a simple left turn into the wrong area can lead to you being attacked by gargoyles or harpies. It can help to spend some time getting a feel for the labyrinthine streets and how relatively safe various areas are.
Dalum
Storage
| Item | Price | Item | Price |
|---|---|---|---|
| Fish | 14 | Potato | 14 |
| Apple | 14 | Cucumber | 14 |
| Old Cheese | 14 | Plum | 14 |
Dalum is the owner of Loc Muinne’s makeshift town inn, the Eternal Flame. Speak to him to access your storage, which really comes in handy in this part of the game. He’s also a trash merchant, so he’s useful for selling off stuff you decide you don’t want to store.
Bras of Ban Ard
Craftsman / Dice Poker
| Item | Price | Item | Price |
|---|---|---|---|
| Diagram: Zerrikanterment | 501 | Silver Ore | 45 |
| Sting | 126 | Diagram: Superb Yellow Meteorite Silver Sword | 339 |
| Armor of Tir Na Lia | 3,207 | Diagram: Superb Blue Meteorite Silver Sword | 551 |
| Short Elven Sihil | 1,045 | Diagram: Superb Red Meteorite Silver Sword | 314 |
| Elven Sword | 1,046 | Koviri Sword | 910 |
| Rusty Well-Balanced Dagger | 26 | Novigradan Sword | 1,576 |
| Well-Balanced Dagger | 39 | The Runes of Power I | 95 |
| Robust Well-Balanced Dagger | 51 | The Runes of Power II | 95 |
| Superb Well-Balanced Dagger | 76 | The Runes of Power III | 95 |
| Well-Balanced Silver Dagger | 51 | The Runes of Power IV | 95 |
| Robust Well-Balanced Silver Dagger | 76 | Vran Armor Enhancement | 332 |
| Superb Well-Balanced Silver Dagger | 101 | Magic Wrap | 235 |
| Iron Ore | 20 | ||
You can speak to Bras just outside the Eternal Flame. Bras is a craftsman and has an excellent shop list. Among his more interesting wares are the Runes of Power books needed to complete The Gargoyle Contract, the diagram for the exceptional silver sword Zerrikanterment, vran armor enhancements, and magic wraps. Look carefully at the abilities of the Zerrikanterment before you decide which silver sword you want to use through the end of the game. While there is another silver sword you can loot this chapter with higher base damage, the Zerrikanterment is about as good and may have special effects you find preferable. Bras of Ban Ard is also instrumental in two side quests, From a Bygone Era and The Gargoyle Contract.
The Incredible Lockhart
Dice Poker
| Item | Price | Item | Price |
|---|---|---|---|
| The History of the Council of Mages | 64 | Diagram: Hardened Leather | 251 |
| The Duties and Goals of the Lodge | 126 | Diagram: Studded Leather | 276 |
| Formula: Tiara | 84 | Diagram: Elemental Stone | 214 |
| Diagram: Sun Rune | 439 | Diagram: Oil | 126 |
| Diagram: Ysgith Rune | 439 | Diagram: Leather | 176 |
| Diagram: Earth Rune | 439 | Diagram: Essence of Water | 226 |
| Diagram: Moon Rune | 439 | Diagram: Amethyst Dust | 264 |
| Diagram: Fire Rune | 564 | Diagram: Diamond Dust | 314 |
| Sun Rune | 376 | Formula: Tawny Owl | 207 |
| Ysgith Rune | 501 | Formula: Specter Oil | 104 |
| Earth Rune | 251 | Formula: Necrophage Oil | 125 |
| Moon Rune | 376 | Formula: Blade Oil | 70 |
| Fire Rune | 501 | Formula: Insectoid Oil | 111 |
| Balisse | 11 | Formula: Gadwall | 139 |
| White Myrtle Petals | 12 | Formula: Thunderbolt | 125 |
| Celandine | 10 | Formula: White Raffard’s Decoction | 97 |
| Wolfsbane | 15 | Formula: Hanged Man’s Venom | 90 |
| Scleroderm | 14 | Formula: Arachnid Oil | 104 |
| Cortinarius | 16 | Formula: Lapwing | 139 |
| Bryonia | 24 | Formula: Maribor Forest | 152 |
| Mandrake Root | 20 | Diamond Dust | 29 |
| Verbena | 24 | Amethyst Dust | 22 |
| Twine | 14 | Cloth | 20 |
| Wolf’s Aloe Leaves | 126 | Leather | 20 |
| Green Mold | 126 | Oil | 14 |
| Diagram: Solid Cloth | 251 | Essence of Water | 14 |
The Incredible Lockhart sells potion formulas, alchemical ingredients, and a variety of diagrams. The best of them are probably the diagrams for the various types of runes, which are quite easy to make in this chapter of the game. Otherwise, you won’t be dealing with Lockhart too often, though he does crop up in a mini-game side quest.
|
The Incredible Lockhart is named in honor of a character from the Harry Potter novel series, Gilderoy Lockhart. |
Earos
Craftsman
| Item | Price | Item | Price |
|---|---|---|---|
| Harpy Trap | 126 | Phosphorescent Crystal | 20 |
| Conflagration | 76 | Thumper | 14 |
| Talgar Winter | 76 | Leather | 20 |
| Clawer | 51 | Timber | 7 |
| Biter | 51 | Endrega Hide | 89 |
| Diagram: Harpy Trap | 201 | Twine | 14 |
| Diagram: Conflagration | 251 | Grapeshot | 101 |
| Diagram: Clawer | 189 | Formula: Dancing Star | 84 |
| Diagram: Talgar Winter | 276 | Formula: Dragon’s Dream | 111 |
| Diagram: Rage | 251 | Formula: Devil’s Puffball | 77 |
| Diagram: Biter | 226 | Formula: Flare | 35 |
| Diagram: Well-Balanced Dagger | 89 | Formula: Stenchbulb | 63 |
| Diagram: Blue Meteorite Ore | 301 | Formula: Zerrikanian Sun | 97 |
| Rotten Meat | 7 | Formula: Grapeshot | 70 |
| Bauble | 14 | Formula: Red Haze | 84 |
| Endrega Gland Extract | 14 | ||
The Vergen ratcatcher apparently ran off and joined the circus after Henselt’s army was defeated, but he’s still willing to craft traps for you. Earso is back in Loc Muinne with his entire Chapter 2 shop list intact, so you can buy basically the same sorts of things from him. If there’s a trap diagram you want and haven’t picked up yet, go see Earso about it.
Felicia Cori
Barber / Dice Poker
| Item | Price | Item | Price |
|---|---|---|---|
| Formula: Rook | 173 | Three Years Among the Endregas | 64 |
| Formula: Golden Oriole | 63 | Wraiths: Fear and Trembling | 95 |
| Petri’s Philtre | 26 | Bruxae—Eulogists of Death | 101 |
| Formula: Falka’s Blood | 139 | How to Kill a Bullvore | 126 |
| Formula: Brown Oil | 125 | Beings of the Element of Earth | 189 |
| Formula: Cat | 70 | Of Trolls and Trolling | 157 |
| Formula: Samum | 104 | Gargoyles, Gutters, Splutters—Maintenance and Repair | 126 |
| Formula: Swallow | 70 | Dearhenna’s Memoirs | 1 |
| Formula: Tiara | 84 | Formula: Tawny Owl | 207 |
| Formula: Wolf | 77 | Formula: Specter Oil | 104 |
| Formula: Whirl | 207 | Formula: Necrophage Oil | 125 |
| Formula: Brock | 104 | Formula: Blade Oil | 70 |
| Formula: Virga | 104 | Formula: Insectoid Oil | 111 |
| Formula: Stammelford’s Philtre | 207 | Formula: Gadwall | 139 |
| Diagram: Solid Cloth | 251 | Formula: Thunderbolt | 125 |
| Diagram: Hardened Leather | 251 | Formula: White Raffard’s Decoction | 97 |
| Diagram: Studded Leather | 276 | Formula: Hanged Man’s Venom | 90 |
| Diagram: Elemental Stone | 214 | Formula: Arachnid Oil | 104 |
| Diagram: Oil | 126 | Formula: Lapwing | 139 |
| Diagram: Leather | 176 | Formula: Maribor Forest | 152 |
| Diagram: Essence of Water | 226 | The Temerian Royal Dynasty | 64 |
| Diagram: Amethyst Dust | 264 | The Viziman Uprising | 64 |
| Diagram: Diamond Dust | 314 | The Temerian Special Forces | 64 |
| Balisse | 11 | Monstrum, Or a Portrayal of Witchers | 64 |
| White Myrtle Petals | 12 | The Realms of the Nordlings | 64 |
| Celandine | 10 | The Valley of the Flowers | 64 |
| Wolfsbane | 15 | The Pontar Valley | 64 |
| Scleroderm | 14 | The Rose and the Flame | 64 |
| Cortinarius | 16 | The Conjunction of the Spheres | 64 |
| Bryonia | 24 | Veyopatis—A Forgotten God | 64 |
| Mandrake Root | 20 | Marshall Milan Raupenneck | 64 |
| Verbena | 24 | The Nilfgaardian Provinces | 64 |
| Surgical Tools | 164 | Diamond Dust | 29 |
| The Runes of Power I | 95 | Amethyst Dust | 22 |
| The Runes of Power II | 95 | Cloth | 20 |
| The Runes of Power III | 95 | Leather | 20 |
| The Runes of Power IV | 95 | Oil | 14 |
| The Horrors of War: Rotfiends | 64 | Essence of Water | 14 |
| Harpies—Daughters of the Gale | 95 | Essence of Death | 189 |
| The Arachas—A Study | 145 | Arachas Eyes | 439 |
| Drowners: A Textbook for Initiates of the Order of the Flaming Rose | 32 | Troll Tongue | 439 |
| Nekkers in the Mist | 32 | ||
Felicia isn’t marked on the in-game map, but she’s not hard to find. Her shop list isn’t exactly the same as it was in Chapter 2, but it’s very similar. She still sells mainly potion formulas, books, and items for crafting. Curiously enough, she still sells the surgical tools that you needed for finishing With Flickering Heart. You can buy them again here, but don’t expect them to do anything.
Marcus
| Item | Price | Item | Price |
|---|---|---|---|
| Anabolic Steroids | 251 | Amethyst Dust | 22 |
| Formula: Wolf | 77 | Balisse | 11 |
| Formula: Whirl | 207 | White Myrtle Petals | 12 |
| Formula: Brock | 104 | Celandine | 10 |
| Formula: Virga | 104 | Wolfsbane | 15 |
| Formula: Stammelford’s Philtre | 207 | Scleroderm | 14 |
| Formula: Maribor Forest | 152 | Cortinarius | 16 |
| Formula: Tawny Owl | 207 | Bryonia | 24 |
| Formula: Specter Oil | 104 | Mandrake Root | 20 |
| Formula: Necrophage Oil | 104 | Verbena | 24 |
| Formula: Blade Oil | 70 | Twine | 14 |
| Formula: Insectoid Oil | 111 | Wolf’s Aloe Leaves | 126 |
| Diamond Dust | 29 | Green Mold | 126 |
Marcus primarily sells herbs for alchemy and some potion formulas. He also sells the Anabolic Steroids potion, which you can take as part of this chapter’s arm-wrestling quest. You can buy as many Anabolic Steroids potions as you want, but it doesn’t do anything that’s mechanically useful outside of its quest role.
Points of Interest
Harpies
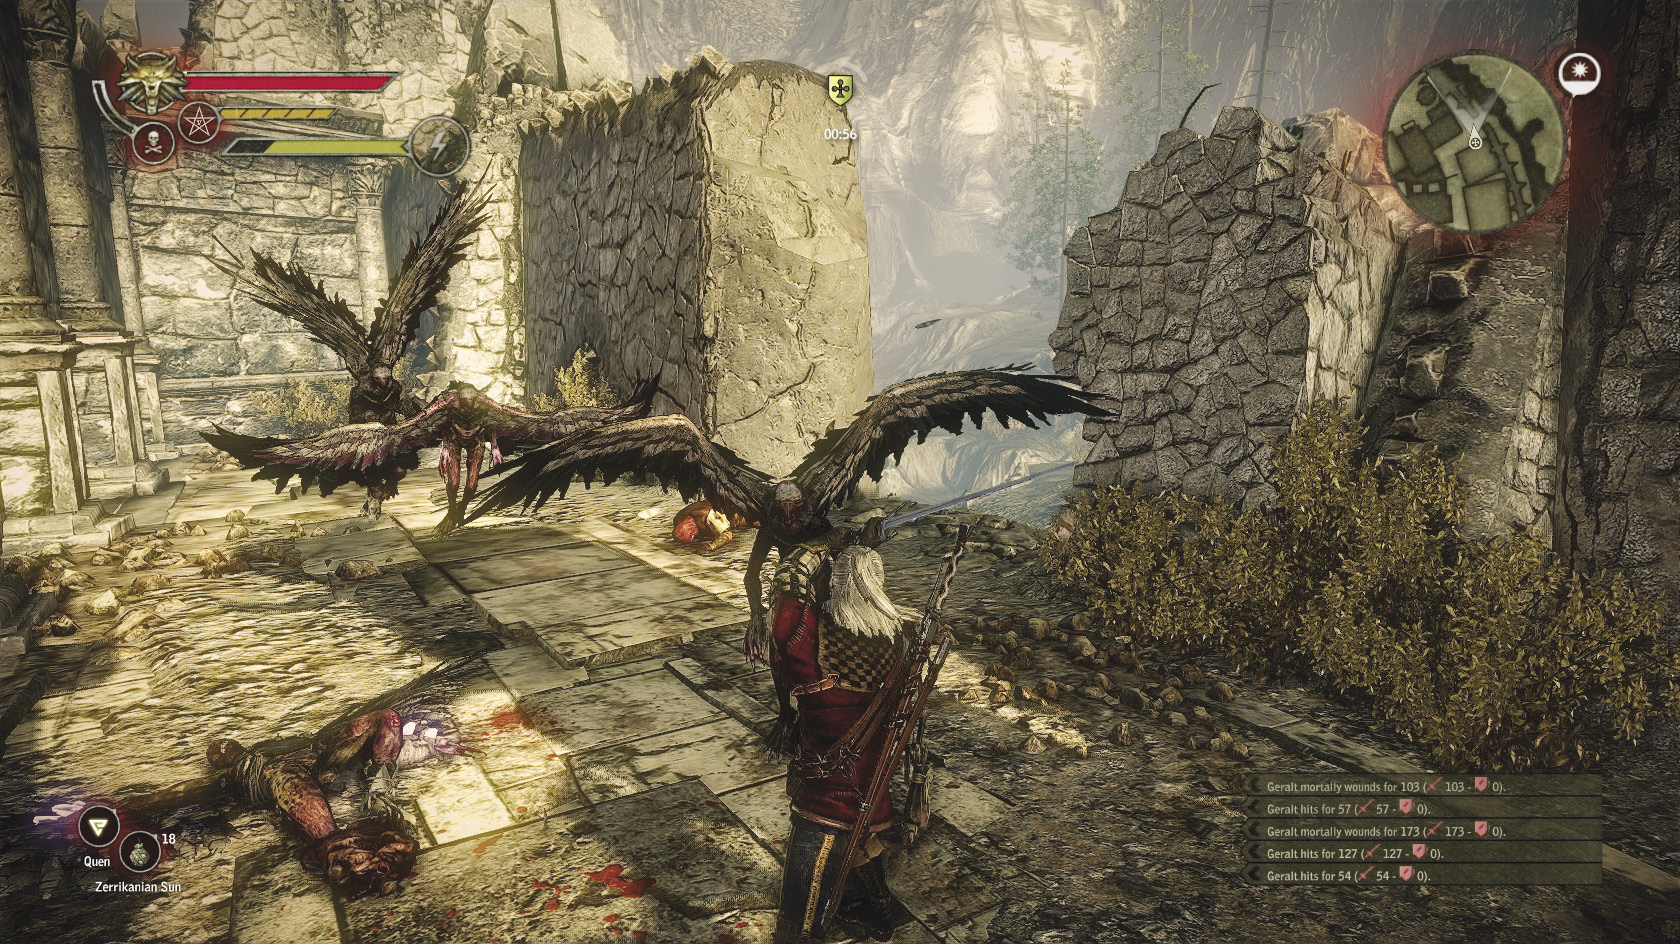
There’s an area to the northeast of Loc Muinne where you are attacked by harpies nearly every time you pass through. You are likely to encounter them for the first time when you go to do this chapter’s Poker Face side quest. In terms of difficulty the encounter is trivial, but it can be really useful if you end up needing to grind orens in this chapter. You can just kill harpies until you have as many monster guts as you can carry, then go sell them all off. Since harpy feathers sell for so much, you can quickly rack up spare cash this way at relatively little risk to yourself.
Nilfgaardian Bounty Hunters
The first time you venture down a particular path northeast of the town square, you trigger an encounter with Nilfgaardian soldiers who want to collect the bounty on Geralt’s head. Defeating them is more challenging than beating the prior groups of bounty hunters you’ve faced, but overall should be a fairly manageable task. The main difficulty you face in this fight is the combat mage, so depending on your build you may want to make preparations before triggering the battle. The usual tricks for fighting mages work against this one, as do the usual tricks for fighting groups of armed humans.
Royal Guards
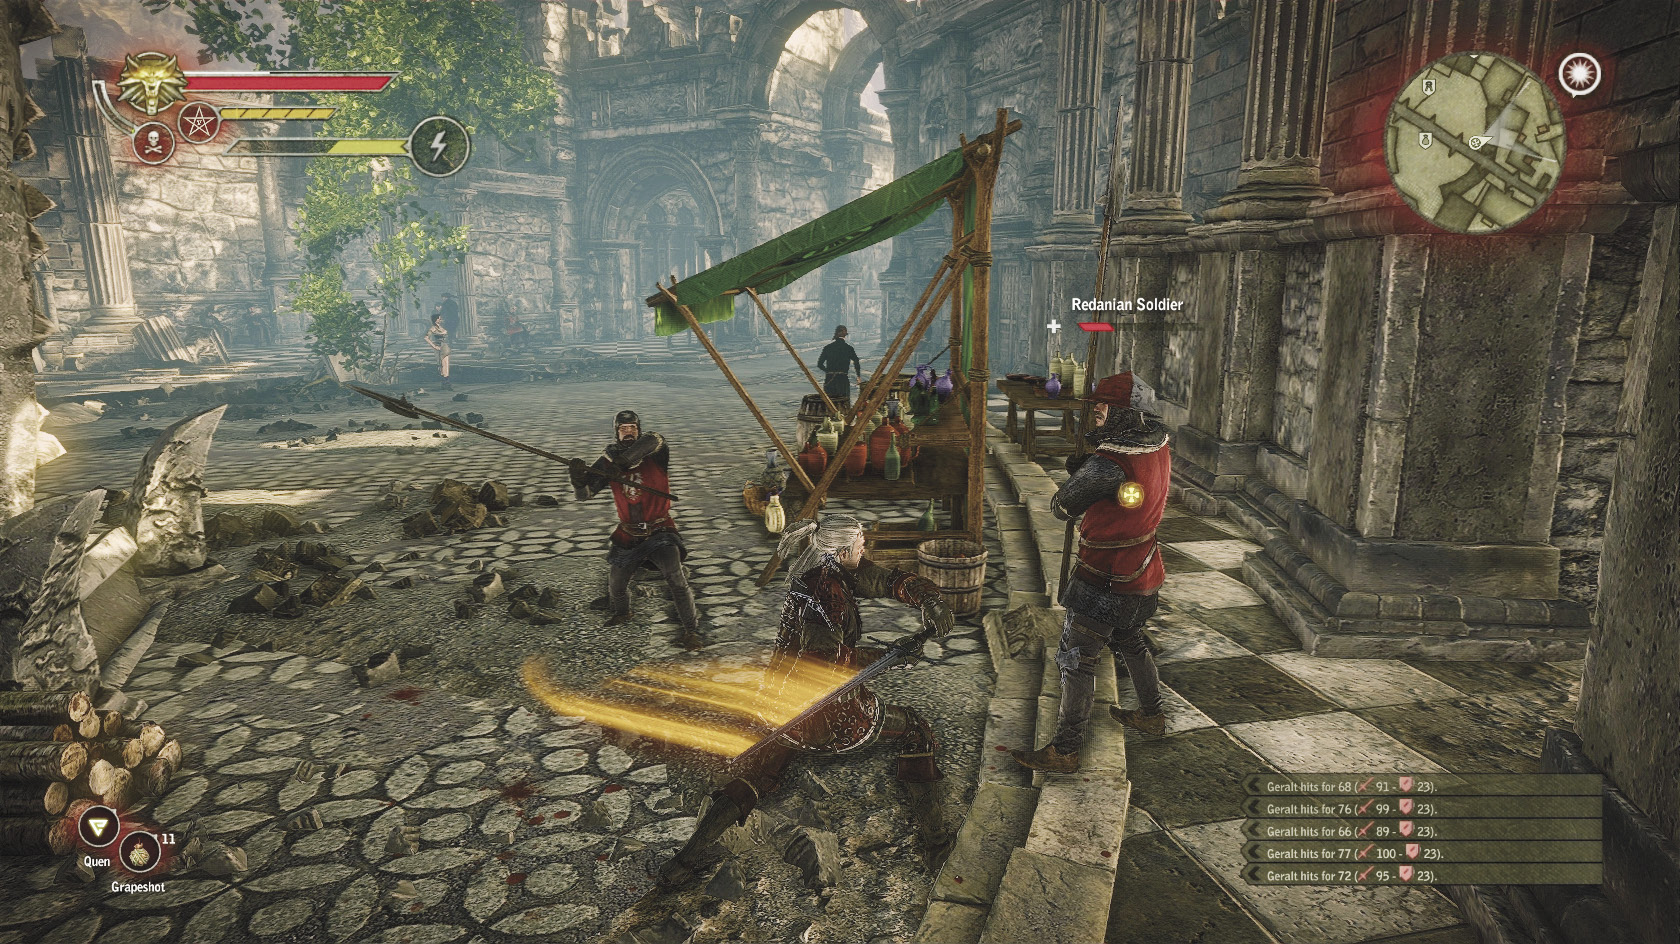
Some areas of Loc Muinne are patrolled by guards attached to the militaries of the various visiting kings. For the most part, these guards hate you and attack you if you pass by too closely. Whether your sword is unsheathed or not makes no difference; the guards tend to be hostile on sight. The thickest pack of guards you can wade into is the one in the Temerian camp, which you should only visit if you choose to resolve the main quest For a Higher Cause by getting arrested. Otherwise, entering that area is certain death since the guards infinitely respawn.
Otherwise, the main groups of guards you pass by are the guards from the Redanian camp in the town square and guards by the entrance to the Nilfgaardian camp a little north of that. Note that if you’ve already completed Where Is Triss Merigold?, the Nilfgaardian guards won’t be there. Otherwise, be cautious while heading toward the area where the harpies spawn or areas beyond. You pass rather closely to the Nilfgaardian camp. You also pass by the Redanian guard whenever dealing with the main town square merchants.
Street Preacher
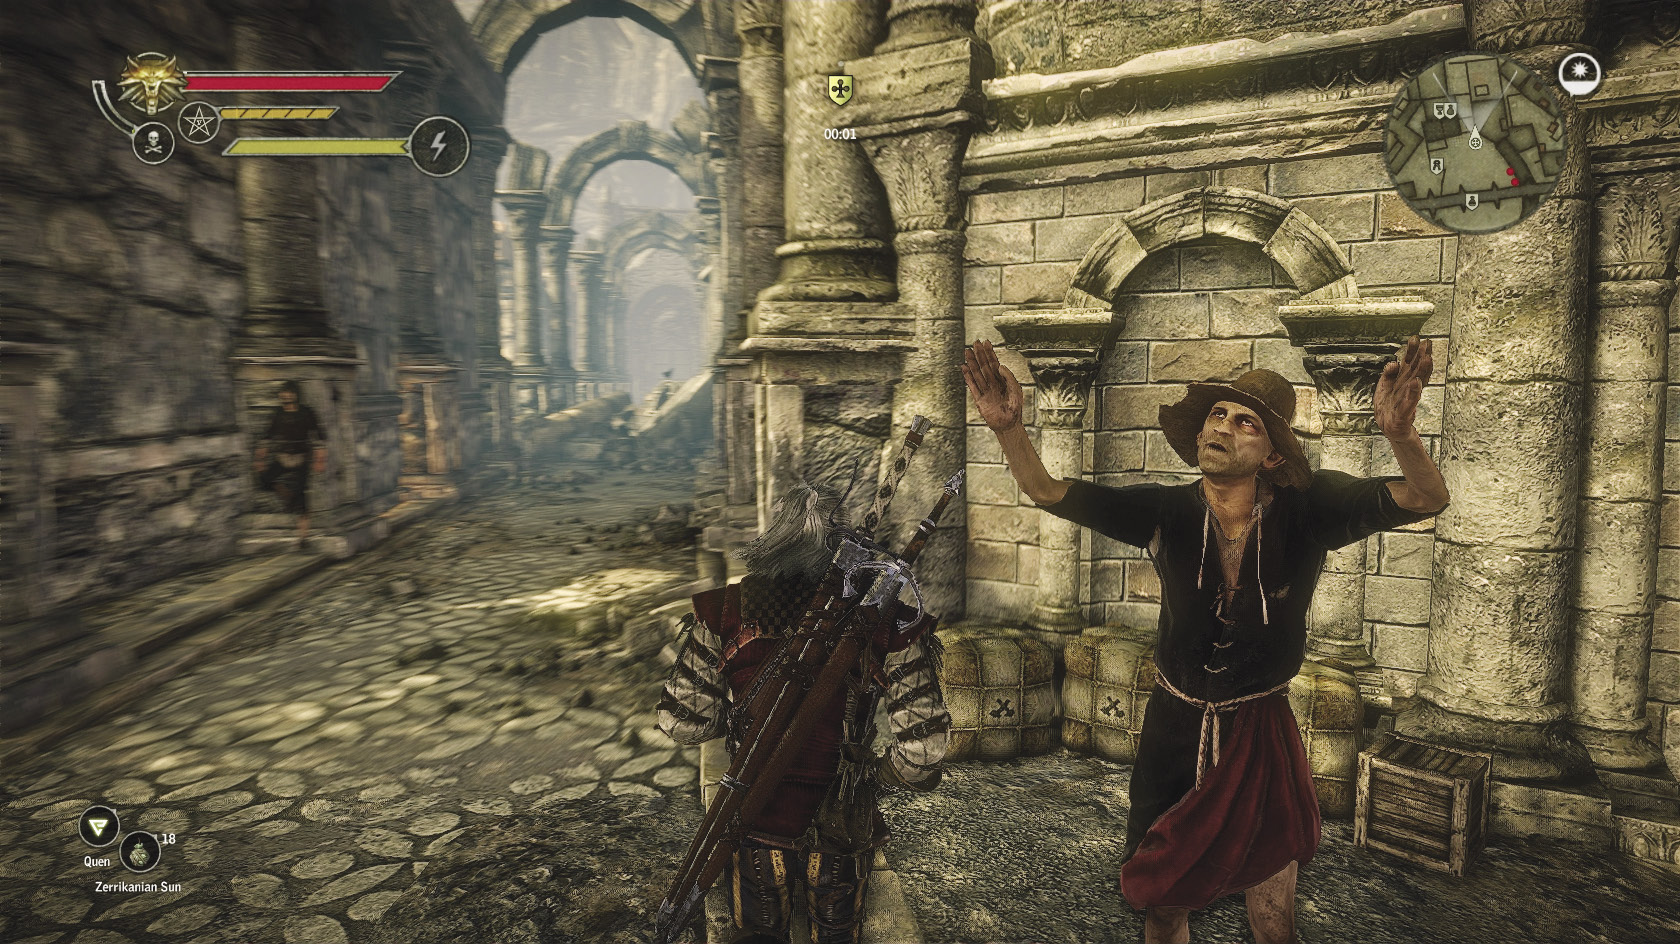
Just across the street from the Eternal Fire is a street preacher who springs to life and begins haranguing the crowd whenever you pass by. This guy has nothing to do with any quests or getting loot, but you should pause and listen to his full rants once. He has two rants, both of which are too long and rambling to hear completely while you’re just running around. They’re pretty hilarious if you hear them in full, though, so pause if you happen to hear him saying something new while you run by.
 Side Quest: The Secrets of Loc Muinne
The first time you enter the town square, you stumble across a scene where a mercenary walks off with an advance instead of finishing a job. The explorers who failed to hire him immediately try to get you to take the job instead. If you want to accept it, say “You’ll need to pay me.” At that point, the explorers try to get you to accept a lump sum payment at the end of the quest. You can say “Agreed, but it’ll cost you more” to agree to those terms. You can pick the other dialogue options to attempt to persuade or intimidate the mages into giving you an advance.
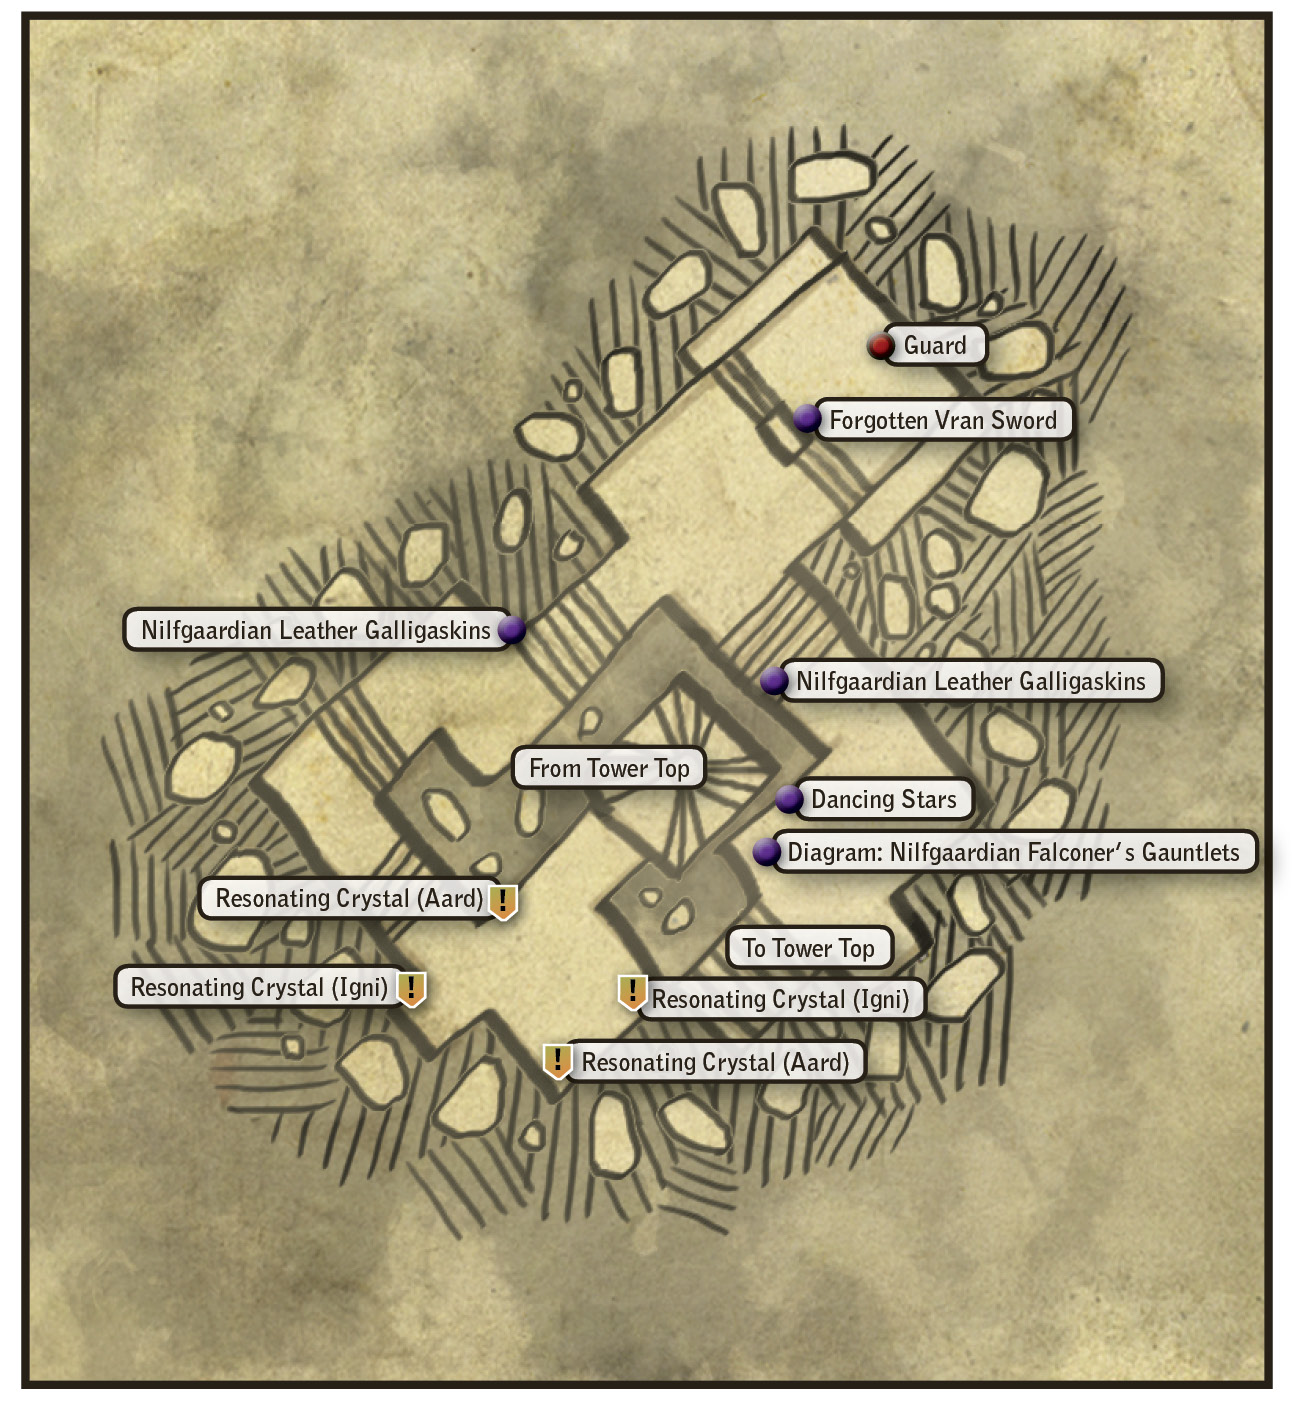
After the mages depart, head into the tower that stands north of the town square. You enter at the top of a spiral staircase that runs down through the different layers of the catacombs that run beneath the city. Enter the door nearest where you enter from the street, near the top of the staircase. This should take you to an area guarded by wraiths and bruxae. You should have little trouble defeating them. Bruxae are essentially female wraiths and can be fought using the same tactics.
To proceed, you need to deal with the resonating crystals near the cellar. Basically, the crystals are designed to hold the power of a certain kind of magic. One pair is designed to hold Aard and the other pair Igni. You can work this out easily by trial and error or just glance at the guide’s map labels to proceed. When you have lit up both pairs of resonating crystals, a door at the bottom of the stairwell opens. Enter to examine a room dominated by a massive stone statue of a vran. In the next chamber, bruxae and wraiths spawn as you step through.
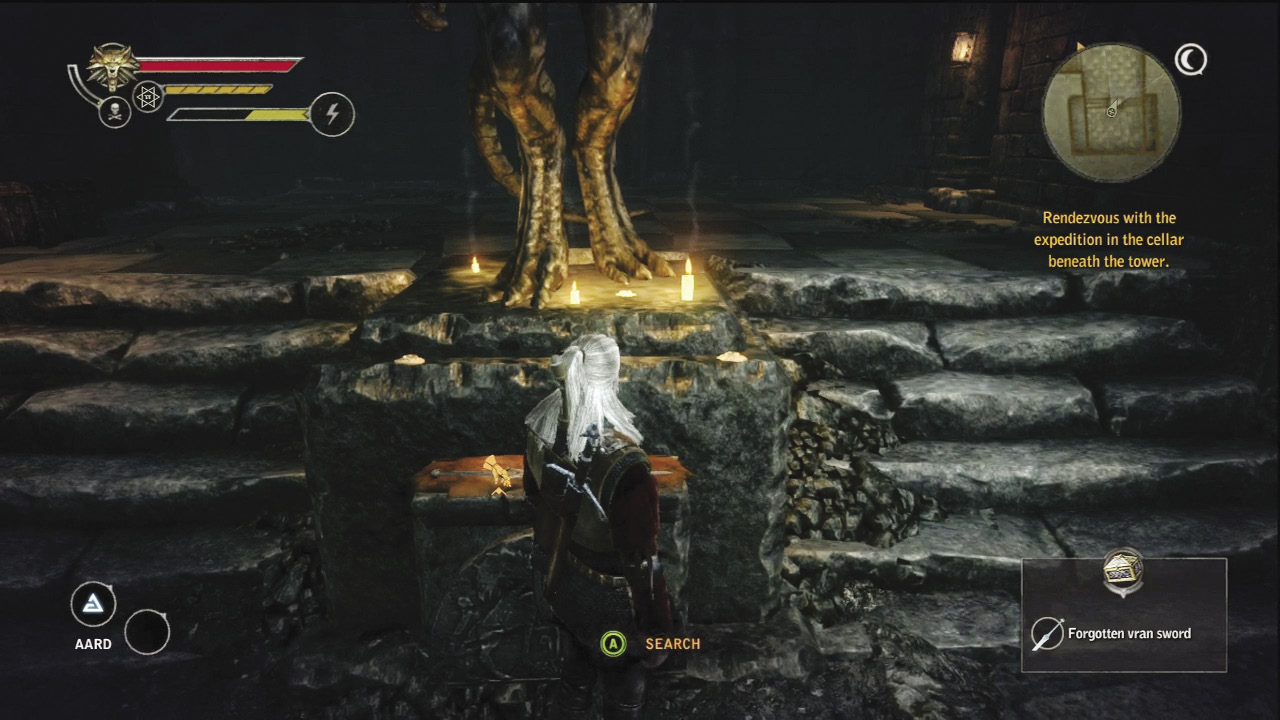
Descend the stairs and examine the area in front of the statue. In one corner, you should find a chest stuffed with hundreds of orens. At the feet of the statue, you find the forgotten vran sword, the most powerful steel sword that can be obtained in a standard game. Equip it immediately and slot it with runes if you can.
A guard wearing a mask and robes appears behind you and attacks. The guard fights like a basic spellcaster, using Quen to defend himself and throwing fireballs at you. He doesn’t have a very stiff offense, but between his vitality and his repeated use of Quen, damaging him can be a slow process. When he reaches 75 percent, 50 percent, and 25 percent vitality, the guard teleports to an upper area of the room and summons a horde of wraiths to fight you. Switch to your silver sword and dispatch them quickly. The guard shoots fireballs at you while you battle the wraiths. This works a bit like the trebuchet fire did in Chapter 2. Dodge-roll to evade the explosion. After that, the guard teleports back down so you can resume trying to damage him again.
When you defeat the guard, another door at the far side of the room slowly slides open. Duck into it to find a room patrolled by wraiths and bruxae. Defeat them, then loot the room. Most of the loot is random, but you can find the diagram for Nilfgaardian falconer’s gauntlets there. The one way you can exit this room takes you to the base of the spiral stairwell that runs down from the tower and into the catacombs. From here, you should enter a door that’s about halfway up the spiral to find the area where the explorers and their hired mages are waiting.
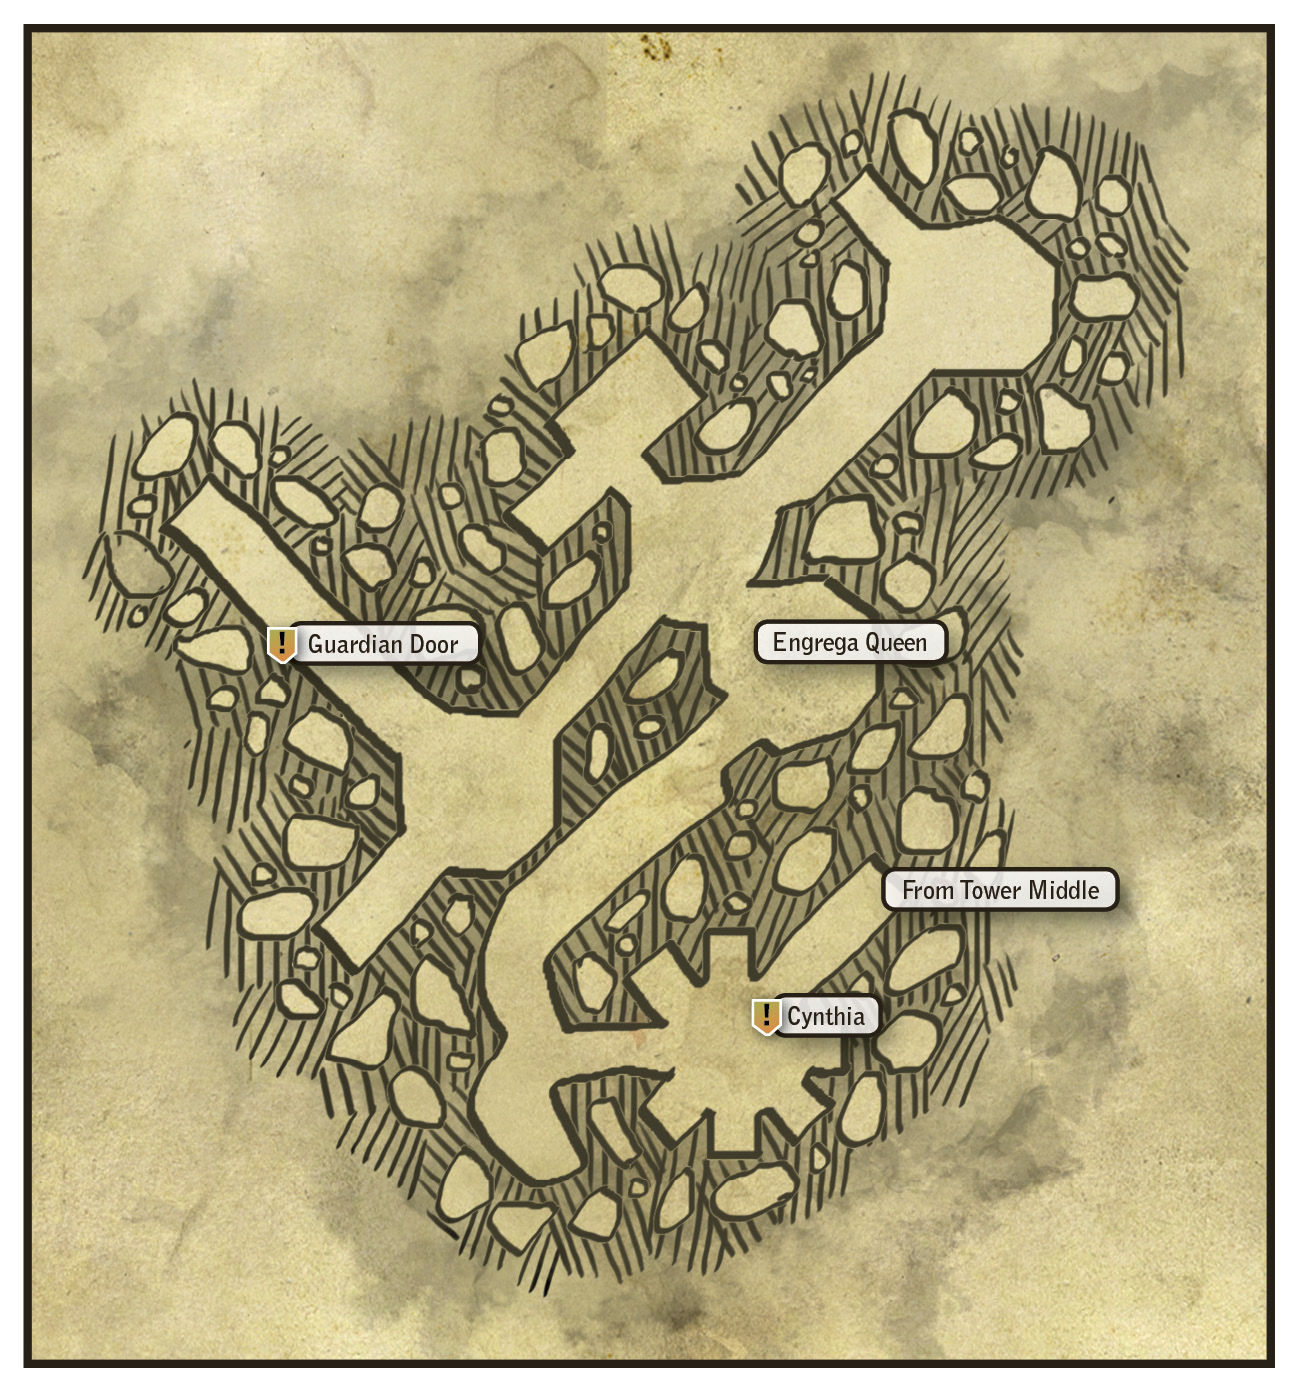
One of the mages turns out to be a familiar face, Philippa’s “student” Cynthia, who disappeared in Chapter 2. She’s here with another Nilfgaardian mage, Adalbert. You can have a heated conversation with them about Triss, and then you must choose either to work with them or to refuse the job. If you refuse to work with Cynthia’s group by saying “I’m not about to work for Nilfgaard,” then you find yourself in combat with Cynthia and Adalbert. This amounts to fighting four mages at once, since Adalbert uses a multiplication spell to fight alongside two copies of himself. Each copy of Adalbert must be defeated individually to end the spell.
Each mage uses Quen for defense and teleports if you get too close. Cynthia attacks with fire while the three Adalberts attack with lightning. This fight is incredibly dangerous, since you’re stuck in a relatively small area. Cynthia is generally the easiest to defeat. Take advantage of the great central pillar in the middle of the room as cover to deflect the lightning blasts from the Adalberts. The real challenge of this battle is finding a way to knock down the Adalberts before they can chip away at your vitality.
You can do it the hard way, by keeping Quen up and then rolling in to attack them when they’re in their spell-casting animations. If you can catch one of the mages with Quen down, you can chew through his or her vitality quickly. Mage builds with the Aard III or alchemists with Zerrikanian suns can make quick work of this battle by stunning the mages through their Quen defense shields. Once stunned, most mages go down with only a handful of blows, or much less if you trigger an instant kill.
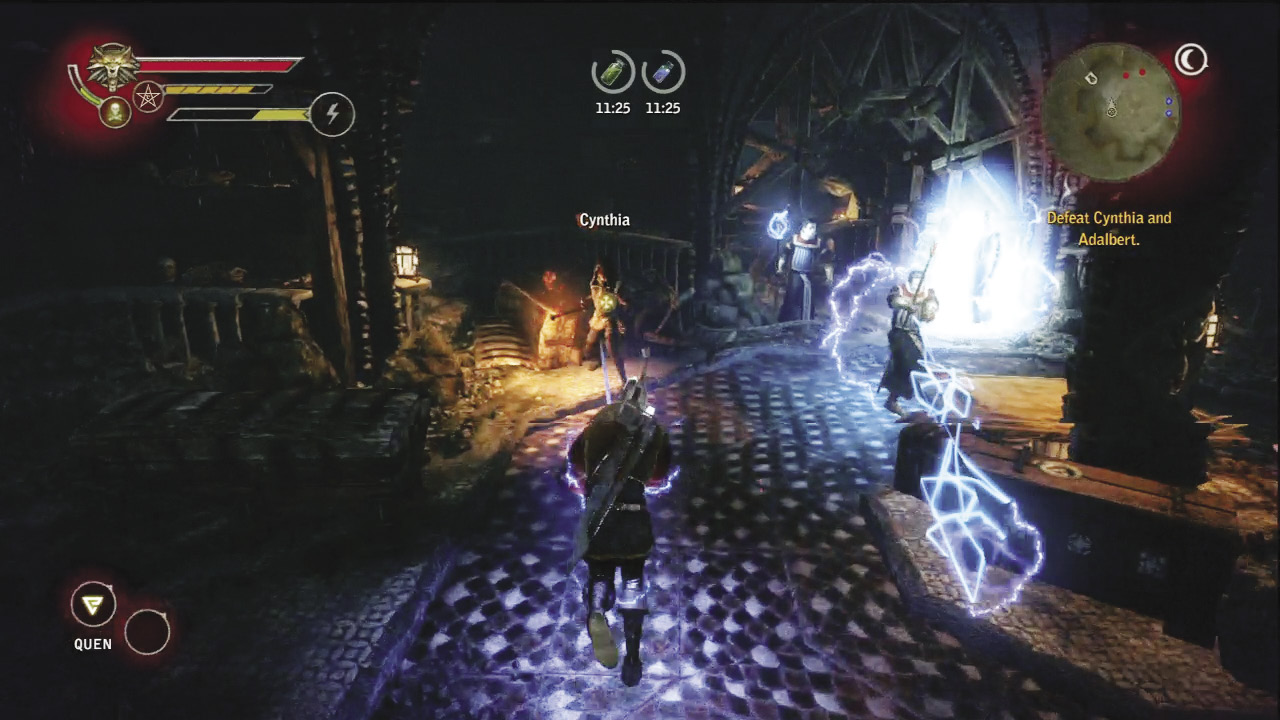
After you’ve defeated the four mages, you can loot the chamber for a massive amount of orens, but you immediately fail the quest. The explorers who hired you chew you out for murdering everybody. From here you can explore a bit to pick up loot, but you cannot access any of the quest’s other maps due to all the mages being dead. Proceed with the next side quest if you’re okay with this.
If you aren’t, then let’s back up a bit and assume that you don’t want to kill the mages. Say “Fine, I’ll help you” when you reach the right branch of the conversation. Cynthia’s group remains friendly and now you can simply follow them to your next objective. When the group pauses at the iron gate, step through first. Battle the group of rotfiends beyond. This battle should be relatively easy. The mages help you, so keep Quen up to protect against the moments where they inevitably and accidentally shoot you in the back with fire or lightning.
Next you come to a room thick with greenery, where endregas led by a queen endrega appear to attack you. This proceeds basically like the rotfiend battle—just keep Quen up and use whatever tactics suit your build. Be sure to loot the bodies here, as the queen endrega tends to have really good drops. Among them will be the queen endrega’s pheromones, which you need to fulfill the quest An Encrypted Manuscript. After this battle, keep following the main group. A cutscene triggers. Wait while Cynthia dispels the illusion over the hidden door. Another cutscene shows you the door’s gimmick in action. It asks riddles. Those who answer correctly get to pass through. Those who answer incorrectly die by fire. To get past the door, Geralt must answer a riddle correctly. If you answer incorrectly, you get hit by a bolt of fire that does massive damage and probably kills you. You can’t outrun the attack, either.
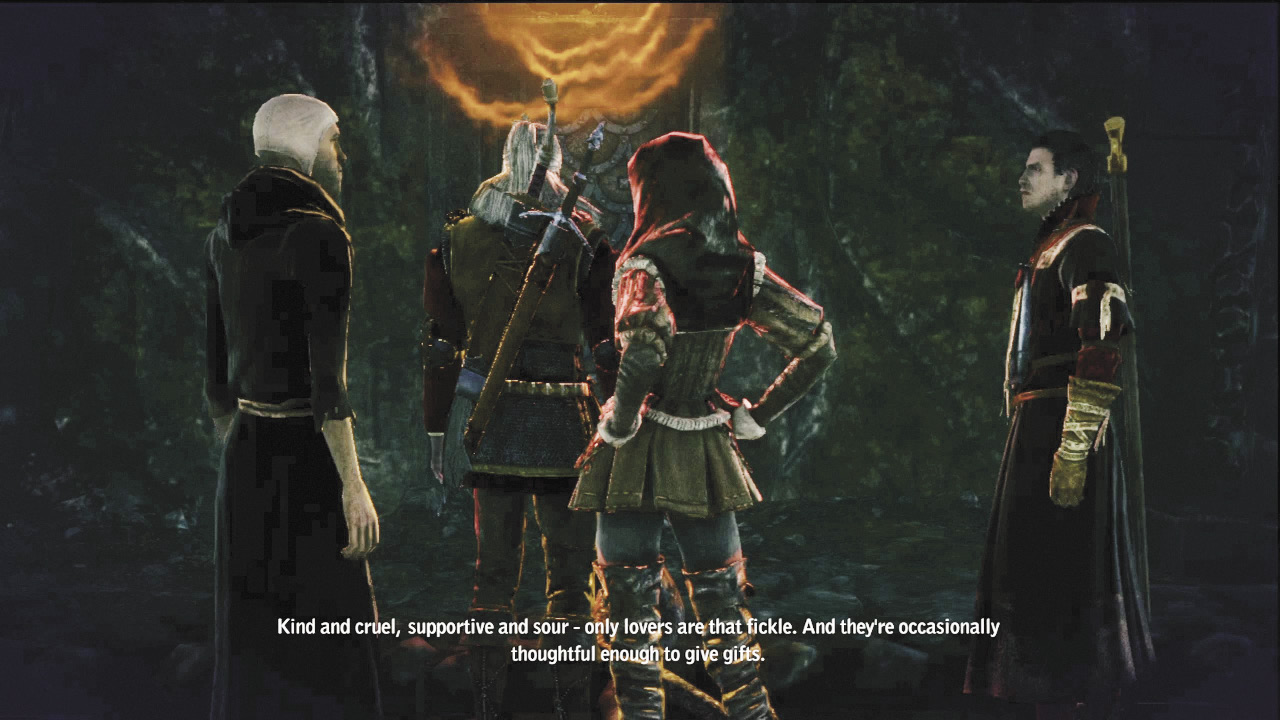
Fortunately, it’s easy to answer the riddles correctly. If you want to do things “honestly” and try to figure out the answers yourself, then use the following method. After the door golem gives you one of the three possible riddles, ask your allies what they think. Listen carefully to what they say. Your allies always help you by tipping you off to which answers are wrong. Anything an ally suggests as an answer is going to be incorrect. They usually suggest four different possible answers in their conversation. You usually select an answer to the door golem’s riddle from a list of six possible answers. So, after listening to your allies eliminate certain answers, you only have to decide between the two remaining. You’ve got a 50-50 chance of being right, and usually one of the two possible answers left fits the riddle more intuitively.
Alternatively, you can decide that guessing games are for chumps and just read the correct answer here:
Riddle: Pleasant or terrible, I come at night or in daytime. Short or long, but yours alone, essential, I am…
Answer: A dream.
Riddle: Capable of kindness and cruelty, I take victims when I sour. I can be on your side or wrong you. I bring gifts, though you already have me.
Answer: Fate.
Riddle: I’m seen to fly, described as hard. I can be your currency and heal all wounds, but not many things can stand my test.
Answer: Time.
After you pass through the door, you trigger another cutscene. This should clue you in to the fact that a fight against human opponents is coming up. Follow the group, then a cutscene introduces a group of Redanian knights who don’t take the idea of competition kindly. There’s a lot of them in a relatively small space, which always makes a fight more dangerous. On the other hand, you have four mages with you and they don’t have any. Throw up Quen, oil your steel blade with hanged man’s venom, and then wade into the bastards. Keep Quen up so your mage allies don’t accidentally set you on fire. Home in on Redanians who are being incinerated, as they’ll have a hard time defending themselves.
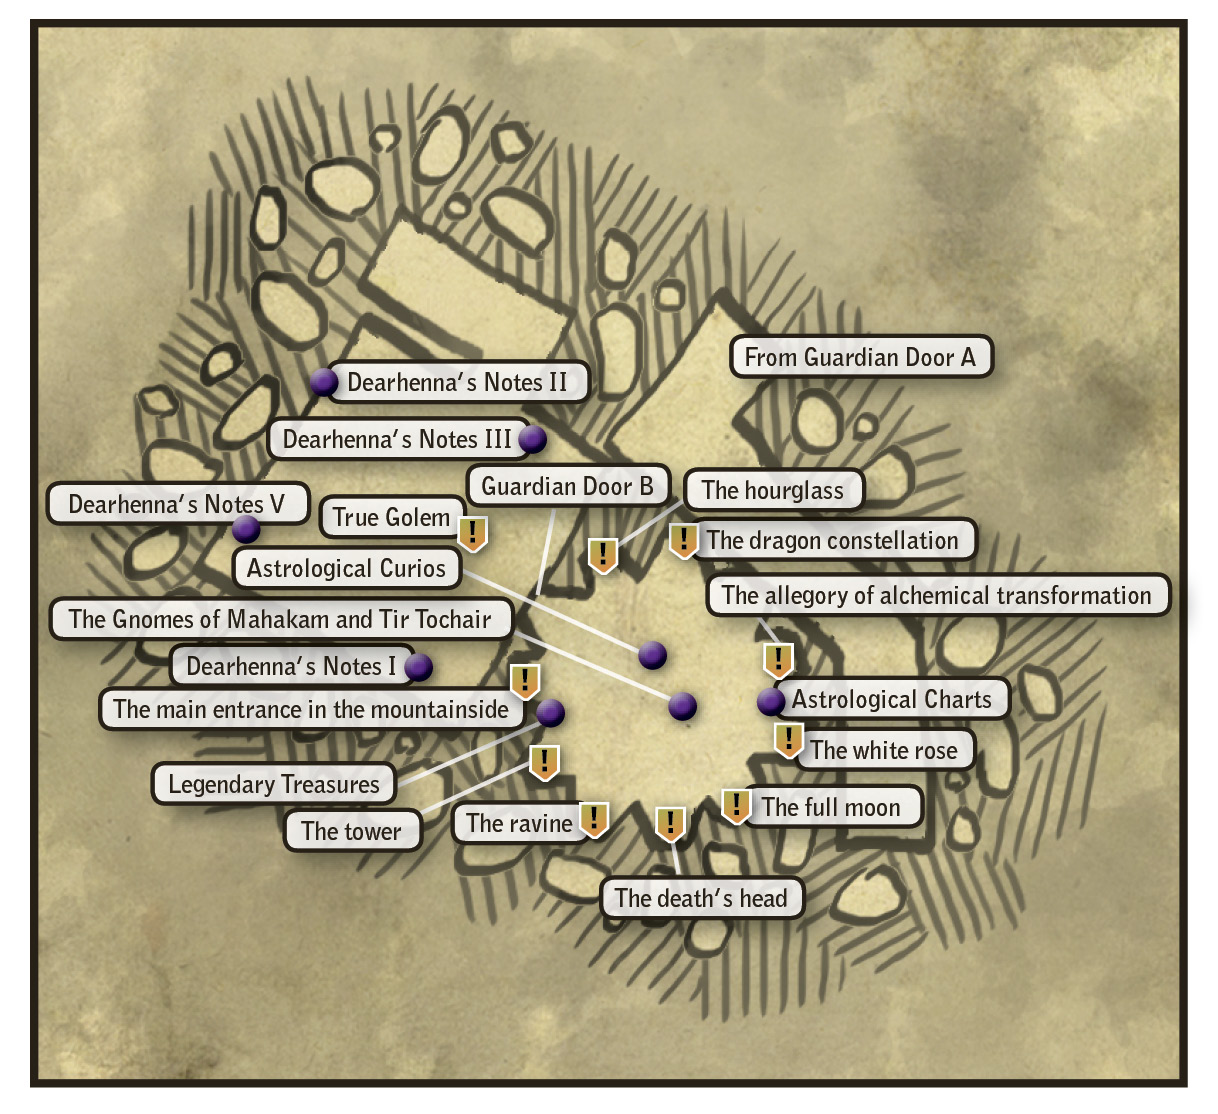
After you clear out the Redanians, you come to another riddle guardian. Before you answer its riddle, loot the room. There’s a fair amount of random loot as well as some books that can help you answer the guardian’s riddle. The books are the Astrological Charts, The Gnomes of Mahakam and Tir Tochair, Astrological Curios, and Legendary Treasures. This guardian’s riddle is very different from the first set of riddles. What’s going on here is essentially a pressure-plate puzzle, where you must decode the three verses of the riddle to place three of your companions on the correct three pressure plates. There is a pressure plate in front of each of the nine frescoes painted in the nine alcoves of the room. As you go through the verse, you must deduce which of the three possible options is the one that is correct. If you select an incorrect option, then three gargoyles drop into the room and you must defeat them before you can try again.
The exact riddle the guardian gives you is, “A group of travelers wandering through the dark. Three guides above them so three were marked. At night they trailed a drake serpentine, and a silver lady, shining and fine, if only her visage she would deign to unfold. By day they followed a mountain-vault—its riches untold.” You must analyze the meaning of each verse to figure out which of the three possible frescoes corresponds to the correct pressure plate. Basically, the verses and the possible answers you can give correspond like this.
First verse: At night they trailed a drake serpentine
Options: The hourglass, the dragon constellation, the allegory of alchemical transformation
Second verse: A silver lady, shining and fine, if only her visage she would deign to unfold
Options: The white rose, the full moon, the death’s head
Third verse: By day they followed a mountain-vault—its riches untold
Options: The ravine, the tower, the mine entrance in the mountainside
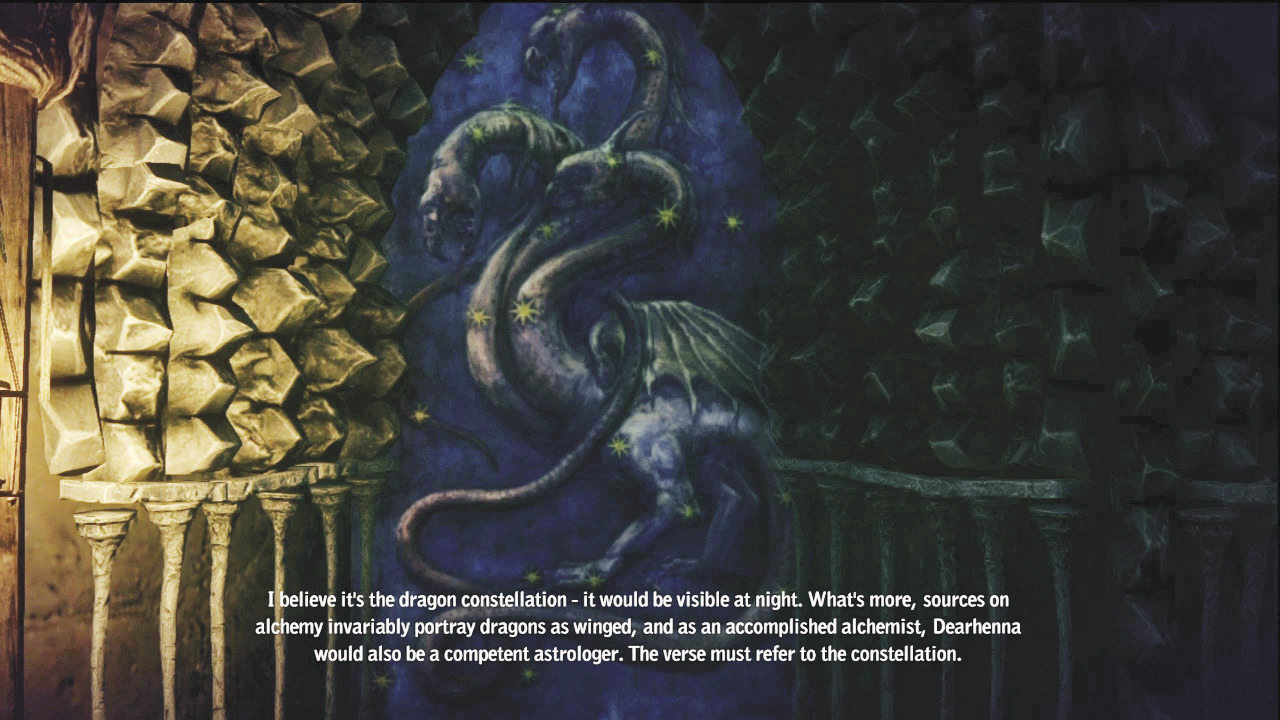
There is no simple way to figure out the correct sequence. Read each of the quest-related books you can loot in this room. The books give you an idea of how Dearhenna saw the world and what sorts of things he valued. When your companions each suggest a possible interpretation of each verse, you should select the interpretation that seems closest to what Dearhenna would’ve thought, based on what you’ve read in the books he kept around. If you don’t want to bother with trying to guess it yourself, the correct answers are, in sequence:
The dragon constellation
The full moon
The mine entrance in the mountainside
After you enter the correct combination, a cutscene wipes out the member of your party who refused to stand on a pressure plate. The door to the next room opens, where a golem awaits you. This isn’t the usual type of golem that attacks immediately; instead you can speak with it. Ask it every question that you can. If you ask it every possible question, you should open up a new dialogue option at the main branch, the ability to say “I know enough.” If you take that option, you can then say things that may let you pass the golem without a fight. Here is a highly entertaining sequence of responses for bypassing the golem:
- “I know you’re a guardian, and I respect that.”
- “I’m a guest here and I wish to talk.”
- “Let’s talk about lies and delusions.”
- “Only you and the master’s will exist. Everything else is doubtful.”
If you attempt to use any Axii sign hex on the golem during the conversation, it always fails and provokes the golem into attacking you along with two duplicates of itself. You also end up in a fight if at any point you choose the option “This is going nowhere.” It is also possible to incite the golem into attacking you after you’ve gotten into the “I know enough” conversation options. For instance, saying “With Dearhenna’s notes, we can free you” triggers an attack. The golems are far from invincible and you can defeat them by using the tactics you’ve used to battle elementals before. Dodge-roll to keep from getting hit much and keep Quen up. If one of the golems is being pelted by the NPCs, try to focus your blows on it so you can put it down a bit faster. After the golems are defeated, loot their remains, as you may get a rare golem trophy for defeating them. Then, loot the rest of the room.
 Side Quest: Dearhenna’s Journal
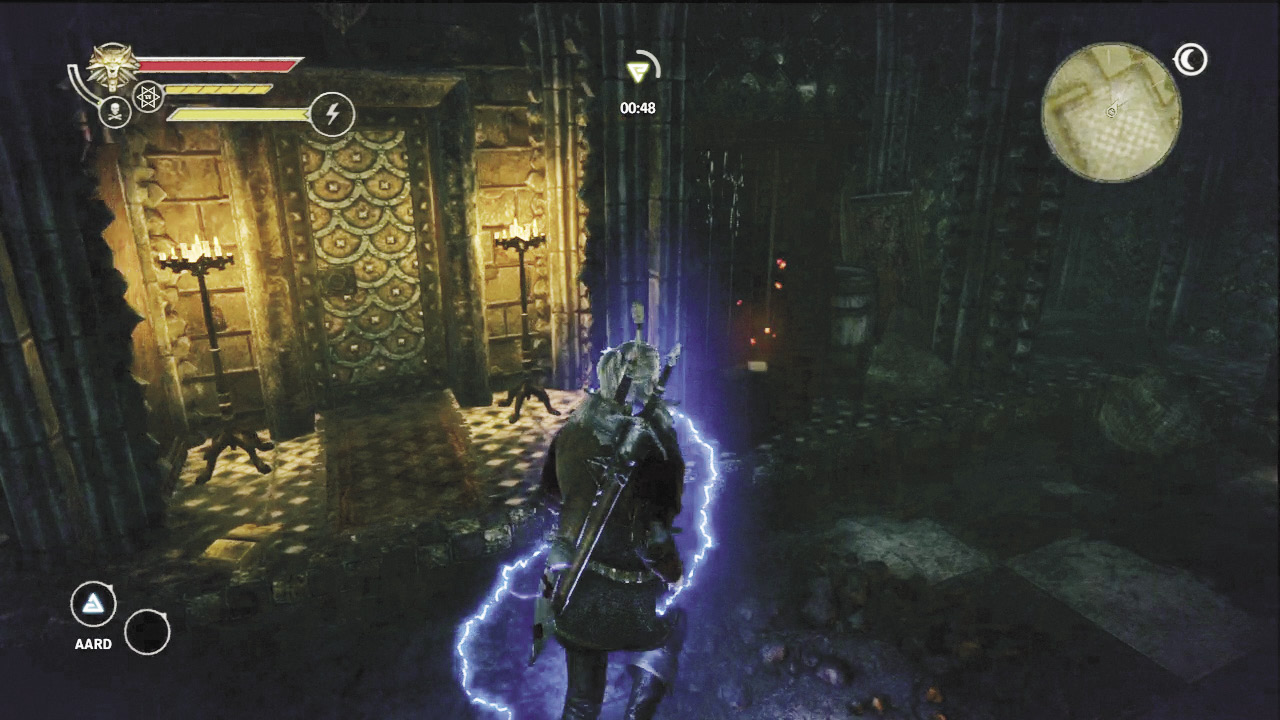
If you glance around Dearhenna’s study, it should become clear that there are four quest items in it. These items are Dearhenna’s notes I, II, III, and V. You can pick them up in any order. Once you obtain any one of them, you trigger the side quest Dearhenna’s Journal. This quest should be treated as a sub-quest whose outcome is affected by The Secrets of Loc Muinne. Read on to see how the various outcomes of The Secrets of Loc Muinne affect the outcome of Dearhenna’s Journal. How Dearhenna’s Journal resolves directly affects another linked side quest, A Tome Truly Rare, that you may be able to pursue directly after finishing The Secrets of Loc Muinne. For now, just pick up all the Dearhenna’s notes you can, then approach Cynthia and Adalbert at the rear of the room.
This triggers a cutscene where Cynthia dispels another illusion, revealing a strange artifact. This initiates a dialogue sequence. Ask her every question you can about the Wild Hunt and Letho before selecting any of the options highlighted in orange. The options highlighted in orange each end the quest (and resolve Dearhenna’s Journal), but in different ways.
If you say “All right, we’re even,” then Cynthia pays you the fee you’re owed (around 100 orens) and teleports away with the artifact. The quest automatically resolves and you get 500 XP. If you make this decision, it automatically resolves Dearhenna’s Journal but will not trigger the quest A Tome Truly Rare. You’re finished here and should begin the next side quest.
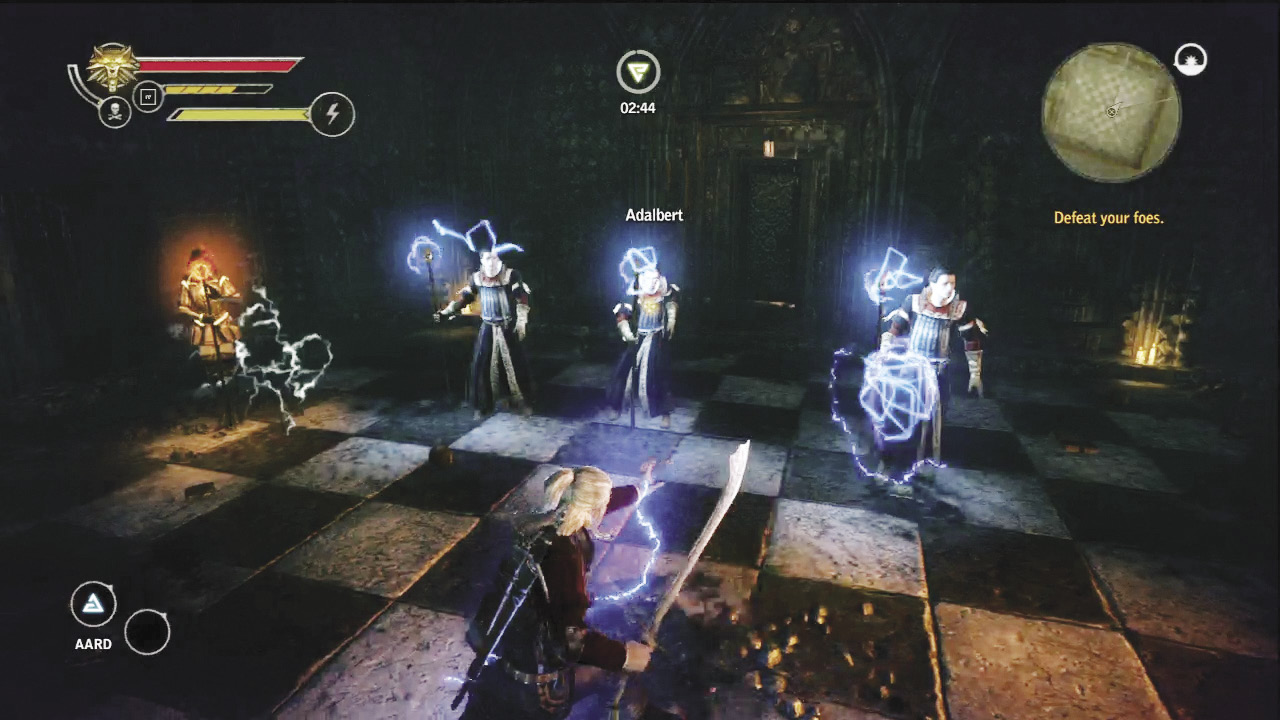
If you say “I can’t let you leave with that thing,” then you end up fighting Adalbert and Cynthia for possession of the artifact. This is effectively a battle against four mages at once, which is going to be challenging. Fortunately, this is a large room so you’ve got space to maneuver. Focus on eliminating Cynthia first, then Adalbert and his two duplicates. If you have Aard III or are an alchemist with Zerrikanian suns, you can stun the mages to get around their Quens. You can eliminate them rapidly with a handful of blows each, or even quicker if you trigger finishers or instant kills. Loot Cynthia’s body to receive Dearhenna’s notes (IV) and the book Bane of the Vrans, which resolves the side quest Dearhenna’s Journal and initiates a particular version of the side quest A Tome Truly Rare.
After you get the loot, then you can use the artifact. You can see up to three cutscenes from a list of five involving Roche, Triss, Dandelion, Saskia, and Radovid. These cutscenes aren’t essential to progressing the plot in any way, but they reveal interesting information about what other characters are doing. After the artifact runs out of power, the quest resolves and you gain 500 XP. Progress the quest A Tome Truly Rare.
If you say “I’d like to try the artifact,” Adalbert becomes hostile and you must battle him alongside Cynthia. This battle is very similar to the other fights with mages you’ve already won, so fall back on similar tactics. Use Quen, roll around, and strike Adalbert when he pauses to cast a spell. Adalbert’s ability to summon two duplicates of himself in combat is a complication, but not a tremendous one. Each Adalbert has relatively low vitality and is going to go down easily once you can get an attack to connect. Aard III can come in handy here, as can Zerrikanian suns for mages. It can also be useful to focus on whichever Adalbert Cynthia is attacking at the moment, so you can take advantage of any incineration effect she’s inflicted. Once you defeat Adalbert and his two clones, the battle is over. Loot his body to obtain Dearhenna’s notes (IV). This resolves Dearhenna’s Journal and triggers A Tome Truly Rare.
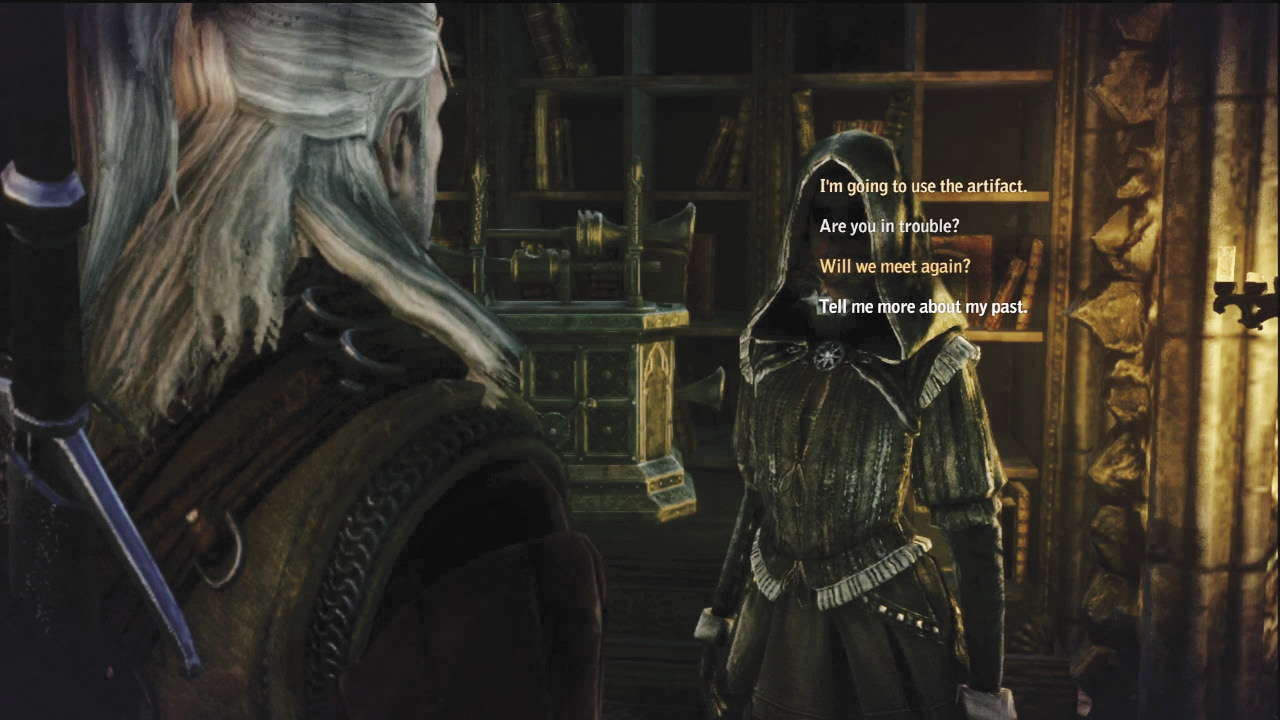
A dialogue scene begins after you win the fight. Ask Cynthia all of the questions in white that you can. Asking “Will we meet again?” prompts her to mention that you can find her later at the inn. If you want to have a love scene with Cynthia, you absolutely must ask her this. After your dialogue with Cynthia concludes, you may use the artifact to contact one person. You choose from a list that includes Triss, Roche, Dandelion, Saskia, and Radovid. Each selection cues up a different cutscene that lets you know what’s happening to that person. What you select doesn’t affect anything but can shed an interesting light on the story’s events. After you use the artifact, the quest resolves and you gain 500 XP. Cynthia teleports away. Loot Dearhenna’s laboratory and the surrounding areas thoroughly before you return to Loc Muinne. Read on to proceed with A Tome Truly Rare.
 Side Quest: A Tome Truly Rare
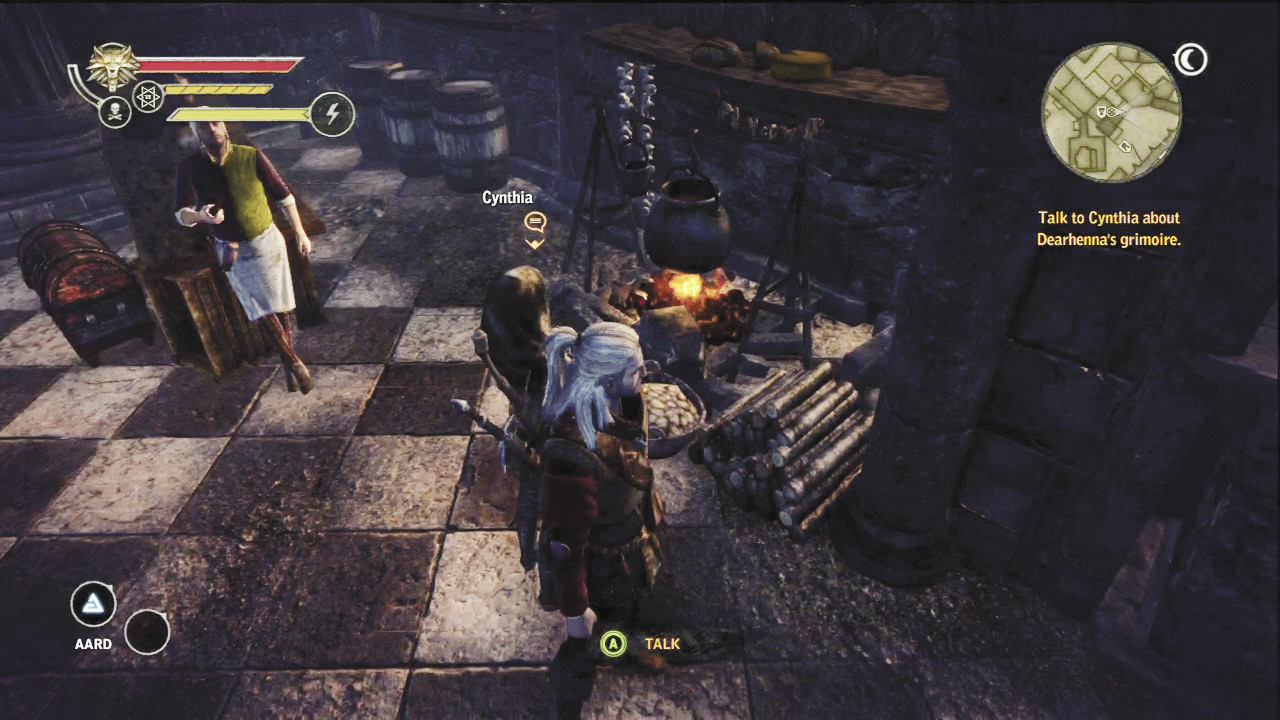
If you’ve triggered it, then how this side quest progresses depends on whether Cynthia is alive or dead. If Cynthia is alive, you know of the book Bane of the Vrans but do not have a copy in your possession. Go meet Cynthia at the inn and ask her about the expedition. This should open up some conversation options that directly relate to what you found completing Dearhenna’s Journal. You want to ask her “What did Dearhenna actually research?” and “I know about the book.” After that, say “Every word you say is a lie,” followed by “I’m curious to know the real Cynthia.” If you want to initiate the love scene with Cynthia, then select “[Embrace Cynthia]” when the option to do so comes up. You can resolve the quest successfully without sleeping with Cynthia. What’s important is getting to the branch where you make the decision.
If Cynthia is dead, then you have a copy of the book Bane of the Vrans and must decide what to do with it. The book is encrypted, so go see Bras of Ban Ard about it. Bras offers to buy it from you, if you wish to sell it. You can also opt to hang on to it, though the quest does not resolve as long as the book is in your possession. Note that Bras of Ban Ard doesn’t pay you a whole lot for the book, so selling it to him is not necessarily better than just keeping it for yourself.
 Side Quest: A Score to Settle
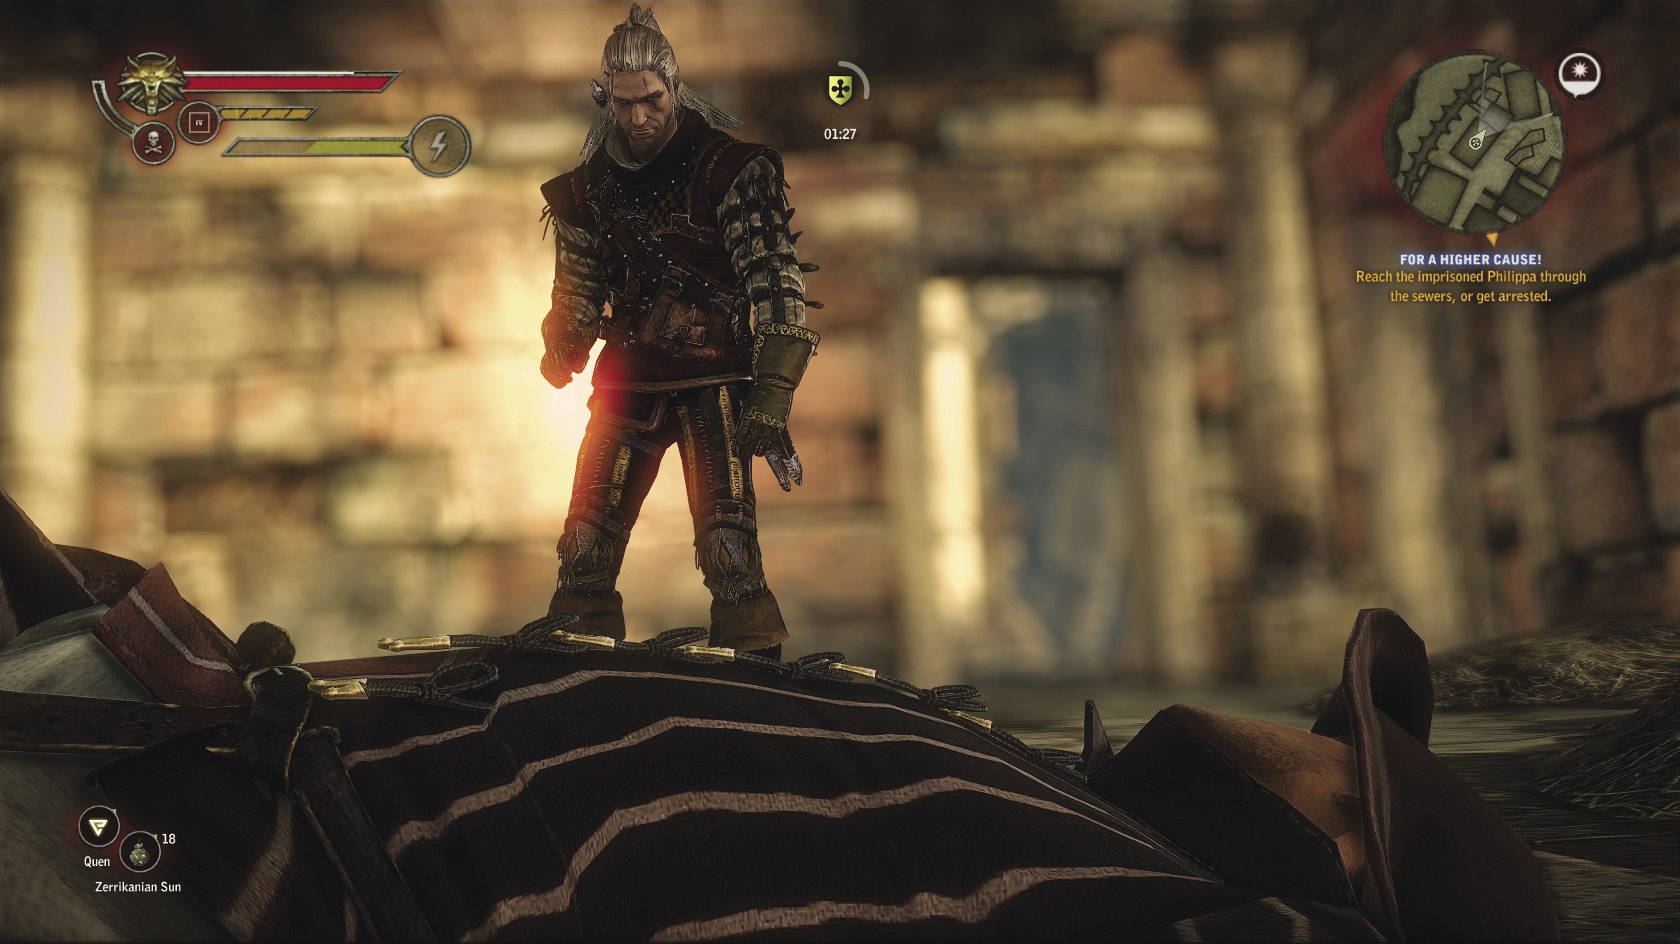
Now you can move on to the mini-game side quests. There’s no proper fist-fighting mini-game for Chapter 3, but you can wrap up some unfinished business from Chapter 2. From the inn, head north and past the harpies’ spawn point toward the area where you can find Loc Muinne’s dice players. The minute you enter the dice players’ building, Silgrat appears and challenges you to a revenge bout. What follows from there is an ordinary fistfight, where you should really have no trouble defeating him. You don’t get any orens for this final victory, but you do gain 150 XP.
 Side Quest: Poker Face: Loc Muinne
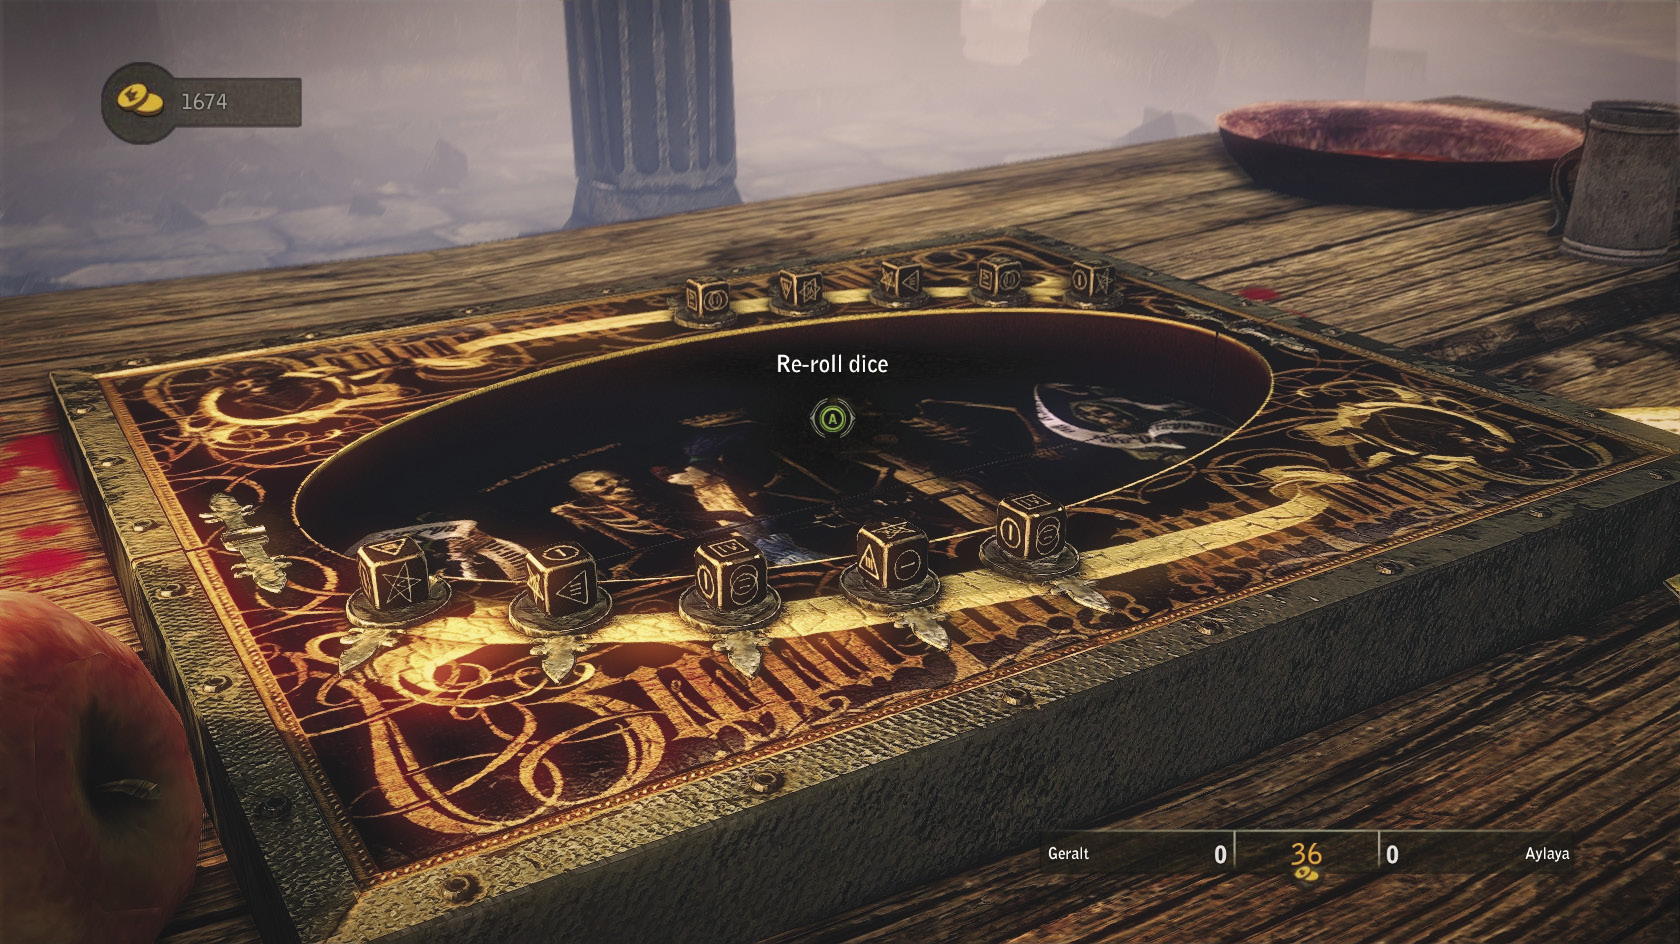
With Silgrat out of the way, start playing dice. Begin by approaching the two elven players, Filly and Aylaya. You can face them in any order. After you’ve beaten them both, head over to the next table and challenge first Hadrian the Black, then his apprentice. With these victories under your belt, you can go back to the area just outside the inn and challenge The Incredible Lockhart. When you defeat him, you get a choice of “something nice” or 150 orens as your bonus for finishing the quest. The something nice is your choice of a diagram for making magic wraps, a runic armor enhancement, or a fire rune and an earth rune. Bear in mind that the recipe for magic wrap demands troll skin. So if you haven’t been slaughtering trolls as you come across them, the diagram is basically useless to you and you should probably take the runes instead. For a player who has been going for the troll-killing achievement, the diagram of the magic wrap is by far the better prize.
 Side Quest: Bring It On: Loc Muinne
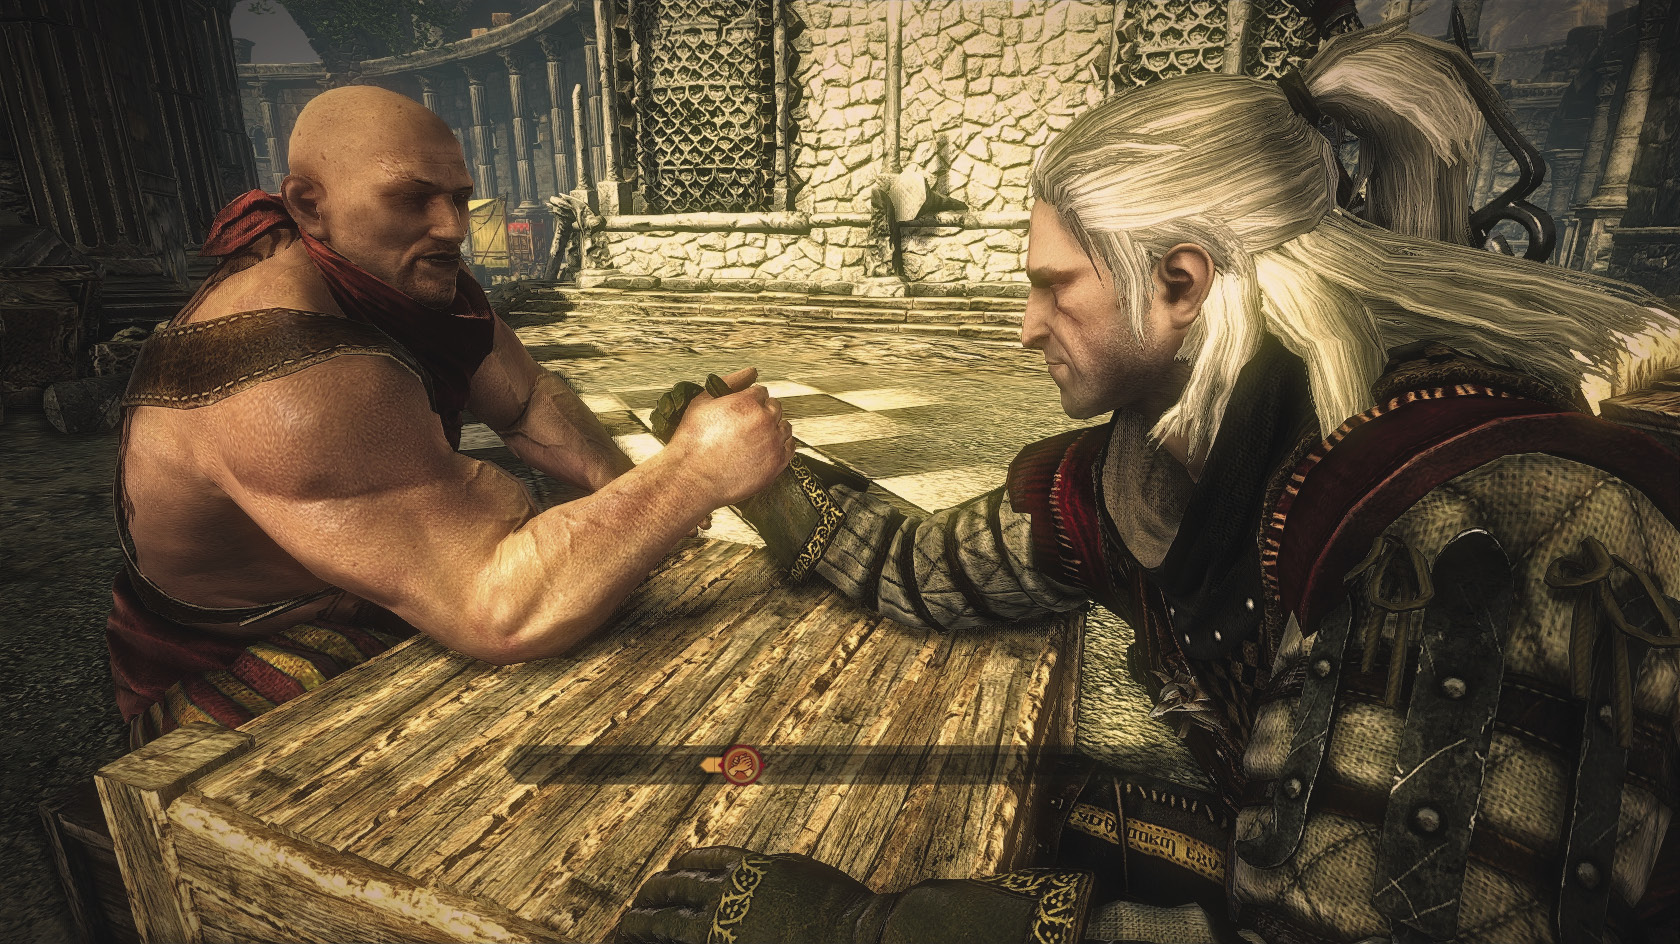
For this quest, you must beat only one opponent, the Mighty Numa. Go find him and challenge him. Wager the minimum amount of orens for this first bout, because it’s designed to be impossible to win. After the bout ends, you have a few options for how you can react to Mighty Numa.
You can accuse him of cheating. If you do, then this opens up a dialogue branch where you have two choices. If you say “Make my day” to Mighty Numa, it initiates a fistfight with him. He’s not especially difficult to beat. After you beat him, Mighty Numa swears to stop cheating. You get 25 XP.
You can try to intimidate Mighty Numa by saying “You’re not fast enough…”; Numa is usually fairly easy to intimidate, and most of the time this option is successful. Mighty Numa says he doesn’t need potions to beat you and swears not to cheat the next time you arm-wrestle. You get 10 XP.
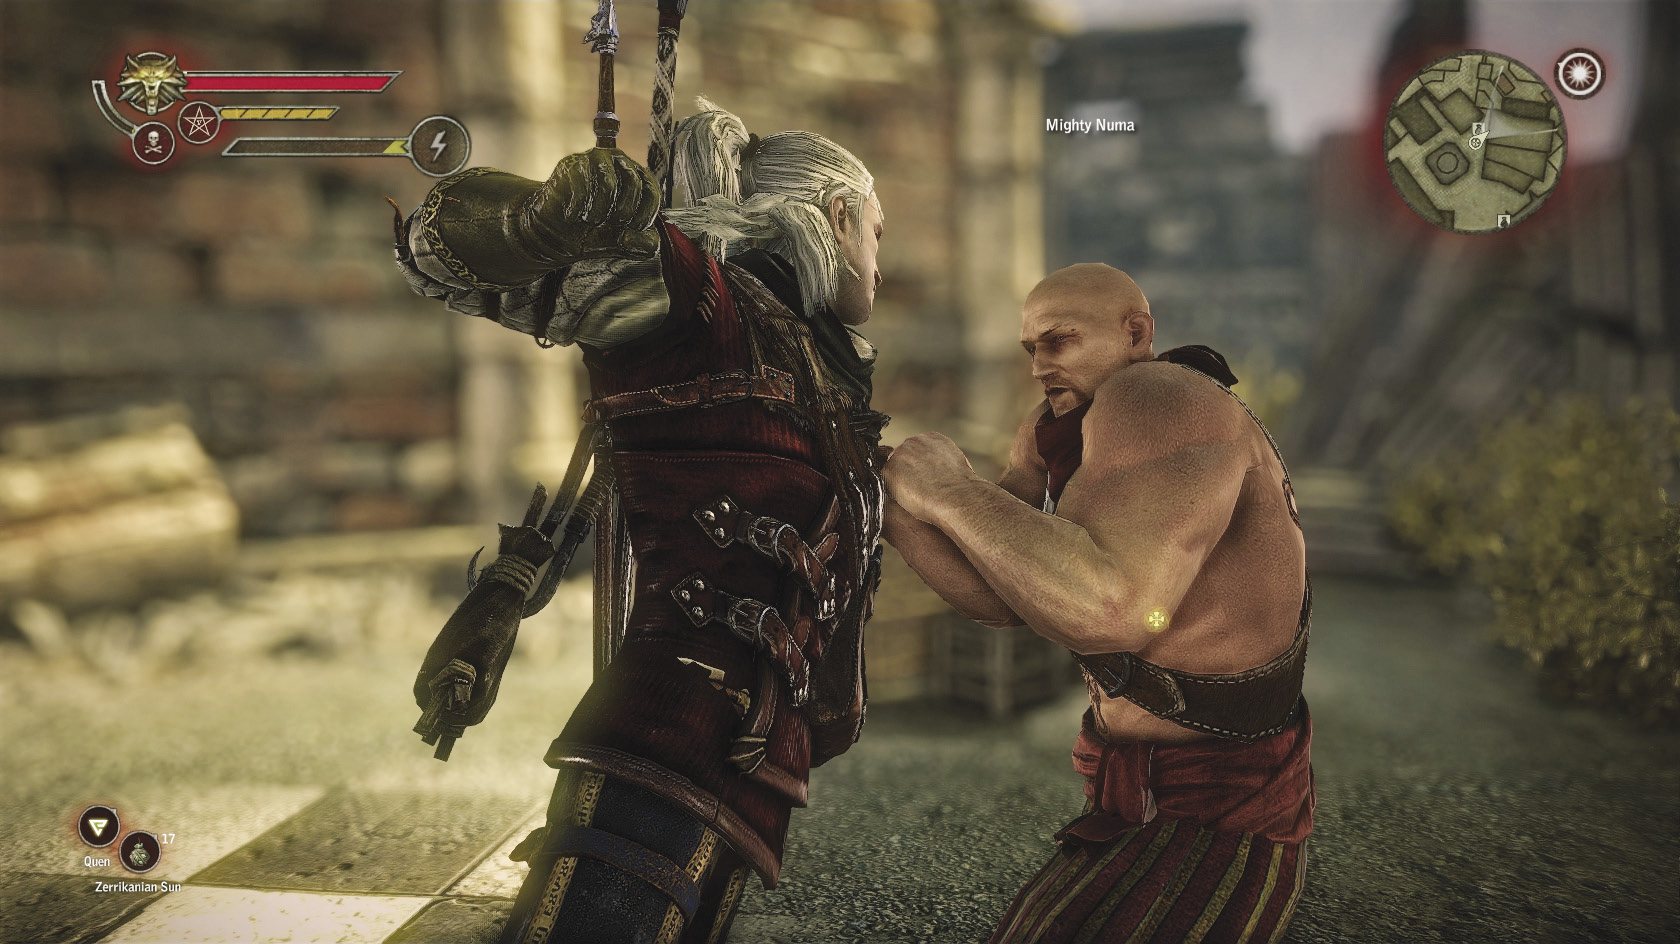
You can also simply admit “I lost.” If you do things this way, then you next need to buy an Anabolic Steroids potion from Marcus. Drink it, then challenge Mighty Numa to an arm-wrestling match again while the potion is active. You should defeat him easily, so bet the full 200 orens possible so you can reap a 400-oren reward. After you beat the Mighty Numa, you get 25 XP and Numa gives you the diagram for the long, robust gauntlets. The quest resolves, awarding you with an additional 100 XP.
If you go to arm-wrestle Mighty Numa again after fistfighting him or intimidating him, the effects are the same as challenging him while under the influence of Anabolic Steroids. You should defeat him very easily, then get 25 XP, the diagram, and then an additional 100 XP. So overall, the most lucrative way to tackle this quest is to fistfight Mighty Numa after your first loss. The Anabolic Steroids potion is quite expensive, so not buying one maximizes your profit.
 Side Quest: Mystic River
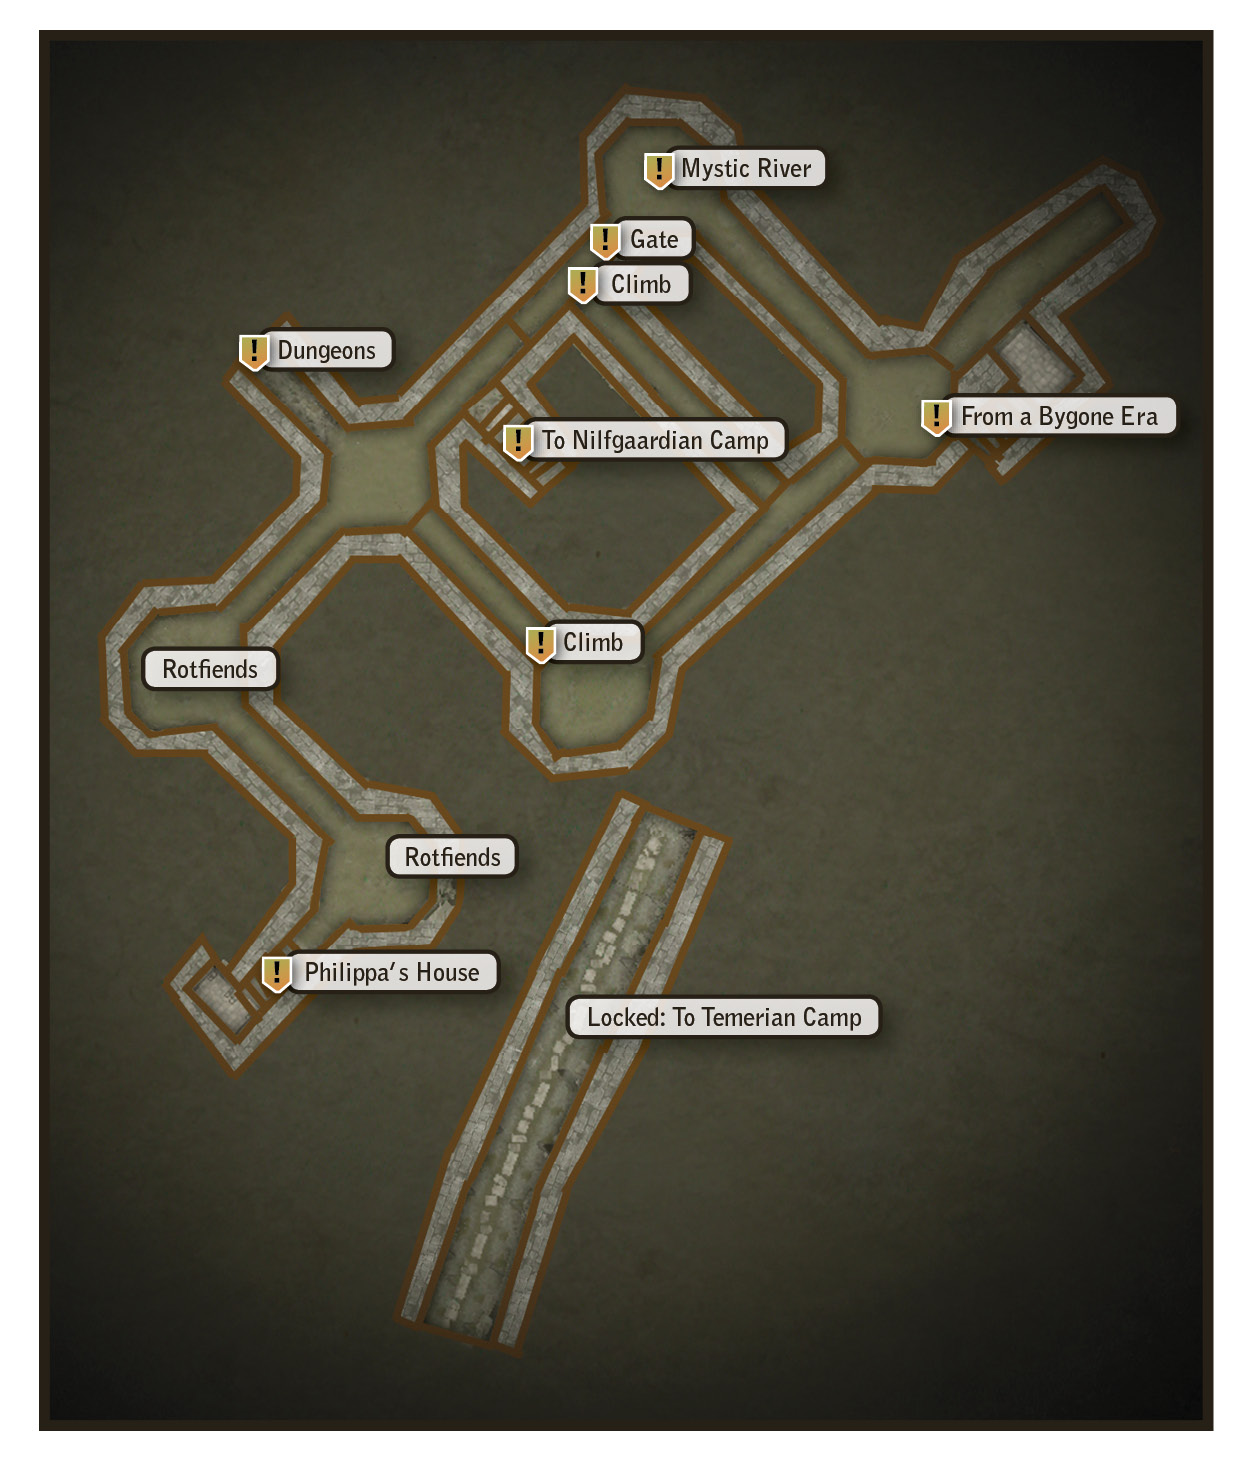
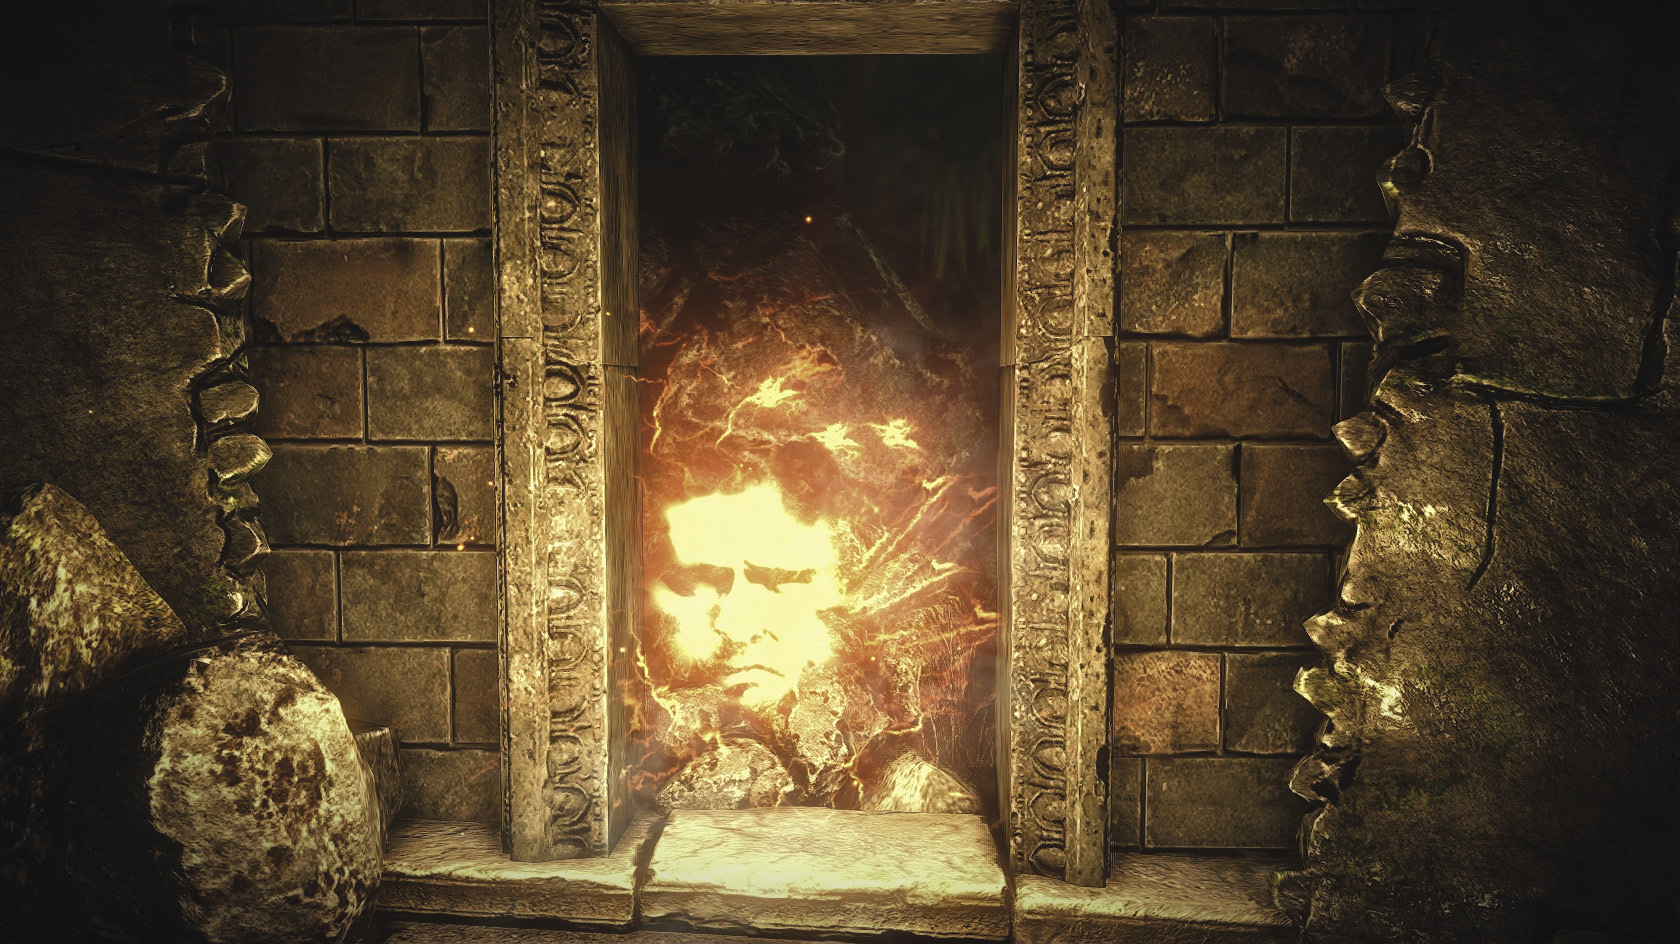
Head into the sewer entrance near Mighty Numa’s area of the town square. When you pass by the initial chamber, if you have Malget’s notes in your possession, a giant flaming head set into the wall begins talking to you. There’s nothing you can do with this creature just now, though you’ll come back to it later. Simply say “See you,” and ignore it for the time being.
Take a right and you come to a tunnel where two bullvores patrol. As long as you don’t let yourself get caught between the bullvores, defeating them should be simple. Adrenaline abilities are highly effective here and it’s also easy to just beat them to death with strong sword attacks, provided you’ve got a strong defense at your disposal, like leveled-up Quen.
Once you’re past the bullvores, the tunnel empties out into a dead end (the gate you passed through earlier is locked now) stuffed with treasure chests. Loot them to get an amazing array of treasure. One chest contains the diagram for the armor of Ys, and the other contains the diagram for vran armor, an armor of Ysgith, a fire rune, and the steel sword Deireadh. Note that even if you don’t qualify for finishing Mystic River in this chapter, you can pick up the diagram for the armor of Ys.
The quest isn’t finished until you’ve crafted the vran armor. Once you’ve gathered the materials needed to craft it and the whopping 2,000 orens it costs to make, just go visit any craftsman. The in-game quest text may make it sound like you need to specifically visit Bras of Ban Ard, but any craftsman will do. After you’ve successfully crafted the vran armor, the quest resolves. You get no XP for resolving the quest, but then again, you’ve now got the most powerful armor you can obtain on a standard difficulty. Equip and slot it with +2 enhancements before the next side quest.
Ysgith vs. VranIf you carefully compare the stats of the vran armor and the armor of Ysgith, you may notice that the vran armor is really only better if you’re playing as a swordsman (or perhaps an alchemist). The armor of Ysgith confers a lot of bonuses that are extremely useful to mage builds. If you’re a mage Geralt, you may want to think long and hard about simply not finishing Mystic River, so you can keep the armor of Ysgith. A mage can finish the game just fine in an Ysgith armor slotted with +2 enhancements. |
 Side Quest: From a Bygone Era
You can only initiate this quest if you obtained Malget’s notes in Chapter 2. If you weren’t following the walkthrough closely, there’s a fairly high chance that you didn’t since the quest involving them doesn’t trigger automatically. Just keep it in mind as something to do next time, in that case, and move on to the next side quest.
If you do have Malget’s notes, go see Bras of Ban Ard. Say “I want to know everything about this manuscript.” Bras quickly figures out that Malget’s notes contain a password that lets you access a secret vault—but he won’t tell you how to use the password for free. At this point, you come to a dialogue branch where you can opt to bribe him or use Axii on him. If Axii works, he just goes ahead and tells you how to use the password. If you bribe him, you probably need to give him at least 300 orens to get him to talk.
Either way, he explains that you don’t need to know what the book actually means to use the password correctly, just which part of it must be repeated to the sentry if you want to pass. You can work this out on your own, but to state it plainly, you need to say:
1. Zi
2. Uddu-ya
3. Ia Ia
4. Gat
5. Exa
6. Nibbit
7. Kanpa
8. Gat
9. Uddi-Zi
Go to the sewers from the entrance north of town square. You should emerge with the sentry you need to speak with immediately to your right. Approach the sentry down in the tunnels and say the exact sequence of words to it. The sentry disappears and turns into a teleportation portal. If you’re having a hard time finding the sentry for some reason, consult the sewers map.
On the other side is a simple puzzle you must solve to proceed through the room’s door. In this room is a series of braziers. To pass through the door, you must light them all simultaneously. The problem is that lighting any one brazier causes the state of two others to “reverse.” That is, if they are alight, they are extinguished, and vice versa. So to get all seven of the braziers lit up simultaneously, you need to take advantage of this property. This involves understanding the relationships among the braziers, which we’ll refer to with letters to make what’s going on a bit clearer.
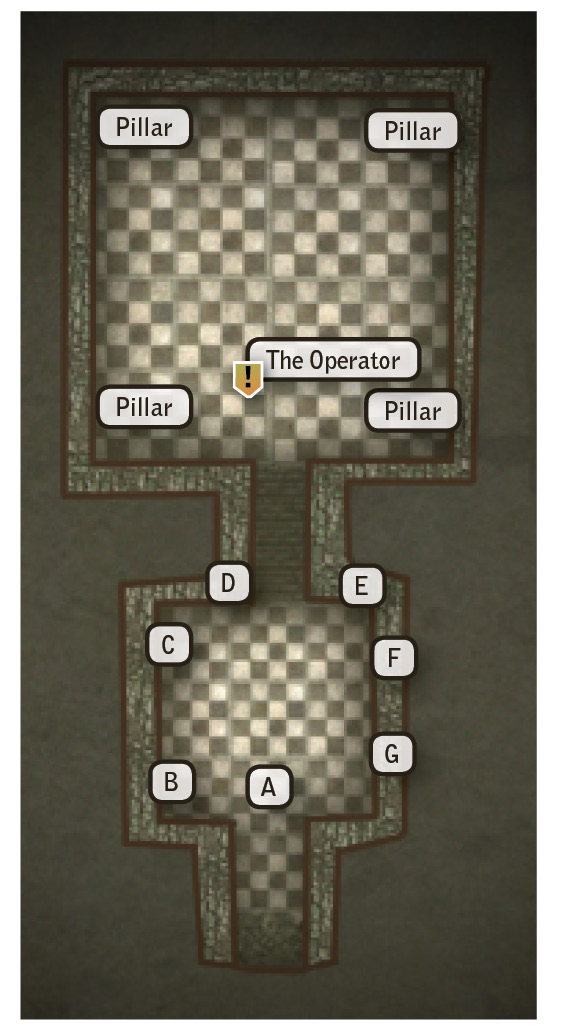
- A reverses B and D
- B reverses E and G
- C reverses A and B
- D reverses C and F
- E reverses A and G
- F reverses C and E
- G reverses C and F
So solving the puzzle is simply a matter of taking advantage of the reversals so that you can get all seven braziers going at once. There are a lot of different ways to do it, but the sequence that uses the fewest number of moves (that we’ve found) is A, F, B, A. Once the room is open, you’re free to enter and speak to a forbidding NPC called the Operator. You may want to pause and save your game here. Before you speak with the Operator, think carefully about where you are in your game and what you want to do.
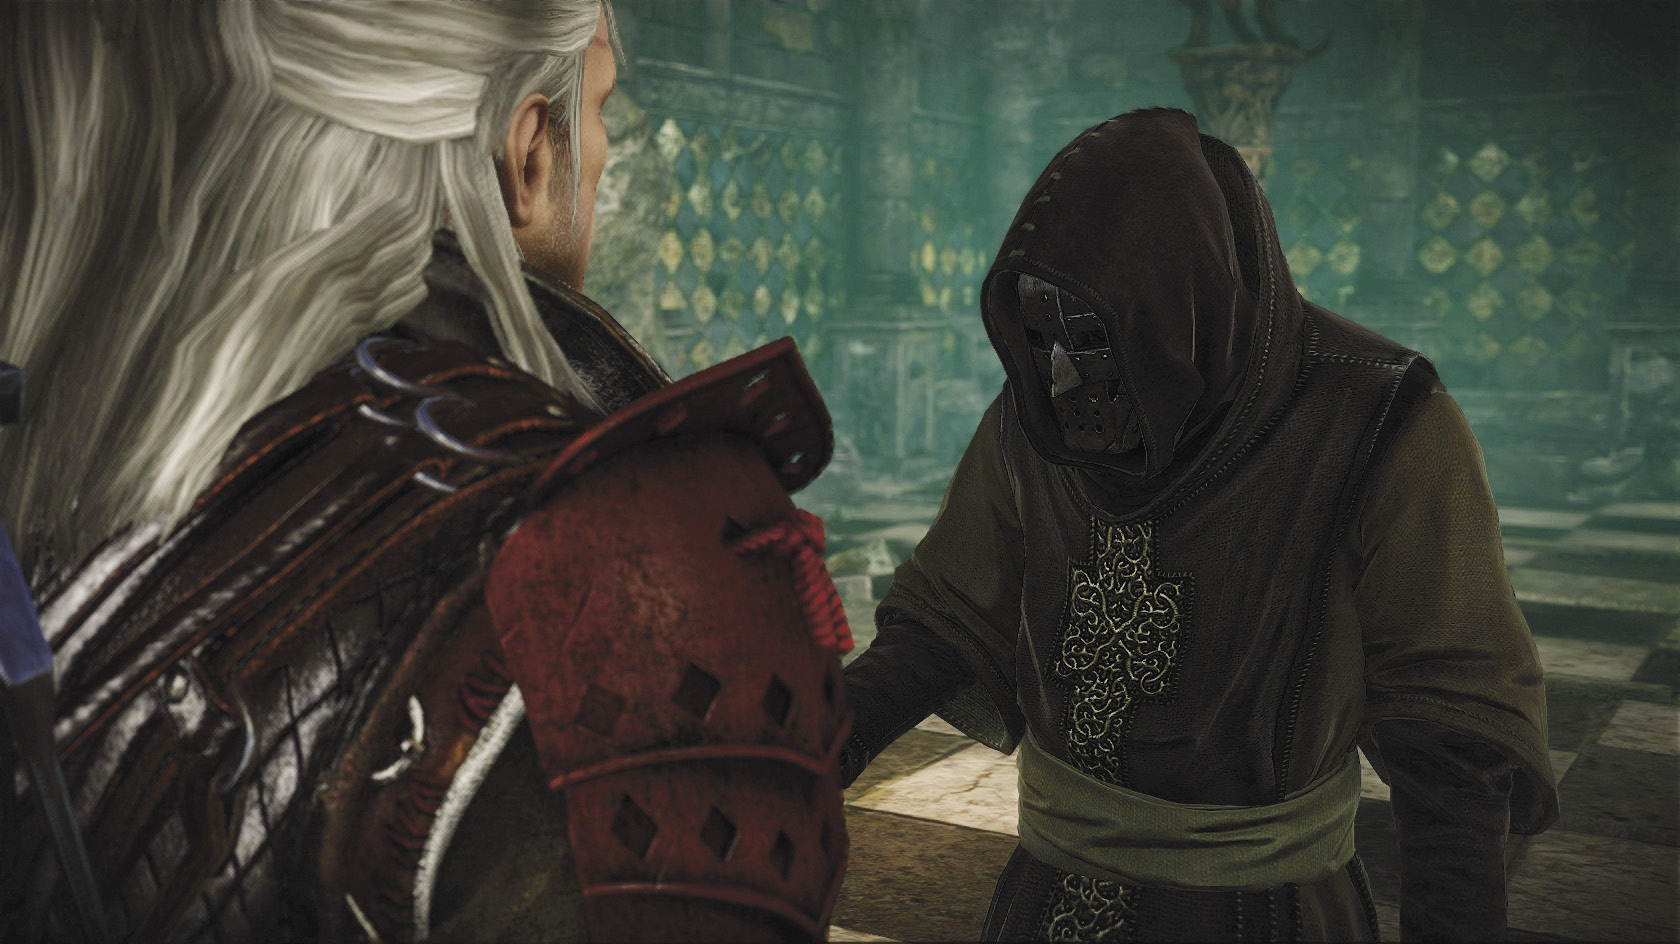
You can use the Operator to respec your Geralt build if you aren’t happy with it, or you can attempt to fight the Operator to obtain a game-breakingly powerful weapon and some rare drops. You can also use this fight to test your build. The Operator is by far the toughest encounter in the game, and only very strong builds are going to be able to drop him. If you try fighting the Operator and can’t get his vitality below 50 percent no matter what you try, then your build is weak and you should probably respec.
You can only speak to the Operator once. If you attempt to leave during that conversation, he disappears and you can never re-enter this area. So before you speak to the Operator, take a look at where you are in the game. If you’re positive you want to reset your skills, you can go ahead and speak with him regardless of level. If you’re interested in fighting him, make sure you’re fully prepared for the battle.
Visit craftsmen to make any traps you might want to use (notably, the Talgar winter). Make sure you have ingredients on hand for any potions you want to drink or bombs you want to make. You should be armed with the forgotten vran sword and Deithwen, wearing either vran armor or (if you’re a mage) armor of Ysgith. All of your equipment should be fully slotted. You should be at level 35, so Geralt has every skill and stat bonus possible. You may want to skip ahead and complete The Gargoyle Contract so you can pick up the Elder Blood items, which can boost your armor and resistances a bit further.
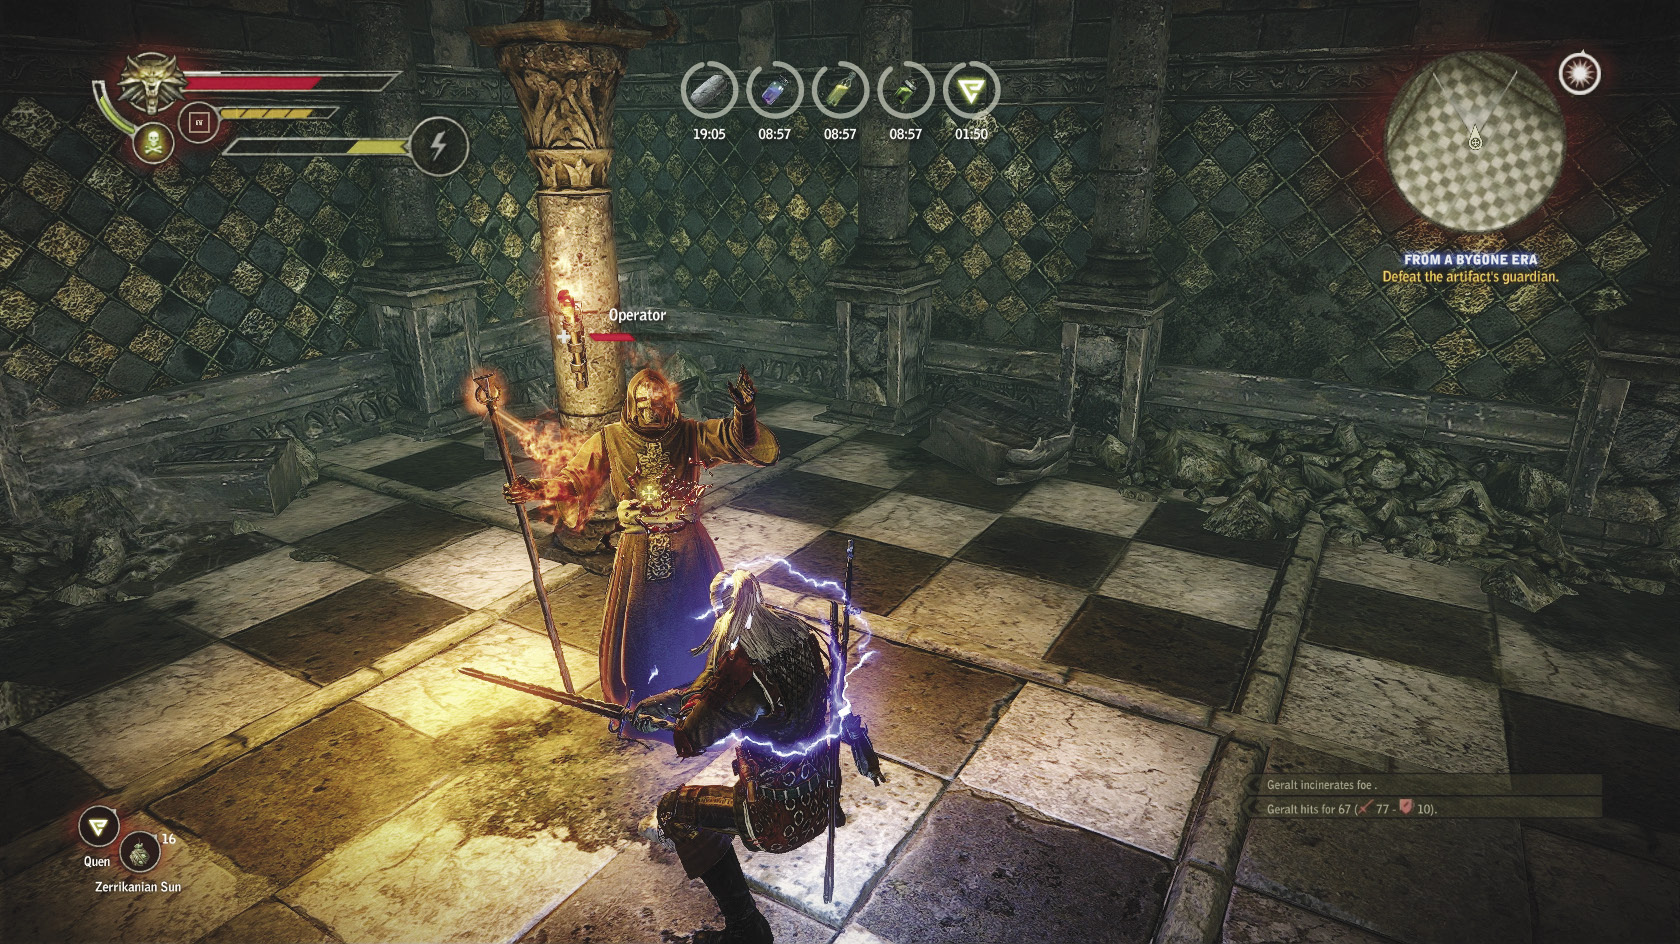
If you want to get the Operator to respec you, say “What does this artifact do anyway?” and then “Yeah. Get started.” You immediately enter a meditating stance and get all of your talents back. You must still spend six on the training tree to unlock the others, but after that you can spend your talents however you wish. If you invested in some ability you really don’t like or picked a skill tree you’re not totally happy playing, then you can use the respec to put your points toward something different and hopefully better.
It is possible to screw yourself out of any interactions with the Operator if you say entirely the wrong things. If you say “I need to get out of here” or “What does this artifact do anyway?” followed by “No,” the Operator banishes you from his hidden area and the quest automatically fails. Obviously, you don’t want to do this.
If you want to fight the Operator, say either “I’m no chosen one” or “What does this artifact do anyway?” followed by “I think I can use this thing myself.” You get a slightly different response for each, but either way the Operator becomes enraged and vows to kill you. Do not undertake this decision lightly. If you decide to fight the Operator, then only do it after applying your strongest potions, enhancing your sword with whetstones, and having huge stacks of the appropriate traps or bombs in hand.
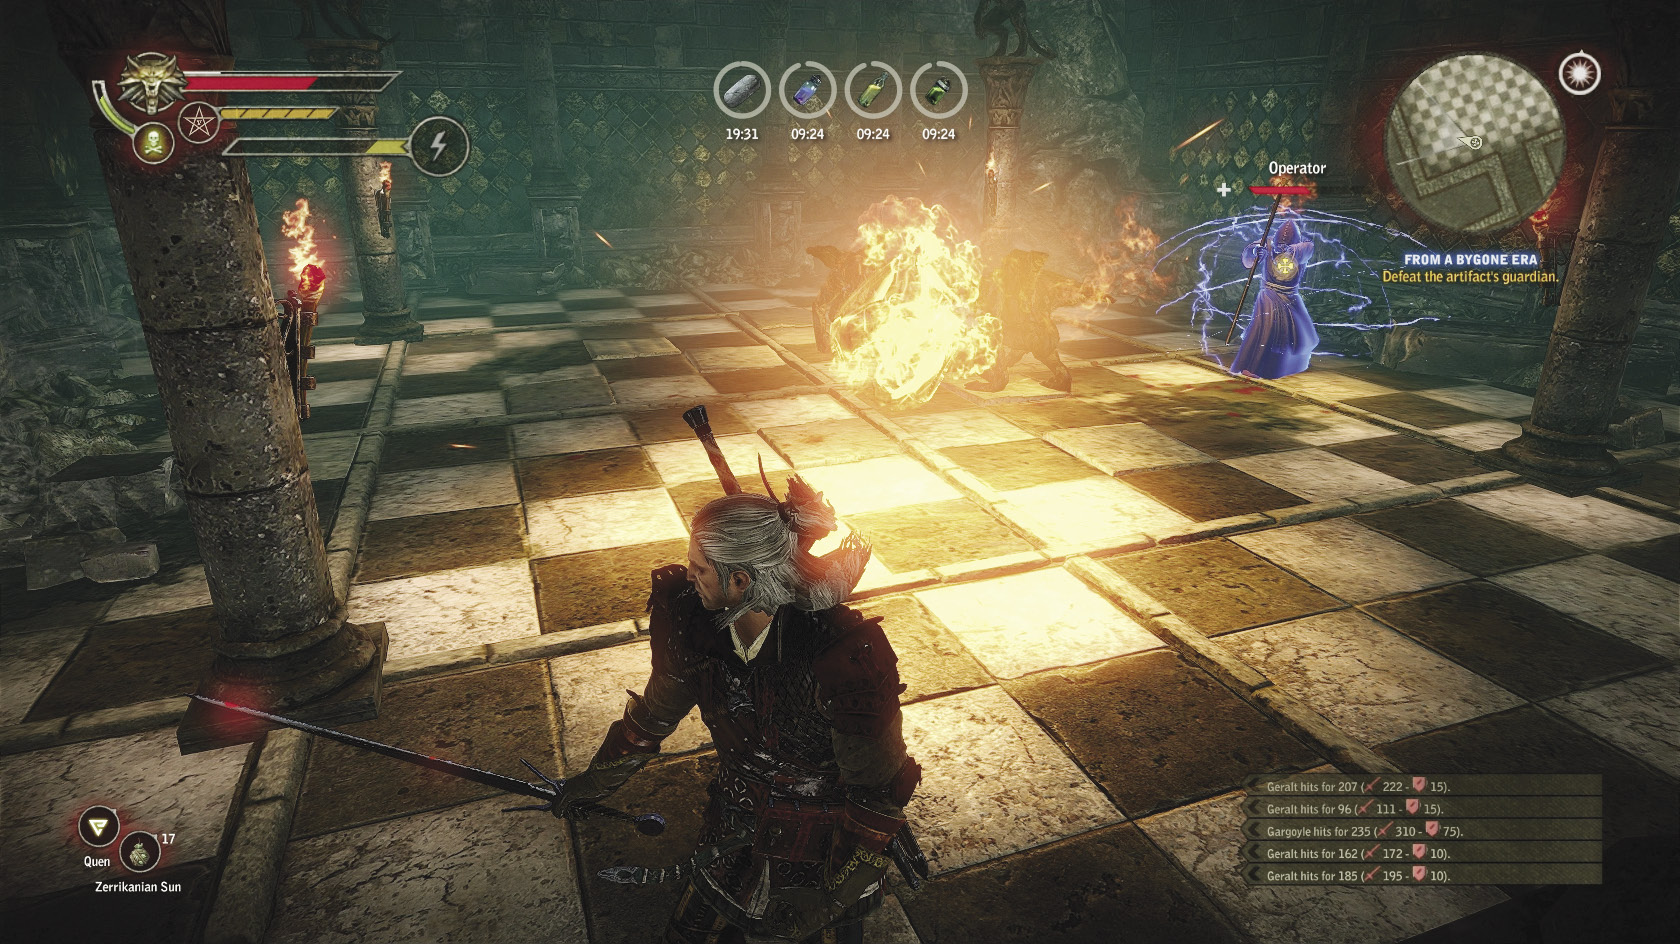
The Operator begins by shooting powerful fireballs at you constantly. He can defend himself with Quen and moves too quickly for daggers to interrupt his spells. The best way to damage him is to roll up to him while he’s preparing a fireball and hit him before the animation completes. You can usually get in a three-hit combo before he throws Quen up. If you corner him, he teleports away or hits you with his staff, which can stun you or knock you down. The Operator’s vitality regenerates at a frightening rate, so turtling isn’t an option when you fight him. His only real weakness is being fairly vulnerable to incineration, so dancing stars and leveled-up Igni can be useful here.
The Operator by himself might be manageable, but there’s a huge complication to the fight. When the Operator is reduced to 75 percent, 50 percent, and 25 percent HP, he summons a pair of incredibly strong gargoyles. Although the Operator is clearly a supernatural being, the game considers him human and you need to be wielding a steel sword to do optimal damage to him. The gargoyles he summons are ridiculously powerful, though, and can batter your Quen down in no time. You can’t afford to attack them with anything but an optimal silver sword like Deithwen, since they do so much damage they can easily kill you in one or two hits on all but the lowest difficulties.
Defeating the gargoyles quickly and efficiently is the key to winning this battle. There are a few ways to go about it, but they all amount to the same basic idea: Get rid of the gargoyles fast, then go back to hitting the Operator before his vitality has time to significantly regenerate.
One way is to rely heavily on your adrenaline effects. You should be at level 35 before even thinking about fighting the Operator, so you should have your skill tree’s adrenaline skill at least unlocked and hopefully boosted. For this method, you immediately blow your adrenaline effect the moment the gargoyles appear so you can kill them quickly (possibly instantly), then get back to battling the Operator. The danger of this method is that even if you’re using equipment to boost your adrenaline regeneration, it’s really hard for mage and swordsman builds to generate adrenaline quickly enough for handling all three waves of gargoyles. Alchemists can come close to doing it, but still probably need a backup plan for dealing with wave two or three. Swordsmen and mages need a backup plan for getting through the rest of the battle.
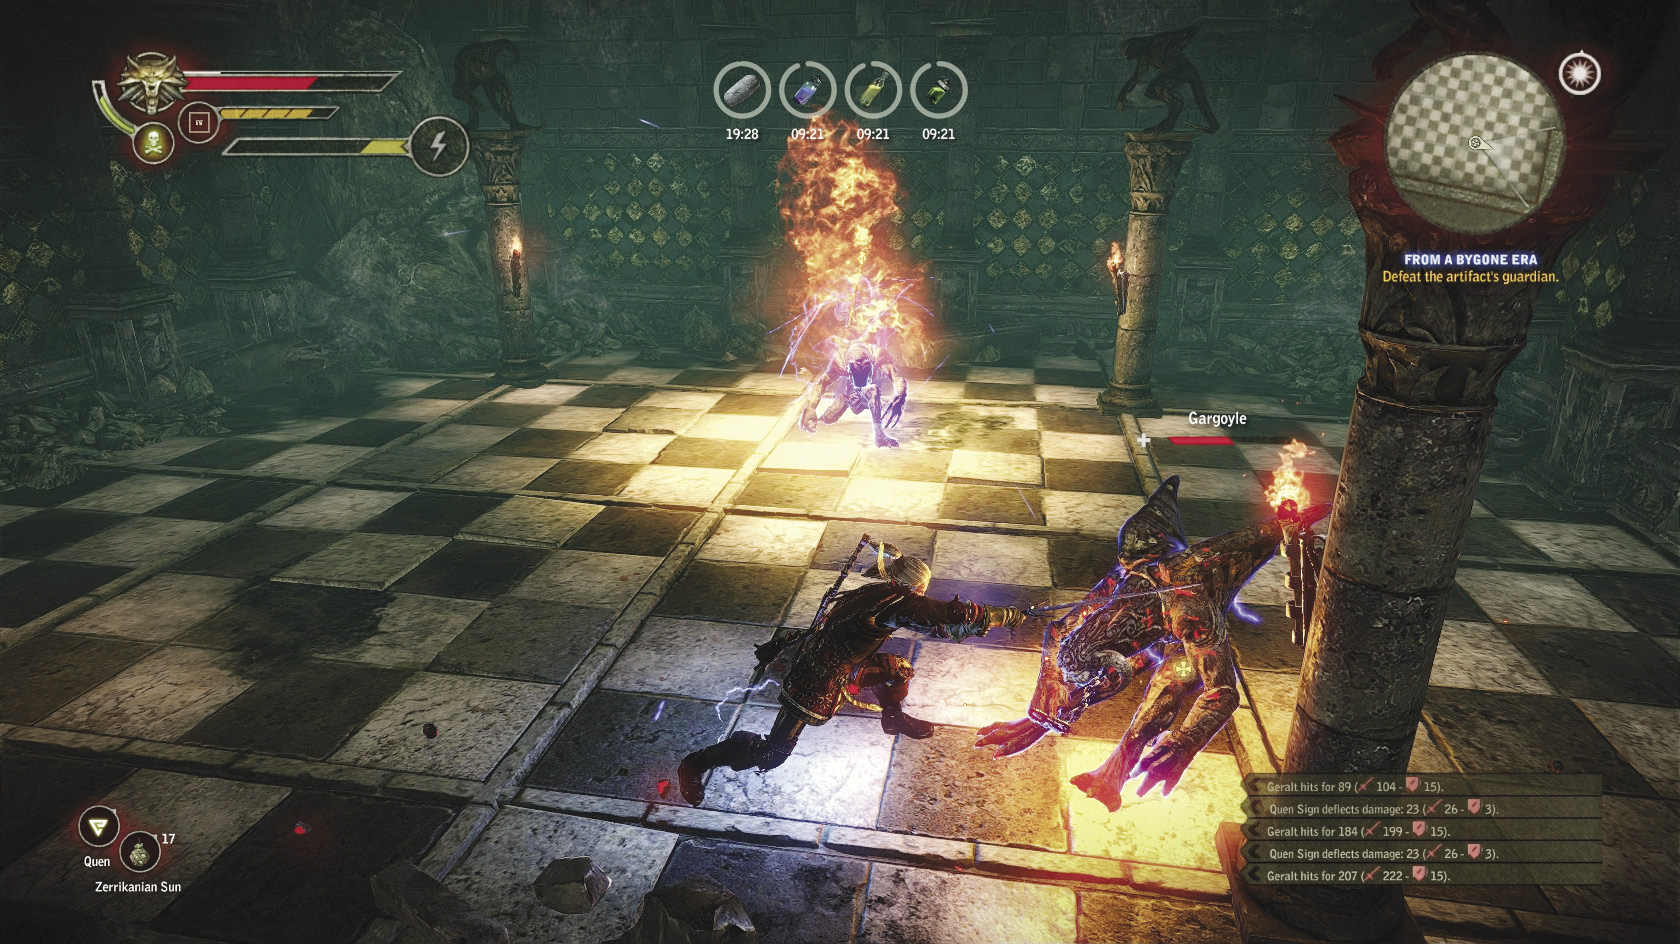
Since adrenaline is unreliable, you can try to focus on instant kills to eliminate the gargoyles. If you go this route, optimize your equipment so that every piece of your kit possible is upping your instant kill chance. Also make sure you’ve taken every instant kill skill available to your skill tree. Mages don’t get any such skills, so pursuing this method is probably not going to be successful. This can be a fruitful approach for alchemists or swordsmen, though, especially ones with access to Aard III.
The third and final way is to abuse the freeze critical effect. Very few things in the game let you inflict freezing on enemies, but you can do it consistently with use of the Talgar winter trap. The forgotten vran sword can also do it regularly in the hands of a swordsman or any build that has taken skills that bolster critical effects chances. Gargoyles are fully vulnerable to freezing, so at the very least the critical effect slows them. If one is frozen solid, then you only need to hit it once to shatter it. This acts as an instant kill, but depending on your build, it may be easier to trigger.
A few tactics may seem useful but actually aren’t worth it. The big one is mind-controlling the gargoyles. This does get the gargoyles off of you, giving you time to recover. The problem is that you can’t really damage the Operator at all while the gargoyles are beating on each other. He just stands there and keeps his Quen up until the gargoyles are back on his side. If the gargoyles turn on the Operator, they can’t really damage him, either. Overall this tactic just makes the fight more frustrating.
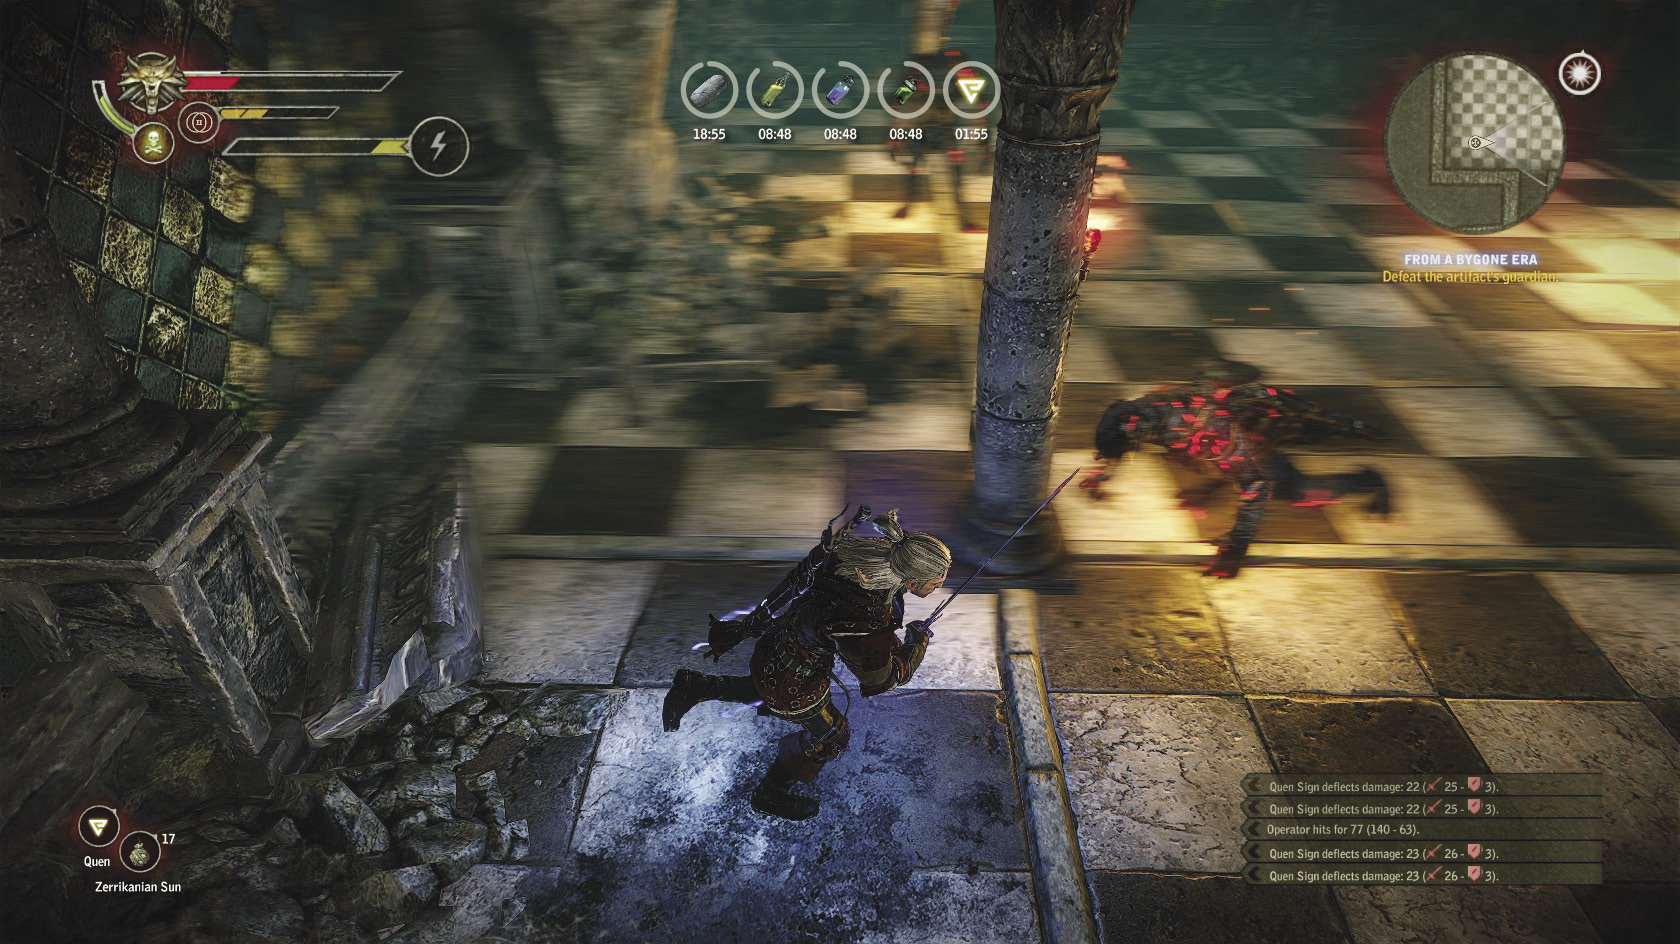
Another tactic to avoid is hiding behind pillars. You may notice that if you stand directly behind one of the pillars, you enter a “safe spot” where the Operator’s fireballs can’t hit you and gargoyles can’t see you. There’s no really effective way to attack from behind the pillar, though, and any time you spend standing there is time the Operator spends regenerating vitality. If you try to leave the safe spot, you may find yourself quickly pinned against a wall by the gargoyles and beaten to death before you can escape. It’s much safer to just keep moving around, relying on Quen or other defensive abilities to help soak up blows.
A positioning trick that is far more useful is to try to keep the gargoyles positioned between you and the Operator after they appear. It is difficult to do this consistently, but if you pull it off right, then the Operator basically smacks his gargoyles in the back with fireballs while he’s trying to target you (similar to the friendly fire you sometimes have to deal with when Triss is your ally). The Operator’s fireballs don’t do a lot of damage to the gargoyles, but if the fireballs are hitting the gargoyles then they’re not hitting you.
If you defeat the Operator, he drops the Operator’s staff, dragon scales, a vran armor enhancement, and a magic wrap. Only the Operator’s staff is worth it, as this weapon has a perfectly ridiculous +80 percent chance of incineration and a +10 percent chance of freeze. Using it in battle with humans is going to result in hilariously one-sided victories. You don’t need anything like this to finish the game, though, and only a handful of battles with human opponents are left in the game. In short, while the Operator’s staff is an amusing curio, it’s not worth fighting the Operator to get. It’s more of a trophy.
You can successfully resolve this quest by either getting a respec for Geralt or defeating the Operator. You must choose one or the other. If you kill the Operator, you cannot respec. If you respec, you cannot fight the Operator. Either way, you don’t get any XP for resolving the quest but should be better off for having done it.
|
This entire quest is a reference to the classic PC game Fallout 2. “The Chosen One” is the name of Fallout 2’s protagonist, and is implied to be the guy the Operator is actually waiting to see. Note that you have to descend into an underground vault to meet him, much like the famous Vaults of the Fallout series |
 Side Quest: The Gargoyle Contract
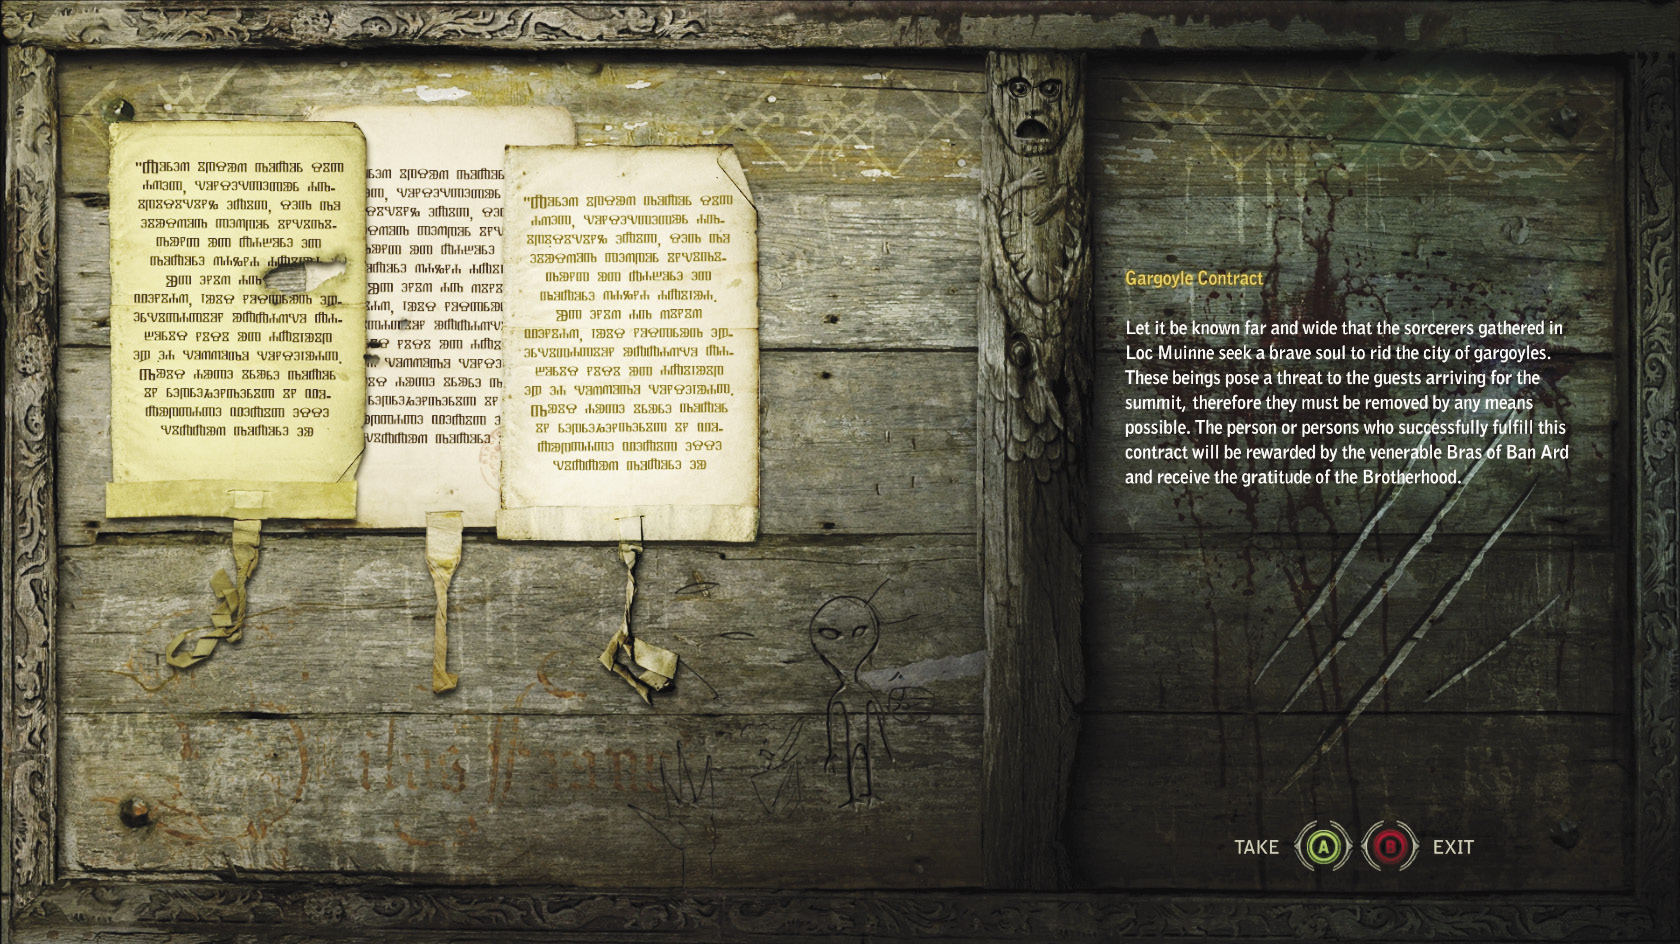
You can grab this quest off of the notice board outside the inn. As with most contract quests, the first step is researching gargoyles. You probably haven’t fought them enough to pick up full knowledge, so instead pick up a copy of Gargoyles, Gutters, Sputters—Maintenance and Repair from Felicia Cori if you haven’t already. If you already have a copy of that book, read it. You may also want to pick up all four volumes of Runes of Power from either Bras of Ban Ard or Felicia Cori. You aren’t required to buy these to complete the quest, but they contain information about a certain puzzle you must solve. This guide contains the same information you need, so if you want to save your orens, you can skip them.
The locations of the three “gargoyle courtyards” in Loc Muinne are labeled on your map. The easiest way is to start with the room to the northwest and then circle around clockwise to find the others. When you enter a gargoyle courtyard, you are immediately attacked by three to five gargoyles, just as you were when you first entered Loc Muinne along with Iorveth. Fight them using whatever tactics worked well for your build the first time.
After you defeat the gargoyles that guard the courtyard, look around the area for a stairwell leading down. At the bottom of the stairwell is an iron gate, then beyond it an underground room. The room should contain a magically locked chest, four magic runes glowing on the walls, and a podium. When you come to the podium, press the interaction button to read what it says. What you get is a snippet of poetry that acts as a code, indicating the order in which you should extinguish the runes.
You must move toward each rune and press the interaction button to extinguish it. If you extinguish them in the correct order, they remain extinguished and the chest magically unlocks. If you extinguish them in the incorrect order, then Geralt takes some damage and a random critical effect (usually bleeding, poisoning, or incineration). After that passes, you can try again.
Each room’s clue is randomly selected from a list of six possibilities. If you read the Runes of Power books they detail 12 possible runes, but in practice the Loc Muinne rune rooms use varying combinations of only four runes: art, time, sky, and animal. Here’s what each rune looks like.
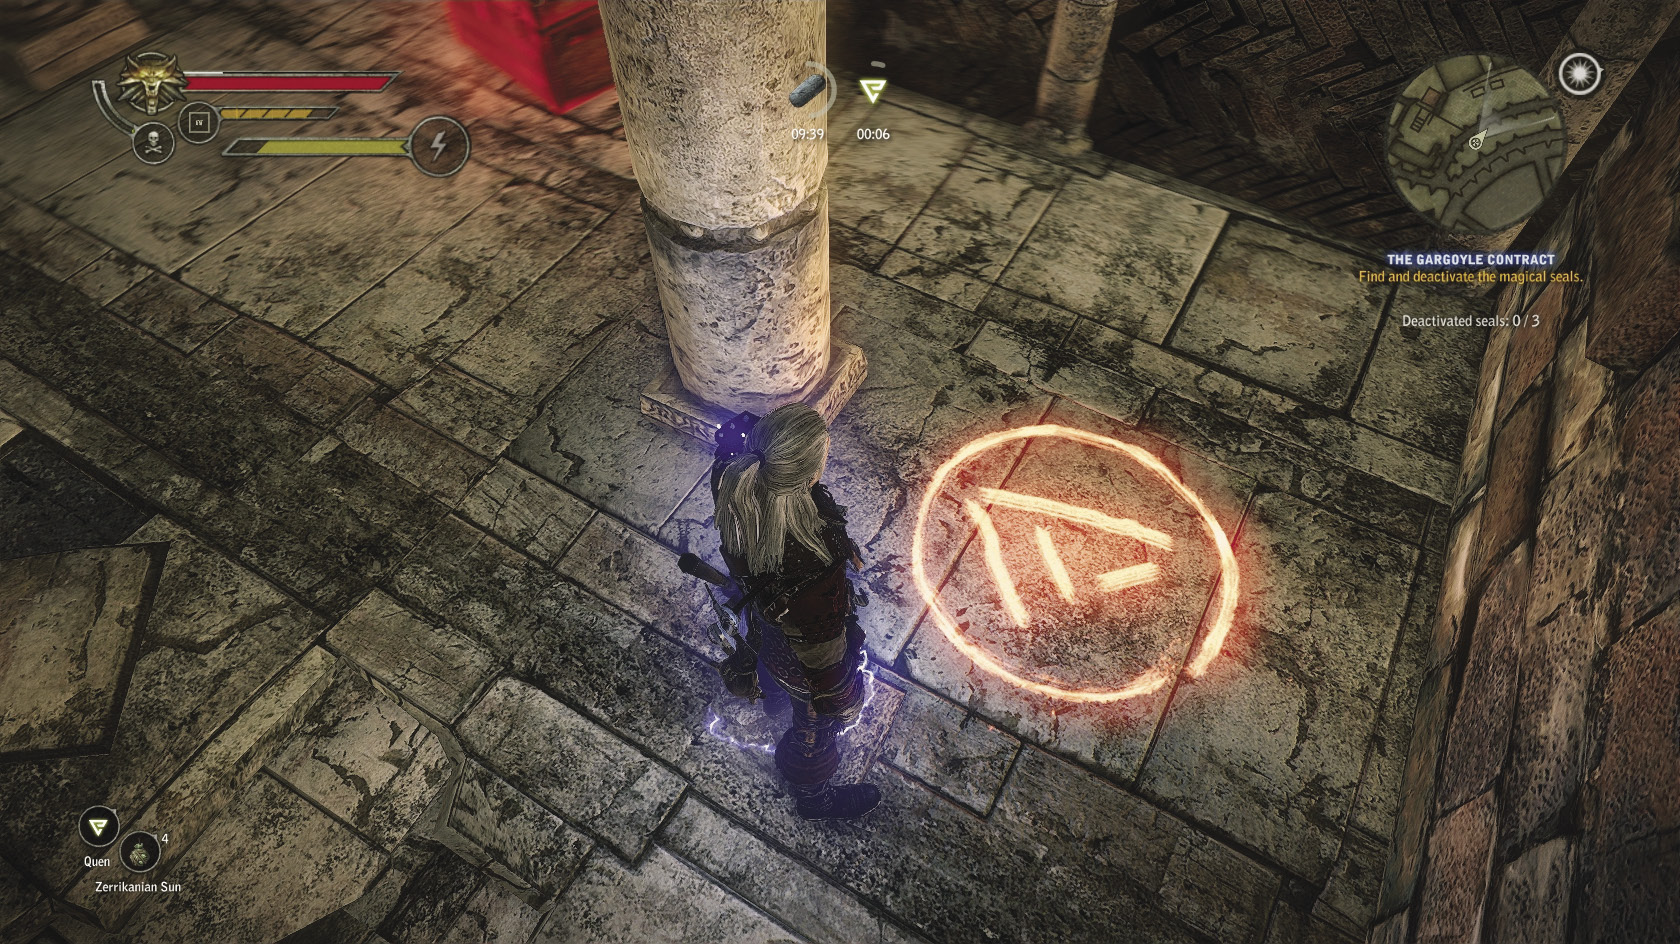
Art
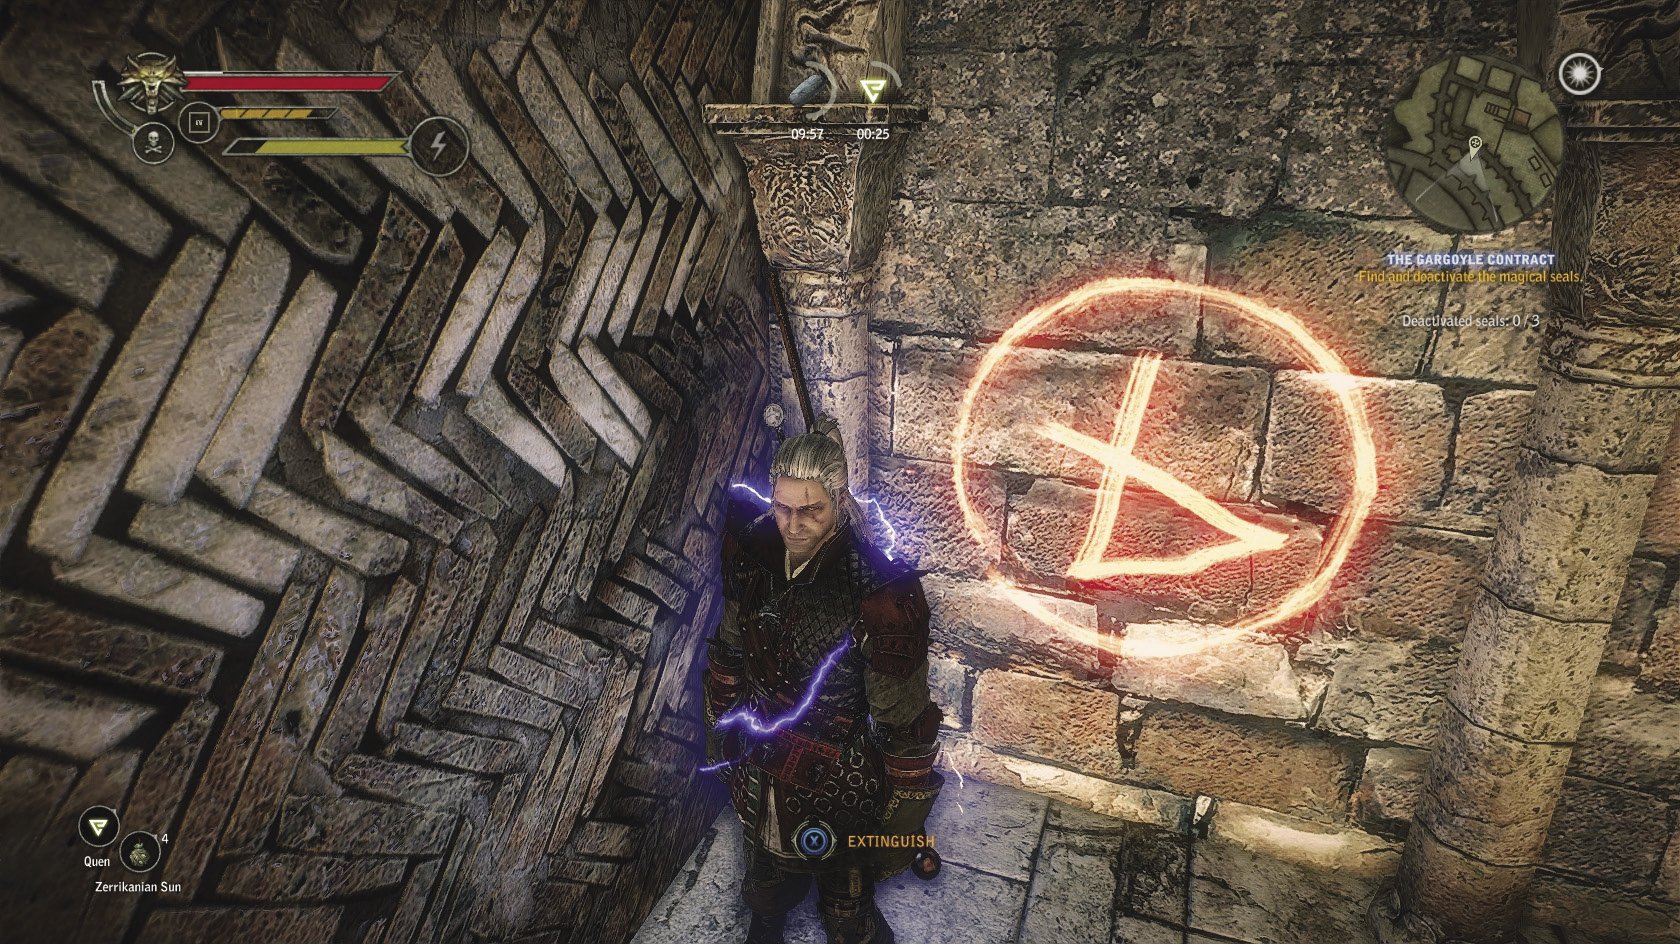
Time
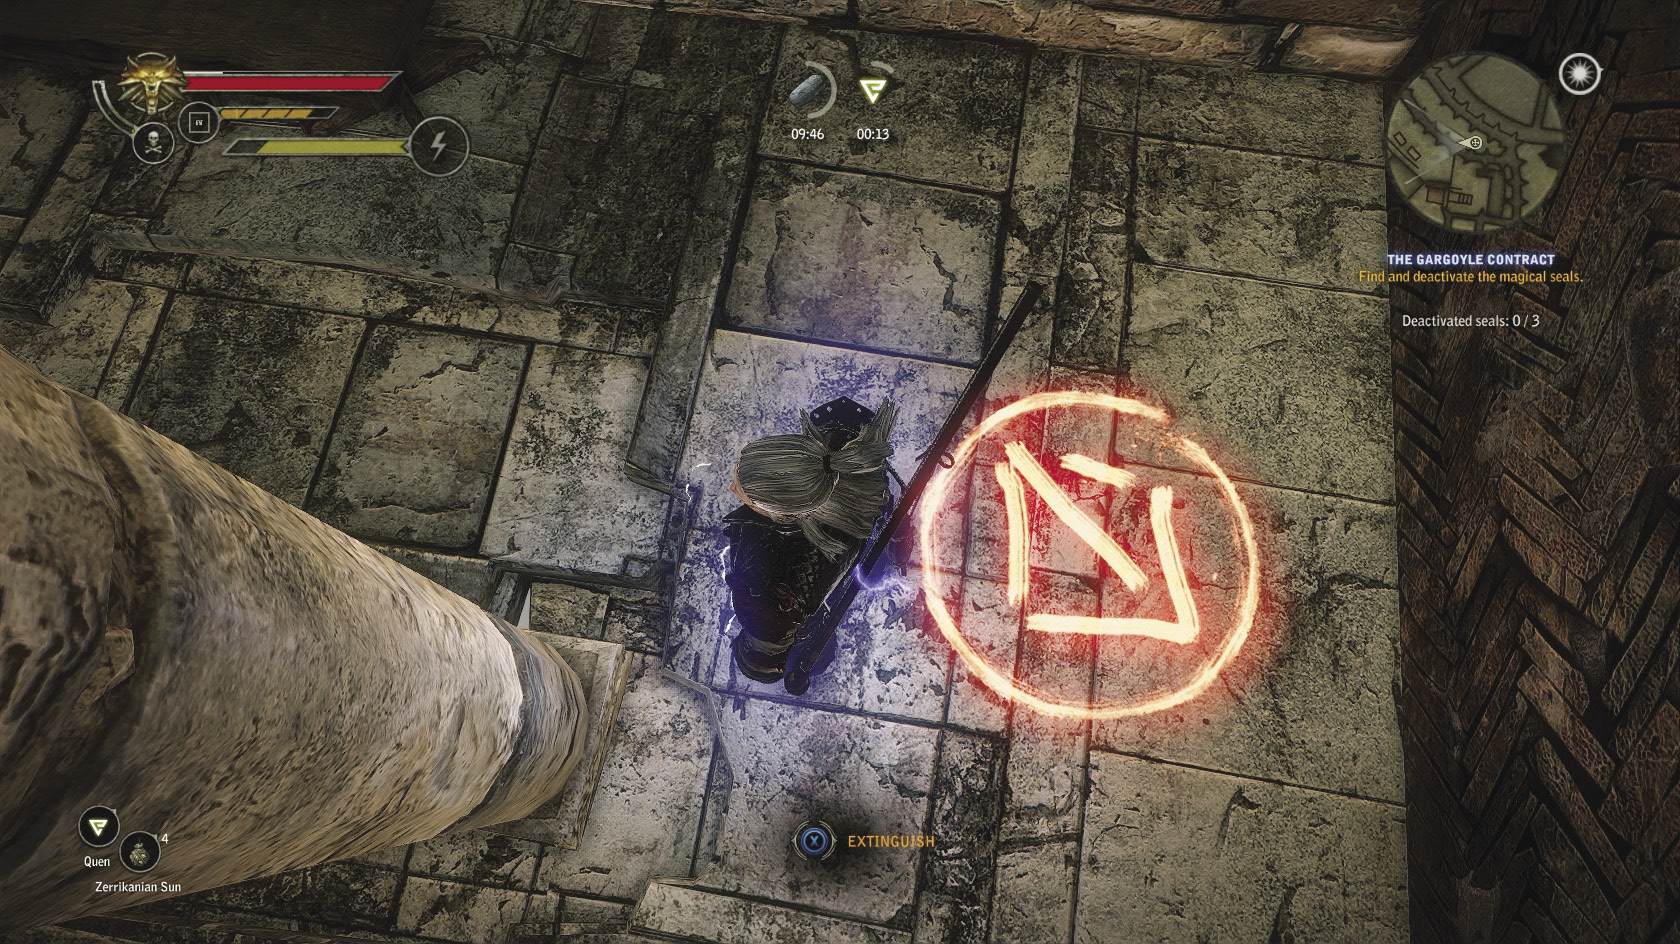
Sky
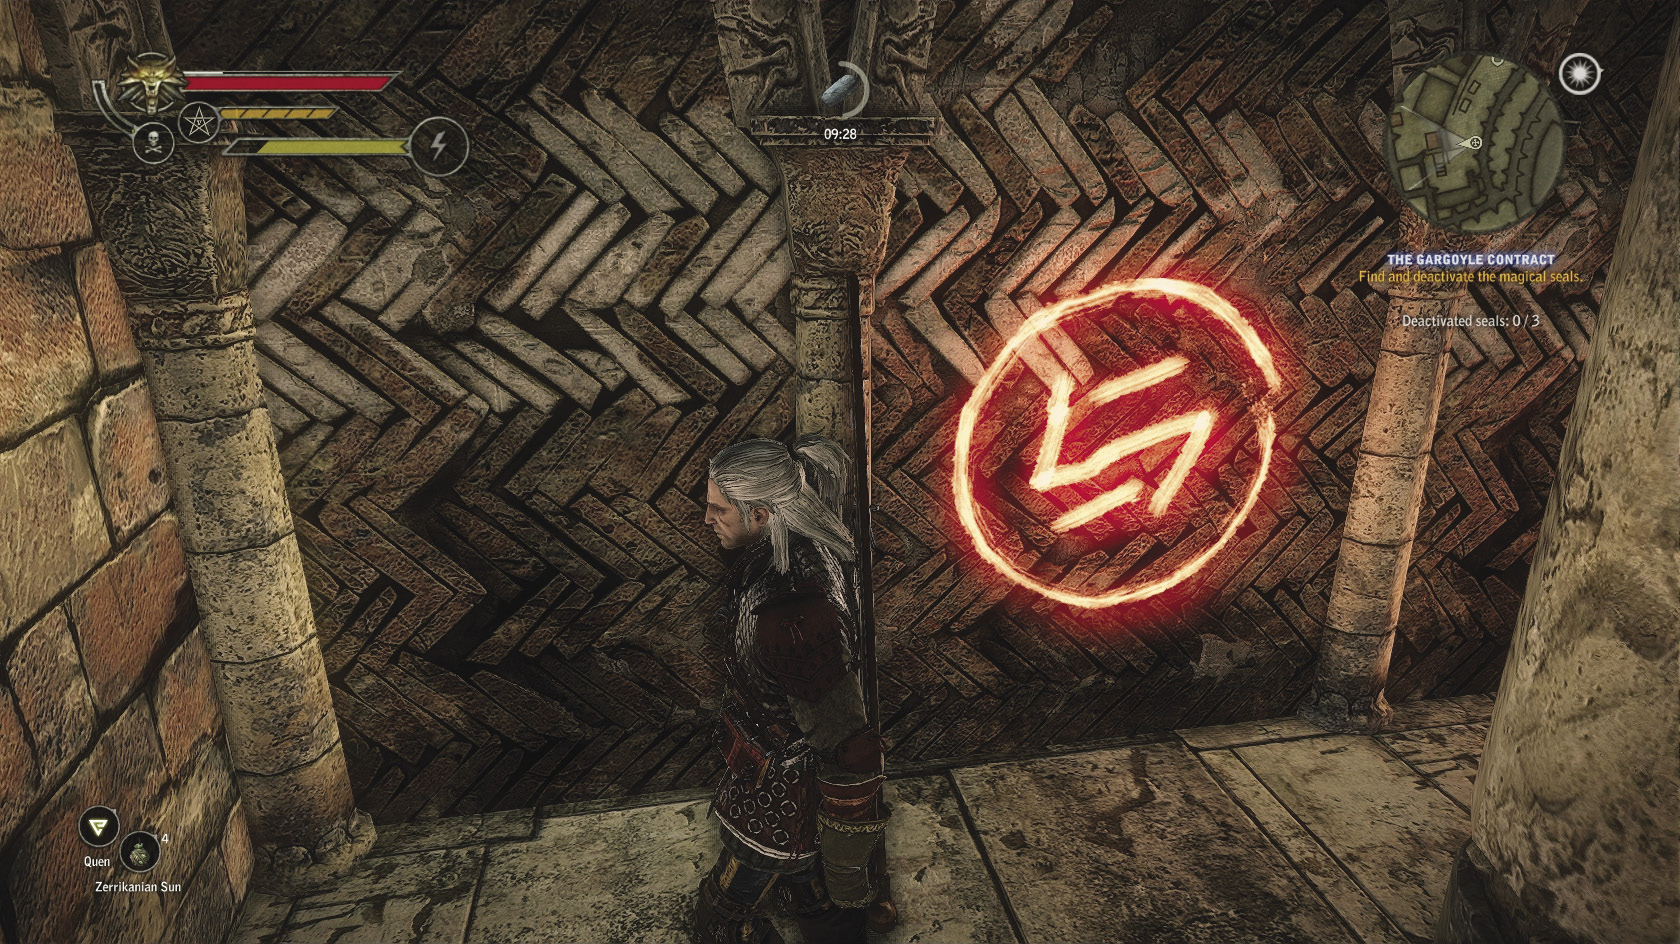
Animal
Here are the six possible clues you can find waiting for you on the podium of any given rune room. The list isn’t treated in a truly random fashion, so you won’t get the same clue twice. Basically, in any given game’s version of this quest, you should encounter half of these clues.
First ClueA doe’s long shadow The moon quietly moans It is autumn already
Second ClueThree field mice Dance in a circle at dusk Stars are like grain
Third ClueGlittering fish Dying on a fresco Struck by lightning
|
Fourth ClueBehold the comet It is like a wolf in times of scarceness An evil lullaby
Fifth ClueDivertimento! Clouds are like bees When bells ring
Sixth ClueOn the dark sky The beauty of a falcon’s flight Faster and faster
|
You absolutely must correctly extinguish the rune sequences in the three underground chambers, or it does not count toward the completion of this quest. As long as the runes burn, the gargoyles simply respawn in each courtyard as time passes. Once you’ve extinguished the runes, the gargoyles cease to appear. While the exact puzzles you solve in each room will be semi-randomly generated, you do find certain treasure consistently in each room.
In the northwest room, where we advise that you begin, the locked chest contains the silver sword Addan Deith and the diagram for the Elder Blood trousers. You also obtain some interesting information about the Wild Hunt here. In a game on standard difficulty, Addan Deith is the strongest silver sword you can consistently obtain in the game in terms of pure damage. That said, Deithwen’s large damage bonuses make it deal more damage in one of the game’s climactic battles. You can use either sword comfortably to finish the game, but if you’ve already slotted Deithwen with runes, you might as well keep using it.
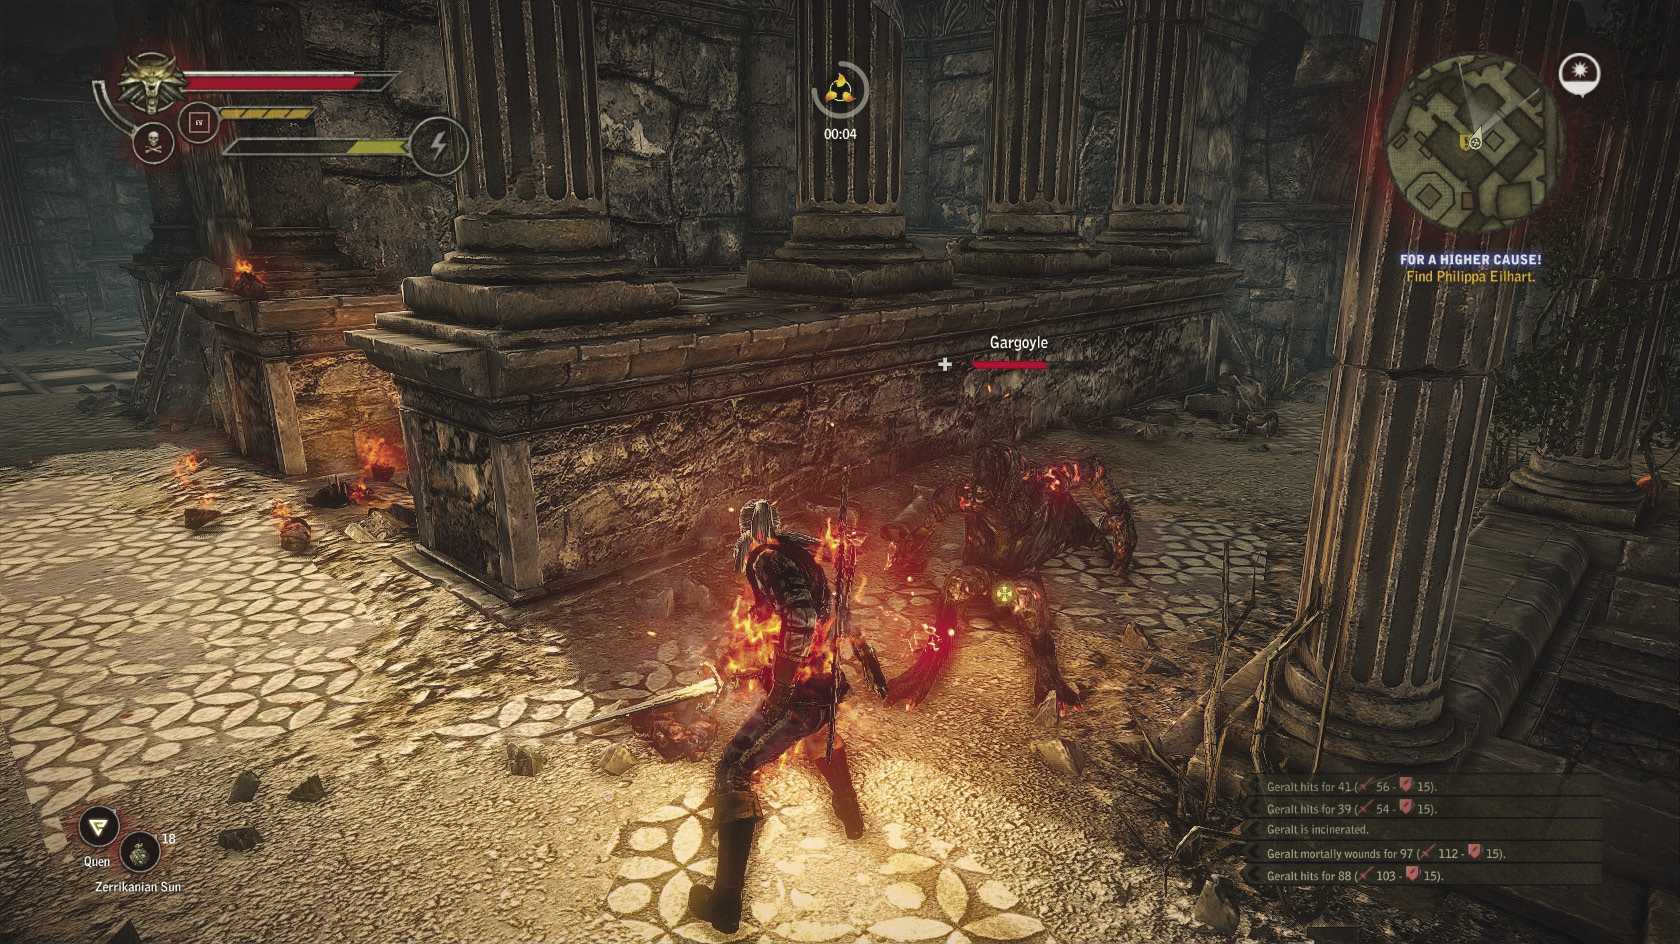
When you head over to the northeast room, which isn’t far from the dice players’ building, the locked chest consistently contains the diagram for the Elder Blood gauntlets. You face some additional challenges in successfully getting into this room to solve its puzzle.
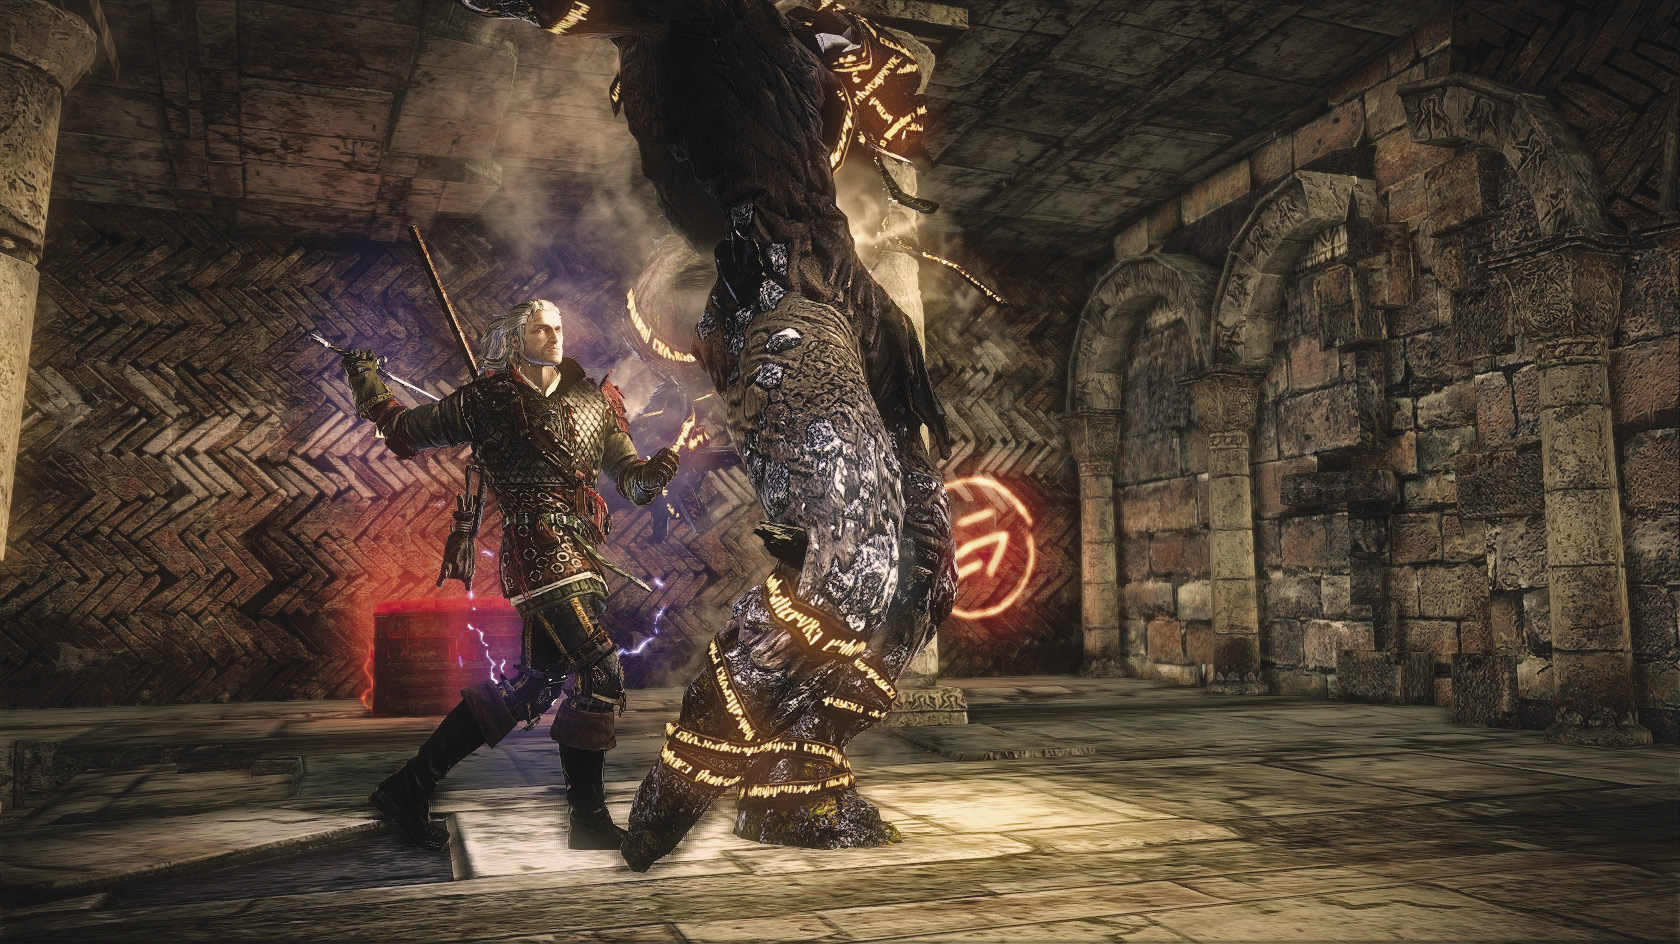
After you’ve defeated the gargoyles and entered the northeast underground room, you find it’s guarded by a golem. This fight is extremely dangerous, due to the small size of the underground room. It’s very hard to retreat from the golem for long and very easy for the golem to kill you even on normal difficulty by just hitting you once or twice. Prepare for this battle by drinking an array of potions that supports your build and oiling your silver sword with Falka’s blood or whirl to increase your damage output. If you have any adrenaline abilities available, you should definitely use them here. In particular, getting an instant kill on this golem with Combat Acumen is invaluable on higher difficulties. It may be worth your while to grind adrenaline by fighting harpies repeatedly until you have a full meter, so you can pull this trick off.
The final southeastern gargoyle courtyard must be approached carefully. It’s the one you may have passed through when you entered Loc Muinne. To get back to it, remember to use the series of doors to pass around the Temerian camp, which is still a death trap for you. Once you’ve unlocked the room’s chest, you can obtain the diagram for the Elder Blood boots and the encrypted manuscript quest item.
Once you’ve solved all three puzzles, go talk to Bras of Ban Ard to resolve the quest and get your reward. He gives you 200 orens in payment and you receive 150 XP. You should take some time to craft the Elder Blood items and equip them. Unless you’re already using something that has really good synergy with your build (like the mage’s trousers on a mage or the herbalist’s gloves on an alchemist), the Elder Blood items are essentially the best boots, trousers, and gauntlets you can obtain in a game on standard difficulty.
Upon completing this quest, if you’ve finished every other side quest in the game that involved destroying monster nests, you should unlock the Pest Control achievement. Remember that you need to turn the quest in to Bras of Ban Ard for it to count as completed. You also get the character attribute Arcane Knowledge for completing this quest.
 Side Quest: An Encrypted Manuscript
This quest can be extremely devious, although it’s a bit of a footnote if you already have the forgotten vran sword. To initiate it, talk to Bras of Ban Ard after you obtain the encrypted manuscript during The Gargoyle Contract. He says that the book is sealed by a powerful magical spell that he can only break if you bring him a bunch of very specific alchemy items. What makes this quest so tricky is that you cannot go out and obtain some of these materials during this chapter.
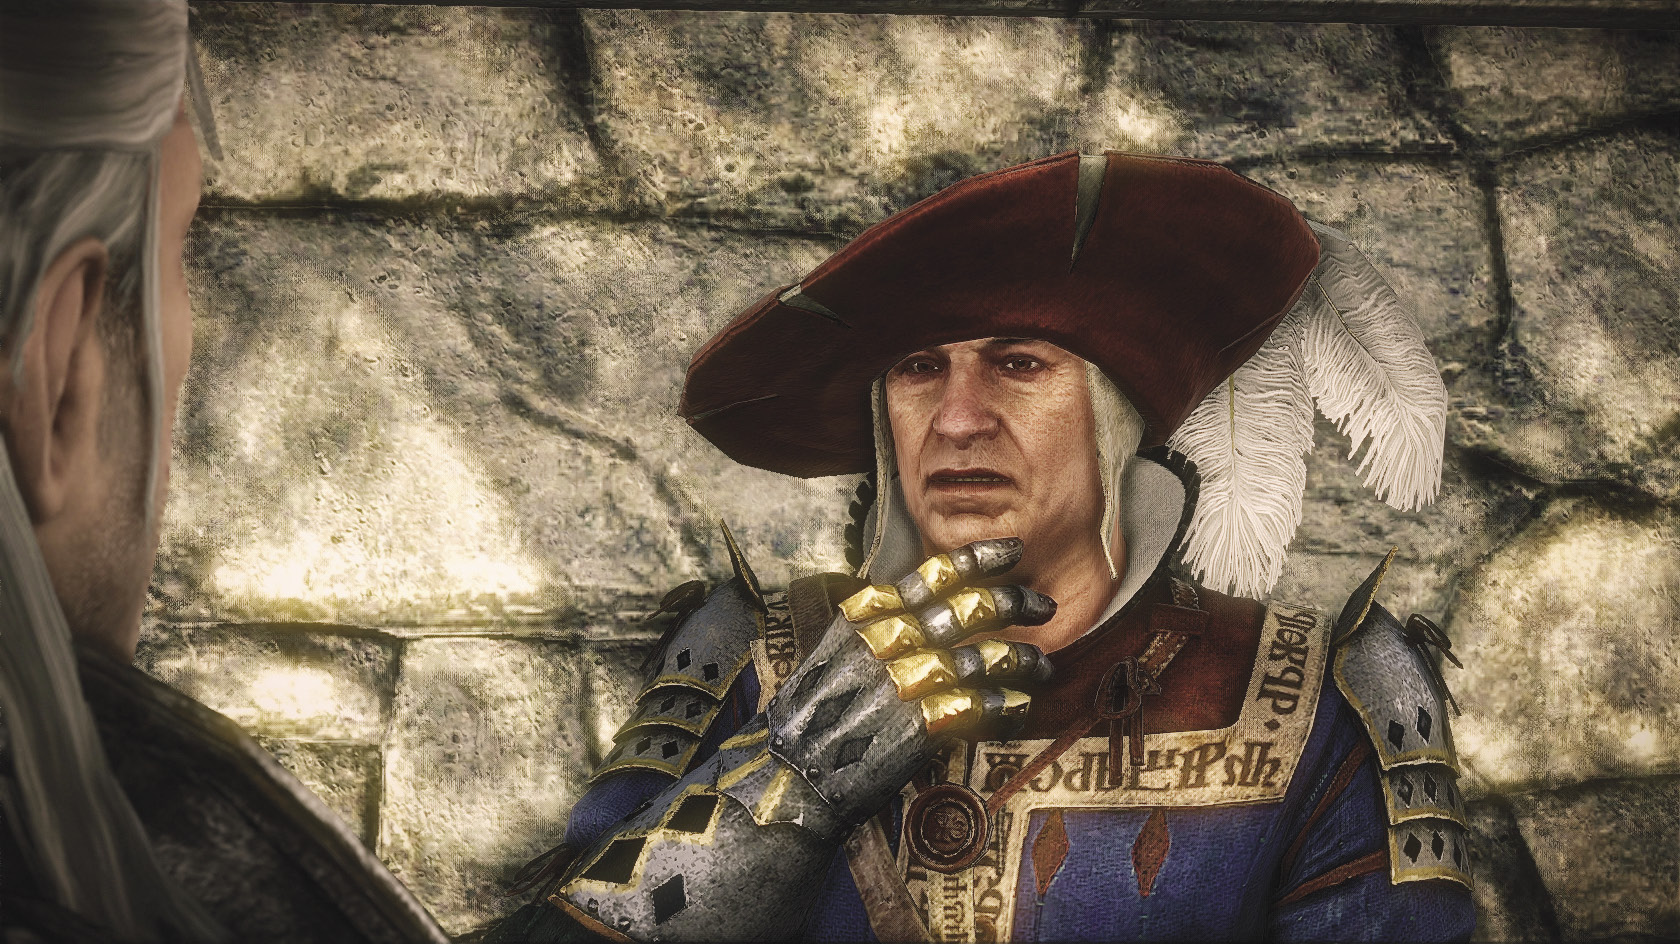
To cast the spell that decrypts the manuscript, Bras of Ban Ard needs one warrior nekker blood, one queen endrega’s pheromones, one bullvore brain, and one harpy’s egg or rotfiend tongue. You had a chance to obtain warrior nekker blood any time you previously fought warrior nekkers and should have at least one by now. You pick up a bullvore brain every time you kill a bullvore, so unless you sold or used up all of yours, you should have one. You can grind harpies in this chapter to get the harpy’s egg if necessary and may have a rotfiend tongue on hand. Depending on how you completed The Secrets of Loc Muinne earlier, you may have battled a queen endrega and obtained queen endrega pheromones.
If you have all four of the required items, bring them to Bras of Ban Ard and he can automatically decrypt the manuscript. From it Bras extracts the diagram for Caerme, which allows you to make the chapter’s second most powerful steel sword. If you missed the forgotten vran sword earlier, Caerme is definitely worth wielding. If you already have the forgotten vran sword, though, then just hang on to the diagram as a trophy and enjoy the 50 XP reward you get for decrypting the manuscript. This exhausts the chapter’s side quests, so by now you should be ready to end the game.
 For a Higher Cause!
Now let’s go back to that choice you had to make earlier. As a refresher: To get into the Redanian dungeons where Philippa is being held, you should either cut through the sewers or get yourself arrested.
If You Go Through The Sewers
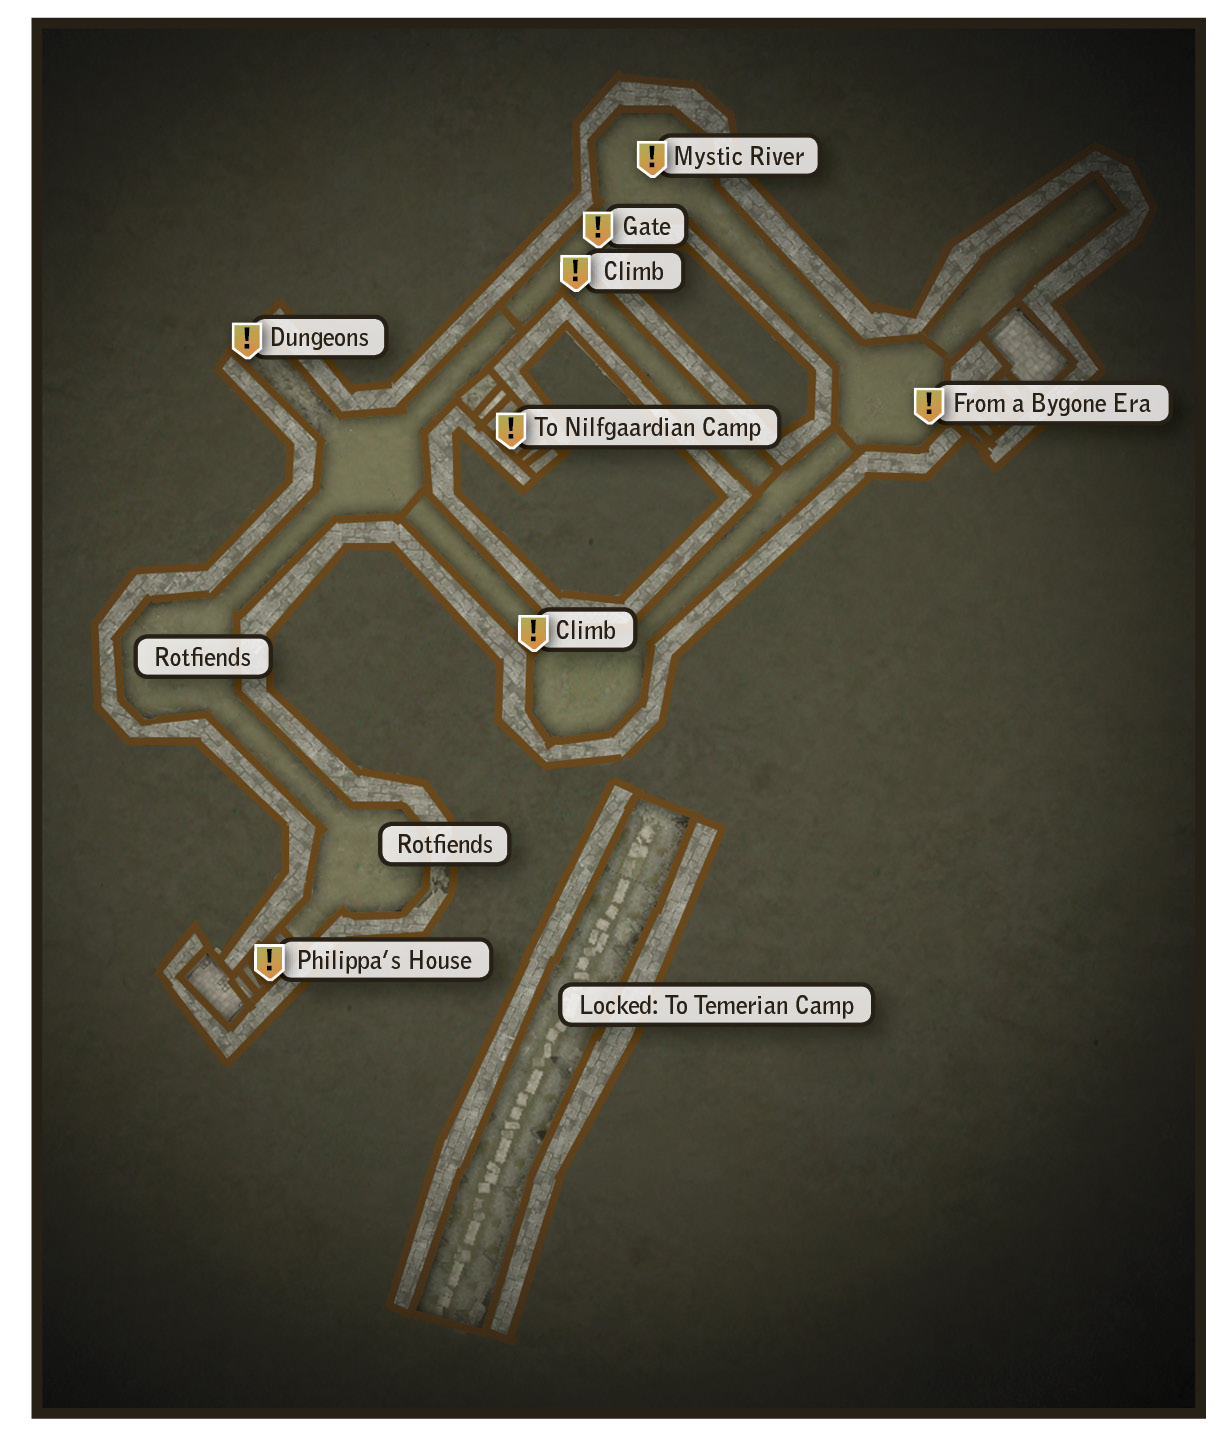
Make your way to the sewer entrance north of the town square. Proceed through the iron gate that’s near the room full of Mystic River loot. You may have to battle a pack of rotfiends once you’ve passed through. To your left will be a upraised tunnel you must climb up a wall to enter. Take a left at the end of the tunnel and head forward until you reach a chamber, where there’s another tunnel you can get into by climbing. At the end of this tunnel, a stairway leads into the dungeon where Philippa Eilhart is being held. Approach it to trigger a cutscene that leads to a major decision you can make regarding where you’ll go for your next main quest. If you want to lift the spell from Saskia, begin The Spellbreaker. If you want to save Triss, begin Where Is Triss Merigold?
If You Get Arrested
There are a couple of ways to get arrested. One is to head over to the dice players that the guide map instructs you to avoid. These dice players are hostile, and virtually any interaction after you’ve initiated a conversation with them ends with Geralt’s arrest. If you play dice poker with them, then regardless of the match’s outcome, you get into a fistfight and get arrested. If you tell them they stink, a fistfight ensues and you get arrested. You can back out of the conversation in the first branch after speaking with them, but this is your only chance to do so. All other options lead to the dungeon.
You can also take a stroll into the Temerian camp nearby. First, fight the two guards at the entrance. They should be relatively easy to kill. Once they’re out of the way, barge right into the camp. Dodge-roll around for a bit so all the knights are pissed off and chasing you. When they catch up, just stand still and soak the damage. You won’t die, but once your vitality drops past a certain point a cutscene triggers that ends with you in the dungeon.
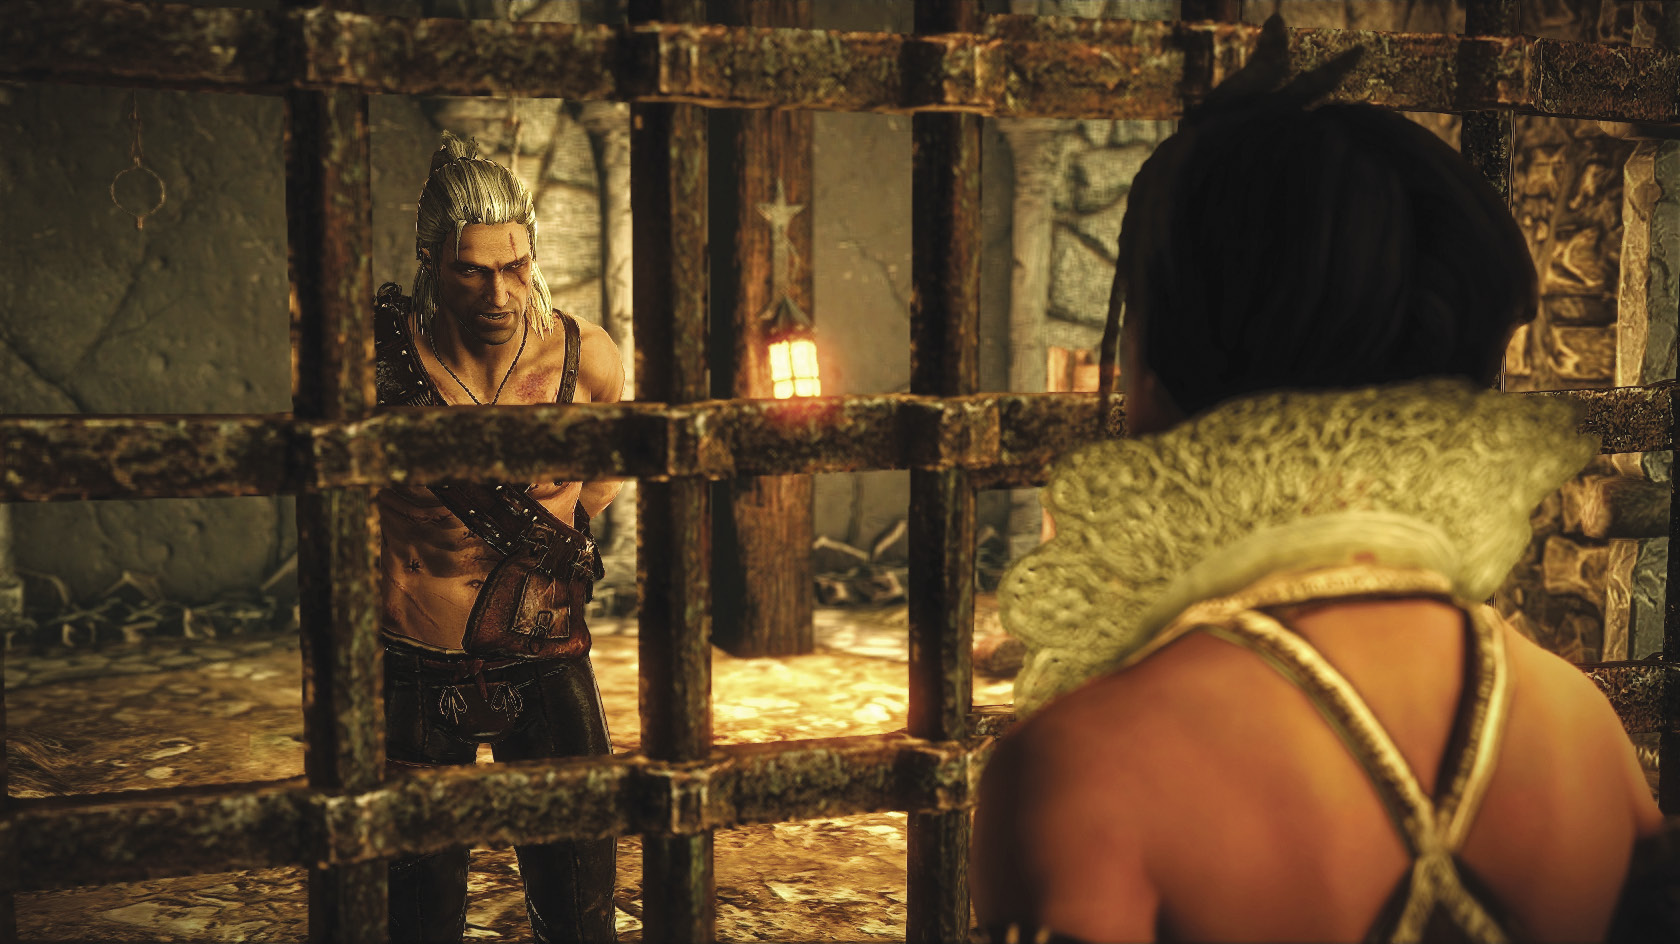
Once in the dungeon, you’re in a cell next to Philippa Eilhart. When you get a chance to talk to her, ask as many questions as you can. You can find out a lot of story information this way. After the initial dialogue sequence, let the cutscenes play out.
Eventually, King Radovid leaves you with Shilard Fitz-Oesterlen and a couple of Nilfgaardian guards. Pay careful attention during the dialogue sequences. During one of them, you have to free yourself by pressing the interaction button rapidly to fill a meter. If you fail to do this, then when Shilard orders his guards to kill you, the ensuing cutscene will actually kill you. If you set yourself free, then in the cutscene you steal a sword from a guard and then enter a brief combat sequence. Just defeat the remaining Nilfgaardian guard to move onward.
After this, you begin a final dialogue with Philippa. At the end of the dialogue, you must make a choice regarding which of two possible main quests you will pursue next. If you want to lift the spell from Saskia, read on to begin The Spellbreaker. If you want to save Triss, begin Where Is Triss Merigold?
 The Spellbreaker
If you decide that Philippa is going to lift the spell on Saskia, you must first lead her away from the dungeon. At the bottom of the first stairwell, you come to a pair of Nilfgaardian guards, but Iorveth conveniently appears to dispatch them. After that, Iorveth begins leading Philippa and you are free to fight. During this sequence, you need to clear the way for Philippa and Iorveth through two chambers stuffed to the gills with rotfiends and greater rotfiends. These fights are surprisingly dangerous and you should prepare for them with potions and necrophage oil, regardless of build.
If all goes well the enemies are no harder to defeat than regular rotfiends, but an unusually high number of them spawn in an enclosed space during this sequence. If one or two get behind you, then your Quen may be battered away and most of your vitality drained before you even know what’s happening. On higher difficulties, it’s pretty easy for one mistake in this fight to get you killed. A good tactic for managing the crowd of rotfiends is to get one to detonate, then ignite the resulting gas cloud with Igni or a dancing star. If you get lucky with positioning this lets you set four or five of the rotfiends on fire, which means that even the rotfiend you aren’t currently stabbing to death is still being damaged.
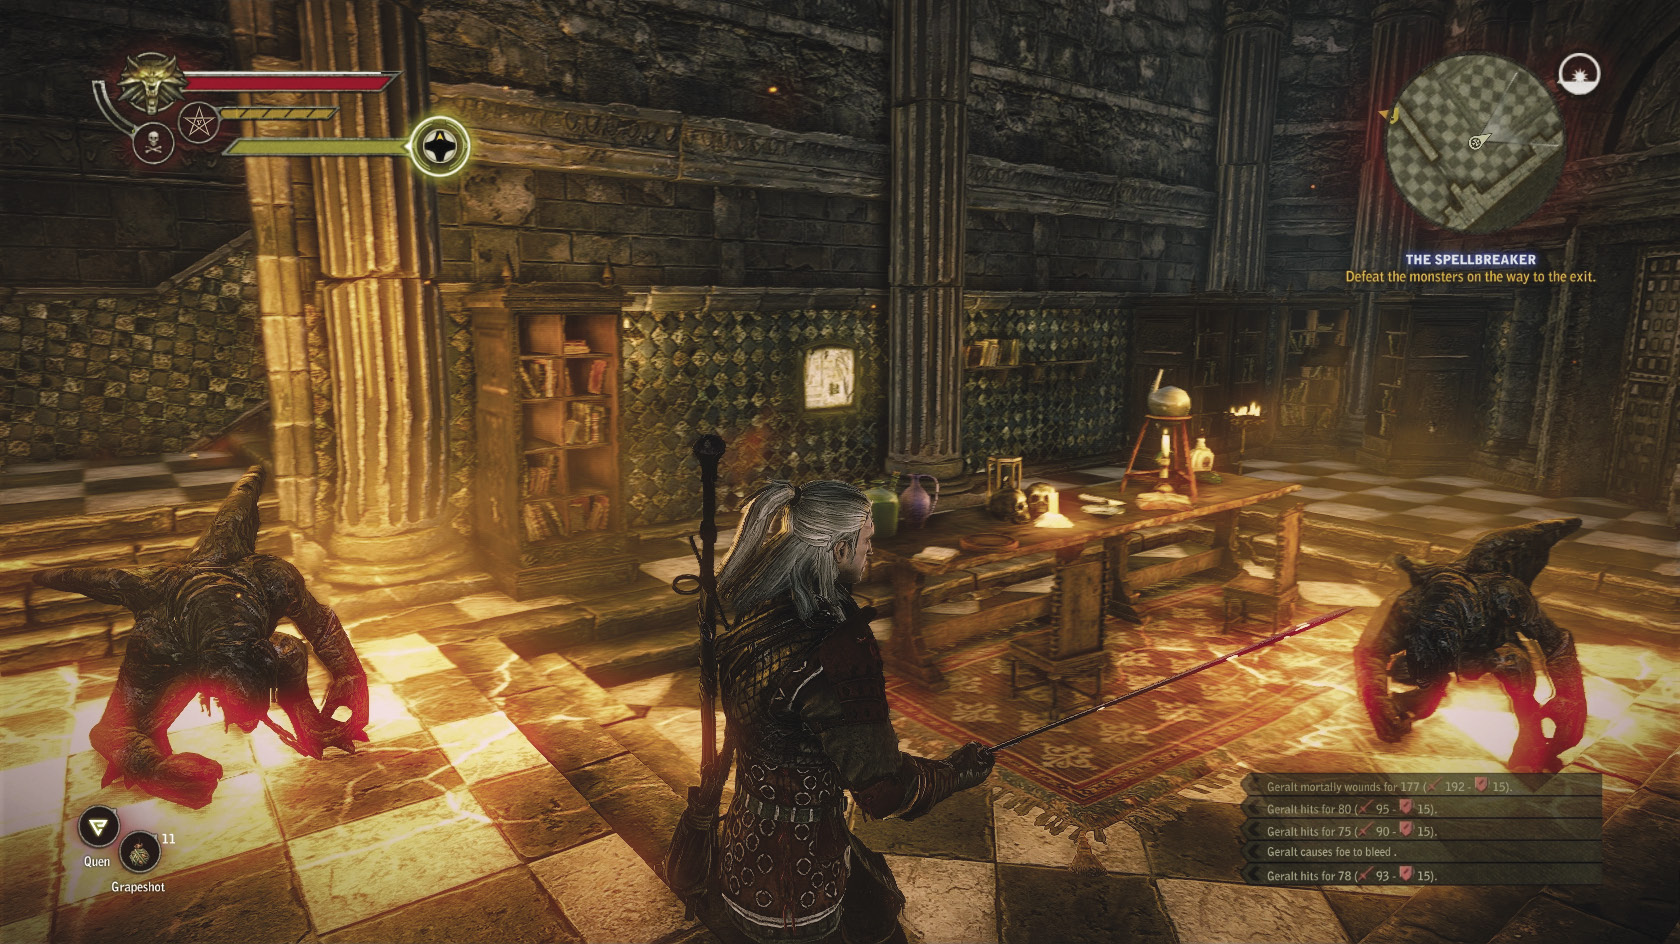
After you clear the second rotfiend chamber, you come to the stairwell that leads from the sewers to Philippa Eilhart’s house. Go in ahead to clear out some monsters that are guarding the place. At the top of the stairwell is a single gargoyle that you should be able to defeat without too much difficulty. Beyond it is Philippa’s main room, which is guarded by a pair of gargoyles. Prepare for this battle with potions and an appropriate sword oil, probably Falka’s blood, before you enter and start the fight. The big table in the center of the room creates a very constricted space for fighting. Gargoyles spawn on either side of you, so if you go to quickly engage one, the other comes up behind you and starts punching you in the kidneys. This can rapidly batter down your Quen and then kill you, so it’s better to prepare and just overkill the gargoyles to death.
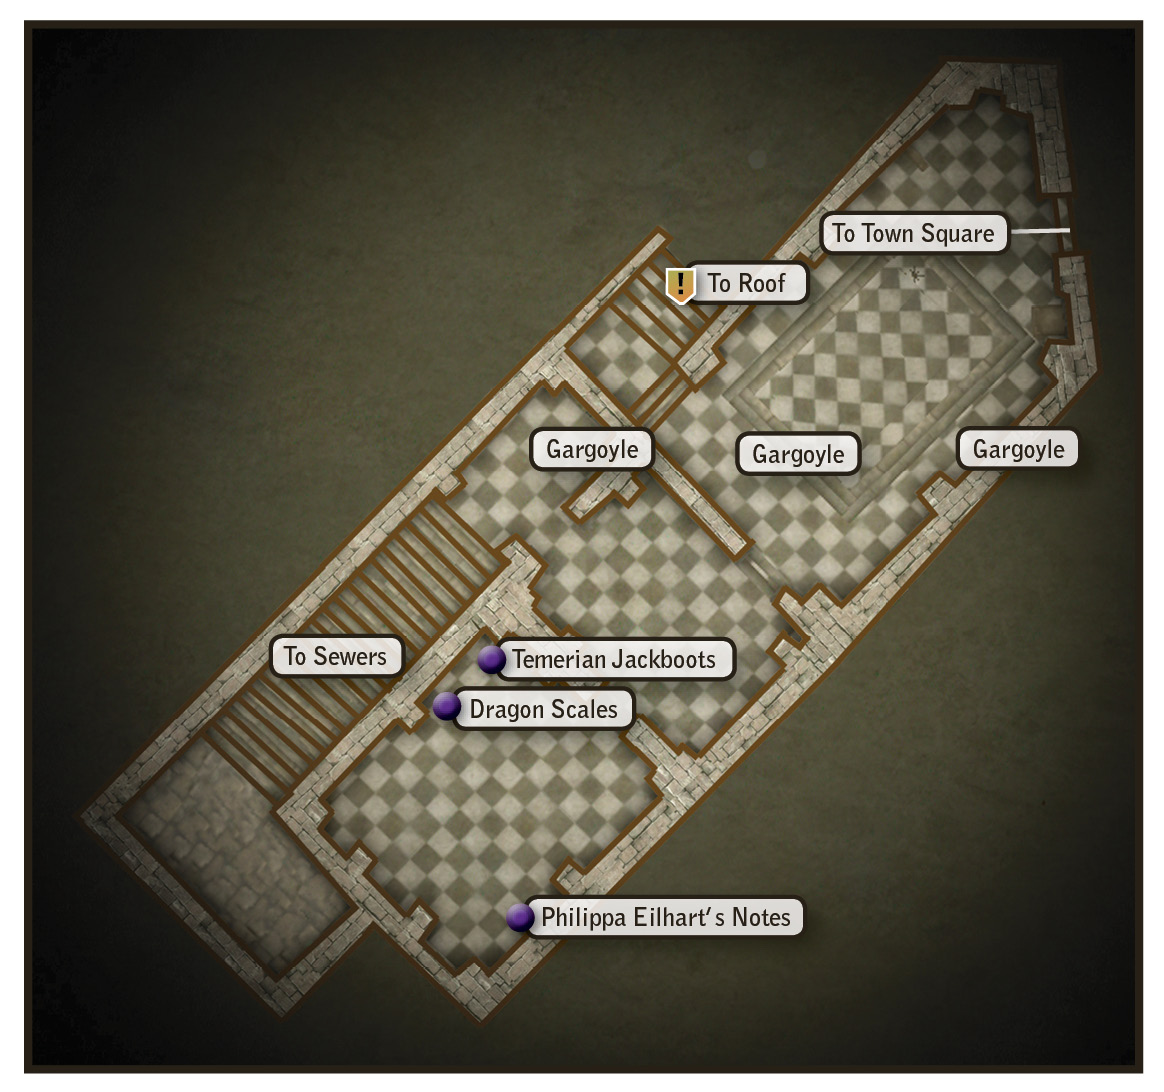
After you’ve taken care of the gargoyles, head up the stairs to the roof of the building with Iorveth and Philippa. You get sent back downstairs to ransack Philippa’s quarters for her notes. While you’re there, you can also pick up some rare equipment and the dragon scales, a crafting item used in making one of the chapter’s better silver swords. There may also be some random orens or other loot around. When you’re done, head back up to the roof. You need to use the three diagrams outlined on the notes to figure out what order to light the ritual candles around the locked chest. The letters should be read as Roman numerals. Now you may be wondering: Which of the three diagrams is the correct one?
That’s where you need to remember that Philippa Eilhart is a cold, devious woman. The game picks which diagram is the correct one for opening the chest randomly, so you need to apply brute force and try all three. If you use an incorrect sequence for lighting the candles, you take some damage and a bleeding critical effect. On the basic difficulties, this won’t be lethal. On higher difficulties, you should wait for your vitality to regenerate before making another attempt.
Even once you have the correct candle sequence, Philippa’s spell keeps trying to kill you. After Philippa casts the unlocking spell and the cutscenes play out, you find yourself in combat with a golem that’s much tougher than the one you faced earlier. You fight the golem in a magically enclosed parallel dimension where pillars of fire periodically form and erupt upward beneath your feet. It works like the bits in the draug fight where he calls for the trebuchets, or where you play the priest leading soldiers to safety. When you see the ground beneath Geralt’s feet beginning to light up, dodge-roll away. You shouldn’t count on Quen to tank through the damage, because you need it up to tank through the golem’s damage. Feet Work helps out a lot here, as can having up potion buffs and using Falka’s blood to grind out a little more damage per blow against the golem.
Once you finally destroy the golem, you return to reality and can open the chest. Inside is Philippa Eilhart’s dagger, which you can use to break the spell on Saskia later in the chapter. Obtaining this item resolves the quest and should unlock the Spellbreaker achievement. Now that you can break the spell, it’s time to crash the summit.
 Where Is Triss Merigold?
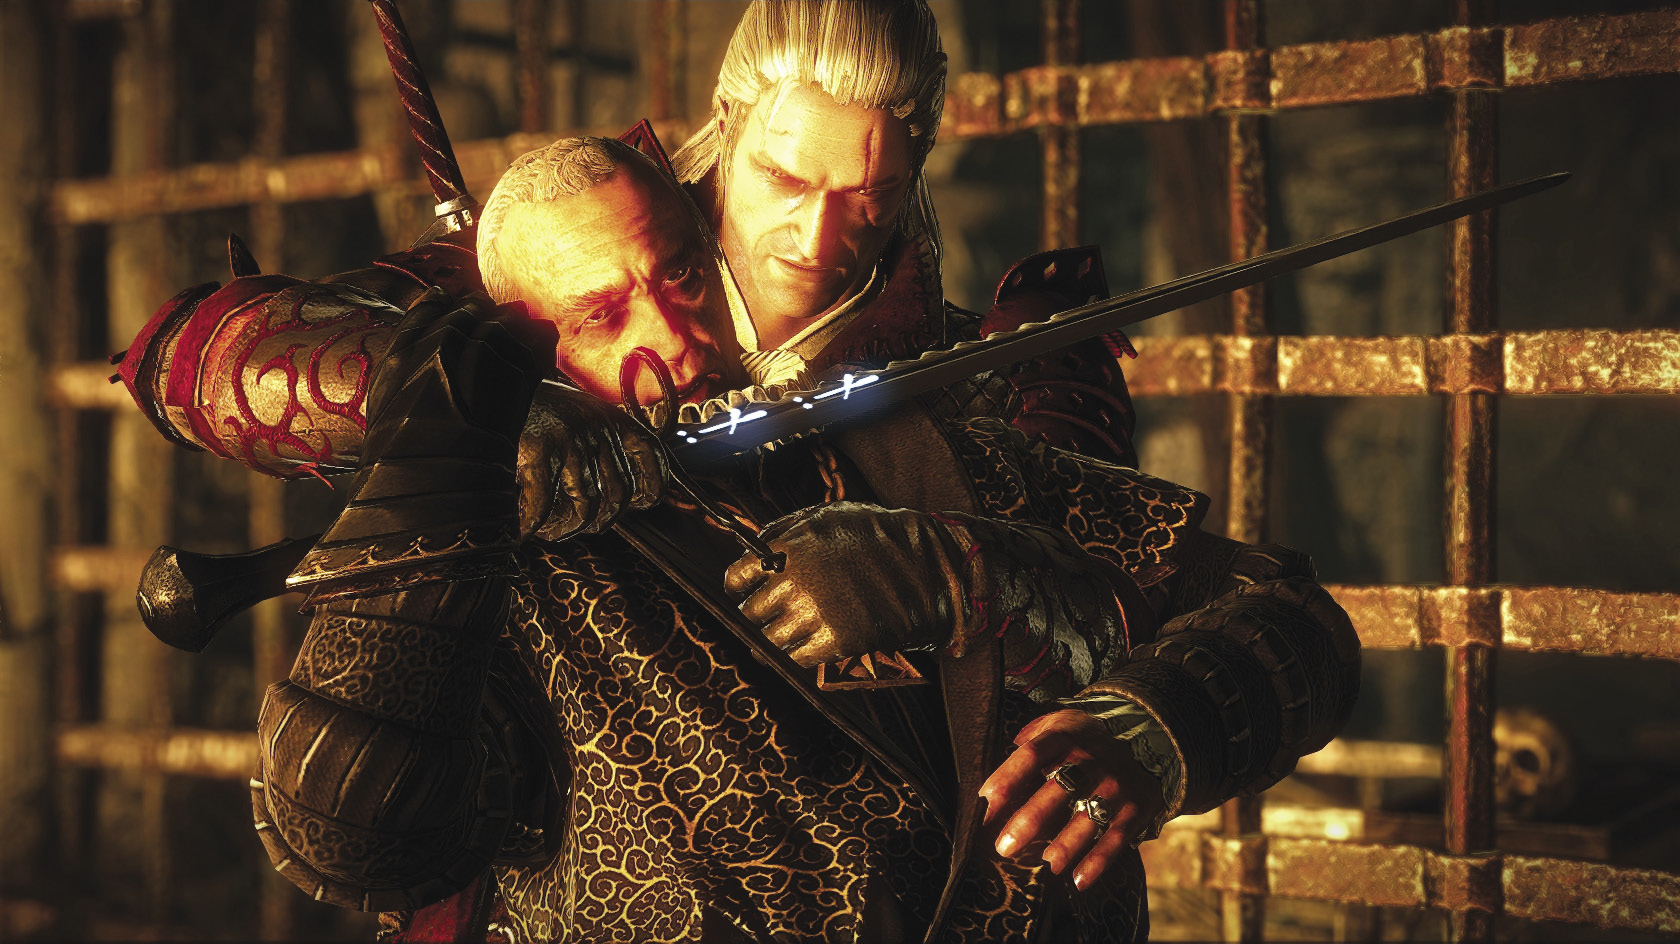
If you decide to go after Triss, then you grab Shilard Fitz-Oesterlen and force him to lead you into the Nilfgaardian camp. Your route goes through the sewers, but nothing too eventful happens there. The fireworks start when you enter the camp and are confronted by Renuald aep Matsen and a troop of Nilfgaardian soldiers. Geralt attempts to bargain with Fitz-Oesterlen’s life, but Matsen replies by killing Fitz-Oesterlen himself with a crossbow. After that, the Nilfgaardian troops jump you. How difficult this battle is depends entirely on how well your build handles bunches of human enemies at once. If you have some reliable form of crowd control and mass damage, or at least a reliable defense like maxed-out Quen, you should weather this first battle easily.
Once you’ve killed the first Nilfgaardian group, take a little time to loot the camp. Shilard drops Shilard Fitz-Oesterlen’s second letter to the emperor. Everything else in your current area is random, but the orens at least are worth grabbing. If you check the door that leads to the next courtyard over, where Triss is held, you find it’s locked. Time to go looking for the key. To begin, head into the walled area where the Nilfgaardian harpy sword waits. Grab it and any random loot in the area you want, then climb up the ladder. Atop the walls you run into a pair of Nilfgaardian crossbowmen, who should be easy to defeat. Follow the area atop the wall until you reach a point where you can jump down. Keep going until you find another area where you can leap down.
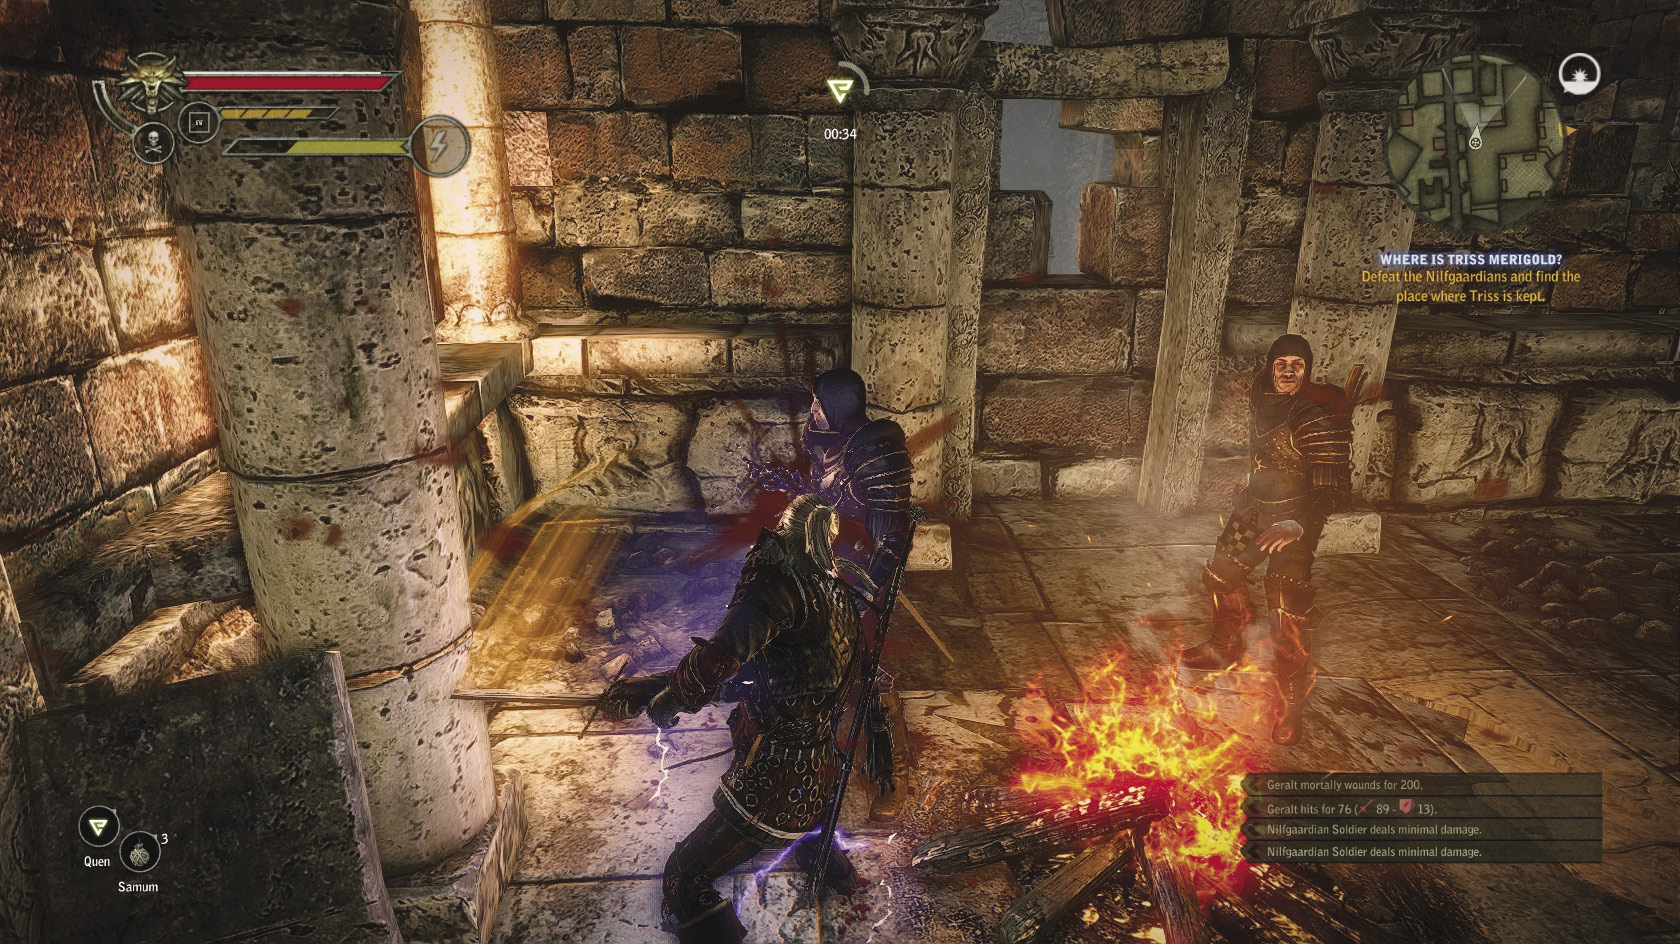
Pause before you make the jump down into the pond area. The next battle is a test of resources, so drink some potions, oil your blade with hanged man’s venom, and prepare some bombs or traps of your choice. Once you descend, you are in a challenge where you must fight waves of Nilfgaardian troops who throw themselves at you at Matsen’s command. You need to weather three waves of around four Nilfgaardian troops at a time. They all wear full armor and use their swords skillfully to parry your blows. You can afford to whittle them down with Riposte later on, but early in the battle you need to focus on dodge-rolling, getting cheap shots, and using your bombs and traps for crowd control. Adrenaline-based abilities can be hugely useful here.
After you’ve mowed down Matsen’s waves of men, climb up into the courtyard where the entrance to Triss’s prison is located. You have a brief dialogue with Matsen where you may say what you wish. After the dialogue ends, you must battle another wave of around four Nilfgaardians. One of them is a combat mage who is basically a toned-down Vanhemar. He uses the same combat tactics, teleporting randomly, throwing fireballs, and tossing up Quen. Pick off the mage first, then pick off the Nilfgaardian troops who are wielding only swords next. Once the mage is down, Renuald aep Matsen and his shieldmen wade into the fray.
Try to pick off the other combatants first, so you can slow down the pace of battle to deal with Matsen and his men. Use your crowd-control techniques, signs, and adrenaline abilities to try and pick off the shieldmen. Matsen has hefty vitality, but your Geralt build should be verging on the level cap by this point in the game and carrying extremely powerful equipment. Once Matsen is isolated, it’s probably just a matter of time until you defeat him.
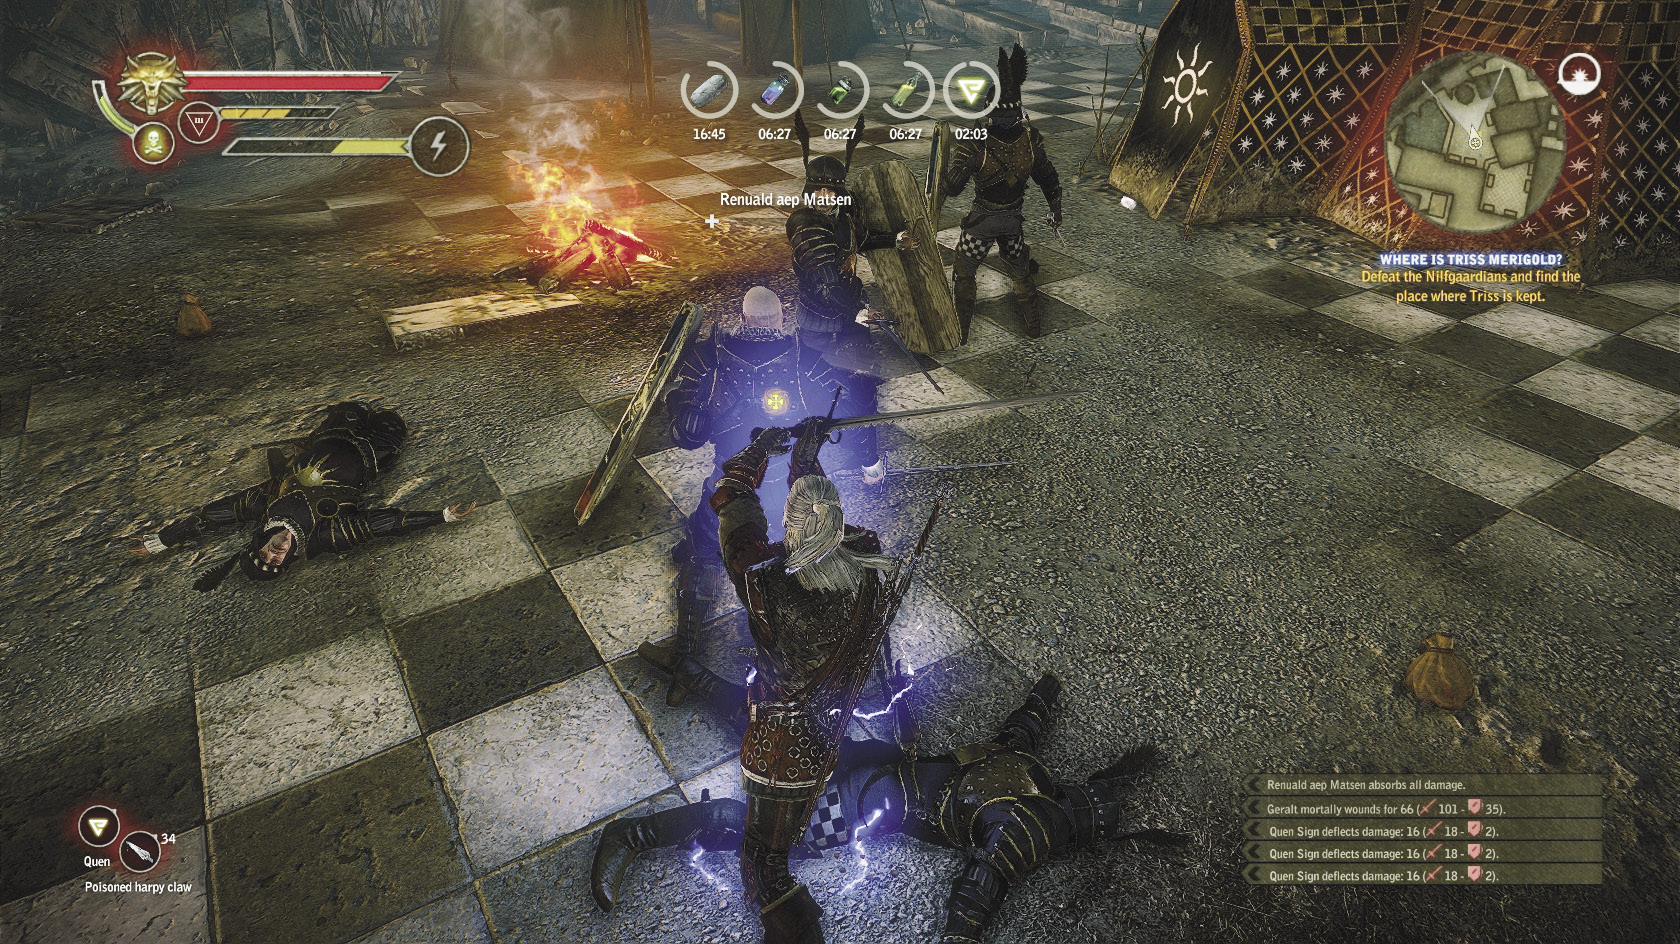
After you defeat Matsen, you can loot his body to obtain Triss’s prison key, the Nilfgaardian camp key, Renuald aep Matsen’s letter, and the armor of Vicovaro. You can examine the loot the other Nilfgaardians you’ve defeated have left behind, too. Be sure to investigate the open tent to the left of the entrance to Triss’s prison cell. There you can find the diagram for Nilfgaardian falconer’s gauntlets and Shilard Fitz-Oesterlen’s third letter to the emperor.
Now, you can go unlock Triss’s cell and release her. After you do, you can have a long conversation with her about the Lodge and what’s really going on with the kingslayers. When the conversation is over, you must lead her out of the camp. This is pretty simple, as you can use the Nilfgaardian camp key to pass through the door that was locked earlier.
Don’t head back into the sewers; instead go unlock the door at the head of the same building where the tunnel from the sewers emerges. Simply follow your quest marker. The stairway to the sewers should be on your right. From there, just turn left and exit through the door. At this point you resolve the quest and receive a 2,500 XP reward. Triss decides to go crash the summit with you. She’s going to go wait at a certain point in town and you can simply talk to her when you’re ready to move on to the ending of the game. Read on.
 A Summit of Mages
 Enter the Dragon
To initiate A Summit of Mages, head to the amphitheater. You should encounter a knight from Vengerberg on the way in, which triggers a cutscene that reflects Prince Stennis’s fate in your game. After the cutscene ends, go find and speak with your companion. If your companion is Iorveth, he’s waiting by the doors to the amphitheater. Triss will be waiting in the alleyway where you encountered the knight.
If your companion is Triss, she needs you to take care of the guards outside the amphitheater’s entrance before she can approach and the pair of you can enter the summit. If your companion is Iorveth, he’s…already killed the guards himself and is just waiting for you to get done doing whatever. The rest of this quest consists of simply watching the events of the cutscene play out, but exactly what you see is determined by the decisions you’ve made in your game. A Summit of Mages resolves automatically when the cutscenes end.
You must now chase down Síle de Tansarville, who has been spirited off to her tower by the mind-controlled Saskia. The chase up the tower is a setpiece where you can minimize damage by giving yourself immunity to incineration. Dodge-rolling up the stairs helps, too. You may take a little damage, but if you’re using Quen it should be extremely minor.
When you get to the top of the stairs, you face a choice. After a brief cutscene, Síle prepares to teleport away using her megascope. When she begins the teleport, it becomes clear that someone’s tampered with it. You can choose to save Síle by removing the flawed diamond using an interaction prompt, or to simply let her be torn apart by doing nothing at all. Whether you save Síle or let her die has little impact on the rest of your game. If she dies, you unlock the Witchhunt achievement. If you save her, she thanks you with a very important bit of information before she teleports away, and you unlock the Sensitive Guy achievement.
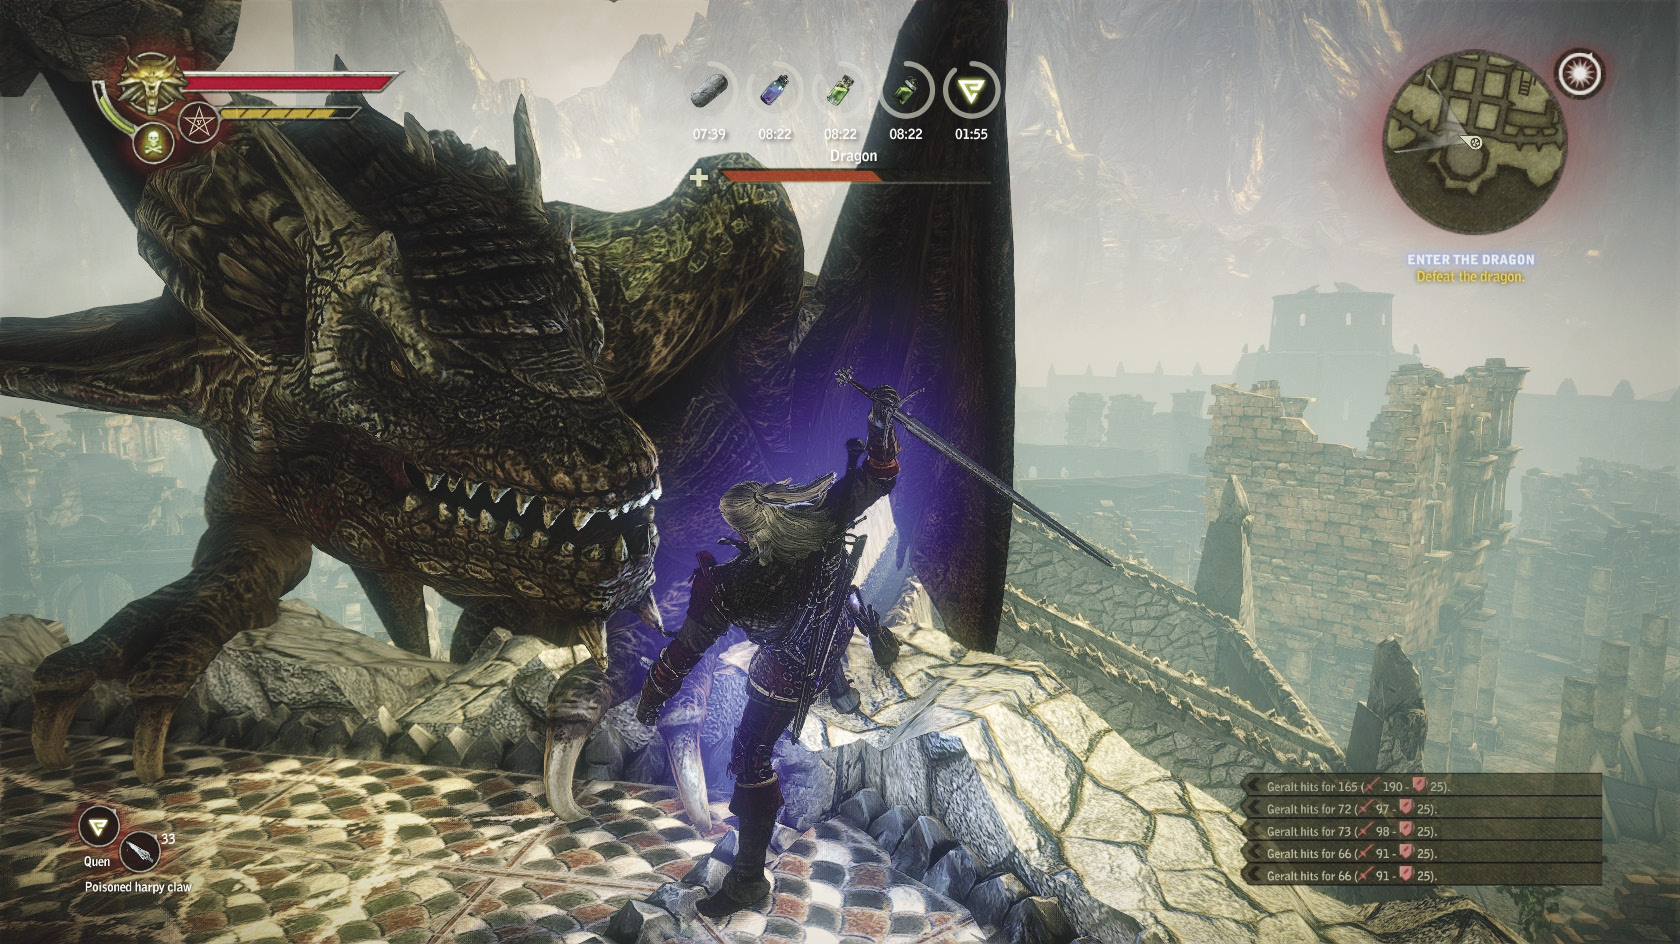
After Síle departs, you begin your battle Saskia in her true form as the dragon Saesenthessis. For the first phase of the combat, you only fight the dragon’s massive head and neck, smashed into the tower room where you stand. During this part of the battle, you simply need to evade its attacks, then roll up to the dragon’s head to get in a quick counterattack. Keep Quen up to mitigate damage, and use any tricks that you think might be appropriate. When you get her down to about half of her vitality, she leaps off the side of the tower and flies up to its flat roof.
Follow her by climbing up to the tower roof. In this phase of the battle, you still damage her in basically the same ways. Dodge-roll to evade attacks, then try to roll in to her right or left to get in a quick blow of your sword. Don’t try to score multiple hits, or you’re likely to get smacked around by one of her claws or a snapping bite.
Occasionally, Saesenthessis takes to the air to attack you. She may rear up or hover in place while breathing flame at you. If you can give yourself immunity to incineration, this does no damage. Throwing up Quen is the simplest way, but alchemist builds will have more options. She may also attempt to attack you with lunging dives. To avoid these, keep an eye on her when she takes to the air and then dodge-roll either side. Sometimes she decides to attack by lashing her tail at the tower’s roof. This is also something you can dodge-roll away from easily enough.
Note that you can also damage Saesenthessis with thrown daggers. If you have two points invested in the Dagger Throwing skill and a sufficiently large stack of silver throwing daggers, it is possible to kill her through thrown dagger damage. Alchemists can achieve a similar effect if they have two points of the Alchemist skill and a sufficiently large stack of a heavily damaging bomb like grapeshot. Even if you don’t want to try killing her purely with thrown weapons (as it can demand a very large stack on higher difficulties), keep in mind that you can damage her with bombs or daggers while she is flying around and also when she rears up to breathe fire at you.
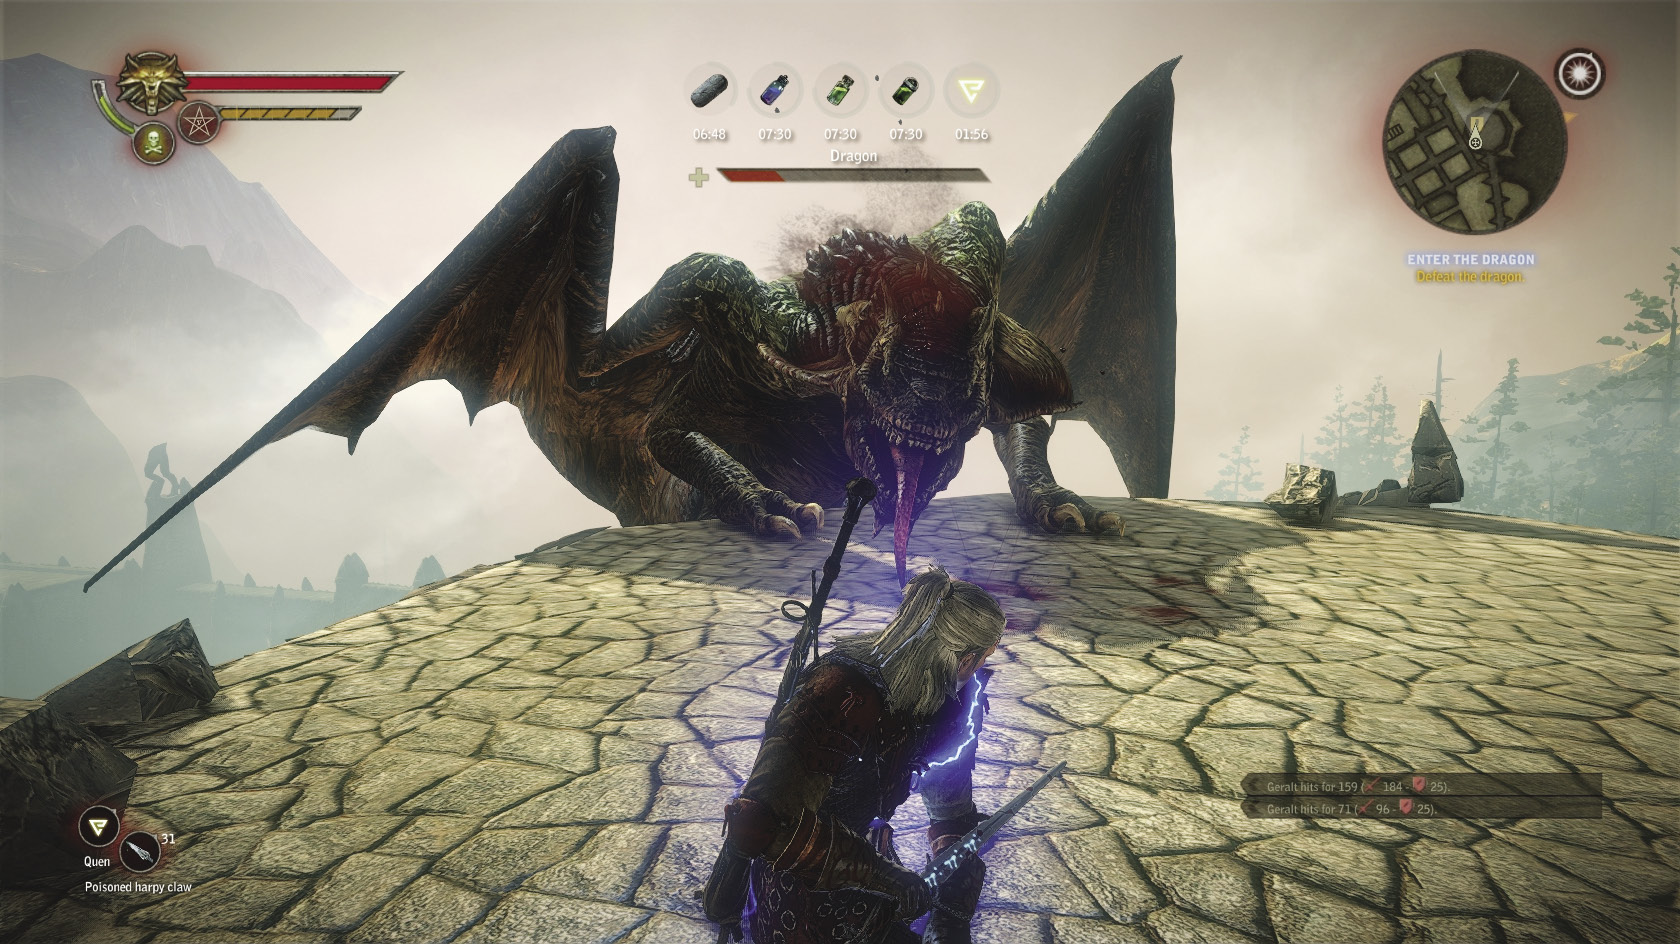
While Saesenthessis doesn’t deal especially heavy damage per blow, she has a ton of vitality and you have to hack away at her for quite some time. If you’ve got some sort of strong defensive ability and optimal equipment, you should be able to survive long enough to whittle her vitality down all the way. Once you reduce her vitality to a tiny sliver of red, a cutscene begins. There are a couple of QTEs here, and you need to hit them to finish the battle. Hit the interaction button when prompted, then the strong attack button.
If your companion was Iorveth, then the rest of this quest plays out automatically. Geralt uses the dagger to remove the spell, letting Saesenthessis revert to Saskia. You can have a long conversation with her at this point if you wish, asking her various questions that reward you information about her backstory and how she fits into The Witcher universe. When the conversation ends, you return to the city to begin the game’s brief epilogue. Saving Saskia in this way unlocks the achievement Dragonheart.
If your companion was Triss, then you face a decision here. You can slay Saesenthessis, since you know you can’t break the spell, or you can walk away and simply leave her to whatever her fate might be. If you choose to kill Saesenthessis, you unlock the achievement Being Witcher George. If you simply walk away and leave her alive, you unlock the achievement Dragonheart. Which decision you make won’t affect the rest of the game dramatically, but Triss will comment on what you did. After that, you proceed to the game’s epilogue.
|
The quest name Enter the Dragon is an homage to the famous 1973 Bruce Lee film of the same name. |
Epilogue (Iorveth)
 The Assassins of Kings
 Returning Memories
If Your Companion Is Iorveth
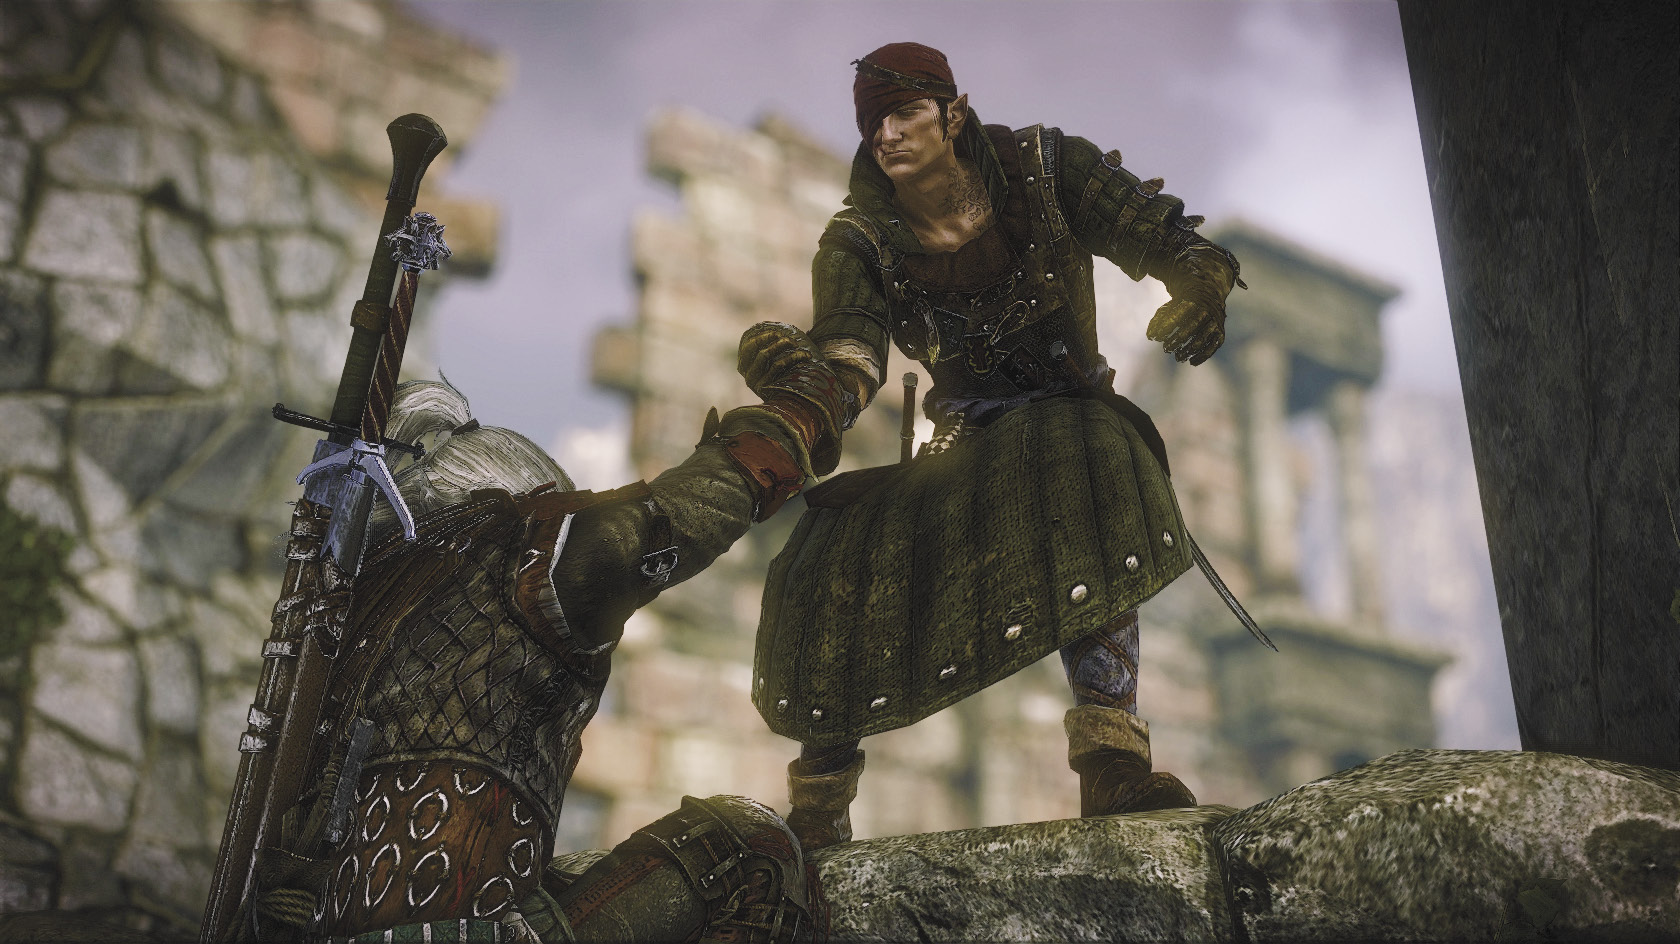
Iorveth helps you up as you climb back into Loc Muinne, then fills you in on what’s happened in the city. Egged on by the revelations from the Nilfgaardians at the summit, the soldiers left in the city have begun a bloody pogrom against the mages who gathered in Loc Muinne. Iorveth saw Letho get Triss out of the Nilfgaardian camp, so he leads you away to meet her.
On the way to the meeting place (in the Temerian camp’s former location), you have two encounters that illustrate how the city has erupted into chaos. In the first, which takes place where you met dice players earlier, you save a pair of sorceresses from some Kaedweni soldiers who are openly talking about how they’re going to rape and torture them to death. In the area just beyond that, where you fought the bounty hunters, you find Nilfgaardian troops led by a combat mage. With Iorveth at your side, you should make short work of them.
When you make it to the former Temerian camp, you do find Triss with Letho. She immediately gets up and walks toward you. After a quick dialogue scene, she goes to wait with Iorveth outside the walled-in camp area. This encounter automatically resolves Where Is Triss Merigold? for this chapter. Skip to the Letho’s Fate walkthrough that describes your upcoming encounter with Letho.
If Your Companion Is Triss
Triss helps you up as you climb back into Loc Muinne, then fills you in on what’s happened in the city. Consumed by fury at the knowledge of Síle’s role in the regicides, the soldiers left in the city have turned on the mages. Only the Council’s re-establishment has kept it from turning into an all-out bloody pogrom against magic-users. She also mentions receiving a letter from a messenger sent by Letho, who wants to meet with Geralt one last time at the site of the former Temerian camp. Begin heading in that direction.
Along the way, you stumble across a group of Kaedweni soldiers who have captured Iorveth, who seems to have had a bad run-in with someone very powerful. If you want, you can simply leave him there by moving away from the group of soldiers at top speed. Triss follows and you move on to the encounter with Letho with this as Iorveth’s apparent final fate.
If you hang around long enough or attack them, they all fight back. You should have an easy time defeating them all, between your high level and Triss’s magical support. Just remember to keep Quen up so Triss doesn’t set you on fire by accident. After you defeat all of the Kaedweni soldiers, one of them drops a glittering pouch. It contains Philippa Eilhart’s dagger. In this case, you leave Triss behind with Iorveth. You should make your way into the now-deserted Temerian camp to confront Letho alone. Read on.
Letho’s Fate
When you enter the camp, Letho begins a dialogue scene with you. During this dialogue, you have the option to ask him many different questions about his motivations and activities. Say “I chased you for many reasons” to get into the optional dialogue branches where you can ask Letho for explanations of his behavior. (The first decision, whether or not to accept his vodka, is purely for flavor.)
When you’re ready to make the Epilogue’s major decision, say “Let’s finish this.” At this point, you can choose to spare Letho or to kill him. The decision has no mechanical effect, as you might expect at this late date in the game. It’s purely a matter of whether you want to fight him (or, perhaps, whether you’re comfortable with the idea of killing him).
If you wish to spare Letho, say “Go. Somewhere far away.” Letho is true to his word and simply leaves. Geralt returns to his companion (or companions) and proceeds to make his way out of Loc Muinne. The game is over, enjoy your ending. Finishing the game by sparing Letho unlocks the achievement Old Friends. By completing Chapter 3, you unlock the Once Ain’t Enough achievement. By finishing the game, you unlock the achievement To Be Continued.
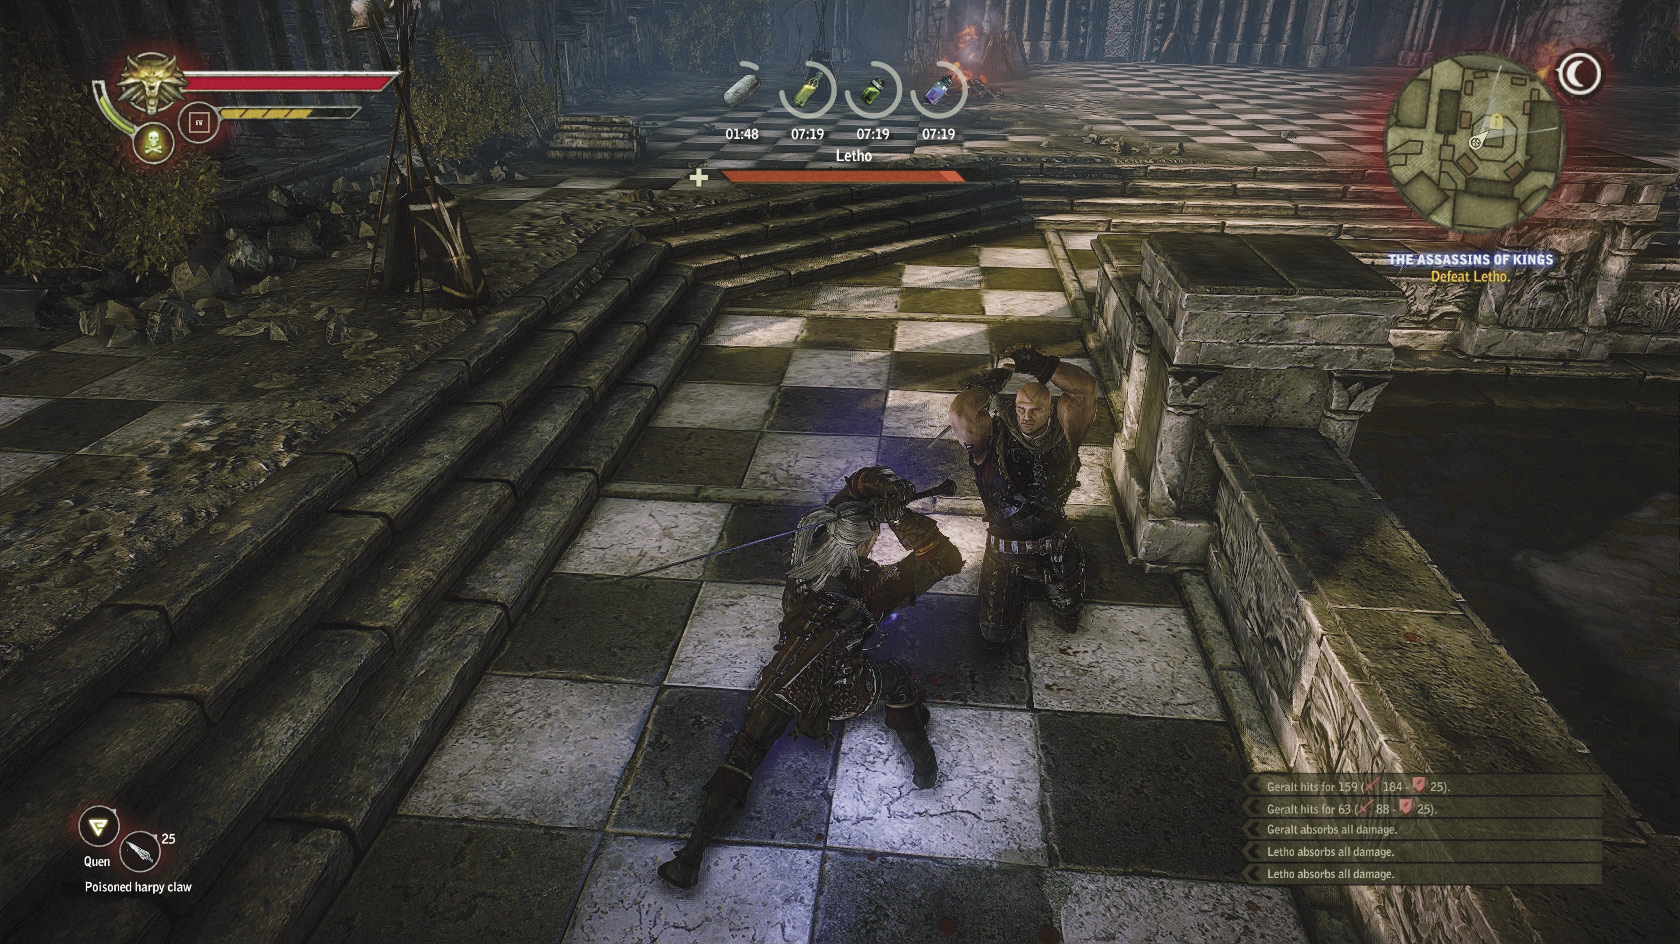
If you wish to fight and kill Letho, say “Give it your best shot” to initiate the fight. This battle is tough enough that you should make whatever preparations for it you deem necessary. If you want to use potions, be sure to drink them just before entering the Temerian camp and skip all of the optional question-and-answer stuff. Oil your steel sword with hanged man’s venom. Letho’s vulnerabilities are the same, so traps and Yrden can be very powerful here if you succeed at getting him to chase you. Letho still punishes you for getting too far away by throwing bombs, but in the wide open Temerian camp it’s easier to evade and outrun his bombs. In particular, you can make good use of the pool in the middle of the square for both evading Letho and luring him into walking over any traps or Yrdens you might want to lay.
Letho’s vitality is absurdly high. Chipping it down is going to take a while even with an optimal build. Letho is faster than he was in your first fight, so you may not be able to interrupt his signs with thrown daggers. Strong attacks are usually too slow in this battle, but it’s easy enough to get in a couple of light attacks before you roll away from him. Having both levels of Feet Work makes this battle much easier, perhaps even more so than having a maxed out Quen to use for defense. When you get Letho’s vitality down to about 25 percent, he enters a “battle fury” where he begins to use signs and bombs with much less frequency. Instead, he does his spinning attack a lot more. Keep Quen up, roll around him, and try to use light attacks to hit him a couple times.
Never go for more than a couple of blows. Even when his vitality is low, Letho is going to block you. Getting staggered usually means you get punished with counterattacks. Letho still hits like a freight train, even with your upgraded equipment and maxed-out stats. You need to be patient and careful if you want to defeat him once and for all. When you do beat Letho, you trigger a cutscene, then transition into the game’s normal ending cutscenes. Killing Letho unlocks the Avenger achievement. By completing Chapter 3, you unlock the Once Ain’t Enough achievement. By finishing the game, you unlock the achievement To Be Continued.