
The Witcher 2: Assassins of Kings Guide Data
Bestiary
As a witcher, Geralt of Rivia’s main task in life is to hunt down and slay monsters, with a sideline in lifting curses. All monsters take full damage from silver swords and only partial damage from steel swords. The reverse is true, incidentally, when you use a silver sword against humans. Beyond that, different species of monsters have wildly varying strengths and weaknesses. Some are intuitive to a monster’s nature, while others are a bit surprising. All should be exploited as ruthlessly as possible, using whatever skills and specialties your Geralt build has developed.
Monsters are grouped by species for this bestiary’s purposes, since all creatures of a single species usually share similar drops, attack patterns, and vulnerabilities. Some monster species occur in several variations. Most variant monsters are just a more powerful version of a basic monster type, but there are exceptions to this, too. Certain variant versions of a monster may have special drops unique to that variant. Read each section carefully if you’re having a hard time deciding how to fight a particular monster, or if you just want to learn a bit more about what rewards you can expect to loot from a dead monster’s body.
Note that the drops for each creature species are separated into the categories “alchemy drops” and “other drops.” This division is extremely important to how the alchemist tree skill Harvester works. Taking the Harvester skill increases the drop rate of a monster’s alchemy items but does not affect the drop rate of other items you can obtain by defeating that monster. An alchemy item is defined by the game as any item that has value as an alchemical substance. That is, an item is an alchemical substance if it contains vitriol, rebis, aether, quebrith, hydragenum, vermilion, sol, caelum, or fulgur, and therefore can be used to brew potions, oils, and bombs.
Which items are dropped when a monster dies is determined basically at random. Some monsters may drop multiples of a given item, especially if slain by a Geralt that has the Harvester skill. Usually a monster yields some drops upon its defeat, but not always. If you’re not sure if you’ve grabbed a monster’s drops or not, scan the area with your medallion after you finish a battle. Monster drops always highlight in bright orange if they’re present, like other types of loot. Monster carcasses can sometimes be hard to see if you’ve been fighting in tall grass or shallow water.
Drowners
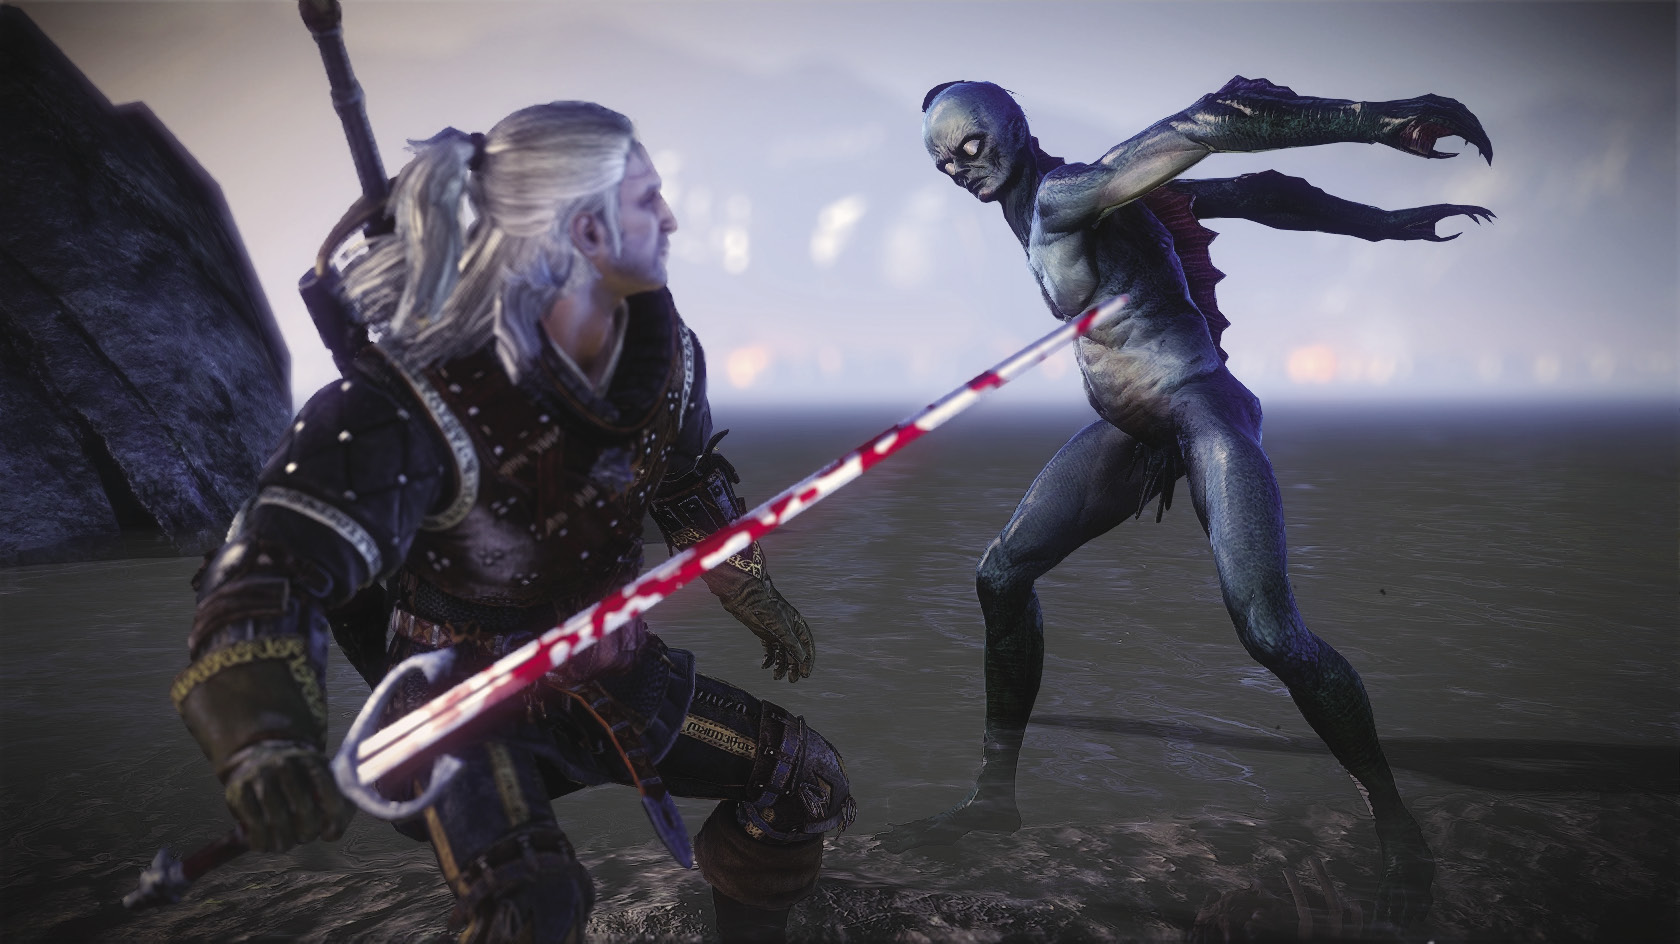
| Drowner | |
|---|---|
| Resistances | Poison |
| Bleeding | |
| Vulnerabilities | Incineration |
| Knockdown | |
| Stun | |
| Alchemy Drops | Drowner Brain |
| Essence of Water | |
| Amethyst Dust | |
| Other Drops | Twine |
| Cloth | |
| Drowner Trophy | |
| Orens | |
The first time you see a monster in The Witcher 2, it is a drowner eating a fallen soldier. It attacks you, but you defeat it easily with a basic silver sword. This experience sums up the drowner. Although frightful and grotesque on the surface, these fishlike humanoids are among the weakest creatures in the game. You can occasionally find them active during the day, but drowners only come out in force at night, when they swarm in packs led by elite drowners called drowned dead. When drowners led by a drowned dead attack in packs, they can be extremely dangerous, especially since you’re inclined to underestimate them.
They favor watery areas like sewers, swamps, coasts, and riverbanks. So, as you might expect, you encounter them through most of the game when you’re near watery areas. In the Prologue, you can find them prowling the sewers beneath La Valette Castle. In Chapter 1, they come out at night near the waterfall and in the swampy areas around the bandit’s hideout. In Chapter 2, you encounter them in the quest Lost Lambs (on Roche’s route) and along the beaches near Malget’s hut at night.
Drowners are relatively speedy opponents, so light attacks are best used to quickly home in on their locations and eliminate them. Drowners are immune to poison and bleeding but are surprisingly vulnerable to fire. Dancing stars and conflagrations can come in handy for whittling down a pack’s numbers rapidly. They are also vulnerable to most traps and easy to lure over them. Finally, drowners are vulnerable to knockdown, so you can use Aard to easily incapacitate and slaughter them one by one. Read the book Drowners: A Textbook for Initiates of the Order of the Flaming Rose to gain knowledge of drowners.
Killing a drowner yields two unique, relatively useful drops. One is the drowner brain, which is used primarily in crafting amethyst dust. It can be wise to hold on to drowner brains through the end of Chapter 2, just in case you run out of amethyst dust and need to make more. Once you get into Chapter 3, you should have a good idea of how much amethyst dust you’ll need through the end of the game. At that point, you can safely sell off the brains if you’re pretty sure you won’t be using them.
The other noteworthy drowner drop is essence of water, which is always used when crafting runes. It’s much cheaper to craft runes than to buy them, so it’s worth your while to farm drowners for essences of water when you’re in a chapter where they occur. Drowners don’t occur in Chapter 3, so grind out some extras ahead of time for use in Chapter 3. Although you can craft essences of water from a diagram, the process consumes some relatively expensive ingredients.
Drowners are believed to be the spirits of evil men and criminals who have drowned or otherwise died in water. Drowners are either the body or the hateful spirit of the dead, returned to drag other living creatures down into a watery grave. Drowners tear their dead prey to bits with their claws and consume the soggy remains.
|
There is only one mention of a drowner in the translated Witcher novels. In the story “The Edge of the World” from The Last Wish, a quote from an ancient manual says that a witcher should be paid no more than “one silver penny or three halves” for slaying a drowner. Even the ancients knew these guys are pretty easy to kill. |
Drowned Dead
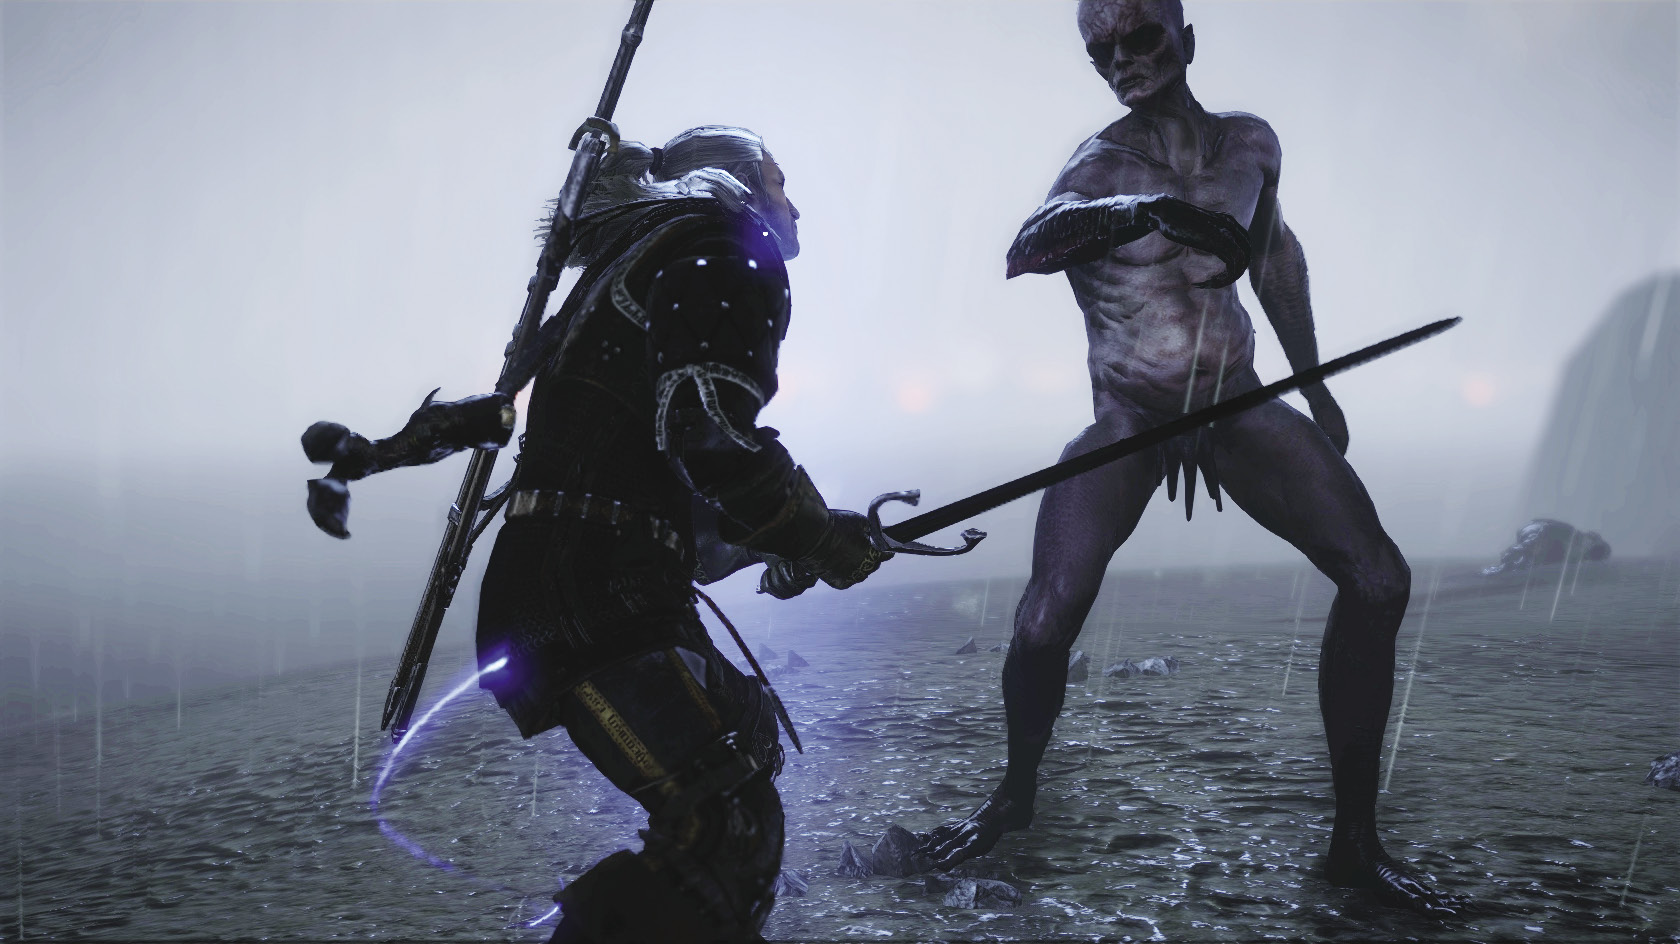
An elite form of drowner that acts as pack leader, a drowned dead has more vitality than the average drowner and can hit much harder. They only occur as part of a drowner pack after nightfall. You encounter them in Chapter 1 in the swamps around the bandit hideout and in Chapter 2 along the northern stretch of beach near the site of Sabrina Glevissig’s execution. When you realize a drowner pack you’re fighting contains a drowned dead, approach the battle more cautiously than usual. Keep Quen up in case the drowned dead jumps you from behind. The overall best strategy for dealing with drowned deads is to pick off the rest of the drowner pack with light attacks, then hammer away at the drowned dead with strong attacks.
Nekkers
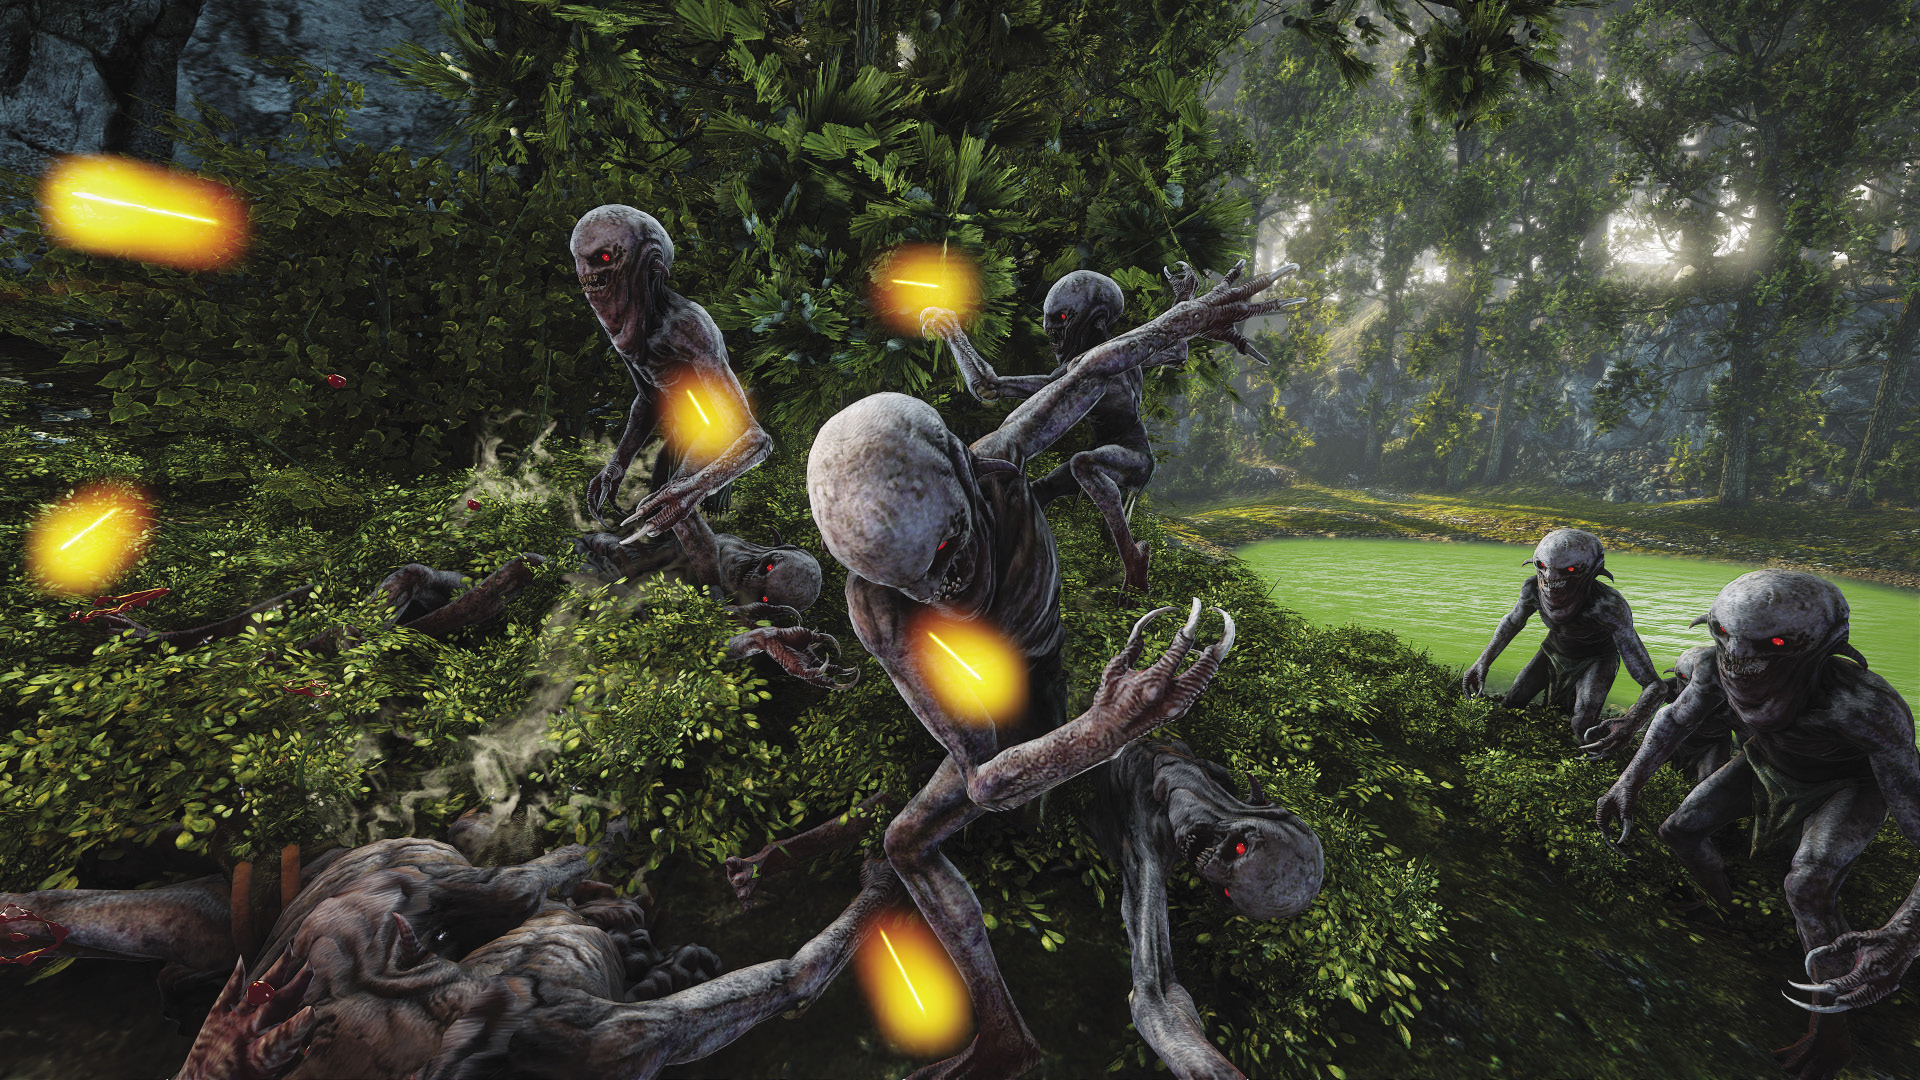
| Nekker | |
|---|---|
| Resistances | None |
| Vulnerabilities | Bleeding |
| Poison | |
| Stun | |
| Knockdown | |
| Incineration | |
| Alchemy Drops | Nekker Claws |
| Nekker Eyes | |
| Nekker Heart | |
| Nekker Teeth | |
| Other Drops | Cloth |
| Twine | |
| Nekker Trophy | |
Nekkers can be thought of as land-bound, burrowing drowners. Individually, nekkers are very weak, but they always occur in groups of around half a dozen at the least. A group of nekkers can go from harmless to threatening in a short period of time if they surround you and attack from behind. Much like drowners, they originate in some way from the bodies of the dead. The relationship is less clear, though. It is known only that nekker nests tend to form and thrive near battlefields and other areas that have seen mass die-offs.
Nekkers inhabit dark, humid areas that are neither too wet nor too dry. Favored habitats include forests and caves. You encounter nekkers in the forests and cave areas around Flotsam in Chapter 1. In Chapter 2, nekkers lurk in the mines beneath Vergen and in the forests to the north of the city. In Chapter 3, you can encounter nekkers in the forests and caves north of Loc Muinne, but only on Roche’s route.
Nekkers have no immunities or vulnerabilities. You can fight them any way you wish. The most efficient way to fight nekkers is generally to use some bombs or traps for crowd control, then focus on pure damage output once their numbers are whittled down. Nekkers are relatively quick and agile opponents, so light attacks are best for quickly moving from one target to the next. Read the book Nekkers in the Mist to gain knowledge of nekkers.
There are four drops unique to the nekker. All have their uses, but they tend to be relatively limited. Nekker claws in a standard game are used only in crafting the armor of Ysgith, whose diagram you obtain in Chapter 3. If you wish to make this armor, put five nekker claws into storage early in the game (and make sure you kill at least one troll). Otherwise, you can simply sell nekker claws as you obtain them for extra cash. You kill dozens of nekkers in the course of a game and will probably obtain well over a hundred claws.
Nekker eyes are worth keeping on hand until you reach Chapter 3, since you can use them along with drowner brains to craft amethyst dust. Once you reach Chapter 3, you should have a good idea of how much amethyst dust you need to finish the game with, so you can sell off any nekker eyes you’re pretty sure you won’t need.
Always hang on to nekker hearts, as you can use them to craft two very useful items: fury traps, which cast Axii on all opponents within a certain radius when the trap is sprung, and Ysgith runes, which add a valuable damage bonus and a Bleeding critical effect to swords. Nekker hearts are heavy, so keep them in storage until you’re ready to use them in crafting.
Nekker teeth have no useful role in crafting and should always be sold off for orens immediately—unless you’re playing a game on Dark mode. On Dark mode, put at least nine nekker teeth into storage for use in crafting the silver sword Anathema and the steel sword Ultimatum. After that, you can sell the teeth off for much-needed extra cash.
Nekker Warriors
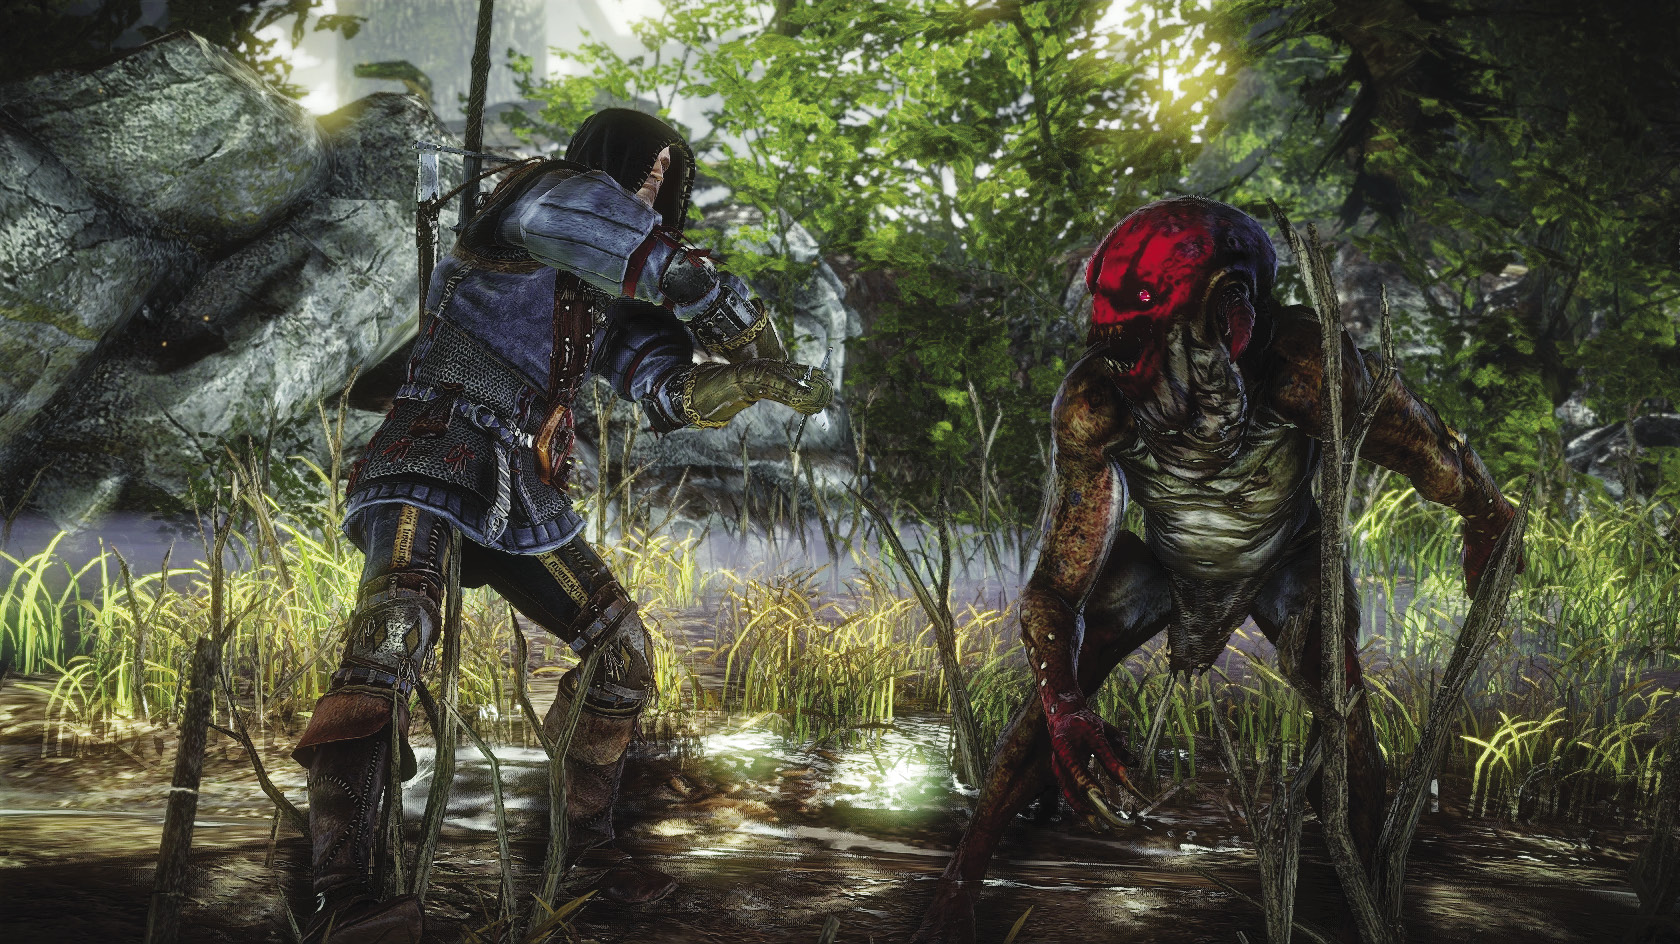
| Nekker Warrior | |
|---|---|
| Resistances | None |
| Vulnerabilities | Bleeding |
| Poison | |
| Stun | |
| Knockdown | |
| Incineration | |
| Alchemy Drops | Nekker Claws |
| Nekker Eyes | |
| Nekker Heart | |
| Nekker Teeth | |
| Other Drops | Cloth |
| Twine | |
| Nekker Trophy | |
| Nekker Warrior Blood | |
Every large group of nekkers is accompanied by at least a few nekker warriors. These creatures are especially large and brawny nekkers that mark their faces with red clay. They possess more vitality than their smaller kin and hit much harder. They’re also more aggressive than other nekkers, so you often end up forced to engage them when you first encounter a nekker group. Focus on eliminating the weaker nekkers first and saving the other nekkers for last.
Nekker warriors yield one unique drop, in addition to the other drops you usually get for killing nekkers. That drop is warrior nekker blood, which is required in Chapter 3 to complete the quest An Encrypted Manuscript. The game considers this a quest item rather than an alchemy or crafting item, so it has no weight and is worth only 1 oren. Hold on to any warrior nekker blood you happen to acquire throughout the course of the game.
Endregas
| Endrega | |
|---|---|
| Resistances | Poison |
| Vulnerabilities | Bleeding |
| Stun | |
| Knockdown | |
| Incineration | |
| Alchemy Drops | Endrega Embryo |
| Endrega Jaw | |
| Endrega Saliva | |
| Endrega Teeth | |
| Endrega Venom | |
| Other Drops | Endrega Hide |
| Endrega Trophy | |
| Diagram: Endrega Hide Armor Reinforcements | |
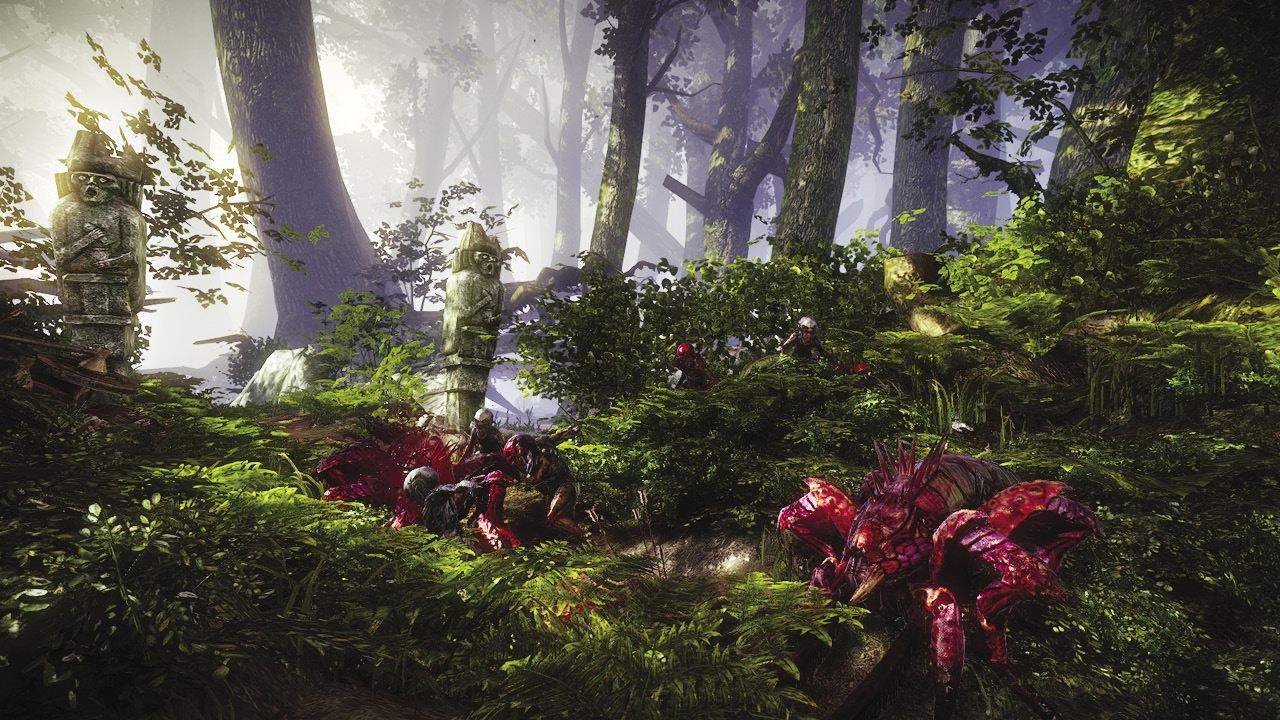
Endregas resemble spiders but behave more like insects. Even at that, there’s something genuinely unsettling about endrega physiology. Although they are six-legged like insects, they have jaws lined with teeth like a vertebrate’s. Endregas live in temperate to humid forests, where they can drop from trees to surprise their prey or battle intruders who draw too close to their nurseries. An endrega’s heavily armored body and poisonous bite make it a dangerous opponent. They are a bit slow, so they’re easy to handle alone, but if you see one endrega then there are probably at least two more lurking somewhere nearby.
There are many different varieties of endrega, because the species is divided into an insect-like caste system. The humble endrega is a worker at the low end of the totem pole. The endrega warrior fights off predators and is a bit rarer, with the rarer endrega guard patrolling nurseries. At the core of endrega society is the queen endrega, which lays eggs that must mature in coccoons. The queen endrega is very rare and only comes out of hiding when the colony’s nursery is threatened.
Endregas occur most commonly in forests and occasionally in temperate caves. They are only friendly to arachasae and attack virtually any other species that enters their territory. You encounter endregas in the forests outside Flotsam in Chapter 1. In Chapter 2, you can only encounter them by heading to the area to the north of the Visionary’s hut, near the shrine to Sabrina Glevissig. In Chapter 3, you can encounter endregas in the forests to the north of Loc Muinne on Roche’s route. On Iorveth’s route, you can encounter them in the secret cave that leads into Loc Muinne and also in the caverns that lead to the lost secret laboratory of Dearhenna.
Endregas can barrel toward you with a sudden charging attack, but otherwise are slow. Strong attacks are best suited to smashing through their heavily armored bodies. Endregas are immune to poison but vulnerable to bleeding, incineration, stun, and knockdown. Their wide, low body structure makes them particularly vulnerable to traps, as it’s hard for them to move through a trapped area without triggering them. In addition, endregas are insectoids and therefore take additional damage from a silver sword coated in insectoid oil. Read the book Three Years Among the Endregas to gain knowledge of endregas.
Creatures of this species can drop six unique materials, five of which count as alchemy materials. Endrega embryos should be hoarded, as they’re extremely useful. They are a necessary component in crafting conflagration traps and also contain fulgur, which is often required to brew high-end potions like Tawny Owl. You can also get endrega embryos by destroying endrega coccoons during the quest The Endrega Contract in Chapter 1.
Endrega teeth are also worth hoarding, especially in Chapter 1. You need 15 endrega teeth to make the jagged blade and can also use them to craft endrega hide reinforcements, which can be useful for slotting out armor you’re going to be wearing for a short period of time. Conveniently, endregas sometimes drop the diagram for endrega hide reinforcements.
Endrega venom is required to craft clawer traps, so keep it if you think you’ll ever want to use such a trap. The clawer’s function is mostly duplicated by the reusable snares you can pick up in Chapter 1, so you could begin selling this material off in Chapter 2.
Endrega jaws can be sold off, as they aren’t used in any sort of crafting and the alchemy reagent they contain, vermilion, has many other common sources. Endrega hide can be sold off in a standard game, where it cannot be used to craft anything particularly useful. If you are playing on Dark mode, you will need five endrega hides to use when crafting the Blasphemer’s set.
Endrega Warriors
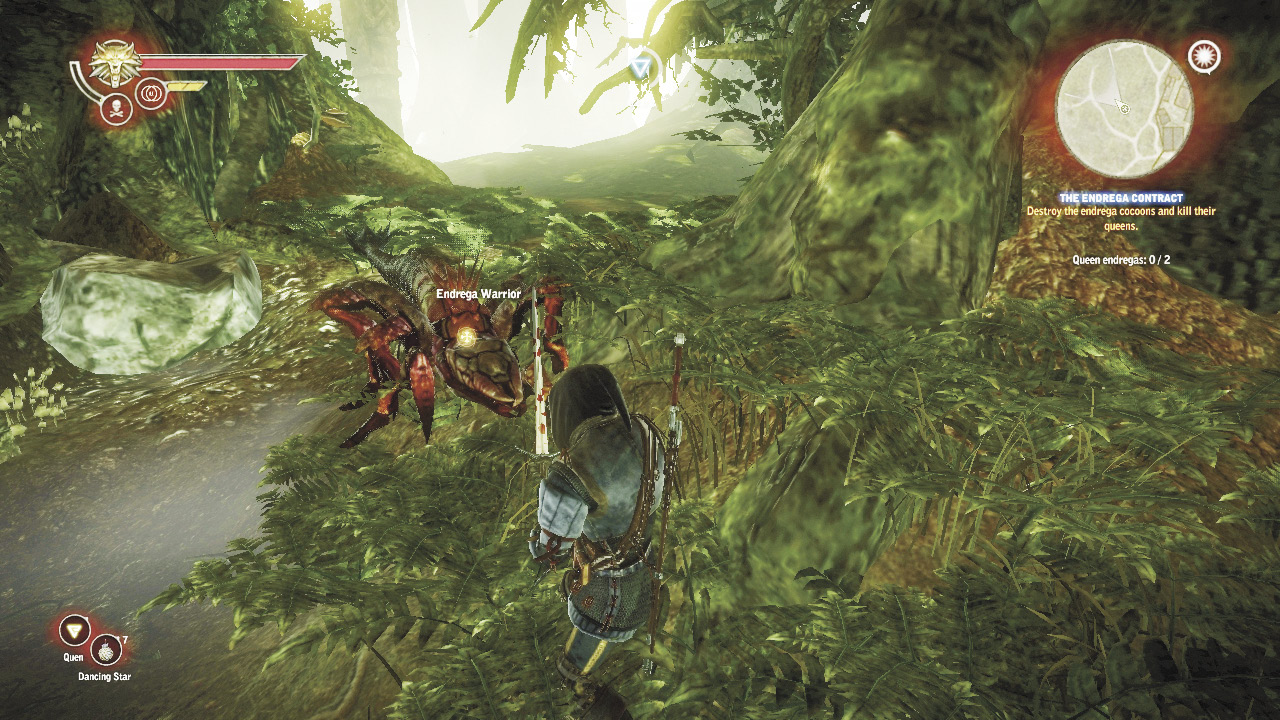
An endrega warrior is an endrega with a long, spiked tail. As you might expect, it’s a bit more aggressive than a normal endrega and hits a bit harder. It’s not any tougher and can be defeated just as easily as its cousins. You sometimes encounter endrega warriors alongside arachasae, particularly in the secret cave you can opt to pass through in Chapter 3.
Endrega Guards
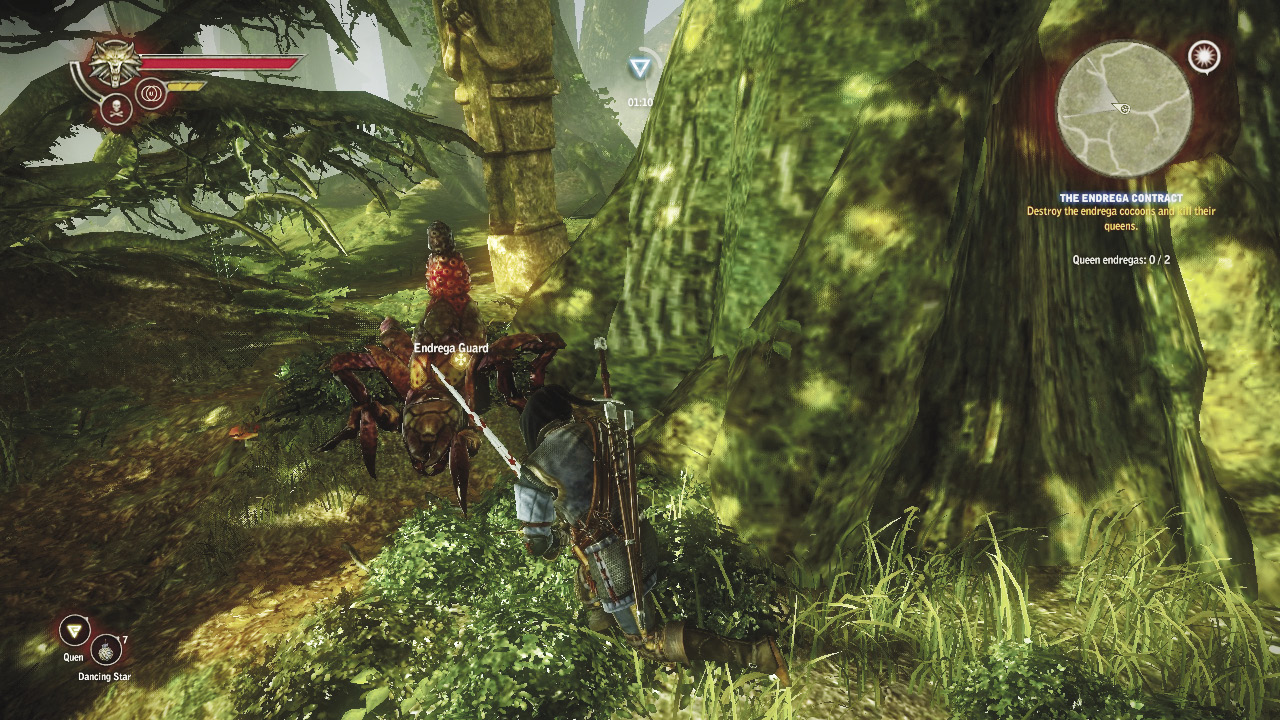
You primarily encounter endrega guards near the endrega nurseries you encounter in Chapter 1, as part of The Endrega Contract. Their bodies are a bit higher off the ground and more compact than an ordinary endrega’s. They don’t hit any harder than the average endrega, but they do have a bit more vitality. They tend to appear in swarms with other endregas.
Endrega Queens
| Endrega Queen | |
|---|---|
| Resistances | Poison |
| Vulnerabilities | Bleeding |
| Stun | |
| Knockdown | |
| Incineration | |
| Alchemy Drops | Endrega Embryo |
| Endrega Jaw | |
| Endrega Saliva | |
| Endrega Teeth | |
| Endrega Venom | |
| Queen Endrega Pheromones | |
| Greater Vitality Mutagen | |
| Other Drops | Endrega Hide |
| Endrega Trophy | |
| Diagram: Endrega Hide Armor Reinforcements | |
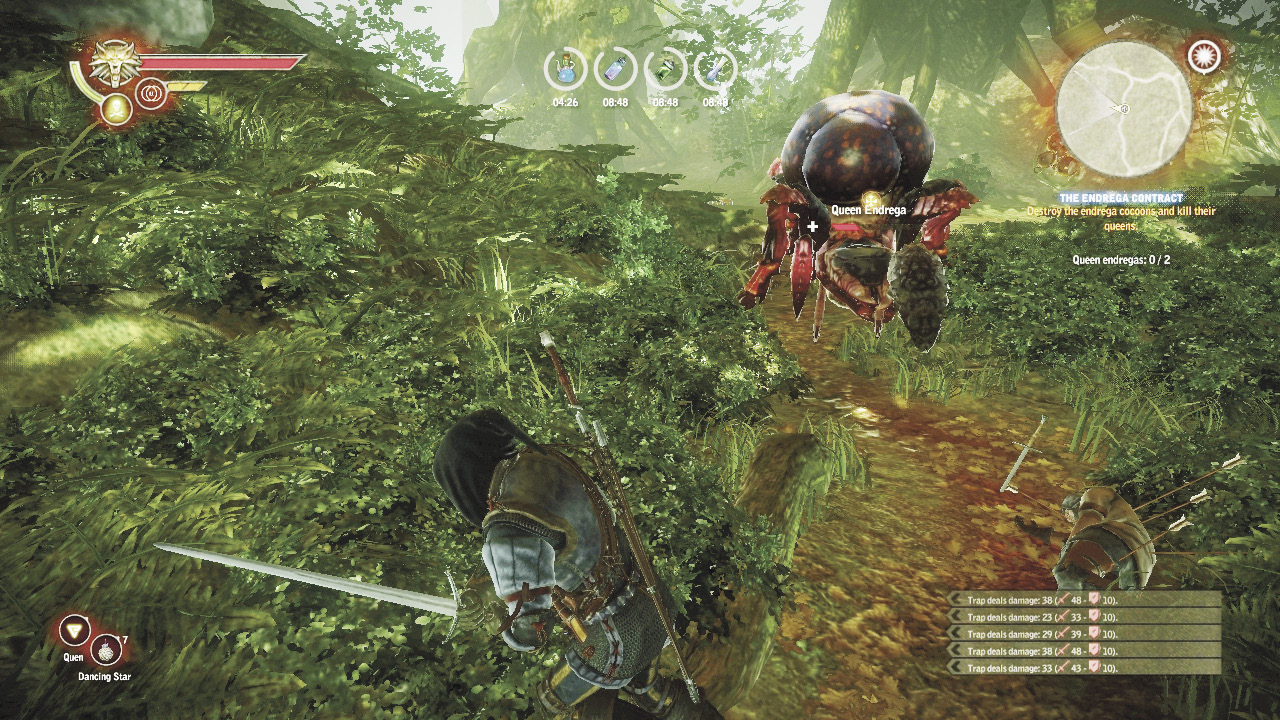
Endrega queens are enormous compared to standard endregas. They have a similar charging attack, but their large size means they hit much harder and can charge much farther. They also can attack a distant foe by spraying poison at it. Endrega queens are easiest to damage if you can hit them from the back or sides, as they can block head-on attacks. You can also stun them with Yrden to force them into dropping their guard, or lure them over traps. You only encounter endrega queens during The Endrega Contract quest in Chapter 1 or during The Secrets of Loc Muinne on Iorveth’s route in Chapter 3.
You can pick up two extra drops from an endrega queen, in addition to the usual endrega drops. One is the queen endrega’s pheromones, a requirement for completing the quest An Encrypted Manuscript in Chapter 3. It is possible to sell off the queen endrega’s pheromones or use them in alchemy, so be careful. Put them into storage once you’ve obtained them to make sure this doesn’t happen.
The other extra drop is the greater vitality mutagen. While mutagens usually drop at random when you fight foes, the queen endrega is one of the few enemies in the game that consistently drop a specific type of mutagen. The greater vitality mutagen is one of the better mutagen drops, too, and worth slotting.
Rotfiends
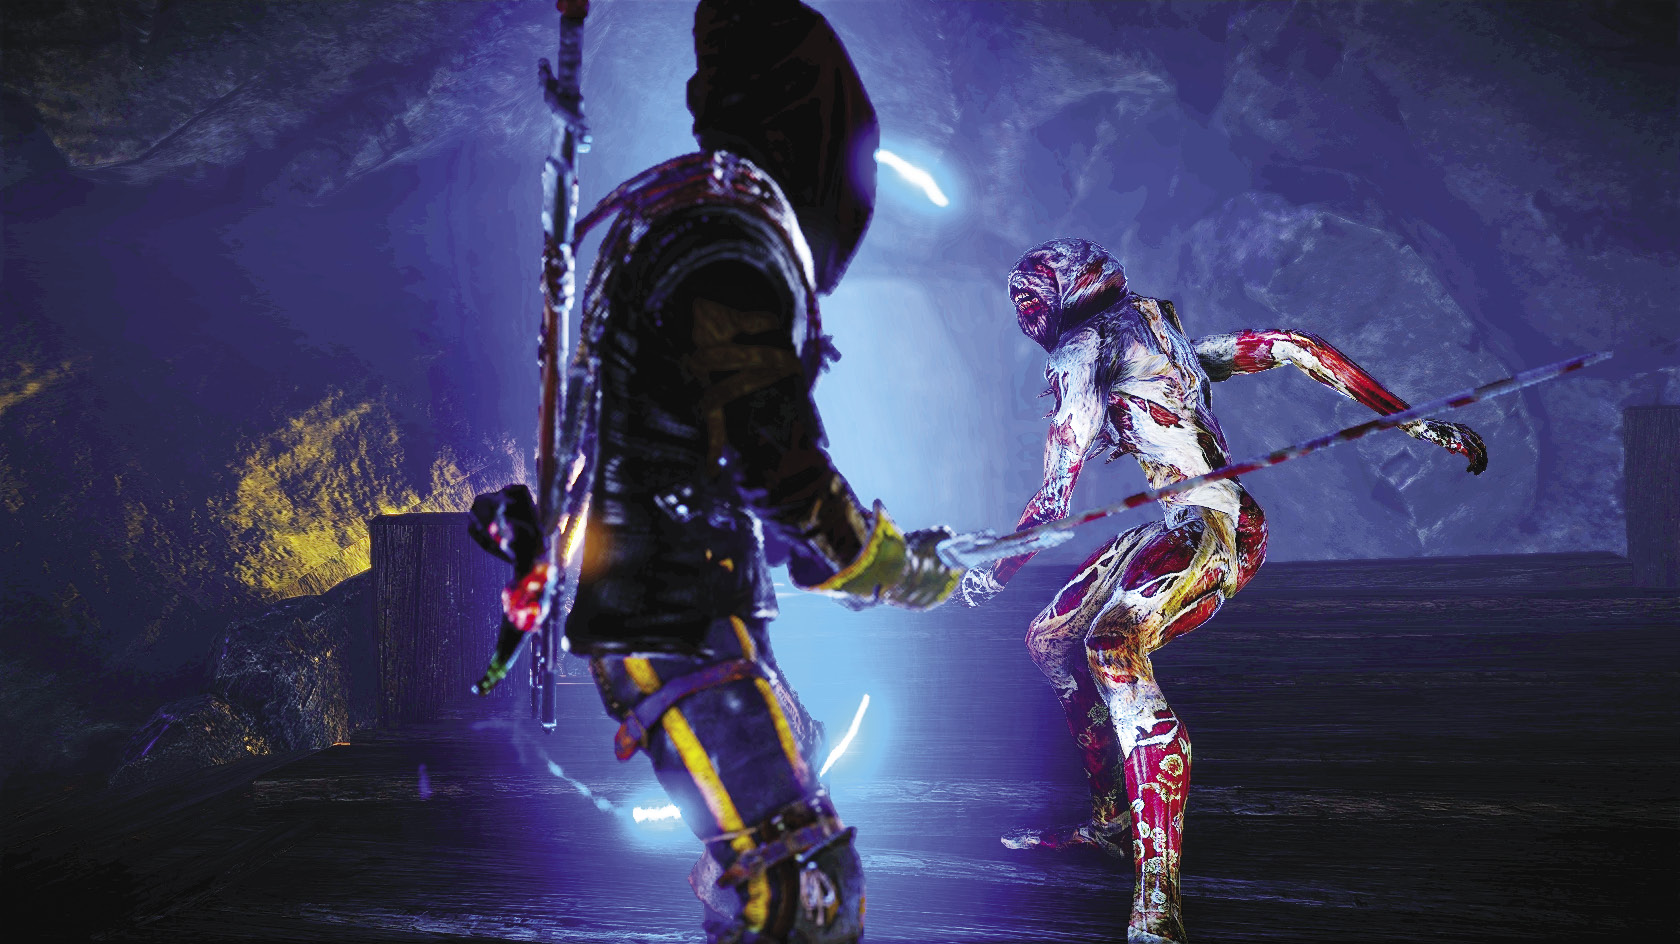
| Rotfiend | |
|---|---|
| Resistances | Poison |
| Bleeding | |
| Vulnerabilities | Stun |
| Knockdown | |
| Incineration | |
| Alchemy Drops | Necrophage Blood |
| Necrophage Eyes | |
| Necrophage Skin | |
| Necrophage Teeth | |
| Rotfiend Tongue | |
| Diamond Dust | |
| Other Drops | Rotfiend Trophy |
The rotfiend is another monster that spawns from mass death. When bodies are left to rot and fester after war, plague, or famine, they inevitably draw the attention of rotfiends. Rotfiends feed on all types of carrion but have a preference for human corpses and flesh. When packs of rotfiends become bold enough, they begin attacking living humans that pass through their territory. It is difficult to exterminate all of the rotfiends in an area due to their great resiliency. They’re best driven off by destroying their food supply, which means at the very least burning corpses that cannot be buried properly.
You encounter groups of rotfiends primarily in Chapter 2. They can be found in the mine tunnels around Vergen and swarming around the unburied corpses around the Kaedweni Camp. In Chapter 3, they’re in the sewers beneath Loc Muinne.
Rotfiends are best fought with light attacks, moving rapidly from target to target. When you deplete a rotfiend’s vitality, it seizes up briefly before exploding into a poisonous, flammable cloud of gas. This explosion does much heavier damage than any of a rotfiend’s usual attacks, so roll away from it. You may need to get clear of the entire rotfiend pack, as the explosion and fumes damage other rotfiends nearby. You sometimes see chain reactions of rotfiend explosions, which can work to your advantage if you’re not stuck in the middle of them. Rotfiends attack with a lunging, leaping motion, so never assume one is too far away to damage you. Oil your blade with necrophage oil to damage them more quickly. Bombs and traps are also useful for keeping swarms under control. To gain knowledge of rotfiends, read the book The Horrors of War: Rotfiends.
You can get five unique materials from defeating rotfiends, almost all of them worth keeping on hand. Necrophage blood and necrophage skin should be stockpiled, as they can be used to craft oil. Necrophage skin can also be used to craft leather and magic wraps. Necrophage eyes can be sold freely, as they aren’t required for crafting and contain vitriol, which is easily obtained from other sources. Necrophage teeth should be kept in storage until Chapter 3 or so, since they can be used to craft extra diamond dust if you need it. Rotfiend tongue has no crafting use and contains caelum, an alchemical substance you can obtain in other ways. So rotfiend tongues can be sold freely, though you may want to keep one in storage. You can substitute a rotfiend tongue for the harpy egg required to complete the quest An Encrypted Manuscript in Chapter 3.
Greater Rotfiends
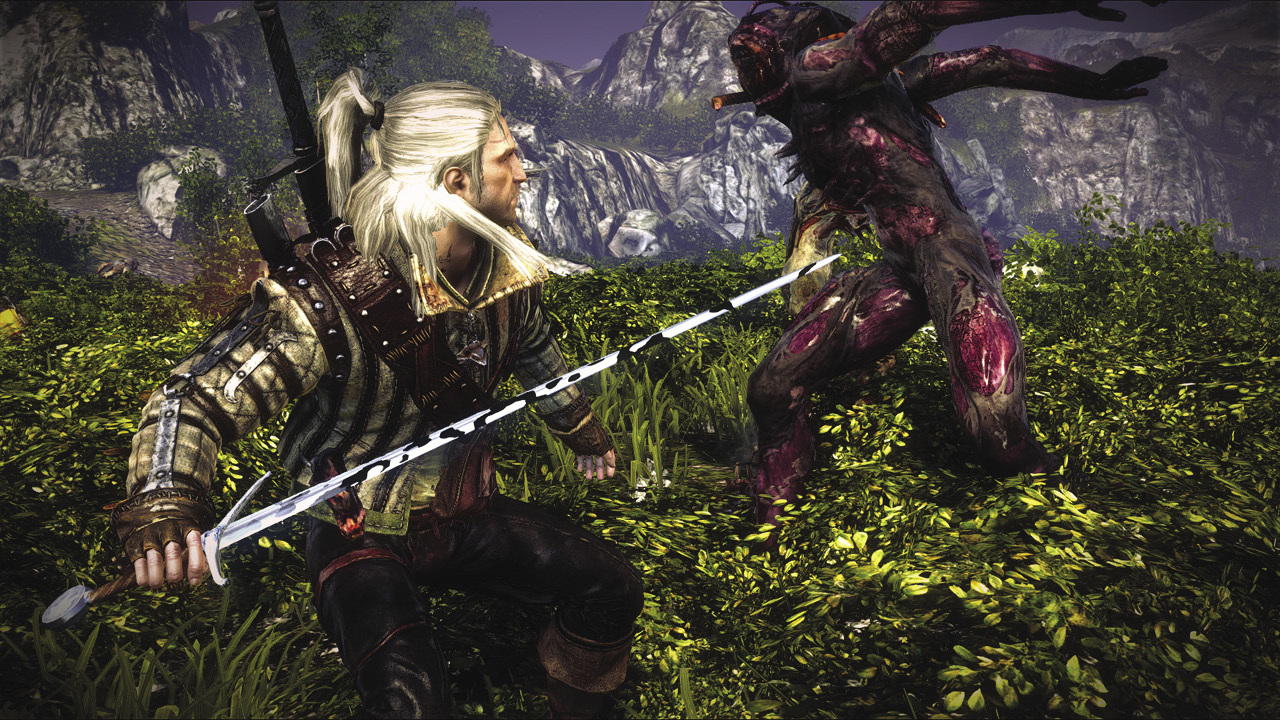
The greater rotfiend is larger and stronger than common rotfiends, dealing more damage and able to soak up more damage, too. It also explodes when its vitality is depleted, but the explosion is more damaging and spreads a larger cloud of gas. It attacks using tactics similar to those of regular rotfiends, but its strength can make it very dangerous if it jumps you while you’re trying to deal with other members of the pack. Greater rotfiends are better fought with strong attacks rather than light attacks, so you can put them down more quickly.
Greater rotfiends thrive in cave environments and are primarily encountered there. Greater rotfiends do not roam the fields around the Kaedweni Camp in Chapter 2 but can be encountered in the camp cave and in the various caves and tunnels near Vergen. A lone greater rotfiend can be encountered in Chapter 1, in the cave you venture into in order to find ostmurk. This is the first rotfiend of any sort you encounter in the game.
Wraiths
| Wraith | |
|---|---|
| Resistances | Poison |
| Bleeding | |
| Vulnerabilities | Stun |
| Incineration | |
| Knockdown | |
| Alchemy Drops | Essence of Death |
| Amethyst Dust | |
| Diamond Dust | |
| Other Drops | Wraith Trophy |
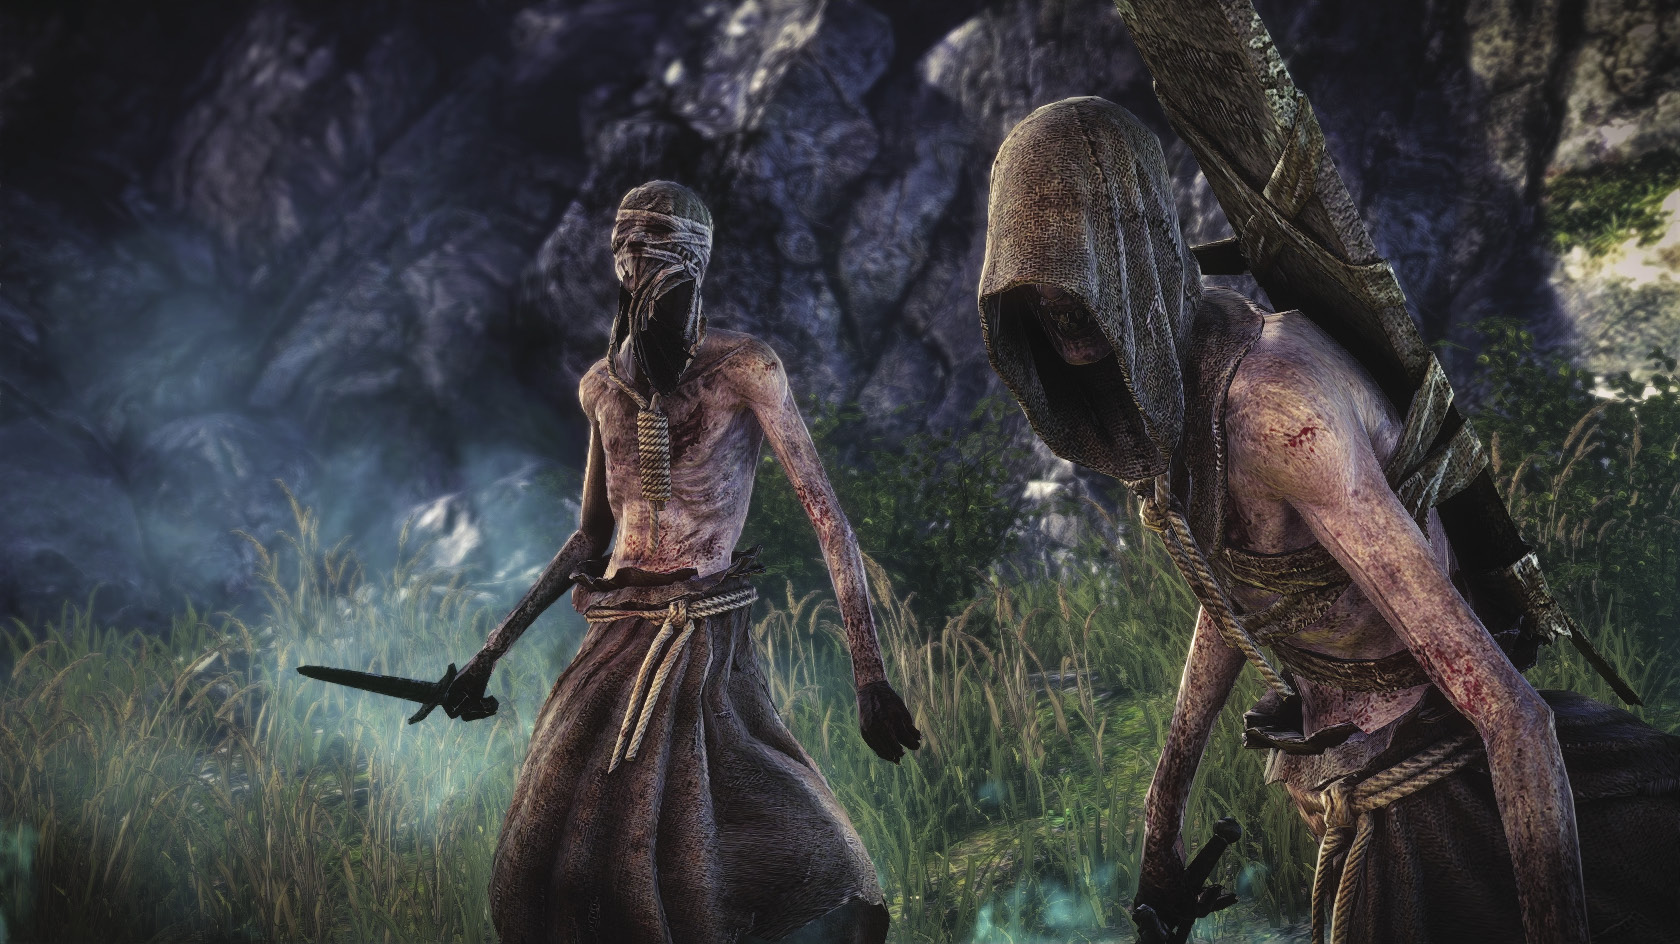
Wraiths are the spirits of those who died with unfinished business in this world, often a simple grudge against all who still live. Wraiths have a connection to the site of their death or burial and often patrol these areas. They are not mere apparitions, but tangible beings that wield very solid, deadly swords. Some wraiths can be spoken to and even negotiated with, if the tie binding them to this earth is something specific like duty or revenge. Most wraiths are implacable embodiments of wrath that must be slain, like any other breed of monster.
You encounter wraiths in Chapter 1 during the quest In the Claws of Madness. During Chapter 2, they spawn regularly at night when you enter the burned village outside Vergen. They also spawn while you investigate the Dwarven Catacombs in the course of completing Death Symbolized and (on Iorveth’s route) With Flickering Heart. You can summon them infinitely in the basement of Malget’s house if you light the candles in an incorrect sequence. Finally, you must fight a series of infinitely respawning wraiths during the Chapter 1 quest Melitele’s Heart and the Chapter 2 quest (on Roche’s route) The Blood Curse.
Wraiths appear to fly just above the ground, but they can still trigger traps. They are swift enemies and are best fought with light attacks. Be careful if you riposte their blows, as the wraith may prove quicker than you. Wraiths are very vulnerable to Aard, which knocks them from the air and gives you an opening to attack while they’re helpless. You can also easily set a wraith aflame, making them vulnerable to Igni, dragon’s dream, and dancing stars. Wraiths take extra damage from specter oil. Be sure to oil your blade before you settle in to fight a great swarm of wraiths. Read the book Wraiths: Fear and Trembling to gain knowledge of wraiths.
Wraiths have only one unique drop material, the essence of death. You must give this material to Anezka as part of completing the quest Melitele’s Heart in Chapter 1. In a standard game, it is only used to craft magic wraps but should still be stockpiled since it contains the rare alchemical substance fulgur. In Dark mode, you use essence of death to craft the silver sword Virgin in Chapter 2.
Bruxae
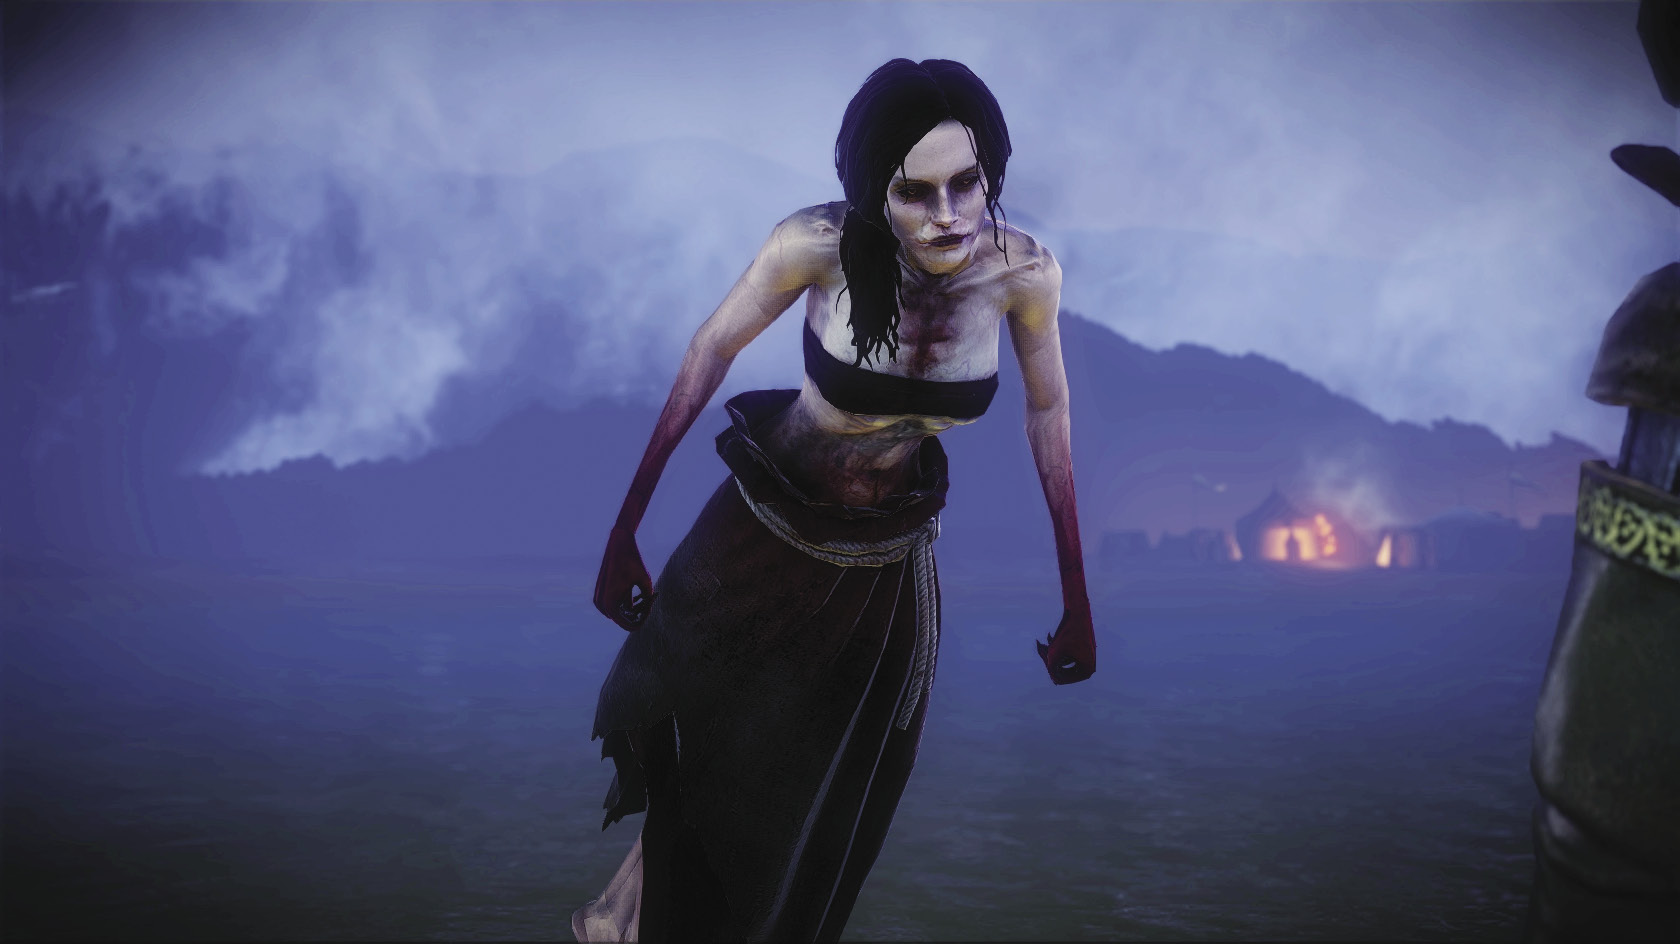
In terms of mythology, the bruxa is a wholly separate creature from the wraith. She is a form of female vampire that can assume the guise of a beautiful woman. When she feeds, however, she becomes bestial and terrifying. Bruxae usually take lovers that fall under their power and willingly supply their blood, until they waste away and die. When threatened, they can blind and deafen foes with the terrible force of their screeching.
In The Witcher 2, though, the bruxa is a variant of wraith. She has the same characteristics, shares a similar appearance, and even drops the same types of materials upon death. Bruxae usually, but not always, have more vitality than the average wraith when they appear. They attack with swords, using the wraiths’ same one-two thrust. You can read the book Bruxae—Eulogists of Death to learn more about bruxae.
You can encounter a powerful and devious pack of bruxae in the course of completing the quest Little Sisters. You can also encounter bruxae spawning alongside wraiths in Chapter 3, when you explore the areas where the quest The Secrets of Loc Muinne takes place.
|
The short story “A Grain of Truth” in the collection The Last Wish concerns a bruxa named Vereena. |
Knight Wraiths
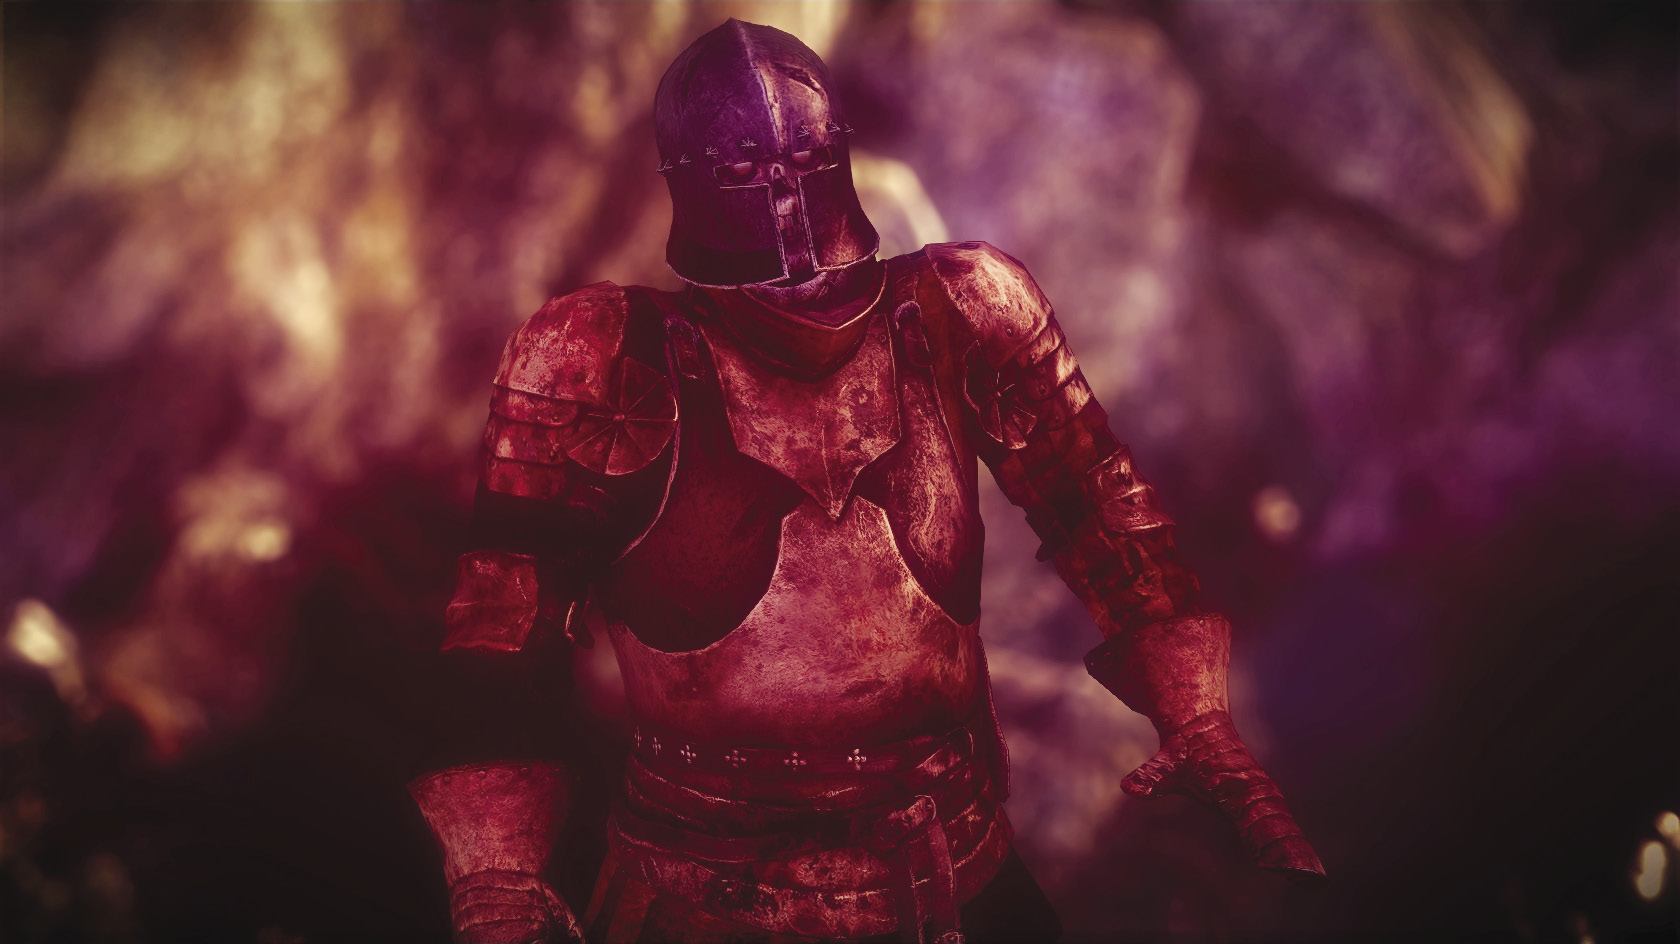
These creatures appear only in Chapter 2, inhabiting the cursed battlefield that lies between Vergen and the Kaedweni Camp. Knight wraiths are soldiers caught up in the blood curse of Sabrina Glevissig, forced to repeat the events of the Battle of Brenna forever until the curse is broken. Knight wraiths fight like the soldiers and knights they once were and have a basically humanoid form. They are more resistant to knockdown than ordinary wraiths and bruxae but otherwise share all of the same characteristics and drops.
Knight wraiths can be fought exactly as you’d fight a sword-wielding human opponent. Individual knight wraiths are not dangerous, but they can spawn infinitely on the cursed battlefield and it’s difficult to kill them more quickly than they spawn. When you leave the cursed battlefield on Iorveth’s route in Chapter 2, knight wraiths and regular wraiths pour out behind you. It’s best to fight them with the help of the Scoia’tael troop that camps nearby.
Harpies
| Harpy | |
|---|---|
| Resistances | None |
| Vulnerabilities | Poison |
| Bleeding | |
| Incineration | |
| Knockdown | |
| Stun | |
| Alchemy Drops | Harpy Egg |
| Harpy Eyes | |
| Harpy Feathers | |
| Harpy Saliva | |
| Other Drops | Harpy Claws |
| Cloth | |
| Robust Cloth | |
| Twine | |
| Leather | |
| Hardened Leather | |
| Orens | |
| Harpy Trophy | |
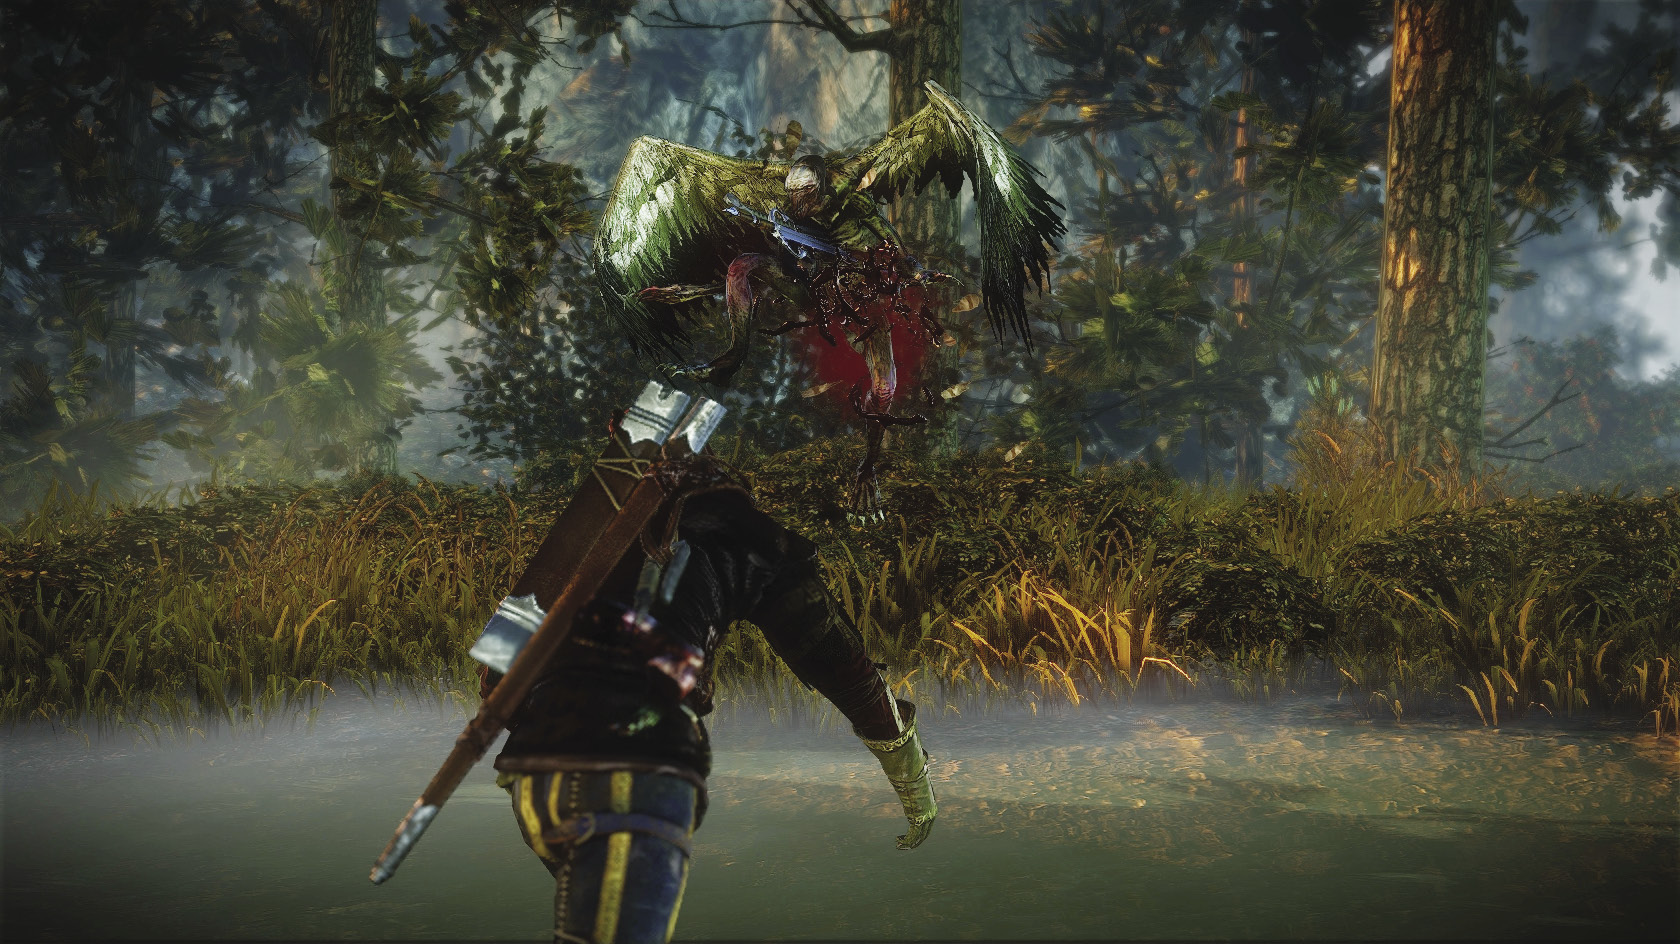
Harpies are humanoid bird-monsters famed for their thieving ways. They build nests in mountainous regions and then swoop down on human settlements below, stealing farm animals and shiny objects. Harpies live and hunt in enormous packs, led by more elite members of the species that are larger and stronger than the common harpy. The strongest forms of harpy are said to be intelligent and to possess a certain measure of magical power. Each harpy colony is ruled by a queen, the strongest and smartest member of the race.
Harpies are first encountered in Chapter 2. On Iorveth’s route you can find them thronging the area around the Old Quarry, which is the entrance to a remote area called the harpy lair. These harpies are the subject of the quests The Harpy Contract and The Queen Harpy Contract. You can also find harpies in the forests north of Vergen. On Roche’s route, you encounter a group of rapidly spawning harpies just outside the Visionary’s hut. In Chapter 3, you can encounter harpies in an area north of the town square in Loc Muinne.
Harpies are fliers, much like wraiths, but they are still vulnerable to traps. They tend to use hit-and-run tactics, landing a combo and then retreating slightly. They are best fought using light attacks and are extremely vulnerable to Aard, which knocks them down and leaves them helpless for a few moments. Their feathered bodies are also extremely vulnerable to incineration, making Igni and dancing stars useful when battling groups of them. Often it is best to dispatch ordinary harpies with light attacks, then use your signs and other witcher’s tricks against more elite members of the species. You can read the book Harpies—Daughters of the Gale to gain knowledge of harpies.
The kleptomaniacal nature of the harpy means that it tends to drop a great deal of loot upon death, including a variety of crafting materials and orens. There are five unique materials that only members of the harpy species can drop. Harpy eggs are a relatively rare drop and you should probably keep whatever you get. A harpy egg is required for the quest An Encrypted Manuscript. Most Geralt builds can simply sell off harpy eyes, but alchemist builds may want to keep them. Harpy eyes contain aether, an alchemical substance required in many different bombs and potions but relatively difficult to obtain.
Harpy feathers are perhaps the harpy’s most ubiquitous and valuable drop. They can be sold for 9 orens apiece, making them very useful for generating large amounts of cash quickly. In crafting, harpy feathers are only used to make the steel sword Caerme. In Dark mode, harpy feathers are needed to make the Oathbreaker’s trousers, the Kinslayer’s armor, and the Kinslayer’s gauntlets. You also need to amass a very large number of harpy feathers to complete the quest A Sackful of Fluff.
Harpy saliva can be sold off freely, as it has no role in crafting and contains only caelum, which is easily obtained. Harpy claws contain no alchemical substance and have no real role in crafting, so they can also be sold off freely.
|
The short story “A Grain of Truth” in the book The Last Wish contains a passing reference to harpies: “Something sitting in the crown of an enormous oak shrieked and hissed. It could have been a harpy, or an ordinary wildcat. The witcher didn’t stop to check.” |
Erynias
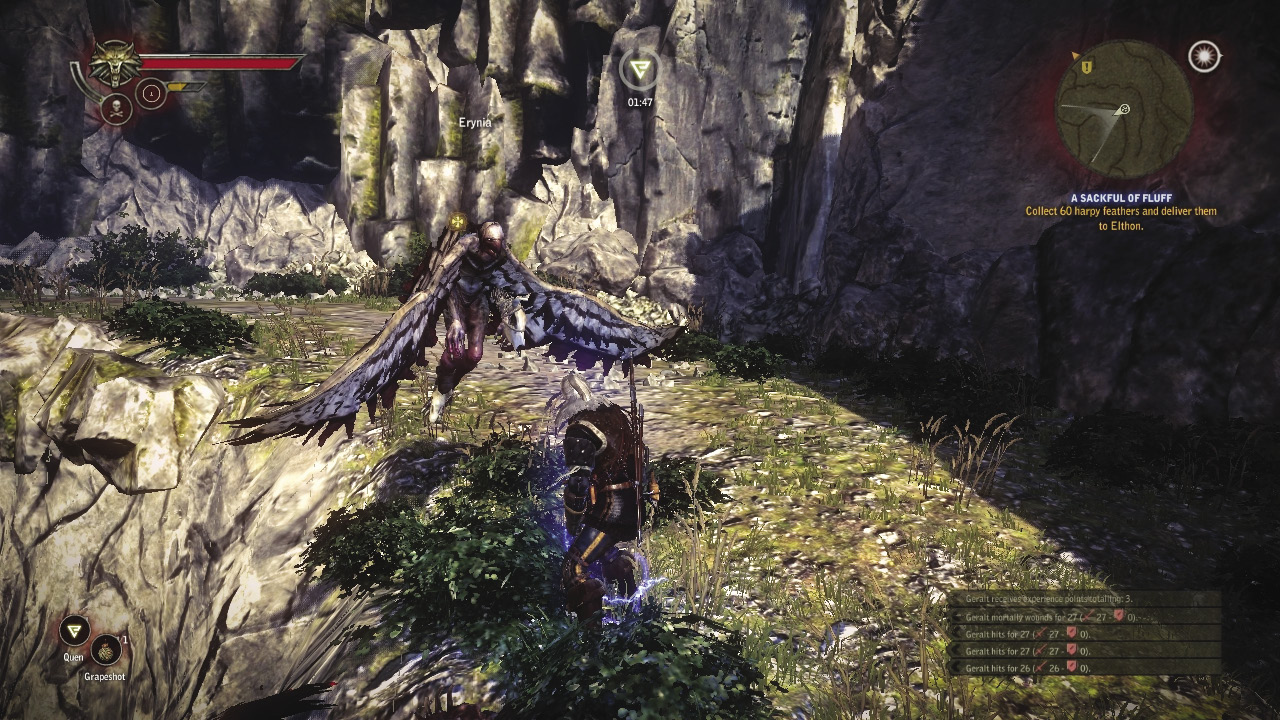
Erynias are larger and swifter than common harpies, with more vitality. They wear crude mirrorlike armor and bracers mounted with crystals. Usually you find an erynia or two acting as commander wherever you find a large group of harpies spawning.
Celaeno Harpies
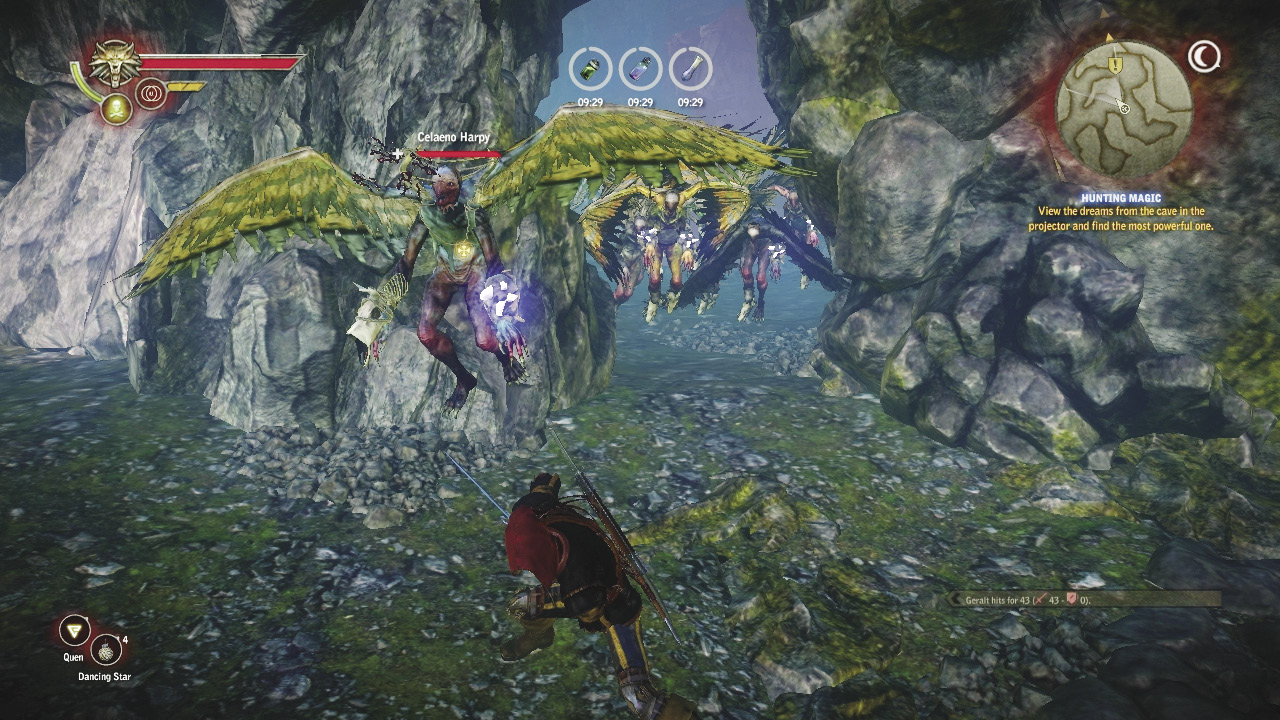
Celaeno harpies are the nobility of the harpy race. They are stronger, swifter, tougher, and, more importantly, more intelligent than the lower orders of harpy. Although not truly sentient, celaeno harpies are much cleverer than the lower members of their species. They take harpy kleptomania to a new level by stealing dreams from members of other races. They encase the dreams in magic crystals. Anyone who holds the crystal can experience the feelings of the dream or view it by inserting it into a special projector. Mages find the power encased on the dream crystals useful in their work and sometimes breed harpies because of that.
Celaeno harpies can only be encountered in Chapter 2, primarily on Iorveth’s route. You can fight a great number of them both at the harpy nest north of Vergen, at the Old Quarry, and within the harpy lair. Eight celaeno harpies act as the retinue of the harpy queen. Celaeno harpies are substantially more difficult to fight than erynias or standard harpies, due to having a much higher vitality than lesser members of their race. They also hit extremely hard, which makes even a small group of them a serious threat.
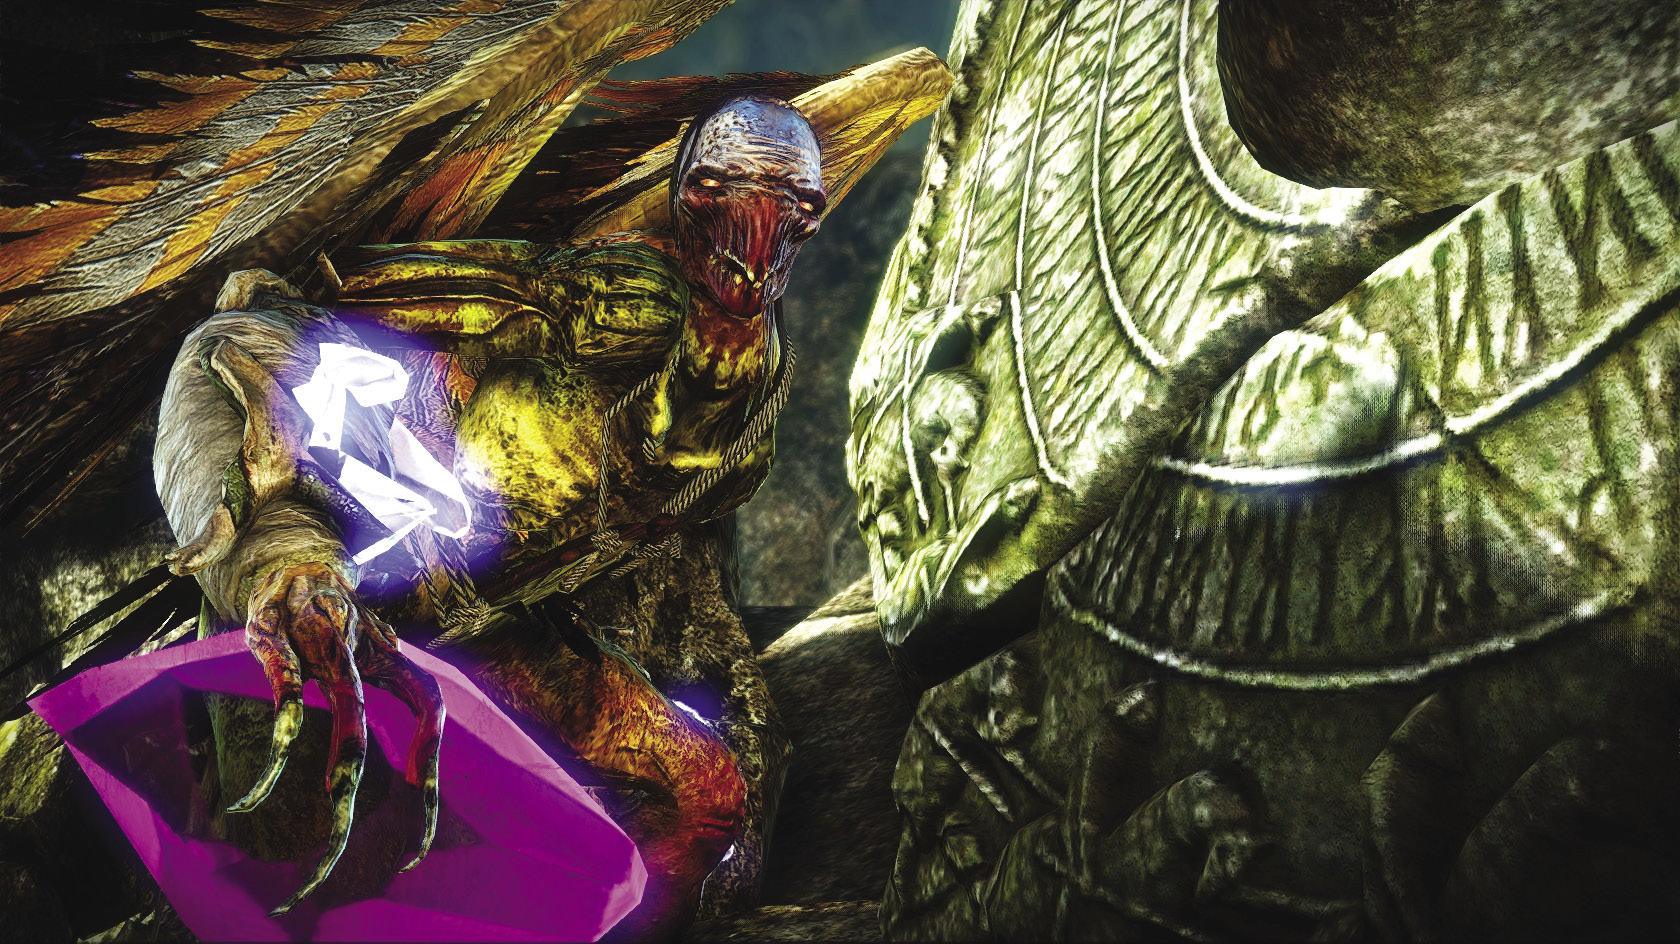
Harpy Queen
| Harpy Queen | |
|---|---|
| Resistances | None |
| Vulnerabilities | Poison |
| Bleeding | |
| Incineration | |
| Knockdown | |
| Stun | |
| Alchemy Drops | Harpy Egg |
| Harpy Eyes | |
| Harpy Feathers | |
| Harpy Saliva | |
| Other Drops | Harpy Claws |
| Cloth | |
| Robust Cloth | |
| Twine | |
| Leather | |
| Hardened Leather | |
| Orens | |
| Harpy Trophy | |
| Harpy (Sword) | |
The harpy queen rules the harpy colony near Vergen from within the confines of the harpy lair. She can only be encountered on Iorveth’s route, as part of the Hunting Magic main quest and The Harpy Queen side quest. While she is by far the strongest and toughest form of harpy, what makes her dangerous is that she only appears alongside her huge retinue of celaeno harpies. Upon defeat, she drops the silver sword Harpy.
Arachasae
| Arachas | |
|---|---|
| Resistances | Poison |
| Bleeding | |
| Incineration | |
| Knockdown | |
| Stun | |
| Vulnerabilities | None |
| Alchemy Drops | Arachas Eyes |
| Arachas Armor | |
| Amethyst Dust | |
| Diamond Dust | |
| Other Drops | Arachas Trophy |
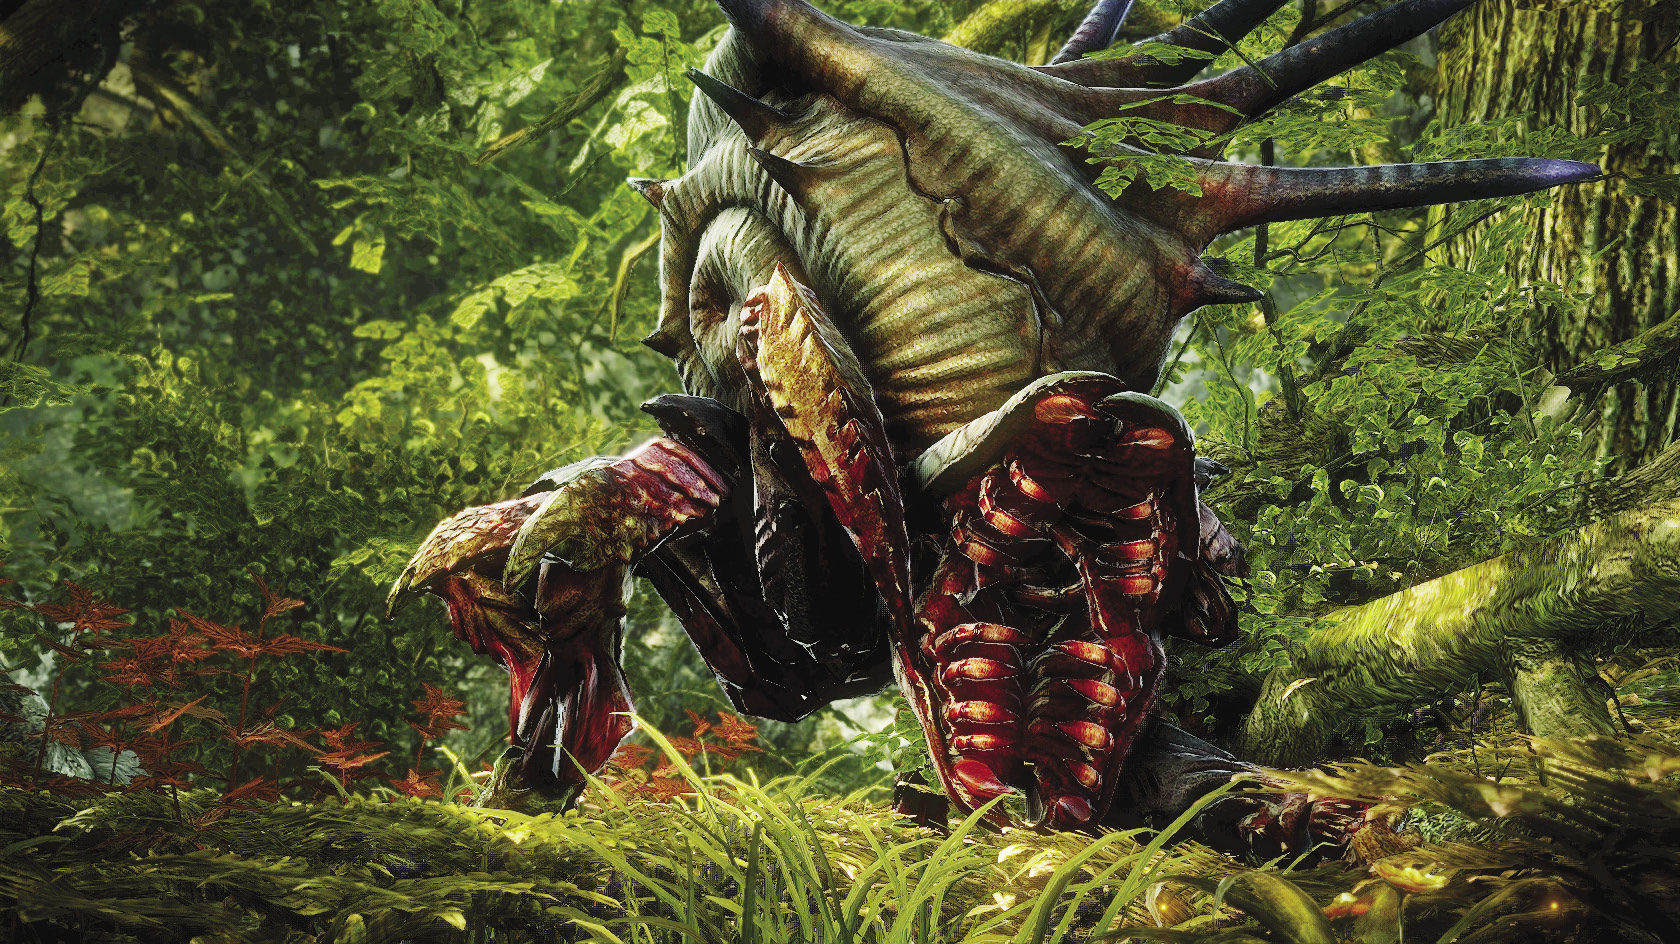
The arachas is one of the first enemies in the game that occurs alone rather than in packs. It’s a huge creature, similar in shape and size to the endrega queen. The arachas favors a similar fighting style, too. The arachas is heavily armored and frequently blocks attacks made to its front, then charges forward to batter its attacker back. The arachas hits extremely hard due to its enormous size. Arachasae occur largely alone and tend to prefer temperate forest environments. They sometimes dwell in caves or rocky basins.
You battle an arachas in Chapter 1 as part of the main quest The Assassins of Kings. In Chapter 2, you can encounter one hidden in a ravine outside the gates of the Kaedweni Camp and another one north of the Visionary’s hut, near the shrine to Sabrina Glevissig. In Chapter 3 on Iorveth’s route, there’s one in the secret tunnel beneath Loc Muinne.
Arachasae block attacks from the front, so roll around to the back and sides to damage one more easily. This shouldn’t be too difficult, as arachasae are slow enemies when they aren’t charging. You can afford to use strong attacks against them, so long as you’re at the creature’s back or sides. The arachas has no particular vulnerability and must be overcome with pure damage. Extraordinary measures like freezing and instant kills are also effective, though perhaps overkill. You can increase your damage output when battling an arachas by oiling your silver sword with insectoid oil.
Arachasae drop two unique materials. Arachas eyes are required for the quest Melitele’s Heart in Chapter 1 and otherwise contain fulgur, which makes them useful for making high-end potions. Arachas armor is used in crafting the armor Dearg Ruadhri and the ceremonial steel sword of Deithwen. It contains quebrith, but this substance is easily obtained in other ways.
Bullvore
| Bullvore | |
|---|---|
| Resistances | Poison |
| Bleeding | |
| Knockdown | |
| Vulnerabilities | Incineration |
| Stun | |
| Alchemy Drops | Bullvore Brain |
| Necrophage Blood | |
| Necrophage Eyes | |
| Necrophage Skin | |
| Necrophage Teeth | |
| Other Drops | Cloth |
| Twine | |
| Bullvore Trophy | |
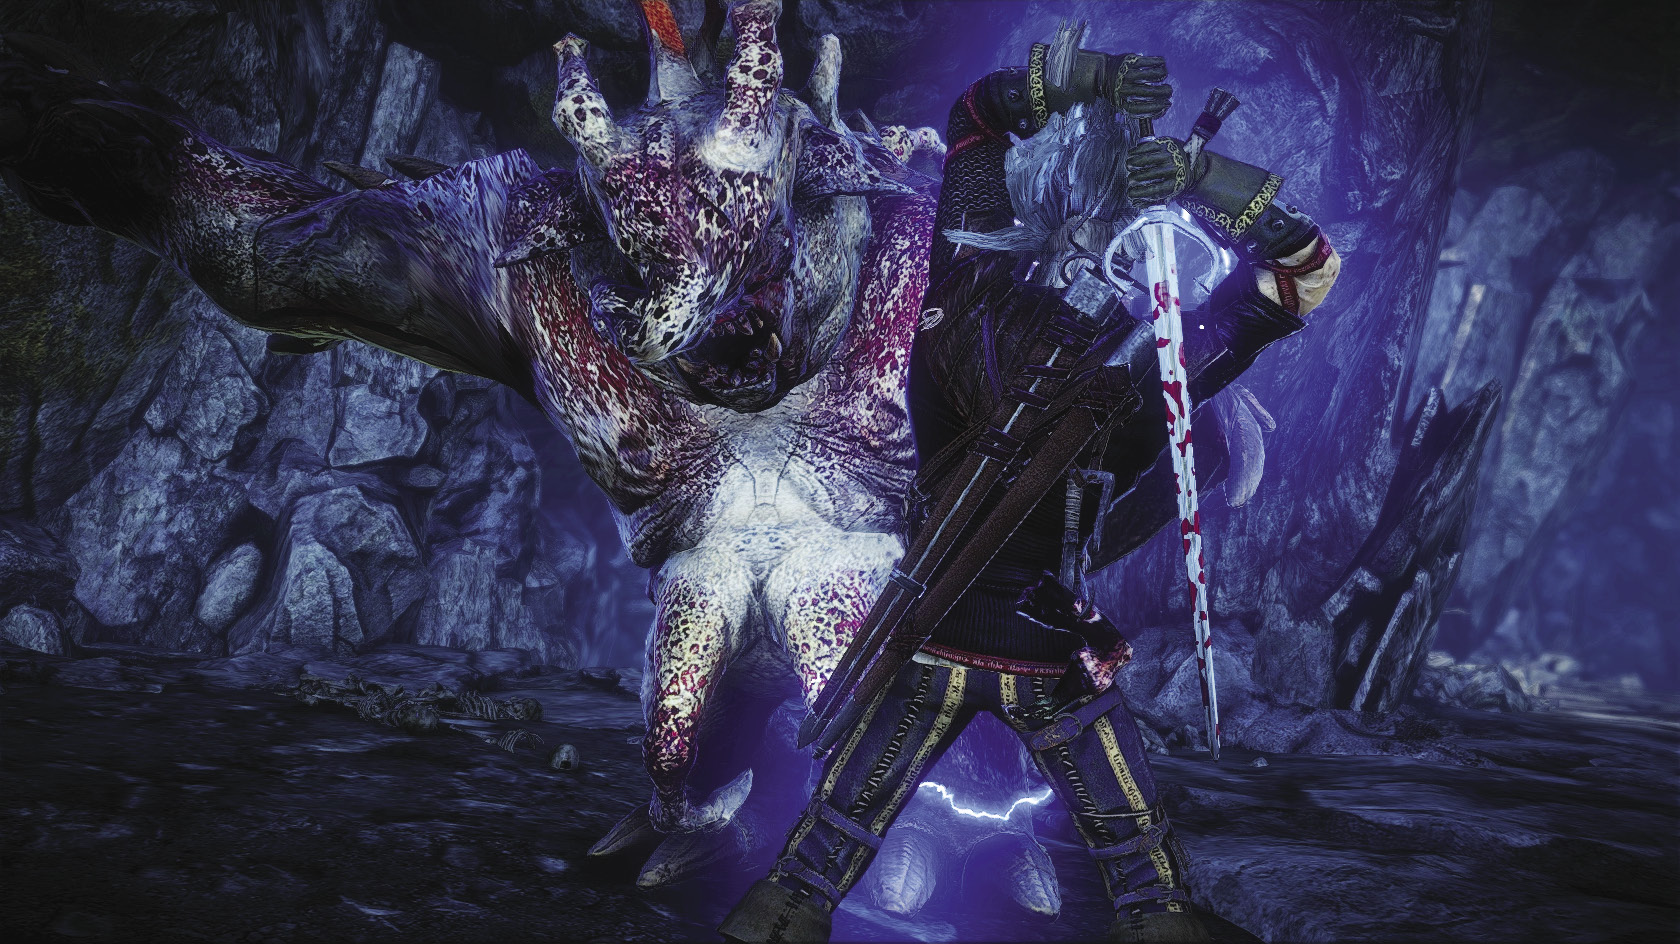
The bullvore is an enormous specimen of necrophage, related to the rotfiend but exponentially more dangerous. It draws its name from its bull-like head, which is stuffed with sharp, flesh-rending teeth. Most bullvores dwell among lesser creatures like nekkers and rotfiends, rather than other members of their own species. The bullvore’s steps shake the ground around it. Its charging attack is devastating, and it can attack from a distance with a deadly poison spray.
You begin encountering bullvores in Chapter 2. Bullvores infest the abandoned mine shafts around Vergen, and there’s one in the camp cave beneath the Kaedweni Camp. You also fight what is basically a bullvore during the course of the Little Sisters quest on Roche’s route, if you make certain decisions. In Chapter 3, you can fight a pair of bullvores in the sewers beneath Loc Muinne.
As with most very large creatures, the bullvore’s main weakness is its own slow speed. You can attack it with strong blows with impunity if you get to the creature’s back or sides. You can even attack it head on, and the bullvore only occasionally blocks. Be sure to quickly dodge-roll away when it does begin to block, as that usually means it’s soon going to charge. Since the bullvore is a necrophage, it takes extra damage from necrophage oil. The creature is also vulnerable to being stunned and incinerated, so signs like Igni and Aard are quite useful in these fights.
The bullvore has only one unique drop, the bullvore brain. You need a bullvore brain to complete the quest An Encrypted Manuscript in Chapter 3. It also contains fulgur, which makes it useful in crafting high-end potions.
Trolls
| Troll | |
|---|---|
| Resistances | Bleeding |
| Knockdown | |
| Vulnerabilities | Poison |
| Incineration | |
| Stun | |
| Alchemy Drops | Troll Tongue |
| Troll Skin | |
| Other Drops | Cloth |
| Leather | |
| Twine | |
| Orens | |
| Troll Trophy | |
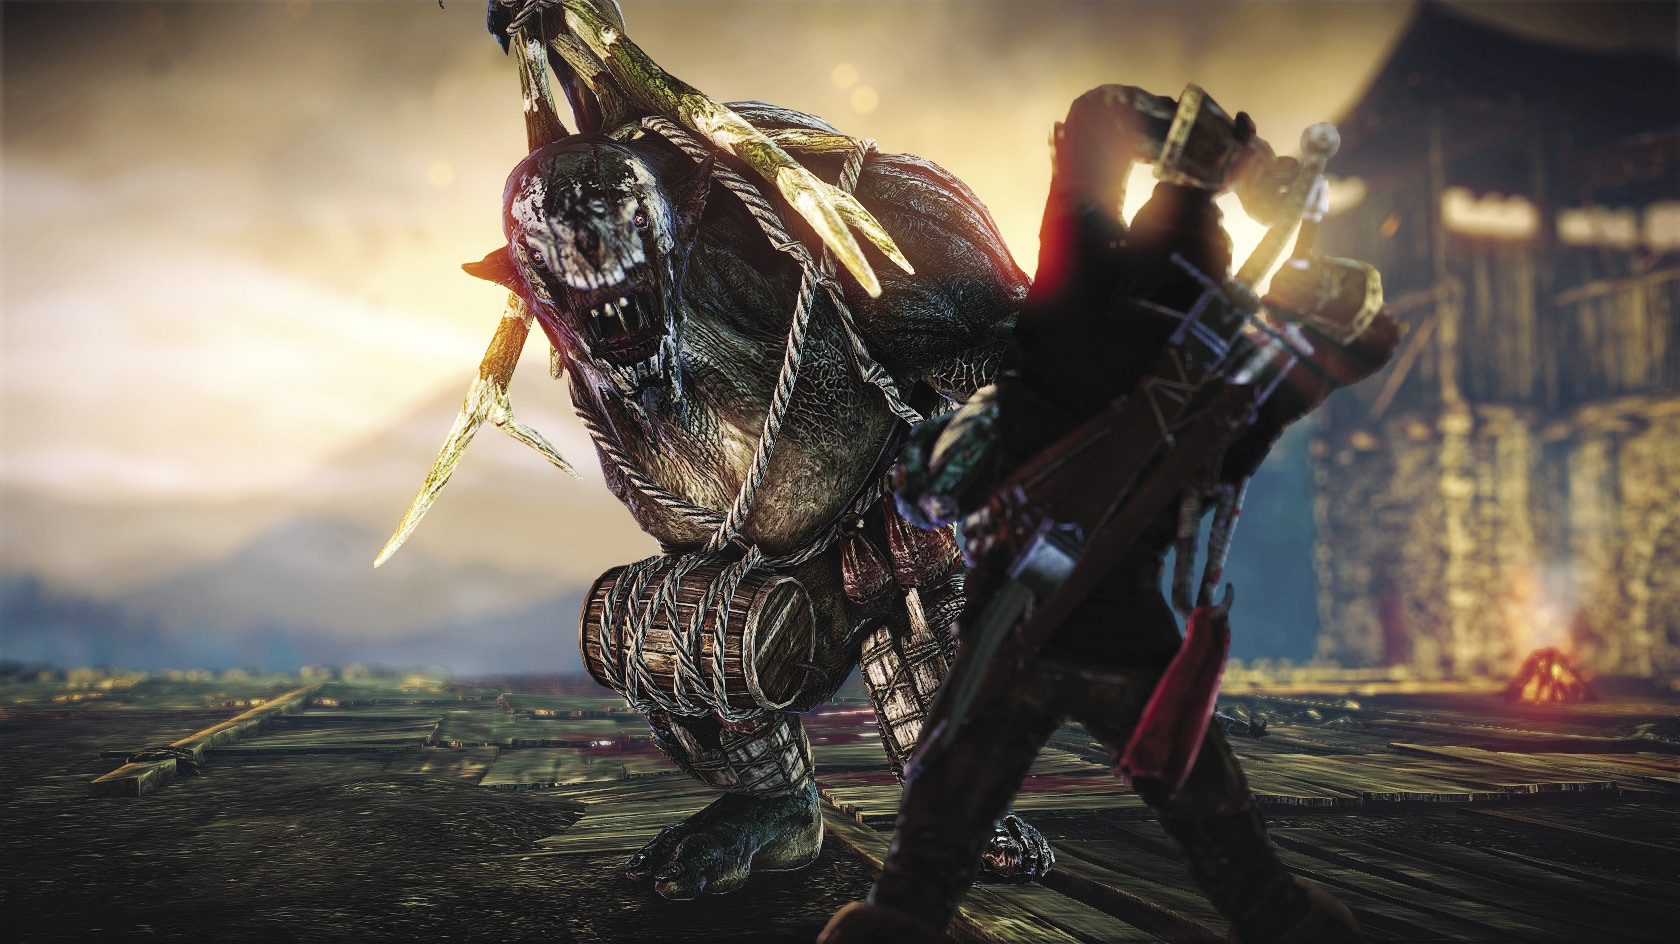
Trolls are enormous beasts, primitive yet clearly sapient. Trolls are enormously, unthinkably strong, but fortunately they are also slow, clumsy, and got out of the habit of eating humans centuries ago. Now trolls only attack humans who are trying to attack them, a rare but still regrettable sight. You can easily reason or bargain with a troll, in fact, if you can figure out what it’s saying in its slurred speech. Male trolls often put themselves to useful work building and maintaining bridges over rivers, in exchange for tolls from those who pass by. These tolls are spent mostly on vodka, as trolls are notorious drunks. She-trolls take care of their lairs, fight off predators, and prepare food. A troll deprived of his wife is a truly piteous sight, for a troll’s heart is far more sensitive than its thick hide.
You have several chances to interact with trolls in the game. In Chapter 1, you can slay or befriend a troll in Flotsam in the quest Troll Trouble. In Chapter 2, you inevitably cross paths with a pair of trolls that live outside Vergen. There’s another troll that can only be encountered on Roche’s path, rampaging near the edge of the cursed battlefield to the southeast. You can avoid this troll, but you cannot befriend it.
Trolls hurl enormous rocks at their opponents or throw their tremendous weight into a forceful charge. Fortunately, trolls are quite stupid, and may not notice you’re there at all if you get behind them. Strong attacks slowly but surely hack away at a troll’s robust store of vitality. Roll to evade the troll’s attacks, then do great damage by hitting it from behind. Bombs and daggers can damage a troll from a safe distance, provided the troll doesn’t figure out where you are. Trolls have few vulnerabilities, but they are one of the few monstrous species in the game that are vulnerable to poison. An application of arachnid oil to your silver sword can help put a troll down quickly.
You can harvest two unique materials from a troll’s carcass. Troll tongue is required to complete the quest Melitele’s Heart and in Dark mode to craft the Kinslayer’s trousers. While you can often buy troll tongues if you need to, their rarity means any troll tongue you obtain should be placed into storage for future use. Be careful not to accidentally use it in alchemy. Troll skin is a pure crafting material required to create the armor of Ys and magic wraps, so these diagrams become useless when you receive them in Chapter 3 if you’ve been exclusively befriending trolls.
|
While trolls do not appear in either of the original Witcher novels available in English, there is a passage in the short story “The Voice of Reason” from the collection The Last Wish that describes them in passing: “One day I ride up and what do I see? A bridge. And under that bridge sits a troll and demands every passerby pay him. Those who refuse have a leg injured, sometimes both. So I go to the alderman: ‘How much will you give me for that troll?’ He’s amazed. ‘What are you talking about?’ he asks. ‘Who will repair the bridge if the troll’s not there? He repairs it regularly with the sweat of his brow, solid work, first rate. It’s cheaper to pay his toll.’” |
Elementals
| Elemental | |
|---|---|
| Resistances | Bleeding |
| Poison | |
| Incineration | |
| Knockdown | |
| Vulnerabilities | Stun |
| Alchemy Drops | Elemental Stone |
| Amethyst Dust | |
| Diamond Dust | |
| Other Drops | Red Meteorite Ore |
| Yellow Meteorite Ore | |
| Blue Meteorite Ore | |
| Elemental Trophy | |
These creatures are often called golems, though this is technically a misnomer. A true golem was created by a sorcerer and given life through its name-word. It is intelligent, but in an artificial and limited sort of way. The elemental has a similar appearance but is otherwise a very different sort of creature. Elementals are beings summoned from the elemental planes and bound into the service of a mage. The greater beings of the upper planes are far beyond the ability of most mages to control, so any elemental you encounter is likely a younger and weaker spirit. That does not mean you should take them lightly. Even the weakest beings of the elemental planes can snuff out a mortal’s life with but a single blow. You should prepare carefully and use cautious tactics when battling them.
Try to get behind or beside an elemental before you begin attacking it. Before battle with an elemental, always drink potions to increase your defenses and oil your blades with Falka’s blood to increase your damage. Elementals are quite speedy for their size, so sometimes you have no choice but to attack one head on. In that case, hit it with strong blows until it blocks, then quickly dodge-roll out of the way. After blocking, the elemental counterattacks, usually with a charging attack or a powerful blow that almost always knocks you down. If you make a mistake in battle with an elemental, you can be dead before you know it. Note that although the two types of elemental have very different appearances, they share resistances and drops.
Earth Elemental
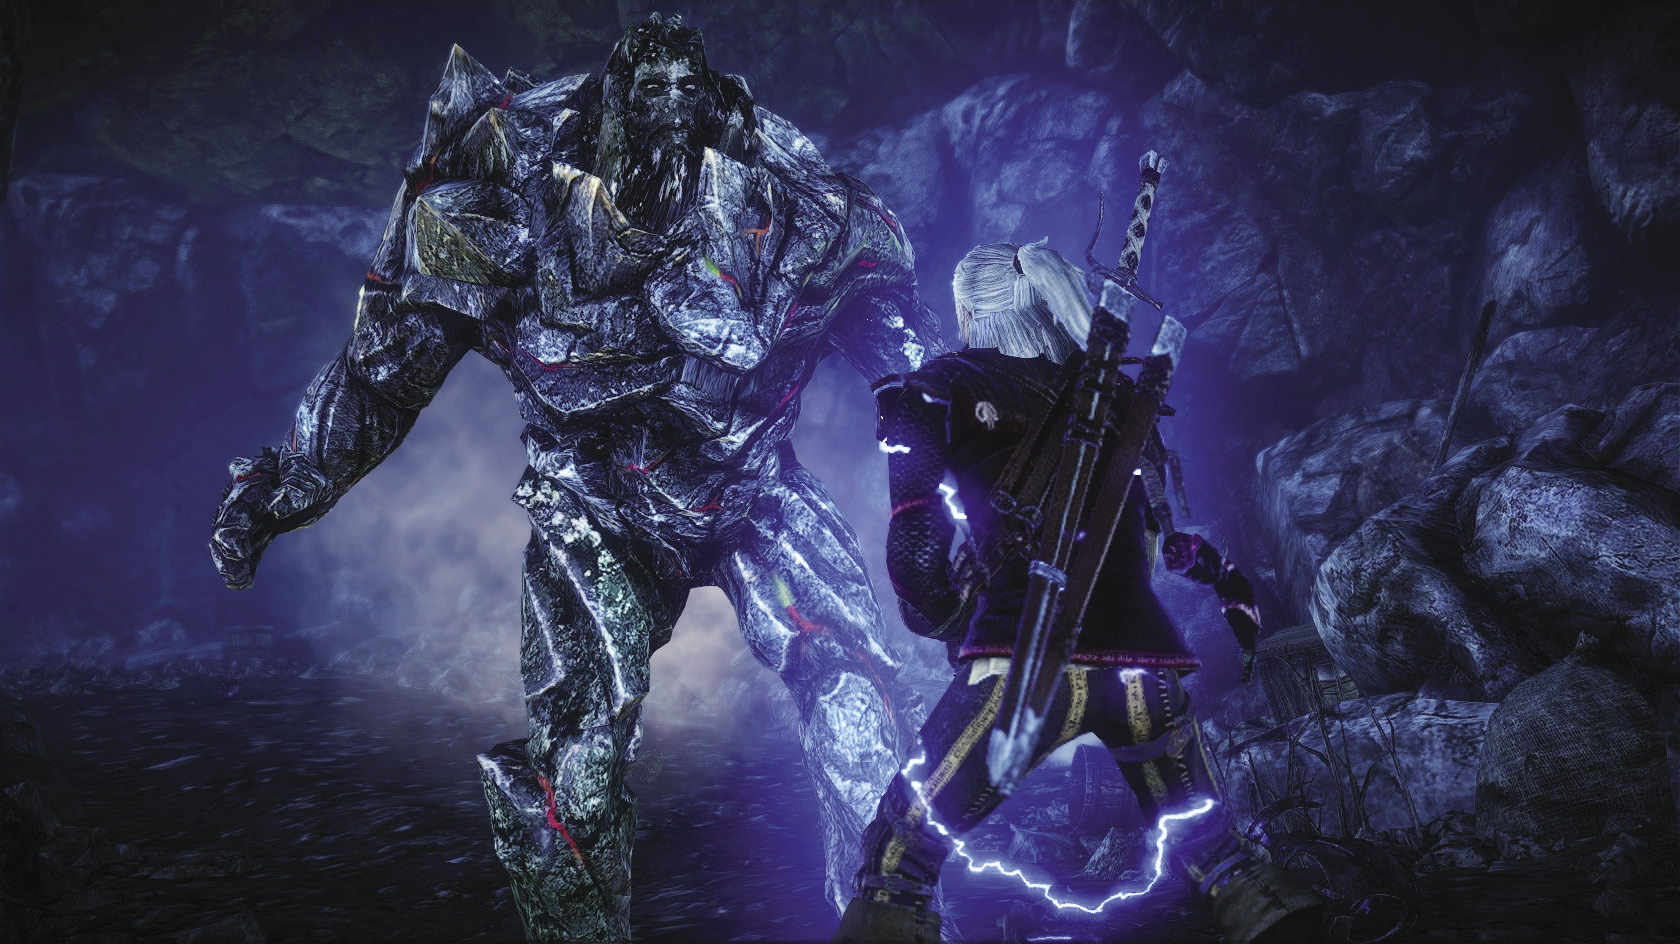
Earth elementals resemble living boulders. They are used by mages primarily as sentinels, to destroy any intruder that attempts to get into a forbidden area (usually, somewhere a mage is storing something interesting). An elemental happily slays any being its master has not ordered it to spare, which makes them brutally efficient watchdogs. You encounter earth elementals only in Chapter 2. On Roche’s route, one patrols the kingslayers’ hideout. Another guards the armor of Ban Ard in the cave beneath the Kaedweni Camp. The earth elemental is the weaker of the two types of elemental in the game. Read the book Beings of the Element of Earth to gain knowledge of earth elementals.
Fire Elemental
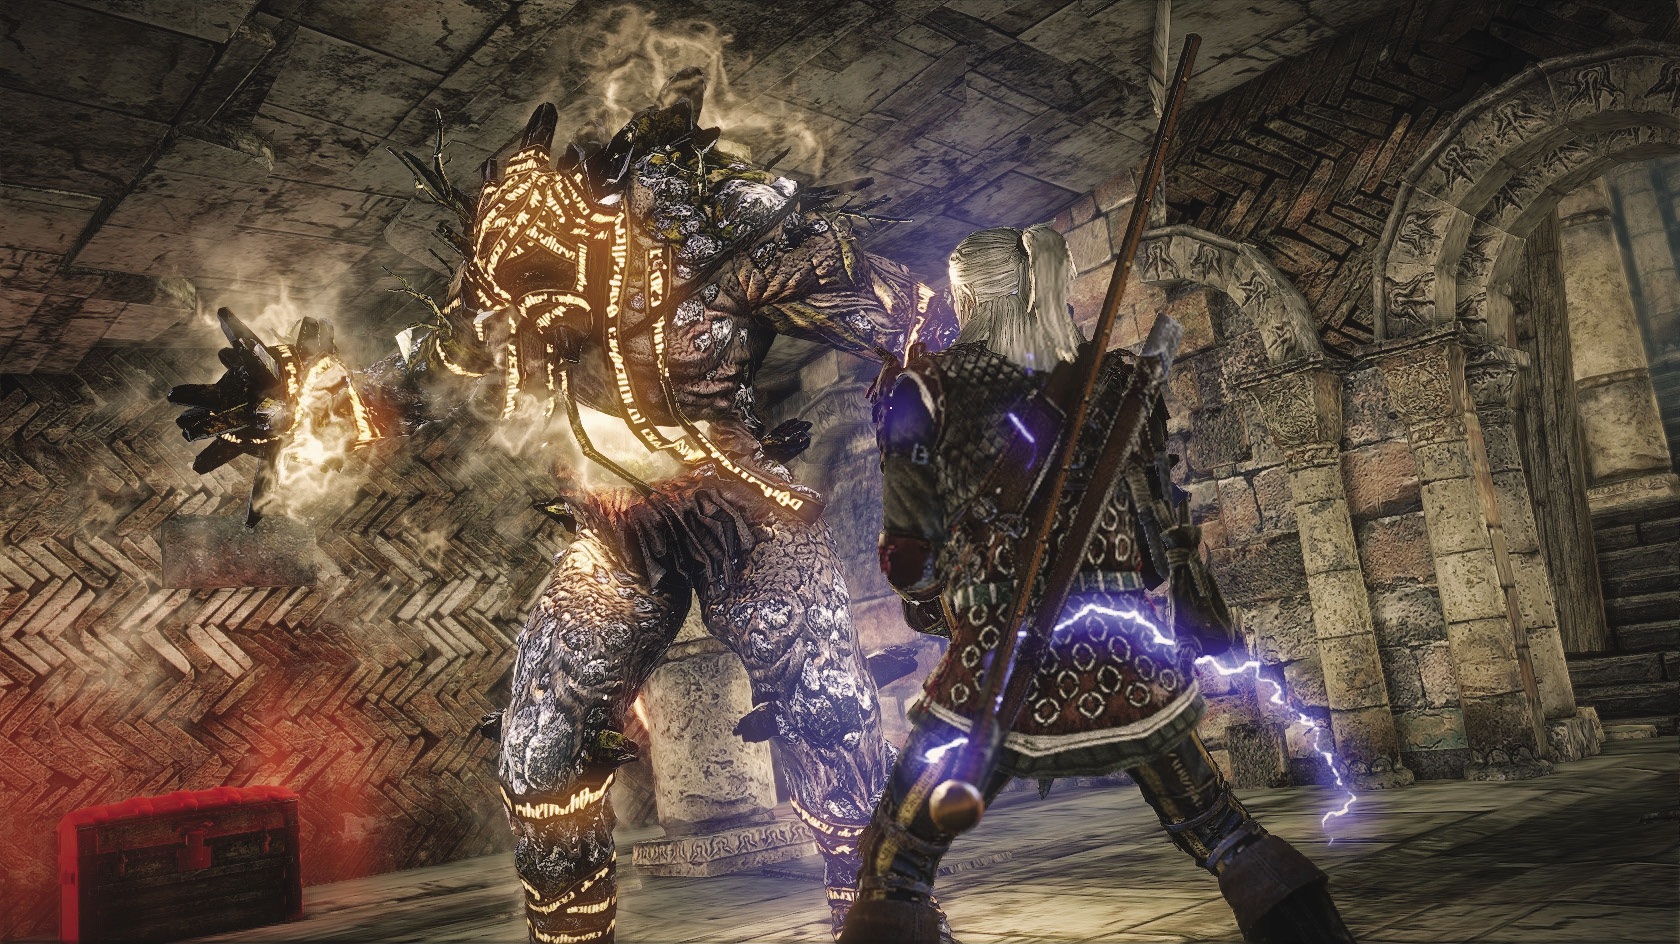
Fire elementals share something of the stony appearance of earth elementals, but their bodies constantly glow and crackle with an aura of intense heat. Where earth elementals are stubborn servants at best, fire elementals are far more powerful and obedient to the mage that summons them. Since their behavior can be completely controlled by magic, fire elementals are often used as a mage’s trump card. In war a mage can send a fire elemental out to scour the enemy, while a mage with treasures to protect can bind a fire elemental into magical locks to annihilate would-be thieves. You can encounter a fire elemental at the end of Chapter 2 on Roche’s route, during the quest The Siege of Vergen. In Chapter 3 on Iorveth’s route, you can encounter a fire elemental while resolving the quest The Spellbreaker. On both routes, you must battle a fire elemental in the course of finishing the quest The Gargoyle Contract. Read the book Beings of the Element of Fire to gain knowledge of fire elementals.
True Golem
| True Golem | |
|---|---|
| Resistances | Bleeding |
| Poison | |
| Incineration | |
| Knockdown | |
| Vulnerabilities | Stun |
| Alchemy Drops | Elemental Stone |
| Amethyst Dust | |
| Diamond Dust | |
| Other Drops | Red Meteorite Ore |
| Yellow Meteorite Ore | |
| Blue Meteorite Ore | |
| Golem Trophy | |
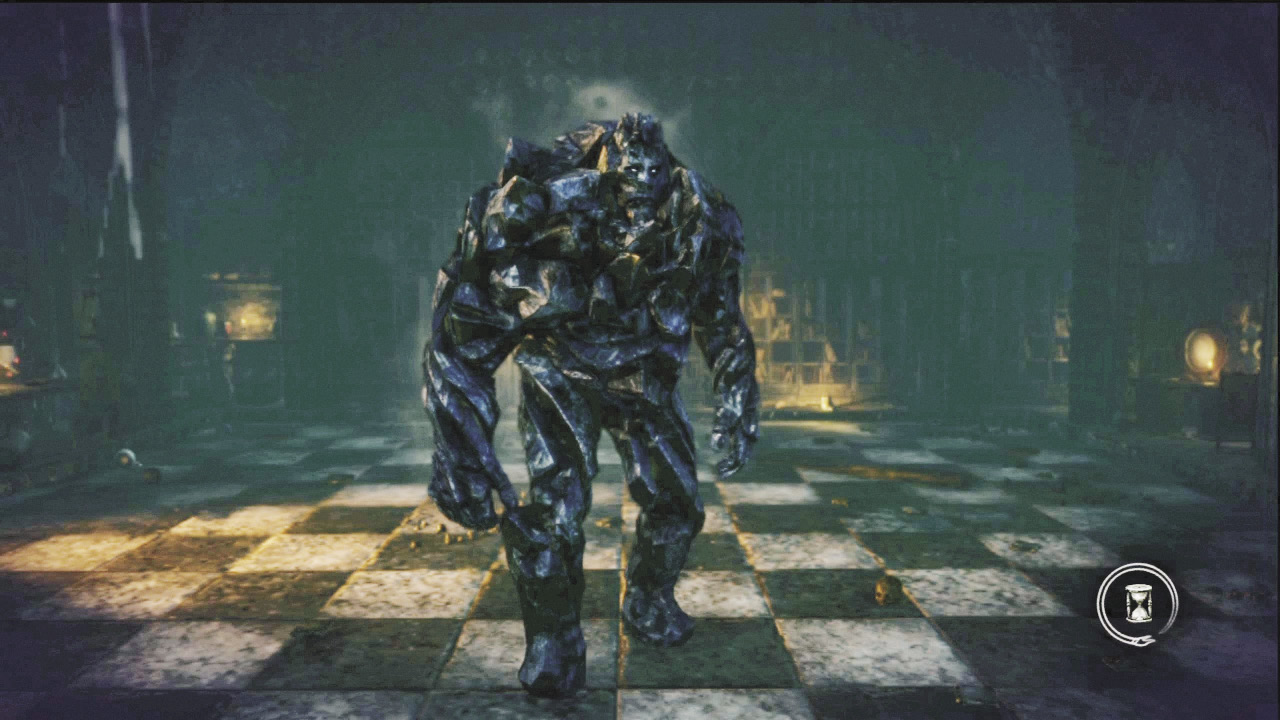
At first glance, a true golem can be easily confused with an earth elemental. It has a similar stony body, though the golem is often larger and has even greater strength. The golem is a purely synthetic being, crafted by a mage and animated through use of a secret name-word that only the mage knows. With the name-word, a golem can be deactivated. A wise mage will not divulge the name-word of his creation, and few golems are made intelligent enough to possess the power of speech at all. Crafting golems is a laborious, time-consuming practice that few modern mages can bring themseles to practice. It is far simpler to just summon an elemental, which led to the habit of calling such creatures golems.
You can encounter only one true golem in the game, during Chapter 3 on Iorveth’s route while resolving the side quest The Secrets of Loc Muinne. This golem is the guardian of Dearhenna’s study, so cunningly programmed that it can hold a perfectly intelligent conversation. The golem follows Dearhenna’s program unswervingly, though, merely conversing with guests. It will not allow anyone into Dearhenna’s study, and anyone trying hard to enter it is judged an intruder and destroyed with prejudice. This golem can summon two copies of itself to help eliminate intruders and attacks by swinging its great arms down at its assailants. It generally does not charge, instead fighting cautiously.
A true golem can generally be fought the same way you’d battle an earth or fire elemental—by using strong blows. You cannot use potions to prepare for a battle with it, if you end up fighting it, but oiling your blade with Falka’s blood can help a little. Hitting it from behind helps you get past its potent defenses. A true golem’s drops are similar to an elemental’s drops, but the true golem is the only monster in the game that drops the potent golem trophy.
Gargoyles
| Gargoyle | |
|---|---|
| Resistances | Bleeding |
| Poison | |
| Incineration | |
| Knockdown | |
| Stun | |
| Vulnerabilities | None |
| Alchemy Drops | Gargoyle Dust |
| Gargoyle Heart | |
| Amethyst Dust | |
| Diamond Dust | |
| Elemental Stone | |
| Other Drops | Gargoyle Trophy |
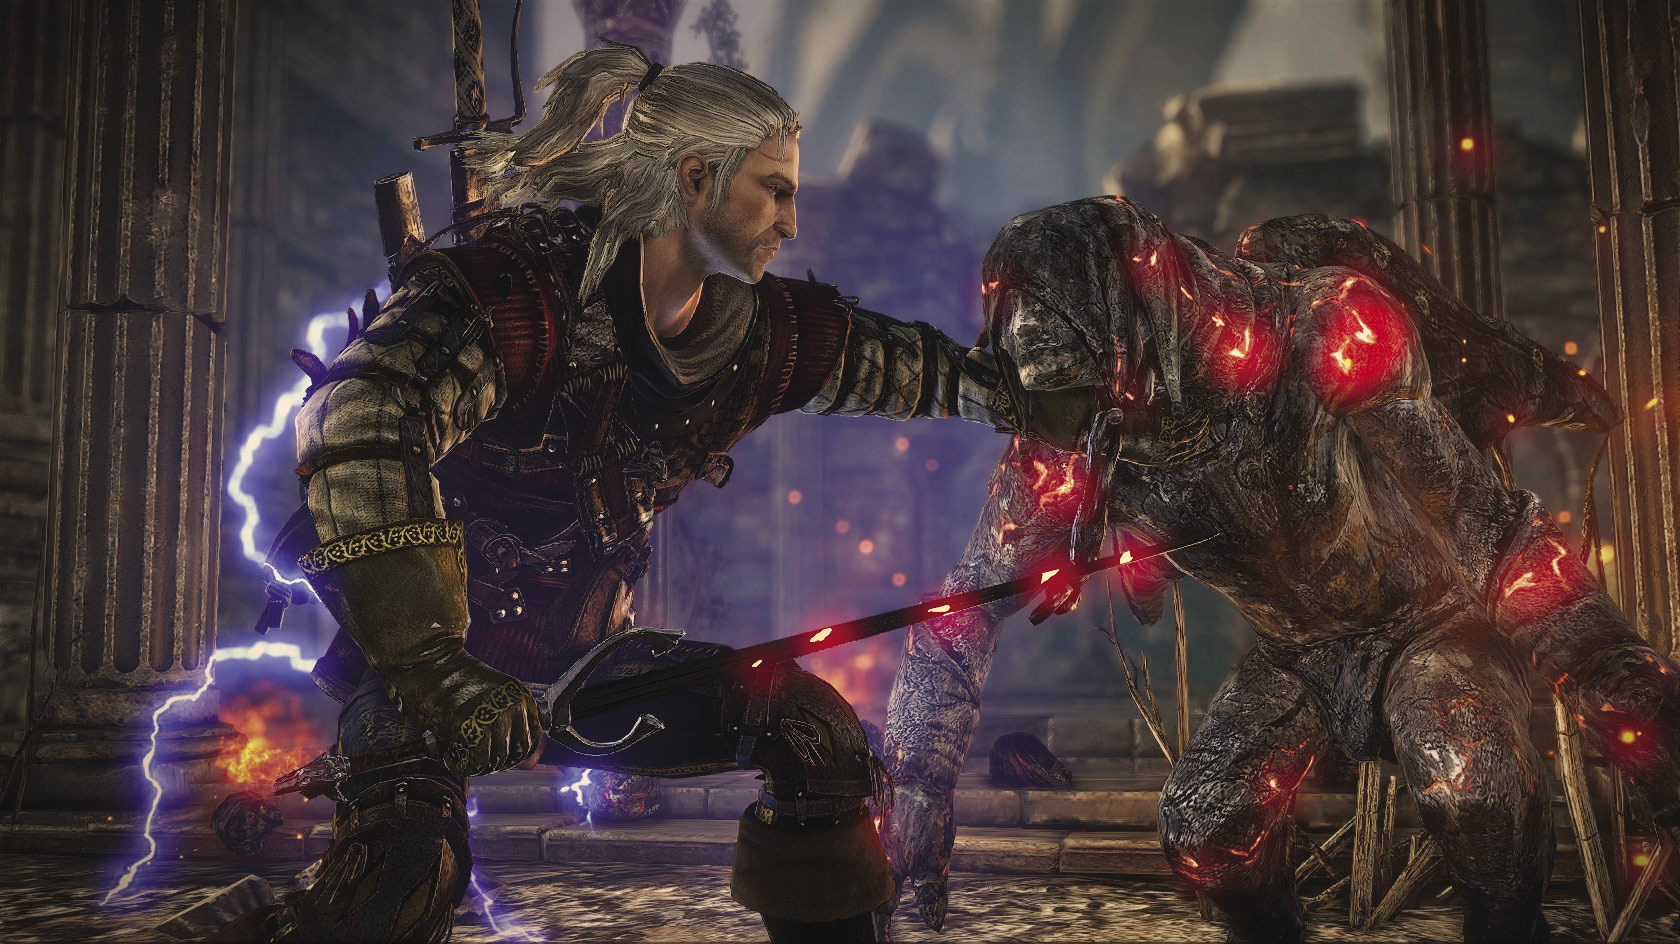
The gargoyle was a sort of cheap, mass-produced golem. A mage still had to go to the effort of breathing life into a chunk of carved stone to make one, of course, but the enchantments to give it life were simpler and required only runes to keep them going. Most of the gargoyles created in the old days of high magic are now no more than statues, but the ones in Loc Muinne have long outlived their original masters. These gargoyles still guard their territories fiercely, though, and slowly regenerate even after they’ve apparently been destroyed.
You can encounter a pair of lone gargoyles in Chapter 2 on Roche’s route, patrolling the kingslayers’ hideout. In Chapter 3, gargoyles must be battled in the course of completing The Gargoyle Contract. You also encounter them patrolling Philippa Eilhart’s house on Iorveth’s route, while completing the main quest The Spellbreaker. If you choose to fight the Operator as part of the quest From a Bygone Era, you must contend with pairs of super-strong gargoyles that he summons periodically throughout the battle.
Gargoyles are the strongest of the enemies that attack in packs. They hit as hard (or harder) than many creatures twice their size, but are perhaps the most agile enemies in the game. Gargoyles have no true weaknesses and are highly resistant to damage. Despite their speed, strong attacks are best used against them so you can defeat them in fewer blows. Even when you bludgeon away a gargoyle’s vitality, it still finds a way to attack you in death. Much like rotfiends, gargoyles explode when their vitality reaches zero. This explosion comes with less warning, does more damage, and inflicts incineration and knockdown if you’re caught in it. You can read the book Gargoyles, Gutters, Splutters—Maintenance and Repair to gain knowledge of gargoyles.
Gargoyles have two unique drops of note. Gargoyle dust in a standard game can be sold off, since it has no use in crafting and contains only vermilion, a common alchemical substance. In a Dark mode game, gargoyle dust is needed to craft the Kinslayer’s boots, Kinslayer’s gauntlets, and the steel sword Mourner. Gargoyle hearts can be used to craft elemental stones, but you usually have a steady supply of them by the time you begin fighting gargoyles regularly in Chapter 3. It can be more lucrative to simply sell them off.
Werewolves
| Werewolf | |
|---|---|
| Resistances | Bleeding |
| Poison | |
| Incineration | |
| Knockdown | |
| Stun | |
| Vulnerabilities | None |
| Alchemy Drops | None |
| Other Drops | Werewolf Trophy |
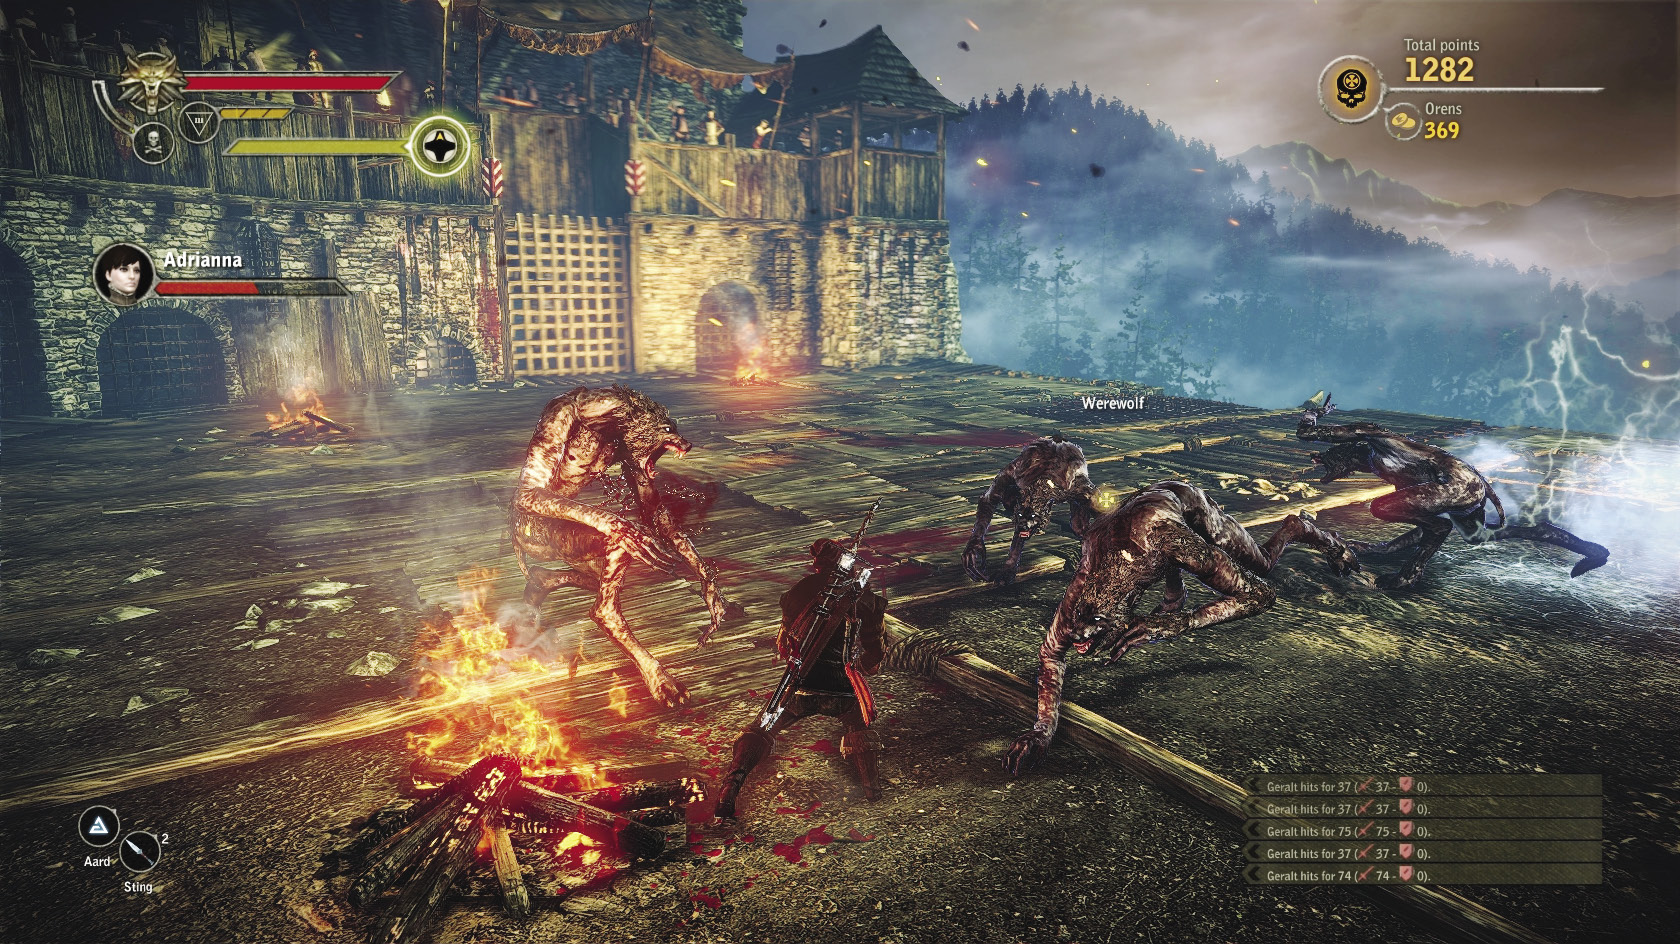
A werewolf is a once-ordinary man who suffers from the curse of lycanthropy. As a werewolf, he gains preternaturally sharp senses, incredible strength, and astounding vitality. Other men come to regard him as a monster and hunt the werewolf relentlessly, if he’s not lucky enough to find some remote retreat where he can simply scare others away. It is possible to break the curse of lycanthropy, but so difficult that there are few records of attempts ever succeeding. More often than not, the werewolf meets his doom at the end of a witcher’s silver sword.
You primarily encounter werewolves as a special opponent in the game’s Arena mode. In the main game, there is only a single werewolf. In Chapter 3, on Roche’s route, there is a cave infested by nekker warriors that you can investigate while escorting Brigida Papebrock to the riverbanks. If you visit the cave at night, you can find the werewolf lurking in one of the cave’s most remote recesses.
As an attacker, the werewolf is very similar to the gargoyle. He has similar speed and can hit an opponent with repeated, powerful blows. The werewolf has, if anything, greater vitality than the werewolf. It takes strong equipment and high stats to put a werewolf down quickly or to resist its attacks. The werewolf has no real vulnerabilities to exploit otherwise. Use strong attacks against it to try to reduce its vitality quickly, or use light attacks to try to keep it perpetually stunned by your blows.
Werewolves do not drop any materials that can be used in alchemy or crafting. Their only drop is the werewolf trophy.
|
One of the most famous stories in the collection The Last Wish is “A Grain of Truth,” which tells the tale of a werewolf named Nivellen. |
Draugirs
| Draugir | |
|---|---|
| Resistances | Bleeding |
| Poison | |
| Knockdown | |
| Vulnerabilities | Incineration |
| Stun | |
| Alchemy Drops | Draugir Claws |
| Essence of Death | |
| Amethyst Dust | |
| Diamond Dust | |
| Other Drops | Draugir Armor Fragment |
| Red Meteorite Ore | |
| Yellow Meteorite Ore | |
| Blue Meteorite Ore | |
| Draugir Trophy | |
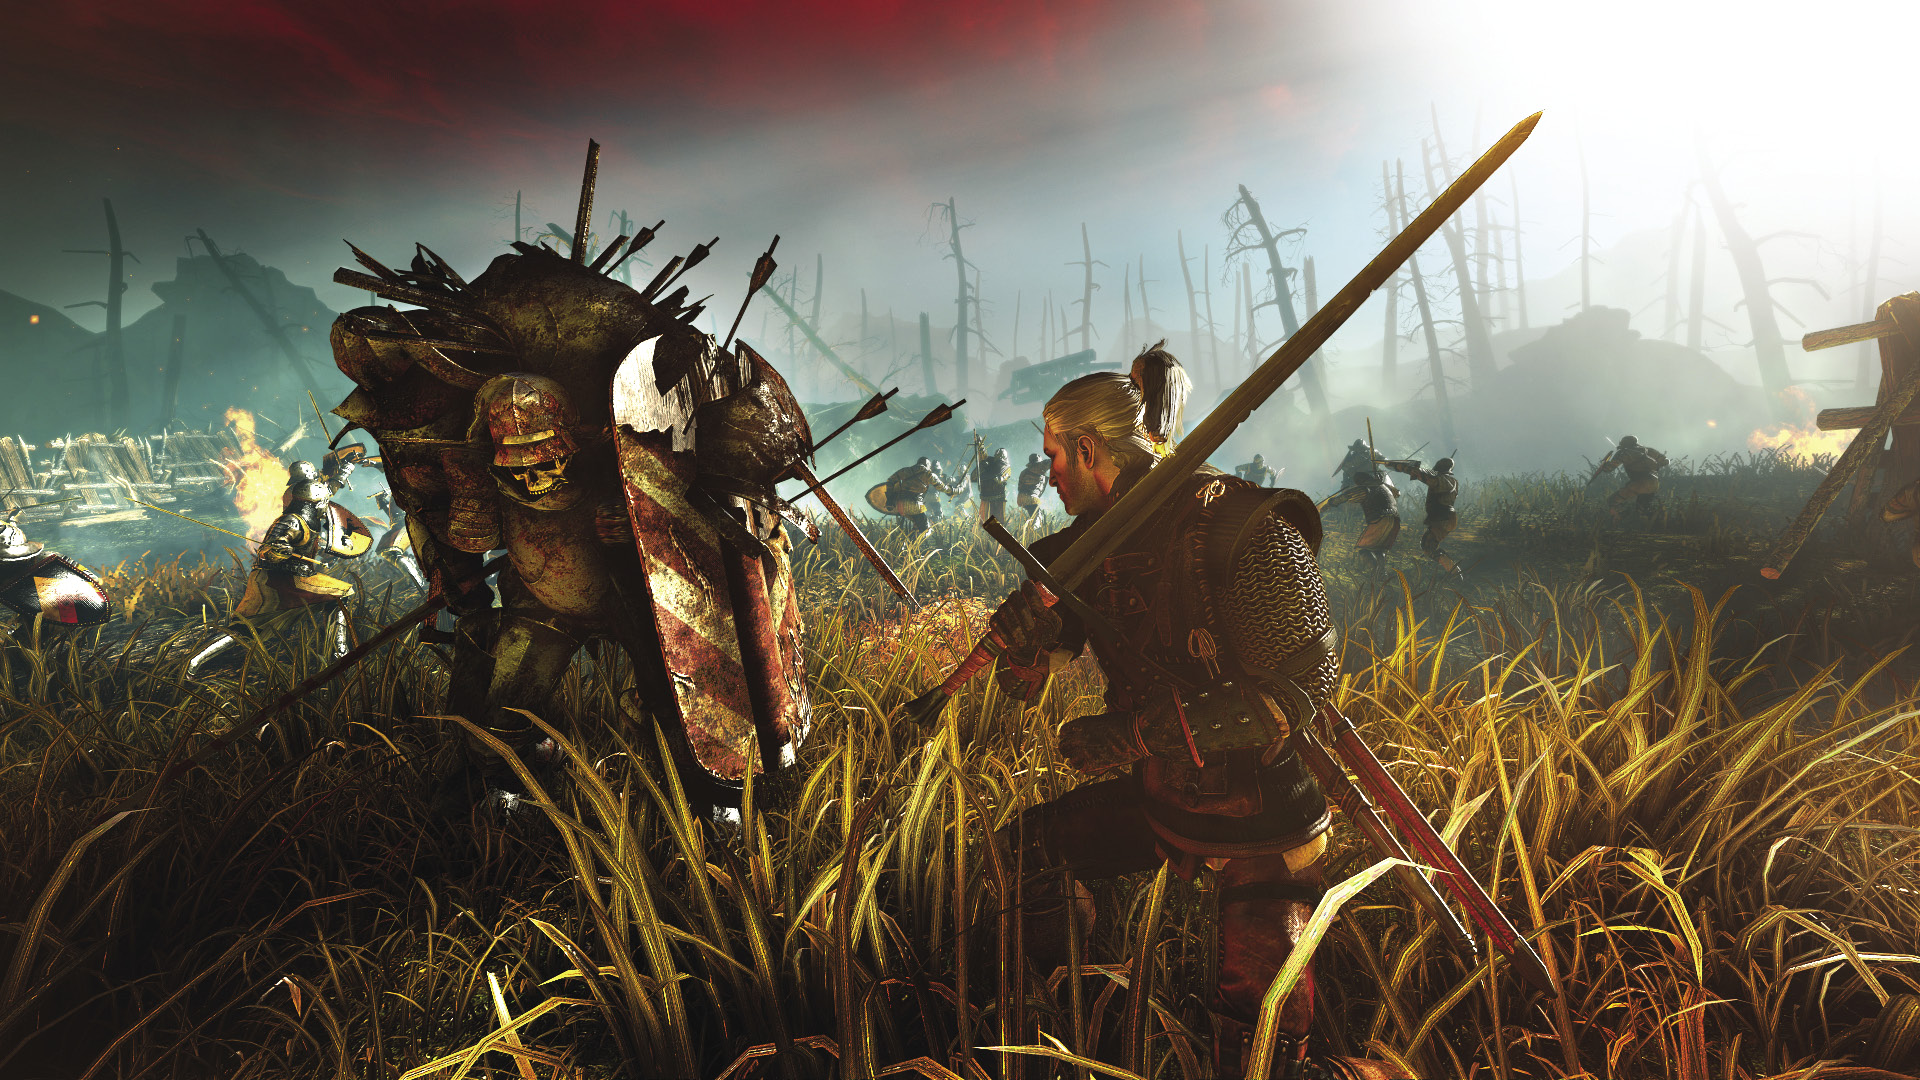
Draugirs are the servants of the draug. For this reason, although there are many draugirs, they can only be encountered in Chapter 2, before you’ve defeated the draug itself. Each draugir is the draug in miniature, a demon born from a damned soul and bound into a body made of cast-off armor, shields, swords, siege engines, and soldiers’ corpses. The soul trapped in the draugir cannot rest so long as the draug exists, as it is instead compelled to carry out all of the draug’s orders.
A draugir’s fighting style is much like that of a human knight carrying a sword and heavy shield. You can fight them using a slow and cautious style, parrying its blows and then countering with skills like Riposte. Oiling your blade with specter oil can increase your damage. Occasionally the draugir charges you, which gives you a chance to dodge aside and then hit it from behind. Draugirs are slow enough that you can sometimes interrupt their blows with light attacks, too. They can also be stunned using a variety of methods, which can give you a chance to damage them. Read the book Slaves of the Curse to learn more about draugirs.
Draugirs have two unique drops, which must be acquired during Chapter 2. The draugir claw contains the alchemical substance rebis but otherwise can be simply sold off. The draugir armor fragment is worth only 1 oren, but in a Dark mode game it can be used to craft the Oathbreaker’s armor.
Kayran
| Kayran | |
|---|---|
| Resistances | Bleeding |
| Poison | |
| Incineration | |
| Knockdown | |
| Vulnerabilities | Stun |
| Alchemy Drops | Essence of Water |
| Kayran Eyes | |
| Kayran Tissue | |
| Kayran Skin | |
| Other Drops | Kayran Trophy |
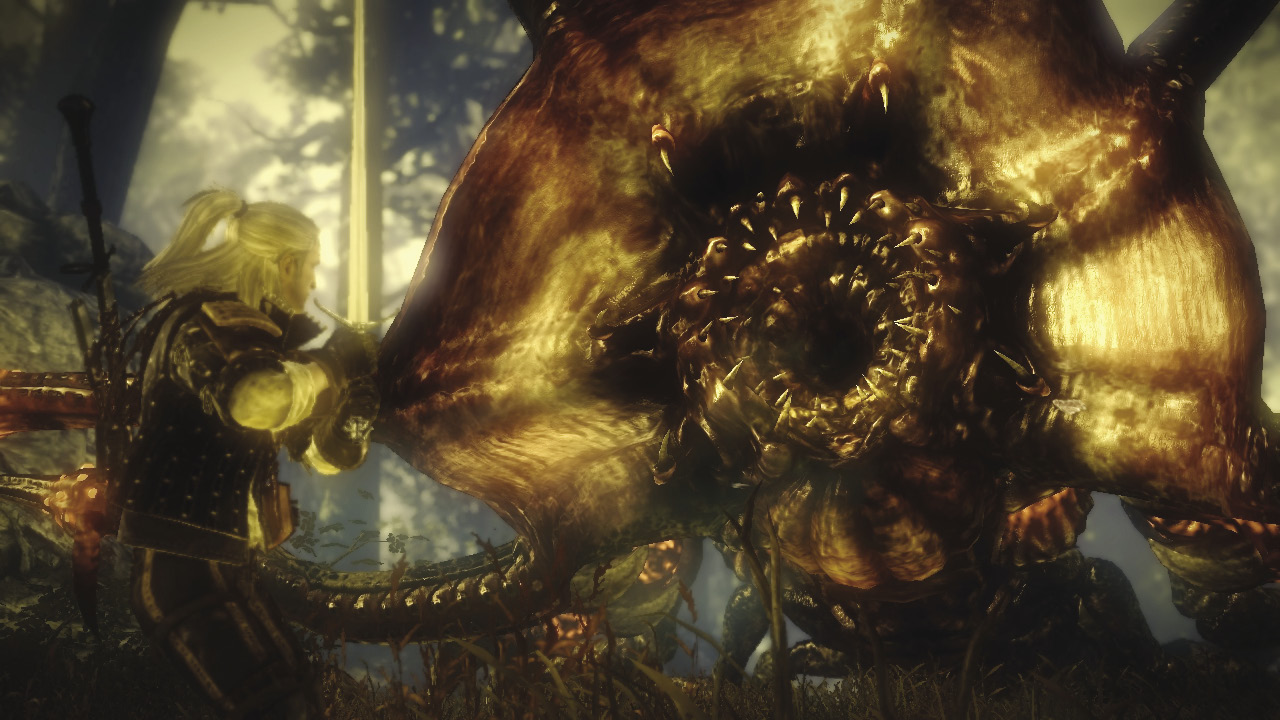
The kayran is a creature you face only once in the game. The kayran resembles nothing so much as an enormous octopus, but its tentacles are taloned and it has the ability to walk on land. It has lived in the waters near Flotsam for over a hundred years, growing larger and mutating over time. It is horrifically strong when you are hired to exterminate it in the game, blocking in the town, smashing boats, and shredding nets. When you face the kayran, it is sick and not long for the world anyway. Rather than a lingering, cancerous death, you give it the chance to leave the world fighting a battle for the ages.
You can only battle the kayran after luring it onto dry land. You must be careful to dodge the smashing blows delivered by its tentacles and to drink a Mongoose potion to protect you against the kayran’s poison spray. Its only vulnerability is to being stunned through the Yrden sign, which can immobilize one of its tentacles just long enough for you to sever it. If you can survive long enough to sever many of the creature’s tentacles, you might have the chance to finish it off with a well-placed bomb. Read the book The Kayran—A Monograph to learn more about the kayran.
The kayran drops three unique materials upon its death. Kayran eyes and kayran tissue cannot be used in crafting, but they contain the rare alchemical substance fulgur. Kayran skin has no alchemical value but can be used to craft the potent kayran carapace armor and kayran carapace reinforcements.
Draug
| Draug | |
|---|---|
| Resistances | Bleeding |
| Poison | |
| Knockdown | |
| Incineration | |
| Vulnerabilities | Stun |
| Alchemy Drops | Draug Essence |
| Essence of Death | |
| Amethyst Dust | |
| Diamond Dust | |
| Other Drops | Draug Armor Fragment |
| Red Meteorite Ore | |
| Yellow Meteorite Ore | |
| Blue Meteorite Ore | |
| Draug Trophy | |
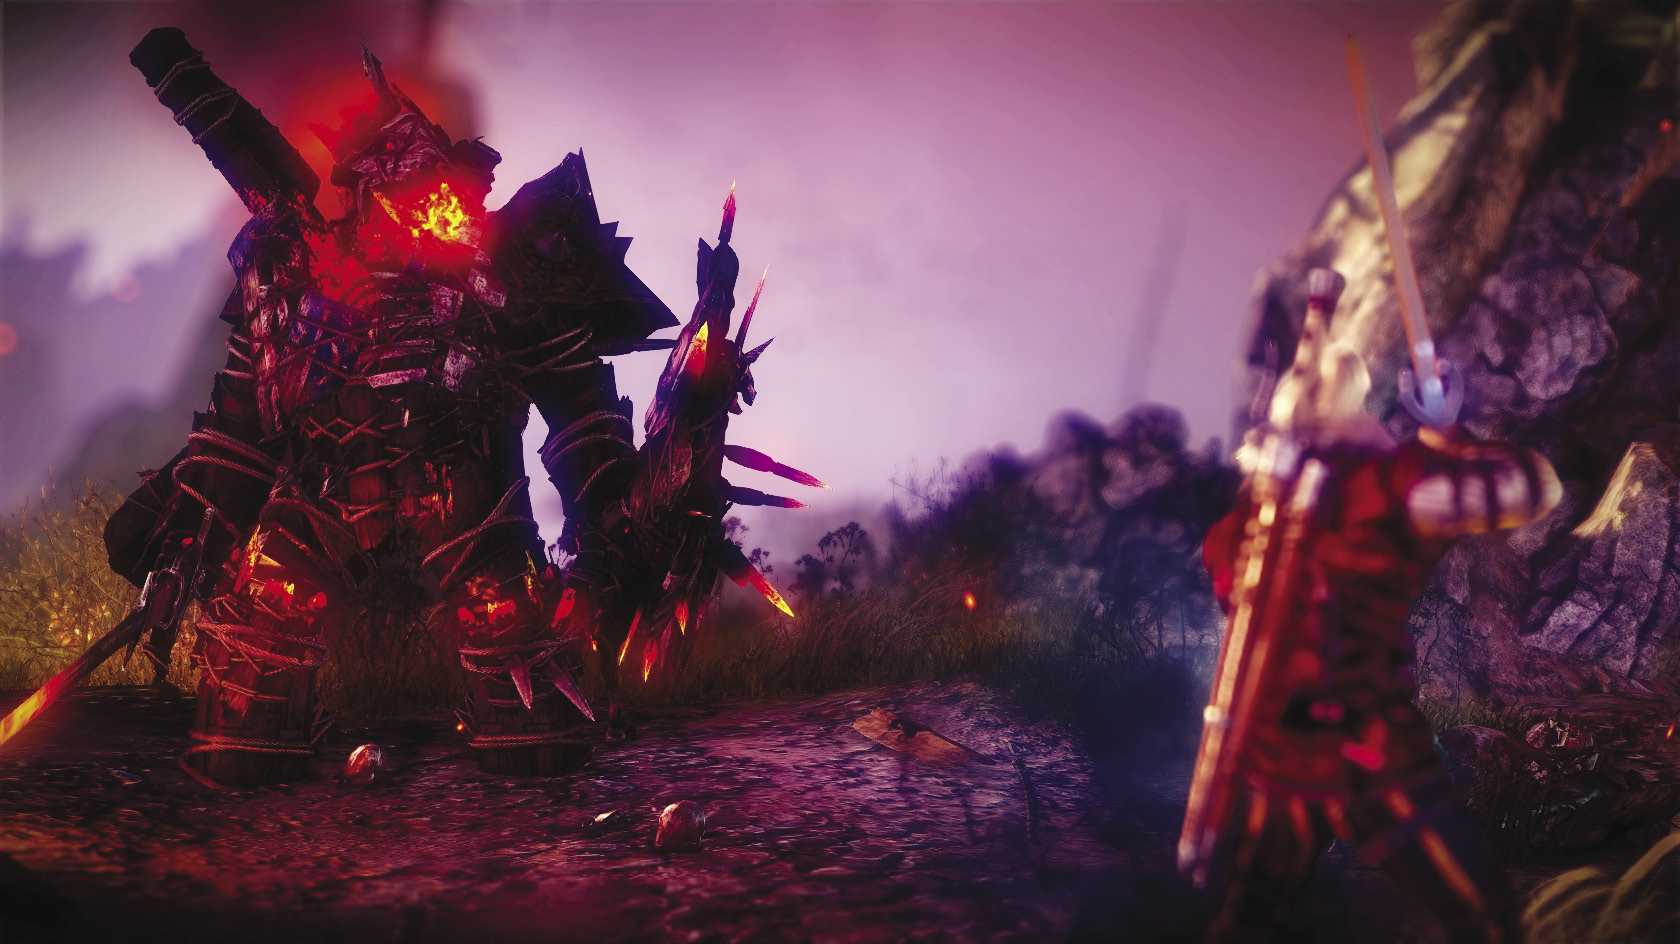
The draug is a demon of fire and hatred. Much like the draugir, its body is animated by fire and formed of cast-off arms and shields. It is a lord of wraiths and commands countless draugirs and knight wraiths to do its bidding. The draug you face in Chapter 2 was once Vandergrift, also called “The Visitor,” who commanded Henselt’s forces at the Battle of Brenna. Unable to accept his defeat at Seltkirk’s hands, Vandergrift’s hateful spirit took advantage of the power of Sabrina Glevissig’s blood curse to take on the form of a mighty draug. The draug seeks to fight and refight the Battle of Brenna forever, until it finally wins.
Defeating the draug requires first destroying its armor, then reducing its vitality. The draug takes damage from the blows of a silver sword, slowly but surely. You can accelerate the process by oiling your blade with specter oil. It is best to roll around the draug to attack it from behind, but this can be difficult. You can stun the draug using Aard or Yrden, giving yourself an opening to attack. The draug attacks with great sweeps of its sword and a powerful charge. It is best not to flee too far from it, or it will rain fireballs from its army’s trebuchets and flaming arrows from its archers. Stay close to the draug and force it to focus all of its attention on fighting you. You can read the book The Legendary Accursed to learn more about the draug.
The draug has two unique drops, the draug armor fragment and the draug essence. Both are used only to craft the draug armor, which cannot be made until Chapter 3.
Dragon
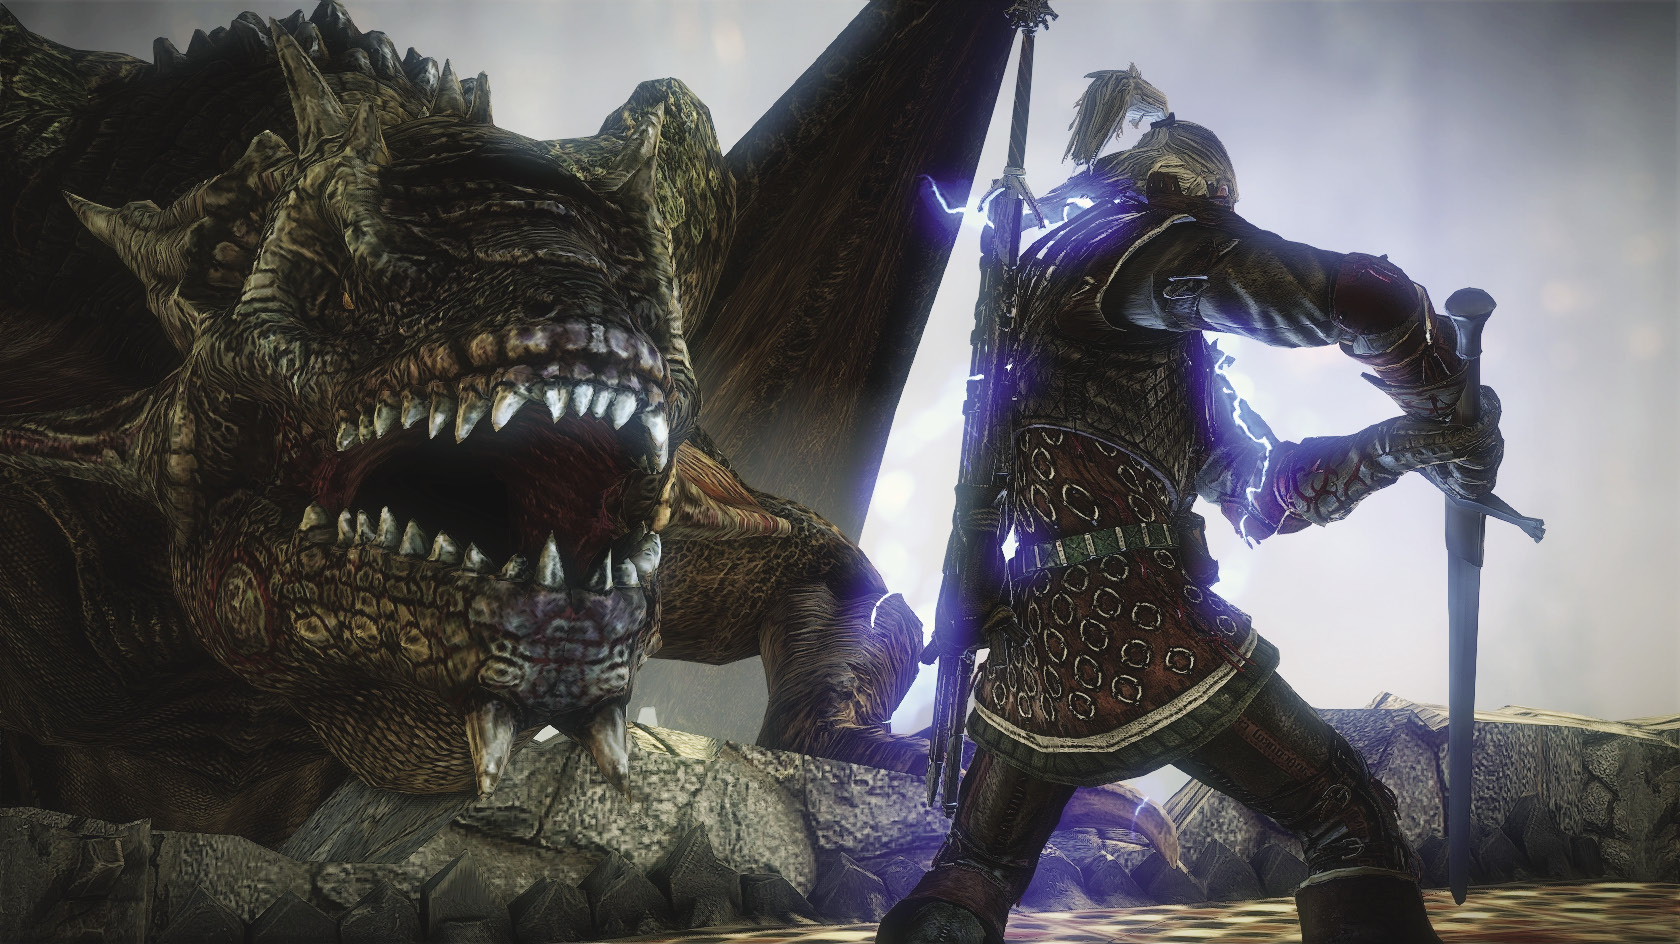
| Dragon | |
|---|---|
| Resistances | Bleeding |
| Poison | |
| Knockdown | |
| Incineration | |
| Stun | |
| Vulnerabilities | None |
Dragons are nearly extinct, but in their prime they were so awe-inspiring that many still fear them to this day, based on tales alone. Many similar but lesser creatures like dracolizards, flying drakes, forktails, slyzards, and wyverns are commonly mistaken for them. Dragons in their heyday were famed for their enormous appetites and their great hoards of treasure, which the creatures kept hidden in mountain lairs. Different dragon types could be identified by scales of different hues, including green, red, black, and white. In stories there are said to be gold dragons that can speak and change shapes, but it seems unlikely that such a creature ever existed.
Only a fool or a truly desperate person would dare to fight a dragon head on. Dragons have no weaknesses and must be fought with nerves and reflexes alone. Anyone facing a dragon should prepare by using the Quen sign or finding some other way to resist incineration. You must avoid the dragon’s sweeping tail, slashing claws, and snapping teeth. Its hide is so tough that even the best silver sword can only hope to pierce the delicate skin along its face and neck. So yes, the only way to damage a dragon is to quite literally hurl yourself at its jaws. You must dodge away from a dragon quickly after striking it, or you will be punished. A wise (or perhaps cowardly) fighter might prefer to keep a safe distance and damage it by throwing silver daggers at its jaws.
You get no alchemy or crafting drops for slaying the dragon. Read the book About Dragons to learn more about them.
|
Dragons are frequently mentioned in passing in the Witcher books currently available in English, The Last Wish and Blood of Elves, but the most significant Witcher tales concerning dragons have yet to be translated. |