
Call of Duty: Black Ops III Guide Multiplayer Arsenal
Equipment

Lethal
Lethal gear for indirect attacks
C4
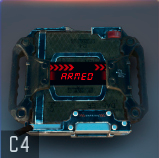
A plastic explosive detonated by double tapping Reload or pressing Throw Lethal. A proximity alarm notifies player when an enemy is near.
C4 is a manually detonated explosive, making it useful for guarding objectives and blocking chokepoints.
Thrown C4 sticks to surfaces, allowing you to plant it on walls or ceilings, which can be useful to help conceal the package from alert enemy players.
When an enemy player without the Hard Wired perk approaches your planted C4, an alarm appears on your screen—detonate it fast enough and you can usually score a kill, as long as they aren’t using the Flak Jacket perk.
C4 takes a moment to arm when thrown, so you can’t use it as an airbursted explosive—stick to cooked Frags for that trick.
Combat Axe
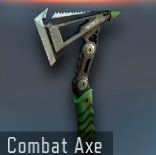
Retrievable axe that causes instant death on impact.
A specialized piece of lethal gear, the Combat Axe is a thrown weapon that is instantly lethal if it hits, but requires practice to become truly effective with it.
The axe is highlighted through walls or terrain where it lands, so you can always retrieve it simply by walking over it (unless you really lobbed it across and off the map).
A Combat Axe can be a surprisingly useful piece of kit for an LMG or Sniper build—if you’re skilled with it, you can instantly and silently dispatch an attacker at close range, faster even than switching to a Pistol.
Frag
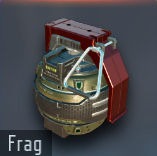
Explodes after a short fuse. Can be cooked by holding Throw Lethal.
The most basic of explosive grenades, Frags can be ‘cooked’ by holding the Grenade button. Frags have a 3.5s timer, so you can safely hold it for up to three seconds before the throw.
Each second you hold the grenade, your crosshair pulses, so timing it is quite easy.
If you practice throwing the Frag at each pulse, you can learn exactly where the grenade detonates at different times, and this allows some impressive and useful stunts like detonating it in front of windows or just over cover.
The reach of the Frag grenade is greater than any other lethal gear if you are skilled at timing and aiming your throws. The downside is that it requires cooking time to use, so this is a poor choice if speed is your primary concern.
Uncooked Frags can be tossed back by pressing the Grenade button when standing near a hostile Frag on the ground. The Fast Hands perk resets the timer, meaning it’s always safe to throw a Frag back with the perk. Without it, running may be the safest option unless you’re sure you have time to grab it and throw it back!
Semtex
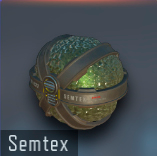
Grenade that sticks to surfaces before detonating.
A sticky grenade with a slightly shorter fuse than the Frag, Semtex is ideal for getting explosive damage on target more quickly.
Semtex sticks to any surface (or player!) that it contacts, and a stick to another player is lethal even to a player with Flak Jacket.
Semtex works well as a general explosive, as it is easy to use, has a fairly short detonation timer, and has a predictable throwing arc, with no roll like the Frag.
Thermite
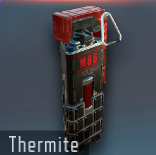
- Explodes on impact to create a dangerous heat zone for a short time, burning any enemies inside.
Thermite is a useful area denial lethal, creating a field of burning death that quickly kills any players that run through or stay in the flames.
Flak Jacket all but eliminates damage from Thermite, so you can safely ignore it when using that perk as long as you aren’t under direct enemy fire.
Thermite works very well for clearing objective areas and blocking narrow passages. Remember that players can always use double jumps and wall runs to bypass Thermite, but in interior areas, you can create temporary impassable chokepoints, and on objectives, players have no choice but to back off or die in the flames.
Thermite doesn’t have the instant explosive power of some other lethals, so it isn’t as strong of an option for directly eliminating enemies, but its utility for area denial is very useful—and with a good throwing arm, you can surprise and directly kill campers who are scoped in and unaware when the Thermite lands.
Trip Mine
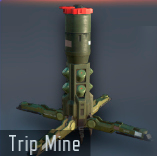
Proximity mine that launches into the air before detonating.
Trip Mines can be thrown and stick to any surface. If a hostile walks into range, the mine triggers and detonates.
Trip Mines explode out directly from whatever surface they were stuck to (floor, wall, ceiling) in a straight line, creating a narrow cone explosion.
There is a delay before Trip Mines fire, so sprinting players who run past at an angle can often completely avoid the explosion, and at its outer reaches, the blast is not fatal. Flak Jacket users can all but ignore the blast.
Because of the delayed activation and inability to kill fast moving players (which is most of them!), placement of Trip Mines is critical if you actually want to score kills.
As an early warning device, Trip Mines are effective whether they even do any damage—if you are nearby, the sound of your Trip Mine going off is enough warning to aim toward the threat before it arrives.
To score kills, you must place Trip Mines very carefully. The most reliable method is to stick them on the edge of a doorway (or hall, narrow gap, etc.) so that any player running through the door triggers the mine, and the resulting explosion is channeled directly in line with them.
You want your mine firing off so that the blast is channeled directly along with the player that triggered it; if they are running perpendicular, they’re all but guaranteed to dodge it completely.
A devious method to score kills with Trip Mines is to pair them with Shock Charges. A properly placed combo of a single Trip Mine and Shock Charge placed carefully can guarantee kills on anyone not running Flak Jacket or Tactical Mask. Add Scavenger to repeatedly reset your traps.