
PlayStation All-Stars Battle Royale Guide Essentials Combat Trials
Combat Trials
INTRODUCTION
Simply put, Trials are the fastest way to hone individual skills for both specific characters and overall tactics, and you should absolutely undertake them as soon as possible. The faster you can soak up the lessons being doled out here, the more deadly you’ll be on the battlefield. That doesn’t mean it’ll be easy, however: the All-Star Trials are aptly named, and these may require many, many retries before finally being overcome. Thankfully, the very strategies in the pages to come were designed to help you best them, but don’t be daunted if it feels like you’re hitting a brick wall. Many times, moving to another challenge or character can help freshen things up before heading back to a particularly difficult Trial.
GENERAL TRIALS
While there are literally hundreds of character-specific Trials waiting, it’s a good idea to get to grips with the absolute basics first, and that’s where the General Trials come in handy. With just 10 objectives, the key components of what makes PlayStation All-Stars Battle Royale tick are laid bare.
#1 — AP TRIAL
| Difficulty | Player Character | Opponent | Level | Time Limit | Kills Required |
|---|---|---|---|---|---|
| Hero | Ratchet | Evil Cole | Dojo | 5:30 | 2 |
| Legend | Fat Princess | Sweet Tooth | Paris | 4:30 | 2 |
| All-Star | Drake | PaRappa | Metropolis | 3:30 | 3 |
Objective: Build up your AP meter with attacks using


 , and score with lethal Super attacks to pass the Trial.
PaRappa, in the hands of competent players, can be incredibly hard to contain, but in the hands of ruthless AI, he’s practically supersonic. Add in one of the more difficult Level 1 Super attacks, and Drake almost doesn’t stand a chance. The key is containment. Drake’s
 slide is great for knocking the little rapper down, but staying on top of him as he gets up is even more important. Work AP-heavy combos as much as possible to build your meter, then carefully time Drake’s Super; he lobs an explosive tank that requires both patience and proper timing to catch the speedy little dog in the blast radius.
#2 — SUPER LEVELS TRIAL
| Difficulty | Player Character | Opponent | Level | Time Limit | Kills Required |
|---|---|---|---|---|---|
| Hero | Kratos | Big Daddy | Dojo | 4:00 | 3 |
| Legend | PaRappa | Sweet Tooth | San Francisco | 1:30 | 3 |
| All-Star | Sweet Tooth | Evil Cole | Hades | 1:00 | 3 |
Objective: Each character has three Super attacks that you can reach by building up more of the AP meter. Get one kill with each Super level.
Count your blessings here: Evil Cole isn’t especially quick, and your Super attack meter builds constantly. Try to lure Cole under the platforms for the Level 1 Super, launch the Level 2 missile at mid-range and immediately angle it down toward the ground to get a splash damage kill, and simply unload with the
chaingun attack during the Level 3 Super.
#3 — BLOCKING TRIAL
| Difficulty | Player Character | Opponent | Level | Time Limit | Kills Required |
|---|---|---|---|---|---|
| Hero | Kratos | Evil Cole | Dojo | 6:00 | 2 |
| Legend | Jak | Ratchet | San Francisco | 5:00 | 2 |
| All-Star | Evil Cole | PaRappa | Sandover Village | 2:30 | 3 |
Objective: Block your opponent’s attacks using
 . Quickly hit them back to gain AP for kills.
The Legendest opponent here is actually the rather meager time limit compared to the other difficulties. Thankfully, the rewards for blocking and counter-attacking are just as plentiful. Wait for PaRappa’s rapid-hit punch to try to connect, then counter quickly to build up a Level 1 Super. Lucking into grabbing the rapper can be tough, so instead simply repeat the block/counter process (the bread and butter
combo works great) until you’re at Level 2 and coax the beanie-headed pooch toward the edge of one of the ledges before unleashing. If he ends up hanging out at the bottom of the water wheel, move to the right side of the stage to pull him back up.
#4 — DODGING TRIAL
| Difficulty | Player Character | Opponent | Level | Time Limit | Kills Required |
|---|---|---|---|---|---|
| Hero | Kratos | Jak | Dojo | 6:00 | 2 |
| Legend | Kratos | Big Daddy | Hades | 5:00 | 2 |
| All-Star | Kratos | Sweet Tooth | Dreamscape | 3:00 | 3 |
Objective: Evade your opponent’s attacks with
 /
/
 . Quickly hit them back to gain AP for kills.
This is one of the easiest Trials of the bunch, so savor it while it lasts. You don’t actually need to roll out of the way of an attack, just away from Sweet Tooth to trigger the AP bonus. Roll away as he nears, then unload with a quick combo to build up a Super. It’s possible to wait for Kratos’s Level 3 Super and knock all out three kills in one go, but time shouldn’t be much of a factor either way.
#5 — THROWS TRIAL
| Difficulty | Player Character | Opponent | Level | Time Limit | Kills Required |
|---|---|---|---|---|---|
| Hero | Kratos | Radec | Dojo | 5:30 | 2 |
| Legend | Fat Princess | Jak | Paris | 4:30 | 2 |
| All-Star | Big Daddy | PaRappa | Invasion | 2:30 | 3 |
Big Daddy has the slowest movement speed of the entire roster, and being forced to get within throw range of one of the fastest characters on one of the biggest stages is no easy task. Use Charging Rush
to close the distance, taking advantage of its super armor to avoid PaRappa’s attacks. Once in range, use Big Daddy’s Slam throw (right stick
) and catch PaRappa with a
,
 combo during the bounce reaction for almost two full bars of Super. Repeat until you can trigger Big Daddy’s Level 3 Super, stopping the clock and letting you take care of all three kills in one go.
#6 — ITEMS TRIAL
| Difficulty | Player Character | Opponent | Level | Time Limit | Kills Required |
|---|---|---|---|---|---|
| Hero | PaRappa | Sly Cooper, Sweet Tooth | Hades | 4:30 | 3 |
| Legend | Sly Cooper | Drake, Toro | Columbia | 3:30 | 4 |
| All-Star | Sly Cooper | Ratchet, Fat Princess, Jak | Stowaways | 3:00 | 7 |
Objective: Pick up items to gain AP for Supers.
Getting seven kills in three minutes is actually quite easy Stowaways. Item spawn rates are cranked to the max, and just grabbing an item awards nearly a full Super Meter. During the first phase of the Level, use Oni Toro’s
attack to keep the area clear, and rely on Torobi the Kat’s movement abilities when the Level opens up during the second phase. Two quick Level 3 Supers and one Level 2 later and you’re golden!
#7 — MOVING & JUMPING TRIAL
| Difficulty | Player Character | Opponent | Level | Time Limit | Cakes Required |
|---|---|---|---|---|---|
| Hero | Fat Princess | Spike, Drake | Sandover Village | 3:00 | 21 Pieces |
| Legend | Fat Princess | Kratos, Toro | Dreamscape | 1:30 | 21 Pieces |
| All-Star | Fat Princess | Toro, Heihachi | Alden’s Tower | 2:30 | 50 Pieces |
Objective: Collect all the pieces of cake before time runs out.
Don’t bother with attacking; lead your foes while dropping bombs (
), then use Fat Princess’ mid-air
dash to cross large gaps. Air recover if she’s hit (and she’ll definitely get hit; Toro and Heihachi are relentless), and concentrate on grabbing the lowest pieces of cake first when the screen starts to scroll upward. It’s crucial to grab as many cakes as possible on the second stationary area, as well as on the way up. If you reach the top of the tower with 44 or less cakes, retry and start over.
.#8 — LEVEL HAZARDS TRIAL
| Difficulty | Player Character | Opponents | Level | Time Limit | Kills Required |
|---|---|---|---|---|---|
| Hero | Evil Cole | Drake, Sly Cooper | Metropolis | 4:30 | 3 |
| Legend | Toro | Ratchet, Sweet Tooth, Evil Cole | Hades | 4:30 | 4 |
| All-Star | Big Daddy | Cole, Toro, Ratchet | Alden’s Tower | 4:30 | 4 |
Objective: Attack to gain AP for Supers. Getting hit by level Hazards resets your AP!
So, this is what it’s come to, eh? Pitting one slow, lumbering Big Daddy against three far more agile opponents where the objective is to avoid Hazards? Guess it’s not called All-Star for nothing. The key here is making the most of Big Daddy’s area effect attacks. Since the lumbering oaf has no real dial-a-combos, make heavy use of his
-based attacks, in particular
to dash across the level and
to ground pound, catching any enemies nearby in a locked AP-rich juggle. Dash everywhere and let loose with a Level 3 Super attack to freeze your adversaries in their tracks, then
through them for an easy win.
#9 — COUNTER SUPER TRIAL
| Difficulty | Player Character | Opponent(s) | Level | Time Limit | Kills Required |
|---|---|---|---|---|---|
| Hero | PaRappa | Fat Princess | Time Station | 4:00 | 3 |
| Legend | Jak | PaRappa | San Francisco | 3:00 | 4 |
| All-Star | Sly Cooper | Fat Princess, PaRappa | Black Rock Stadium | 2:00 | 4 |
Objective: Use your Super to counter your opponent’s Super. Kills only count if your adversary is using a Super!
The biggest obstacle here is the limited amount of time meted to notch four kills against opponents who have already started their Super. Worse, both PaRappa’s Level 2 and Fat Princess’ Level 2 Supers stay active and mobile for quite a while, while you get…a big pink hippo. Thankfully, your AP meter stays constantly charged, so Supers aren’t nearly as limited as the time. Concentrate on luring your opponents down to the middle-left and middle-right of the stage to incite them to start their Supers, then quickly launch yours. Avoid the smallish platforms, as they usually mean the AI will just pound on you and waste time, and rarely is there enough reaction time to send out The Murray to counter with justice and fury and goggles and a cape.
#10 — TAUNTS TRIAL
| Difficulty | Player Character | Opponents | Level | Time Limit | Taunts Required |
|---|---|---|---|---|---|
| Hero | PaRappa | Evil Cole, Big Daddy | Sandover Village | 6:00 | 3 |
| Legend | Fat Princess | Sly Cooper, Cole | San Francisco | 5:00 | 3 |
| All-Star | Radec | PaRappa, Spike, Sweet Tooth | Dojo | 5:00 | 3 |
Objective: Complete a Taunt
 to score. Hit the score limit to pass the Trial.
Welcome to easily the most difficult of the General Trials. An absolutely infuriating combination of the tiniest level, it features three extremely quick enemies all gunning for you while ignoring each other and agonizingly long wind-ups for your attacks all mixed into a kind of rage stew. The key is to take a hint from the AI: only attempt to taunt when the screen is clear (or as clear as possible) of opponents after using Radec’s Level 2 Super. Actually getting enough AP to do so, however, will be an exercise in pain; PaRappa can pull you into the crowd, Spike constantly electrocutes, and Sweet Tooth plants mines all over the friggin’ place. The key is to use
to catch one of your three adversaries with a sticky bomb, and catching the others in the explosion. Try backing against a wall and firing
and
into the wall behind you, and unloading a never-ending stream of
grenades. If you need to switch sides, leap into the air, face away from the direction you wish to travel, and endlessly spam air
to teleport across the stage while dropping grenades. When the Level 2 is ready, unleash it when all opponents are on the ground, and spam the Taunt button to ensure Radec completes the animation in time. It’s going to take a few attempts, but just hang in there and victory is yours!
CHARACTER TRIAL
One of the most impressive parts of how PlayStation All-Stars Battle Royale cobbles together so many different fighters from a multitude of genres is just how diverse those fighting styles are. Not only are the moves themselves different, but individual timing, range, damage, combos, and status effects are all unique to each fighter. Drilling deep into each character’s move set isn’t just smart: it’s essential to becoming a great all-around player — to say nothing of specializing with a favorite brawler.
Each character has between twenty-one to twenty-five Combat Trials to complete, with at least one of those Trials being unique to that character. The rest are drawn from a pool of twenty-two common Trials shared amongst the cast. Combat Trials can be attempted at any of the three difficulty levels, awarding you Ranking Points and stars that unlock more Trials for that character: Hero earns you one star, Legend nets you two stars, and All-Star difficulty banks three stars. Trials can be tackled in any order once they are unlocked, but you need to earn at least fifty stars to unlock them all!
The data tables below serve as a quick reference regarding the common Trials, followed by details and strategies for each Trial on All-Star difficulty.
TRIALS PER CHARACTER
| Character | Total Trials | Unique Trials |
|---|---|---|
| Big Daddy | 22 | Plasmid |
| Cole | 23 | Grind, Absorb |
| Dante | 23 | Counter-Attack, Air Streak |
| Evil Cole | 23 | Grind, Charge Up |
| Fat Princess | 21 | Villager |
| Heihachi | 22 | Counter-Attack, Charge AP |
| Jak | 24 | Mass Inverter, Air Streak |
| Kratos | 23 | Counter-Attack |
| Nariko | 23 | Sword Grab, Counter-Attack |
| Nathan Drake | 25 | Barrel, Stun Dart, Wall |
| PaRappa | 23 | Mic Grab, Boxy Box, Reflect |
| Radec | 22 | Distance |
| Raiden | 22 | Counter-Attack, Air Streak |
| Ratchet | 23 | Mr. Zurkon, Tesla Spike |
| Sackboy | 23 | Reflect, Fan, Teleport |
| Sir Daniel | 21 | Shield |
| Sly Cooper | 24 | Teleport, Counter-Attack, Invisibility |
| Spike | 22 | Ape, Teleport |
| Sweet Tooth | 23 | Roadkill Mine |
| Toro | 21 | Sleeping |
COMMON TRIALS OVERVIEW
| Trial | Objective | Exempt Characters |
|---|---|---|
| Super Level 1 | Use your unlimited Level 1 Super attacks to get kills. | — |
| Multi-Kills | Use your unlimited Level 2 Super to kill multiple enemies at once. Single kills don’t count! | — |
| Super Level 3 | Use only Super Level 3’s to get kills. Move fast! | Fat Princess, Heihachi, PaRappa, Spike, Toro |
| Move List | Hit opponents with the prompted move. | — |
|
Attacks
|
Build up AP for Supers using only your
attacks and throws.
|
— |
|
Attacks
|
Build up AP for Supers using only your
attacks and throws.
|
— |
|
Attacks
|
Build up AP for Supers using only your
attacks and throws.
|
— |
| Streaker | Get multiple hits in a row to gain an AP multiplier. Getting hit resets your multiplier. | — |
| Team | Finish the match on the highest scoring team. | — |
| Combo | Land a quick series of hits on your opponent to earn AP for Supers. | — |
| Stock | Players have limited respawns. Eliminate your opponents before you get eliminated! | — |
| Multi-Hit | Strike multiple opponents at once and follow up with hits to gain AP for Supers | — |
| Avoid Super 1 | Your opponent has infinite Level 1 Supers! Kill them to pass the Trial. | — |
| Survive Super 2 | Your opponent has infinite Level 2 Supers! Survive to pass the Trial. | Raiden, Sackboy, Sir Daniel |
| Level 2 Master | To score, kill three opponents in quick succession with your Super Level 2. | — |
| Perfection | Dying will cause you to fail the Trial. Win the match by getting the highest score! | — |
| Arena | Fight your clone and finish with the highest score. Look out, this one is tough! | — |
| 3 vs 1 | It’s you versus three opponents on one team. Win the match by getting the highest score. | — |
| Untouchable | Getting hit resets your AP! Get kills to pass the trial. | — |
SUPER LEVEL 1 TRIAL
HERO AND LEGEND DETAILS
| Difficulty | Opponents | Level | Time Limit | Kills Required |
|---|---|---|---|---|
| Hero | Varies per Character | Varies per Character | 2:30 | 5 |
| Legend | Varies per Character | Varies per Character | 2:00 | 10 |
ALL-STAR DETAILS — TIME LIMIT: 1:30 — KILLS REQUIRED: 10
| Character | Opponents | Level | Pro Tip |
|---|---|---|---|
| Big Daddy | Jak, Sly Cooper | Invasion |
Big Daddy can have more than one Little Sister in play at a time, so rapidly press
 to create a never-ending stream. Use
to close distance gaps.
to create a never-ending stream. Use
to close distance gaps.
|
| Cole | Kratos, Toro | Sandover Village |
Don’t waste time trying to hit one opponent with the other. Use
to hold a foe in place and tap
to kill quickly. Repeat until victorious.
|
| Dante | Drake, PaRappa | Dojo | Activate Overdrive from a distance and catch both foes with the fireball created by the final sword swing. |
| Evil Cole | Spike, Cole | Invasion | Bait enemies to the top of the shipping crate in the lower-left of the level and try to nail one enemy with the other in these tight quarters. |
| Fat Princess | Cole, Ratchet | Alden’s Tower |
Try to knock opponents off the right side of the level with
or (mash)
, then score free kills when they respawn in a stun state.
|
| Heihachi | Drake, PaRappa | Dojo |
Use the invincible Wavedash (
) to approach foes and counter (
) attacks, followed by a Super Attack while they’re stuck in a butt-drop stagger.
|
| Jak | Sweet Tooth, Fat Princess | Dojo |
Get in the air and use
to approach from above, triggering Jak’s Super right when he lands.
|
| Kratos | Cole, Drake | Alden’s Tower |
Use
or
to safely close gaps and attempt to knock foes off the right side of the level. Kill on respawn, or use
|
| Nariko | Drake, PaRappa | Dojo |
Push foes away with
, then activate Nariko’s Level 1 Super while they’re at a distance.
|
| Nathan Drake | Toro, PaRappa | Black Rock Stadium |
knocks foes away just far enough to score a kill with the propane tank. Deploy Oil Drums (
) to keep foes at a distance.
|
| PaRappa | Toro, Cole | Black Rock Stadium | PaRappa’s Level 1 passes over Toro, so bait foes to either of the two ramps in the center and attack them both from below. |
| Radec | Cole, Drake | Black Rock Stadium | Make camp on either of the tall platforms against the walls and take advantage of the homing abilities of Radec’s Level 1 Super. |
| Raiden | Drake, PaRappa | Dojo |
Activate Raiden’s Level 1 at least one full character length away from your target, and hold
or
to move towards them during its active period.
|
| Ratchet | Drake, Sly | Dreamscape | Force opponents to either side of the level and catch them both with a fast Super activation. |
| Sackboy | Drake, PaRappa | Dojo | Sackboy’s Level 1 passes over PaRappa at anything but point blank range when grounded. Always keep an Electric Pad deployed to raise him to kill height. |
| Sir Daniel | Drake, PaRappa | Dojo |
Keep Golden Shield out to auto-block Drake’s shots. Sir Dan’s Level 1 activates ultra-fast, so catch opponents jumping in with a quick press of
.
|
| Sly Cooper | Kratos, Toro | Alden’s Tower |
Knock opponents off the right side of the level with
for free respawn kills, or counter (
) attacks and press
immediately after the teleport.
|
| Spike | Kratos, Sly Cooper | Sandover Village |
Keep foes locked down with
for a guaranteed kill. The radius of
also serves as a great deterrent to an invisible Sly.
|
| Sweet Tooth | Kratos, Spike | Franzea | Stick to the flower platform in the center of the level, and activate Sweet Tooth’s Level 1 from either side of the platform once enemies arrive. |
| Toro | PaRappa, Drake | Dojo | Activate Toro’s Level 1 at sweep range to allow enough time for the startup to complete, or bait foes with Toro Nap canceled into the Super. |
MULTI-KILLS TRIAL
HERO AND LEGEND DETAILS
| Difficulty | Opponents | Level | Time Limit | Kills Required |
|---|---|---|---|---|
| Hero | Varies per Character | Varies per Character | 2:00 | 10 |
| Legend | Varies per Character | Varies per Character | 1:30 | 12 |
ALL-STAR DETAILS — TIME LIMIT: 1:00 — KILLS REQUIRED: 15
| Character | Opponents | Level | Pro Tip |
|---|---|---|---|
| Big Daddy | Kratos, Radec, Drake | Black Rock Stadium |
Stay on the upper platforms and use ground and air
to rush down foes.
|
| Cole | Spike, Evil Cole, Sweet Tooth | Franzea | Activate Cole’s Level 2 from the center flower platform towards the side with the most foes. The ice cross the gap, continuing until it hits a wall. |
| Dante | Evil Cole, Kratos, Sly Cooper | Metropolis | Bait enemies onto the conveyor belts, then activate Stinger once they’re all grounded for easy multi-kills. |
| Evil Cole | Spike, Evil Cole, Sweet Tooth | Franzea | Stand on the belly of the floating creature. The radius of this Super catches foes standing on the flowers above. |
| Fat Princess | Radec, Spike, Evil Cole | Time Station |
Foes like to stay on the uppermost platforms. Be sure to hold
 to maximize the chicken’s jump and reach them.
|
| Heihachi | Evil Cole, Kratos, Sly Cooper | Metropolis | Kuma’s really good at tracking down foes. Keep enemies occupied with attacks to prevent evade actions, and activate again as soon as Kuma does his happy dance. |
| Jak | PaRappa, Cole, Evil Cole | Black Rock Stadium |
The attack stays active longer if Jak leaps off a platform. Stay in the upper areas, and use
/
to change direction if needed.
|
| Kratos | Spike, Radec, Toro | Invasion |
Bait enemies to the upper-left platform, drop down (
), and activate the Super.
|
| Nariko | Evil Cole, Kratos, Sly Cooper | Metropolis | Activate the cannon at the edge of either side platform. You can strike foes almost anywhere on the level from here. |
| Nathan Drake | Ratchet, Fat Princess, Sly Cooper | Columbia | Try to keep foes on the left side of the level to minimize their escape options, and activate the Super from ground level. Activate from the center mound for better area coverage. |
| PaRappa | Evil Cole, Drake, Radec | Time Station | It’s hard for PaRappa to reach the highest platforms while on his skateboard. If enemies are camping there, jump up before triggering the Super. |
| Radec | Toro, PaRappa, Cole | Hades | Remain on the central ground-level platform, and activate from the edges to maximize coverage. |
| Raiden | Evil Cole, Kratos, Sly Cooper | Metropolis | Raiden doesn’t need AP when he has unlimited meter. Avoid using the right stick and instead focus on landing normal attacks for quick kills. |
| Ratchet | Jak, Kratos, Toro | Columbia |
Press
from the center mount to fire a Chronobomb on either side of the level, then go in for the kill while enemies are slowed.
|
| Sackboy | Evil Cole, Kratos, Sly Cooper | Metropolis | Try to bait enemies close to Sackboy in one of the corners before releasing hot coals over their heads. |
| Sir Daniel | Evil Cole, Kratos, Sly Cooper | Metropolis |
Activate Sir Dan’s Level 2 Super from the center of the conveyor belt to maximize its area of coverage. Press
again as soon as the prior Super is finished, in case anyone is still standing.
|
| Sly Cooper | Drake, Fat Princess, Sweet Tooth | Columbia | Keep your opponents away from the right side of the level so that the three raised platforms won’t block Sly’s bombs. |
| Spike | Sweet Tooth, Fat Princess, Drake | Black Rock Stadium | Remain on the two central raised platforms whenever possible to maximize coverage. Spike’s projectile passes over gaps, but stops when it hits a wall. |
| Sweet Tooth | Cole, Fat Princess, Sly Cooper | Hades | Activate near point blank range to minimize any time spent steering the missile. Baiting foes into the pits on either side is a good way to score multi-kills. |
| Toro | Evil Cole, Kratos, Sly | Metropolis | Remember that the star falls in the direction Toro is facing. Try to keep foes grouped in corners to catch them all in the explosion. |
SUPER LEVEL 3 TRIAL
| Difficulty | Opponents | Level | Time Limit | Kills Required |
|---|---|---|---|---|
| Hero | PaRappa, Fat Princess, Jak | Stowaways | 1:00 | 10 |
| Legend | Sweet Tooth, Ratchet, Evil Cole | Columbia | 1:00 | 12 |
| All-Star | Spike, Radec, Toro | Invasion | 1:00 | 15 |
Like the Multi-Kill Trial, grouping can be a huge help here depending on your character’s Level 3 Super. Obviously, insta-killing Supers are handy, but if you have to chase enemies down, try to do so as quickly as possible, and be near an adversary to unload on them when your Super ends. AP generation is greatly increased here, so one or two short combos should do it. The sooner you’re using that Super, the longer the clock is frozen during its duration. Any time not spent attacking to build AP or unleashing the Level 3 is wasted, so get to it!
MOVES LIST TRIAL
| Difficulty | Opponent(s) | Level | Time Limit |
|---|---|---|---|
| Hero | Varies per character | Dojo | 10:00 |
| Legend | Varies per character | Hades | 6:00 |
| All-Star | Varies per character | Columbia | 6:00 |
The objective for this Trial is to simply land a hit with each basic directional attack in your character’s arsenal, as covered in the character tutorials. With six full minutes at your disposal, you shouldn’t have much of a problem even on All-Star difficulty. Just be mindful of your opponents and use your evasive actions to avoid getting caught between them or killed by a Super. Every second you spend waiting to respawn is time better spent trying to land attacks. For characters with attacks that only connect directly above their head (i.e. Radec
) or air attacks that are hard to land against a grounded opponent, try knocking your opponents onto the raised platforms on either side of Columbia and attacking them from below or the side. The location of your opponent doesn’t matter, only that the listed attack connects. Work your way through your character’s
,
, and
attacks as they’re presented, then land each of their three throws to finish the Trial.
ATTACKS TRIAL
HERO AND LEGEND DETAILS
| Difficulty | Opponents | Level | Time Limit | Kills Required |
|---|---|---|---|---|
| Hero | Varies per Character | Varies per Character | 4:30 | 2 |
| Legend | Varies per Character | Varies per Character | 3:30 | 2 |
ALL-STAR DETAILS — TIME LIMIT: 2:00 — KILLS REQUIRED: 3
| Character | Opponents | Level | Pro Tip |
|---|---|---|---|
| Big Daddy | Spike, Kratos | Metropolis |
Combo
to
to maximize AP gain. Wait until Big Daddy is at Level 3 before activating the Super.
|
| Cole | Sly Cooper, Spike | Franzea | Use Grind-based attacks to quickly attack foes until Level 3 is acquired. |
| Dante | Ratchet, Evil Cole | Stowaways | Dante’s BnB combo (see Dante Combo I) to rapidly build up to a Level 3 Super. |
| Evil Cole | Jak, Toro | Dojo |
On such a small level, simple three-hit
combos should be sufficient to build enough AP for multiple Supers.
|
| Fat Princess | Drake, Radec | Columbia |
Stay on the left-hand platform with a wall to her back and take advantage of the super armor bestowed while charging neutral
. Combo into
,
on hit until you can activate Ride the Chicken!
|
| Heihachi | Ratchet, Evil Cole | Stowaways |
Use Heihachi’s unique dodge roll to safely close the distance. Juggle with an upward throw into neutral
until Kuma can be summoned.
|
| Jak | Sly Cooper, PaRappa | Black Rock Stadium |
Scoring all the hits of Jak’s neutral
attack gets him almost all the way to a Level 3 Super.
|
| Kratos | Evil Cole, Spike | Columbia |
Use Kratos’s BnB combo at close range, or
to catch enemies at distanc to quickly reach Level 3.
|
| Nariko | Ratchet, Evil Cole | Stowaways |
Catch a foe with
to cause a bounce, and then use neutral
attacks to fill her Meter.
|
| Nathan Drake | Sweet Tooth, Ratchet | Dreamscape |
,
,
,
combos can quickly get Drake to Level 3. Pepper the level with Grenades
to catch foes at a distance.
|
| PaRappa | Sly Cooper, Evil Cole | Stowaways |
Close gaps with air
and concentrate on landing mashed
attacks until PaRappa is at Level 2 or Level 3.
|
| Radec | Spike, Toro | Dreamscape |
Retreat from foes using
to build AP while staying safe. Air
is Radec’s fastest attack to build up to Level 3 quickly.
|
| Raiden | Ratchet, Evil Cole | Stowaways |
Concentrate on a single foe and catch them with a full neutral
attack string to get all the AP you need.
|
| Ratchet | Sweet Tooth, Jak | Time Station |
Use
to catch foes on thin platforms above Ratchet.
|
| Sackboy | Ratchet, Evil Cole | Stowaways |
Reflect your opponent’s projectiles with
, and catch anyone foolish enough to jump in with
.
|
| Sir Daniel | Ratchet, Evil Cole | Stowaways |
Closing the gap with foes is tough, but remember that Sir Daniel has tremendous range with his aerial
attacks.
|
| Sly Cooper | Spike, Drake | San Francisco | Keep a Cap Mine deployed at all times while teleporting around the level. Focus on countering attacks and don’t worry about staying invisible. |
| Spike | Toro, Sweet Tooth | Black Rock Stadium |
Dive into enemies using air
, then follow up with a neutral
combo to acquire three full Levels.
|
| Sweet Tooth | PaRappa, Cole | Columbia |
Use
to attack while moving across the level. At close range, try to land
followed by the attack of your choice until you can activate a Level 3 Super.
|
| Toro | Ratchet, Evil Cole | Stowaways |
Toro’s
moves have extremely limited range. Try to get close and use
for a butt-drop, followed by
and repeat.
|
ATTACKS TRIAL
HERO AND LEGEND DETAILS
| Difficulty | Opponents | Level | Time Limit | Kills Required |
|---|---|---|---|---|
| Hero | Varies per Character | Varies per Character | 4:30 | 2 |
| Legend | Varies per Character | Varies per Character | 3:30 | 2 |
ALL-STAR DETAILS — TIME LIMIT: 2:00 — KILLS REQUIRED: 3
| Character | Opponents | Level | Pro Tip |
|---|---|---|---|
| Big Daddy | Jak, Sly Cooper | Metropolis |
is always Big Daddy’s go-to attack, so don’t hesitate to use it liberally. Switch to (mash)
when both characters are close.
|
| Cole | Kratos, Toro | Alden’s Tower |
Deploy a constant barrage of Sticky Grenades
and Lightning Bolts (hold
) to build up AP rapidly.
|
| Dante | Drake, PaRappa | Metropolis |
Keep enemies together and dance around them using various cancels while never letting off the
button. Focus on scoring double-kills with Level 1 Supers to pass.
|
| Evil Cole | Spike, Cole | Stowaways |
Litter the ground with Double Grenades (
) and the air with
to cover all bases.
|
| Fat Princess | Cole, Ratchet | Franzea |
Mash
at close range to build AP quickly. Drop in with air
to surprise from above, and rely on
to get closer to foes.
|
| Heihachi | Drake, PaRappa | Metropolis |
Combo
into
or
to build AP rapidly. Drop in on foes with air
, then press
on wake-up for an invincible sweep.
|
| Jak | Sweet Tooth, Fat Princess | Metropolis |
The Blaster
is Jak’s most efficient attack for building AP.
|
| Kratos | Cole, Drake | Alden’s Tower |
Jump cancel
on hit into air (mash)
or air
for big AP gains. Use
on the ground to absorb Cole and Drake’s projectiles.
|
| Nariko | Drake, PaRappa | Metropolis |
Rely on Counter (
) to keep Nariko safe. On hit, launch with
, jump cancel, and transition into air
to rake in the AP.
|
| Nathan Drake | Toro, PaRappa | Hades |
Liberal use of Run and Gun Advance and Retreat supply a constant stream of AP, while
clears some space. Only use
when standing on the edge of the thin platforms.
|
| PaRappa | Jak, Sly Cooper | Alden’s Tower |
Dive in on foes with air
, then flatten them with
. At close range, use an up throw followed by
.
|
| Radec | Sly Cooper, Evil Cole | Time Station |
Play aggressively and catch foes with
while deploying rapid-fire
grenades. Catch anyone on a thin platform with
from below.
|
| Raiden | Drake, PaRappa | Metropolis |
Close the distance with air
dives, then focus on landing neutral
attack strings for large amounts of AP.
|
| Ratchet | Drake, Sly Cooper | Franzea |
and
are Ratchet’s bread and butter attacks here. Hold
to keep a fully charged Sonic Erupter blast at the ready when moving.
|
| Sackboy | Drake, PaRappa | Metropolis |
Fire Jam Session (
) from the edge of the side platforms. Use
or
when enemies get close.
|
| Sir Daniel | Drake, PaRappa | Metropolis |
Even without the Golden Shield,
is still a great attack for building AP. Use
when enemies are close, or
followed by
when they try to get in.
|
| Sly Cooper | Kratos, Toro | Invasion |
Teleport toward foes when they’re far away, and switch to
as the distance closes. Try to keep your foes on the wide flat area at the bottom of Invasion.
|
| Spike | Kratos, Sly Cooper | San Francisco |
Keep a Bananarang (
) deployed at all times, and concentrate on trapping foes with
or short range RC Satellite Laser activations.
|
| Sweet Tooth | Kratos, Spike | Black Rock Stadium |
All of his
attacks are close range, making this a tough trial. Focus on getting within shotgun range and only use the chainsaw at close range in the corner.
|
| Toro | Drake, PaRappa | Metropolis |
Toro is stuck as Justice Toro during the match, but luckily he’s speedy. Close the gap with foes, and combo
into
,
to fill your Super Meter.
|
ATTACKS TRIAL
HERO AND LEGEND DETAILS
| Difficulty | Opponents | Level | Time Limit | Kills Required |
|---|---|---|---|---|
| Hero | Varies per Character | Varies per Character | 4:30 | 2 |
| Legend | Varies per Character | Varies per Character | 3:30 | 2 |
ALL-STAR DETAILS — TIME LIMIT: 2:00 — KILLS REQUIRED: 3
| Character | Opponents | Level | Pro Tip |
|---|---|---|---|
| Big Daddy | Toro, Spike | Black Rock Stadium |
Lead enemies into the corners of Black Rock. Deploy air
to trap approaching foes, zap with
, and then follow up with (hold)
.
|
| Cole | Fat Princess, Sly Cooper | Dojo |
Hold foes in place with
, followed by
. Alternate between ground and air
to launch or flatten foes.
|
| Dante | Sweet Tooth, Ratchet | Dojo |
Cross-up opponents with
canceled into
or
. If someone get’s in Dante’s face, use
to counter.
|
| Evil Cole | Drake, Jak | San Francisco |
Keep a trap
deployed at all times, as well as a full charged Giga Punch (hold
). These two should rapidly build the AP needed for fast Level 1 kills.
|
| Fat Princess | Sly Cooper, Drake | Sandover Village |
Remember: only one villager allowed at a time. Only deploy bombs (
) from the air to reduce recovery time, and be sure opponents are lined up before using
. Rely on
at close range.
|
| Heihachi | Sweet Tooth, Ratchet | Dojo |
Very hard. Only
or a successful counter (
) can deal damage directly. Spam
until the beach ball appears, and rely on it to eject precious AP Orbs from foes.
|
| Jak | Kratos, Sly Cooper | Stowaways |
There should never be a moment where a Gyro Buster (
) isn’t in play. While deployed, use
and charged air
to build more AP.
|
| Kratos | Ratchet, Evil Cole | Sandover Village |
Mash
at a distance, and
when at close range. Use
after a
counter, or from beneath one of the right-hand platforms.
|
| Nariko | Sweet Tooth, Ratchet | Dojo |
Deploy air
and direct it downward to catch foes from above, or leap in with air
, followed by
to raise your AP Levels.
|
| Nathan Drake | Evil Cole, Sweet Tooth | Alden’s Tower |
Tag foes with
to disable their jump ability, and keep a steady stream of Oil Drums (
) deployed at all times. Use
to charge in or escape as needed.
|
| PaRappa | Jak, Sly Cooper | Alden’s Tower |
Stand in the Ray Sphere and deploy
to gain free AP quickly. If foes land on the Ray Sphere platform, drop down and use air
to send them flying.
|
| Radec | Jak, Spike | Columbia |
Rely on neutral
as your main AP generator. Hang out at ground level under the right-hand platforms, keeping the area above covered with
and
attacks. Push foes away with
if they push past your defenses.
|
| Raiden | Sweet Tooth, Ratchet | Dojo |
Stick to
attacks to advance on foes while attacking with relative safety. Parry (
) at close range, then follow up with
.
|
| Ratchet | Sweet Tooth, Jak | Time Station |
Keep Mr. Zurkon (
) out at all times, and set up a pair of Tesla Spikes between the lowest two platforms in the center of the level. Charge and aim air
with Ratchet’s back against a wall.
|
| Sackboy | Sweet Tooth, Ratchet | Dojo |
Put Sackboy’s back to the wall and deploy
and
, the fire a barrage of snack cakes with A and replace the fan and electrical pad as needed.
|
| Sir Daniel | Sweet Tooth, Ratchet | Dojo |
Very hard. Keep Golden Shield
equipped at all times to auto-block projectiles, and
whenever available. Deploy air
to gradually increase AP, and rely on throws to eject AP Orbs.
|
| Sly Cooper | Jak, Spike | Franzea |
A Cap Mine (
) should always be in play. Use
to reflect projectiles from this trigger-happy duo, and rely on
counters followed by
otherwise.
|
| Spike | Jak, Toro | Invasion |
Try to keep enemies in the lower-right or lower-left corners, and deploy a full charged
for big AP gain. Trap a foe in a corner and mash
for even more.
|
| Sweet Tooth | Radec, PaRappa | Alden’s Tower |
Roadkill Mine’s (
) should always be in play, even better if dropped from above, as they’re Sweet Tooth’s main source of AP income.
|
| Toro | Sweet Tooth, Ratchet | Dojo |
Toro’s costume changes can cancel into one another and themselves. Fire a constant stream of Torobi Stars
at long range, and switch to Justice Toro or Oni Toro when foes get closer. This trial is a lot easier than it looks!
|
STREAKER TRIAL
| Difficulty | Opponents | Level | Time Limit | Kills Required |
|---|---|---|---|---|
| Hero | PaRappa, Fat Princess | Time Station | 4:30 | 2 |
| Legend | Jak, Sweet Tooth | Columbia | 3:30 | 2 |
| All-Star | Ratchet, Evil Cole | Sandover Village | 2:00 | 3 |
Sandover Village is one of those maps that can leave you pulling your hair out—especially when time is at a premium. Racking up hits is a tall order when opponents are sitting in the water and you’re up above. Worse, the challenge is to continually attack without getting hit yourself. Your best bet is to park your character in the upper-right part of the level and let enemies come to you. If ejected into the water, use the water wheel to get back into the fray as quickly as possible, but watch for attacks as you leap up back onto solid ground; it’s a favorite ambush spot for the AI.
TEAM TRIAL
HERO AND LEGEND DETAILS
| Difficulty | Teammate | Opponents | Level | Time Limit |
|---|---|---|---|---|
| Hero | Varies per Character | Varies per Character | Varies per Character | 2:30 |
| Legend | Varies per Character | Varies per Character | Varies per Character | 2:30 |
ALL-STAR DETAILS — TIME LIMIT: 2:30
| Character | Teammate | Opponents | Level | Pro Tip |
|---|---|---|---|---|
| Big Daddy | Cole | Sweet Tooth, Ratchet | Time Station |
Focus on using air
from above, or
and
while at the bottom of the level.
|
| Cole | PaRappa | Ratchet, Drake | San Francisco | Use hit-and-run tactics with Grind attacks while PaRappa keeps the enemy occupied. |
| Dante | Jak | Spike, Cole | Metropolis | Stick close to Jak in case he successfully lands a Mass Inverter blast, opening up opponents to the air combo of your choice. |
| Evil Cole | Radec | Kratos, Sly Cooper | Invasion | Stay on the same level as Radec and allow him to do his thing from the far side of the level while you make Evil Cole chase down foes. |
| Fat Princess | Jak | PaRappa, Sweet Tooth | San Francisco |
Ensnare foes with a fully mashed
attack while Jak pelts them with gunfire.
|
| Heihachi | Jak | Spike, Cole | Metropolis | Jak has many attacks that put foes in an aerial state, essentially starting a juggle string for Heihachi. |
| Jak | Drake | Toro, Ratchet | Columbia | Drake is guaranteed to keep a steady supply of Oil Barrels rolling, which won’t affect Jak. Stay within their blast range to cover Jak during lengthier startup periods. |
| Kratos | PaRappa | Fat Princess, Jak | Time Station | If PaRappa is attacking foe, so should Kratos. Let PaRappa set ‘em up and go into Kratos’s BnB combo, or score a free kill while the foe is stuck in a flurry of punches. |
| Nariko | Jak | Spike, Cole | Metropolis | Opponents trapped in Jak’s Mass Inversion blast are wide open to many of Nariko’s Key Pose combos. |
| Nathan Drake | Radec | Cole, Jak | Time Station | Climb to the top of Time Station and do your own famous ape impression by releasing a constant stream of Oil Drums onto the platforms below. |
| PaRappa | Fat Princess | Sweet Tooth, Kratos | Hades |
Stand near Fat Princess’ bombs, and pull enemies in with
and force them to eat the explosion.
|
| Radec | Kratos | Fat Princess, Sweet Tooth | Columbia | Set up shop on the left-hand platform and let Kratos knock enemies into the path of Radec’s sniper rifle. |
| Raiden | Jak | Spike, Cole | Metropolis | Focus on whichever enemy Jak isn’t attacking. Raiden works best in one-on-one situations. |
| Ratchet | Fat Princess | Spike, PaRappa | San Francisco | Mr. Zurkon is the only villager Ratchet needs, but Fat Princess’ Butt Drop and ballerina attacks create some excellent attack opportunities for Ratchet. |
| Sackboy | Jak | Spike, Cole | Metropolis |
Play this match like you normally would with Sackboy, but be sure to use the Grabinator (air
) on anyone caught by Jak’s Mass Inverter.
|
| Sir Daniel | Jak | Spike, Cole | Metropolis | As always, keep the Golden Shield deployed. Take advantage of times where both enemies are occupied with Jak to pull out a fresh Golden Shield without fear. |
| Sly Cooper | PaRappa | Evil Cole, Radec | Columbia | Whenever PaRappa catches a foe with a flurry of punches, Sly should be close by to either steal AP from behind or blow them sky high with an Explosive Barrel. |
| Spike | PaRappa | Cole, Evil Cole | Franzea |
PaRappa is great at keeping a single opponent locked into place, giving Spike enough time to fully charge
or to get close for a fully mashed
attack.
|
| Sweet Tooth | Toro | Ratchet, Jak | Invasion | Toro’s costumes can make Sweet Tooth miserable on this massive level by forcing foes out of range. Try to keep up with Toro and attack foes with the Shotgun while they’re stuck in one of Toro’s attacks. |
| Toro | Jak | Spike, Cole | Metropolis | Stick with the normal Toro gameplan during this fight, but look for opportunities to land hard-hitting Oni Toro or Justice Toro attacks on occupied opponents. |
COMBO TRIAL
| Difficulty | Opponent | Level | Time Limit | Kills Required |
|---|---|---|---|---|
| Hero | PaRappa | Time Station | 4:30 | 2 |
| Legend | Jak | Columbia | 3:30 | 3 |
| All-Star | Ratchet | San Francisco | 2:30 | 3 |
San Francisco is a fairly small level, which means that traversing the entire length shouldn’t take long with even the slowest of characters. That’s good if you accidentally land an attack that knocks Ratchet away, because otherwise, the goal should be to land as many consecutive hits as possible. Consult your character’s Combo Tutorial to memorize some of their lengthier combos—juggles especially. The more you can press the attack, the faster you’ll generate the necessary AP to unload with a carefully aimed Super.
STOCK TRIAL
HERO AND LEGEND DETAILS
| Difficulty | Opponent | Level | Stock |
|---|---|---|---|
| Hero | Varies per Character | Varies per Character | 3 |
| Legend | Varies per Character | Varies per Character | 3 |
ALL-STAR DETAILS — STOCK: 3
| Character | Opponent | Level | Pro Tip |
|---|---|---|---|
| Big Daddy | Fat Princess | Metropolis |
The super armor of
should trump most of Fat Princess’ attacks, but beware her charged
attack and any inbound villager attacks.
|
| Cole | Fat Princess | Stowaways |
Cole has a massive speed advantage here, so use it. Create some distance and fire a Redirect Rocket, then tag Fat Princess with
to force the rocket to her location.
|
| Dante | Fat Princess | Metropolis |
Rely on
to cross-up Fat Princess and keep her in hitstun with big Bold Cancel combos to prevent villager attacks.
|
| Evil Cole | Fat Princess | San Francisco |
Keep your distance while using
to trap Fat Princess, and then transition into the combo of your choice.
|
| Fat Princess | Sweet Tooth | Stowaways |
Sweet Tooth’s shotgun can demolish the super armor of a charged
attack, so put him in hitstun with
at a distance. Follow up with
to close the gap.
|
| Heihachi | Fat Princess | Metropolis | Wavedash towards Fat Princess to avoid villager attacks, and begin attacking with Electric Wind God Fist once you’re through the breach. |
| Jak | Fat Princess | Alden’s Tower |
Mage Fireball is Fat Princess’ only long-range option, so feel free to hang back and pepper her with
shots. Dodge fireballs when they get close, and escape with air
when her majesty gets too close.
|
| Kratos | PaRappa | Franzea |
Kratos has a big range advantage, but PaRappa has more speed. To compensate, hang out on the lowest center platform and use the tracking abilities of
to catch PaRappa as he approaches.
|
| Nariko | Fat Princess | Metropolis |
Pull in Fat Princess with
, and then bounce her with
to begin a combo. If a villager attack is inbound during your pull attempt, jump immediately and switch to an air
attack.
|
| Nathan Drake | Sweet Tooth | San Francisco |
Get to the uppermost left platform immediately and kick out an Oil Drum at the start of the match. Use
when Sweet Tooth gets close. Climb the rubble when the right-hand platform is destroyed and repeat this tactic, deploying Level 2 Supers when available.
|
| PaRappa | Kratos | San Francisco |
Your main concern is dealing with Kratos’s precognitive counters. Bait out a counter with a Mic Grab at max range, then rush in with
to start a combo.
|
| Radec | Sly Cooper | Dojo |
Force Sly to the other side of the map with ground or air
, and then deploy
to prevent him from jumping in. Hold up in a corner and fire
into the wall behind Radec to protect him with firing long-range attacks.
|
| Raiden | Fat Princess | Metropolis |
Speed is Raiden’s ally, but he must contend with dodging villagers to open up Fat Princess’ defenses. Focus on getting her into a corner and using basic
combos to build AP quickly.
|
| Ratchet | Fat Princess | Invasion | Mr. Zurkon is far superior to any fleshy villager. Keep him deployed, and trap Fat Princess in the Suck Cannon with the right stick. Aim and fire her into one of the lower corners and begin an endless gadget assault. |
| Sackboy | Fat Princess | Metropolis | Set up a Checkpoint Anchor in the air right at the start of the match and resume the normal Sackboy plan of an Electric Panel/Fan combo. Beware, villagers aren’t affected by the fan’s air stream! |
| Sir Daniel | Fat Princess | Metropolis |
Sir Daniel’s Golden Shield absorbs projectiles, so that takes care of worrying about villager attacks. Charge at her and follow up with basic
combos on hit.
|
| Sly Cooper | Sweet Tooth | Hades |
Dance around Sweet Tooth’s brutal attacks using Sly’s teleport
and decoy counter
to get behind him. Chip away at him bit by bit and deploy Murray after a counter once you have a full Super Meter.
|
| Spike | Fat Princess | Hades |
Keep your distance from Fat Princess. Focus on hitting her with
or
projectiles, and only approach via a charged air
before beginning a combo.
|
| Sweet Tooth | PaRappa | Metropolis | Instead of chasing after PaRappa, hang out on the side platforms and wait for him to walk right into a Roadkill Mine. Use the shotgun to quickly blast him away and repeat the process. |
| Toro | Fat Princess | Metropolis |
Utilize Torobi the Kat’s
teleport to avoid incoming villagers and get close to the princess. Change into Justice Toro at close range and use his hard-hitting moves to defeat her super armor attacks.
|
MULTI-HIT TRIAL
| Difficulty | Opponents | Level | Time Limit | Kills Required |
|---|---|---|---|---|
| Hero | PaRappa, Fat Princess, Cole | Time Station | 4:00 | 2 |
| Legend | Jak, Sweet Tooth, Big Daddy | Columbia | 3:00 | 2 |
| All-Star | Ratchet, Evil Cole, Toro | Sandover Village | 2:00 | 3 |
With a fairly limited amount of time and Sandover’s all-too-familiar layout, it can be difficult to get enemies to group up for your attacks. Stick to the upper-right portion of the level and block to draw foes to you, then unload. The AP generation is cranked way up for hits in this Trial, so it shouldn’t take long to stock Supers, even Level 3s if you let enemies come to you rather than trying to chase them down.
AVOID SUPER 1 TRIAL
| Difficulty | Opponent | Level | Time Limit | Kills Required |
|---|---|---|---|---|
| Hero | Your Character | Varies by Character | 3:00 | 2 |
| Legend | Your Character | Varies by Character | 3:00 | 3 |
| All-Star | Your Character | Varies by Character | 3:00 | 3 |
Because the Super Survival Trials are all based on your character, every trip through these Trials will be different. The key is to survive for as long as possible, avoiding Supers at all costs. Use fast attacks to interrupt your evil twin during their Super startup period, and focus on building AP for your own Super attacks. Make liberal use of the terrain of each level and evasive actions to make escapes, and be prepared to punish your opponent when they whiff a Super.
SURVIVE SUPER 2 TRIAL
| Difficulty | Opponent | Level | Stock Limit | Supers Survived |
|---|---|---|---|---|
| Hero | Your Character | Varies by Character | 4 | 4 |
| Legend | Your Character | Varies by Character | 3 | 4 |
| All-Star | Your Character | Varies by Character | 3 | 5 |
Depending on your character, this can be an absolute nightmare of a challenge. Characters that have longer-term Supers like PaRappa and Fat Princess create a constant game of keep-away. Like the Level 1 Supers, it’s absolutely crucial to stay mobile. Drop (
) or pass (
while falling) through platforms to make a hasty escape as needed, and keep at it! Remember, the Trial will only be completed once the AI has spent a set number of Supers. Each time you die, the counter resets, so stay on your toes!
SURVIVE SUPER 3 TRIAL
| Difficulty | Opponent | Level | Stock Limit | Supers Survived |
|---|---|---|---|---|
| Hero | Your Character | Varies by Character | 8 | 1 |
| Legend | Your Character | Varies by Character | 6 | 2 |
| All-Star | Your Character | Varies by Character | 5 | 3 |
No matter your character, surviving the onslaught that is a constant string of Level 3 Supers is going to be a serious test of your mettle. Dodge rolling is hugely important here, but so too is air dodging, since your character is technically invincible until touching the ground (and can even transition right into a roll out of the way with proper timing). Absolutely milk the air dodge to minimize the amount of exposure; in some cases, the AI may not even attack if you’ve removed their ability to hit your character.
PANDEMONIUM TRIAL
| Difficulty | Opponents | Level | Time Limit | Kills Required |
|---|---|---|---|---|
| Hero | Sly Cooper, Radec, Drake | Varies per Character | 3:00 | 5 |
| Legend | PaRappa, Sweet Tooth, Kratos | Varies per Character | 3:00 | 7 |
| All-Star | PaRappa, Kratos, Fat Princess | Varies per Character | 3:00 | 10 |
With a fairly generous time limit and plenty of AP doled out for even the most basic of combos, expect to hear that announcer shouting “Level 1!” more or less constantly. That also means a constant barrage of Supers from all players, so stay agile; getting tagged by a Super usually means losing a whole AP level, so experiment with letting loose with a bunch of Level 1s of your own before trying to save up. The risk of losing those levels and the time spent earning them can be quite high depending on your character.
LEVEL 1 MASTERY TRIAL
| Difficulty | Opponents | Level | Time Limit | Kills Required |
|---|---|---|---|---|
| Hero | PaRappa, Fat Princess, Jak | Stowaways | 3:00 | 6 |
| Legend | Sweet Tooth, Ratchet, Evil Cole | Columbia | 2:00 | 8 |
| All-Star | Spike, Radec, Toro | Invasion | 1:30 | 9 |
Thankfully, there’s a bottomless supply of Level 1 Supers at your disposal, but the Invasion map offers plenty of room for retreats and only a minute and a half to notch almost double-digit numbers of kills. Bait enemies into coming to you by blocking near an object where you can trap them easily (like the shipping container) or one of the sides of the level, then unleash when they’re in range. A quick roll away while changing direction to face your opponents before using a Super can help catch them in the radius of the attack.
LEVEL 2 MASTERY TRIAL
| Difficulty | Opponents | Level | Time Limit | Kills Required |
|---|---|---|---|---|
| Hero | PaRappa, Fat Princess, Jak | Stowaways | 3:00 | 6 |
| Legend | Sweet Tooth, Ratchet, Evil Cole | Columbia | 2:00 | 9 |
| All-Star | Spike, Radec, Toro | Invasion | 1:30 | 9 |
Once again, the Invasion map wreaks havoc with attempts to corral enemies to let loose with an endless supply of Level 2 Supers. Use the same techniques as other All-Star challenges on this map: block to attract enemy attacks, wait for the AI dogpile, then cut loose with your Super. Remember, all three have to be caught in the Super attack for their tally to count, but you only have to do it three times. That averages out to 30 seconds per trio, so make those Supers count.
PERFECTION TRIAL
| Difficulty | Opponents | Level | Time Limit |
|---|---|---|---|
| Hero | Sly Cooper, Sweet Tooth, Kratos | Varies per Character | 1:30 |
| Legend | Drake, Fat Princess, Radec | Varies per Character | 2:00 |
| All-Star | PaRappa, Sweet Tooth, Kratos | Varies per Character | 3:00 |
Completing this Trial on All-Star difficulty is an exercise in Super Meter management, but you need to monitor all of your opponent’s Super Meters along with your own! Basically, you want to minimize an adversary’s ability to perform a Super. Prevent the AI from keeping their AP by using throws or any items that happen to spawn during the match, and collect the ejected AP Orbs to grow your Meter. Prioritize these attacks towards the opponent with the most AP acquired, and make Hedgehog Grenades and Rail Guns you number one priority if they appear: both of these items temporarily disable the ability to use Super attacks on hit. However, no mater how good you are at squeezing AP out of opponents, its inevitable that your opponents are going to gain enough AP to attempt at least a Level 1 Super. Avoid these characters like the plague and hope they go one of the other AI-controlled characters, or attempt to bait their Super, evade, and punish if you’re feeling bold. Get in kills when you can and stick it out for a full three minutes to cross this Trial off your list!
ARENA TRIAL
| Difficulty | Opponent | Level | Time Limit |
|---|---|---|---|
| Hero | Your Character | Hades | 3:00 |
| Legend | Your Character | Invasion | 3:00 |
| All-Star | Your Character | Stowaways | 3:00 |
Take heed when reading this Trial’s objective, because SuperBot isn’t lying: this will be a true test of what your character can do in the hands of PlayStation All-Stars’ AI. Cranked up to CPU 5, the hardest of five difficulty levels, the AI is fully equipped to unleash combos, unload Supers with devastating accuracy, and make full use of the entire move set in an attempt to best you in total wins. As this plays like any other standard match, keeping a mental tally of your score is absolutely vital to knowing when you can simply burn the clock and when you need to make Supers count to tip the scoring scales.
3 VS 1 TRIAL
| Difficulty | Opponents | Level | Time Limit |
|---|---|---|---|
| Hero | Sweet Tooth, Ratchet, Evil Cole | Invasion | 3:00 |
| Legend | Spike, Radec, Big Daddy | Black Rock Stadium | 3:00 |
| All-Star | Toro, Sly Cooper, Cole | Columbia | 3:00 |
The biggest issue here isn’t that you’re stuck fighting off three enemies that are all constantly gunning for you; it’s that their combined score needs to be offset by your own kill count. Luckily, the AI isn’t set to a terribly high level, but the single best way to ensure victory is to paint the whole opposing team with kills. Try to spread out your kills evenly to keep the whole group’s score down, and whenever possible, try to get multiple kills with a single Super. Think back to the Mastery Trials from earlier, and try to pull the entire group to an area where they can be easily trapped. Remember that Level 3 Supers stop the clock if you’re in need of precious time to rack up some last-second kills.
UNTOUCHABLE TRIAL
| Difficulty | Opponent(s) | Level | Time Limit | Kills Required |
|---|---|---|---|---|
| Hero | Sly Cooper | Varies per Character | 4:00 | 1 |
| Legend | Kratos | Varies per Character | 4:00 | 2 |
| All-Star | PaRappa, Sweet Tooth | Varies per Character | 4:00 | 2 |
The stakes get a little higher on All-Star, with not one but two combatants to keep at bay. Because a single hit will wipe out any AP progress, it’s important to keep both foes on the same side of your character rather than letting them sandwich you. As a bonus, hitting both characters bestows extra AP, so it can make getting to that Level 1 Super a quicker prospect. Avoid trying to stockpile too much AP, and make those Level 1s hit fast and true. Upon completion of this Trial, you can kiss that character’s Trials goodbye and move on to the next set of challenges with a new combatant.
UNIQUE TRIALS
BIG DADDY — PLASMID TRIAL
| Difficulty | Opponent | Level | Time Limit | Kills Required |
|---|---|---|---|---|
| Hero | Fat Princess | Invasion | 2:00 | 2 |
| Legend | Radec, Dante | Stowaways | 1:40 | 4 |
| All-Star | Spike, Nariko | Dreamscape | 1:30 | 4 |
Objective: Hit your opponent with a Plasmid and follow up to earn AP for kills.
Big Daddy is a slow, lumbering pain machine, but his Plasmid attacks are actually fairly speedy. The
tornado and
/
lightning shots are great for poking from a distance (the former is also a great way to catch enemies on platforms above you without having to jump), and the
fireball grants quite a bit of AP. Remember that you need only connect with an initial Plasmid; after that, any attacks that land while Big Daddy is glowing add to the AP meter. Though 1:30 is hardly a lot of time to stock up on AP, waiting for the Level 3 Super can make hunting down the four kills fairly easy if your foes are close together for the first three kills.
COLE — GRIND TRIAL
| Difficulty | Opponent(s) | Level | Time Limit | Kills Required |
|---|---|---|---|---|
| Hero | Sweet Tooth | Metropolis | 2:00 | 2 |
| Legend | Sir Daniel, Fat Princess | Paris | 1:40 | 4 |
| All-Star | Raiden, Spike | Sandover Village | 1:30 | 4 |
Objective: Strike your opponent with a Grind attack and follow up with hits to gain AP for Supers.
The lesson this Trial is trying to teach is two-fold: first, that the Grind needs to be started at a distance to prep for the attack that follows, and second, that the attack itself needs to be properly timed—neither of which is easy when opponents are running all over the place. Remember that the Grind (
) has to be started first, after which a rising
attack will open Cole up to attacking normally to build AP.
COLE — ABSORB TRIAL
| Difficulty | Opponent(s) | Level | Time Limit | Kills Required |
|---|---|---|---|---|
| Hero | Jak | Dojo | 2:00 | 2 |
| Legend | Radec, Ratchet | Dreamscape | 1:40 | 4 |
| All-Star | Ratchet, Jak | Columbia | 1:30 | 4 |
Objective: Absorb projectiles to gain AP for kills.
Quite possibly one of the easiest Trials in the entire game, simply hold
to deploy Cole’s shield and wait for your AP meter to fill to Level 3. Unleash the fury and guide the tornado toward your opponents, then park the tornado near one side of the stage to grab an enemy as they spawn. If the initial tornado strike happened to suck up both foes quickly, there should be plenty of time to kill both twice during the Super. If not, simply load up and devastate them again.
DANTE — COUNTER-ATTACK TRIAL
| Difficulty | Opponent(s) | Level | Time Limit | Kills Required |
|---|---|---|---|---|
| Hero | Nariko | San Francisco | 2:00 | 2 |
| Legend | Sweet Tooth, Toro | Dojo | 1:40 | 4 |
| All-Star | Kratos, Cole | Black Rock Stadium | 1:30 | 4 |
Objective: Successfully counter-attack with Dante’s
attack to build AP for kills.
Dante’s counter window is really quite generous, giving you a good second or so of time for enemies’ attacks to be turned against them. Try to hold off on unleashing your Super until it hits Level 2. The streak across flat ground is best used the second both opponents are in front of Dante. Repeat twice, and this Trial is in the bag.
DANTE — AIR STREAK TRIAL
| Difficulty | Opponent(s) | Level | Time Limit | Kills Required |
|---|---|---|---|---|
| Hero | Sir Daniel | Dojo | 4:00 | 2 |
| Legend | Ratchet, Toro | Hades | 3:30 | 4 |
| All-Star | Drake, Sly Cooper | Black Rock Stadium | 3:00 | 4 |
Objective: The more moves you perform in the air, the higher your AP bonus. Get kills to pass.
It’s fortunate that Dante is one of the most aerial fighters in the Battle Royale, as the only way to stock AP in this Trial is to dish out the hurt off terra firma. Remember to hold
when uppercutting enemies into the air before unleashing a barrage of mid-air attacks. If the time limit is presenting too much of a challenge, don’t hesitate to consult the Combo Tutorial to get a good idea of the range of Dante’s aerial move set. One of the benefits of staying airborne is that it completely defeats Sly’s use of the teleporting back attack and Drake’s endless supply of barrels.
EVIL COLE — SLIDE TRIAL
| Difficulty | Opponent(s) | Level | Time Limit | Kills Required |
|---|---|---|---|---|
| Hero | Sackboy | Hades | 2:00 | 2 |
| Legend | Sir Daniel, Fat Princess | Paris | 1:40 | 4 |
| All-Star | Ratchet, Radec | Time Station | 1:30 | 4 |
Objective: Strike your opponent with a Grind attack and follow up with hits to gain AP for Supers.
Thankfully, the Time Station is far more contained than the goodie-two-shoes Cole’s station. Use this to your advantage, grinding between the large boxes and using the
rising strike to open up your enemies for some quick AP generation. If you’re fast enough, it’s possible to wait for a Level 3 Super, unleashing The Beast and his ultra-potent fireballs to lay waste to your attackers.
EVIL COLE — CHARGE UP TRIAL
| Difficulty | Opponent(s) | Level | Time Limit | Kills Required |
|---|---|---|---|---|
| Hero | Drake | Columbia | 2:00 | 2 |
| Legend | Sweet Tooth, Heihachi | Black Rock Stadium | 1:40 | 4 |
| All-Star | Toro, PaRappa | Dreamscape | 1:30 | 4 |
Objective: Fully charge up your Charge Up attack and strike an opponent with it to earn AP for kills.
One of the hardest things about Evil Cole’s Giga Punch attack is that it requires a couple seconds of breathing room to prep. Hold
any time you have a little distance from PaRappa and Toro to make sure you’re always charged up, and don’t be afraid to throw down with a
attack when enemies draw near. Repeated charges and smashes will fill your AP quickly, but it’s up to you whether you want to stock it for an appearance of The Beast at Level 3 or use Cole’s handy Level 1 lift to grab and toss enemies. Both are equally viable, but The Beast also has the added benefit of pausing the clock. However, the downside is that his fireballs can sometimes impact the many platform edges in the level and might explode before they can catch an enemy in the blast radius, so aim
FAT PRINCESS — VILLAGER TRIAL
| Difficulty | Opponent(s) | Level | Time Limit | Kills Required |
|---|---|---|---|---|
| Hero | Sir Daniel | Stowaways | 2:00 | 2 |
| Legend | Ratchet, Dante | Paris | 1:40 | 4 |
| All-Star | Sweet Tooth, Kratos | Sandover Village | 1:30 | 4 |
Objective: Hit an opponent with one of your villagers and follow up with attacks to gain AP for kills.
This Trial is a truly great introduction to the sheer amount of possibility with Fat Princess’ loyal minions. The villagers are a potent mix of area effect
, quick horizontal
slashes and
bomb placement. Though only one villager can be used at a time, Fat Princess herself is free to move and attack independently of her subjects, making her unique among the All-Stars cast. The same Sandover Village rules apply here, specifically that staying out of the water is crucial to making the most of the meager 1:30 allotted for the Trial.
HEIHACHI — COUNTER-ATTACK TRIAL
| Difficulty | Opponent(s) | Level | Time Limit | Kills Required |
|---|---|---|---|---|
| Hero | Toro | Time Station | 2:00 | 2 |
| Legend | Dante, Sweet Tooth | Invasion | 1:40 | 4 |
| All-Star | Nariko, Kratos | San Francisco | 1:30 | 4 |
Objective: Successfully counter-attack with Heihachi’s
attack to build AP for kills.
It’s a battle of the long-range opponents with the God and Goddess of War. Both Kratos and Nariko have devastating range compared to Heihachi’s feet and fists, but the counter-attack does respond to even ranged strikes. Be sure to get on the attack as soon as the counter is successful to build AP and take down the duo before their annoyingly effective blades can inflict too much harm.
HEIHACHI — CHARGE AP TRIAL
| Difficulty | Opponent(s) | Level | Time Limit | Kills Required |
|---|---|---|---|---|
| Hero | Sweet Tooth | Dojo | 2:00 | 2 |
| Legend | Big Daddy, Raiden | Franzea | 1:40 | 4 |
| All-Star | Ratchet, Radec | Metropolis | 1:30 | 4 |
Objective: Use your Charge Up move to gain AP for kills.
This Trial is actually fairly easy. With just a handful of charged strikes (
for a second, then
to introduce Heihachi’s palm to Ratchet or Radec’s face) from either of the elevated positions, a Level 3 Super is a lock. Let the evil laughter begin! Then do it all over again to bank yet another All-Star Trial. MUAHAHAHAHAHAHAHAHAAAAA!
JAK — MASS INVERTER TRIAL
| Difficulty | Opponent(s) | Level | Time Limit | Kills Required |
|---|---|---|---|---|
| Hero | Big Daddy | Dojo | 2:00 | 2 |
| Legend | PaRappa, Sly Cooper | Time Station | 1:40 | 4 |
| All-Star | Sly Cooper, Heihachi | Columbia | 1:30 | 4 |
Objective: Hit your opponent with the Mass Inverter and follow up to gain AP for kills.
The hardest part of this challenge is just getting enough time for the lengthy wind-up needed to unload a shot from the Mass Inverter. Though it can be deployed in the air with a slightly smaller area of effect, the fact that Jak has to be in the mix to catch enemies in the blast radius makes it a difficult move indeed. Let loose with the
attack, and immediately chain as many attacks as possible while the short AP gathering window is still open. It’s possible to isolate a single enemy and attack, but the AP glow lasts for just a precious few seconds, so make the most of them. The minute and half offered to finish the challenge should be just enough to get to Level 3, at which point Light Jak’s aimed
attacks can snuff out the enemy combatants with ease while putting the clock on hold.
JAK — AIR STREAK TRIAL
| Difficulty | Opponent(s) | Level | Time Limit | Kills Required |
|---|---|---|---|---|
| Hero | Raiden | Paris | 4:00 | 2 |
| Legend | Dante, Ratchet | Metropolis | 3:30 | 4 |
| All-Star | Big Daddy, PaRappa | Alden’s Tower | 3:00 | 4 |
Objective: The more moves you have Jak perform in the air, the higher your AP bonus. Get kills to pass.
Jak’s neutral
air attack is a great multi-hitter that can really help to rack up hits to boost AP gain, but his
dash is even better for sneaking in one final strike before touching down on solid ground. Stay on the attack as much as possible, and use Big Daddy’s size to rack up hits off of short hops. Try to avoid any
/
strikes, especially in conjunction with
, as they have a meaty charge-up and recovery; that’s time that can be better used for laying out a bunch of spinning strikes.
KRATOS — COUNTER TRIAL
| Difficulty | Opponent(s) | Level | Time Limit | Kills Required |
|---|---|---|---|---|
| Hero | Spike | San Francisco | 2:30 | 2 |
| Legend | Sweet Tooth, Toro | Dojo | 2:00 | 4 |
| All-Star | Sly Cooper, Cole | Black Rock Stadium | 1:30 | 4 |
Objective: Successfully counter-attack with Kratos’
counter to build AP for kills.
Kratos’s Golden Fleece (
) offers one of the shortest windows for counter-attacking among the All-Stars, and he’s paired up against an absolute merciless duo. Sly Cooper’s ability to turn invisible and back attack coupled with constantly laid hat mines and Cole’s relentless lobs of energy are overwhelmingly effective. The key here is heavy use of block to draw enemies in and precision uses of the Golden Fleece to create a counter opportunity. Just because you get a reversal, though, don’t think it’s smooth sailing. The window to rack up AP is quite short, and the barrage of attacks won’t let up. Use Kratos’s
attacks to create breathing room, then try to connect with some
strikes to build up your AP. Two Level 2 Supers performed after blocking enough to get the opposing pair to attack from either side should help you move past this nightmare of a Trial.
NATHAN DRAKE — BARREL TRIAL
| Difficulty | Opponent(s) | Level | Time Limit | Kills Required |
|---|---|---|---|---|
| Hero | Raiden | Invasion | 2:00 | 2 |
| Legend | Dante, Big Daddy | Stowaways | 1:40 | 4 |
| All-Star | PaRappa, Jak | San Francisco | 1:30 | 4 |
Objective: You can only gain AP for kills while you have a barrel out.
If you’ve had to square off against Drake in previous Trials, you know just how annoying his Oil Drum attack can be. That’s intentional; the Oil Drum is meant to both harass and provide a constant means of raking in AP even when Drake isn’t around. Make the most of this dual-purpose item by letting loose while standing on ground level. You’re looking to tag both enemies at once, but if the Oil Drum is destroyed, quickly release another while your opponents are down so that it rolls through and past them, then swiftly attack with a quick combo as they’re rising and the Drum’s AP effect is still active. Block to draw them near, then topple your Level 2 Super to catch both in the debris. With a little practice, this Trial can be completed in seconds.
NARIKO — COUNTER-ATTACK TRIAL
| Difficulty | Opponent(s) | Level | Time Limit | Kills Required |
|---|---|---|---|---|
| Hero | Sweet Tooth | Stowaways | 2:00 | 2 |
| Legend | Heihachi, Nathan Drake | Dreamscape | 1:40 | 4 |
| All-Star | Fat Princess, Big Daddy | Time Station | 1:30 | 4 |
Objective: Successfully counter-attack with Nariko’s
attack to build AP for kills.
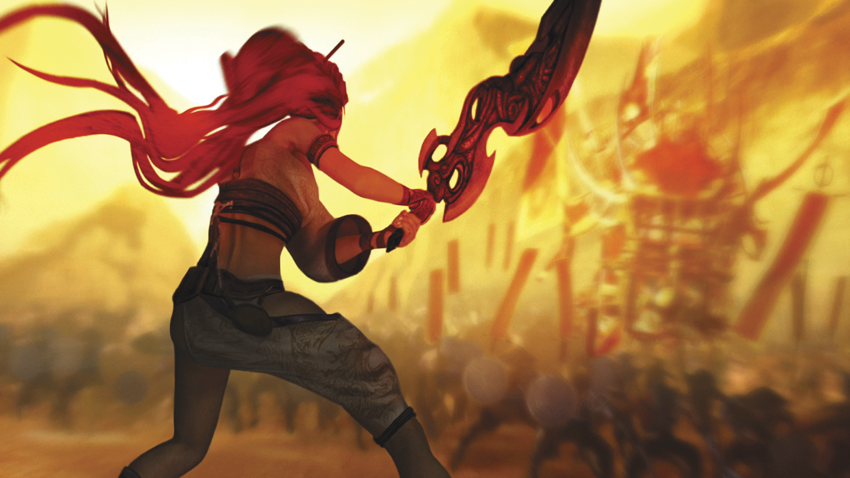
Putting Nariko’s counter-attack on a single button press isn’t just staying true to her moves in Heavenly Sword; it’s also an indication of just how important the ready state is for unleashing her attacks. Because she builds AP so slowly with her normal
attacks but can chain them into an almost constant, seamless string of pain, Nariko is one of the most consistently damaging All-Stars in the roster. Best of all, her counter has an extremely small recovery time, allowing her to jump back on the defense quickly even after mistiming an incoming strike. Put that to use by blocking to draw enemies near, then punish them All-Starly with counter-attack strings that balance wide swipes like
and piggyback off the moves learned from her last Trial with some
grabs to ensure that the adversary is always at arm’s length. Your lumbering opponents won’t know what hit ‘em.
NARIKO — SWORD GRAB TRIAL
| Difficulty | Opponent(s) | Level | Time Limit | Kills Required |
|---|---|---|---|---|
| Hero | PaRappa | Invasion | 2:00 | 2 |
| Legend | Ratchet, Sly Cooper | Black Rock Stadium | 1:40 | 4 |
| All-Star | Jak, Raiden | Alden’s Tower | 1:30 | 4 |
Objective: Sword grab opponents near Nariko with
and follow up with strikes to gain AP for kills.
Winning this Trial on All-Star difficulty boils down to a balancing act; you must make sure Raiden isn’t close by if Nariko attacks Jak, and that Jak can’t hit Nariko with a long range attack if she pulls in Raiden. Luckily, this Trial begins at the top of Alden’s Tower so don’t have to contend with the vertical scroll of the level. Try to stay on or near the raised platform on the left side of the level to cover Nariko from the rear, and focus on an opportunity to snag one of your opponents. Once you’ve snagged an opponent, immediately transition to
to cause a bounce state and trigger a Key Pose. From this point, you have the option to evade if the other character is getting too close, counter an attack, or go right into a neutral
attack string to swiftly build up to a Level 2 Super. Thanks to the boosted AP gain after a sword grab, Nariko should be at Level 3 after two repetitions of this tactic. Activate her Level 3, then take care of all four required kills in one fell swoop.
NATHAN DRAKE — WALL TRIAL
| Difficulty | Opponent(s) | Level | Time Limit | Kills Required |
|---|---|---|---|---|
| Hero | Toro | Metropolis | 2:00 | 2 |
| Legend | Heihachi, Sir Daniel | Dojo | 1:40 | 4 |
| All-Star | Nariko, Sackboy | Hades | 1:30 | 4 |
Objective: You can only gain AP for kills while using your wall.
It might seem like racking up AP in this Trial is as easy as grabbing a wall (
) and firing (
) constantly, but Nariko has a shield throw and Sackboy has the ability to place a spawn point behind Drake, both of which can pop him out of cover. On top of that, the constant fan placement and small stature mean that Sackboy can zip around quite quickly, and Drake’s cover-based bullets sail right over the little guy’s burlap dome (though not Nariko’s, fortunately). A rifle butt smash (
) while in cover can help stock a decent amount of AP per hit, but be ready to hop over the wall (
or
depending on what side Drake’s on) to make sure your attacks are facing the right way.
NATHAN DRAKE — STUN DART TRIAL
| Difficulty | Opponent(s) | Level | Time Limit | Kills Required |
|---|---|---|---|---|
| Hero | Evil Cole | Columbia | 2:00 | 2 |
| Legend | Kratos, Toro | Dojo | 1:40 | 4 |
| All-Star | Fat Princess, Cole | Black Rock Stadium | 1:30 | 4 |
Objective: Shoot an opponent with a Stun Dart and follow up with hits to gain AP for kills.
Two things make this arguably Drake’s easiest All-Star challenge: the Stun Dart (
) attack is ranged and easy to fire, and the window for grabbing AP is fairly generous. Get off a shot, unload on enemies, and watch the AP climb. Even a Level 3 Super isn’t terribly Legend to get in a few seconds if both opponents are caught in range of Drake’s follow-up hits.
PARAPPA — MIC GRAB TRIAL
| Difficulty | Opponent(s) | Level | Time Limit | Kills Required |
|---|---|---|---|---|
| Hero | Spike | Dojo | 2:00 | 2 |
| Legend | Sweet Tooth, Toro | Dreamscape | 1:40 | 4 |
| All-Star | Sly Cooper, Cole | Franzea | 1:30 | 4 |
Objective: Mic Grab an opponent with
and follow up with strikes to gain AP for kills.
While other characters have the ability to pull themselves toward enemies or enemies toward them, none has it as a default button press. PaRappa becomes incredibly dangerous when he can simply bring the fight to him, but thankfully (at least this time), you’re the one in control of the ability. Simply rein in a nearby foe, and delight in the blur of fingers that mashing
can provide. Stay on offense to gather AP until Level 2, then show Sly and Cole that their electric slides are no match for a skateboard.
PARAPPA — BOXY BOX TRIAL
| Difficulty | Opponent(s) | Level | Time Limit | Kills Required |
|---|---|---|---|---|
| Hero | Spike | Columbia | 2:00 | 2 |
| Legend | Sweet Tooth, Toro | Dojo | 1:40 | 4 |
| All-Star | Sly Cooper, Cole | Sandover Village | 1:30 | 4 |
Objective: Use your Boxy Box to gain AP for kills.
This might be the only Trial where it’s better to never attack. PaRappa’s Boxy Box can be thrown down at any time (unless it’s already been deployed) to constantly spit out AP Spheres that anyone in the battle—including PaRappa himself— can gobble up to generate easy AP. “Easy” is a relative term in this Trial, however, as the AI for Cole and Sly is clearly as interested in gaining AP as you should be. Thankfully, by merely holding
to block and pressing
/
to dodge around, you can be the benefactor of most of the AP Spheres without getting constantly besieged by would-be interlopers. Wait for Level 2 to make the most of your Supers, then skate upside their faces a couple times to leave this Sphere-hungry pair behind.
PARAPPA — REFLECT TRIAL
| Difficulty | Opponent(s) | Level | Time Limit | Kills Required |
|---|---|---|---|---|
| Hero | Sackboy | Invasion | 2:00 | 2 |
| Legend | Radec, Ratchet | Hades | 1:40 | 4 |
| All-Star | Sackboy, Drake | Alden’s Tower | 1:30 | 4 |
Objective: Reflect a projectile back at your opponent to gain AP for kills.
One of PaRappa’s most powerful moves isn’t even covered in the Hero tutorials, and it’s really only suggested in the Trials rather than explained, so listen carefully: pressing
when properly timed will use PaRappa’s skateboard to bounce a shot back toward the shooter. In this Trial, it only takes one well-timed return shot to get to Level 2, so don’t be afraid to put that skateboard to good use after tagging Sackboy or Jak with one of their own attacks. Timing is everything here, so keep PaRappa’s distance from the pair to force them to unload with ranged attacks, then clobber the shot and move in for the kill.
RADEC — DISTANCE TRIAL
| Difficulty | Opponent(s) | Level | Time Limit | Kills Required |
|---|---|---|---|---|
| Hero | Heihachi | Dreamscape | 2:00 | 2 |
| Legend | Kratos, Big Daddy | Hades | 2:00 | 4 |
| All-Star | PaRappa, Nariko | Metropolis | 2:00 | 4 |
Objective: Keep your opponent away to avoid having your AP stolen! Get kills to pass the Trial.
Radec is, by his very nature, a long-range player. Nowhere is this more obvious than in his
sniper shot that reaches nearly all the way across the Loco Roco locale. Quickly move Radec to the left side of the stage and start cranking out shots. As they connect, Nariko and PaRappa get flung all the way to the opposite end of the level. Keep up the barrage until you’ve gained enough AP for a Level 3 Super, then put the screws to the pair and keep the targeting reticule on the right side of the stage, then sweep back toward the middle to clinch the last two kills.
RAIDEN — COUNTER-ATTACK TRIAL
| Difficulty | Opponent(s) | Level | Time Limit | Kills Required |
|---|---|---|---|---|
| Hero | Sackboy | Columbia | 2:00 | 2 |
| Legend | PaRappa, Fat Princess | Sandover Village | 1:40 | 4 |
| All-Star | Kratos, Cole | San Francisco | 1:30 | 4 |
Objective: Successfully counter-attack with Raiden’s
attack to build AP for kills.
Raiden is a counter-attacking machine—literally, he’s a cyborg ninja—so it shouldn’t be terribly surprising that his wide window to allow for counters makes this one of the easiest Counter-Attack Trials of the group. Perch atop one of the left or right-most platforms to limit movement, then ready yourself for an incoming strike and unload immediately after to fill the AP gauge to bursting. Thanks to a wide area of effect, even Raiden’s Level 1 Super can wipe out any enemies on the platform if he’s in the middle. Make sure he is to bid this Trial adieu.
RAIDEN — AIR STREAK TRIAL
| Difficulty | Opponent(s) | Level | Time Limit | Kills Required |
|---|---|---|---|---|
| Hero | Dante | Dojo | 4:00 | 2 |
| Legend | Evil Cole, Toro | Paris | 3:30 | 4 |
| All-Star | Sly Cooper, Drake | Dreamscape | 3:00 | 4 |
Objective: The more moves you have Raiden perform in the air, the higher your AP bonus. Get kills to pass.
Both Drake and Sly are relentless with their annoyances, tossing out endless barrels and mine caps, so be on your guard. Raiden does have the unique advantage of a five-hit air combo, but this is going to be a struggle, no two ways about it. As always for Air Streak combos, make sure you’ve given yourself a refresher on Raiden’s combos by visiting the Combo Tutorial and getting a feel for the timing of some of the attacks. Stay on the offensive here, air recovering where possible right into air combos, and keep off the ground as much as possible; there be explosions and metallic tubes meant to keep you from your rightful place among the clouds of the Dreamscape.
RATCHET — MR. ZURKON TRIAL
| Difficulty | Opponent(s) | Level | Time Limit | Kills Required |
|---|---|---|---|---|
| Hero | Dante | Time Station | 2:00 | 2 |
| Legend | Sweet Tooth, Sly Cooper | Columbia | 1:40 | 4 |
| All-Star | Jak, Toro | Dreamscape | 1:30 | 4 |
Objective: You must have Mr. Zurkon active to gain AP for kills.
There’s not really a whole lot to this Trial, but it’s a great way to think whenever you’re controlling Ratchet—there’s basically no time where you wouldn’t want Mr. Zurkon out attacking and even providing a bit of protection. By pressing
, the autonomous robotic maestro of destruction weaves his Symphony of Pain for all to see, effectively letting you concentrate on beating the snot out of Toro and Jak. Rack up enough AP, cut loose with your Supers, and back that quad-set of kills. If sticking to Ratchet’s Level 1 Super, make sure you’ve put his back to one of the walls before firing; Toro especially loves to roll behind the shot and ruin your day.
RATCHET — TESLA SPIKE TRIAL
| Difficulty | Opponent(s) | Level | Time Limit | Kills Required |
|---|---|---|---|---|
| Hero | Sweet Tooth | Paris | 2:00 | 2 |
| Legend | Evil Cole, Big Daddy | Stowaways | 1:40 | 4 |
| All-Star | Drake, Spike | Invasion | 1:30 | 4 |
Objective: Deploy active Tesla Spikes and stay near them to gain AP for kills.
Ratchet’s Tesla Spikes (
) are the perfect method for duping unsuspecting players into walking right into a trap. Because the Spikes have to be set two at a time, it’s possible to drop the first one while the competition is busy, then drop the second when they get closer. For this Trial, just getting them dropped can be a huge pain in the Lombax, as a certain monkey catcher and his tomb-raiding friend all but ignore each other and go straight for you. Ratchet’s
combo will knock them away for a few precious seconds, but remember that the Spikes only have to be out for the AP stocking effect to kick in. Staying near the Spikes—even defending them a little by meeting threats in front of the deployed energy beam—will keep you energized to max out that AP meter and let your Supers have the final word. For those that get a lot of breathing room, placing the Spikes near each other after a double-jump can keep them from getting destroyed right away.
SACKBOY — REFLECT TRIAL
| Difficulty | Opponent(s) | Level | Time Limit | Kills Required |
|---|---|---|---|---|
| Hero | Drake | Time Station | 2:00 | 2 |
| Legend | Radec, Nariko | Sandover Village | 1:40 | 4 |
| All-Star | Drake, Radec, Nariko | Franzea | 1:30 | 4 |
Objective: Reflect a projectile to gain AP for kills.
The key to turning your enemies’ shots against themselves is an itty bitty little… fan. That’s right, the diminutive little wind blower also blows projectiles back from whence they came. Park it near the edge of the right “platform” part of the stage and keep replacing it when the gusts run out, but stay just to the right of the blustery effect’s range. Eventually, you’ll see your AP meter climb into the heavens, at which point a Level 3 Super can reduce all those naughty All-Stars to bubbly targets, all narrated by the inimitable Stephen Fry.
SACKBOY — FAN TRIAL
| Difficulty | Opponent(s) | Level | Time Limit | Kills Required |
|---|---|---|---|---|
| Hero | Kratos | Hades | 2:00 | 2 |
| Legend | Nariko, Dante | Paris | 1:40 | 4 |
| All-Star | Evil Cole, Sweet Tooth | Franzea | 1:30 | 4 |
Objective: Activate your fan and hit your opponent to gain AP for kills.
Ignore the feeling of déjà vu here, though Sackboy is once again asked to deploy his fan in Franzea (you might call it “Fan-zea” after this… but you shouldn’t). This time, however, it doesn’t actually need to be used against your foes if you don’t wish. Just parking the fan in the corner of the level pointed away from anyone else still gives you the AP gaining benefits, but there’s something to be said for learning to actually use one of Sackboy’s most powerful moves. Try throwing down a fan and then dashing (
or
Xhold) through the blast toward your enemies. You’ll rack up some huge hits and bank a ton of AP in the process. Once again, waiting for a Level 3 Super is the easiest way to close out the Trial, though if you’re having trouble reaching your foes in bubble form as they float upward, try a jumping
to grapple up to them.
SACKBOY — TELEPORT TRIAL
| Difficulty | Opponent(s) | Level | Time Limit | Kills Required |
|---|---|---|---|---|
| Hero | Big Daddy | Paris | 2:00 | 2 |
| Legend | PaRappa, Drake | Dojo | 1:40 | 4 |
| All-Star | Raiden, Sweet Tooth | Metropolis | 1:30 | 4 |
Objective: Teleport and follow up with hits to earn AP for kills.
Like the Fan Trial, you don’t absolutely have to use Sackboy’s most powerful and sneaky move, but why not use the challenge to help build some experience for putting it into practice for battles against real players? Start by dropping a Checkpoint Anchor (
) in the lower central area. Since Checkpoint Anchors can be destroyed, it can pay to also place them high up in the air after, say, a double jump. The key to effective use is placing the teleport during the heat of battle away from the main conflict and then heading back into the fray yourself. If things get dicey (like, say, a Level 2 Super from an enemy like Fat Princess or PaRappa that require avoidance), a teleport out of danger (
again) can save your bacon—and keep the attacker from tipping the score in their favor. For this challenge, however, Sackboy must exit the Checkpoint Anchor to rack up AP. Level 3 Super finisher to close, anyone?
SIR DANIEL — SHIELD TRIAL
| Difficulty | Opponent(s) | Level | Time Limit | Kills Required |
|---|---|---|---|---|
| Hero | Ratchet | Columbia | 2:00 | 2 |
| Legend | Jak, Radec | Black Rock Stadium | 1:40 | 4 |
| All-Star | Sackboy, Cole, Evil Cole | Alden’s Tower | 1:30 | 4 |
Objective: Activate Sir Daniel’s shield and follow up with hits to earn AP for kills.
The hardest part about this Trial is just getting the friggin’ shield out. All three combatants pile on plenty of harassment: Sackboy’s fan, the Coles’ electricity grenades on the ground and in the air, and of course lots of Hero melee attacks, as well. Block and roll Sir Daniel away if there’s too much commotion, and once the shield is out, make the most of some of Sir Dan’s attacks—the VD leg sweep is fantastic for not just hitting enemies in front multiple times, but tagging ones behind, too. Building AP should be relatively easy as long as D gets pressed whenever there’s a few moments of breathing room. The move takes a while to fully complete, and the AP harvesting effect won’t activate until the animation completely finishes. With a little luck and these tips, getting a Level 3 Super before the 1:00 mark should be cake, and it might even be possible to rack up all four kills in one go—something most characters could only dream of pulling off.
SLY COOPER — TELEPORT TRIAL
| Difficulty | Opponent(s) | Level | Time Limit | Kills Required |
|---|---|---|---|---|
| Hero | Sackboy | Time Station | 2:00 | 2 |
| Legend | Fat Princess, Raiden | Columbia | 1:40 | 4 |
| All-Star | Jak, PaRappa | Paris | 1:30 | 4 |
Objective: Teleport and follow up with hits to earn AP for kills.
Sly’s teleport (
) is anything but a “get out of jail free” card. It’s quick and in some cases can even be used in lieu of his standard
counter-attack, but teleports should be used to slip out of tight spots wherever possible. The fact that Sly can’t block means Jak’s constant long-range weapons fire and PaRappa’s ability to quickly get in close are going to make this a very difficult challenge indeed. Concentrate on making the most of the teleports; as soon as Sly is behind his target, unload with some meaty combos or even chain the teleport into a reversal for added AP. Air teleports are generally not a good idea against the AI, as it’s quite good at keeping track of where Sly ends up—even if you can’t.
SLY COOPER — INVISIBILITY TRIAL
| Difficulty | Opponent(s) | Level | Time Limit | Kills Required |
|---|---|---|---|---|
| Hero | Sweet Tooth | San Francisco | 2:00 | 2 |
| Legend | Ratchet, Spike | Franzea | 1:40 | 4 |
| All-Star | Sackboy, Drake | Invasion | 1:30 | 4 |
Objective: You must be invisible to gain AP for kills.
Now comes the reason why Sly is so very different from the rest of the PlayStation All-Stars roster: instead of blocking, he simply turns invisible—or at least very, very close. There’s a faint outline, but in the chaos of a big free-for-all fight, it’s likely few players will be able to track the master thief unless they’re being hit by him. The AI isn’t quite as clueless, but at least most of Sly’s repertoire works even when he’s cloaked by near-invisibility. Keep on the attack, but make sure to stay on
to ensure AP is being stocked whenever possible (this will easily be the most difficult part of the Trial, as any contact knocks Sly out of his cloaked effect). Remember, too, that even Sly’s Supers can be unleashed while invisible. It may not be incredibly effective against the AI, but in the real world, a giant pink hippo appearing out of nowhere is sure to throw anyone off guard.
SLY COOPER — COUNTER-ATTACK TRIAL
| Difficulty | Opponent(s) | Level | Time Limit | Kills Required |
|---|---|---|---|---|
| Hero | Sir Daniel | Stowaways | 2:00 | 2 |
| Legend | Big Daddy, Kratos | Metropolis | 1:40 | 4 |
| All-Star | Nariko, Radec | Alden’s Tower | 1:30 | 4 |
Objective: Successfully counter-attack with Sly’s
attack to build AP for kills.
Sly is one of the oddest characters in the Battle Royale: he can’t block, he doesn’t roll, but he can turn an enemy’s attacks against them, just like a few other characters. Tap
(no need for directions, this is a neutral action) at the right time, and the attack is negated, AP generation kicks in, and this Trial becomes trivial. Sure, you’ve probably done a Trial or four like this before, but Sly’s decidedly funky move set really makes him unique among the fighters. Remember,
won’t block attacks, but it can turn the raccoon nearly invisible. The only problem? The AI in this Trial can see him plain as day. Don’t bother being sneaky here; just reverse those attacks and go to town, and this little test of reflexes is yours.
SPIKE — APE TRIAL
| Difficulty | Opponent(s) | Level | Time Limit | Kills Required |
|---|---|---|---|---|
| Hero | PaRappa | Black Rock Stadium | 2:00 | 2 |
| Legend | Sackboy, Toro | San Francisco | 1:40 | 4 |
| All-Star | Sly Cooper, Jak | Franzea | 1:30 | 4 |
Objective: Use your ape attacks to gain AP for kills.
Spike is an interesting character in that he has a means of both directly attacking the enemy and releasing helper apes to distract or annoy opponents. As anyone who has had to play against high-level AI in control of Spike, his ability to stun, teleport, and overwhelm though sheer range and speed is something to be feared. With you in control, however, the tables can be turned at least a little. Sly’s hat mines and electrically-charged slides mean it’s actually a smart idea to stay in the air. Call forth your simian allies by pressing
(holding for longer lengths introduces more powerful versions as needed, but even the vanilla attacks build AP quickly), and consider sticking to Level 1 Supers when enemies are in range; Spike’s got a really fast basic Super that can often catch even the AI by surprise.
SPIKE — TELEPORT TRIAL
| Difficulty | Opponent(s) | Level | Time Limit | Kills Required |
|---|---|---|---|---|
| Hero | Kratos | Hades | 2:00 | 2 |
| Legend | Sir Daniel, Nariko | Invasion | 1:40 | 4 |
| All-Star | Fat Princess, Evil Cole | Stowaways | 1:30 | 4 |
Objective: Teleport and follow up with hits to earn AP for kills.
The close confines of the start of Stowaways is perfect for making the most of the AP-qualifying effects of teleporting. Tapping
is all that’s needed to bamf out of existence and back, and tight quarters means building Super levels is quite easy (especially given how many quick attacks Spike has). Instead of saving up too much, try building close to—but not quite all the way past—the Level 2 Super, then let loose with a little net-catching action to quickly rack up kills. With solid combos, it’s possible to net all four kills before things completely spill out into the open air, but the tight confines offer plenty of chances to make progress toward the four necessary either way.
SWEET TOOTH — LAND MINE TRIAL
| Difficulty | Opponent(s) | Level | Time Limit | Kills Required |
|---|---|---|---|---|
| Hero | Dante | Hades | 2:00 | 2 |
| Legend | Cole, Big Daddy | Metropolis | 1:40 | 4 |
| All-Star | Raiden, Spike | Time Station | 1:30 | 4 |
Objective: You must have a land mine out to gain AP for kills.
The hardest part of this challenge is actually keeping the mines out. Sweet Tooth’s explosive discs are so effective that it’s likely they won’t be out for more than a few seconds before another is needed. On top of that, he gains AP at such a ridiculously high rate that there’s really not much in the way of hurting for Supers. Don’t be stingy with their use, literally kicking booty all the way to the end of the Trial and on to the next.
TORO — SLEEPING TRIAL
| Difficulty | Opponent(s) | Level | Time Limit | Kills Required |
|---|---|---|---|---|
| Hero | Fat Princess | Black Rock Stadium | 2:00 | 2 |
| Legend | Sweet Tooth, Dante | Stowaways | 1:40 | 4 |
| All-Star | Sir Daniel, Radec | Alden’s Tower | 1:30 | 4 |
Objective: Fall asleep to earn AP for kills.
This has to be the most bizarre and hilarious of all the Trials in PlayStation All-Stars Battle Royale. Yes, you read that right: to gain AP in this, Toro must literally do nothing. That’s right, you tap one button (
) to fall asleep, which slowly rewards AP. This can be done in the air or on the ground, or if you’re feeling especially ambitious, …wait for it… both. Just stay away from the fray until Toro’s bagged a Level 2 Super, then crank out that falling star and sit back to enjoy the resulting explosion. Repeat a few more times, and this final unique character-specific Trial is all yours.