
Halo 3 Guide Walkthrough Extras
The Score System
The Score System
Before we reveal the magic numbers behind Campaign Scoring and offer guidance on how to maximize your scoring potential in each mission, here’s a quick explanation of how this engrossing meta-game works.
Getting Started
To activate Campaign Scoring, press x at the Campaign Lobby screen. Highlight the entry above the skulls display, and press a. If you have a current saved game, you will be asked for confirmation before you can adjust the Campaign Scoring setting, as doing so will delete saved progress in the last mission you played.
There are three settings you can choose from. “Off” is the default setting, “Team” activates Campaign Scoring, and keeps a running tally for all participants in co-op sessions. “Free For All”, by contrast, keeps a separate total for each player, which lends itself perfectly to cooperative play with a uniquely competitive edge. Both options activate Campaign Scoring for solo play, so you can pick either if you’re playing alone.
Scoring Mechanics
When you play a mission with Campaign Scoring active you score points for every kill you make, with a running total appearing in the bottom right-hand corner of the screen. All enemies and vehicles with a driver have a “value”, which is immediately added to your total once you dispatch or destroy them.
So far so simple, right? It gets a little more complicated. The feature that makes the Campaign Scoring system so endlessly enjoyable is the inclusion of varied “multipliers”, which reward players for their prowess.
The Difficulty Multiplier
is governed by your choice to play on Easy, Normal, Heroic or Legendary. If you play on Easy, you will receive a quarter of the usual “base” total for every kill. Therefore, a Brute that would net you 20 points on Normal will only be worth 5 on Easy.
Skull Multipliers
can be activated once you find the nine “gold” skulls hidden in Halo 3’s Campaign mode (see page 115). Each one introduces handicaps that can make the process of completing a mission far more demanding. As a rule, the tougher the challenge is, the larger the multiplier will generally be.
Style Multipliers are awarded on a per-kill basis, and reward techniques such as grenade sticks, headshots and stealth attacks. It’s not just a matter of dispatching all adversaries you encounter – it’s how you do it that enables you to achieve the highest scores. Note that a small medal will appear near to the score display whenever a Style multiplier is applied.
A Time Bonus is added if you can complete a mission before a set deadline, with the available multiplier decreasing from a maximum 3x (which will triple your total score) to 1x (no bonus at all).
Finally, note that Penalties are imposed every time you die, revert back to a previous checkpoint, or kill an ally. These take your Difficulty and Skull multipliers into account, and are subtracted from your score immediately.
Difficulty, Skull and Style multipliers are all calculated and applied instantly during play; any potential Time Bonus is only awarded once the level ends. If you’re wondering how individual kills are scored, the process goes like this:
Points scored for each kill = Unit’s base scoring value x (style multiplier + possible second style multiplier) x (difficulty multiplier + skull multipliers)
While you only receive points for enemy deaths that you are directly responsible for when you are on foot, this changes once you jump behind the wheel of a vehicle. Every time a passenger or gunner dispatches an enemy or destroys an occupied Covenant vehicle, you will score points.
Carnage Report
When Campaign Scoring is activated, a Carnage Report screen appears once the mission ends. This provides a more detailed breakdown of your performance in the level (and, if you’re playing with friends, how you all fared in relation to each other). You can cycle through the main information pages with e and r.
Results: Reveals your final score, all active multipliers, and adds a Time Bonus if you have cleared the level within one of four potential deadlines.
Carnage: Details the total number of kills made, plus figures that show how many Betrayals you were responsible for. The K/Friendly column documents how many allies you killed (see the Penalties table to learn how many points you stand to lose), while the Deaths section is fairly self-explanatory – though note that instances where you reverted back to a previous checkpoint also count towards this figure.
Enemy Kills:
Offers a more detailed breakdown of the adversaries you have slain. See table Enemy Classes to learn how the “class” categories work.
Enemy Vehicle Kills:
Like Enemy Kills, but specific to vehicles. See table Enemy Vehicle Classes for information on vehicle classes.
Points Breakdown: “Medals” reveals the number of times you have been awarded Style Points for killing opponents in specific ways, while “Medal Points” details how many additional points your prowess has earned you. “Normal Pts” is your score minus Style Points, and Points is your total score, but without penalties.
Enemy Classes
|
Infantry |
Most Brute types, Drones, lower-ranking Grunts, shield-bearing Jackals, Carrier Forms, Combat Forms, Sentinels |
|
Specialist |
Jump Pack Brutes, Brute Trackers, Brute Stalkers, Brute Bodyguards, Grunts (Heavy & Ultras), Jackal Snipers, Pure Forms |
|
Leader |
Brute Captains |
|
Hero |
Brute Chieftains |
Enemy Vehicle Classes
|
Light |
Chopper, Ghost, Shade |
|
Standard |
Banshee, Prowler |
|
Heavy |
Phantom, Wraith |
|
Giant |
Scarab |
Scores & Multipliers
Enemy Scores
|
Type |
Class |
Base Value |
|
|
|
|
|
Brute |
Infantry |
20 |
|
Brute (Jump Pack) |
Specialist |
30 |
|
Brute Bodyguard |
Specialist |
30 |
|
Brute Captain |
Leader |
50 |
|
Brute Chieftain |
Hero |
150 |
|
Brute Stalker |
Specialist |
30 |
|
Brute Tracker |
Specialist |
30 |
|
Drone |
Infantry |
10 |
|
Grunt |
Infantry |
10 |
|
Grunt (Heavy & Ultra) |
Specialist |
10 |
|
Hunter |
Specialist |
150 |
|
Jackal |
Infantry |
15 |
|
Jackal Sniper |
Specialist |
20 |
|
Carrier Form |
Infantry |
10 |
|
Combat Form |
Infantry |
15 |
|
Combat Form (shielded) |
Infantry |
20 |
|
Pure Form: Ranged |
Specialist |
30 |
|
Pure Form: Stalker |
Specialist |
20 |
|
Pure Form: Tank |
Specialist |
50 |
|
Sentinel |
Infantry |
5 |
Style Multipliers
|
Type |
Multiplier |
Notes |
|
|
|
|
|
Grenade Stick |
1.25 |
Only counts for the “stuck” enemy, though a Multi-Kill bonus may be awarded if others are taken out by the blast. |
|
Headshot |
1.25 |
Applies to Brutes, Grunts, Jackals, and Combat Forms when you hit the Infection Forms embedded in their chests. Cumulative with EMP. |
|
Stealth Kill |
1.25 |
Only applies if your adversary is completely oblivious to your presence when you land a melee attack. |
|
Road-Kill |
1.25 |
Applied when you dispatch an enemy by slamming them with a vehicle. |
|
Multi-Kill |
1.25 |
Awarded when you kill 3 or more enemies within 1.5 seconds. |
|
Needler Superdetonation |
1.25 |
End an opponent’s life with a satisfyingly large Needler-fueled bang, and this bonus is just the icing on the cake. |
|
EMP |
1.25 |
Awarded for killing a Brute or shield-bearing Jackal within 3 seconds of destroying their shields with a charged Plasma Pistol shot or Power Drain. |
Enemy Vehicle Scores
|
Type |
Class |
Base Value |
|
|
|
|
|
Banshee |
Standard |
100 |
|
Banshee (ambient) |
Standard |
50 |
|
Chopper |
Light |
100 |
|
Ghost |
Light |
100 |
|
Prowler |
Standard |
150 |
|
Shade |
Light |
50 |
|
Wraith |
Heavy |
200 |
Difficulty Multipliers
|
Setting |
Multipler |
|
|
|
|
Easy |
0.25 |
|
Normal |
1.0 |
|
Heroic |
2.0 |
|
Legendary |
4.0 |
Skull Multipliers
|
Skull |
Multipler |
|
|
|
|
Iron |
3 |
|
Black Eye |
1.5 |
|
Tough Luck |
1.5 |
|
Catch |
1.5 |
|
Fog |
1.5 |
|
Famine |
2 |
|
Thunderstorm |
1.5 |
|
Tilt |
2 |
|
Mythic |
2 |
Penalties
(Note: Dying or voluntarily returning to the previous checkpoint leads to a base penalty of 25 points being subtracted from your score. This total, like those in the table on the right, is subject to the effects of Difficulty and Skull multipliers.)
|
Ally
|
Base Penalty |
|
|
|
|
Arbiter |
50 |
|
Elite |
50 |
|
Marine/Civilian |
50 |
|
ODST |
100 |
|
Marine Sergeant |
100 |
|
Sentinel |
5 |
|
Hornet |
150 |
|
Mongoose |
50 |
|
Pelican |
200 |
|
Scorpion |
200 |
|
Warthog |
150 |
|
Gauss Warthog |
100 |
Enemy Classes
|
Infantry |
Most Brute types, Drones, lower-ranking Grunts, shield-bearing Jackals, Carrier Forms, Combat Forms, Sentinels |
|
Specialist |
Jump Pack Brutes, Brute Trackers, Brute Stalkers, Brute Bodyguards, Grunts (Heavy & Ultras), Jackal Snipers, Pure Forms |
|
Leader |
Brute Captains |
|
Hero |
Brute Chieftains |
Enemy Vehicle Classes
|
Light |
Chopper, Ghost, Shade |
|
Standard |
Banshee, Prowler |
|
Heavy |
Phantom, Wraith |
|
Giant |
Scarab |
Scores & Multipliers
Enemy Scores
|
Type |
Class |
Base Value |
|
Brute |
Infantry |
20 |
|
Brute (Jump Pack) |
Specialist |
30 |
|
Brute Bodyguard |
Specialist |
30 |
|
Brute Captain |
Leader |
50 |
|
Brute Chieftain |
Hero |
150 |
|
Brute Stalker |
Specialist |
30 |
|
Brute Tracker |
Specialist |
30 |
|
Drone |
Infantry |
10 |
|
Grunt |
Infantry |
10 |
|
Grunt (Heavy & Ultra) |
Specialist |
10 |
|
Hunter |
Specialist |
150 |
|
Jackal |
Infantry |
15 |
|
Jackal Sniper |
Specialist |
20 |
|
Carrier Form |
Infantry |
10 |
|
Combat Form |
Infantry |
15 |
|
Combat Form (shielded) |
Infantry |
20 |
|
Pure Form: Ranged |
Specialist |
30 |
|
Pure Form: Stalker |
Specialist |
20 |
|
Pure Form: Tank |
Specialist |
50 |
|
Sentinel |
Infantry |
5 |
Style Multiplier s
|
Type |
Multiplier |
Notes |
|
Grenade Stick |
1.25 |
Only counts for the “stuck” enemy, though a Multi-Kill bonus may be awarded if others are taken out by the blast. |
|
Headshot |
1.25 |
Applies to Brutes, Grunts, Jackals, and Combat Forms when you hit the Infection Forms embedded in their chests. Cumulative with EMP. |
|
Stealth Kill |
1.25 |
Only applies if your adversary is completely oblivious to your presence when you land a melee attack. |
|
Road-Kill |
1.25 |
Applied when you dispatch an enemy by slamming them with a vehicle. |
|
Multi-Kill |
1.25 |
Awarded when you kill 3 or more enemies within 1.5 seconds. |
|
Needler Superdetonation |
1.25 |
End an opponent’s life with a satisfyingly large Needler-fueled bang, and this bonus is just the icing on the cake. |
|
EMP |
1.25 |
Awarded for killing a Brute or shield-bearing Jackal within 3 seconds of destroying their shields with a charged Plasma Pistol shot or Power Drain. |
Enemy Vehicle Scores
|
Type |
Class |
Base Value |
|
Banshee |
Standard |
100 |
|
Banshee (ambient) |
Standard |
50 |
|
Chopper |
Light |
100 |
|
Ghost |
Light |
100 |
|
Prowler |
Standard |
150 |
|
Shade |
Light |
50 |
|
Wraith |
Heavy |
200 |
Difficulty Multipliers
|
Setting |
Multiplier |
|
Easy |
0.25 |
|
Normal |
1.0 |
|
Heroic |
2.0 |
|
Legendary |
4.0 |
Skull Multipliers
| Skull |
Multiplier |
|
Iron |
3 |
|
Black Eye |
1.5 |
|
Tough Luck |
1.5 |
|
Catch |
1.5 |
|
Fog |
1.5 |
|
Famine |
2 |
|
Thunderstorm |
1.5 |
|
Tilt |
2 |
|
Mythic |
2 |
Penalties
|
Ally |
Base Penalty |
|
Arbiter |
50 |
|
Elite |
50 |
|
Marine/Civilian |
50 |
|
ODST |
100 |
|
Marine Sergeant |
100 |
|
Sentinel |
5 |
|
Hornet |
150 |
|
Mongoose |
50 |
|
Pelican |
200 |
|
Scorpion |
200 |
|
Warthog |
150 |
|
Gauss Warthog |
100 |
Campaign Scoring Strategies & Tips
If you’d like to score points totals that would inspire a passing googolplex to bow, scrape and tug its forelock in deference, the advice and guidance we offer over the next nine pages will make a good starting point. Before you begin reading, though, here’s a quick explanation of the sections you’ll encounter.
Achievement Milestone: How many points you’ll need to score to unlock that mission’s Campaign meta-game Achievement.
Recommended Multiplier: The total Multiplier you should aim for to unlock that Achievement. Don’t forget that Style Multipliers only work on a kill-by-kill basis, whereas the others apply throughout the entire level. Thus, your overall Multiplier is mainly the result of the following formula:
Total Multiplier = (Difficulty Multiplier + Skull Multiplier) x Time Bonus.
Time Bonus: How quickly you’ll need to finish the level to win one of the four possible Time Bonuses.
General Tips: A collection of thoughts, observations, tactics and tricks that can help you maximize your score. We’ve arranged these in sequential order, beginning at the very start of the mission.
Skull Recommendations: Details (for all four difficulty settings) which skulls work particularly well on each mission (and when they should be avoided), with a three-star rating system providing an
at-a-glance guide. The more stars in a cell, the easier it is to play with that skull on the relevant difficulty level. Note that recommended skulls are highlighted for maximum clarity.
Sierra 117
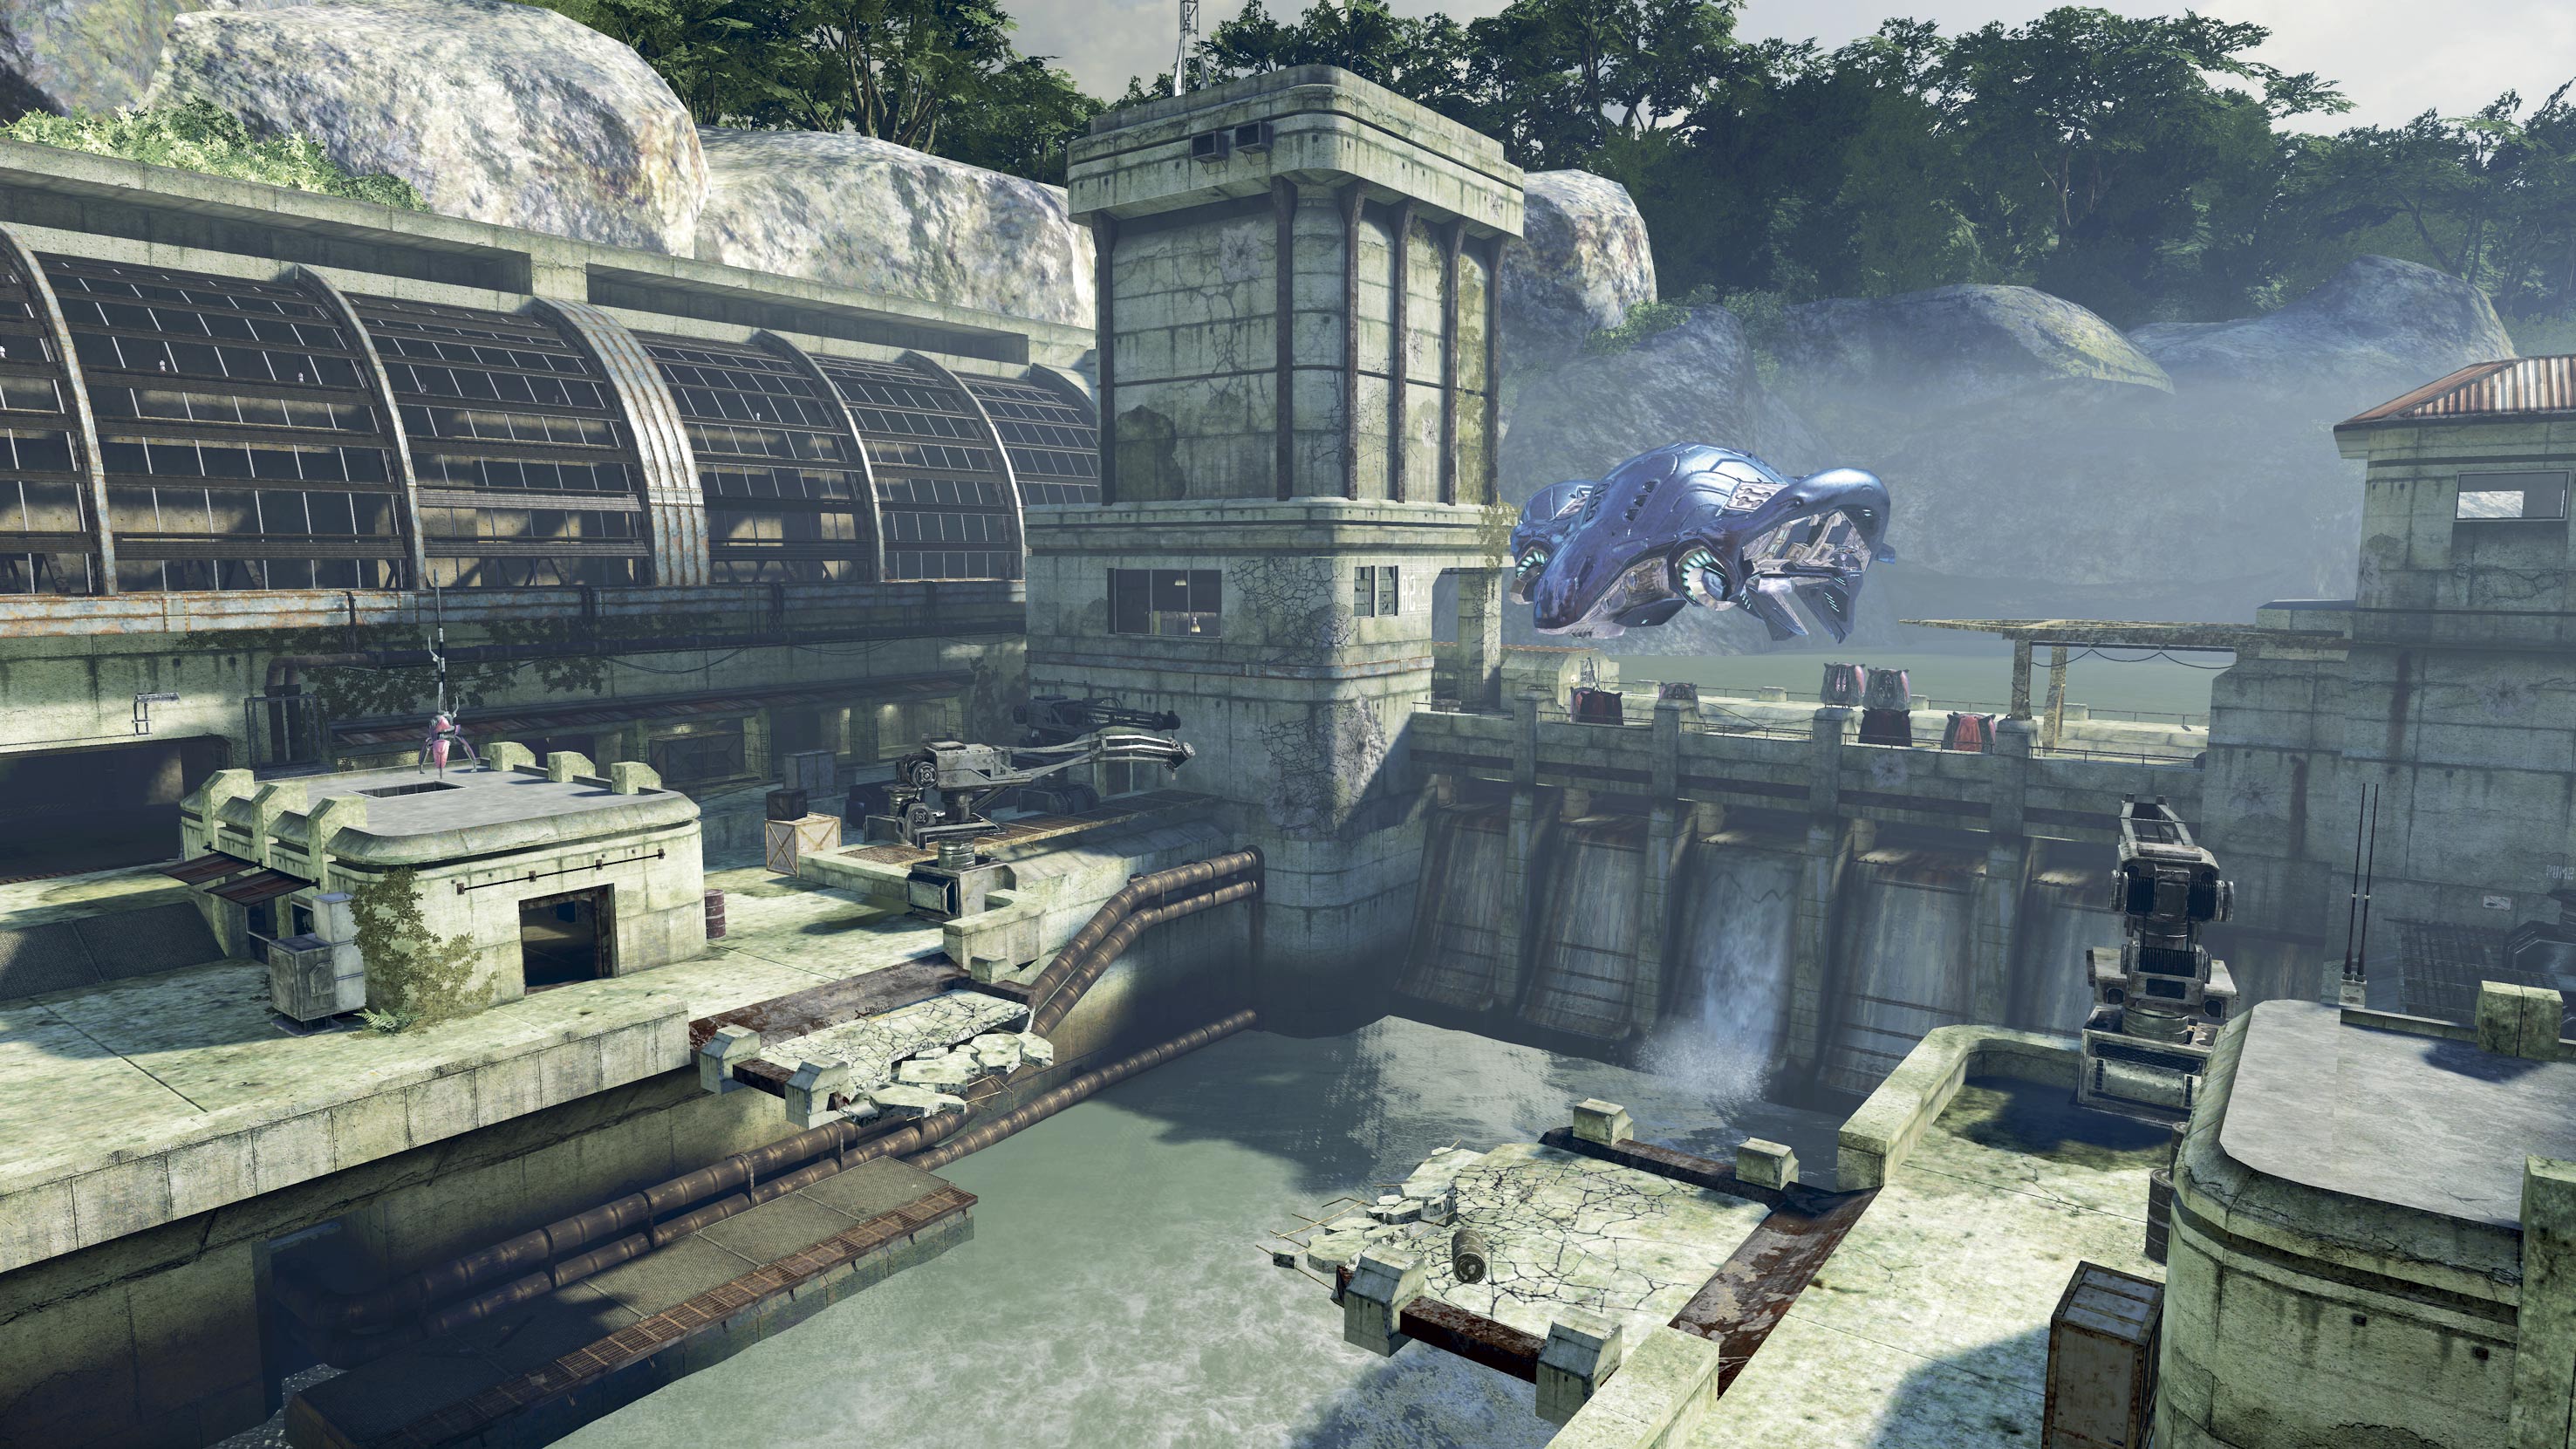
Guerilla
Achievement Milestone: 15,000 points
Recommended Multiplier:
4+
Time Bonus
|
0-15 min |
3x |
|
15-20 min |
2.5x |
|
20-25 min |
2x |
|
25-30 min |
1.5x |
General Tips
The Marines that fight with you at the start will “steal” a lot of kills. This isn’t a massive problem on Legendary, though – you can simply hold back and let the Covenant do their job.
On Legendary, you have immediate access to Plasma Grenades – and, therefore, grenade stick bonuses.
The opening battles along the river bank are definitely the most awkward, as you don’t have access to a ranged weapon. Though the attraction of EMP/headshot bonuses against the Brutes is high, it’s really not worth the penalties if you’re subsequently blown back to the previous checkpoint by a crowd of Grunts. On higher difficulty levels, it’s probably better to play it safe.
In the Grunt Camp area, be sure to tap out the Grunt “sleepers” on lower difficulty levels, then focus on gaining Needler and EMP/headshot bonuses for the rest of the fight. On Legendary, dispatch all Grunts and Jackal snipers with Carbine headshots, then use the Plasma Pistol/Magnum combo on the remaining Brutes and Shield Jackals. Be quick – the Arbiter is a veritable points thief in this battle.
Be sure to make an EMP/headshot kill on the Brute Captain interrogating the Marine, but watch out for the Jackal sniper on Legendary.
When you reach the Sub-station area, you can run over and try to dispatch the two nearest Brutes for EMP/headshot bonuses. On Legendary, this is much more risky – you’ll need to get back behind cover and dispatch the Jackal snipers before the Pelicans are attacked by Banshees.
Kill all Grunts with headshots before you move over to the second part of the Sub-station area. Once the Brutes pull back around the corner leading to Sniper Alley on Legendary, err on the side of caution – they have Brute Shots, and are protected by a distant sniper with a Beam Rifle.
In the area that follows the sniper duel, there is a Chieftain riding aboard the Phantom that hovers briefly beside Johnson’s crashed Pelican. If you still have Beam Rifle ammunition, it’s possible to kill him – though attempting this is a real gamble on higher difficulty levels.
At the dam, you can focus on dispatching snipers and Grunts, then drop down to maximize your points by engaging Brutes and shield-bearing Jackals with EMP/headshot kills. It’s prudent to kill the Chieftain with your Sniper Rifle before you drop down, though…
After freeing Johnson and the Marines, run into position at the end of the dam and try to kill as many enemies as you can before the Pelican arrives.

Skull Recommendations
|
Skull |
Recommendations |
Tips |
|||
|
Easy |
Normal |
Heroic |
Legendary |
||
|
Iron |
*** |
** |
* |
* |
The opening battles are tough, yet it’s definitely possible on Legendary. The snipers that appear from the Sub-station area onwards are the principle danger. |
|
Black Eye |
*** |
*** |
** |
* |
Though torturously difficult on Legendary, this is probably the best Covenant-oriented level to use it on. |
|
Tough Luck |
*** |
*** |
*** |
** |
A strongly recommended choice (and especially so on lower difficulty levels, given that you can’t use grenades until a third of the way through the mission). You have access to all the weapons you need after the opening battles, and there are no large packs of Brutes to worry about. |
|
Catch |
*** |
** |
** |
** |
The opening battles on Legendary are extremely chaotic, but you can usually dispatch all Grunts from distance in subsequent fights. As an added bonus, Brutes don’t use Spike Grenades until the second mission. |
|
Fog |
*** |
*** |
*** |
** |
It definitely makes a couple of confrontations more difficult (particularly the opening fracas along the river bank and the fight that takes place as you approach Johnson’s crashed Pelican), but Fog is another good choice for Sierra 117. |
|
Famine |
*** |
** |
** |
** |
The presence of Covenant dispensers throughout the mission helps, but the reduced ammunition for key weapons (particularly the Battle Rifle, Sniper Rifle and Magnum) means that you’ll need to make every shot count. |
|
Thunderstorm |
*** |
*** |
*** |
** |
Though the thrill of a field promotion fills Grunts with an alarming enthusiasm for their work, most Brutes on this level are already Captains. If you focus on EMP/headshot kills against them, Thunderstorm offers significant points dividends. |
|
Tilt |
*** |
*** |
** |
** |
As there are plenty of Plasma Pistols and no large groups of Brutes, this is one of the better missions to play with Tilt activated. You’ll need to secure a Beam Rifle to take down the Chieftain when you reach the Dam, however. |
|
Mythic |
*** |
*** |
** |
** |
As you should be aiming exclusively for lethal headshots, Mythic doesn’t have a massive effect during Sierra 117. That said, the battles along the riverside at the start are much tougher. |
Crow’s Nest

Demon
Achievement Milestone: 15,000 points
Recommended
Multiplier:
4+
Time Bonus
|
0-20 min |
3x |
|
20-25 min |
2.5x |
|
25-30 min |
2x |
|
35-40 min |
1.5x |
General Tips
When you face the large group of charging Grunts in the road corridor en route to the South Hangar, try making a deft thumbstick flick as you fire the Battle Rifle to take down three at once for a welcome bonus.
Kill the first two Jackals in the South Hangar with the Magnum/Plasma Pistol combo. Survival is more important than Multipliers in the battle that follows on higher difficulty levels – if you don’t concentrate on efficient crowd control, you’ll be quickly overwhelmed. That doesn’t mean that you shouldn’t attempt to make every kill a headshot (or, in the case of nearby Brutes, a grenade stick), though.
There are two Plasma Pistols in the Motor Pool area, so put them to good use. When Brutes rush forward, it’s safer to kill the first couple with a grenade stick on Legendary. You can usually fight the remaining foes one at a time after that point.
Take a Plasma Pistol with you to the Barracks, and be sure to secure the two held by the Jackals on the upper walkway as soon as you can. The concentration of Brutes here means that you need to be patient, and carefully make EMP/headshot kills.
This is a morbid tip, but if you wait for the Brutes to execute their Marine captives, you won’t have to worry about them stealing your targets during the Barracks battle or the Landing Pad Bravo confrontation that follows. In single-player sessions, you already have to worry about the Arbiter busying himself with the process of reducing your potential point total.
If you’re confident in your abilities, take the two Plasma Pistols dropped by the second pair of Jackals in the Barracks into the elevator rather than the Chieftain’s Plasma Turret. You’ll have to be patient to secure EMP/headshot kills on the Jump Pack Brutes, and the Arbiter will be a nuisance throughout, but the Multipliers soon stack up.
As you make your way back to the Ops Center to rearm the bomb, grab a fresh Plasma Pistol – the shield-bearing Jackals you encounter are a ready source of EMP and headshot Multipliers, though be careful not to fall afoul of the Grunt turret operators. (When you finish the Ops Center battle, take the Chieftain’s Fuel Rod Gun – we’ll tell you why in a moment.)
After rearming the bomb, speed run aficionados will find that they can sprint to the final elevator without stopping to fire a single shot on lower difficulty levels. You’ll need to pick both your fights and your route through the roadway and final South Hangar battle more carefully on Legendary, though – the Grunts and Jackals are much more aggressive.
The panicking Grunts in the room where you fought the Drones earlier can be tricky to kill with headshots as they run back and forth. If you have your heart set on a speed Multiplier, it may be better to just kill those you can get a clear shot at as you run through.
If you took our advice and brought the Fuel Rod Gun along, you can use it to annihilate the group of Drones that fly by as you reach the roadway during the final journey to the Hangar.
When you reach the Hangar, you could squeeze a few final points out of this mission by aiming to secure an EMP/headshot bonus with each Jackal.
Skull Recommendations
|
Skull |
Recommendations |
Tips |
|||
|
Easy |
Norma l |
Heroic |
Legendary |
||
|
Iron |
*** |
** |
* |
* |
It’s definitely worth an attempt on Normal. If you’re crazy or gifted enough to try on higher difficulty levels, watch out for the two snipers when you visit the Ops Center for the third time. |
|
Black Eye |
** |
* |
* |
* |
There are a number of battles in the Crow’s Nest level that make Black Eye an extremely poor choice on Heroic and Legendary – particularly the swarm of Drones on the journey to the Ops Center after clearing the South Hangar. |
|
Tough Luck |
*** |
*** |
*** |
** |
It’s a minor inconvenience for a 1.5 Multiplier. You may as well activate it as standard, though you’ll miss “Easy” grenade sticks on Legendary. |
|
Catch |
** |
** |
* |
* |
Enclosed spaces + Catch = explosive headaches. It’s always amusing, of course (the very first fight against the Grunts on the roadway is but a taste of things to come), but it’s just not practical if you’re looking for big scores. Plus, playing with Catch active slows your progress to a crawl, so you can kiss time Multipliers goodbye. |
|
Fog |
*** |
*** |
*** |
*** |
If you know the level well, Fog should be on as standard. You’ll need to be vigilant while fighting in the Motor Pool and Barracks (especially against their respective Chieftains), but there are no real instances where you’re likely to be attacked from behind without prior warning. |
|
Famine |
*** |
*** |
** |
** |
Crow’s Nest bulges at the seams with Marine weaponry on dispensers that are exempt from the Famine effect, but you’ll miss having full Plasma Pistols in the Motor Pool, Barracks and on Landing Pad Bravo. If you’re lousy at securing EMP/headshot bonuses but fully at home with the Battle Rifle, this is an excellent choice. |
|
Thunderstorm |
*** |
*** |
** |
** |
Thunderstorm is generally less appropriate on levels that feature a heavy Brute presence, but it’s definitely a skull you can deal with on Crow’s Nest. |
|
Tilt |
** |
** |
** |
* |
With a Plasma Pistol or Plasma Rifle and a Magnum, the numerous Brutes you face aren’t a problem. With a Battle Rifle in reserve, neither are Grunts and Jackals. The first two Chieftains you face, however, are overwhelmingly tough – especially the one in the Motor Pool. On Legendary, you’ll need to use the Grav Lifts cleverly to even stand a chance of surviving. |
|
Mythic |
*** |
** |
* |
* |
If you’re accomplished at using a Plasma Pistol with a Magnum or Battle Rifle, it’s certainly worth a try on higher difficulty levels. Again, though, the fights against the Chieftains are extremely demanding. |
Tsavo Highway

Cavalier
Achievement Milestone: 15,000 points
Recommended Multiplier:
4+
Time Bonus
|
0-15 min |
3x |
|
15-20 min |
2.5x |
|
20-25 min |
2x |
|
25-30 min |
1.5x |
General Tips
Up to and including the battle in front of the crashed Phantom, all enemies are Easy meat for Road-Kill Multipliers. Skilled players will use handbrake turns for additional Multi-Kill bonuses where possible. If you’re aiming for thoroughness over speed, collect grenades as you find them – they’ll come in useful later.
If you’re on a speed run, you can drive straight from the beginning through to the Pelican Crash Site area in one continuous drive. Naturally, the challenge increases in accordance with your chosen difficulty level.
Though you can cause havoc on Easy and Normal, the Covenant blockade at the dry lake bed is extremely dangerous on Heroic and Legendary. Instead, you’ll need to barge your way through as quickly as possible, park behind the small dam to give your shields a moment to recharge, then hop out to clear the area with a stolen Beam Rifle (and, with the Shade turrets, grenades). It’s a dangerous fight, but worth every last point.
When you reach the crashed Pelican, the Fuel Rod Gun-wielding Chieftain is your absolute priority. If you’re worried about your Marine companions stealing valuable points, you can leave your Warthog in the open before dashing for cover. Just pray that no witnesses survive to report the event…
Once you’ve dispatched the Chieftain from range (you did remember to bring a fresh Beam Rifle, didn’t you?), be content with headshots against the assorted snipers and infantry in this area. In the Campaign chapter, we advise players to capture one of the two Choppers to make later battles much easier on Legendary, but there’s no reason why you can’t destroy both if you’re searching for maximum points throughout. If you do, use the Fuel Rod Gun or grenade tags to destroy the Shade turrets.
On speed runs, you definitely need to secure a Chopper at this point; you can boost it over the broken road section and choose to bypass later enemies entirely on lower difficulty levels.
The huge set-piece battle just off the highway can be exceedingly tough on Heroic and Legendary. If you’re determined to secure every last point in this lengthy confrontation, try stockpiling Plasma Pistols in the buildings before the Phantom bearing the first batch of reinforcements arrives.
On the final stretch of road use the Chopper to divest Brutes of their power armor, then jump out and finish them off with headshots. If you planned ahead and brought a Plasma Pistol along, you can also aim to make some valuable EMP/headshot kills.

Skull Recommendations
|
Skull |
Recommendations |
Tips |
|||
|
Easy |
Normal |
Heroic |
Legendary |
||
|
Iron |
*** |
** |
* |
* |
It’s just about possible on Heroic, but any sane individual wouldn’t even want to think about attempting an Iron playthrough on Legendary. |
|
Black Eye |
** |
* |
* |
* |
Black Eye really isn’t compatible with vehicle-oriented missions. You can enjoy a degree of success up until the fight against the Choppers just before you reach the Roundabout area, but you’ll need to play perfectly to reach the next group of melee-friendly infantry. Is the stress and hardship worth a 1.5 Multiplier? We think not. |
|
Tough Luck |
*** |
*** |
** |
** |
Grenades don’t figure highly in this mission. The only time you might need them is during the main battle just off the highway, and only then on Legendary or Heroic. |
|
Catch |
*** |
** |
** |
** |
It’s fun on all difficulty settings, but you’ll definitely benefit by taking a Chopper to use in Tsavo Highway’s main battle. If you’re looking for a high score, though, leave this firmly and resolutely disabled. |
|
Fog |
*** |
*** |
** |
** |
The big fight in the center of the level is much harder without the Motion Tracker, and combat involving Choppers is also filled with fraught moments. You can address these issues by using the Chopper-related tips (how to get one over the break in the highway, and long-distance cannon shooting at the Roundabout area) in the walkthrough. |
|
Famine |
*** |
** |
** |
** |
If you favor the Chopper-oriented strategy for the second half of Tsavo Highway (see above), having Famine active is no great hardship. |
|
Thunderstorm |
*** |
** |
* |
* |
It makes Choppers and Wraiths more difficult to neutralize, and the main battle is a nightmare. We suggest you leave Thunderstorm off for this one unless you’re prepared for a really stiff challenge. |
|
Tilt |
*** |
** |
* |
* |
You really need a Chopper for the latter half of the level if you activate Tilt on Heroic or Legendary. Keep a Beam Rifle at the ready to deal with the Chieftains. |
|
Mythic |
*** |
** |
* |
* |
If a Tsavo Highway playthrough filled with adamantine Choppers, and Brutes that shrug off previously withering attacks with stamina to spare sounds like a good time, then good luck to you. |
The Storm

Askar
Achievement Milestone: 15,000 points
Recommended
Multiplier:
4+
Time Bonus
|
0-15 min |
3x |
|
15-20 min |
2.5x |
|
20-25 min |
2x |
|
25-30 min |
1.5x |
General Tips
You can pick up a few Easy Multi-Kill points with a well-placed grenade when you encounter the first group of Jackals and Grunts viewing the Prophet of Truth’s sermon.
Unless you plan to drive the Warthog or operate its turret, keep the gates closed to minimize the number of kills taken by Marines. On Heroic and Legendary, dispatch the Grunts with your Battle Rifle, but use the Plasma Pistol/Magnum combo on Jackals and Brutes whenever you can.
Not dying is more important than style Multipliers at Lake Bed A, especially on Legendary. Simply hijack and use the Wraith in the far corner.
With a little forward planning, you can save Missile Pod ammunition to destroy the two Banshees that arrive before they are shot down by the Hornet.
If you’re willing to take the risk, it’s possible to secure EMP/headshot combo bonuses against the Jackals and Brutes just inside Factory B, but stay out of the Chieftain’s line of fire.
If you pick up a Rocket Launcher before the Drones arrive, you might be able to use it to score additional Multi-Kill points against the swarm. The Drones retreat through the broken skylight after a set period, so be ready to fire after them with a Battle Rifle to gain a few extra kills.
On lower difficulty settings, drive the Mongoose aggressively when you reach Lake Bed B to reach targets (especially the Wraiths) before the other drivers can catch up. You should then swing around and head for a Missile Turret to target Banshees and the vehicles that are deployed later. On Legendary, there’s too much scope for random, unavoidable deaths if you drive around the lake bed, so it’s better to head straight for a turret.
When the Scarab arrives, take the elevator to the top of the crane nearest the door and use the Sniper Rifle there to secure as many headshots as you can. Once its crew has been eliminated, jump on board to destroy its engine core.
If you plan ahead by locating and carrying a couple of Plasma Pistols from Lake Bed B into the Warehouse area, you can use them to win massive style points against the Brutes you face there. It’s tougher on Heroic and Legendary, of course, but the rewards are considerable.
Marines are an issue inside the Warehouse, but the Arbiter’s presence means that there’s little point in waiting for the Brutes to slaughter them before you attack. Speed and accuracy is the solution, though it won’t hurt to look the other way should a Marine need your help. It’s also beneficial to callously stand by as the Hunters slaughter everyone when they enter. If you can shoot at their unprotected backs as they make jam out of their doomed quarry, all the better.
In the final battles, it’s better to be satisfied with headshot Multipliers on higher difficulty levels – it’s often too risky to try for anything more.
If you’re willing to make the effort, you can haul a Missile Pod all the way from Lake Bed B to the final battle to use against the “ambient” Banshees circling overhead.

Skull Recommendations
|
Skull |
Recommendations |
Tips |
|||
|
Easy |
Normal |
Heroic |
Legendary |
||
|
Iron |
*** |
** |
* |
* |
As usual: you have almost no hope on Legendary, but it’s eminently achievable on Normal. |
|
Black Eye |
** |
** |
* |
* |
It’s worth a shot on Normal – the Lake Bed A and (to a lesser extent) Lake Bed B fights are tough, but there are ways and means at your disposal to get through them. |
|
Tough Luck |
*** |
*** |
*** |
** |
Sacrificing the full potential of your grenade arsenal in return for an increased Multiplier is a savvy move, though EMP/headshot kills will be tougher to win. |
|
Catch |
*** |
** |
** |
** |
Factory A and the Warehouse are more difficult, but Catch is an invigorating addition if speed isn’t of the essence. |
|
Fog |
*** |
** |
** |
** |
The battles on Lake Bed A and B can be awkward, and you’ll need to be extremely methodical during the final battle to hunt down and destroy Grunts and Jackals. |
|
Famine |
*** |
*** |
** |
** |
There are quite a few Marine weapon dispensers to find, but having reduced ammunition in certain important weapons is a real handicap. |
|
Thunderstorm |
*** |
*** |
** |
* |
The Lake Bed A and B battles are obviously more painful with Thunderstorm active, and the Warehouse fights against Brutes are also more demanding. You’ll particularly learn to loathe the Ghosts and Choppers on Legendary. |
|
Tilt |
*** |
** |
* |
* |
As long as you can keep a Plasma Pistol or Plasma Rifle with you at all times, Brutes (particularly those in the Warehouse) aren’t much harder than usual to beat. The Chieftains, by contrast, can be very tough. |
|
Mythic |
*** |
** |
* |
* |
Again, the principle issues you face with Mythic are that vehicles are harder to destroy, and marauding Chieftains can take much longer to wear down. You’ll need to make the most of the Sniper Rifles you can find to beat the last two. |
Floodgate

Exterminator
Achievement Milestone: 15,000 points
Recommended Multiplier:
6+
Time Bonus
|
0-10 min |
3x |
|
10-15 min |
2.5x |
|
15-20 min |
2x |
|
20-25 min |
1.5x |
General Tips
You can actually kill a few of the Combat Forms fighting Marines in the distance shortly after the mission begins.
When the Combat Forms first attack, attract their attention and aim for successive Multi-Kills with the Gravity Hammer. You need to dispatch as many of them as you can this way before the Arbiter gets involved.
Inside the Warehouse, stand at the top of the steps to the right of the office and use the Battle Rifle to score “headshot” bonuses. Dispatch large groups with Frag Grenades or the Gravity Hammer to reap Multi-Kill rewards.
Stick to the Battle Rifle in the next Warehouse area, and allow Infection Forms to reanimate Combat Forms. The more targets you have to shoot, the better. Don’t bother taking the Flamethrower – it’s of no use to you until you encounter Pure Forms.
The Combat Form ambush in the rusty, winding corridor is an Easy Multi-Kill opportunity if you still have the Gravity Hammer.
When the Elites land, view the ensuing fight from afar and utter a silent prayer that the Flood get the upper hand.
At the bottom of the slope that leads out of the dry lake bed, again concentrate on “headshot” bonuses. You’ll need to be quick – the Arbiter and any surviving Elites won’t hesitate to steal your kills. With any luck, the Infection Forms released by the two Carrier Forms when they topple will revive a few additional Combat Forms.
Accurate long-range marksmanship will enable you to restrict the Arbiter to a few “lucky” kills in the first area of Factory B. In the confrontation that follows, a group of Combat Forms will drop down from above, providing a clean and simple Multi-Kill bonus.
Collect the Flamethrower before you head outside – short of grenade sticks, there really is no better way to kill Pure Forms during this mission.
If Elite reinforcements arrive, there’s nothing you can do about it. Just grit your teeth and make all the kills you can.
If you’re close enough to make an Easy throw, grenade sticks are the most profitable way to dispatch the Ranged Forms as you work your way over to the crashed Flood vessel.
Flood Scoring Tips
The Battle Rifle should be your constant companion throughout Flood-oriented missions, as it’s the key to high scores. You achieve “headshot” Multipliers by shooting the Infection Form inside a Combat Form’s chest.
There is no score for shooting Infection Forms. They’re a nuisance, but try to lead them towards corpses they can reanimate.
As with later missions that feature the Flood, scoring highly with Pure Forms is a matter of balancing ambition and greed with the need to be practical. Ideally, you will always hope to face Tank Forms, as these yield the most points and are easily slain with a Flamethrower. However, if you purposefully avoid shooting the least-valuable Stalker Forms, they are just as likely to transform into the excruciatingly irritating (and lethal) Ranged Forms. On Legendary , it’s usually best to just make the kill and live to fight another day.
Shielded Combat Forms (most commonly encountered on Legendary and Heroic ) should be dispatched with a secondary weapon – just accept the lower points total, and don’t waste Battle Rifle ammunition on their shields. Unlike with other Combat Forms, you should ensure that their bodies are destroyed before you move on.

Flood Scoring Tips
The Battle Rifle should be your constant companion throughout Flood-oriented missions, as it’s the key to high scores. You achieve “headshot” Multipliers by shooting the Infection Form inside a Combat Form’s chest.
There is no score for shooting Infection Forms. They’re a nuisance, but try to lead them towards corpses they can reanimate.
As with later missions that feature the Flood, scoring highly with Pure Forms is a matter of balancing ambition and greed with the need to be practical. Ideally, you will always hope to face Tank Forms, as these yield the most points and are easily slain with a Flamethrower. However, if you purposefully avoid shooting the least-valuable Stalker Forms, they are just as likely to transform into the excruciatingly irritating (and lethal) Ranged Forms. On Legendary , it’s usually best to just make the kill and live to fight another day.
Shielded Combat Forms (most commonly encountered on Legendary and Heroic ) should be dispatched with a secondary weapon – just accept the lower points total, and don’t waste Battle Rifle ammunition on their shields. Unlike with other Combat Forms, you should ensure that their bodies are destroyed before you move on.
Skull Recommendations
|
Skull |
Recommendations |
Tips |
|||
|
Easy |
Normal |
Heroic |
Legendary |
||
|
Iron |
*** |
*** |
** |
** |
This is arguably the easiest mission to complete on Legendary with Iron active. You’ll need to be extremely cautious, move at a snail’s pace at all times (bar the moments where you choose to run away, of course), and let the Arbiter (plus Elites, if they survive) do the hard work for you. |
|
Black Eye |
*** |
*** |
** |
** |
Floodgate seems almost tailor-made for the Black Eye skull. There are times when caution is important (Lake Bed B, Factory B and Lake Bed A in particular), but you can make your way through the entire mission with a Gravity Hammer and an Energy Sword. Naturally, you should use the Battle Rifle to score headshot Multipliers when it’s practical to do so, especially during the early encounters before Combat Forms begin wielding weapons. |
|
Tough Luck |
*** |
*** |
*** |
*** |
You may lose a few Multi-Kill bonuses, but grenades really aren’t a vital part of your arsenal in the Floodgate mission. Note that the Tough Luck skull has no effect on Ranged Forms. |
|
Catch |
*** |
*** |
*** |
*** |
As Flood don’t use grenades, Catch is effectively a way to collect “free” points. Activate it as standard once you locate the skull in Campaign mode. |
|
Fog |
*** |
** |
** |
** |
With Infection Forms insinuating their way into corpses all over the battlefield, and Combat Forms capable of leaping into the fray from all directions, the loss of your Motion Tracker definitely hurts more than usual. You’ll miss it most during the final approach to the Flood ship. |
|
Famine |
*** |
*** |
** |
* |
You need very specific weapons to deal with the Flood on higher difficulty levels, and Famine’s effect can be quite devastating, particularly during the second half of the mission. On Legendary, this is a skull you should only activate if you know the Floodgate level extremely well. |
|
Thunderstorm |
*** |
*** |
** |
** |
Thunderstorm increases the number of shielded Combat Forms you encounter, but they don’t tend to enter the fray until very late in the mission. Enable it for all Floodgate high score attempts. |
|
Tilt |
*** |
*** |
** |
** |
Shielded Combat Forms are far more difficult to deal with, and there’s no doubting that Pure Forms (particularly Ranged Forms and Tank Forms) are more difficult to kill with anything but the best weapons. |
|
Mythic |
*** |
** |
** |
** |
If you’re going to attempt any Flood mission with Mythic active, make it this one. You don’t encounter Pure Forms until the end, and Combat Forms can be dispatched in the usual Campaign Scoring style (that is, with a Carbine or Battle Rifle) with little effort. |
The Ark

Demon
Achievement Milestone: 50,000 points
Recommended
Multiplier:
4+
Time Bonus
|
0-20 min |
3x |
|
20-30 min |
2.5x |
|
30-40 min |
2x |
|
40-50 min |
1.5x |
General Tips
Once you have reduced enemy numbers during the first sniper battle, it’s possible (though dangerous) to move closer and collect a Plasma Pistol to kill Brutes with EMP/headshot combos.
If you’re well versed in the art of fighting Hunters, try to finish off the pair you face after the second sniper battle by sticking them with grenades. It takes a fairly intimate understanding of their total stamina on your chosen difficulty level to pick the right moment (especially on Heroic and Legendary), but even a wild guess is worth a try.
Have a couple of Plasma Pistols at the ready when the two Prowlers arrive. The Brutes dropped off are a relatively Easy source of EMP/headshot bonuses.
Follow the guidance on page 74 to, with the help of a few Marines, turn a Prowler into an intimidating weapons platform. The rewards are significant, especially if the Marine with the Rocket Launcher can get enemy vehicles in his sights.
After Johnson arrives in his Pelican, set off immediately – if you dawdle, the Sentinels will attack the two Ghosts that race to intercept you.
Once you acquire a Scorpion, aim to stay ahead of the other vehicles at all times. You should definitely be able to destroy the enemy vehicles and the pair of Hunters that attack as you drive down the slope.
Don’t take the short-cut of leaping over the edge when the Gauss Warthog arrives. For top scores, you really need to dispatch the Ghosts on the cliff path and the infantry at the bottom. This is most easily accomplished if you take control of the Gauss cannon, but you’ll need to be lethally precise and enjoy a little fortuity on Legendary.
The journey down the main slope is packed with high-scoring targets (particularly Wraiths), but be cautious on higher difficulty levels – even in a Scorpion, a solitary Ghost or Chopper can be your undoing if you drive with careless haste towards your targets.
After “tapping out” the Grunts and stealth-killing the Brutes in the two rooms inside the Cartographer building, take a Plasma Pistol with you to the next chamber. On Heroic and Legendary, you can score an impressive number of EMP/headshot bonuses against the Brutes and Jackals located there.
On the return journey through the same room, EMP/headshot kills are still possible as you fight the reinforcements, but the presence of a Chieftain makes it much more hazardous.
You can score EMP/headshot kills against the camouflaged Brute Stalkers, but you’ll need to fire the charged Plasma Pistol shot at close range to hit them.
Take the two Plasma Pistols dropped by the Jackals into the final confrontation. If you deal with the Chieftain first, you can really boost your points total by killing the Jump Pack Brutes for EMP/headshot bonuses.

Skull Recommendations
|
Skull |
Recommendations |
Tips |
|||
|
Easy |
Normal |
Heroic |
Legendary |
||
|
Iron |
*** |
** |
* |
* |
Being one of the longest missions in Halo 3 (it’s second only to The Covenant in this respect), The Ark is a real challenge for connoisseurs of the Iron skull. Hardcore experts will definitely feel they have a chance of beating it on Legendary, but certain battles later in the level – specifically the section leading up to and including the fight against the Scarab – make it a task suited to the type of flaming ninja that all other flaming ninjas discuss in hushed tones. |
|
Black Eye |
** |
* |
* |
* |
Not recommended. Seriously: the combination of Black Eye and vehicular combat is bad at the best of times, but it’s ridiculous in a mission where you spend much of your time in a slow-moving tank with no infantry in sight. |
|
Tough Luck |
*** |
*** |
*** |
*** |
There is one battle in a cramped room inside the Cartographer building where you might lament the fact that your opponents are more inclined to scatter on cue as you throw a grenade – but only for an extremely fleeting moment. Given the lack of potential for Plasma Pistol/headshot kills, this is an excellent choice. |
|
Catch |
*** |
*** |
** |
** |
This only really has an effect on the battles that take place before you get your hands on a vehicle, and the final section inside the Cartographer building (which can be quite unpleasant on Legendary). Catch is definitely a reasonable choice on The Ark. |
|
Fog |
*** |
*** |
** |
** |
You probably won’t even notice that the Motion Tracker isn’t there until you pass through the Shield Wall. At that point onward, you’ll miss its presence quite keenly. |
|
Famine |
*** |
*** |
** |
* |
With a little forward planning, Famine’s effect is really quite negligible during this mission – indeed, it’s probably worth activating on all Campaign Scoring playthroughs once you know the level well. |
|
Thunderstorm |
*** |
** |
* |
* |
On higher difficulty levels it’s clearly a struggle during the vehicle-oriented battles, and you’ll need to make every shot count in the early sniper battles. |
|
Tilt |
*** |
** |
** |
** |
As it can take half-a-dozen Sniper Rifle shots to take down a Brute Captain on Legendary, you’ll need to play the opening confrontations in an entirely different way, dispatching Grunts and Jackals before moving in to fight the Brutes at close quarters. Thereafter, you always have access to plasma weaponry, and there are tricks and techniques you can use to dispatch both Chieftains with relative ease. If you’re playing to secure maximum EMP/headshot bonuses, this skull is a must. |
|
Mythic |
****** |
** |
** |
* |
If you read the entries for both Thunderstorm and Tilt, you’ll get a fairly clear idea of what to expect with Mythic enabled (though, admittedly, your Sniper Rifle ammo will last a little longer). Only Plasma Pistol specialists should activate this skull on higher difficulty levels. |
The Covenant

Vanguard
Achievement Milestone: 50,000 points
Recommended Multiplier:
4+
Time Bonus
|
0-20 min |
3x |
|
20-30 min |
2.5x |
|
30-40 min |
2x |
|
40-50 min |
1.5x |
General Tips
Remaining in one piece is of paramount importance during the opening battle on higher difficulty levels. It’s definitely possible to dispatch the first Brute for an EMP/headshot bonus, but you’ll need to hurry to kill Grunts before your allies can take them down, though.
As per the tip on page 86 of the Campaign chapter, arming the Marine riding shotgun in the Warthog with your Spartan Laser on Legendary is a vital tactic. If you want to secure maximum points for destroying the Wraith in front of the first tower, though, you should take a Fuel Rod Gun along as well.
You can score a few grenade stick and Multi-Kill bonuses against the Covenant troops inside the entry hall.
After clearing the way to the elevator, ensure that you have a Magnum (they’re available in the drop pods just outside the tower) to go with a Plasma Pistol, with a Beam Rifle in reserve. You can use the latter to dispatch the Chieftain in the upper tower room, then switch to the dual wield combo to take down Brutes for maximum points.
Fight aggressively in the aerial engagement to prevent your allies from reducing your potential points. Don’t forget to destroy the Anti-Air Wraith (and, on higher difficulty levels, the Brutes) when you fly over the small island.
The landing pad zone is packed with Easy points, but be very careful when the Elite dropship lands – you should avoid friendly kills at all costs.
When the Brutes run out from inside the tower, it’s possible to plant a Power Drain through the entrance and follow it up with a Frag Grenade for a Multi-Kill bonus. There’s no room for error, though – if you’re not superlatively swift, you’ll lose the potential EMP bonus. You may prefer to run in front of the door (though out of the blue field, of course) and try to get a few headshots instead.
On Heroic and Legendary, stand back and let the Hunters bludgeon and blast the Elites into oblivion before you step in to kill them. They’ll generally knock the Arbiter unconscious too.
The Brutes that you face as you make your way to the elevator are ripe for Plasma Pistol/headshot takedowns.
If you’re following the strategy suggested in the Campaign chapter, and have brought a Beam Rifle along to use against the Chieftain in the top tower room, you’ll be interested to note that the soldier that usually rides as a passenger on your Hornet carries a Magnum. If you can find him – or, more likely, his corpse – and grab the gun, you can kill the Chieftain with ease with the Beam Rifle, and also score EMP/headshot bonuses against the Brute Stalkers.
When the Flood arrive, aim for “headshot” and Multi-Kill bonuses; against shielded Combat Forms, grenade tags work best. As in most Flood battles, wait for Infection Forms to reanimate corpses to increase your score.
There are a couple of “ambient” Banshees that you can destroy as you make your way down the snowy slope in the Scorpion.
Be thorough in the Scarab battle – don’t miss a single enemy, and watch out for the vehicle reinforcements that arrive once the first Scarab falls.
The confrontations in the Ring Room leading to the Prophet of Truth are too hectic on higher difficulty levels to make EMP/headshot Multipliers worth the risk. Instead, favor a ranged weapon for headshots, and a Needler for Superdetonation rewards, especially in the second section.
When the Flood attacks, use a ranged weapon against standard Combat Forms to score “headshot” Multipliers, and a melee weapon (or, ideally, grenade tags) against shielded varieties. If ammunition is an issue, you can try for Needler bonuses instead. Try to extend the battle for as long as you can – the more that Infection Forms reanimate bodies, the better.

Skull Recommendations
|
Skull |
Recommendations |
Tips |
|||
|
Easy |
Normal |
Heroic |
Legendary |
||
|
Iron |
*** |
** |
* |
* |
It’s the longest mission of all, but there are no flashpoints where regular deaths could be described as a certainty for elite players, even on Legendary. We’d single out the fight against Hunters and Drones in the second tower as the most potentially dangerous encounter. |
|
Black Eye |
** |
* |
* |
* |
It’s possible on the lower difficulty levels, but we wouldn’t care to try it. |
|
Tough Luck |
*** |
*** |
*** |
*** |
The inconvenience is a small price to pay for the 1.5 Multiplier on this vehicle-heavy mission. |
|
Catch |
*** |
** |
** |
* |
It makes the first part of the opening battle quite hellish on Heroic and Legendary, and all indoor sections are extremely unpredictable. Not recommended if a high score is your objective. |
|
Fog |
*** |
*** |
** |
** |
Until you know the level like the back of your hand, it’s better to leave this skull disabled. |
|
Famine |
*** |
*** |
** |
** |
The second of the two towers you visit is definitely harder, especially on Legendary, but the rewards are worth the additional effort and forward planning. |
|
Thunderstorm |
*** |
** |
** |
** |
A good choice for skilled players – it slows your progress to a crawl in places, but the extra points are more than adequate compensation. |
|
Tilt |
*** |
** |
** |
** |
If you use Plasma Pistols or Needlers against Brutes, and Beam Rifles against the first two Chieftains, you’ll barely notice that the skull is active during most confrontations. |
|
Mythic |
*** |
** |
** |
* |
As above, but enemy vehicles are also tougher to destroy. The fight against the two Hunters and the swarm of Drones is a decidedly unpleasant experience on Legendary. |
Cortana
Orpheus
Achievement Milestone: 15,000 points
Recommended
Multiplier:
6+
Time Bonus
|
0-20 min |
3x |
|
20-30 min |
2.5x |
|
30-40 min |
2x |
|
40-50 min |
1.5 |
General Tips
In the first two areas, allow the Infection Forms to reanimate the corpses, though be wary of shielded Combat Forms on Heroic and Legendary. Collect a Carbine if you can find one for headshot bonuses.
When there are no nearby threats and you find standard (that is, not shielded) Combat Form corpses nearby, pop the nearest wall-mounted sac filled with Infection Forms – they’ll hopefully revive the cadavers if you lead the way towards them.
In the Pelican Hill area, it’s difficult to manage the Flood in a way that enables you to maximize your points total. You should still set up your base of operations in the outside area beside the Pelican, but try to lure enemies in gradually, and don’t take unnecessary risks. A Needler yields the highest scores when you use it against Ranged Forms and Tank Forms. If you’re willing to push your luck a little, topple the Carrier Forms near the exit and lead the Infection Forms to corpses before you push forward.
In the small chamber littered with grenades, leave the Infection Forms alone, and prepare yourself for the mini onslaught of Combat Forms that ensues.
In the Bridge area, a constant trickle of Infection Forms will enter once you have neutralized the initial Flood occupants. Lead them to corpses to “recycle” Combat Forms.
There are a number of Cloaking devices situated in and between the Bridge and the Reactor Room. You can employ these during speed runs to skip lengthy confrontations.
The Hive is difficult enough to pass through at the best of times, but you can use the Carbines on the dispenser by the door to increase the number of points gained by shooting unshielded Combat Forms.
In the Reactor Room, be careful not to knock any Flood into the abyss unless you kill them with the shot that propels them over the edge.
During the escape run, you should again lure Infection Forms over to prone Combat Forms to revive them.
When you return to Pelican Hill, a more aggressive and direct approach will prevent the Arbiter from reducing your potential points tally. This may not be worth the risk on Heroic or Legendary when you are pitted against Ranged Forms, though.
Skull Recommendations
|
Skull |
Recommendations |
Tips |
|||
|
Easy |
Normal |
Heroic |
Legendary |
||
|
Iron |
*** |
** |
* |
* |
We would rather set fire to our feet and dance a tango than bother with an attempt on Legendary. |
|
Black Eye |
*** |
** |
* |
* |
It’s achievable, for certain, but Ranged Forms become an even greater torment. If you think you can endure the stress and frustration they cause, give it a try – but don’t say we didn’t warn you… |
|
Tough Luck |
*** |
*** |
*** |
*** |
You may lose a few potential Multi-Kill points, but the effect is negligible. In the close confines of certain tunnels and small chambers, it’s also worth noting that the Flood doesn’t really have anywhere to dive to. |
|
Catch |
*** |
*** |
*** |
*** |
It’s a consequence-free Multiplier. Activate it. |
|
Fog |
*** |
** |
* |
* |
When it can be hard enough to know where you are at times while grinding your way through the Flood labyrinth, disabling the Motion Tracker is only something you should do if you’re attempting to achieve an absurdly high score. |
|
Famine |
*** |
** |
* |
* |
As you rely heavily on weapons lost and found during the Cortana mission, Famine’s effect limits your ability to use certain essential firearms. It’s a fairly poor choice for high score attempts on Legendary, in spite of the 2x Multiplier. |
|
Thunderstorm |
*** |
*** |
** |
** |
The additional shielded Combat Forms can make your life very frustrating on higher difficulty levels. |
|
Tilt |
*** |
** |
* |
* |
Shielded Combat Forms become a real menace, and Pure Forms (especially the Ranged variety) are an incessant trial unless you can engage them with very specific weapons. You’ll need the patience of a saint on Legendary. |
|
Mythic |
*** |
** |
* |
* |
As above. |
Halo

Reclaimer
Achievement Milestone: 15,000 points
Recommended Multiplier:
6+
Time Bonus
|
0-15 min |
3x |
|
15-20 min |
2.5x |
|
20-25 min |
2x |
|
25-30 min |
1.5x |
General Tips
When the dispersal pods land, save Battle Rifle ammunition for headshot bonuses against standard Combat Forms, and make every shot count. The Rocket Launcher and the nearby Fuel Rod Gun should be used to destroy the shielded variety.
Without wasting ammunition for essential weapons, you can use firearms that you don’t need to kill the Stalker Forms climbing to the upper levels of the tower.
Grenade sticks or Needler explosions are the most profitable way to dispatch Pure Forms, but keep the Flamethrower at hand for emergencies.
Use Frag Grenades to score Multi-Kill bonuses against groups of Combat Forms as you make your way to the upper floor.
On higher difficulty levels, don’t concern yourself with Multipliers in the battle that takes place while you wait for the door leading to the Control Room to open. Follow the advice offered in the Campaign chapter, and focus on using weapons that destroy Flood with a minimum of fuss.
To eliminate the maximum number of Combat Forms and Sentinels as you run for the Warthog, you’ll need to hurry – pause for a second, and you’ll lose valuable points as they wipe each other out.
You can secure extra points when you face the Carrier Forms by allowing the Infection Forms they release to reanimate any surviving Combat Form bodies, though this probably isn’t worth the effort at this stage.
When you encounter Sentinels during the Warthog run, you can usually afford to slow down just a little as the Arbiter shoots them with the turret.
The three “roundabout” structures yield additional points. The first is the least profitable (the Infection Forms are worthless, the Carrier Forms too hazardous to hit, and the Sentinels aren’t worth a great deal), but the second is packed with Combat Forms. The third structure features Ranged Forms and Tank Forms. Though risky on Heroic and Legendary , try to hit as many of these as you can.
The tunnel areas feature fewer Combat Forms, but there are definitely some that you can hit if you pick the correct route. Steer well clear of those armed with Fuel Rod Guns in the second tunnel, though.

Skull Recommendations
|
Skull |
Recommendations |
Tips |
|||
|
Easy |
Normal |
Heroic |
Legendary |
||
|
Iron |
*** |
** |
* |
* |
If you can drive the final Warthog run blindfolded, Iron is worth a try – even on Legendary. You’ll need to take every precaution, though, and advance very slowly as you follow the route to the entrance. The fight outside the main doors is ungovernably chaotic on Heroic and Legendary, so you’ll almost certainly need to sacrifice the points gained there in favor of safety and security in some hidden, Flood-free corner far away. Don’t return until Johnson and the Arbiter eventually clear the area – it usually takes around ten minutes on Legendary. |
|
Black Eye |
** |
* |
* |
* |
The Warthog run is abysmally hard. Not recommended. |
|
Tough Luck |
*** |
*** |
*** |
** |
It’s a tactical disadvantage, especially during the main battle outside the entrance on Heroic and Legendary. As skull forfeits go, though, it’s fairly minor. |
|
Catch |
*** |
*** |
*** |
*** |
Consider it an oblique apology from Bungie for every death you’ve suffered at the hands of the Ranged Forms. |
|
Fog |
*** |
** |
** |
* |
While you can keep track of most Combat Forms prior to setting foot on the imposing Forerunner structure, the journey to the entrance is very difficult, especially on Legendary. And as for the battle when you get there – well, it’s truly a backs-to-the-walls encounter without a Motion Tracker. Reach the Control Room, and it’s plain sailing thereafter. |
|
Famine |
*** |
*** |
** |
* |
You rely explicitly on weapons dropped by enemies for the first half of the Halo mission, so it’s an extremely tough task to reach the Control Room in one piece on Legendary. |
|
Thunderstorm |
*** |
*** |
** |
* |
Shielded Combat Forms – need we say more? These aren’t so bad on the way up, when you can set your own pace, but if you have a penchant for Sisyphean trials, the battle outside the main entrance is deeply unpleasant. |
|
Tilt |
*** |
** |
* |
* |
Shielded Combat Forms and Pure Forms will be the bane of your life before you get inside the Control Room. |
|
Mythic |
*** |
** |
* |
* |
As above, but arguably worse. Even standard Combat Forms will often survive single Brute Shot blasts. |