
Halo 3 Guide Essentials How to Play
Basics
How to Play
Commands
The following button configuration applies to Halo 3’s default settings, so don’t fret if you’re a strict southpaw – they can be modified at any time.
|
Command |
In Menus |
On Foot |
Aboard Vehicles |
|
|
Move cursor |
Move forward/backward, strafe left/right |
Move forward/backward, strafe (where applicable) |
|
|
- |
Look around, aim |
Rotate camera/change direction |
|
|
Move cursor |
Up: toggle Flashlight on/off |
- |
|
|
Confirm |
Jump Skip cinematics |
Brake |
|
|
Cancel |
Melee attack |
|
|
|
Edit options |
Use equipment |
|
|
|
- |
Draw reserve weapon Drop weapon in left hand (when dual wielding) |
- |
|
|
- |
Change grenade type Hold to pick up weapon with left hand Reload weapon in left hand |
- |
|
|
- |
Hold to pick up weapon with right hand Reload weapon in right hand |
Hold: climb aboard/exit vehicle |
|
|
Select the top menu option |
Toss grenade Fire with weapon in left hand (when dual wielding) |
Use optional feature (varies with each vehicle type): power slide, speed boost, et al |
|
|
Select the bottom menu option |
Fire with weapon in right hand |
Fire (only available with certain vehicles or with turrets) Horn |
|
(Press) |
- |
Crouch |
- |
|
(Press) |
- |
Zoom |
- |
|
|
Enter Settings menu |
Enter/exit pause menu |
|
|
|
- |
||
|
|
Access/exit Guide menu |
||
Menu
This section introduces the most common menus in Halo 3, describing everything first-time players need to know to get started. If you require any further help, or simply crave a hand to hold as you hesitantly behold Halo 3’s intuitive user interface for the first time, you can always take the radical step of consulting your Halo 3 game manual…
The Main Menu
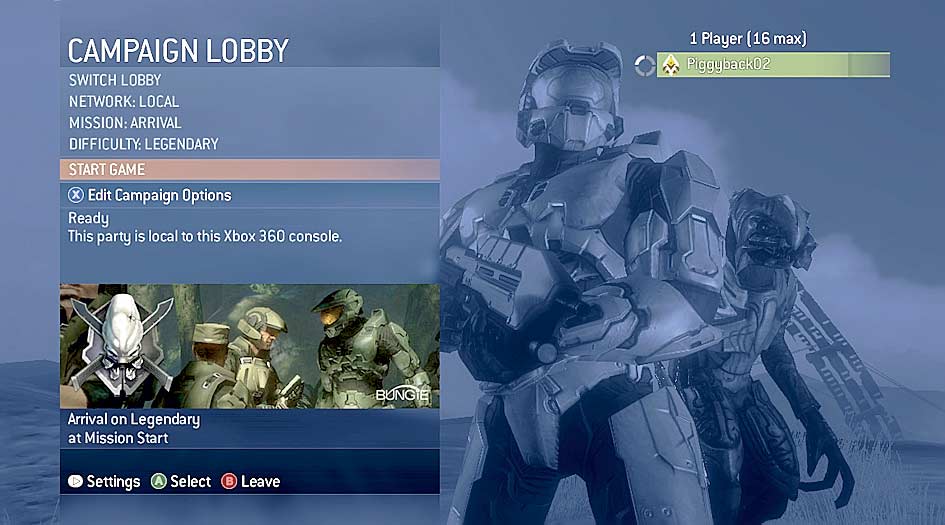
To begin a new Campaign, select Start Solo Campaign from the Main Menu. You then must choose a difficulty level from the four available: Easy, Normal, Heroic and Legendary. Normal is the best setting for those playing Halo 3 for the first time. If you find this level (or, perhaps, the demands of regularly walking across the room to retrieve your controller) too challenging, you can always play on Easy until you grow in both confidence and ability. As suggested in the guide introduction, only veterans of Legendary campaigns in Halo and Halo 2 should consider starting on Heroic; everyone, and we mean everyone, should leave Legendary alone at first.
The Campaign menu enables you to pick specific missions to play once they have been unlocked. This is also where you can launch co-op games. Once in the Campaign Lobby, you are free to choose previously completed levels to play (and individual Rally Point starting positions within those levels), and to adjust the difficulty level. For co-op, you can set up a split-screen game, or meet up with other players on a LAN or via Xbox LIVE (either by hosting them in your party or by joining theirs). You may additionally press v to change certain settings. As soon as you’re ready, select Start Game to proceed.
The Pause Menu
Press v at any time during the game to access the pause menu. It features two main pages that you can switch between by moving the stick left or right.
The Game page shows the status of your current mission objectives, which are marked with a tick once completed. From here, you can choose to restart your mission, or revert to the last checkpoint (an extremely useful feature if a battle goes spectacularly awry). The Save and Quit option enables you to quit your game and resume it later from the last-triggered checkpoint.
Most of the options in the Settings page are self-explanatory. However, there are a few options in the Game Controls sub-menu that we should at least briefly explain.
Look Inversion:
Determines if you need to move the stick up to look up and down to look down, or vice versa.
Look Sensitivity:
The higher this setting, the greater the speed at which you look around. A high sensitivity will not necessarily make you more effective, though. It’s best to leave this on the default setting, then adjust it in small increments at a later date if required.
Button Layout:
Choose the layout that best suits your needs. Note that the Bumper Jumper setting is interesting for left-handers, as it enables them to have the commands of the most crucial battle moves mapped to triggers and bumpers.
Stick Layout:
Controls the functionality of both sticks. Most left-handers will use this option to switch to the Southpaw configuration.
Auto Look Centering:
With this option enabled, the camera will automatically return to a forward-facing position as you move. This is useful if you’re struggling to control the camera during combat.
Crouch Behavior:
Determines if you must hold l to crouch, or instead press it once to toggle between stances.
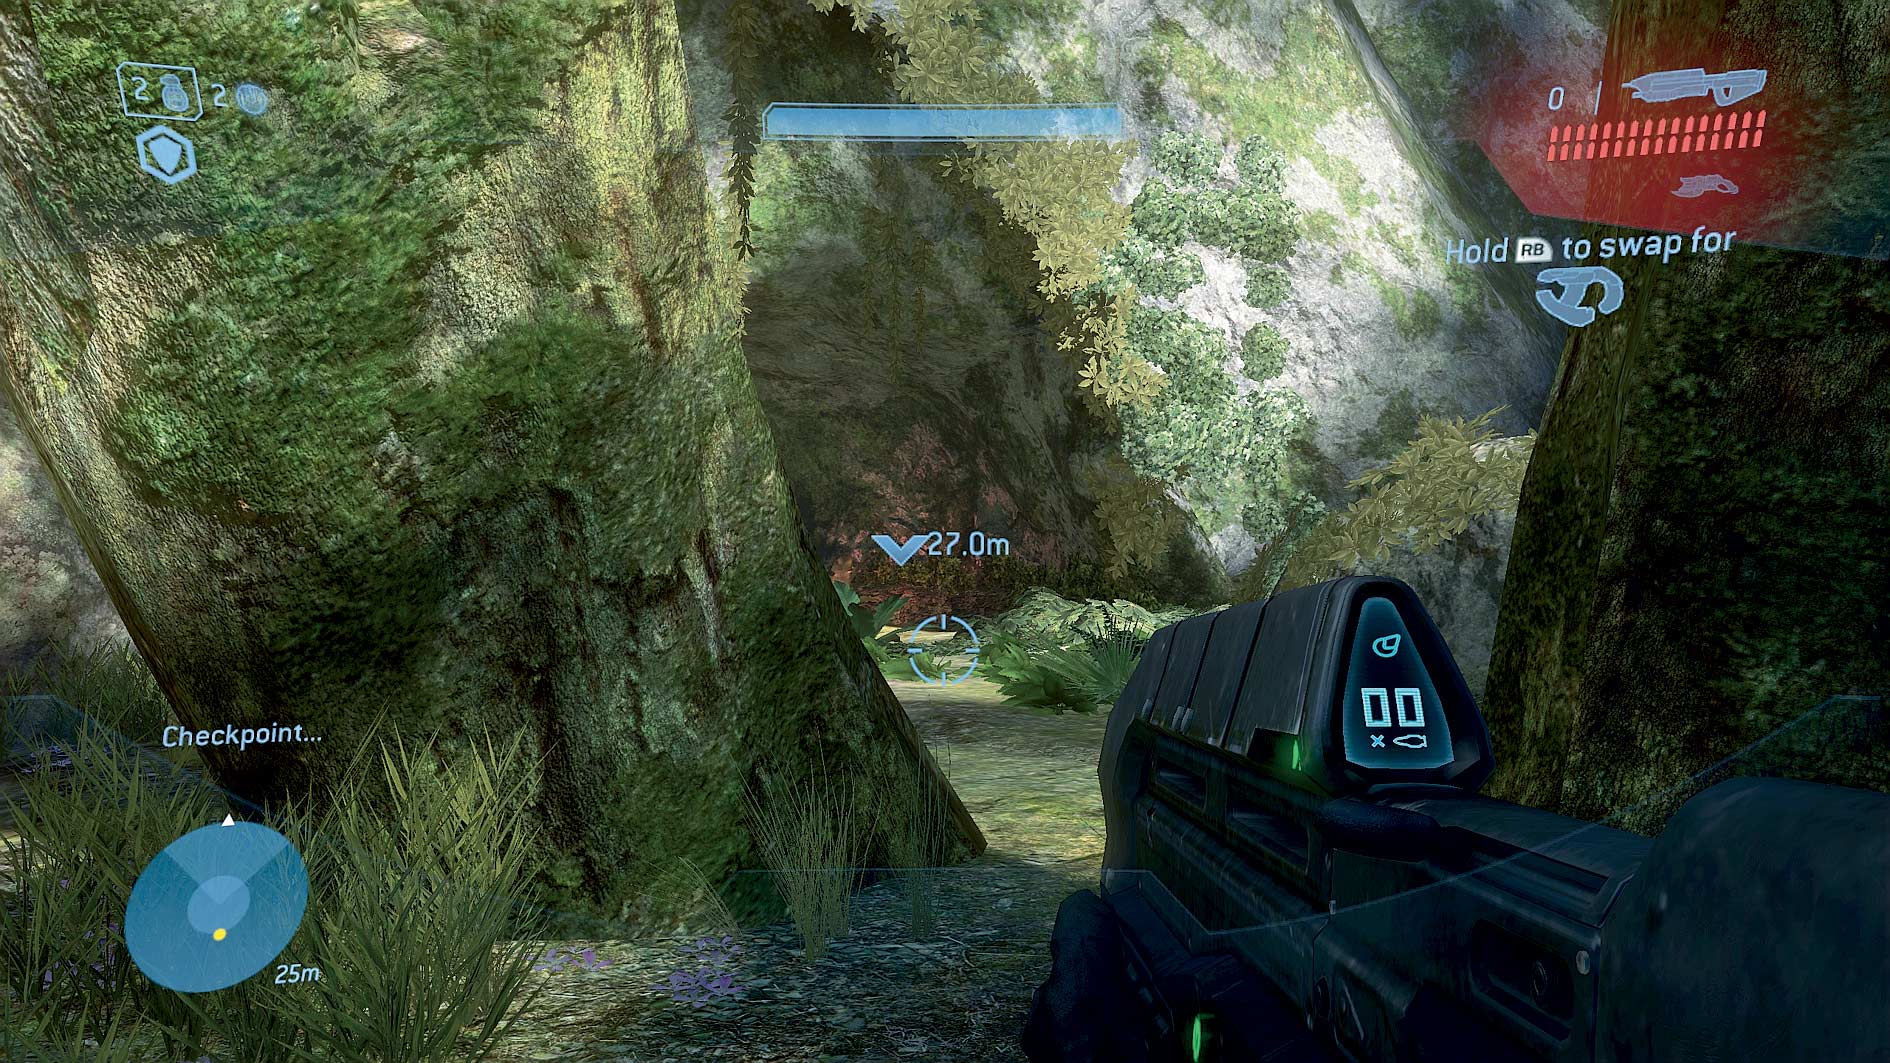
Primary Weapon:
The weapon currently held in your right hand. The number to the left shows the total ammunition carried or remaining battery power, while the gauge below displays the ammo in the current clip, or a temperature gauge for weapons powered by fuel cells. If this gauge reaches its red extreme, an automatic cooling system will prevent you from firing for a few seconds. When you dual wield (use two weapons simultaneously – see page 14), an additional (and functionally identical) display will appear in the left-hand corner of the screen for the weapon held in the corresponding hand.
Reserve Weapon:
The secondary weapon you have at your disposal, which will either be holstered or slung over the Master Chief’s shoulder. Note that the reserve weapon icon will flash if it is out of ammunition or has a depleted fuel cell.
Energy Shield:
This gauge shows the status of your shield, with the bar decreasing as the Master Chief is hit by weapons or explosions. Once empty, it will turn red and flash (there’s also an alarm that sounds), indicating that any further damage might kill you. If you avoid being hit for a number of seconds, your shield will return to normal working order and the gauge will be refilled.
Grenades:
You can carry a maximum of two grenades per type; the currently selected model is highlighted. When you’re dual wielding, this display will be replaced by information about the weapon held in your left hand (see Primary Weapon).
Equipment:
You may only hold one piece of equipment at a time; a representative icon will be positioned here when you’re carrying an item. Guidance on how to use these gadgets is provided in the Campaign chapter.
Crosshair:
The crosshair shape varies with each weapon, and its color indicates whether a target is an ally (green) or a foe (red).
Onscreen Instructions:
Every time you can interact with your environment (for example, to pick up a weapon or to open a door), the button you need to press will appear here.
Radar:
Also called Motion Tracker, this device reveals the location of all moving or firing entities in your immediate vicinity. The top of the radar corresponds to the direction you’re facing. Friendly beings are represented as yellow dots (this includes you, in the center of the circle), while hostiles are red dots. Larger dots signify vehicles. When you have an objective to fulfill, the direction of your target will sometimes be shown as a white triangle
Waypoint Indicator:
In some instances an icon will indicate the direction of your next destination, as well as how far you need to travel to reach it.
Checkpoint:
Whenever you cross a new checkpoint, it will be briefly mentioned above the radar. Read the “Halo 3 Primer” section further along in this chapter to learn more about the checkpoint system.
Halo 3 Media
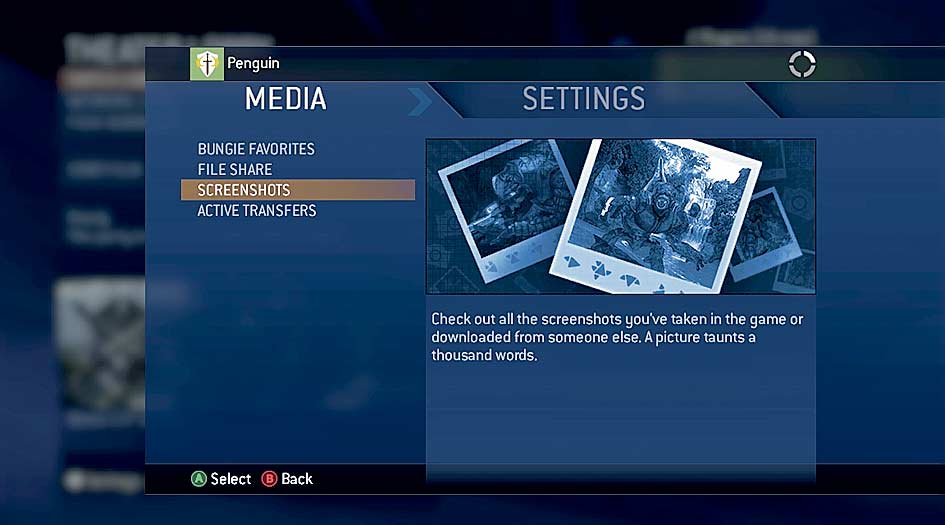
Halo 3 isn’t just great to play: it’s also fun to watch and look at, and the ability to create, share and download custom Game Types and edited maps is endlessly absorbing. In this section, we provide a brief introduction to the File Share and Theater features, and tell you how you can use them to watch, play and distribute film clips, screenshots, custom maps and Game Types.
To visit the Media page in Your Settings, simply press v at any time. From here, you have access to several self-explanatory options. Bungie Favorites provides a list of Bungie’s recommended files, which are frequently renewed. File Share and Screenshots enable you to manage, amazingly enough, your File Share and your Screenshots.
File Share
Your File Share is a dedicated online area where you can make files available for other people to download. Each Halo 3 player with an Xbox LIVE Gold Membership has their own File Share space allocated, with no limits on the number of transfers that can take place.
Uploading data to your online File Share is dead easy. All you have to do is enter your File Share menu from Your Settings (see above), and select the files you would like to upload. These files can be:
- Video footage stored while playing Campaign or Multiplayer modes (including Forge sessions).
- Screenshots taken while watching Campaign or Multiplayer game videos in the Theater (more on this below).
- Custom Game Type Variants created in the Custom Games menu.
- Maps that you have edited in the Forge
Downloading data from another person’s File Share is also a snap. Simply highlight their name from within a game Lobby, then press a to display their Player Details, which includes their File Share. You can also press 0 and browse your Friends and Recent Player lists. If you select someone while Halo 3 is running, you’ll see a special File Share entry added to the usual list of options.
Once a file is in your File Share space, you are free to use it as you please, and as many times as you want. You can access your File Share from the Custom Games Lobby to load a map and/or a Game Type Variant; from the Forge Lobby to load a map; or from the Theater Lobby to load entire game films, edited clips or screenshots.
You can also recommend files from your File Share to your friends. Whenever you do so, they’ll receive a message taking them directly to the file in question.
Theatre
The Film option enables you to choose the file you want to watch from several categories, including those in your File Share. Halo 3 automatically records events when you play in Campaign and multiplayer modes, so you can find your prior performances in the Recent Films list. If you’d like to store one of these for future viewing or sharing, simply highlight it and press x,
then follow the onscreen prompts.
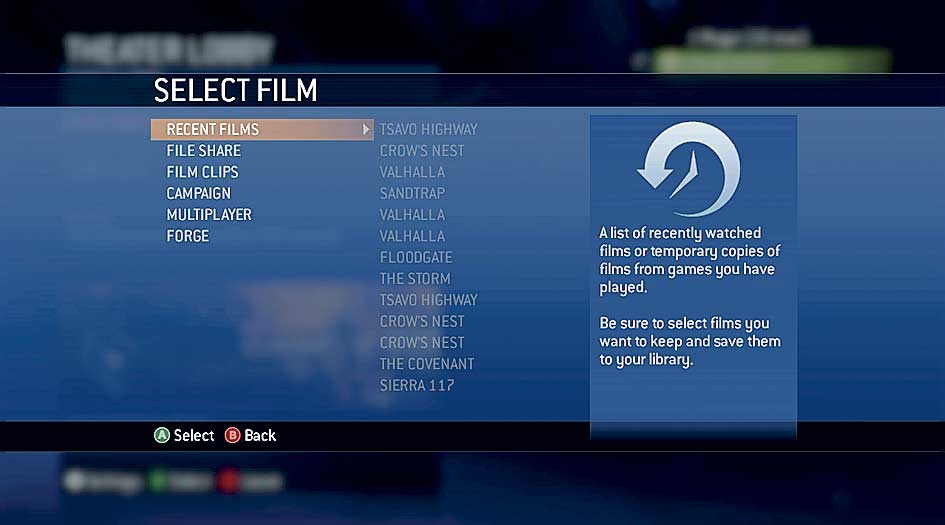
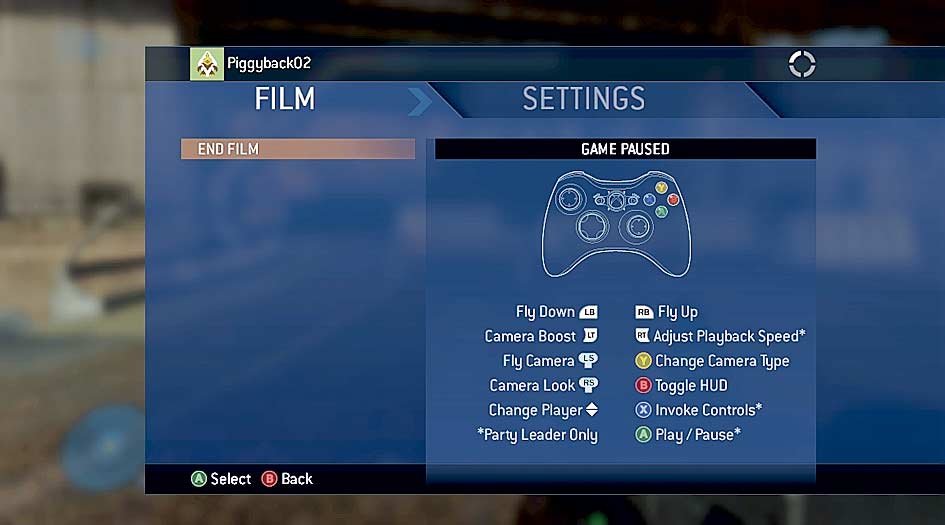
Once you have chosen a video to play, select Start Film. While watching it, you can press v at any time to pause. From there, you can end the film you’re watching, change the usual Settings, and check the commands available in Theater mode. If you are viewing a video in a group, note that only the Party Leader has access to certain Theater functions.
Camera controls:
Use y to change the camera type (following the selected character, or flying freely around him); move the camera with d or f, and e or r; note that you can hold E to increase the speed of movement.
Adjustments:
The following commands are handy when taking screenshots. a enables you to pause and resume playback, and S cycles through the various HUD settings. Use R to control the playback speed, and press up or down on t to change player (only available for footage from co-op and multiplayer games).
Advanced controls:
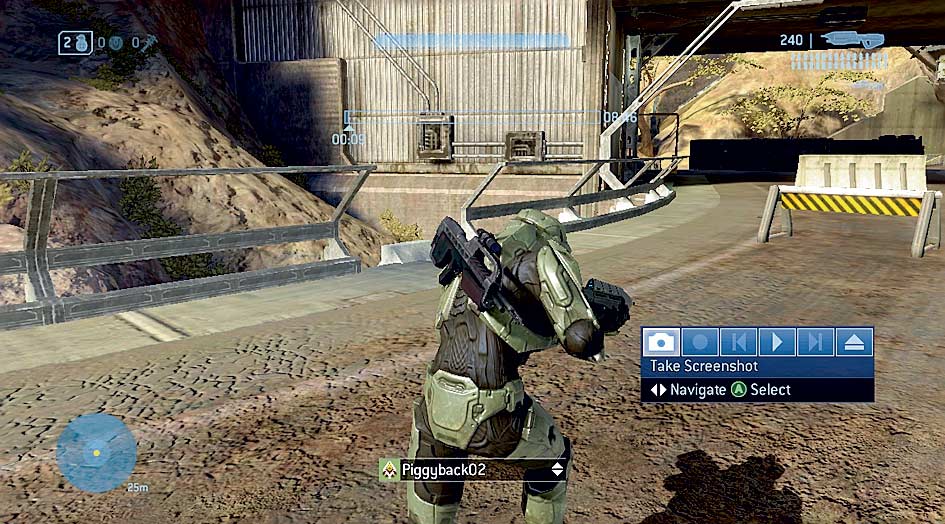
Press x at any time to display the Theater Control Pad, and navigate its options by pressing left or right on t. You can take screenshots by selecting the camera-shaped icon. Once you have taken a screenshot, you must name it (either manually, or using the Autoname function) before it is saved. The Record Clip option enables you to create a smaller film clip that shows a particular sequence of events. As a rule, most people won’t be willing to wade through an entire Campaign level recording to see the funny thing that happens eight minutes in, so it pays to edit your files accordingly.
The Theater can be used to enjoy memorable videos, but it’s also a great way to study how others play in multiplayer matches. You can pick up a surprising number of techniques and strategies by watching how your opponents and teammates behave. With the tools at your disposal, including the flying camera and the “change player” feature, there’s not a single moment in a match that you won’t be able to analyze and learn from.
Halo 3 Primer
A Guide For New Recruits
If you haven’t played a game in the Halo series before, we strongly recommend that you read the following introduction to the key features that set Halo 3 apart from its FPS (“first person shooter”) peers. If you have previously played a Halo game, but perhaps feel a little rusty after years of inactivity, consider this a brief refresher course. More experienced Halo players can either drum their fingers while we run through these fundamentals, or skip straight ahead to the Campaign chapter on page 16.
So, in brief, Halo 3’s Campaign mode isn’t a low-rent FPS single-player experience where you listlessly trade shots with cardboard cut-out assailants. It offers variable, sophisticated and – above all – endlessly enjoyable sci-fi combat where, as your opponents generally have greater firepower, you need to be clever and creative to survive. Completing levels is not the only goal – how you play them matters just as much. With all the vehicles, weapons and gadgets at your disposal, Bungie’s sandbox-style design affords you a remarkable degree of freedom to fight battles in any way you please. There’s no real “right” or “wrong” way to approach combat. The point is to freely experiment, and to enjoy doing so.
The first step on this road, then, is to familiarize yourself with a few of the noteworthy features that make Halo 3 and its forebears so very special. So, without further ado…
Movement
We don’t intend to teach you how to play an FPS: we presume throughout the guide (and especially after, in the words of Sergeant-Major Johnson, we “kick off the training wheels” at the end of this short opening chapter) that you can use a dual-stick controller, and have fired a few virtual shots in anger before now. That said, there are a couple of general playing tips that it would be foolish of us not to mention. Firstly, even when playing on the Normal difficulty setting, you’ll soon notice that the Covenant troops are shrewd and aggressive. You’ll need to learn to use available cover intelligently, taking refuge behind a solid element separating you from your foes every time you’re in danger.
Secondly, if you stand stock still and shoot from the hip, you’ll be cut to pieces. You should try to keep moving whenever the Master Chief is exposed during combat. It’s vital that you strafe to dodge enemy fire while fighting out in the open, and you should always have a rough escape plan in mind. There’s no shame in a temporary retreat, especially when it provides valuable time for the Chief’s shields to recharge.
Shields
One of the original Halo’s many pioneering design features was the Master Chief’s energy shield. Capable of withstanding a level of damage linked to the game difficulty setting, it would cut out under extreme fire from enemy weapons, rendering the Chief vulnerable to damage on a secondary health meter. However, and here’s the deceptively-simple-yet-very-clever bit, the shield would be fully replenished if the player could avoid damage for a short period of time. This novel revision of the traditional “energy gauge” system encouraged players to use cover intelligently, and treat their smart and sneaky Covenant opponents with respect.
In Halo 2, Bungie dispensed with Health Packs and the visible second energy bar entirely, and it’s this system that is used in Halo 3. You can find the shield gauge at the top of the HUD (see page 10). When the Master Chief’s shield energy is full, he’s (broadly speaking) protected from all but the most dangerous weapons when you play on Normal. The moment the bar is reduced to below a quarter full, and especially when the gauge flashes an insistent, angry red, it’s vital that you take cover.
While the Master Chief can withstand a certain amount of additional damage once his shield fails, this “period of grace” is hard to judge. Through experience you’ll gain a better understanding of the punishment he can endure, but it‘s generally advisable to find a good place to hide when the in-helmet alarm sounds.
Weapons
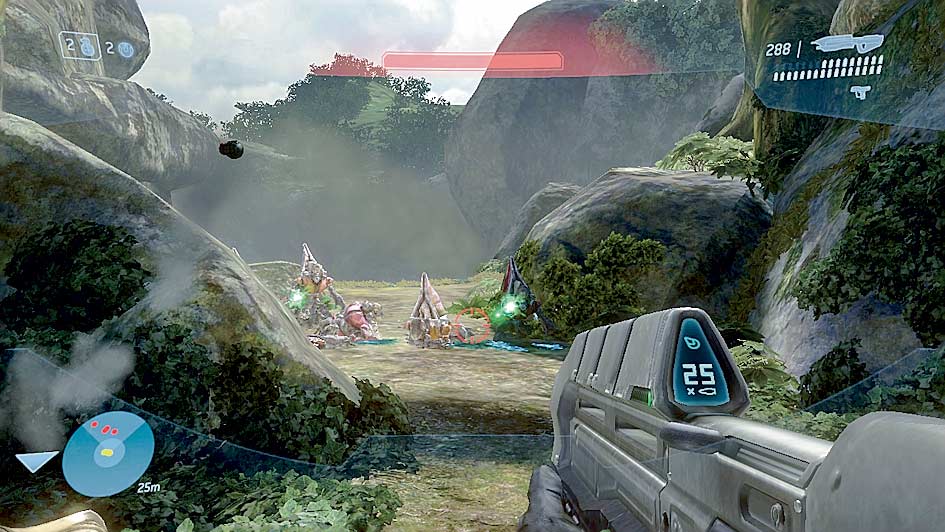
There’s a hint of Rock, Paper, Scissors to the balance of Halo 3’s subtle, finely tuned weapons system. Every firearm has its place, excelling in certain situations, yet perhaps lacking bite in others. Some are specialist tools (underestimate the slight yet mightily useful Plasma Pistol at your peril), some (such as the Battle Rifle or Carbine), are solid against a wide assortment of foes, while others offer the carefully rationed pleasure of sheer pure brute force: indeed, certain weapons are powerful enough to take down armored vehicles.
On the Normal difficulty level, it’s generally the case that some firearms are simply more efficient than others in specific situations, but learning how to make the most of your arsenal is still highly important. You will learn more about the strengths and weaknesses of weapons in the Campaign chapter, but try to bear the following points in mind:
An extremely cool feature inherited from Halo 2 is dual wielding. Dual wielding is the practice of holding two one-handed weapons at the same time. If it’s possible to dual wield a nearby weapon with the gun held in the Master Chief’s right hand, an onscreen prompt will appear at the upper left-hand corner of the screen. Dual wielding has two main applications: it can double your firepower if you carry the same type of firearm in both hands, or it can offer tactical benefits if you handle two weapons of different types. However, you cannot throw grenades while dual wielding; furthermore, any attempt to perform a melee attack will lead you to discard the weapon held in your left hand.
The Master Chief can carry a maximum of three weapons at once – one in reserve (holstered or slung over the Chief’s shoulders), and up to two “active” weapons if you’re dual wielding. A portable turret can count as a third weapon too.
Frequent reloading is a discipline that you’ll need to learn quickly. Ducking back behind cover to change a clip becomes second nature after a while, but you can always tell a fresh-faced Halo 3 recruit by the way that they charge into battle with a practically empty clip, then skitter, slide and squeal like a baby gazelle when they hear the ominous and abrupt report of the “dead man’s click”. We’d love to think up a clever new mantra or mnemonic to help such individuals, but the timeless “Reload or Die!” pretty much communicates the message perfectly.
Unlike in Halo 2, you can use e and r to reload each weapon independently, adding a subtle but important strategic layer to dual wielding.
Many enemies have vulnerable spots, particularly unprotected heads, so learn to pick your shots carefully. If your aim is akin to that of a six-year-old boy taking a restroom break, even lowly Covenant Grunts will struggle to stifle their snickering behind cupped claws. “Spraying and praying” just doesn’t cut it in Halo 3.
It often pays to conserve ammunition. Unless you’re in a situation where you have a ready supply of useful weapons, try to save more powerful firearms until they’re actually required. You’ll find advice on weapon usage throughout the Campaign chapter. By walking over the same type of weapon as the one that you are carrying, you will automatically collect new ammunition if it’s possible to do so. However, certain weapons (particularly the Plasma Pistol and Plasma Rifle) are powered by built-in fuel cells, and cannot be recharged.
A melee attack is often a viciously efficient way to finish off an opponent. Hits from behind are instantly lethal against a wide range of enemies – such “stealth” kills may even slay a fully armored Brute.
Grenades
Another defining feature of the Halo series is the inclusion of a dedicated button for throwing grenades, which clearly underlines their importance in general combat. In Halo 3 you can carry a maximum of two of each grenade type; these are automatically collected from the battlefield as you walk over them.
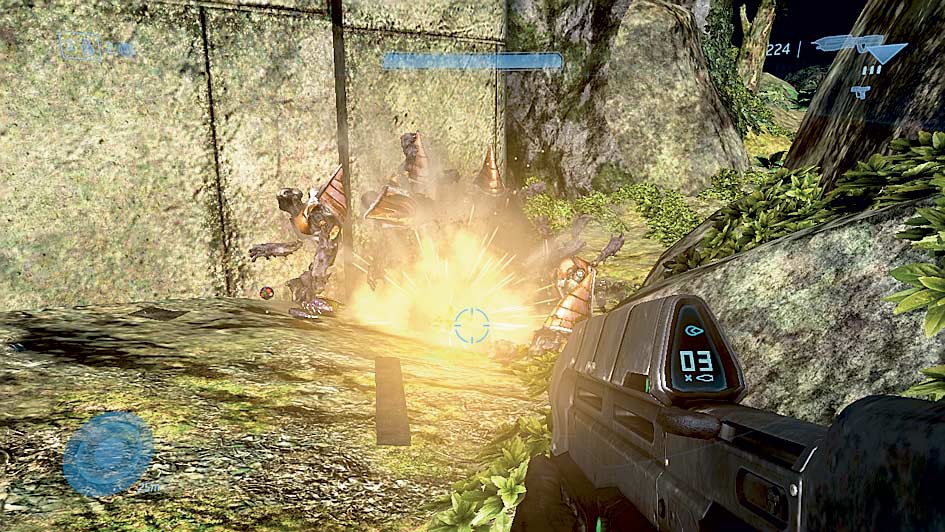
Grenades are powerful against crowds, or strong enemies that can weather the storm of an entire Assault Rifle clip without blinking or breaking stride. However, there are many other ways they can be used; there’s plenty of room for creativity. You could, for example, cover a hasty retreat by throwing one at the ground to discourage foes from giving chase.
Equipment
The inclusion of specialist “equipment” is a new feature in Halo 3. The Master Chief can only carry a single piece of equipment at a time, and will automatically collect an item provided he is not currently carrying anything. Whenever you want to swap a gadget with a different type positioned at his feet, simply follow the onscreen prompt.
To avoid spoiling any surprises, we explain the function and use of all equipment types in the relevant areas of the Campaign chapter.
Allies
Not everyone you encounter in Halo 3 carries a gun with a bullet inscribed with the words “Master Chief” sitting impatiently in the chamber: you will also be frequently accompanied by troops who will fight alongside you. On one level these individuals act as a diversion for enemy combatants, drawing fire away from your position and contributing to each affray with their fair share of kills. On another, they’re talkative, highly welcome companions – you’ll find that you actively go out of your way to ensure their wellbeing, often just to see what they’ll say or do next.
You can actually swap weapons with certain allies: simply stand in front of them and press the button that appears onscreen to make the exchange. However, some troops will not accept certain firearms, and you should note that you cannot take weapons of a type that the Master Chief is already carrying. It is also not possible to trade weapons with a co-op player.
Vehicles
There are many vehicles (including unique model variants) to drive in Halo 3, each having its own characteristics and capabilities. To climb inside a vehicle, approach the appropriate side and follow the onscreen prompt. While each mode of transport behaves in a different way, it’s generally safe to assume that you steer with one thumbstick, then accelerate and reverse (and, in some instances, strafe) with the other thumbstick. Though it may take a little getting used to, this system soon becomes second nature.
With certain vehicles you can also hop on board as a gunner or a passenger – watch out for the onscreen message that appears as you approach them from different directions. When you take up one of these positions, nearby allies will often climb in as well, driving you on an attack run if there are enemy forces present. If the coast is clear, they’ll simply chauffeur you (and any other troops on board) to the next battle.
Finally, it’s actually possible to “board” and take control of enemy-controlled vehicles. We’ll offer more detailed advice on this in the Campaign chapter, but remember that it can be achieved by holding the usual button while approaching a vehicle from a specific direction – generally from the side. Covenant troops are far from stupid, though, and will attempt to dodge you or, indeed, simply run you over.
Checkpoints
Halo 3 automatically stores and saves your progress when you reach “checkpoints”. These can be triggered by arriving at a particular area, or killing specific enemies; they may occur prior to, during, or after battles. When you die, you will be restored to the exact position and state you were in when you last passed a checkpoint. This is a clean, simple and fair process that runs transparently in the background and encourages experimentation.
If the tide of a battle turns against you, and you’d like to turn back time to put things right, you can enter the pause menu and select “Revert to saved” to start again from the last checkpoint. (We usually prefer to commit suicide in the most spectacular, explosive manner possible to achieve the same effect, but perhaps that’s just us.)
Audio
As magnificently rich as the Halo 3 audio experience is, it would be a mistake to regard everything you hear as mere incidental ear-candy. If you listen closely, you’ll notice that there are a wide variety of audio cues that can help you to stay alive. From the hissing and fizzing of a thrown Plasma Grenade, to shouts and warnings from your allies, to the audible plotting and scheming of emboldened Grunts, it pays to have a keen ear. Incidentally, you should note that when you hear the dull, echoing report of distant gunfire on your travels, that battle is actually really happening further forwards – it’s not just an atmospheric effect. If you want to save your allies, you’ll need to move quickly. Finally, if you’re lucky enough to have a Dolby 5.1 sound system, you can use the apparent position of a sound to gauge where your enemy is shooting, walking, or even reloading. If he sounds like he’s upstairs, or behind you, he probably is.
Onscreen Text
Last, but not least, keep an eye on the upper left and (especially) right-hand sections of the screen. This is where useful prompts will appear to inform you when you can perform certain actions, such as collecting weapons, boarding vehicles, or interacting with objects.