
The Sims 4 Guide Architecture and Design
Building a House
Building a house is not very difficult, although it can seem overwhelming at first. In fact, the first few times you build a home, expect it to be a learning experience. Even experienced home builders go back with a sledgehammer at times to make little changes as they work on a house. Therefore, the best way to learn how to build a house is to…build a house. So let’s get started.
There are three ways to build: move into a pre-made home, construct a new home using pre-made rooms (Styled Rooms), or from scratch starting on an empty lot.
Using the Filter Build Mode has a powerful tool some players might miss at first. Yet it can help you find what you need quickly. Click on filter menu that appears over the catalog to open the filter menu. Then you can choose from several styles, colors, and content (unlocks or purchased). For example, if you want to maintain a specific style for your home, such as Gothic Farmhouse or Queen Anne, you can use the style filter to ensure that only those selections that fit your style appear for you to choose. |
An empty lot is a blank canvas just waiting for your masterpiece of architecture.

Styled Rooms
One of the new features in The Sims 4 are styled rooms. They allow you to build and furnish a home in a matter of minutes. From the Build menu, select Styled Rooms. There are several choices for each of the main types of rooms including kitchen, bathroom, bedroom, dining room, living room, study, and kid’s room. There are even outdoor styled rooms that you can use for instant patios or yards. Plus there are 16 career rooms that are only unlocked by reaching level 10 in a career. While most of these are studies, some are kitchens or bedrooms. Each is styled after the career they represent.
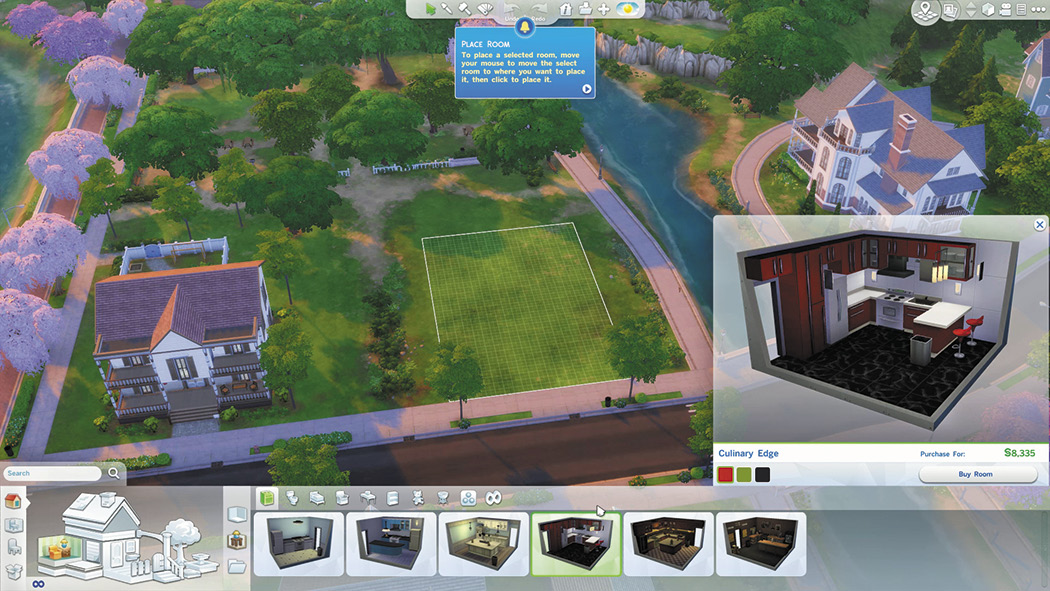
Pick out a styled room that you like, then select the color scheme.
When using styled rooms, you first select the type of room, then the style, and finally a color scheme. Styles and color schemes flow through the different types of rooms, so you can pick one of each type of room and have them already coordinated for your home. Once you decide which room you want, select “Buy Room” to purchase it. If you’re just building for fun and not directly for your Sim, the cost is just added into the total value of the lot.
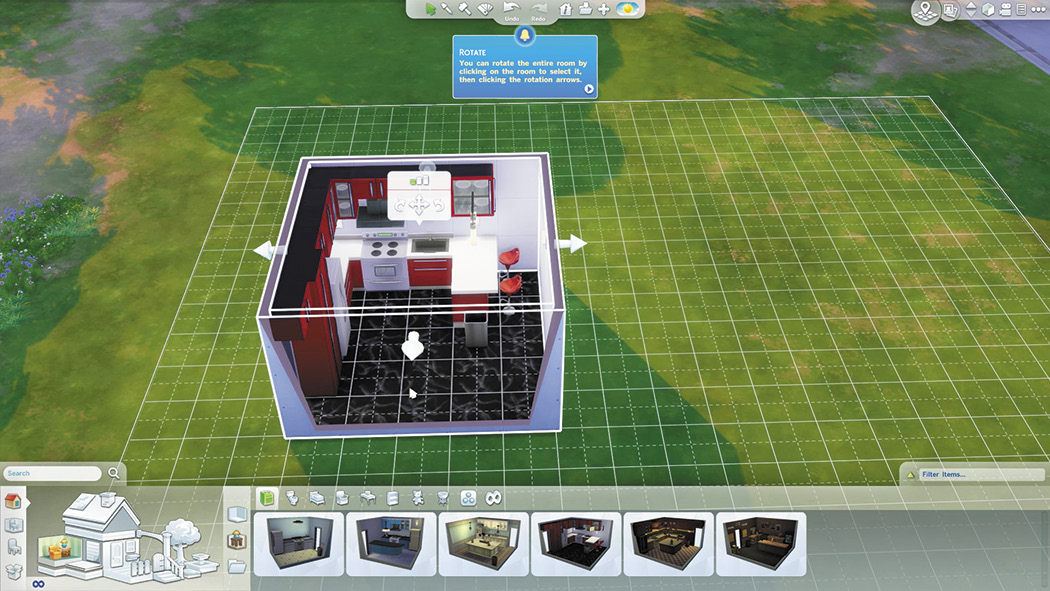
Put down the styled room. Then you can move it, rotate it, and even change the dimensions to fit your house.
Place the room onto the lot. You don’t even need to use any of the Room tools. These styled rooms can be rotated and moved—you can even drag the walls to change the dimensions of each room. Each room has a door or opening already created. You can try to line up the rooms so the doors connect them. Or just wait until you have the rooms all arranged how you like and then move the doors or put in new ones. Finally, you can use the Room tool or the Wall tool to fill in any gaps or to create a hallway or entryway for your home. Put in a front door, decorate the exterior of your house, put on a roof, and you are done. The furnishings are already in the rooms and the house is ready to move into.
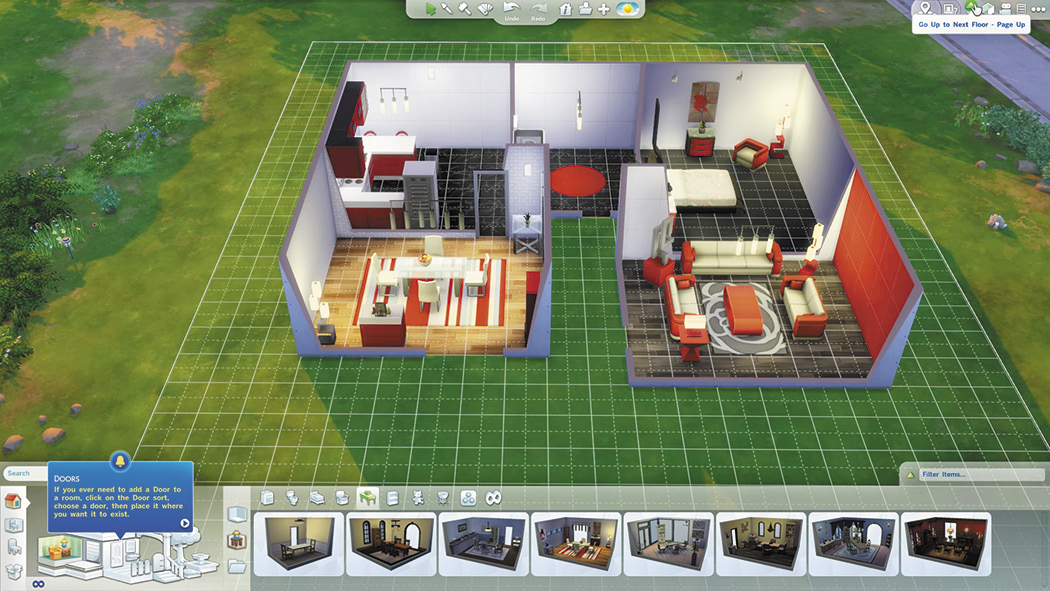
Piece together several styled rooms to make your house. Keep the same theme throughout, or pick different styles for a very eclectic home.
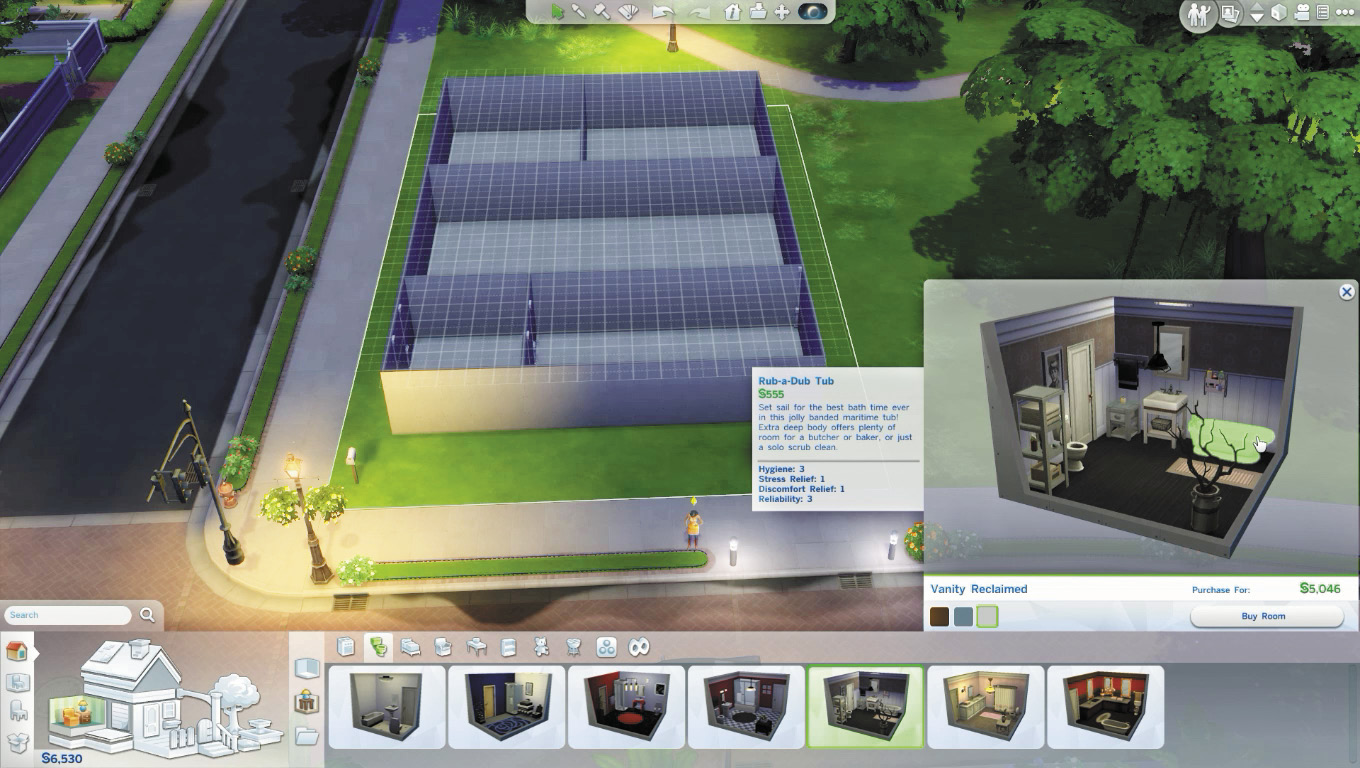
Buy individual objects from a Styled Room through the Showcase window. Click to select and purchase the desired object.
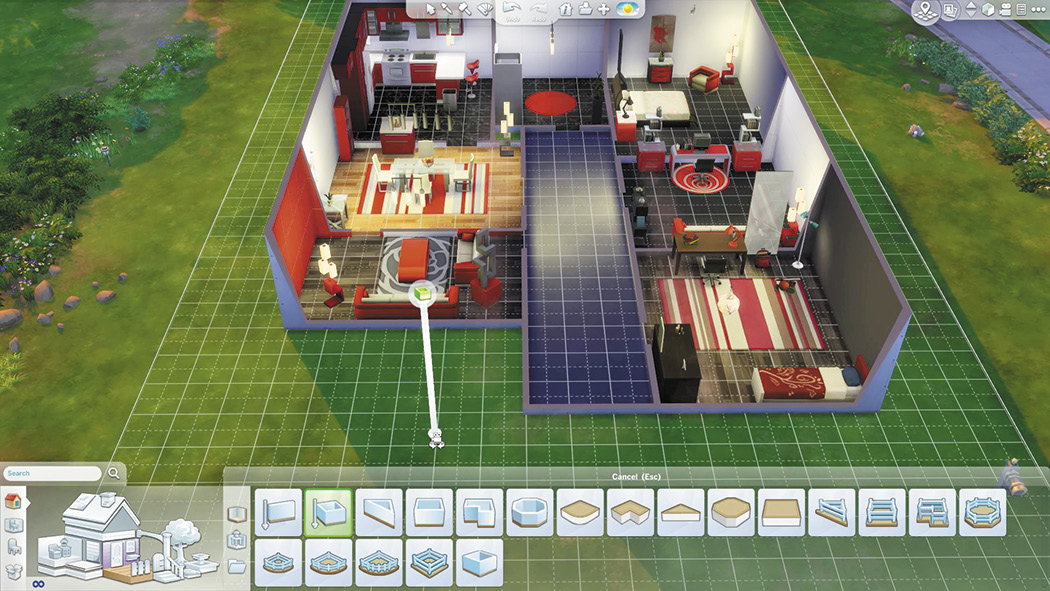
Once all of your styled rooms are in position, use the Room tool to fill in the empty spots between the rooms. A hallway down the middle of the home is a great way to provide access to all of the rooms.
Walls and Empty Rooms
In the Build menu, click on the wall portion of the home next to the front door to select the Walls and Empty Rooms menu. This is where you lay out the main shape of your home and determine the size and position of the various rooms.
In the Walls and Empty Rooms menu, you can build walls, rooms, and even decks. There are several tools within this category and they include:
- Wall Tool
- Flat Square
- Room Tool
- Triangular Deck
- Triangular Room
- Square Deck
- Square Room
- L-Shaped Deck
- L-Shaped Room
- Octagon Deck
- Octagonal Room
- Rounded Deck
- Flat Round
- Rounded Deck (Large)
- Flat L-Shape
- Rounded Deck (X-Large)
- Flat Triangle
- Square Deck (Diagonal)
- Flat Octagon (Diagonal)
- Square Room (Diagonal)
However for this step, we are focusing on rooms. You can select the Room tool, which allows you to drag out a square or rectangular room as small or as large as you like. Or, you can select the Square Room option and place a room onto the lot. Then click on the room and drag the walls to change the shape and size of the room. If you want a triangular, L-shaped, or octagonal room, you first place the room and then select it and drag the walls to get them to the correct dimensions.

The easiest way to lay out a floor plan is to use the Room tool. Select a spot of the lot where you want one of the corners of the house to be and then hold down the left mouse button while dragging out the shape of the room. Release the button and presto, you have a room with a floor, walls, and ceiling.

Then drag out some more rooms to form the general shape of the house. Don’t worry if the rooms are not the correct dimensions yet. You can always adjust them later.

Forgot to make a space for a bathroom? No problem. Just use the Wall tool to draw a wall across one of the rooms and divide it into two rooms.
Some players choose to stick with just square or rectangular rooms for their first home. The other shapes are a lot of fun, but can get tricky at times. For basic homes you need a kitchen, a living room, a bedroom, and a bathroom. You may also want to add a dining room or a study. Once you have created all of the rooms, you may want to adjust the sizes.
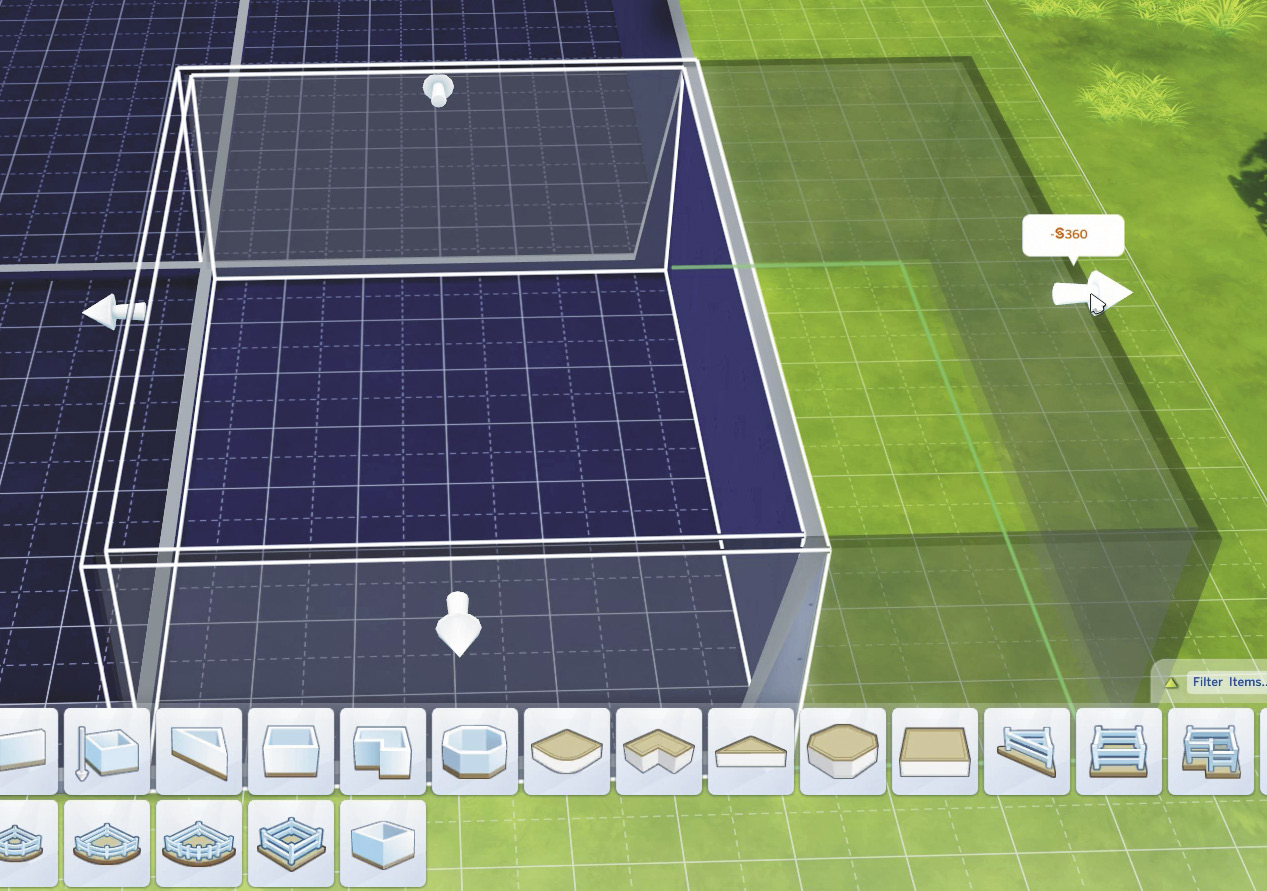
Click and hold on one of the arrows, then drag the wall to move it and change the size of the room.
With the Select tool, just click on a wall and an outline of that room appears with arrows on each wall. Click on a wall, then click and hold down the mouse button while on a wall arrow. Then drag the wall arrow to move it. While a room is selected, you can also rotate it 90 degrees in either direction, move the entire room, or even change the height of the walls. When you do this, you change the height of all rooms on the same floor of the house.
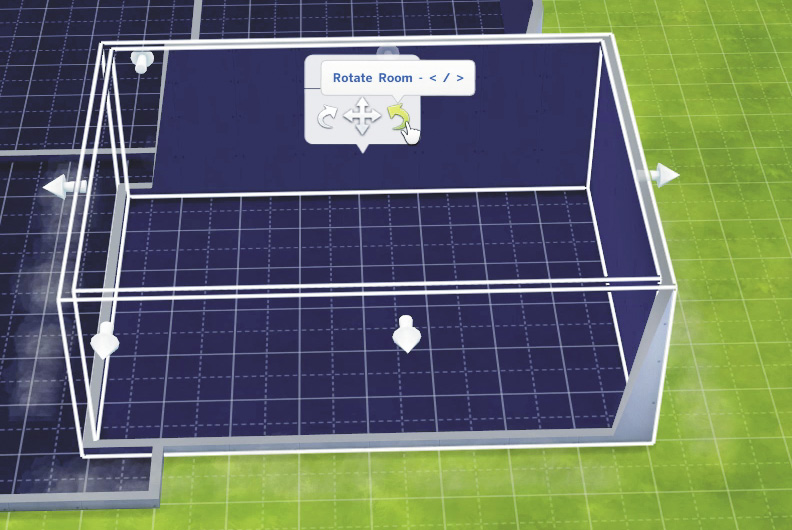
Click on the curved arrows to rotate the room 90 degrees in either direction.
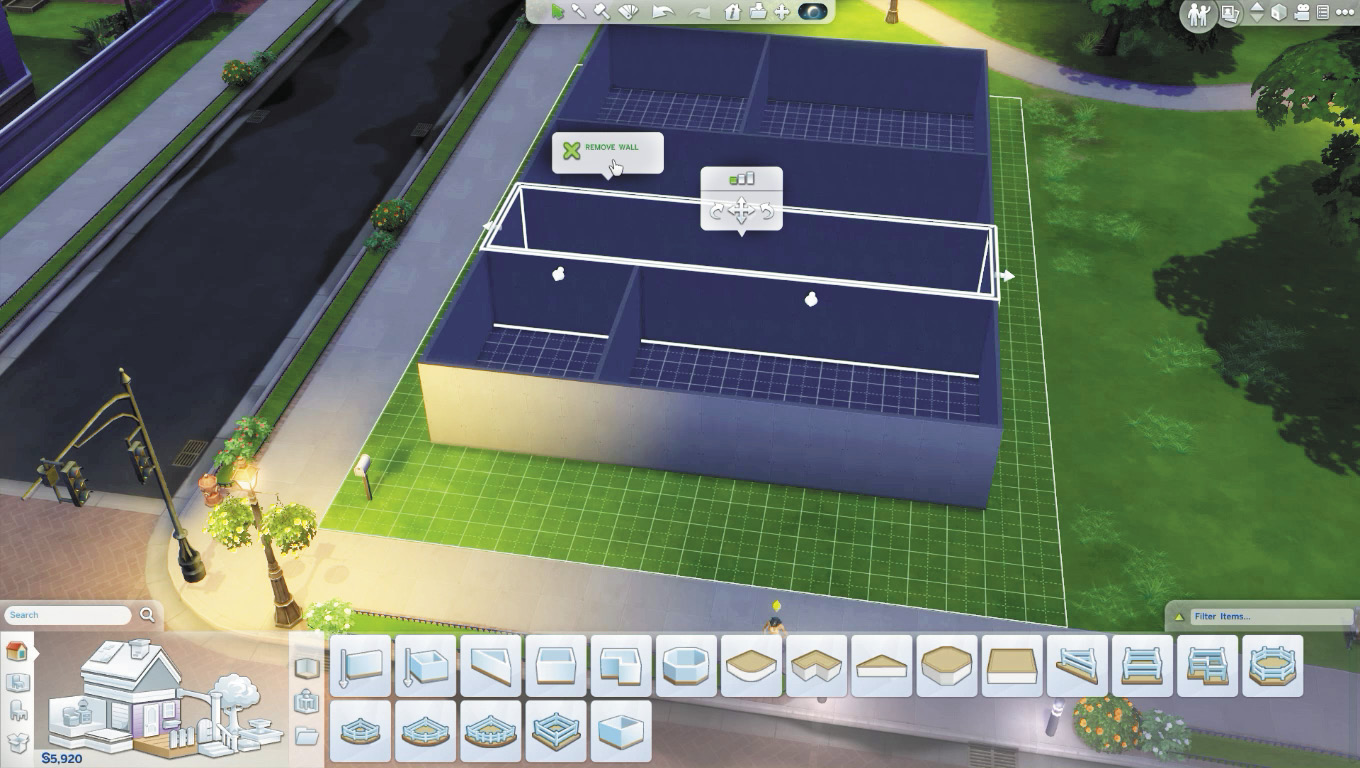
Knock out unwanted walls with the Sledgehammer tool. When a room is selected, you can also delete walls by clicking on the wall, and clicking on the Remove Wall button that appears.

That room in back is too large. Click on one of its walls, and then drag the arrows to resize it how you want. You can even do this once the house is completed and Sims have moved in.
You may not want walls completely dividing all of your rooms. For example, maybe you want an opening that leads from your living room to your dining room and kitchen. Because walls divide these rooms, you just need to remove a few wall sections. Select the Sledgehammer tool and then click on those wall sections you want removed and they are gone. Get the floor plan of your house how you want it. However, it does not have to be perfect. It can always be modified at any stage of construction.

You can even move a freestanding wall. Just click on the Move icon (the four arrows forming a cross) and drag the wall to another position. You can even turn that single wall into a complete room by pulling on the arrows.
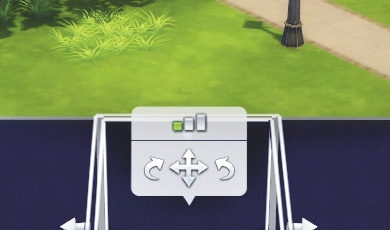
When you select a room or wall, you can change the height of the wall by clicking on the wall height buttons. This not only changes the height of the selected wall or room, but all walls of that level.
Wall Patterns and Floor Patterns
Now that the walls are where you want them—or at least where you think you want them for now—you are ready to do a bit of decorating. It’s time to pick a new menu. Click on the textured wall square on the side of the house in the Build menu to open up all of the wall covering options. You can choose to put these patterns one wall segment at a time or apply it to the entire room. There are several types wall patterns including:
- Paint
- Masonry
- Wallpaper
- Rock and Stone
- Tile
- Siding
- Paneling
Pick what you want and then click on a wall panel to change it to the color and texture of your choice. Wall patterns run between §2 and §12 per wall section. The fancier patterns are more expensive. Of course, drywall is free.
Start covering your walls. It may seem dark at first because not much light gets into your home without windows and lamps. However, once you add these features, you can see the true colors.
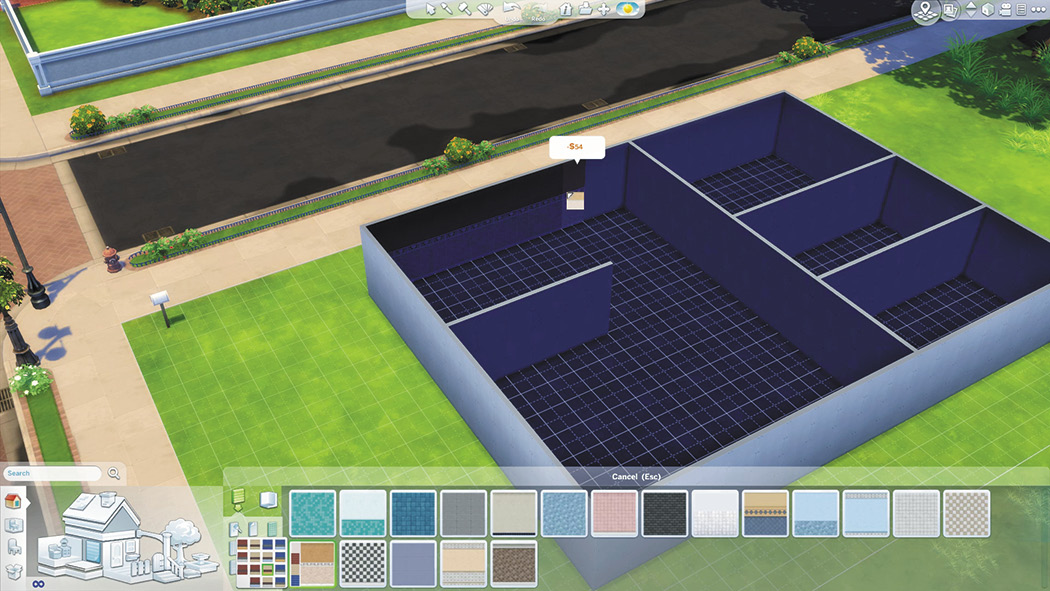
Once you have the walls of a room done, click on the floor patterns from the Build menu. There are several types of patterns within this category and they include:
- Wood
- Linoleum
- Carpet
- Metal
- Tile
- Outdoor
- Stone
Once you pick a pattern, then select a color within that pattern and then lay down your floor covering You can put it down one tile at a time, hold SHIFT to cover the entire room, or drag it wherever you want. You may even want to use different patterns in the same room to create an original floor or wall design. Floor patterns run between §4 and §20 per floor tile. You can also do quarter tile placement by pressing CTRL+F while a floor pattern is selected.
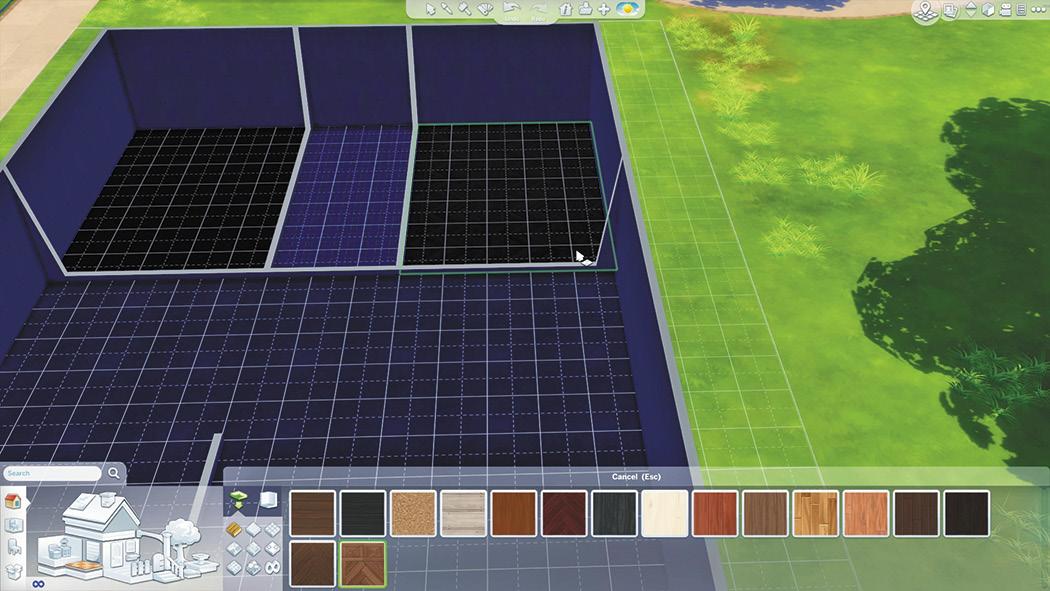
Installing wood flooring in the study is extremely easy. The hard part is deciding which pattern to use.
Doors
If you’re going to get your Sims into your house and then between rooms you’ll need some doors. Click on the door on the house in the Build menu and then choose from the large selection of doors. Some doors are more appropriate for exterior doors while others are for interiors. However, you can put them wherever you want. Your home must have at least one exterior door. However, some like to put a door on the back or side of the house as well. You also need doors into each room that is complete enclosed so Sims can get to these rooms. To install a door, select the door you want from the menu and then move the cursor with the door attached to a location on the wall where you want the door.
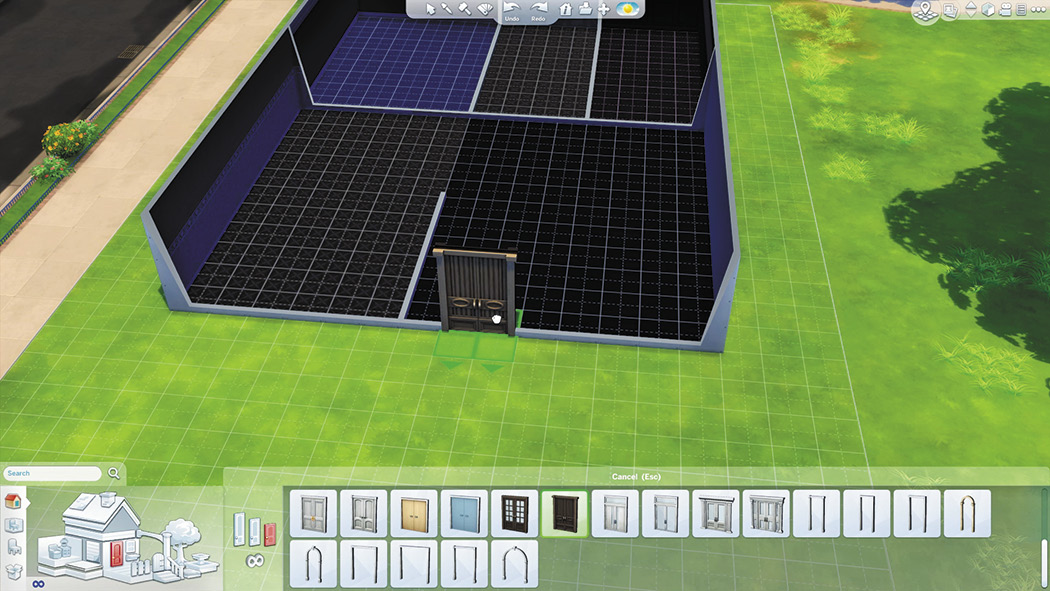
All homes need a front door. Depending on the layout, you may want a back door as well. Within Live Mode, you can click on an exterior door and set it as the front door. That assigns which door Sims use when they come to visit.
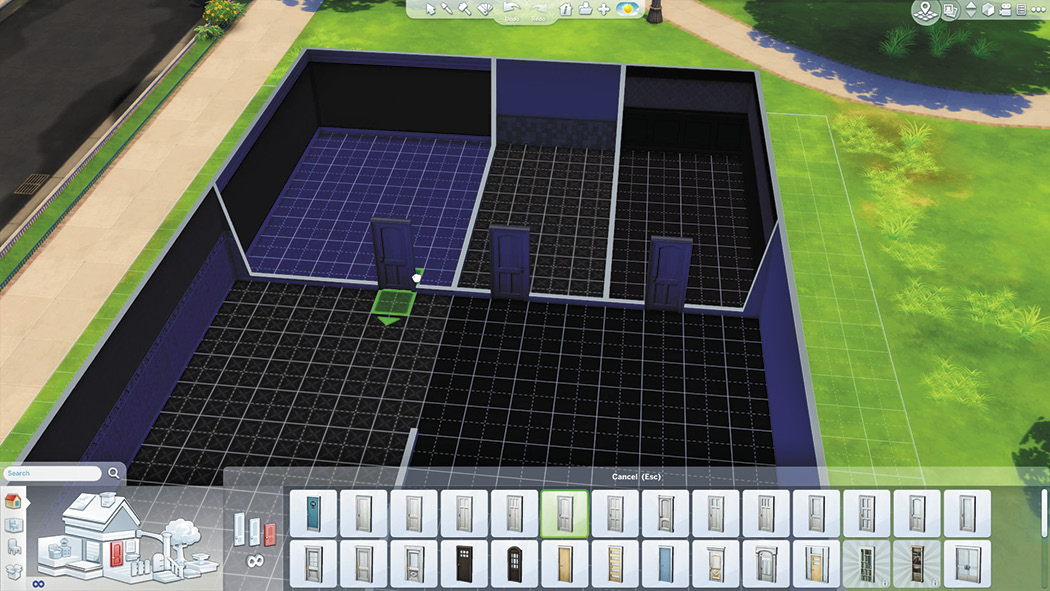
Add interior doors to each enclosed room so Sims can access them.
Windows
Windows are important because they help provide lighting to your home during the day. You can choose to add one window at a time, or you can also choose to add windows to an entire room with one click. From the Build menu, select which placement mode you want to use and then select the windows you would like to add. Adding a window is similar to adding a door. However, while a door has to be positioned along the floor, you have a bit more flexibility with windows because now you can move windows and wall objects vertically.
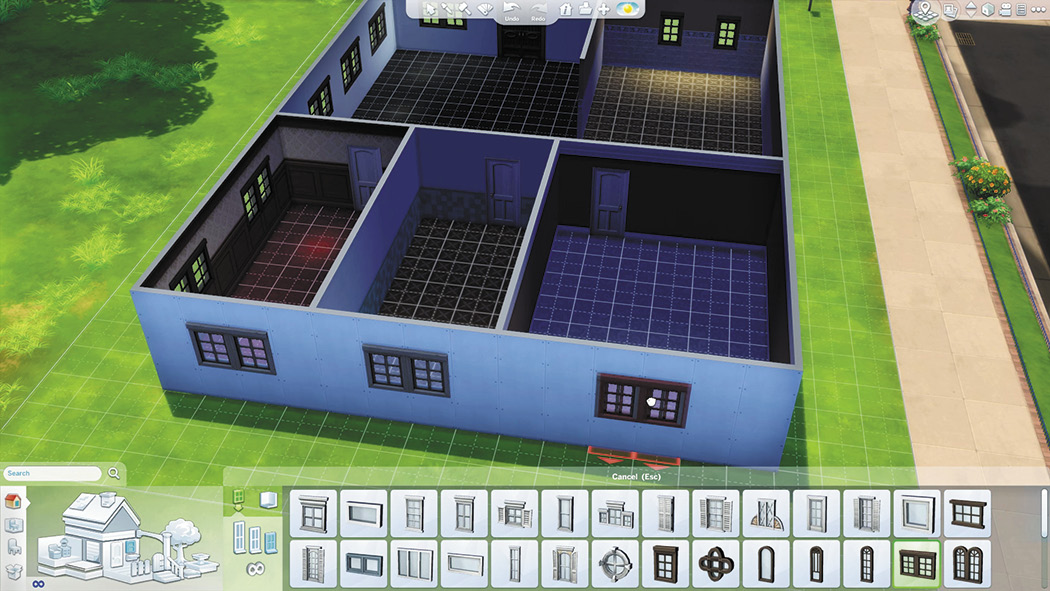
Place windows along all of your exterior walls to provide enough light to your house.
Columns and Spandrels
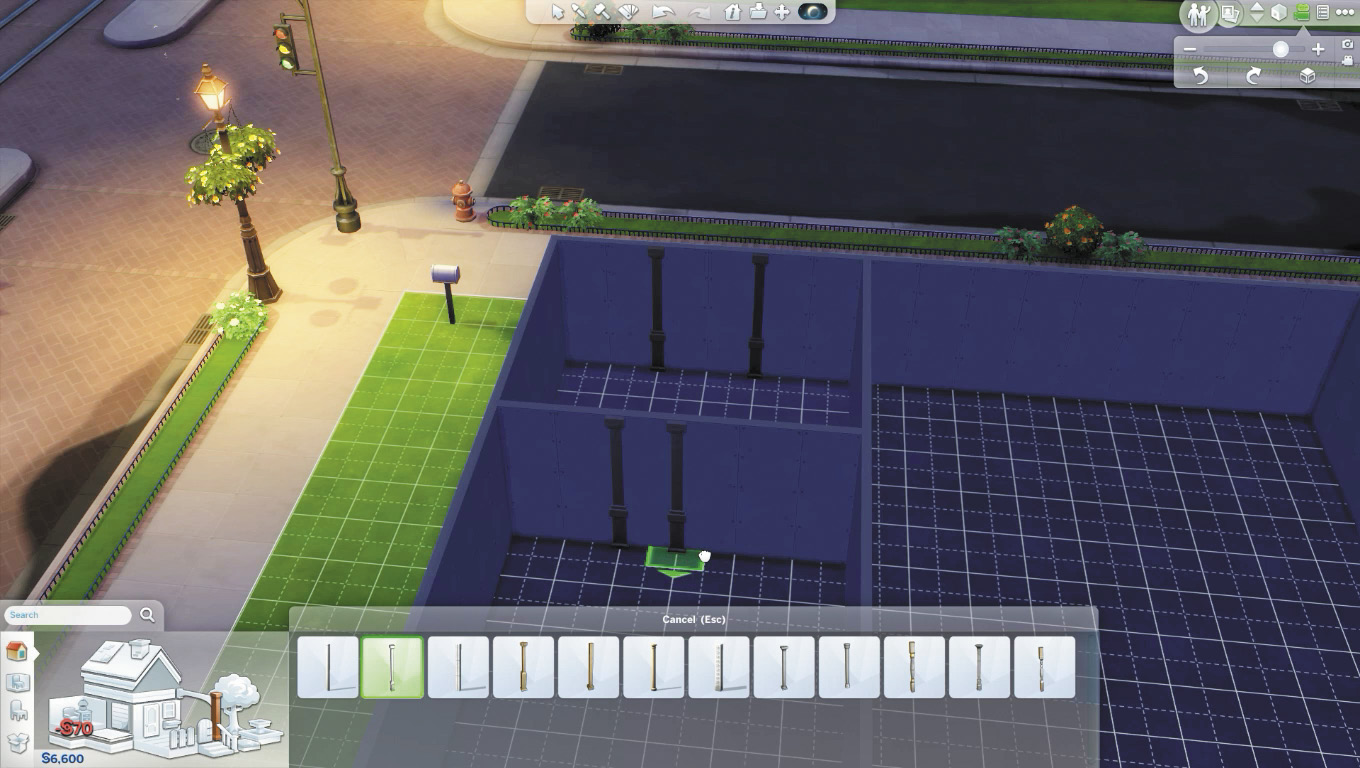
Another way to spruce up your house is to use columns and spandrels. Columns can be placed both inside and outside of your home. Their height will automatically match the height of the walls on their level. You can also pilaster columns by placing them against a Wall or corner of a room.
Spandrels are a type of decoration that extend across the top of wall or decks. You can simply replace existing walls or place them on top of decks and foundation fences for a decorative touch. Try using spandrels to connect columns both inside your home as well as on the outside. They can really add to a porch or a balcony.
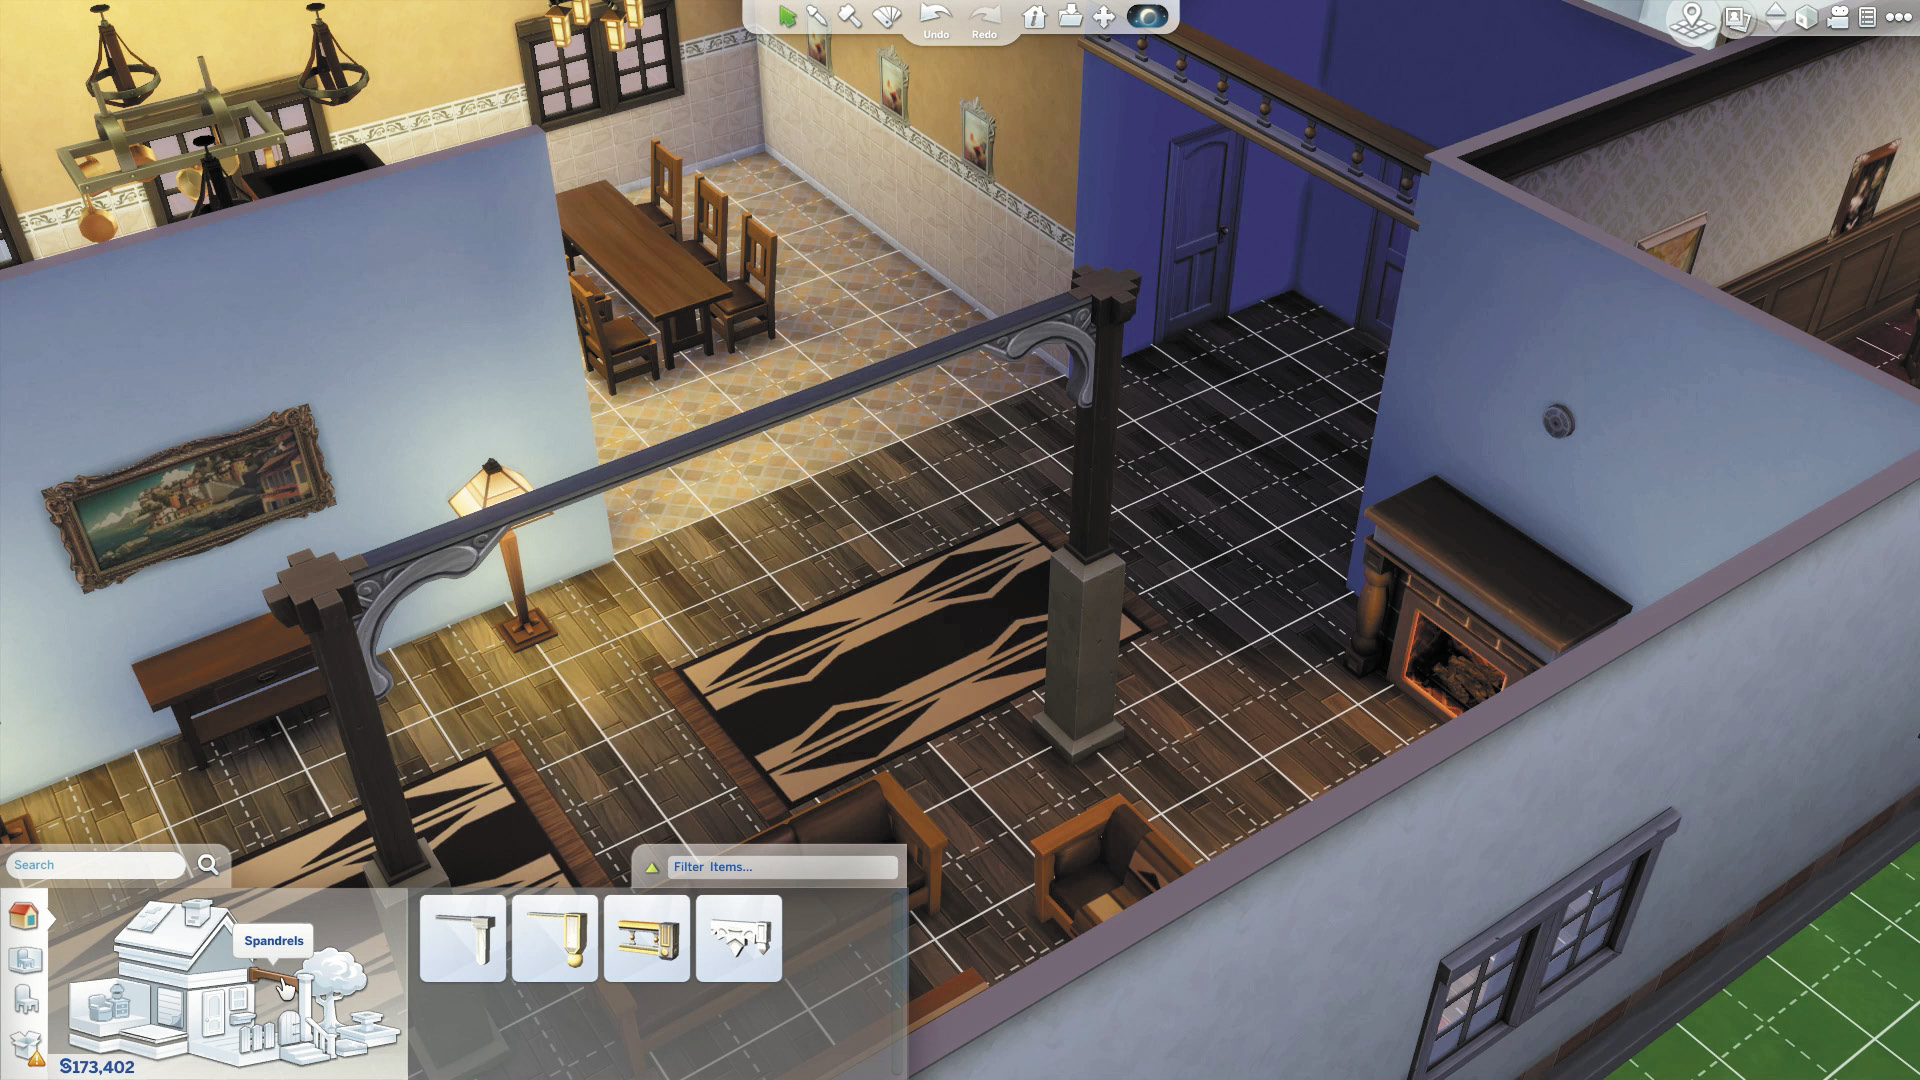
A couple columns connected by a spandrel can create a division in a large open room without actually dividing the room.
Exterior and Roof
With the design of the interior completed and doors and windows, it is time to work on the exterior some more. Go back to wall patterns and select the pattern you would like to use for the exterior walls of your home. Use the same method as for the interior walls.
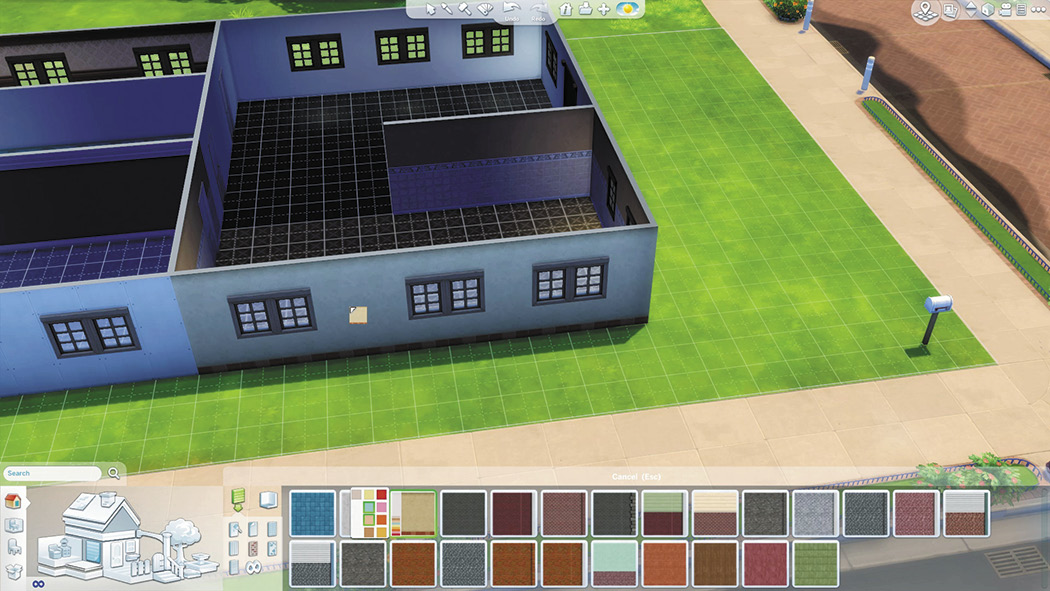
Paint or texture the outside of your home. You can choose from several different patterns and colors.
Now click on the roof in the Build menu to see your options for a roof. There are eight different choices. They include the following:
- Gabled
- Gabled (Diagonal)
- Hipped
- Hipped (Diagonal)
- Half Gabled
- Half Gabled (Diagonal)
- Half-Hipped
- Half-Hipped (Diagonal)
Putting a roof on a house is fairly easy. Select the type you want and then place it on the corner of the top of your house. It will be small to begin with. Now click on arrows and drag the roof to cover your house. You may want the roof to extend past the walls of your home so you have an overhang. Once the roof covers your house, you can then adjust the pitch, height, and curvature of the roof by dragging the arrow on top of the roof.
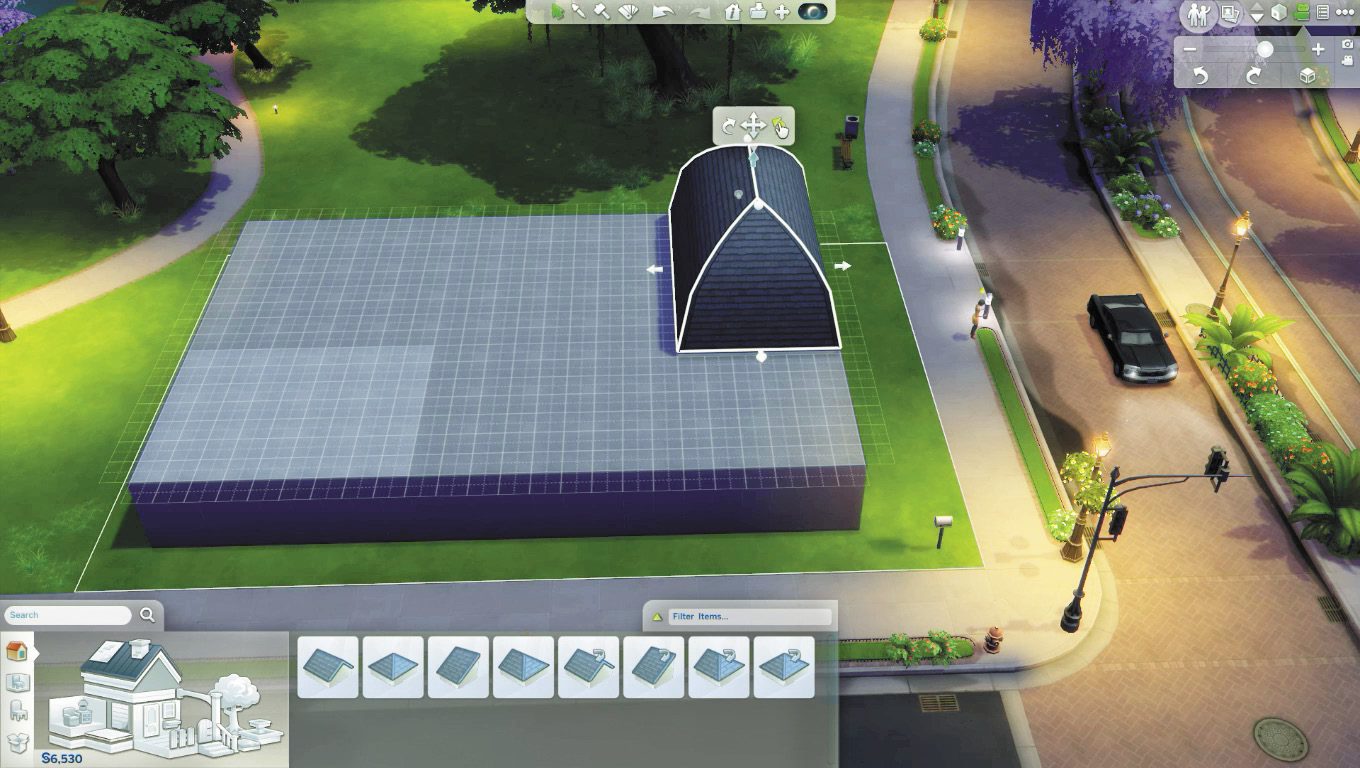
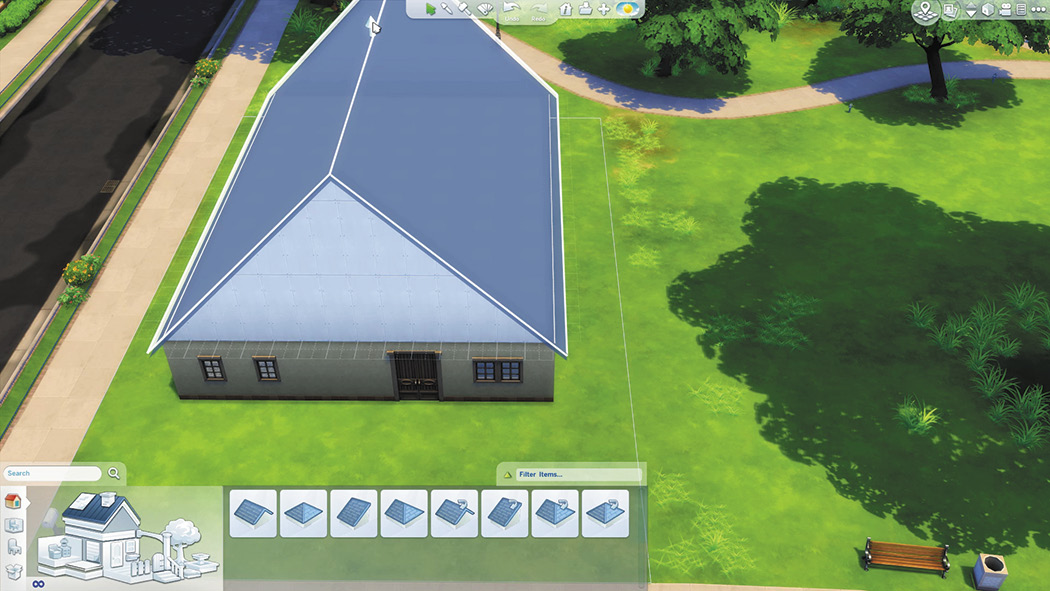
Place the type of roof you want and then drag it to the correct dimensions.
Once you get the roof shaped properly, you need to choose a pattern. This is a separate menu selected from the Build menu. Find a look you like and then click on the roof and the entire roof is patterned. There’s no need to do sections of roof at a time. Then you can choose the roof trim. This is a separate menu with four different trims from which to choose and each comes in a variety of colors. The choices are:
- Angled Roof Trim
- Square Roof Trim
- Stepped Roof Trim
- Beveled Roof Trim
Roof sculptures such as a chimney on top of your house can put a finishing touch on the roof and add a lot to a home.
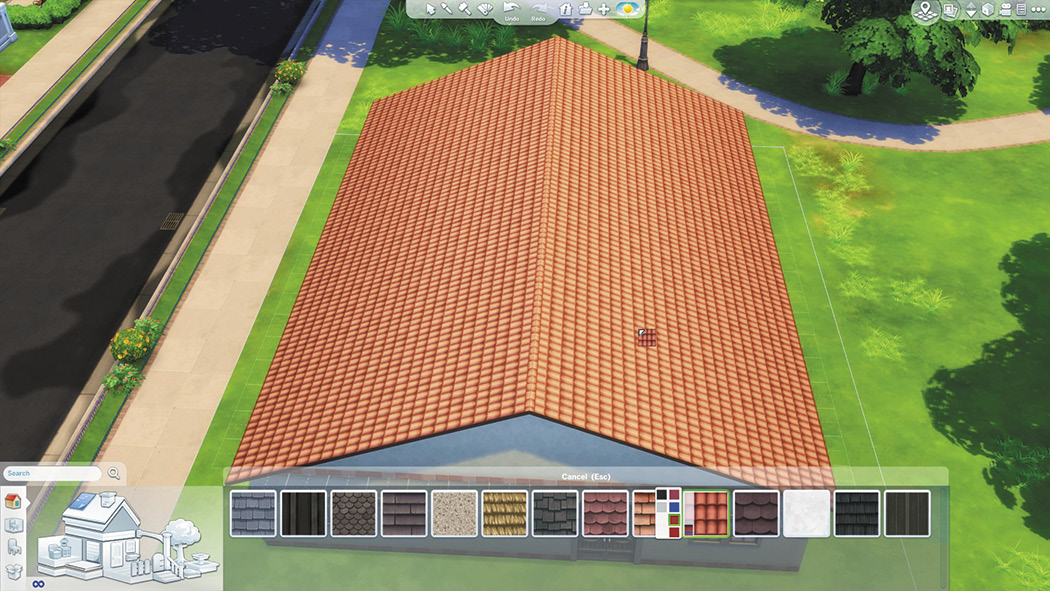
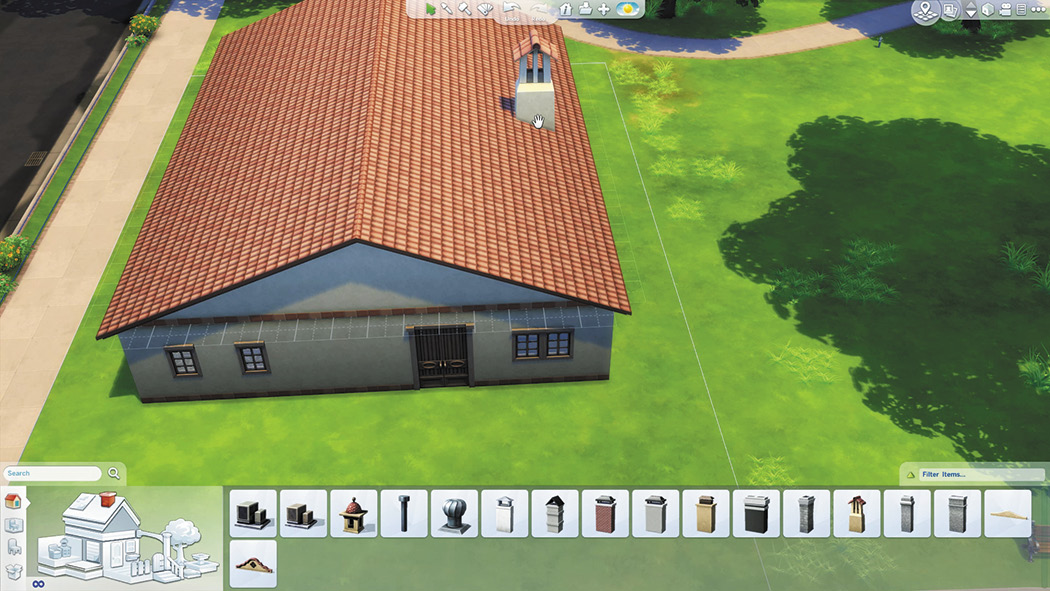
Pick a pattern for your roof and then add to the decor by adding a roof sculpture such as a chimney, air conditioning unit, or even air vents. These details really add to your home.
Friezes and Exterior Trim
If the walls of your home are medium or tall in height, you can add a frieze. Just select the frieze and color that you want, then click on the exterior wall and this type of trim will appear on top of the wall. If you have a multiple story structure, you can choose to add exterior trim. This is placed at the base of the wall of second floor and higher walls.
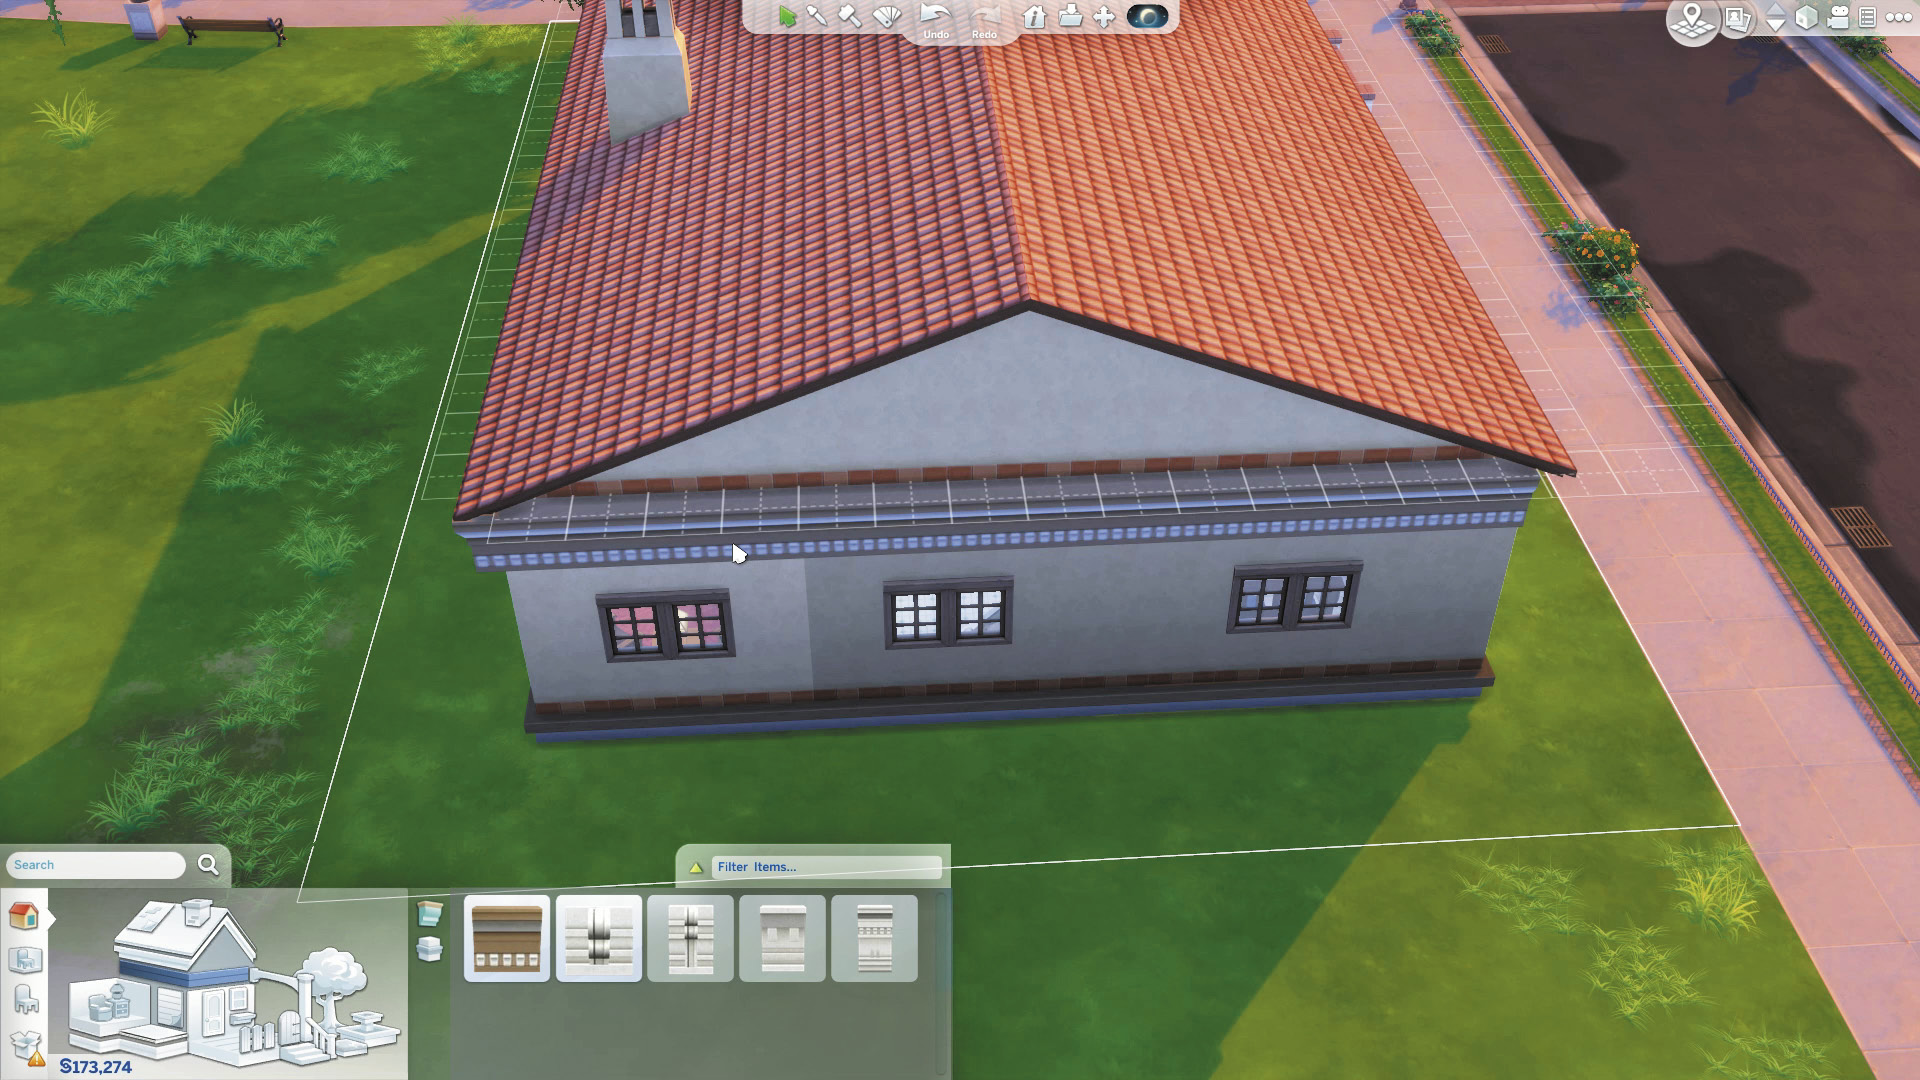
Friezes add some extra style to the exterior of your home.
Foundations
After placing a room, you can add and change the height of your foundation. Select foundation from the Build menu, and then use the slider button next to the menu to raise or lower the foundation. Once you get it as high as you want, then you can select a texture for the foundation to match or complement the exterior of your home. This step is completely optional if you just want your house built on a concrete slab. There is no cost for raising or decorating your foundation.
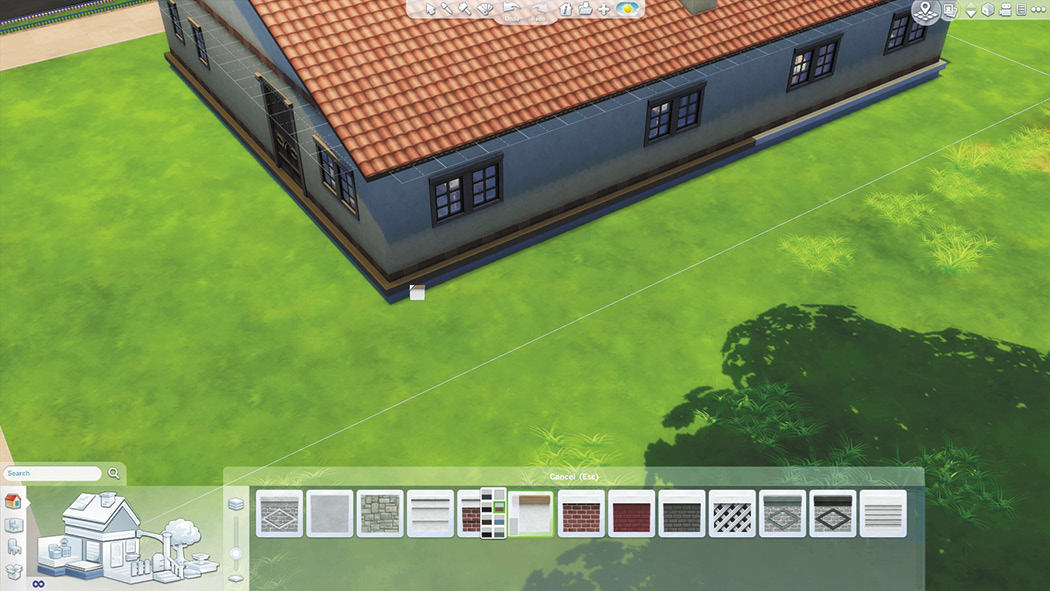
Adjust the height of your home’s foundation, then decorate it with a pattern.
Stairs and Railings
Use stairs to connect multiple floors or create a path to a deck. The taller the stairs, the more expensive they are. Installing stairs in a home is easy. Just select stairs from the build menu and then choose which stairs you want. When you place them in your home, they automatically adjust to the correct height. Then if you want, select railing from the Build menu and find the railings you like. Finally, click the stairs and the railings will automatically be installed on the stairs.
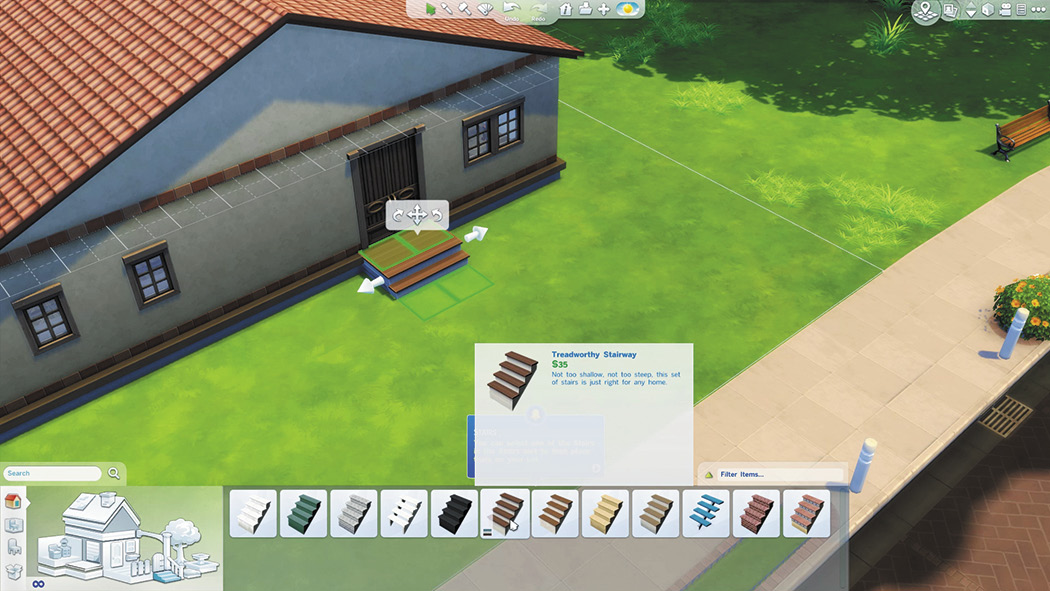
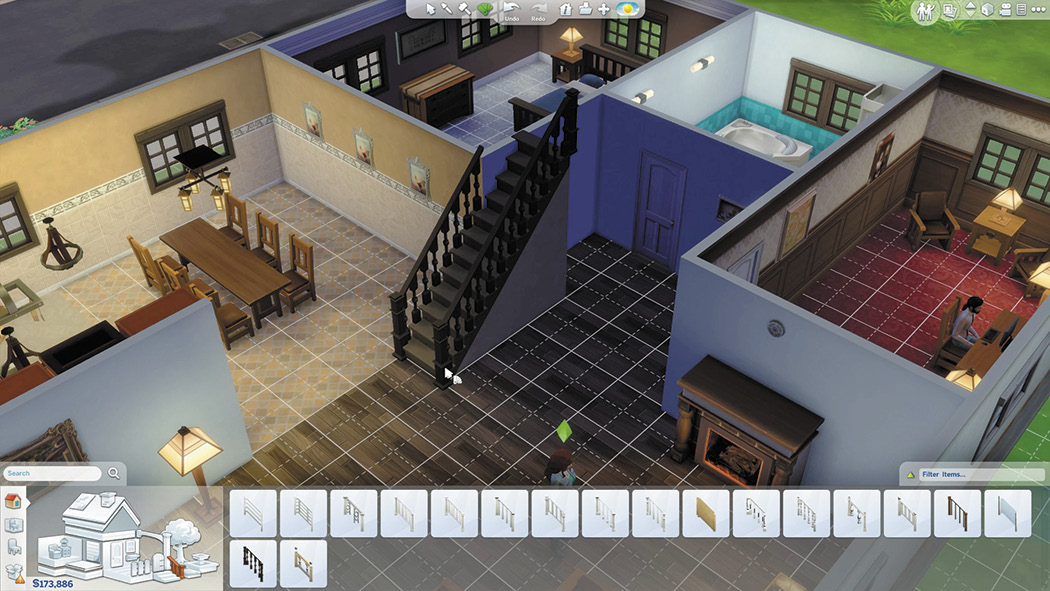
Stairs can be some simple steps up into your home or a staircase leading up to another floor in your home.
Decks, Gates and Fences
Many homes have decks, patios, porches, or even balconies. Go back to Walls and Empty Rooms and select one of the deck options. Use these to essentially build a deck or balcony. You can even do this on a second or higher floor to create balconies. You can manipulate some different shapes to get the deck you want.
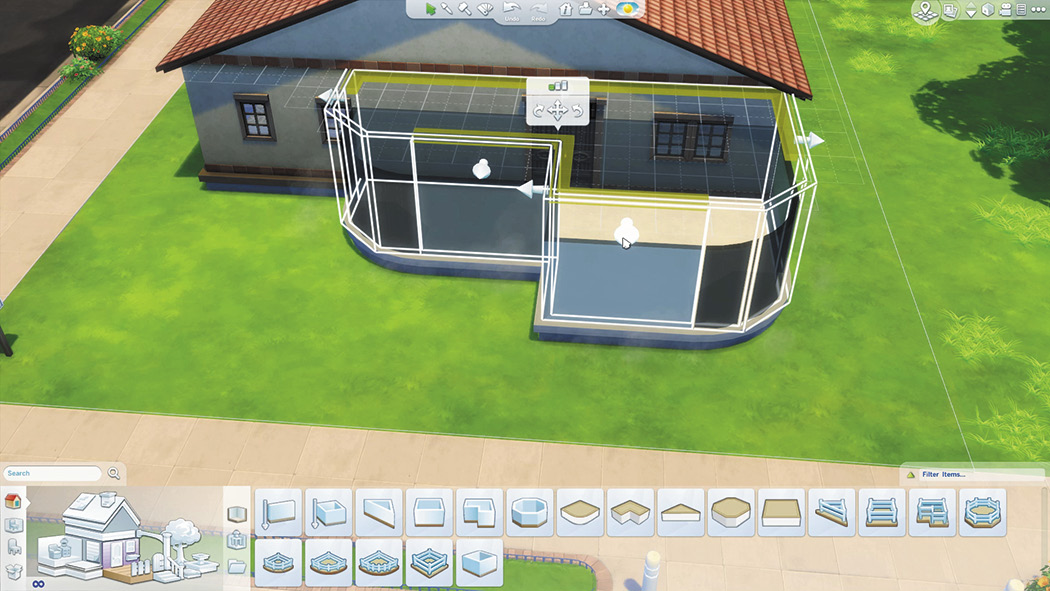
Building decks is just like making rooms. Just rotate and drag the arrows to get the correct dimensions.
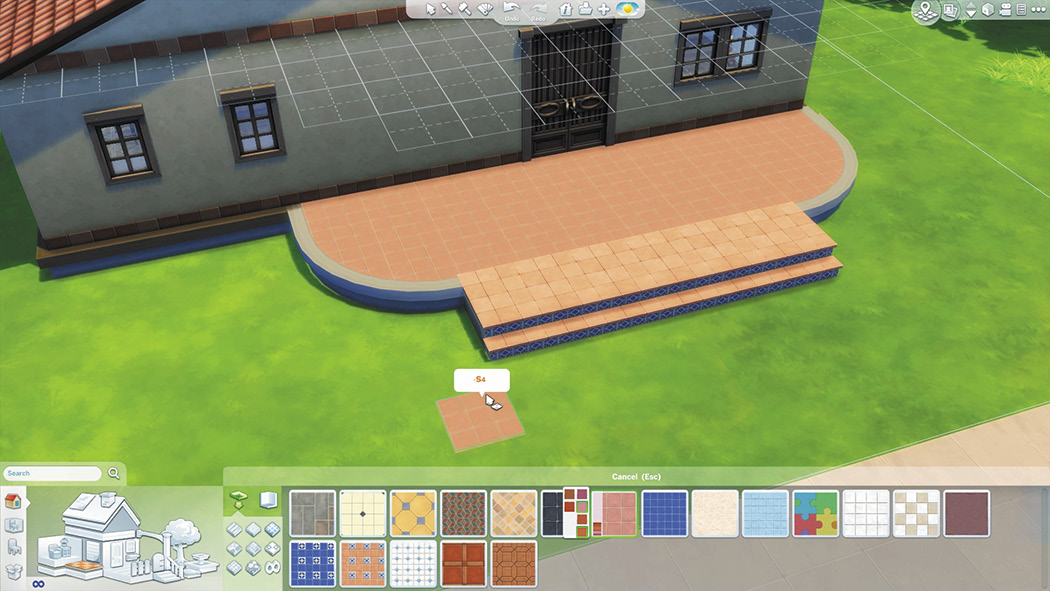
Attach steps to your deck so Sims can get up onto it.
Fences are a great way to separate exterior areas. There are three different ways to place fences. First you can replace an existing wall or fence with a fence. You can also draw a line of fencing or draw an enclosure of fencing. You can put fences where ever you want on your lot. However, if you draw your fence from an existing wall, your fence will have a foundation—the same as the foundation of your structure. If you draw your fence from the terrain, it will not have a foundation. If you have enclosed an area with a fence, be sure to insert a gate so your Sims can get through the fence.
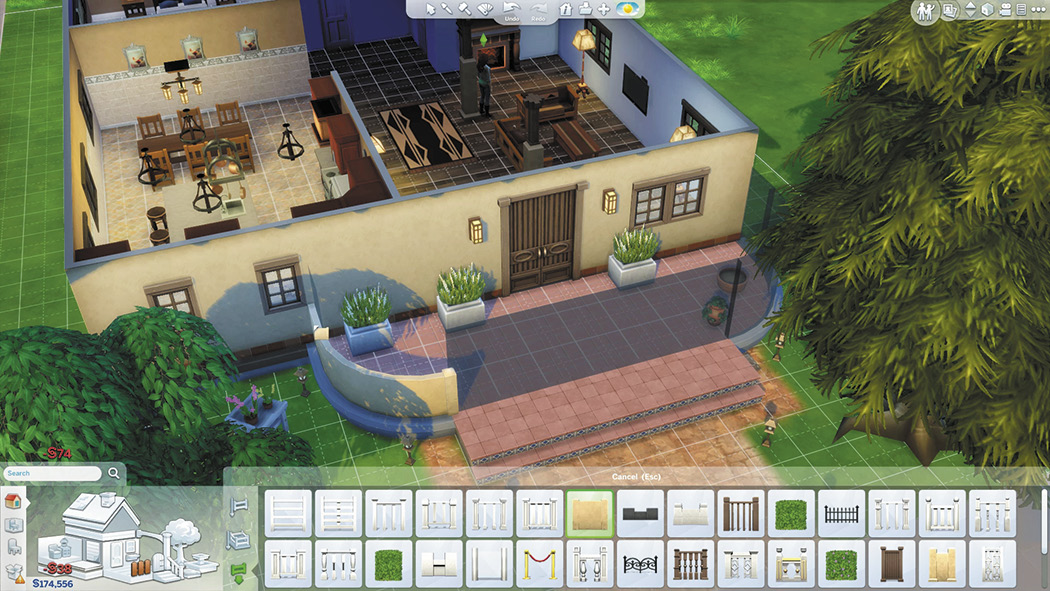
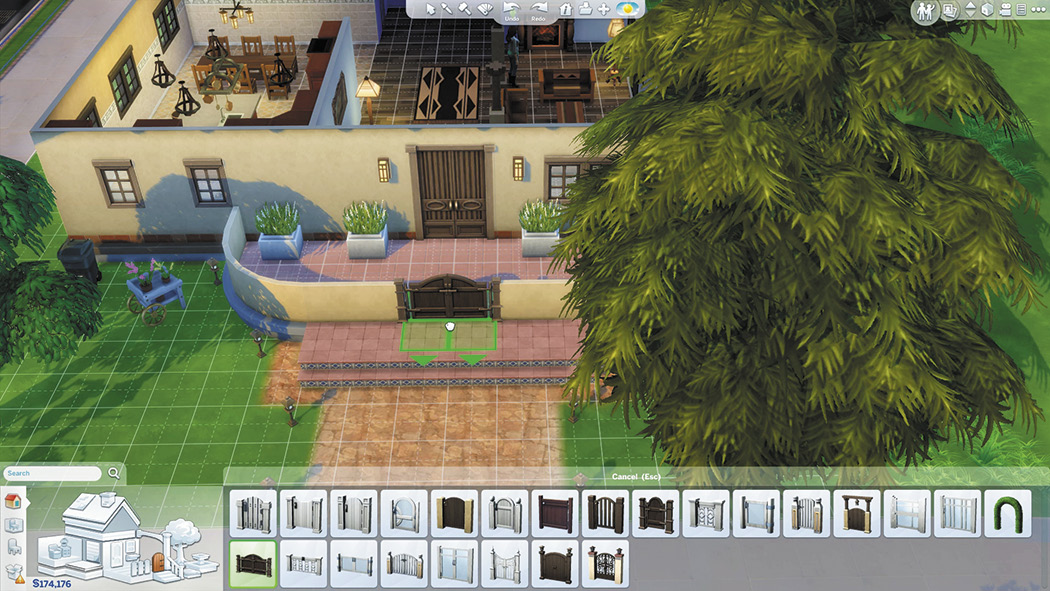
Create your fences first, then insert a gate. It’s just like building a wall and putting in a door.
Terrain Paint
While your lot may come with either sand or grass initially, you can change the terrain with terrain paint. To use this, select Terrain Paint from the Build menu. Then after you decide on whether you want grass, sand, stone, or even pavement, select a shape and size for your brush. Then start painting to change the terrain. The longer you hold down the mouse button, the darker and more full the terrain will be. Use the square brushes to paint sidewalks or walkways and the round brushes for paths and patches of grass and flowers. Use the slider in the terrain paint menu to adjust the softness of the texture you are painting.
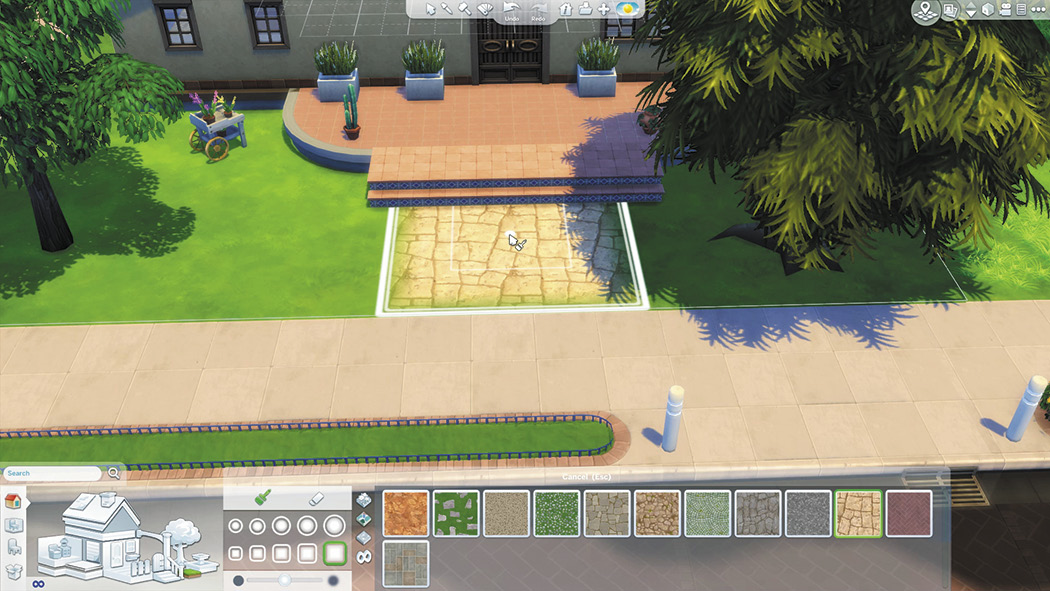
Paint a walkway right up to your house so your visitors don’t have to walk across the grass to get to your home.
Fountains
Fountains can add opulence to your landscaping—or even to the inside of your mansion. Within the fountain category, there are four selections:
- Fountains
- Water Emitters
- Fountain Trims
- Fountain Decorations
If you want to design your own fountain, there are five basic shapes of fountains. Once you place it on the lot, you can then select it and drag the edges to set the dimensions just like a room. This is the basic shape and then needs a trim for the exterior. Then you can add water emitters or other decorations to finish the fountain. There are even a few fountains that are pre-made and ready to go.
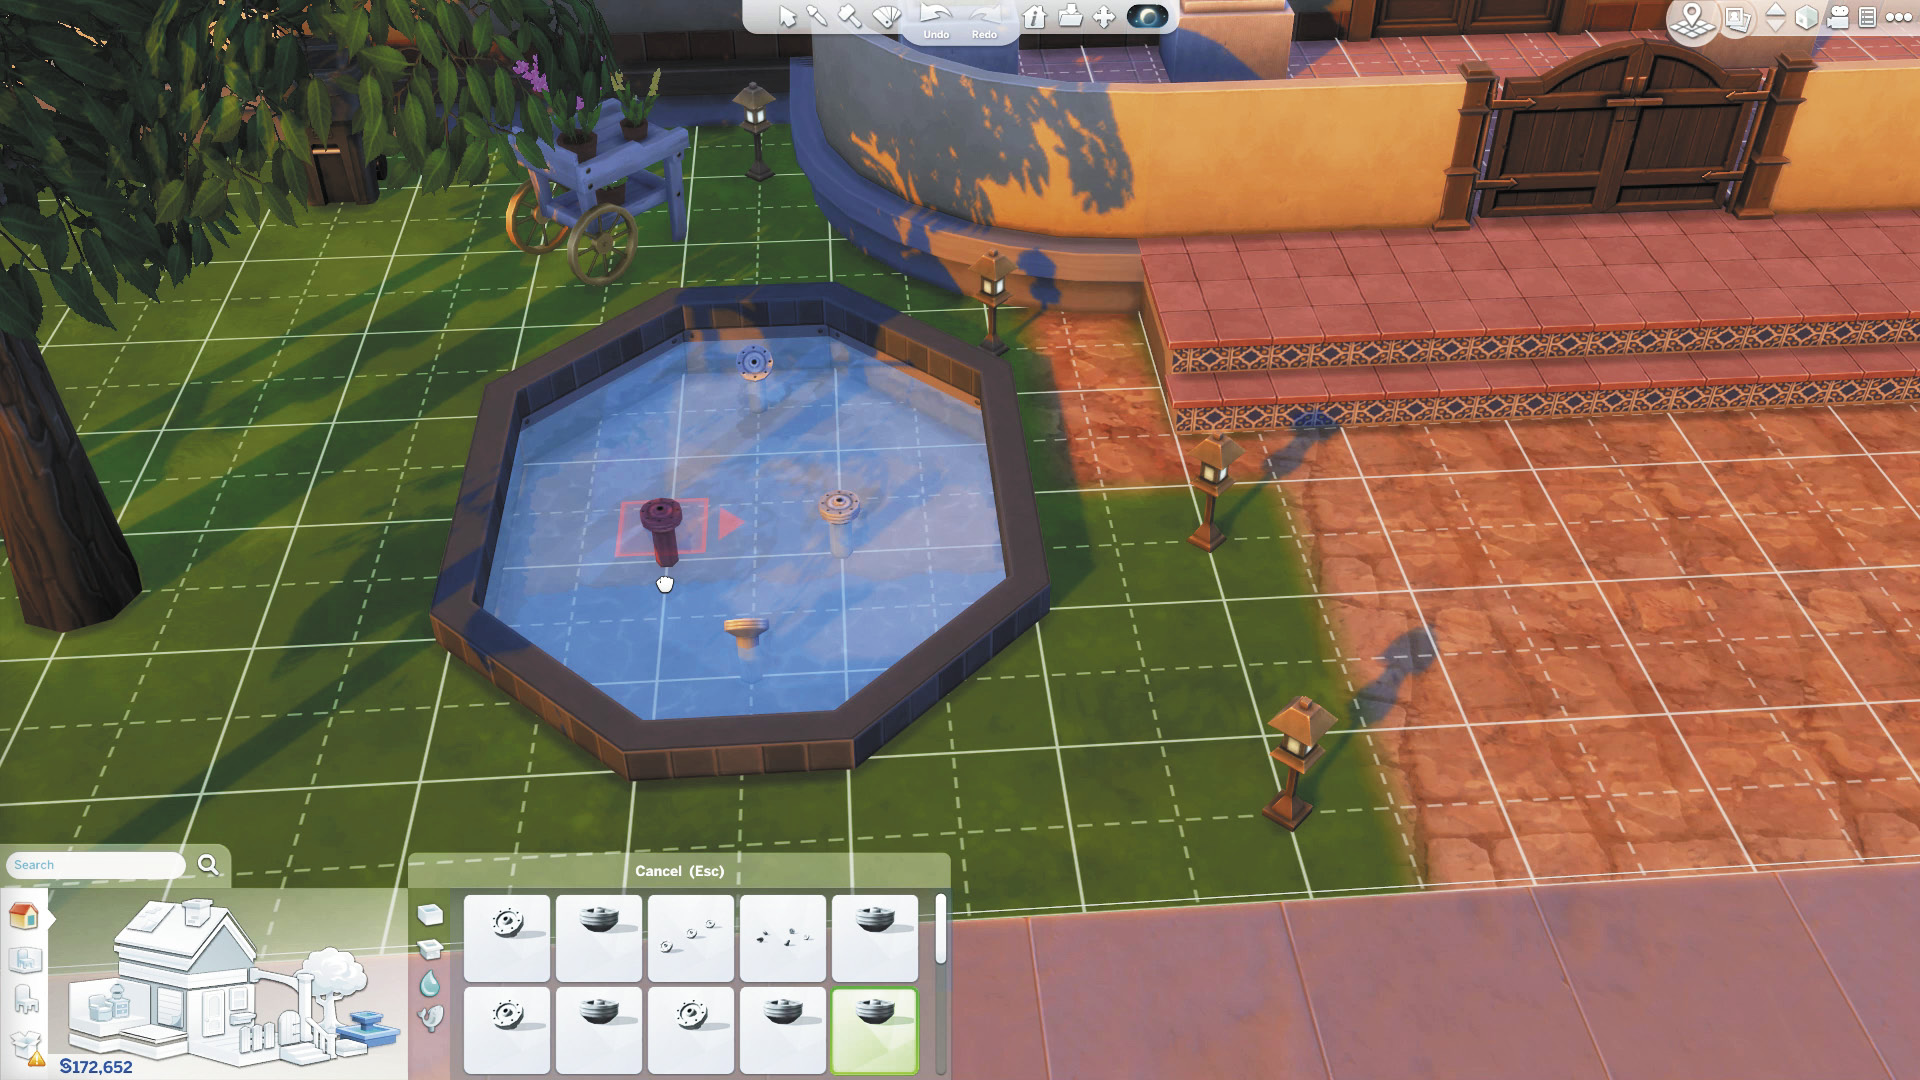
Fountains add to your landscaping and are fun to build. Try out different water emitters and then watch them go when you switch back to Live Mode.