Nintendo Land Guide Walkthrough Solo Attractions
Donkey Kong’s Crash Course
Tilt A Whirl
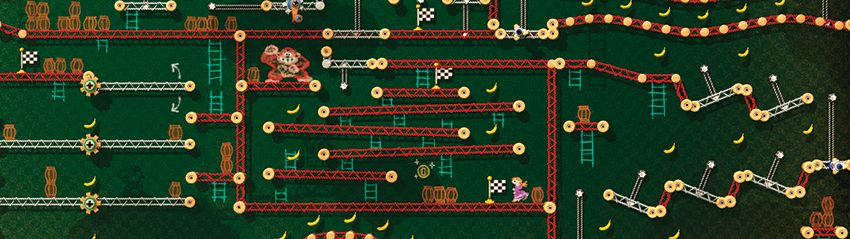
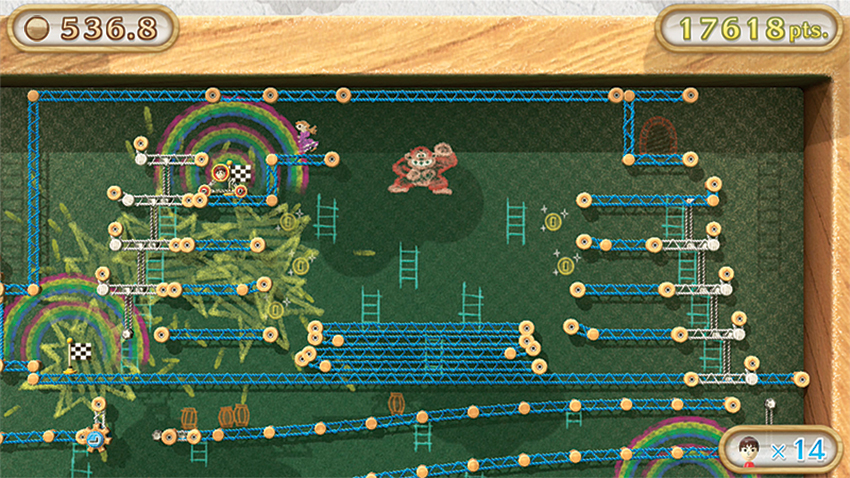
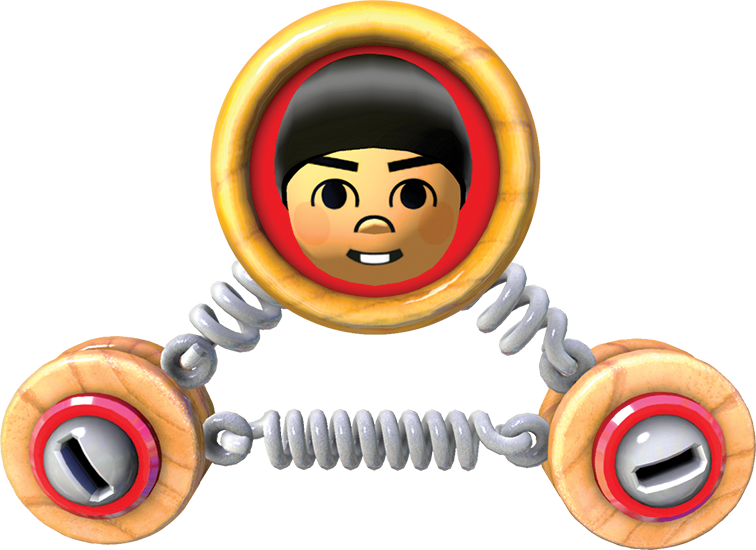
Leave it to Nintendo to take something as simple as the girders and beams that grace the original Donkey Kong and transform them into something incredibly addictive. Using the precision motion controls built right into the GamePad, Donkey Kong Crash Course , transforms your Mii into a Roller, a spring-loaded, three sided object guided by the forces of gravity—and in this case, gravity is literally what you make it. By tilting the GamePad left and right, you influence the way the Roller, well, rolls. The Crash Course starts out simple, but as Nintendo Land has ably demonstrated in other Attractions, simple is only the start.
Controls
| Move Roller | Tilt GamePad left or right |
| Zoom TV View | Press Up or Down on the +Control Pad |
| Operate Mechanisms | Press L Button, R Button, Left Stick, Right Stick, and blow into Microphone (or press the X Button), depending on the on-screen prompts |
| Return to Checkpoint | Y Button |
Assisted Play
| Create Slow Motion Bubble | Point Wii Remote and press A Button |
Get ready for a twisting, tumbling, white-knuckle trip through a seriously trying obstacle course. This gauntlet of fun doesn’t require much; just follow any on-screen prompts to engage the various bits of machinery in the world, which range from pieces of track that can lift the Roller up to new areas, to platforms that have to be hand-cranked to continue onward. For the first part of this Attraction, you need only reach the end goal before the clock hits 600 seconds (or 10 minutes for those who like smaller numbers). Be careful, though! You have a limited number of lives, and while grabbing all the Bananas around the level can lead to the 2000 points necessary to earn an extra life, those extra chances are few and far between.
| Icon | Name | Conditions |
|---|---|---|

|
Perfect Through Area 2 | Get through Area 2 with no mistakes. |
|
|
Cutting Corners | Execute a short-cut |
|
|
Skip 30 Bananas | Leave 30 Bananas behind |
|
|
Double Damsel Rescue | Save Pauline twice |
|
|
Perfect Run | Complete a perfect run (no Assisted Play allowed) |
Course 1
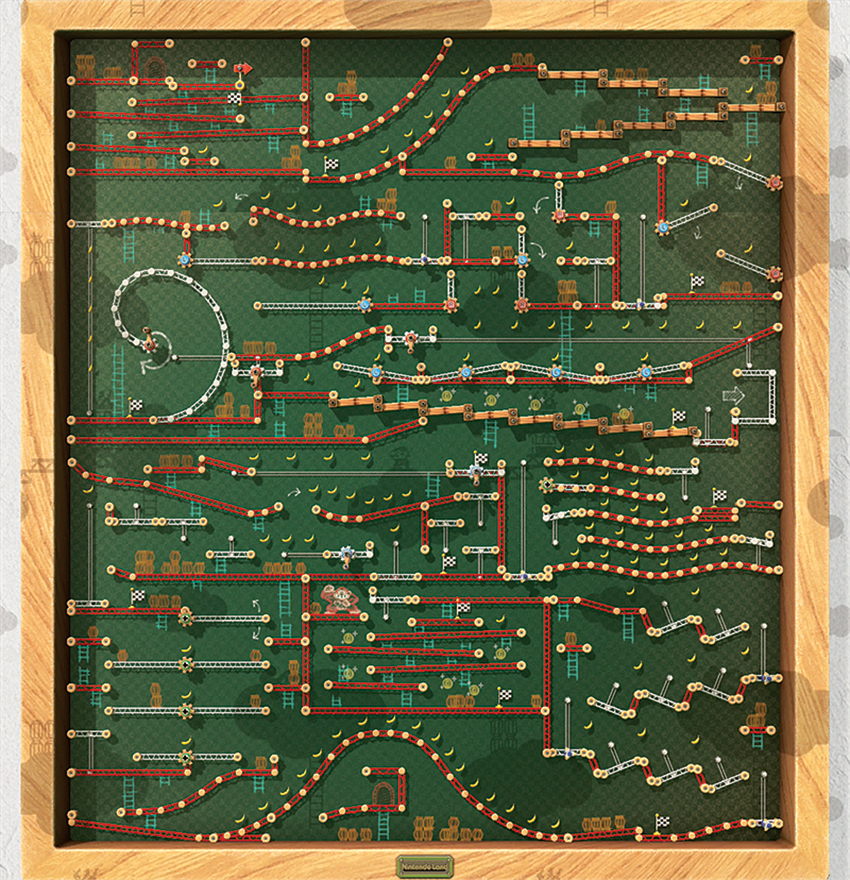
Welcome to the first step toward becoming a Crash Course expert. Although we would love to teach you the various ins and outs of this tilt-heavy journey, much of the controls’ nuances are something you’ll just have to get a feel for yourself. There’s no replacement for experience, they say, and that’s especially true here. Still, as you move through each section, we offer some handy tips and things to watch out for. Above all else, take this course slowly, learn the various hazards, and develop the muscle memory to help you through them again later. Oh yes, you’ll be seeing this trial again.
Area 1
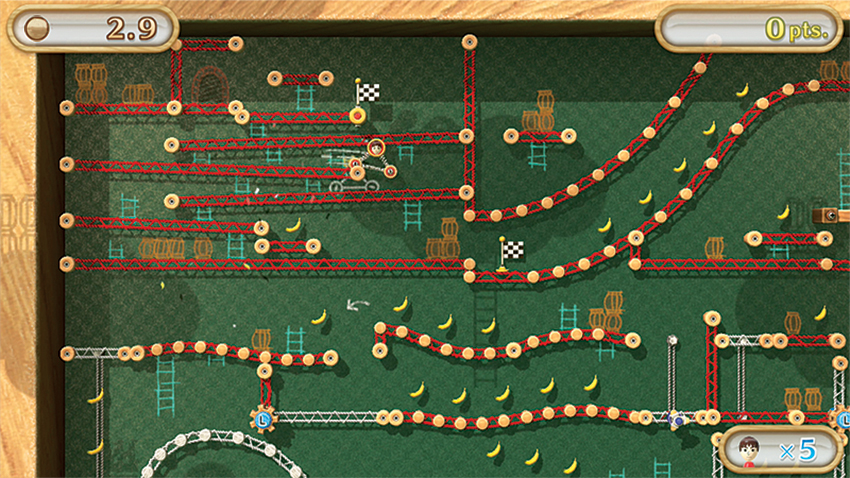
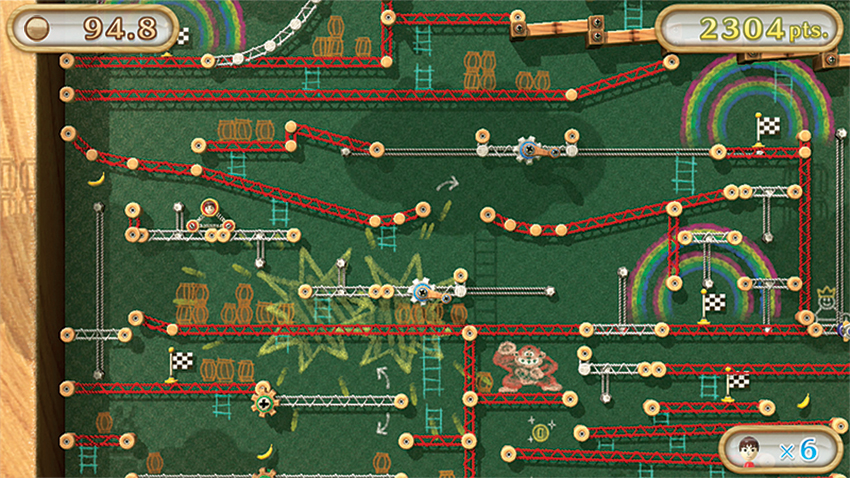
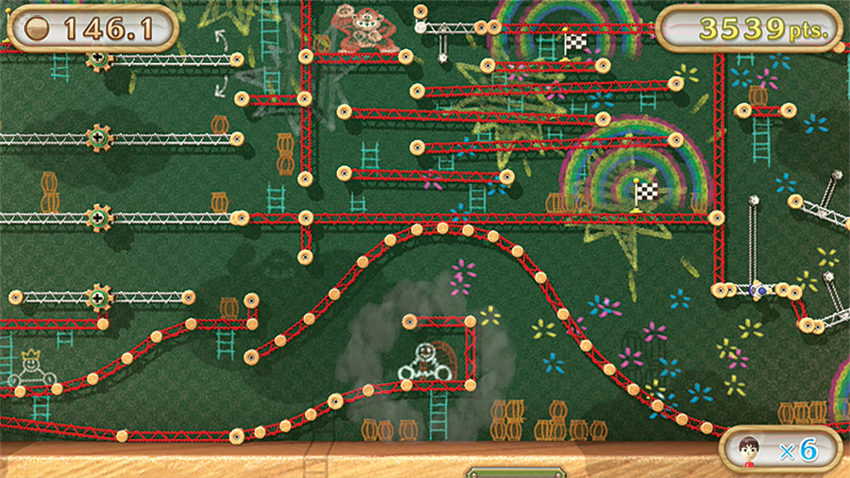
This first section is a breeze. Just tilt left and right to slide down the sloping girders and roll through the flag to move into the next Area.
Area 2
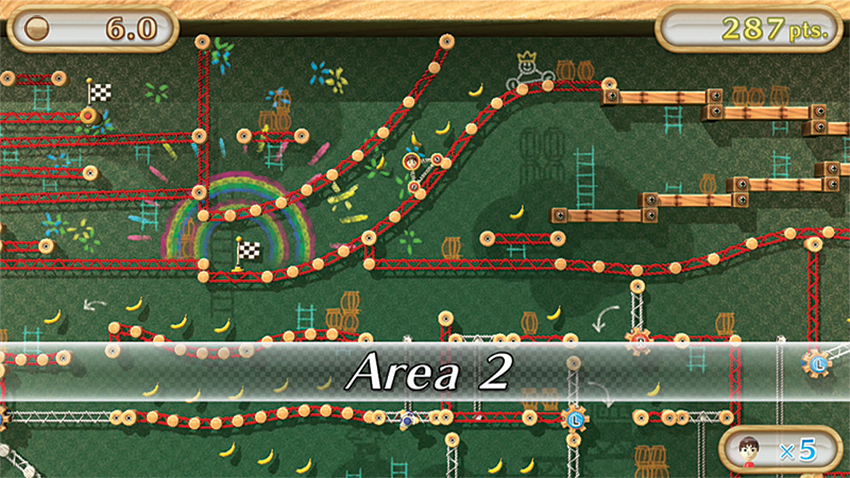
Take this hill carefully. It’s easy to get tilt-happy and create too much forward momentum. As soon as your Roller nears the crest, even out to make sure that you don’t shoot out over the hill and smash against the girder of the next section. Head down the both flights, keeping up speed, then ease off at the end to avoid smashing into the nearby girder. Tilt right until you slide down a lighter bit of flooring with a Rotating Platform nearby.
Area 3
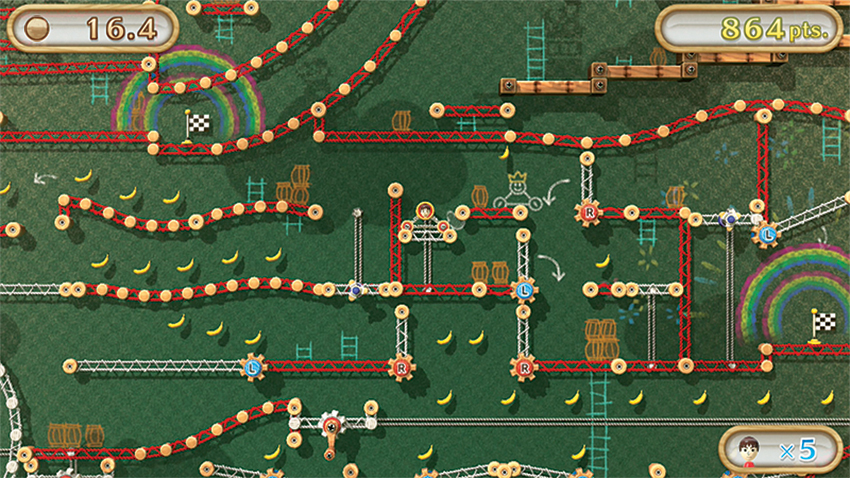
Tilt left after reaching the top of the lift, and get ready for more Moving Floors. Pressing and holding the R Button leads to a platform that automatically lowers you to the next section. Tilt right, holding the L Button to lower another floor, and head down the nearby elevator. Tilt left while holding the R Button to roll through another section with two Moving Floors that link up. Hold the L Button as you climb up the next Moving Floor to connect it to a section above, and then once on this new footing, let go of the L Button and tilt right over some undulating girders. Blow into the Microphone again to lift this elevator, then prepare to pick up a generous burst of speed by tipping hard to the left. With enough oomph, your Roller will sail over the gap and land safely on another section of flooring that lowers and Area 4.
Area 4
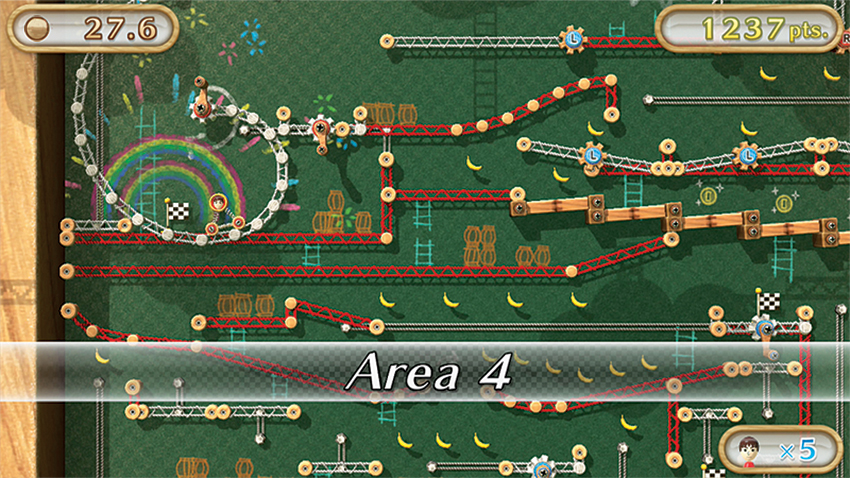
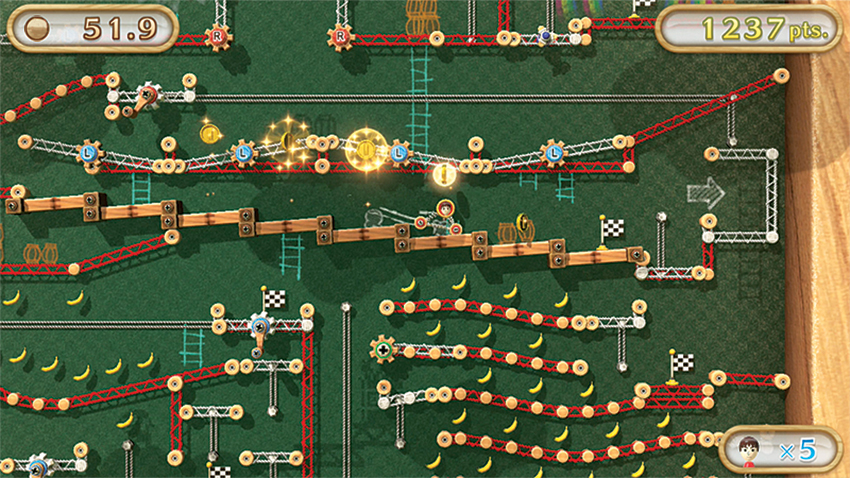
Tilt right past the Checkpoint flag to be slowly raised up by a Gear Crank (rotate the Right Stick clockwise) that spits your Roller onto a Moving Platform that moves right automatically toward more girders as the Gear Crank unwinds. Tilt right, but don’t get too aggressive, as you need to tuck into another Gear Crank—and this one moves the platform to the right as you turn the Right Stick clockwise. After you are deposited onto a sloped girder, tilt left (still holding the Right Stick in place) until your Roller has come to rest on a Moving Floor emblazoned with an L. Tilt left while alternating pressing and letting go of the L Button to create hills over the impediments in your way. After the third and final hill, hold the L Button to keep the Moving Floor tilted downward to allow for a clean jump to the lower girder. If you’ve collected all the Bananas up until now, most of the If you’ve collected all the Bananas up until now, a string of Coins for the Coin Game in the Nintendo Land Plaza will appear. Nice!
Area 5
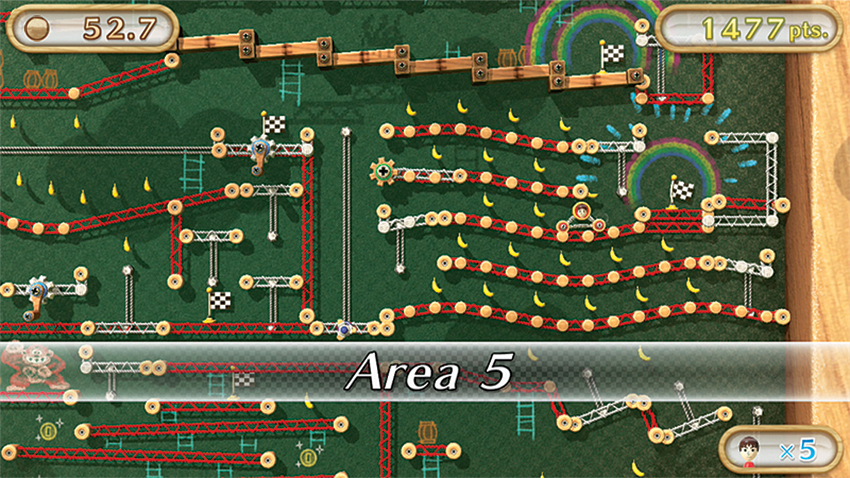
A series of automated elevators transfer you to Area 5. From here, simply tilt left and right, riding the platforms down until you reach another elevator that requires a little light Microphone blowing. You have two options here: Either tilt to the left and continue, or tilt right and ride another platform down for a few more Bananas. Be careful if you opt for the latter path, as you’ll have to wait for some flooring to extend, allowing access back up to where the elevator normally would have left you. With that, Area 5 is done.
Area 6
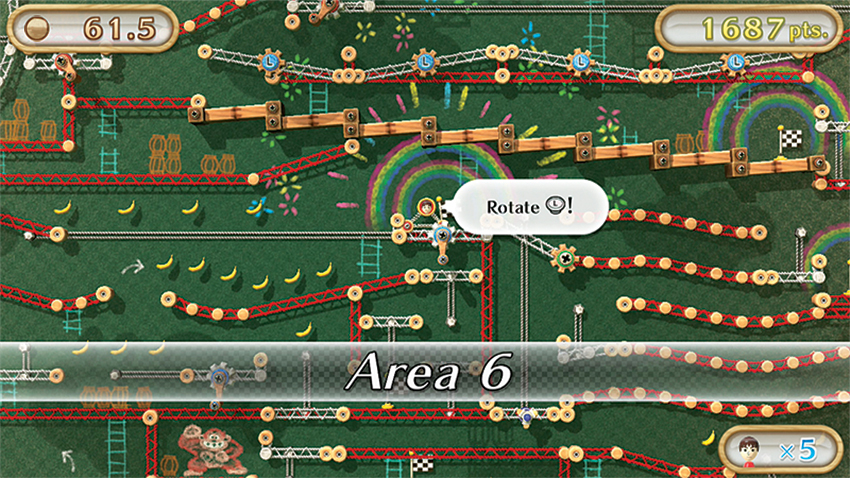
Rotate the Left Stick counter-clockwise to travel to the left onto another set of girders. Drop down and prepare to tilt hard to the right to build up enough momentum to make it across this jump. Ease up a little but keep tilting right to reach a set of elevators that lead out of this section.
Area 7
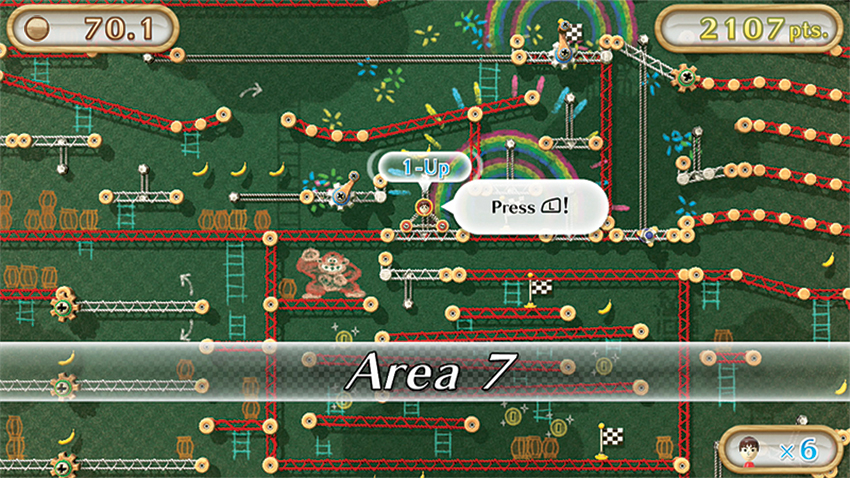
Here’s where things start to get a little tricky. You’re going to want to practice slow, gentle tilts here as you move onto a set of narrow elevators that are rather easy to slip off. Raise the first one when your Roller is centered by pressing the L Button, then tilt slightly to tip onto a moving platform that can be operated with a little Left Stick cranking. Carefully tilt left to center the Roller on another elevator, then press and hold the L Button again to raise this one. Tilt slowly left, center the roller on the platform, and release the L Button to raise the next platform and continue on, pressing and releasing the L Button until you reach the top. Take this section slowly; it’s better to lose a little time to caution than a life and waste even more time getting back to this position. The final elevator takes you down to the Checkpoint flag and out of this section.
Area 8
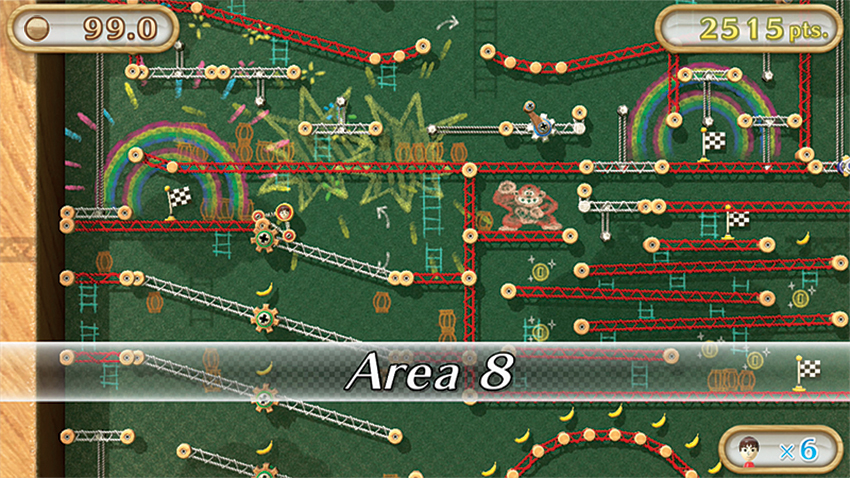
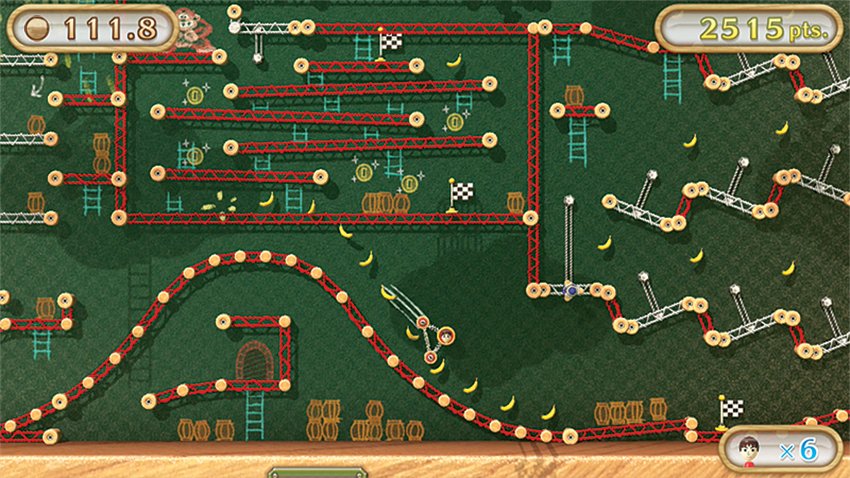
Area 8 offers a bit of a breather after the intensity of those tiny elevators in the last Area, but don’t rush this section. These lengths of flooring will tilt according to how much you tilt the Right Stick to the right. Move carefully down the first two floors, and rest in the nooks on either side before switching direction. When you get to the third section, don’t roll all the way off the platform, but rather rest in the middle and tilt the Right Stick back in the other direction to slope the floor back to the left. Roll into a short elevator, then tilt the Right Stick to the left to create a ramp, then right to tilt the floor so that your Roller can coast off the right edge to a new landing. Tilt left to drop onto another girder below, and then start tilting right to climb a rather large hill. Be very careful here as you crest the hill by tilting back to the left to keep from overshooting the downward ramp on the other side. Tilt right to pass this section and then say hello to Area 9.
Area 9
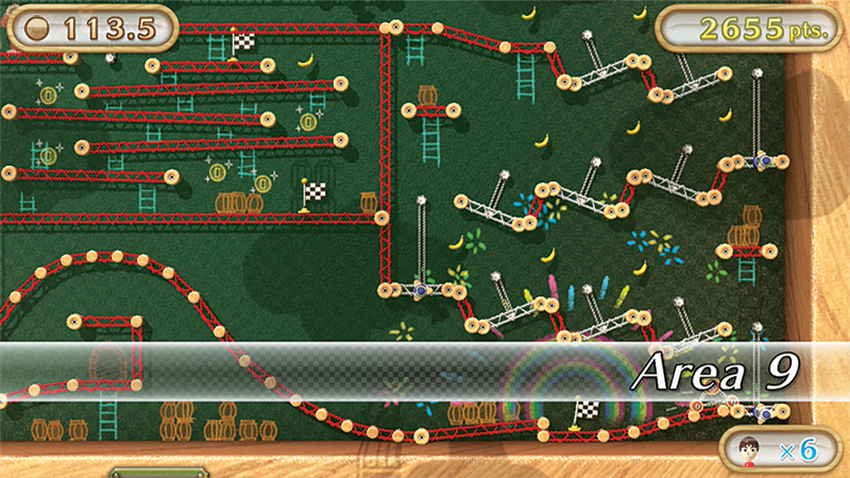
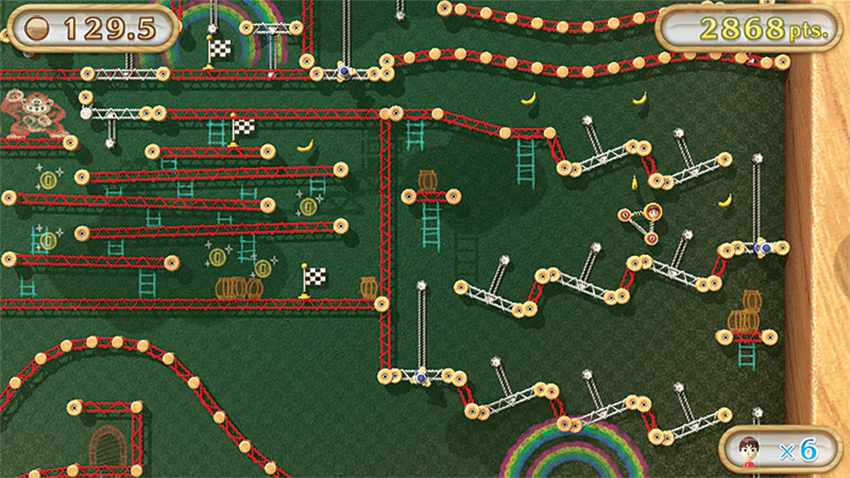
This next section can be a breeze or a bane, depending on how quickly you can grasp the lessons it’s trying to teach. After you ride the elevator up to a set of angled platforms, tilt the GamePad to about a 45-degree angle—just a bit more than the platforms themselves—and then quickly tap (don’t hold) the R Button to launch your Roller up into the air and onto the next platform. Repeat this process, keeping the GamePad angled until you reach an elevator that requires more Microphone blowing. Keep steady breath going as you tilt right, move back onto a new set of angled platforms, and then repeat the same steps: tap carefully to reach yet another breath-powered elevator and a final set of angled platforms that lead back to the left. Ride the elevator down to the next Checkpoint and steel yourself for the final section.
Area 10
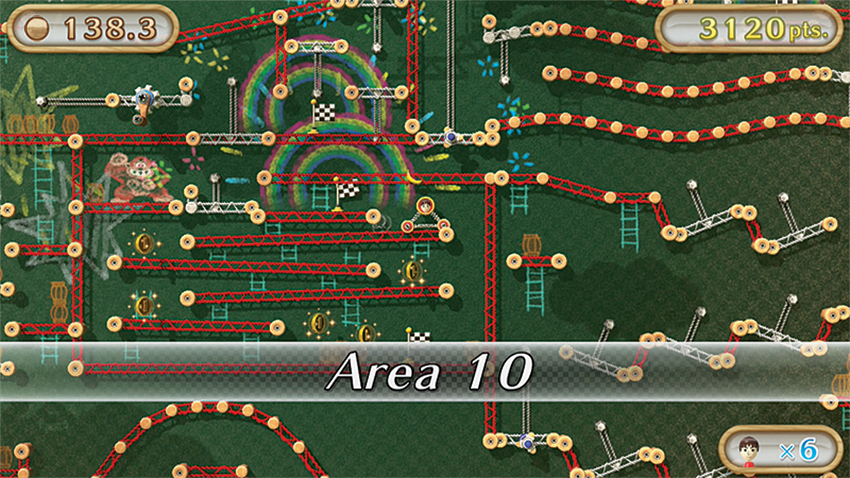
Welcome to the final part of this gauntlet, and it’s the most deceptively simple. Yes, you’re meant to simply tilt your way down the girders, left, then right, then left, and finally right again. It’s that second left that’s the trouble, though. It’s hard to see, but the girder you drop from is just a touch taller than the previous ones have been—and the height difference is enough to send your Roller flipping. The solution? Give the GamePad a mighty tilt left, then quickly tilt right to cancel out the momentum. Your Roller will go flying off the edge, but starts to head back to the right without tipping over the left edge of this last girder. Best of all, you can keep tipping right with some force to give your Roller enough oomph to sail off the girder and into the arms of Pauline. Our hero!
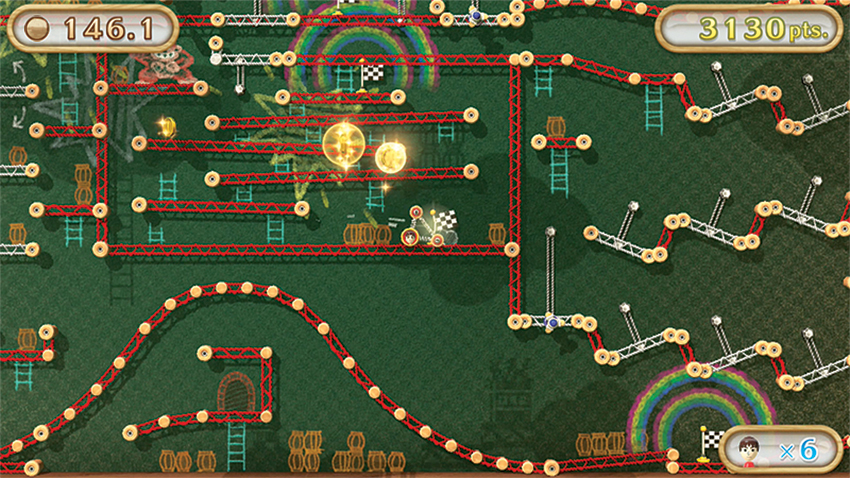
Congratulations are in order! You successfully navigated a harrowing set of obstacles, but, of course, it’s not over just yet. Head back into the Crash Course after Monita awards you a Star to do it all over again. But this time it’s a time trial against your previous time. There is no need to rush here. You know the lay of the land better than you did the first time you finished course, and you should have no trouble besting your old time with that knowledge firmly in mind. When you finish racing against the ghost of your previous best time, a new section will open up near the old see-sawing platforms from Area 9. Follow the same path you did before, and instead of the large hill, you’ll find a Passage that leads to the back side of the board!
Course 2
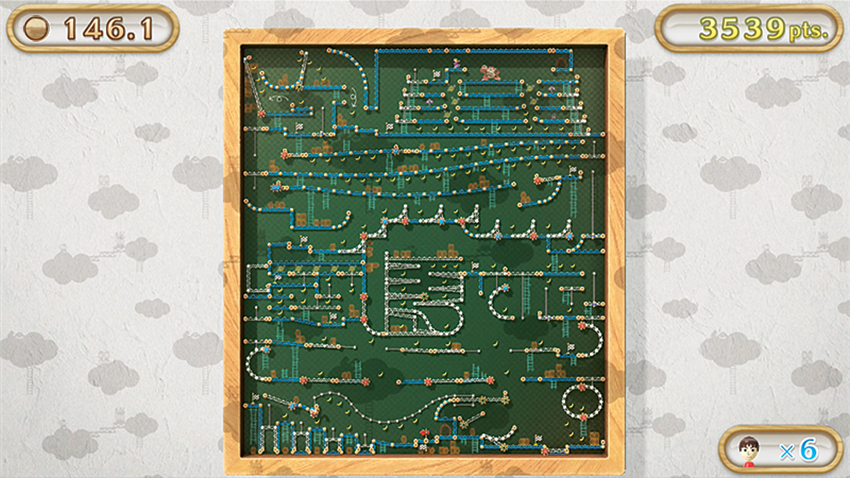
The flip side of the first course is far more deadly and introduces a whole slew of new ways of travel. Like the first course, it’s important to keep your cool and move slowly here. Believe it or not, this isn’t the final challenge that Crash Course has to offer, and it would be a shame to see it all come to an end here—especially because you’ll have to do the Time Trial all over again to get back!
Area 1
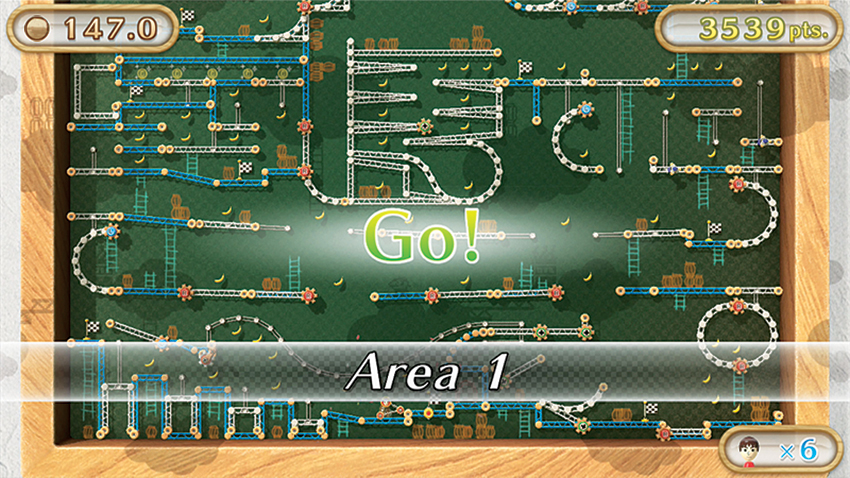
Things start pretty simply. Tilt left until you’re on a small elevator, then press the R Button while continuing to tilt left to roll onto a little ledge. Release the R Button until the next elevator drops, then repeat this lift-tilt-lift process until you’ve cleared the first Area.
Area 2
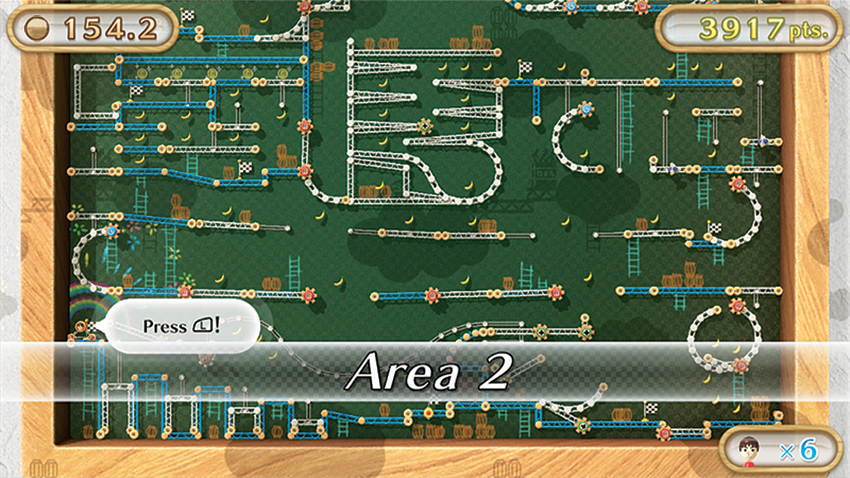
Hold the L Button to lower a Moving Platform enough to allow you to slip into an odd-looking nook. As the on-screen prompt says, you’ll have to rotate the Right Stick to guide a Moving Platform along a track that flips you nearly upside-down in the process. Once it deposits you onto another platform, move through a series of Rotating Platforms to make it to Area 3.
Area 3
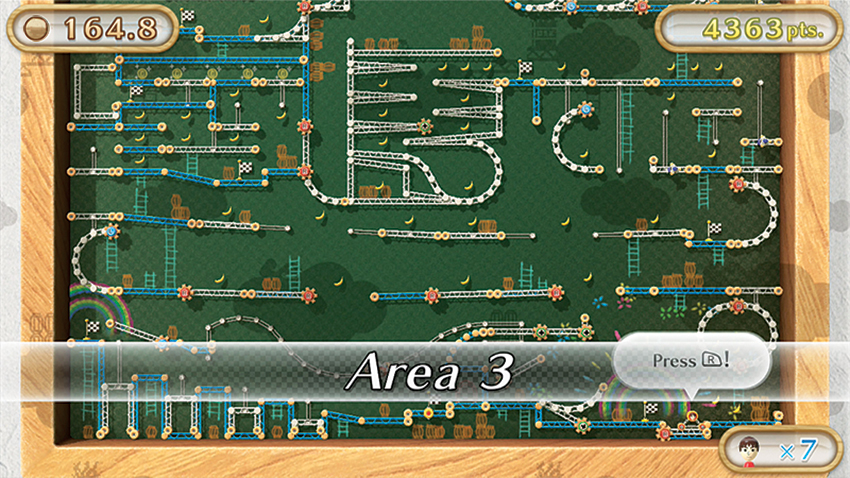
Press and hold the R Button, but don’t tilt to the right just yet. Let the Moving Rail uncurl, creating a ramp your Roller can roll onto, then release the R Button to let it curl you up into another Moving Rail. Repeat the process until you’re transported up to a new girder. The Rotating Platforms in this next section can be tricky, but if you take it slowly, stopping on the sections of blue girder between Rotating Platforms, you can do it without too much hassle. Definitely go slowly, as you’ll have to go through the entire process of being lifted up in the Moving Rails again every time you crash. Roll left into another Moving Rail and hold the L Button to raise yourself up to a new girder. Creep slowly to the right by tilting gently until you’re centered on this moving platform. Then, making sure you’re ready to tilt right, press the L Button again to move the platform slowly toward its counterpart to the right. Transfer platforms, make sure that your Roller is centered, then release the L Button, and then repeat to move to a third and finally fourth platform and the Checkpoint flag.
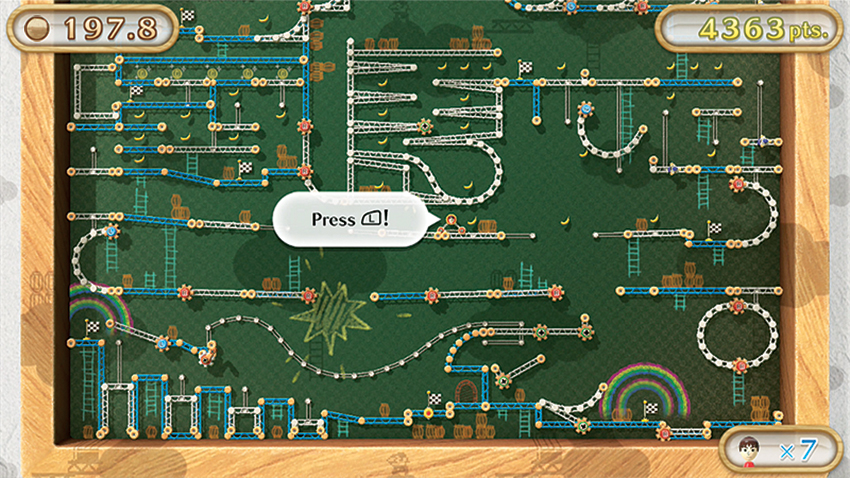
Area 4
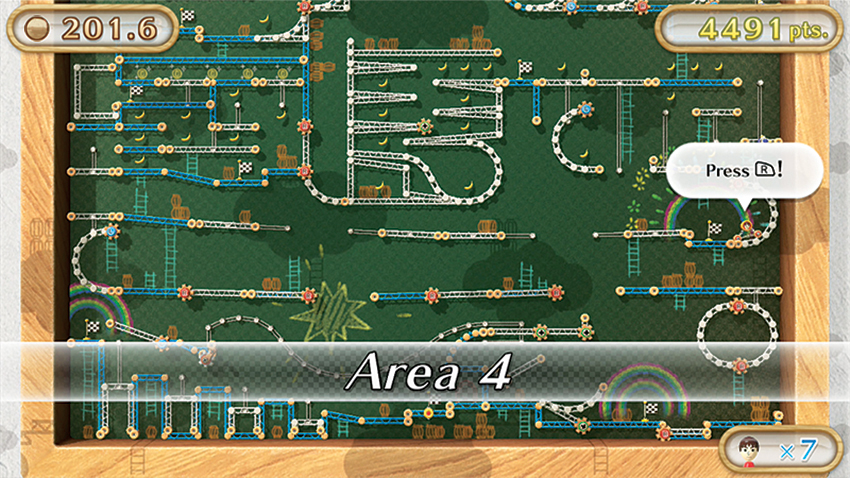
Tilt right into the nearby Moving Rail, then hold the R Button to raise your Roller up to a Microphone-assisted elevator. Blow slowly, raising the platform until you can tilt gently to the right. The platform will automatically drop, which leads to another Microphone-powered elevator. When you reach the top, move carefully to the left until you reach another automated elevator. Avoid rolling off the left side until it comes to a rest next to a Moving Rail that you can slide onto. Press the L Button to move the Moving Rail and it deposits you on an automated lift to the next Checkpoint flag.
Area 5
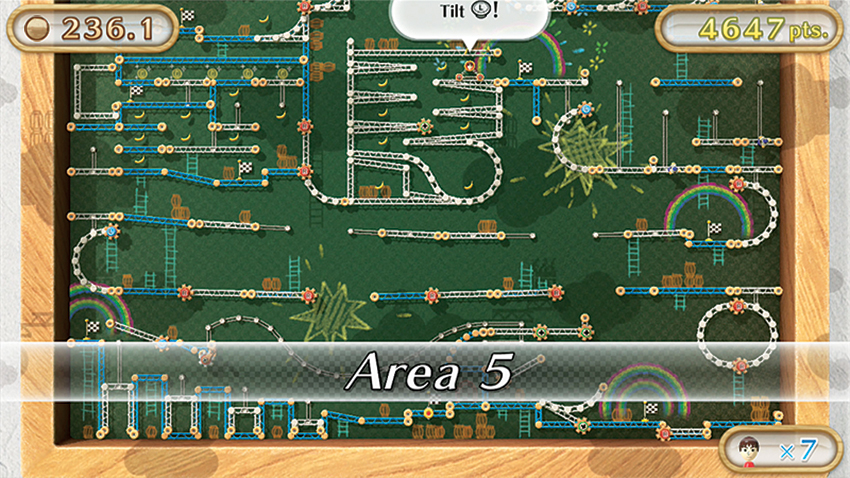
Ready for a world-changing amount of power? Okay, so it’s not quite that much control but the massive rigging structure that your Roller rolls onto to the left of the Checkpoint flag is interesting. By tilting the Left Stick, you can actually cause the entire structure to lean however you’d like. That’s not necessary to make it all the way down to the bottom, though, so long as you tilt the GamePad enough with each little step. When you reach the leftmost platform, head right into a little crook-shaped area, and make sure you’re proceeding slowly. That ramp down can cause you to pick up a lot of speed and accidents are common here. When you’re safely in the crook of the structure, hold the Left Stick right to rotate the entire thing, then keep holding right and head down the stairs again, this time from the underside. You’ll have to employ more heavy tilting this time, as the angles are slightly different, but with steady hands, you’ll be down to the Moving Rail (which is activated with the R Button) and the next Checkpoint flag.
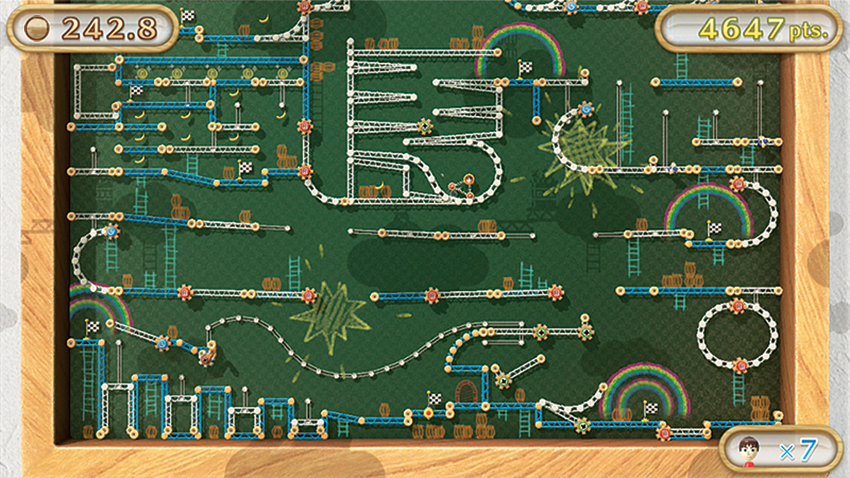
Area 6
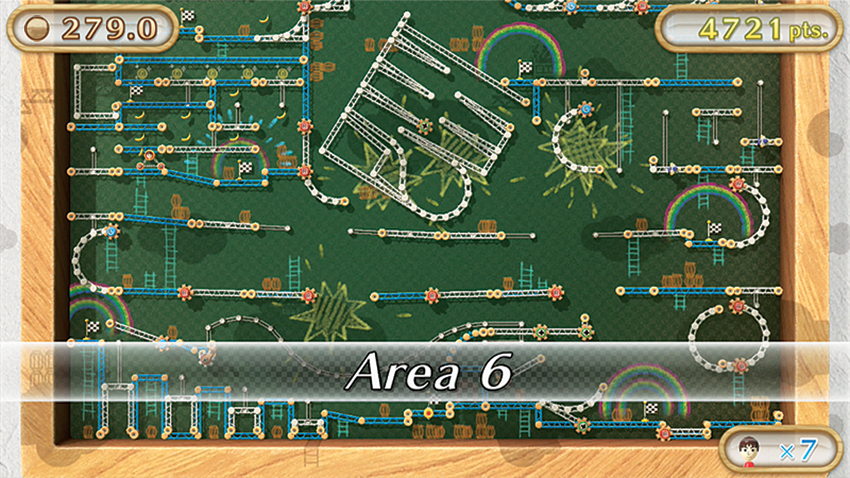
Area 6 is definitely the calm before the storm. Tilt left to ride an elevator up, moving left until you reach a Moving Platform. By pressing and holding the L Button, you can raise the flooring to reach higher perches. Experiment with pressing the L Button to see how the floors interact, then proceed slowly upward. Nabbing all the Bananas here will activate a set of nearby Coins, so don’t forget to grab everything before moving on. Head left and into the automated elevator to reach Area 7.
Area 7
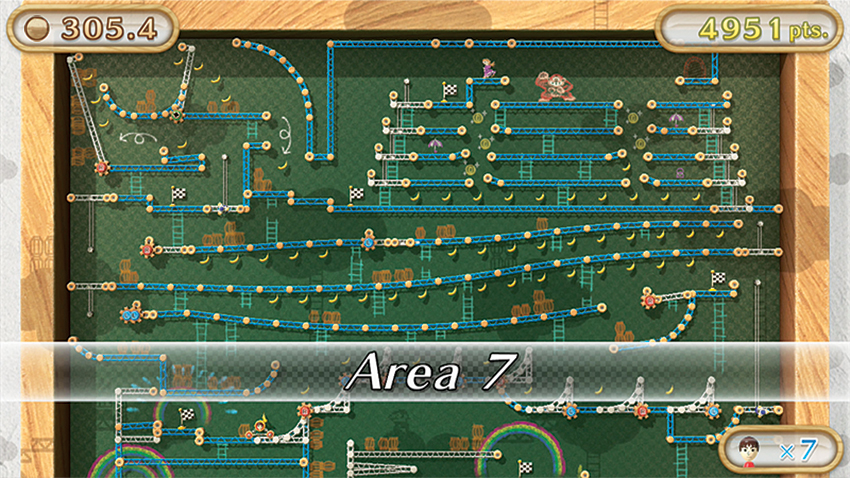
Taken fairly slowly, this small section of L and R Button-driven Moving Rails will slide your Roller right onto a Microphone-assisted elevator and up to Area 8. It’s a short section, but remember not to rush into the next one. Nothing’s worse than losing a life to the easiest section of this course.
Area 8
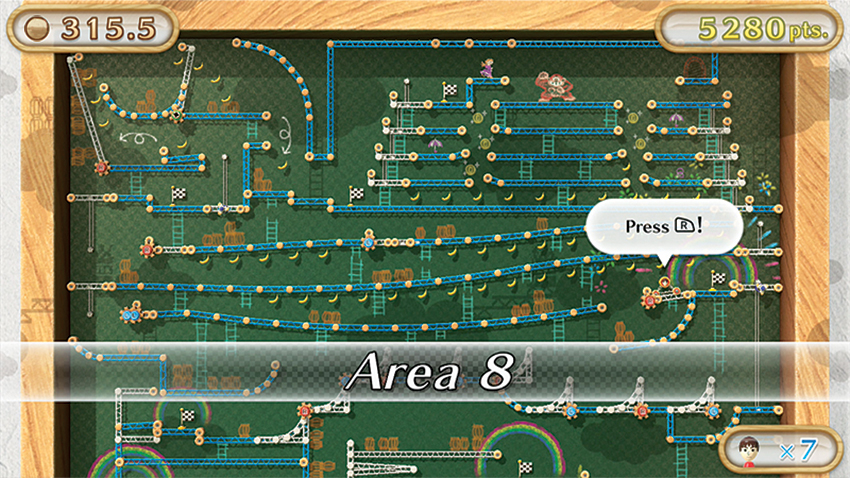
Get ready for a whole new perspective on this little gauntlet. Tilt left until you’re stopped by a small barrier, then hold the R Button to rotate the flooring underneath your Roller until it’s upside-down. The entirety of this Area is navigated while dangling by one of the Roller’s wheels. Tilt to the left to slide along the girder until you reach another Rotating Rail. Try to avoid tilting too far left until the elevator nearby can fully drop, then slide onto it, release the L Button and rise up to a new girder to slide down. Head right until your Roller reaches an elevator, then press the R Button to raise the platform up. Another trip sliding along this girder takes you to yet another Rotating Rail (powered by the L Button), which leads to another Rail powered with the R Button. Just as you did with the girder below, avoid tilting too far left and let this marvelous contraption right your Roller before you glide onto the elevator and over to the Area 9 Checkpoint flag.
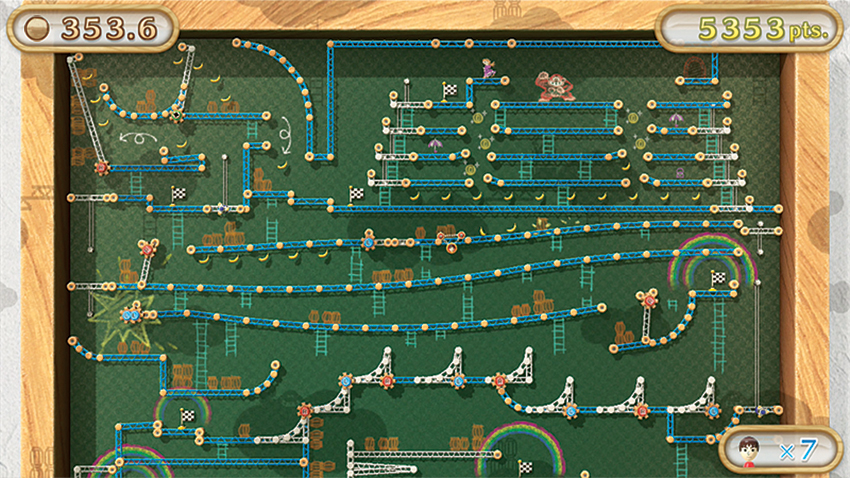
Area 9
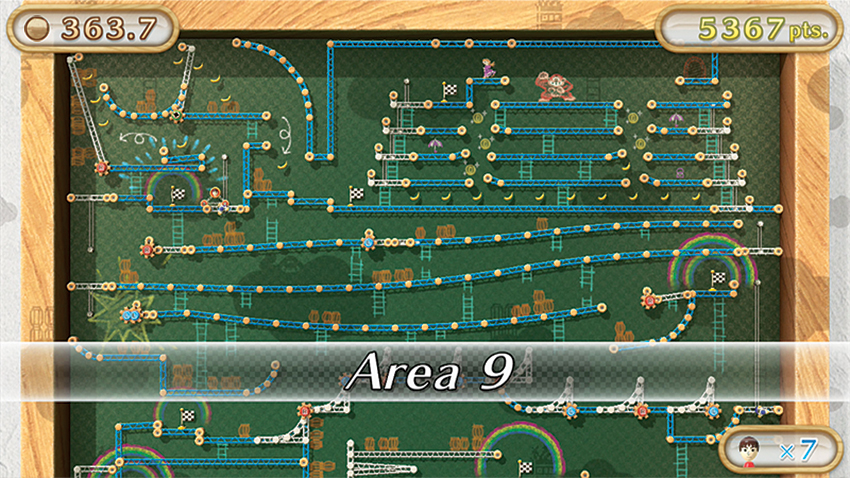
Now we come to the most nerve-wracking part of this course. Blow on the Microphone to raise the elevator and tilt left until you run into a small obstruction. As the game says, you have to be extremely brave here. Tilt the GamePad left 90 degrees so that the platform that was to your left is now below you. Your Roller will flip end over end and land perfectly on the Moving Floor. Move left, up the ramp, and press the R Button until you’ve been deposited into a small U-shaped area. Tilt right to roll up the bit of flooring ahead, but be ready to tilt left again to avoid rolling off the edge. The trick here is to position your Roller so it’s nearly hanging off the right lip of this ledge, then tilt right ever so slightly to start the descent. If this is done correctly, your Roller will flip over the edge, catch a wheel on the ledge below, and flip completely around to land without a scratch. Don’t be dismayed if you don’t get it the first time. This is a very technical part of the course.
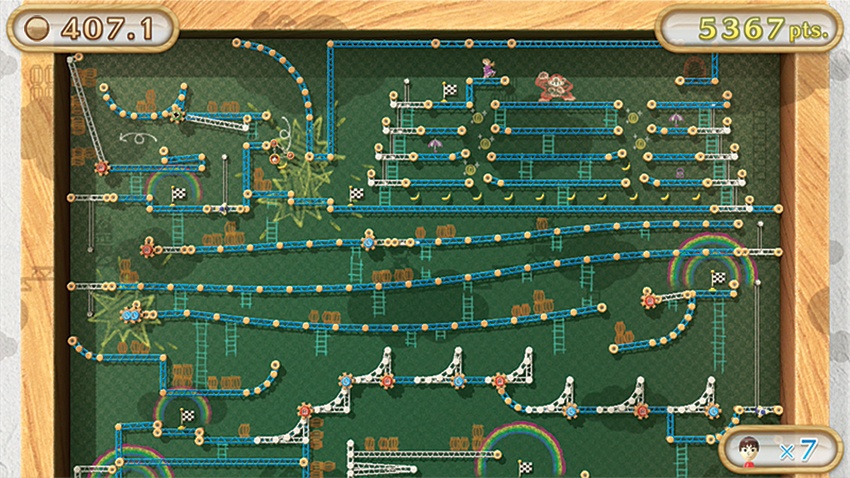
Area 10
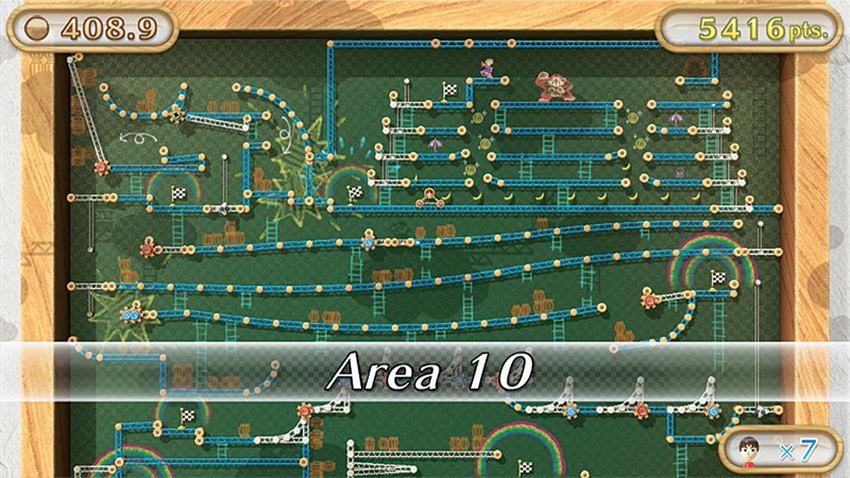
You’ve made it to the final section! All you have to do here is tilt from right to left, using the L and R Buttons to raise the elevators. Be careful here! The gaps widen with each new floor you climb, and culminate in a jump that requires a hard tilt to the left to clear the gap, but necessitates a quick tilt back to the right to cancel momentum, lest you flip over the edge and have to do the whole sequence again—or lose lives. After a harrowing trip, Donkey Kong is defeated and Pauline will have a two-time savior!
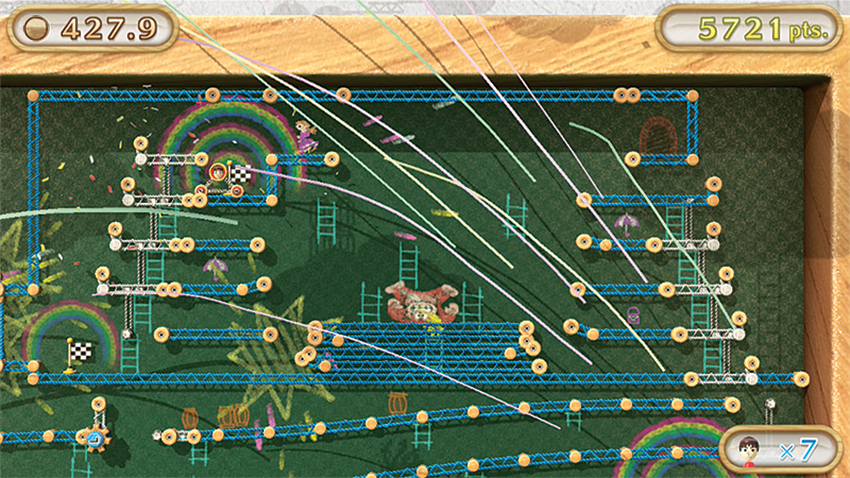
Course 3
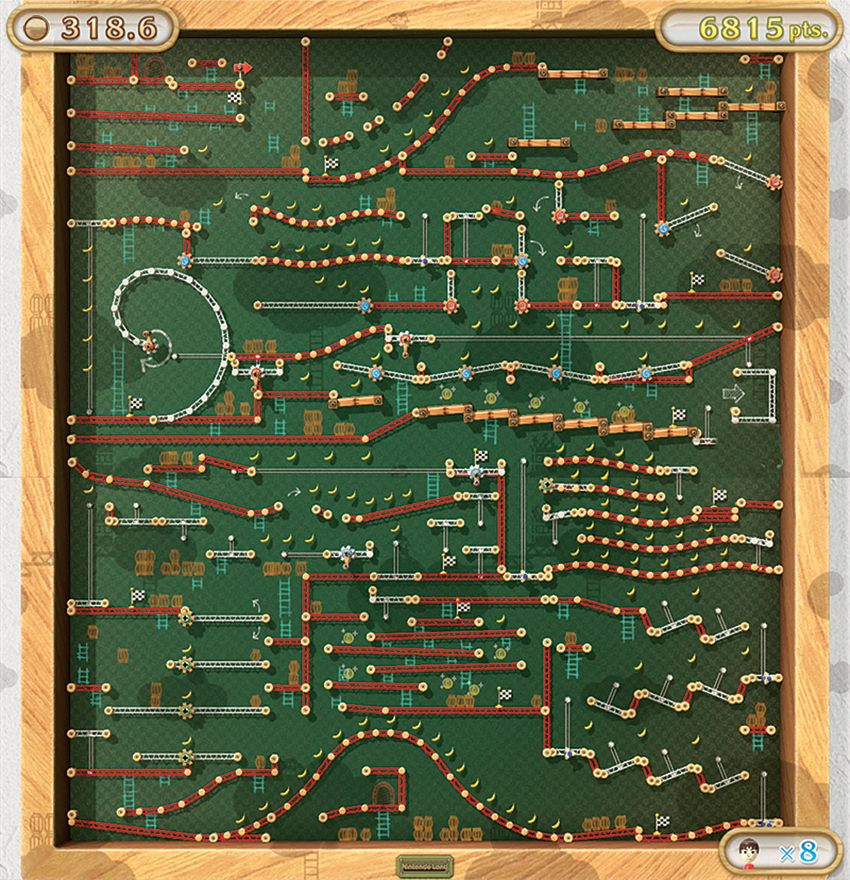
Oh, you thought it was over? No, no, silly player! That was the easy version of the courses. These? These are the diabolical ones. The overall layout is basically the same, but in nearly every Area, something has been added or removed—usually the latter, which means jumps are longer, high-speed sections are faster and require faster reflexes, and, of course, the clock’s still ticking. Get ready for danger! Oh, but before that? Get ready to do a time trial of this second Course—after you complete a time trial of the first Course. Back to back. But hey, at least you know how to get through it all, right?
Area 1
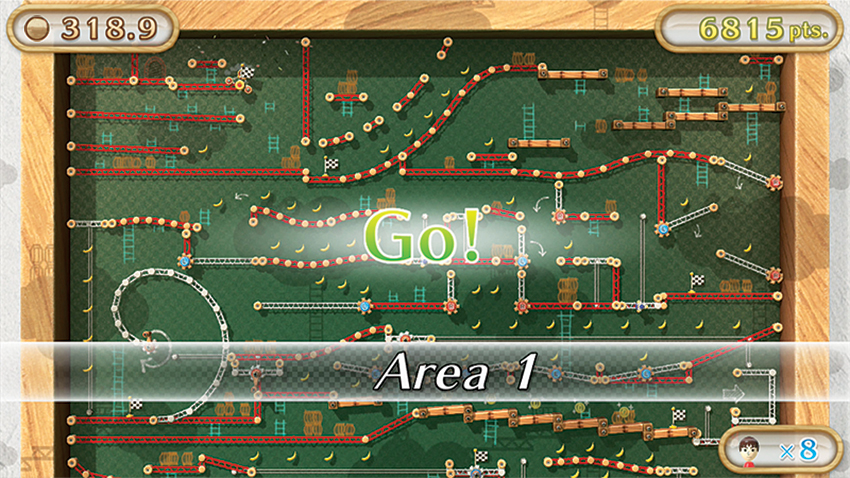
Right from the get-go, you’ll notice some major differences. There’s a perilous drop just like Area 9 of the flip side of the board. Tackle it the same way as you did before: Inch out to the edge, then let the right wheel off your Roller slip off the edge to that the wheel catches on the ledge below and flips your Roller around. Head to the Checkpoint flag to be done with this seriously trying first section.
Area 2
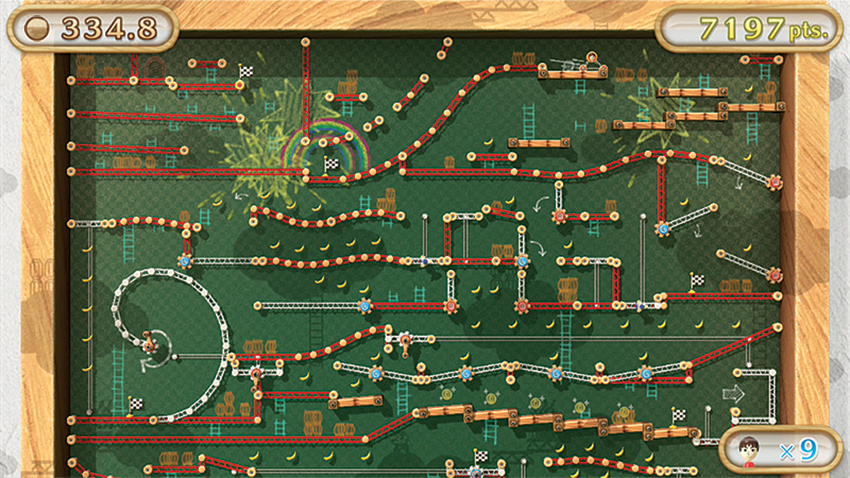
The gaps in the stairs here have widened considerably. Make sure you’re using a ton of tilt to pick up enough speed.
Area 3
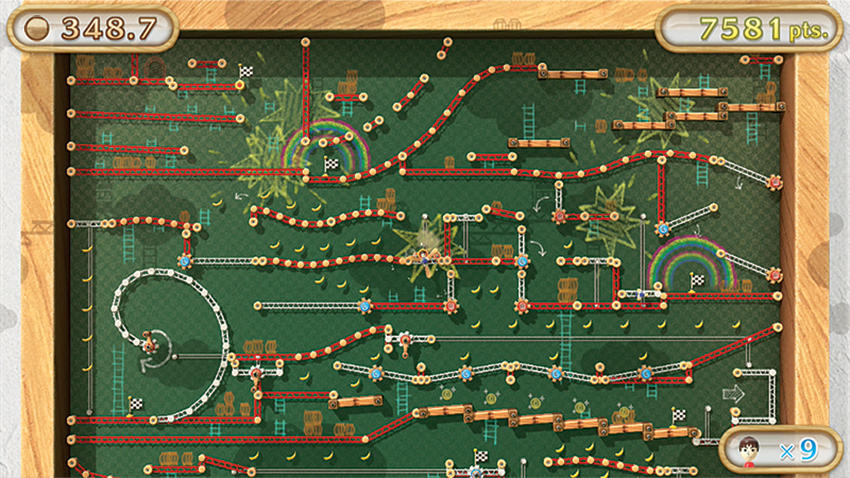
Be careful hopping onto the elevators in Area 3. They no longer have stoppers to keep your Roller from sailing off the edge.
Area 4
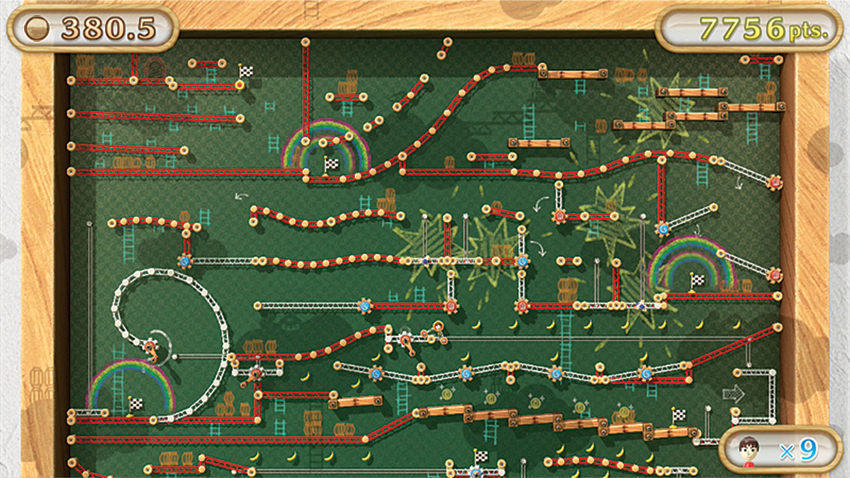
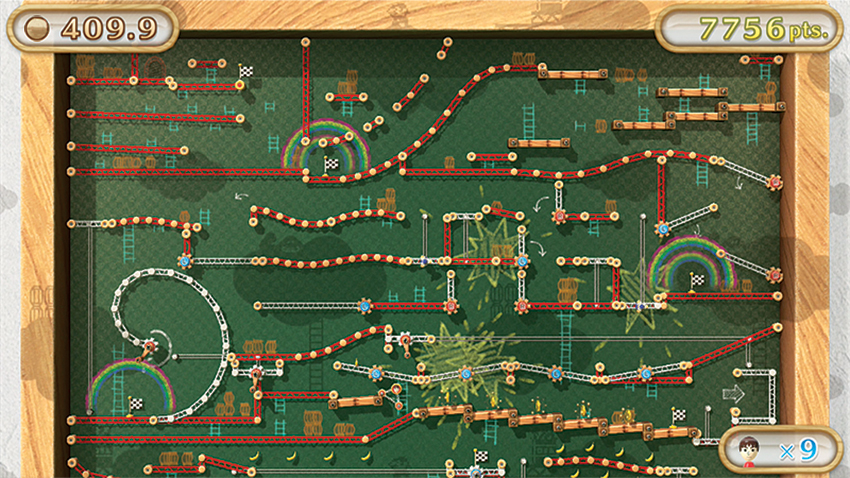
Like the elevators from the previous Area, the Moving Platforms here have no stoppers, so approach them slowly and center your Roller before moving. Just past the seesawing platforms, the jump over the stairs here is much wider, too, so get plenty of momentum.
Area 5
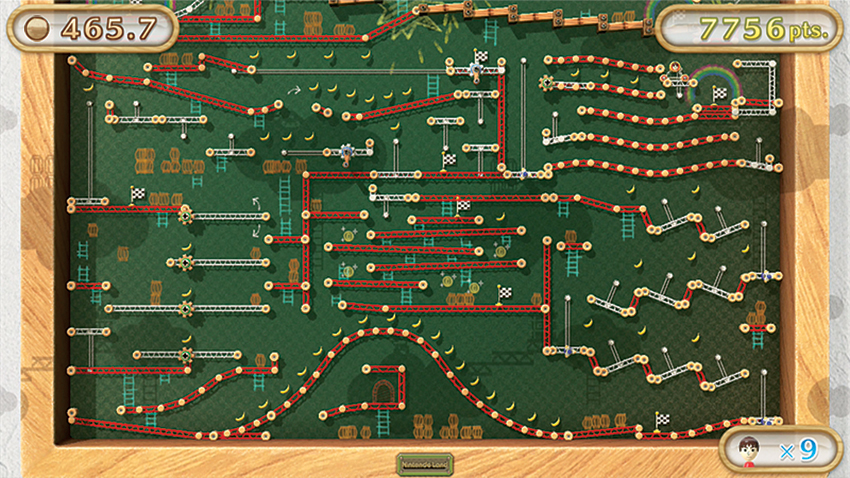
Mercifully, most of the elevators here have stoppers except the one in the area with the extra Bananas. Take that elevator slowly.
Area 8
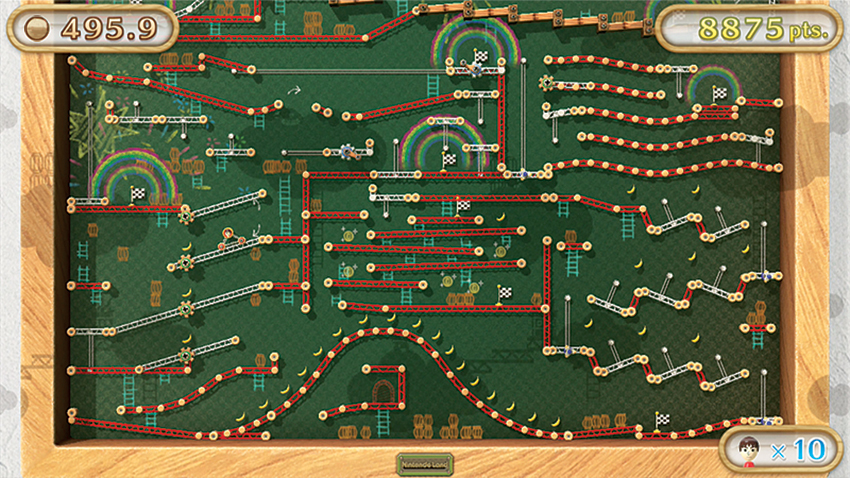
Thankfully, Areas 6 and 7 are unchanged, but Area 8’s Moving Platforms (the ones tilted with the Right Stick) are only half their previous length, so they require a slightly different set of nearby platforms.
Area 10
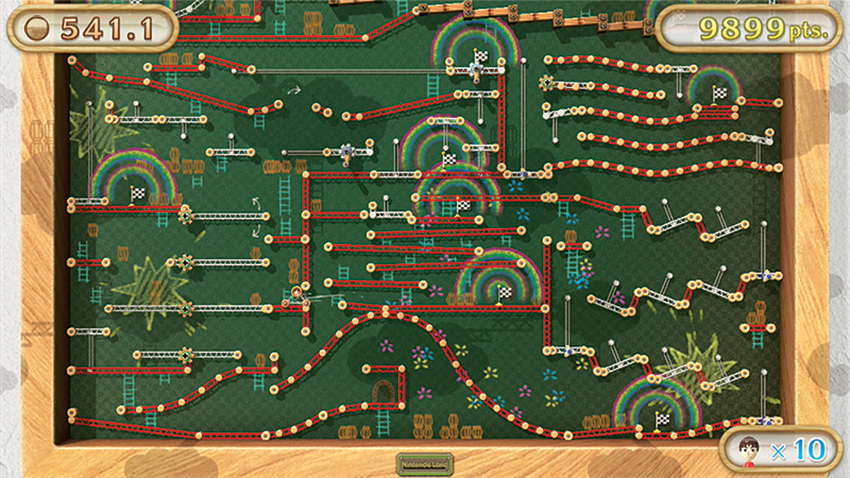
The only major change here is a small jump after you successfully hit the final Checkpoint flag. Get some momentum when you go left to clear the jump and head for the Passage. On to the final course!
Course 4
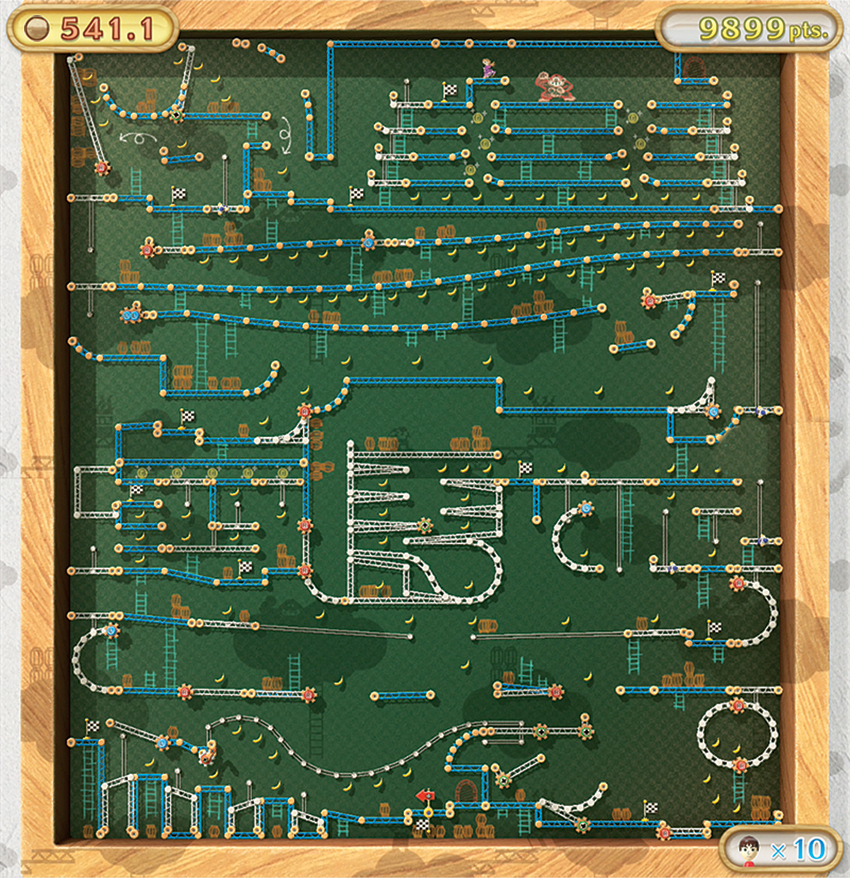
If all the missing bits from that last course didn’t shake you, the precipitous ledges here and quick reaction times required by this one certainly will. Keep those reflexes sharp and don’t rush through areas. There’s no sense in coming this close only to miss out on the ultimate prize. If you’re in need of help, recruit a friend to add some Assisted Play with the Wii Remote. Remember, though, the clock is always ticking in real-time, so don’t hit that 600 minute mark or all of your progress will be for naught!
Area 1
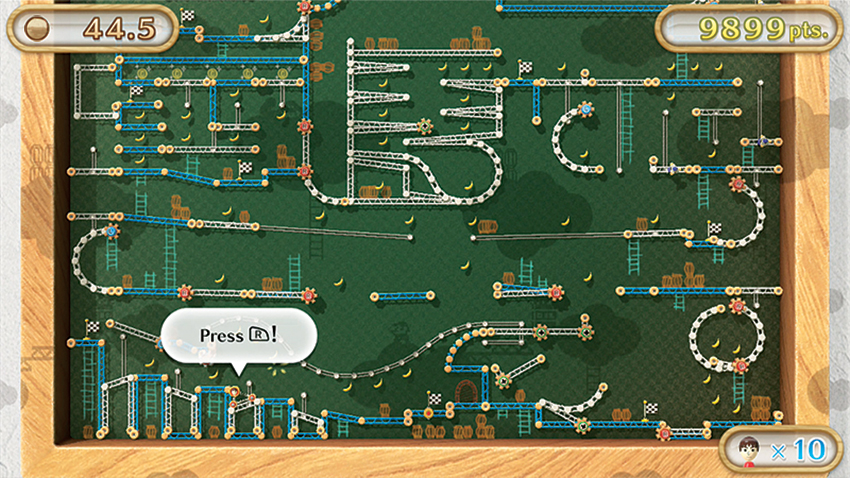
Those R Button-powered platforms at the start are angled now, which makes it a bit more difficult to land on the ledges between them. Take things slow, and be sure you’re completely off the last platform before you lower the next.
Area 3
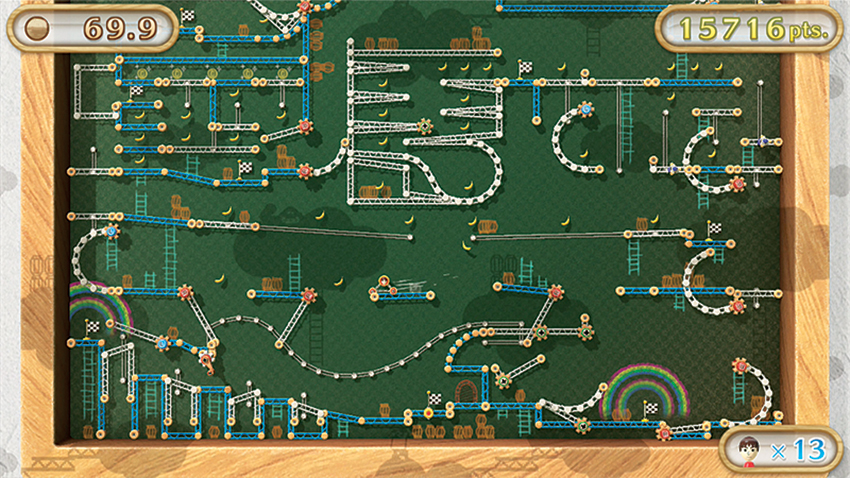
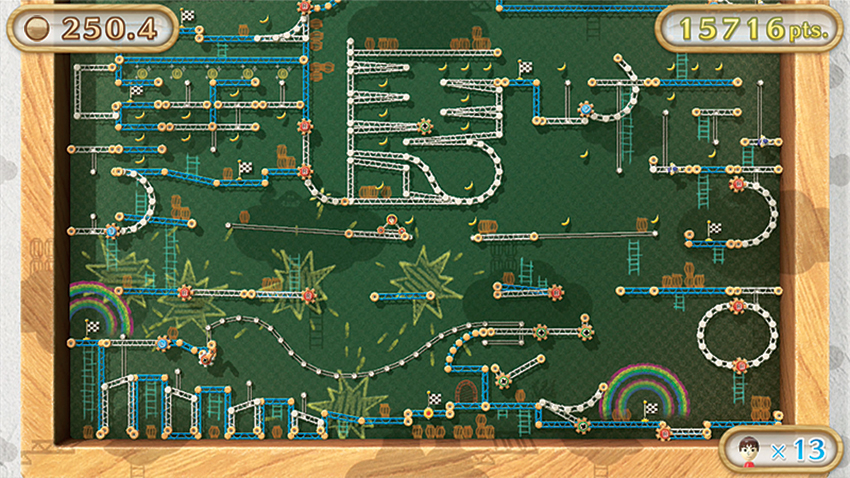
The Rotating Platforms that were challenging before are even more so now. After the first platform has been extended, your Roller must make a flying leap to the next set of girders, then quickly reverse momentum to keep from flying off. Keep the R Button held down to give yourself some extra stopping room, but absolutely do not let go until your Roller is on the blue girders. Releasing the R Button too early will cause the Roller to plunge to its death. When the Roller is safely on the girders, let go to extend a bridge leading to the upper level. Here, the Moving Platforms travel a much longer distance and require more balance. Keep your Roller centered on the platform to avoid being thrown off when the Platforms start moving.
Area 5
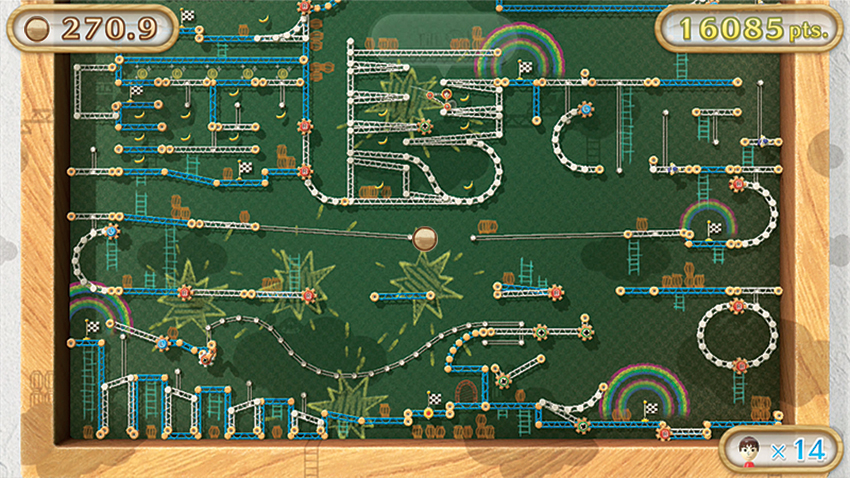
The massive rotating structure has much shorter steps now. Make sure your Roller has plenty of momentum when leaping from one step to the next.
Area 6
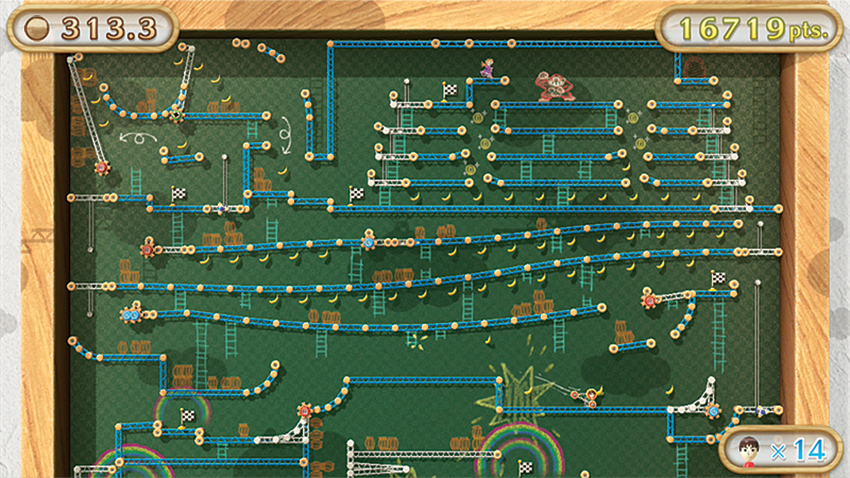
There are two slightly tricky new lips just past the Checkpoint flag in Area 6. Ease carefully over the first lip onto the girder to avoid speeding off the other end of it, but get a good amount of momentum going off the second one or your Roller will crash and burn.
Area 10
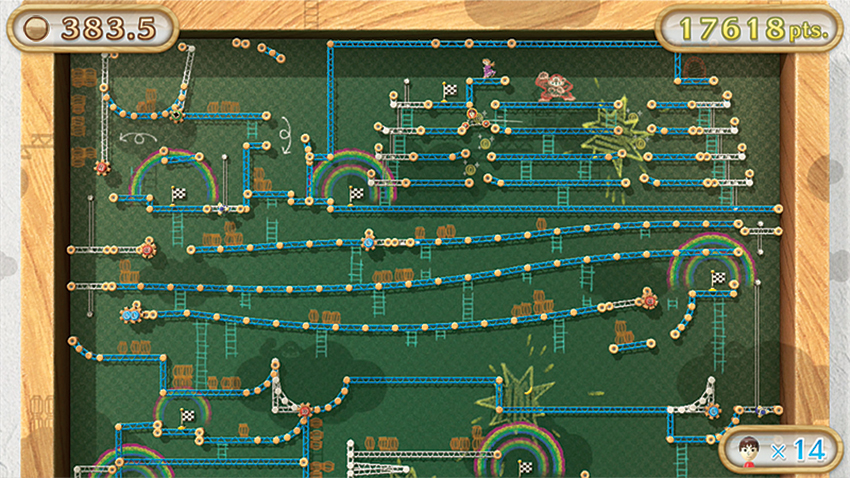
Areas 7, 8, and 9 are remarkably similar to the original version of this course, but don’t let that lull you into thinking the rest is smooth sailing. At the final leaps between the girders, the last jump now has a ledge just beyond with no abrupt stopper. To make the jump, tilt hard to the left, then immediately to the right, and then center the GamePad to stop any further sliding. All you have to do after this is ride up the elevator and rescue Pauline for the last time! Take a bow, high roller. You’ve earned it. You managed to best not just one deviously designed maze of girders and gaps but four of them!