
Hyrule Warriors Guide Walkthrough Legend Mode
Land of Myth: Death Mountain

Playable Characters Impa Impa  Sheik Sheik
Heart ContainerPiece of HeartGold Skulltula
Hard Mode Gold Skulltula
UnlockablesImpa’s Biggoron’s Knife Victory ConditionsDefeat Darunia. Defeat Conditions |


 1,000 KOs—Hookshot Needed

King of the Mountain

The portal Sheik and Impa walked through when the group originally separated took them to Hyrule of Ocarina of Time. More specifically, they ended up on Death Mountain, which is controlled by the Goron Chief Darunia. Darunia, as it turns out, is none too pleased to have intruders on his mountain and decides to challenge Sheik, Impa, and their soldiers to force them out of his domain.
This is one of the hardest Scenarios in Legends Mode. The amount of micromanaging required to stave off Darunia’s forces is nothing short of staggering, and it only gets worse if you’re trying to collect all of the unlockables. That being said, we’ll be sure to give you the best strategy for dealing with Darunia’s relentless assault so you can topple the Goron Chief and take control of Death Mountain.
Slow the Goron Assault!

The Gorons are right in their element on Death Mountain. They love throwing boulders, and buddy, Death Mountain’s got lots of them. Your first task will be to capture the W. and E. Boulder Keeps to stop them from rolling boulders down on the Allied Base. The enemy forces will quickly grab the E. Boulder Keep after the Scenario begins, but the W. Boulder Keep will stay available for a short while after.
Quickly head to the west side of the battlefield and capture the West Keep to gain access to the upper half of the mountain. Waste no time getting to the W. Boulder Keep; the Goron forces will also be attempting to capture it, which is definitely something you don’t want to happen—two Boulder Keeps assaulting the Allied Base with boulders means your survival chances drop dramatically.
Hard Skulltula Opportunity
|


Make sure you don’t leave the Allied Keep unattended for long. The boulders coming down the mountain certainly hurt your base of operations, but not as badly as a legion of Gorons attacking directly can. If you see Captains entering the Allied Base on the minimap, you need to get over there and take down out immediately. Between them and the boulders, the Allied Base can get dismantled in mere minutes.

After you capture one of the two Keeps, run around the battlefield thinning out the Goron forces and capturing their Keeps. This allows you to control the battlefield in case the Gorons decide to pull anything tricky—and they will. Just keep on eye on the Allied Base’s health by using the Battlefield Info screen; if it gets too low from the boulder assault, you’ll need to capture the E. Boulder Keep and finish the mission to keep the Base from falling.
Piece of Heart Opportunity
|


Gold Skulltula Opportunity
|


Capture E. Boulder Keep

After capturing many, if not all, of the enemy Keeps you have access to—or if the Allied Base is in trouble—head over to the E. Boulder Keep and capture it. A chest will appear in the center of the Keep; it contains a Sealed Weapon, which will become Impa’s Biggoron’s Knife, the second version of her Giant Blade.

Once you’ve captured it, wait near the E. Boulder Keep; a veritable avalanche of Gorons lead by Darunia is about to roll down from the top of the map to the Allied Base and you must be as close to the center as possible to intercept them.
Heart Container Opportunity
|


Defeat Darunia

As mentioned before, Darunia, the Goron Chief, will roll down from his keep at the northernmost point of the map with a rather large supply of Goron troops in tow. Stand in the center of the battlefield and intercept him and as many of his troops as you can manage without letting him reach the Allied Keep.

Darunia can be beaten in much the same way as every other Warrior: Block his attacks until his Weak Point Mark appears, then whittle it down to perform a Weak Point Smash. Unlike other Warriors, Darunia is actually quite susceptible to this strategy; he takes quite a bit of damage from a Weak Point Smash and has a Mark that can be depleted swiftly. Make sure to roll behind him if you get the chance, like you would any other Warrior, to keep yourself a little bit safer.
After you defeat him, Darunia retreats to his Keep for the time being.
Another Goron Wave!

The Gorons send out a wave of Captains to take back the Keeps you captured. If you were diligent in capturing Keeps around Death Mountain, the Goron Captains will have their work cut out for them. This gives you all the time you need to progress the battle by escorting Impa/Sheik to the W. Boulder Keep. Be warned, however: Darunia will reappear and try to take back the Boulder Keeps, starting with the western one. If he manages to accomplish that goal, the Keep will begin rolling boulders at the Allied Base once again.
Hard Skulltula Opportunity Continued
|


Cracking the Goron Chief’s Shell

Somehow Darunia is healing himself whenever he flees back to his Keep. This mystery has left your ally puzzled, but it’s not long before she decides to take a shot in the dark and turn the Boulder Keeps back on the Gorons.

She’ll begin making her way to the W. Boulder Keep and she’ll need an escort. Sweep the west side of the map to defeat any enemies with Health Bars to make your ally’s trip to the W. Boulder Keep a breezy one, then go back to the center of the map and take out Darunia for the second time.

As soon as your ally makes it to the W. Boulder Keep, she will turn the boulders against Darunia’s forces and use them to destroy a gigantic jar in the center of his entry hall. It turns out that Darunia has been healing himself with whatever was in that jar. Now that it’s been destroyed, Darunia has no method of healing himself, which leaves him in a panic. He gears up for one last assault and opens the gates to his Keep. You now have the chance to deal the final blow to the Goron offensive.
Race to the Chief’s Room Keep to challenge Darunia directly!
Bombchu Blitz!

Shortly after you destroy the door to his Keep, Darunia begins his final plan: a Bombchu assault like you’ve never dealt with before. Get ready to bounce around the map like a rubber band ball at a trampoline convention because things get a little hairy from here on out.

Race to any Bombchu that has its arrows pointing toward the Allied Base on the minimap first. If the Bombchu reaches it and successfully detonates, it’ll be game over for the good guys. If you captured and managed to hold on to most of the Keeps on the field, you’ll have a much easier time with this section. The Bombchus have to stop at any Keeps you hold and take them before any additional Bombchus can reach the Allied Base, which gives you time to hop back and forth around the map.

If you didn’t capture very many Keeps, or if the enemy Captains from earlier successfully took your Keeps, don’t worry: You’ll have to race around much faster, but this is still completely doable if you don’t waste time getting from Bombchu to Bombchu.

The trick to completing this section quickly is to ignore the Bombchus and go directly for their Operators standing nearby. The Bombchu Operators go down much quicker than the Bombchus do, and if you walk near a Bombchu after defeating its Operator, it turns around and attacks enemy Keeps instead! Some even going directly to Darunia’s room (the Chief’s Keep) to damage him and anything else inside of it.
Rock and Roll

Once you’ve removed the Bombchu scourge from the battlefield, race up to the Chief’s Room Keep and get ready face the Goron Chief himself.
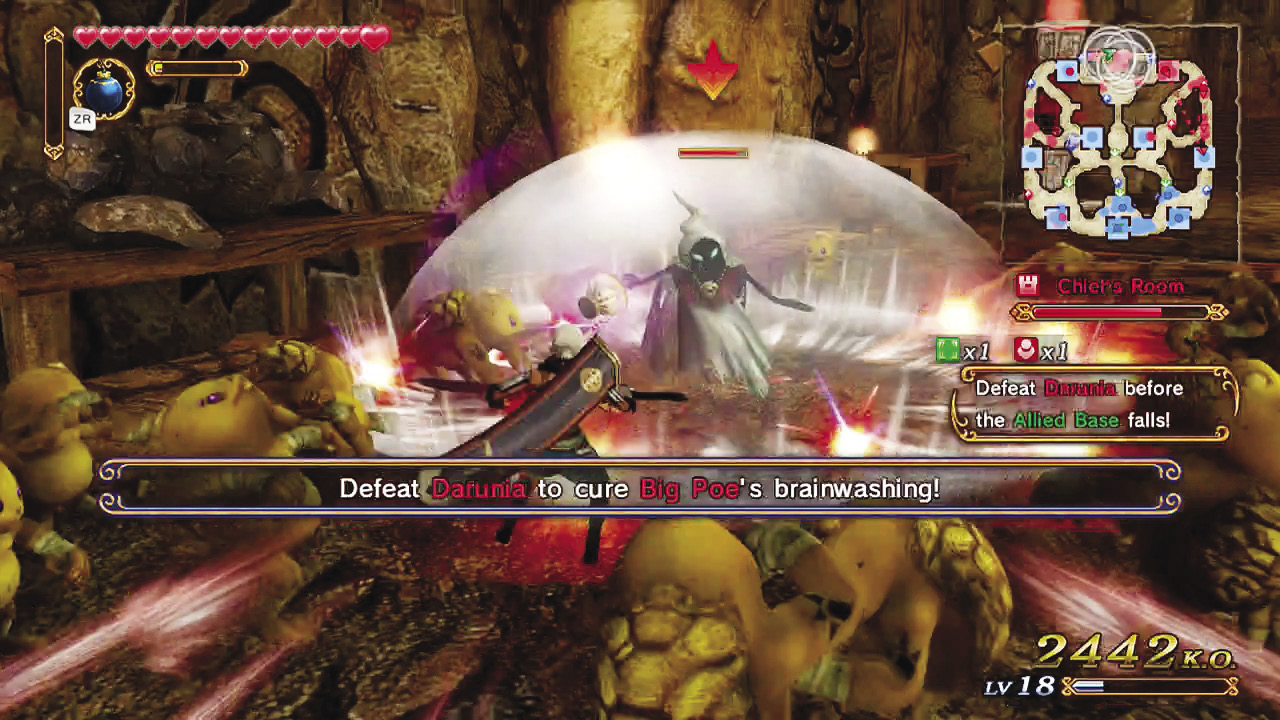
After you reach the Keep, it becomes very apparent that something isn’t quite right with Darunia. Big Poes begin appearing inside the Chief’s Room Keep and Darunia starts complaining of feeling strange. Instead of taking him out directly, defeat all of the Big Poes in the room to weaken him. It just so happens that the reason Darunia attacked you in the first place was because of the Big Poes’ mind control. On top of that, they were empowering Darunia to make him even more deadly on the field.
With the Big Poes cleared out, knock out Darunia to break him free of the mind control and win the battle.