
Hyrule Warriors Guide Walkthrough Adventure Mode
E
E-1
Defeat the Darknut Forces!
Limited Warrior: Agitha (Recommended Level: 35)
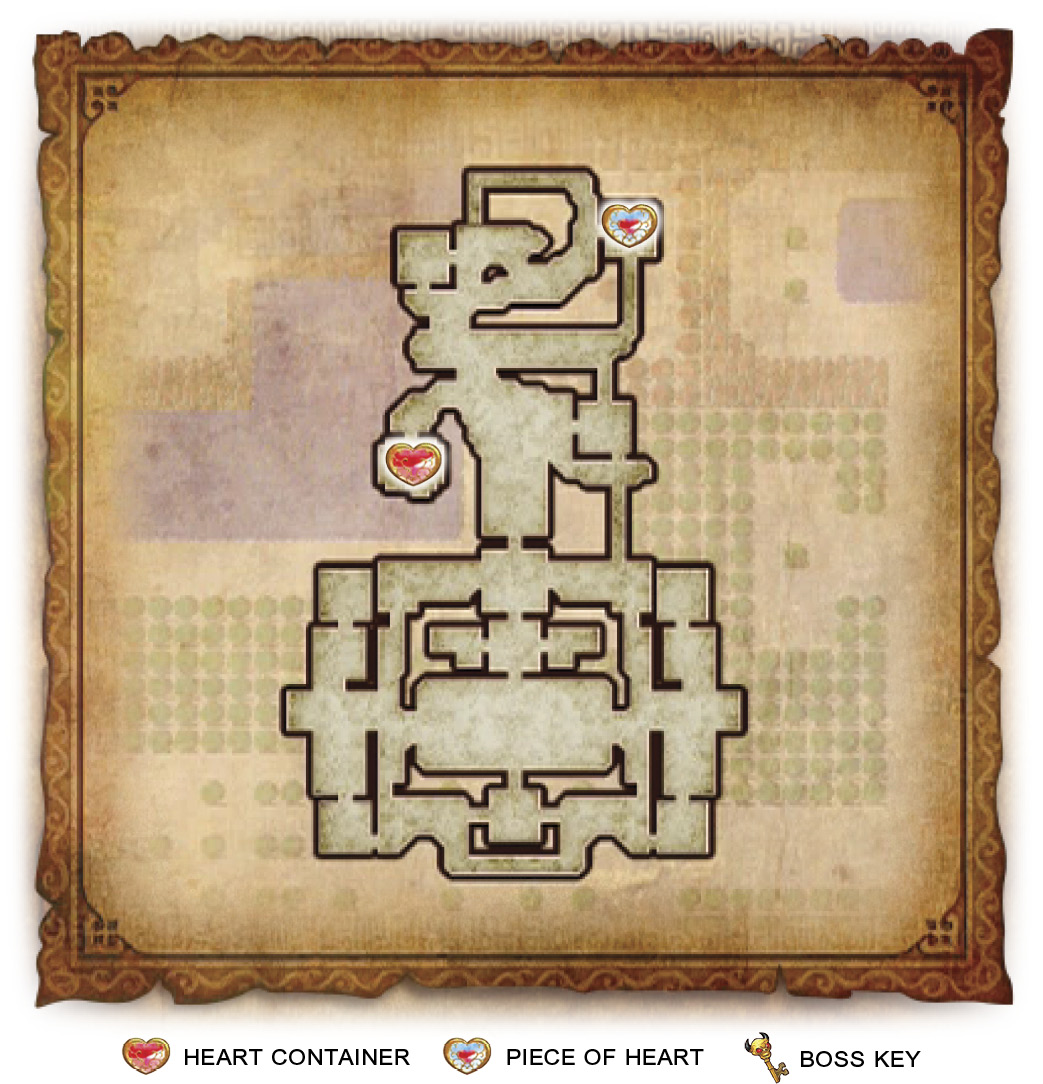
UnlockablesAgitha—Heart Container (in the East Field Keep) Agitha—Piece of Heart (in the South Field Keep) 1,000 KO Gold Skulltula Second Gold Skulltula Search Item |
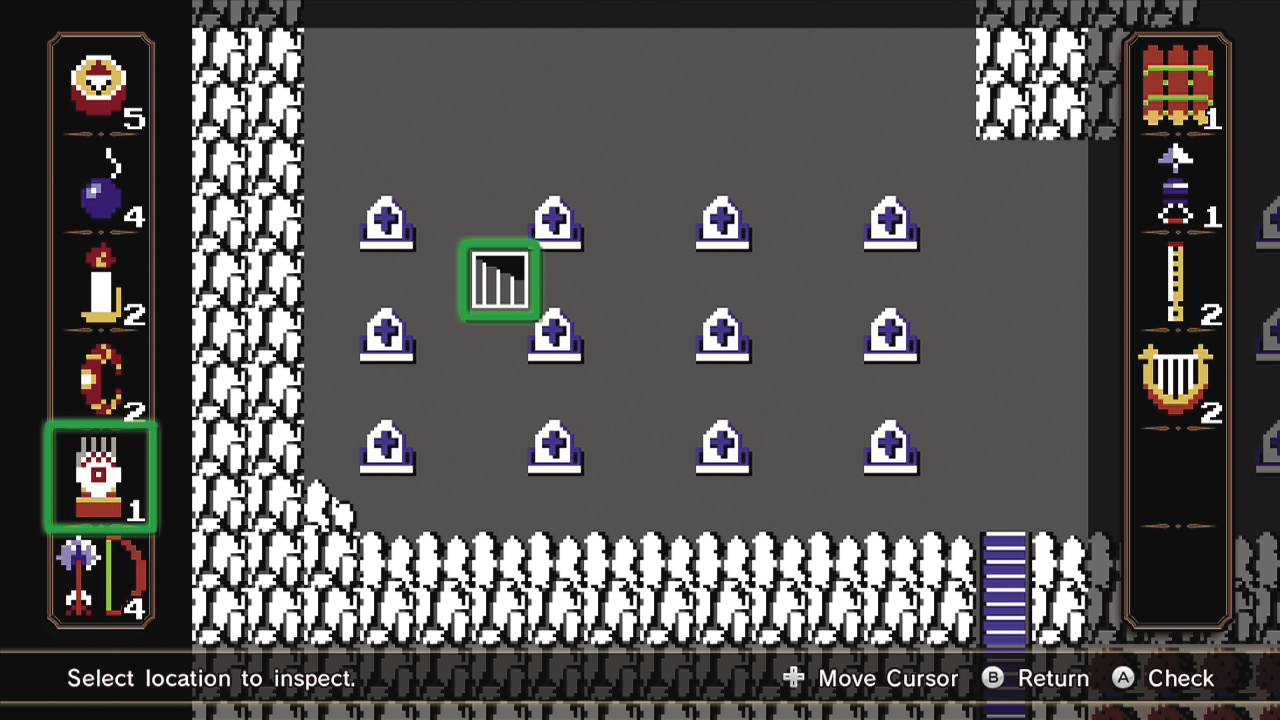
Adventure Battle Scenarios are almost identical to the Scenarios in Legend Mode. You have the full battlefield at your disposal, an enemy Captain/Warrior to defeat to win the Scenario, and teammates to assist you. The key difference is that you typically have only a single mission that appears at the start of the battle, which makes up the bulk of the entire fight. Once that mission is completed, you need only to defeat the enemy Commander to win the Scenario.
Twilight Field
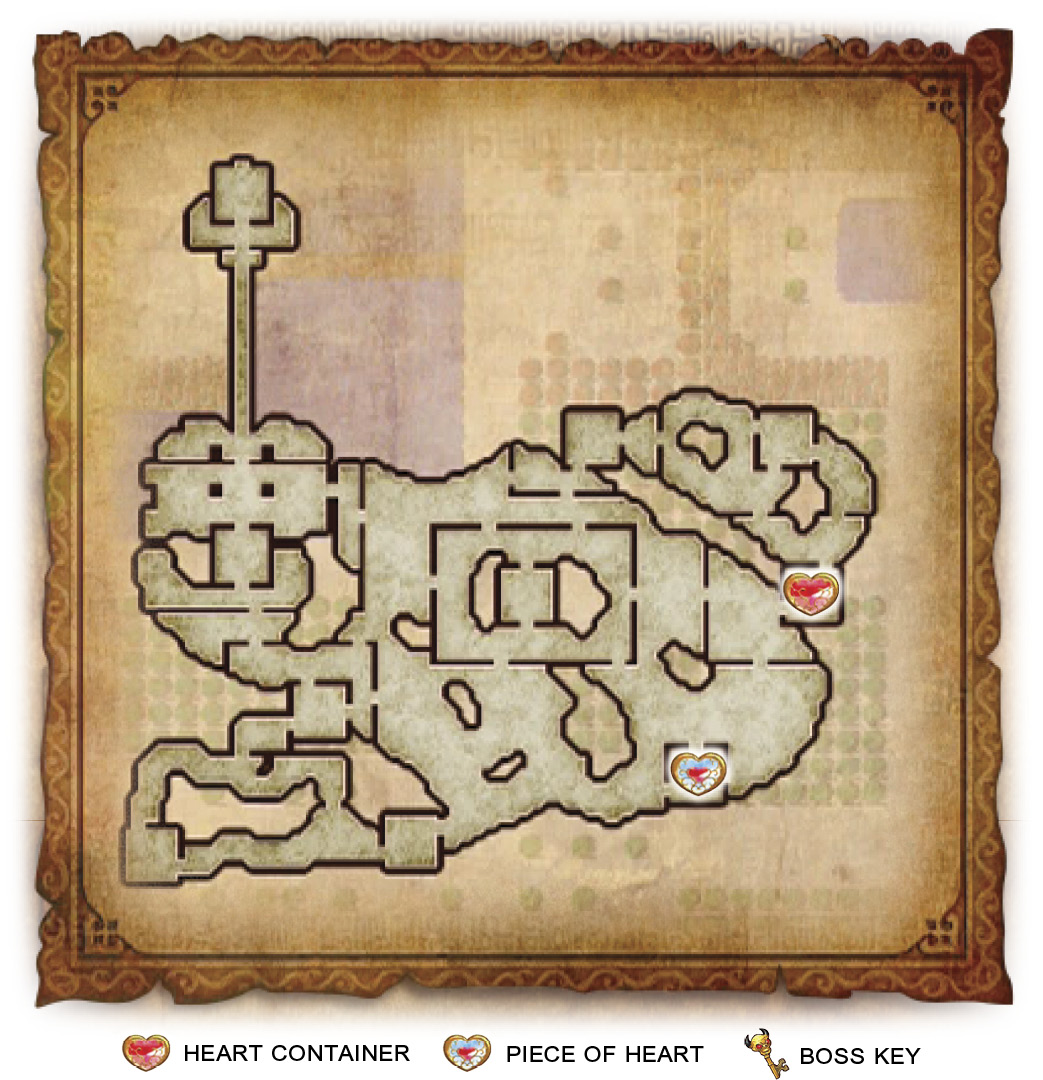
Defeat all enemy Captains to lure the Commander
You need to defeat the three Captains that are marked on your minimap to progress the mission.
Provide support for the Hylian Captain
Shortly after the Scenario begins, an allied Hylian Captain will appear on the battlefield, behind enemy lines. When his health gets low, he’ll attempt to retreat to the Allied Base and will request your aid in accomplishing that goal. If you fail to bring him back to the Allied Base, he’ll return as a vengeful spirit, dead set on bringing you to the underworld with him. Make sure to race to his aid the second you see the mission pop up; the Hylian Captain will have very low health at this point and can be defeated by enemy forces in a very short amount of time.
Defeat the enemy Commander
You can find Zant in the Enemy Base Keep.
E-2
Defeat all Giant Bosses within 10 minutes!
Defeat all Giant Bosses! Scenarios require you to do just that: defeat all giant bosses on the map within the time limit. These Scenarios almost always consist of two or three of the same boss attacking different corners of a confined map at once. Pick your strongest Warrior and challenge the Giant Bosses one at a time and you’ll be fine. Just try to divide up your time evenly for each of the bosses. If you notice that fighting any monster is taking more than half of your time for any monster, quit the Scenario, level up your character, and try again. If that still doesn’t cut it, unlock some of the stronger Weapons in Adventure Mode and come back at a later time.
Two Manhandlas
To defeat Manhandlas, you need to wait until their stalks turn green and then hit them with the Boomerang. Once you’ve hit all four, Manhandla will uproot and its Weak Point Mark will be revealed. Hit it with a handful of Weak Point Smashes and you’ll make short work of the monstrous man-eater.
E-3
Dungeon 7: Defeat the primordial beast!
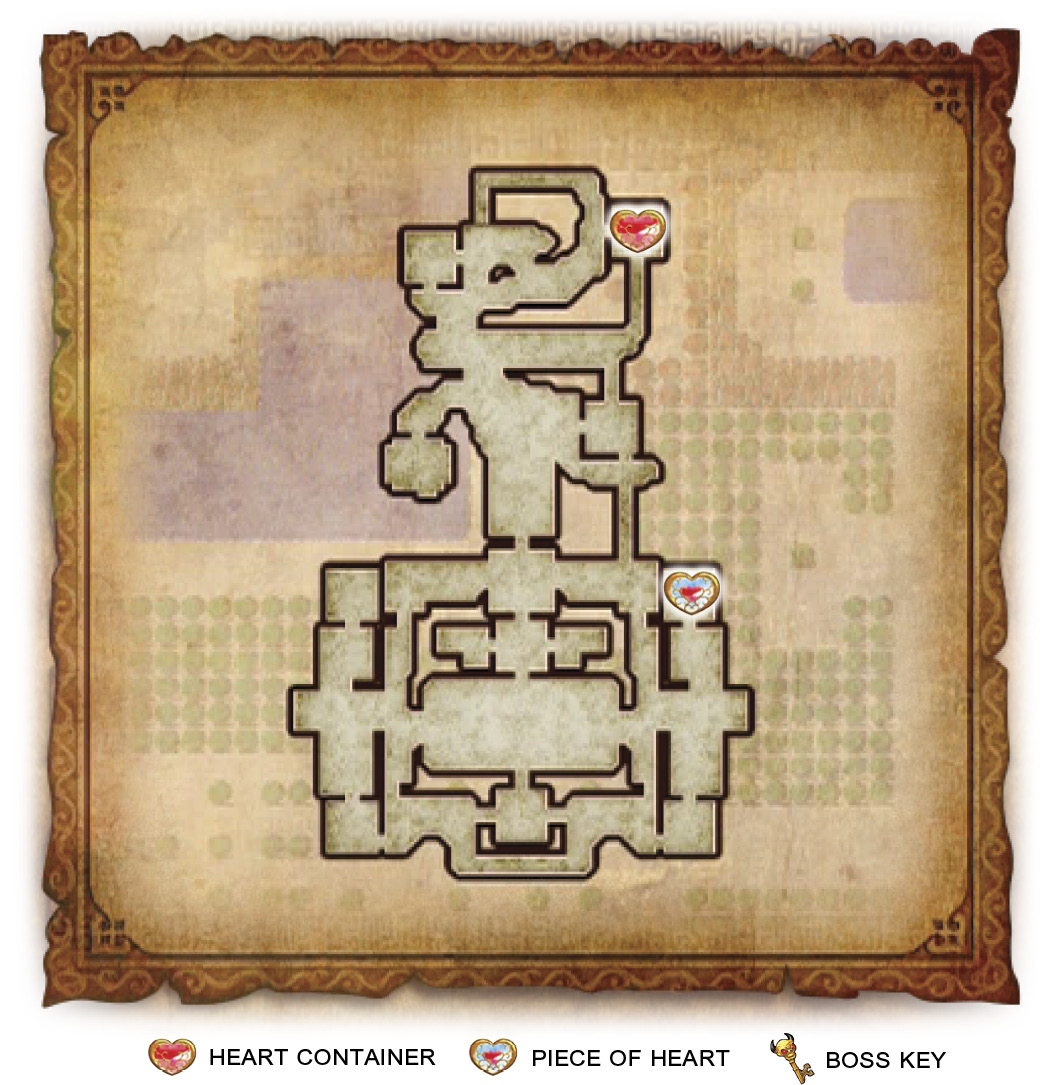
UnlockablesLadder Sheik—Piece of Heart (in the Town Center Keep) 1,000 KO Gold Skulltula Second Gold Skulltula Boss Key (in the Fairy Fountain Keep) Search Item |

Dungeon Scenarios play the same as Adventure Battles, but with a twist: There’s a Giant Boss at the end of each one of them, and you must grab the Boss Key hidden in one of the enemy Keeps to open the Enemy Base’s gates. Other than that, you can expect the same kind of battle you’d get from an Adventure Battle.
Skyloft
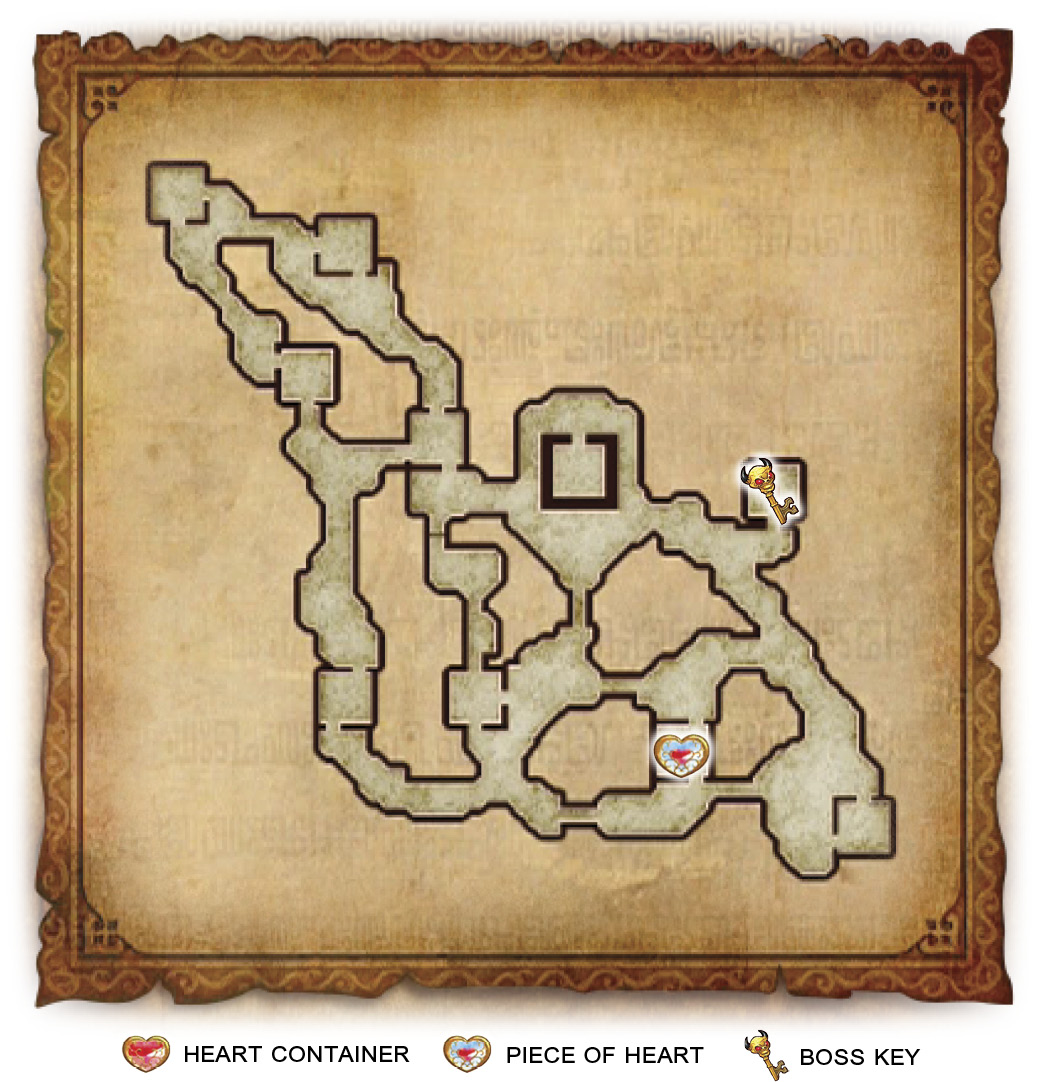
Defeat all enemy Captains to lure the Commander
You need to defeat the three Captains that are marked on your minimap to progress the mission.
Defeat the Gold Cucco
An enemy Cucco will appear on the battlefield almost immediately after the Scenario starts and begin eating everywhere it goes. As it eats it grows more and more powerful. Make a point to defeat the Gold Cucco immediately to keep it from growing stronger and causing you unnecessary problems.
Defeat the enemy Commander
You can find Impa in the Enemy Base Keep. You’ll need to grab the Boss Key from the Fairy Fountain Keep before the Enemy Base will open for you. After you grab the Boss Key, approach the Enemy Base Keep’s gates and they’ll open automatically for you.
Defeat The Imprisoned to win
To defeat The Imprisoned, destroy its toes. You’ll need to watch out for the shock waves it creates when it steps, so alternate between feet whenever The Imprisoned is walking. Once you destroy all of its toes, it’ll fall over and its Weak Point Mark will appear. Repeat this and perform a handful of Weak Point Smashes to win.
E-4
Defeat 700 enemies within 10 minutes!

This is one of the more straightforward Scenario types in Adventure Mode. Defeat the listed number of enemies in the given amount of time to win. Don’t linger on individual enemies and do your best to ignore enemy Warriors, Captains, and Bosses; they are only there to distract you from your goal. Enemy Warriors and Captains will boost the morale of the enemy troops currently in the battlefield, but unless you’re struggling to survive, you can feel free to carry on defeating enemies as usual.
E-5
Watch out! All attacks are devastating!
Watch Out! Scenarios can get pretty hairy if you don’t, well, watch out! Any enemy in these battles—even the basic soldier—can take you down to a quarter heart in a single hit. Basically, you can take two hits before you fail the Scenario. Luckily, these are incredibly straightforward fights, working similarly to the Defeat all enemies! Scenarios. Your goal is to defeat a certain number of Captains. Your best bet is to stick to ranged weapons and use your Bow and Arrow frequently. Carve your way into groups of enemies, instead of running through them, and don’t linger. You’ve got this!
Defeat 20 enemy Captains!
The Captains in the Scenario are all Icy Big Poes. They are some of the more challenging Captains to face in a Watch Out! Scenario, because of their ability to teleport and their excessive use of ranged attacks. Using your Bow and Arrow is a must here. Your best strategy will be to slowly defeat enemy soldiers to thin them out until you’re close enough to shoot the Poes with the Bow and Arrow. Be on your guard and don’t stop for a second.
We highly recommend that you bring Lana to this fight with all of her Kokiri Sword Badges activated. Her 
 makes it incredibly easy to sweep out enemy soldiers, giving you a clearer shot of the Big Poes.
E-6
Dungeon 4: Defeat the ocean beast!
UnlockablesWater Bombs Midna—Heart Container (A-Rank) Ghirahim—Piece of Heart (in the West Field Keep) 1,000 KO Gold Skulltula Second Gold Skulltula Boss Key (in the South Field Keep) Search ItemNone |
Dungeon Scenarios play the same as Adventure Battles, but with a twist: There’s a Giant Boss at the end of each one of them, and you must grab the Boss Key hidden in one of the enemy Keeps to open the Enemy Base’s gates. Other than that, you can expect the same kind of battle you’d get from an Adventure Battle.
Twilight Field
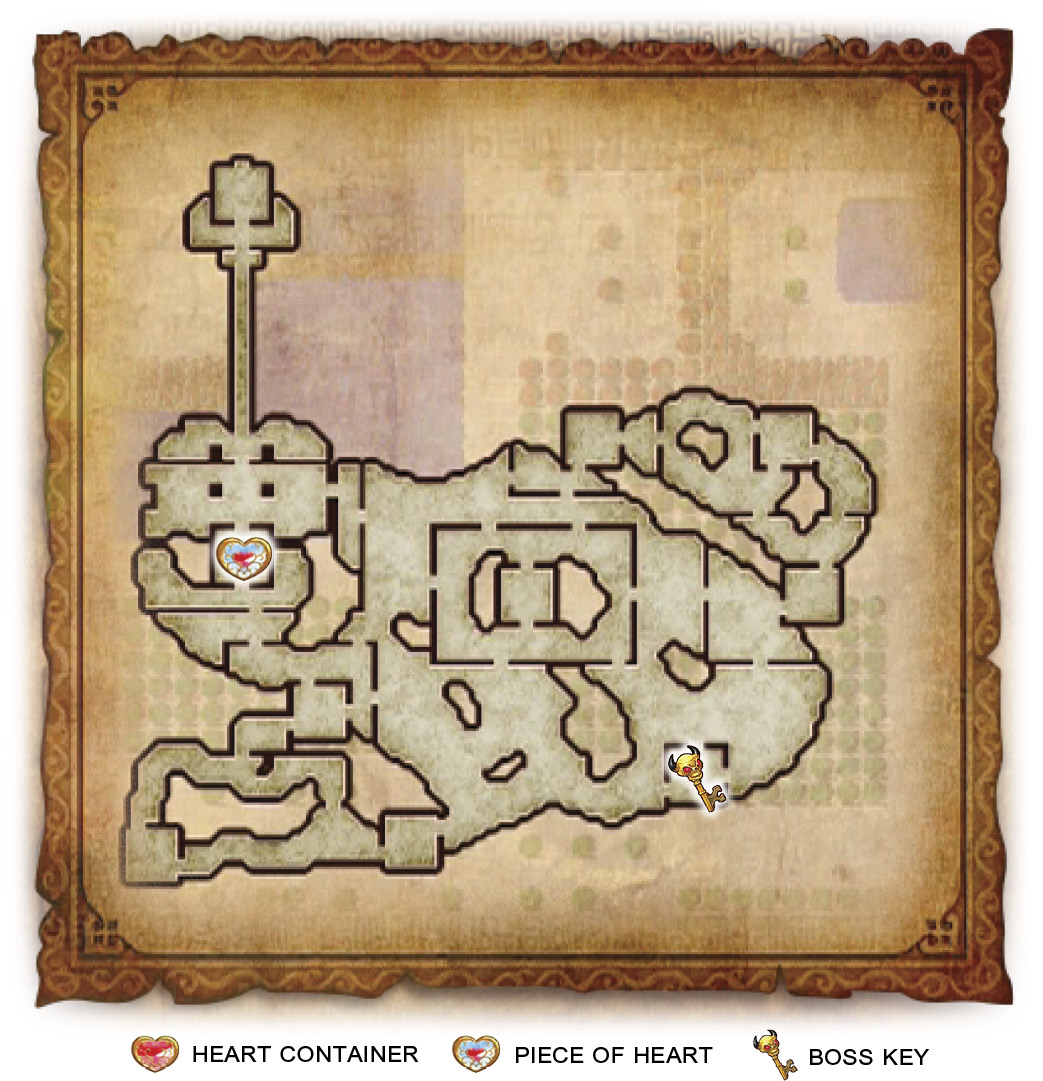
Defend allied Keeps and defeat enemy forces
Your job is to stop the enemy forces from taking any of your Keeps. If they do, they’ll gain a morale boost, making the battle that much harder, and you’ll then be tasked with recapturing that Keep.
There are three Bombchus on the map that will begin going after your Keeps one at a time. The western Bombchu will move first, followed by the southwestern one, then the eastern one. Take them out in that order and waste no time doing so; if one of them blows up in a Keep, you will instantly lose it. You’ll have to be quick in taking out the western Bombchu, as the southwestern Bombchu will reach its destination before the western one will. The western Bombchu is right by your starting location, so take that one out first if you are strong enough. If not, restart the Scenario and race to the southwestern Bombchu’s location.
Once you’ve finished defeating all of the Bombchus, you will have completed the mission and the enemy Commander’s gates will open up.
Convince Fiery Aeralfos to join you
Fiery Aeralfos will appear on the map. Make a point to get to it as swiftly as possible to prevent it from being defeated by the enemy army, or yours. All you need to do is approach it and it’ll join your side of the conflict.
Defeat the enemy Commander
You can find Impa in the Enemy Base Keep. You’ll need to grab the Boss Key from the South Field Keep before the Enemy Base will open for you. After you grab the Boss Key, approach the Enemy Base Keep’s gates and they’ll open automatically for you.
Defeat Manhandla to win
To defeat Manhandla, you need to wait until its stalks turns green and then hit them with the Boomerang. Once you’ve hit all four, Manhandla will uproot and its Weak Point Mark will be revealed. Hit it with a handful of Weak Point Smashes and you’ll make short work of the monstrous man-eater.
Defeat the Rally Captain
After Manhandla appears, a Rally Captain will enter the field. Rally Captains boost the morale of enemy troops, so taking them out swiftly should be high on your priority list.
E-7
Defeat the Moblin Forces!
Limited Warrior: Link (Recommended Level: 25)
Adventure Battle Scenarios are almost identical to the Scenarios in Legend Mode. You have the full battlefield at your disposal, an enemy Captain/Warrior to defeat to win the Scenario, and teammates to assist you. The key difference is that you typically have only a single mission that appears at the start of the battle, which makes up the bulk of the entire fight. Once that mission is completed, you need only to defeat the enemy Commander to win the Scenario.

Faron Woods
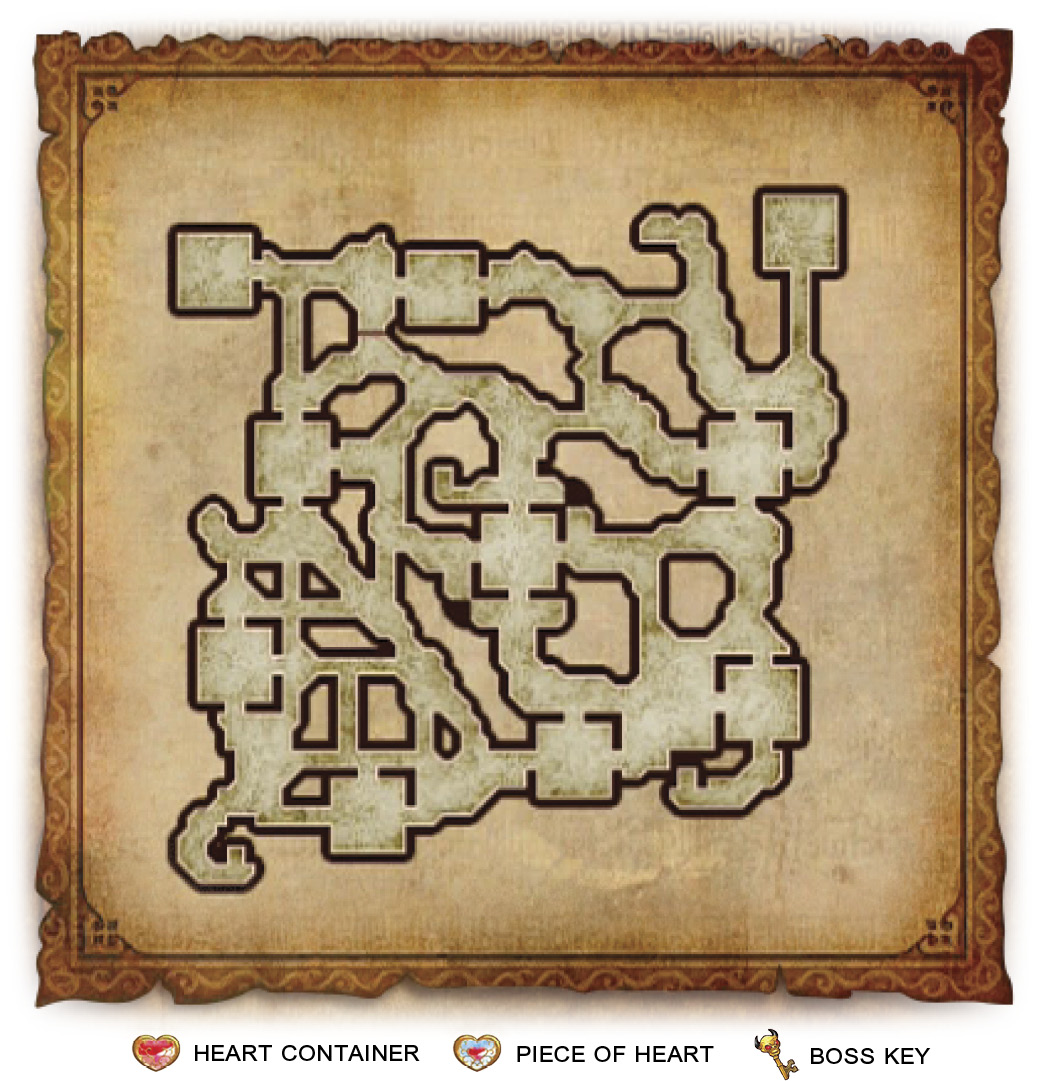
Victory ConditionsDefeat Moblin. Defeat ConditionsIf Sheik flees or the Allied Base falls. |
Defend allied Keeps and defeat enemy forces
Your job is to stop the enemy forces from taking any of your Keeps. If they do, they’ll gain a morale boost, making the battle that much harder, you’ll then be tasked with recapturing that Keep.
There are two Bombchus on the map that will begin going after your Keeps one at a time. The central Bombchu will move first, followed by the northern one. Take them out in that order and waste no time doing so; if one of them blows up in a Keep, you will instantly lose it. Once you’ve finished defeating all of the Bombchus, you will have completed the mission and the enemy Commander’s gates will open up.
Defeat the enemy Commander
You can find Moblin in the Enemy Base Keep.
E-8
Defeat 400 enemies within 10 minutes!
Limited Warrior: Lana (Recommended Level: 25)
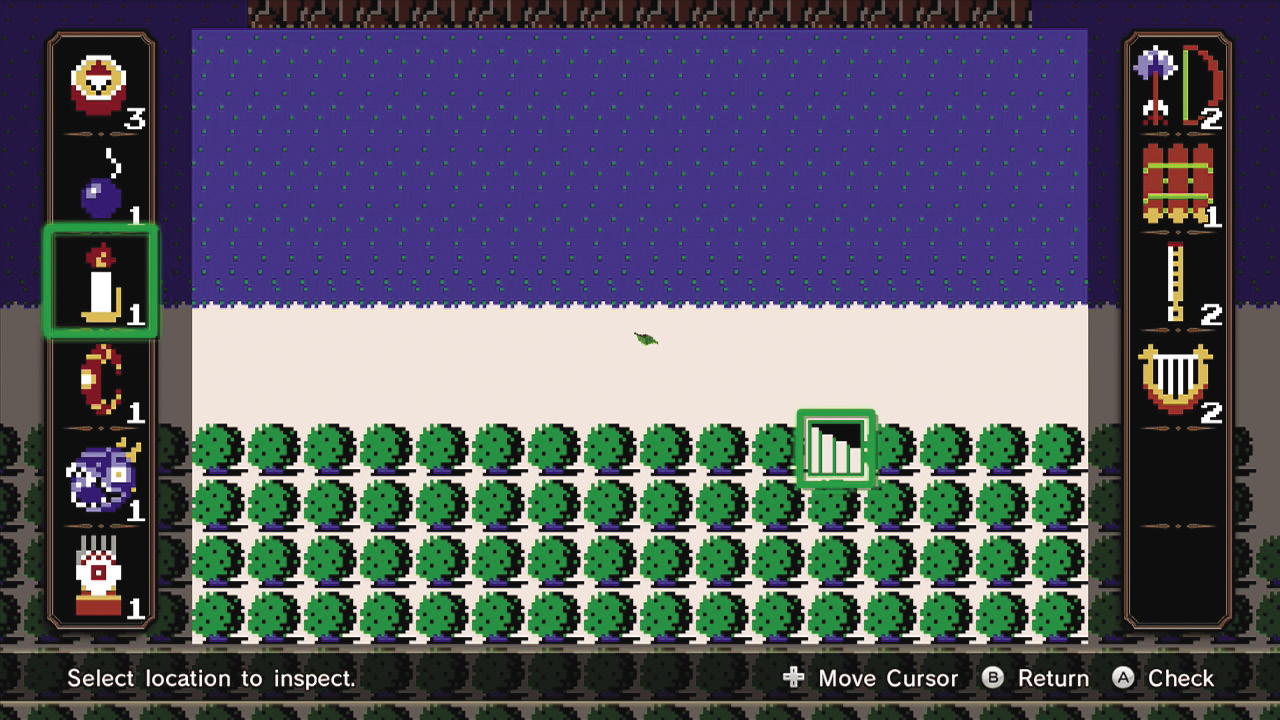
This is one of the more straightforward Scenario types in Adventure Mode. Defeat the listed number of enemies in the given amount of time to win. Don’t linger on individual enemies and do your best to ignore enemy Warriors, Captains, and Bosses; they are only there to distract you from your goal. Enemy Warriors and Captains will boost the morale of the enemy troops currently in the battlefield, but unless you’re struggling to survive, you can feel free to carry on defeating enemies as usual.
E-9
Defeat the enemy unit!
Limited Warrior: Link (Recommended Level: 30)
UnlockablesLink—Heart Container (in the Exit Square) Search ItemCandle: Link’s Silver Gauntlet (Victory Reward) |

Adventure Battle Scenarios are almost identical to the Scenarios in Legend Mode. You have the full battlefield at your disposal, an enemy Captain/Warrior to defeat to win the Scenario, and teammates to assist you. The key difference is that you typically have only a single mission that appears at the start of the battle, which makes up the bulk of the entire fight. Once that mission is completed, you need only to defeat the enemy Commander to win the Scenario.
Eldin Caves
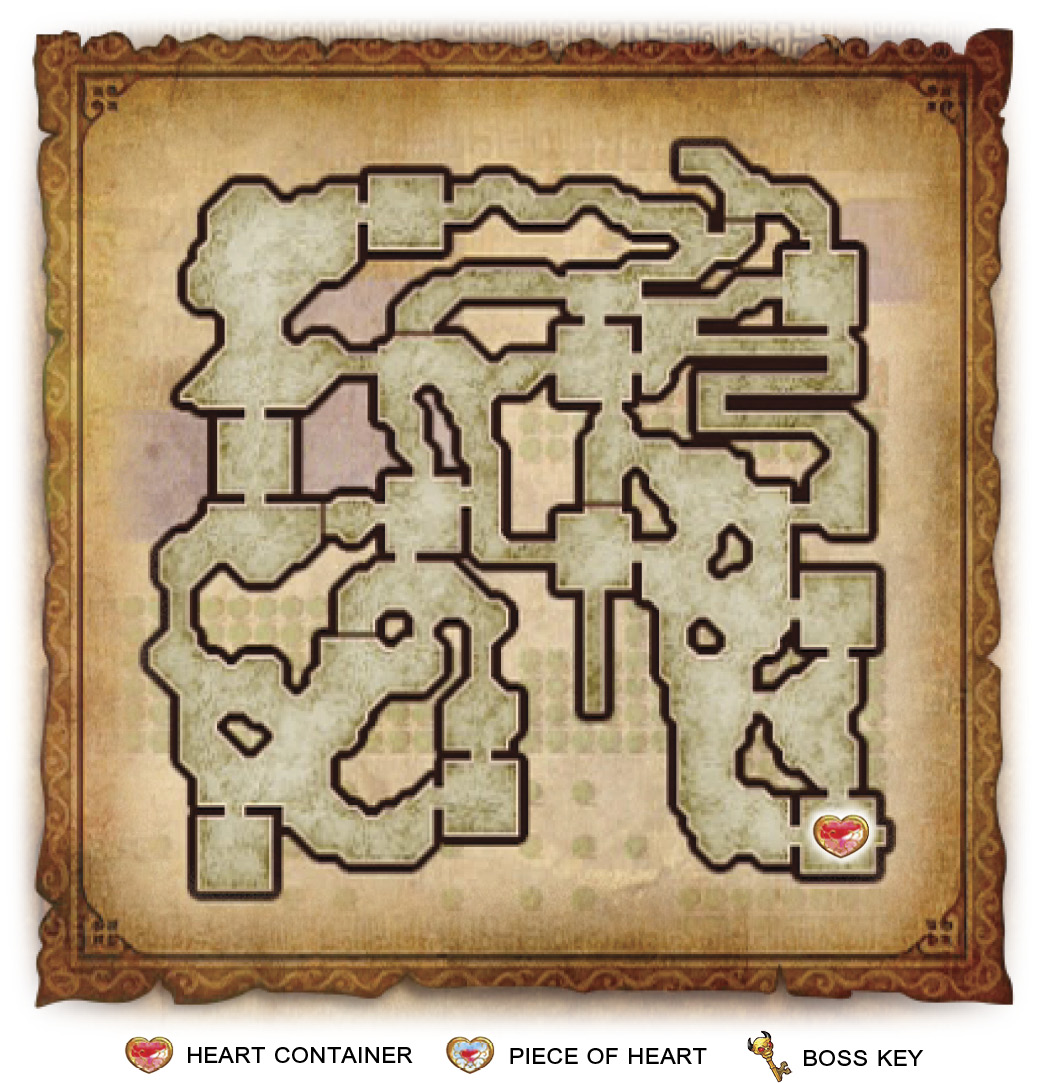
Victory ConditionsDefeat Volga. Defeat ConditionsIf Zelda flees or the Allied Base falls. |
Defeat all enemy Captains to lure the Commander
You need to defeat the three Captains that are marked on your minimap to progress the mission.
An allied Cucco appears shortly after the start of the Scenario. Keep it safe and it’ll continuously call more Cucco fighters to fight for your army as you defeat more enemies.
Defeat the enemy Commander
You can find Volga in the Enemy Base Keep.
E-10
Fight as a warrior of fire!
Limited Warrior: Darunia (Recommended Level: 25)
UnlockablesDarunia—Heart Container (in the Lakeside Keep) Darunia—Piece of Heart (in the King’s Hall Keep) Search ItemPower Bracelet: Princess Ruto (Victory Reward) |
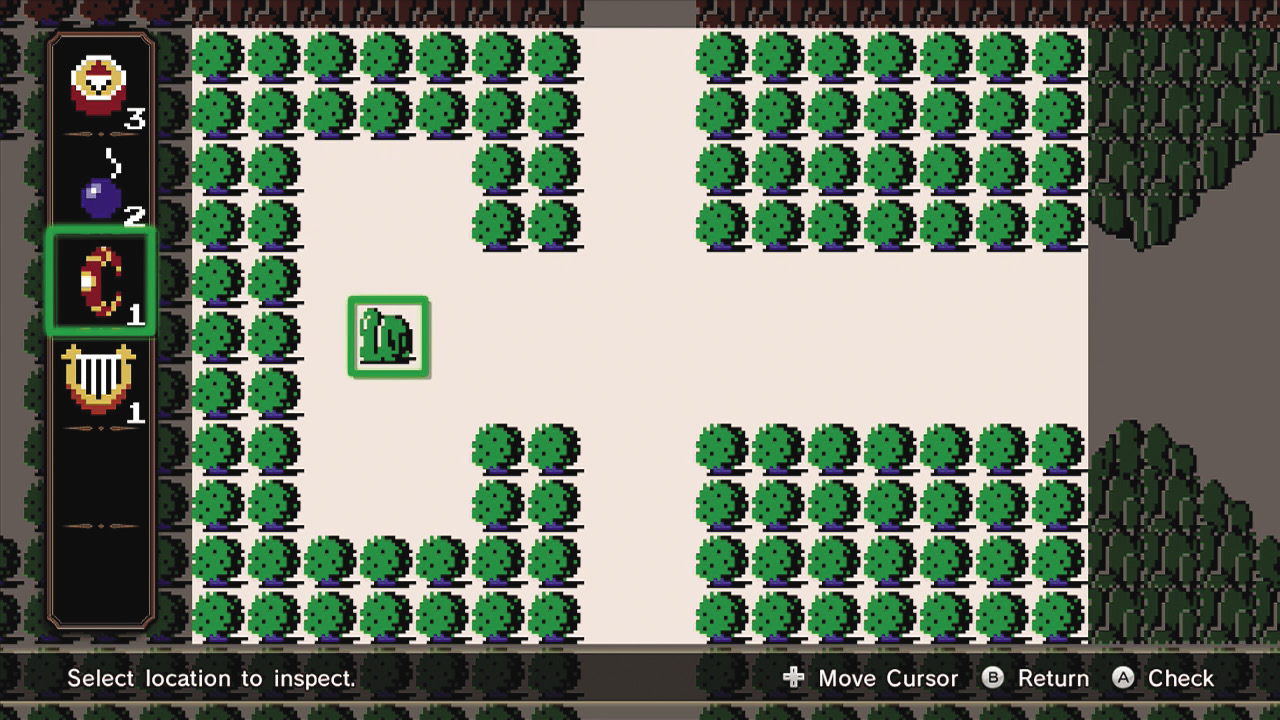
Adventure Battle Scenarios are almost identical to the Scenarios in Legend Mode. You have the full battlefield at your disposal, an enemy Captain/Warrior to defeat to win the Scenario, and teammates to assist you. The key difference is that you typically have only a single mission that appears at the start of the battle, which makes up the bulk of the entire fight. Once that mission is completed, you need only to defeat the enemy Commander to win the Scenario.
Lake Hylia
Victory ConditionsDefeat Stalmaster. Defeat ConditionsIf Zelda flees or the Allied Base falls. |
Defeat all enemy Captains to lure the Commander
You need to defeat the three Captains that are marked on your minimap to progress the mission.
Convince Icy Big Poe to join you
Icy Big Poe will appear on the map. Make a point to get to it as swiftly as possible to prevent it from being defeated by the enemy army, or yours. All you need to do is approach it and it’ll join your side of the conflict.
Defeat the Summoner immediately
As soon as you finish defeating the three enemy Captains, a Summoner enters the battlefield. It has the ability to summon Captains directly to your location. If you’re not struggling to defeat the Captains, don’t worry about rushing over to take out the Summoner. You can keep exploring the map to find all the secrets before wrapping up this Scenario.
Defeat the enemy Commander
You can find Stalmaster in the Enemy Base Keep.
E-11
Defeat 500 enemies within 10 minutes!
Difficulty: Easy
This is one of the more straightforward Scenario types in Adventure Mode. Defeat the listed number of enemies in the given amount of time to win. Don’t linger on individual enemies and do your best to ignore enemy Warriors, Captains, and Bosses; they are only there to distract you from your goal. Enemy Warriors and Captains will boost the morale of the enemy troops currently in the battlefield, but unless you’re struggling to survive, you can feel free to carry on defeating enemies as usual.
E-12
Defeat the warriors of time!
Limited Warrior: Zelda (Recommended Level: 25)
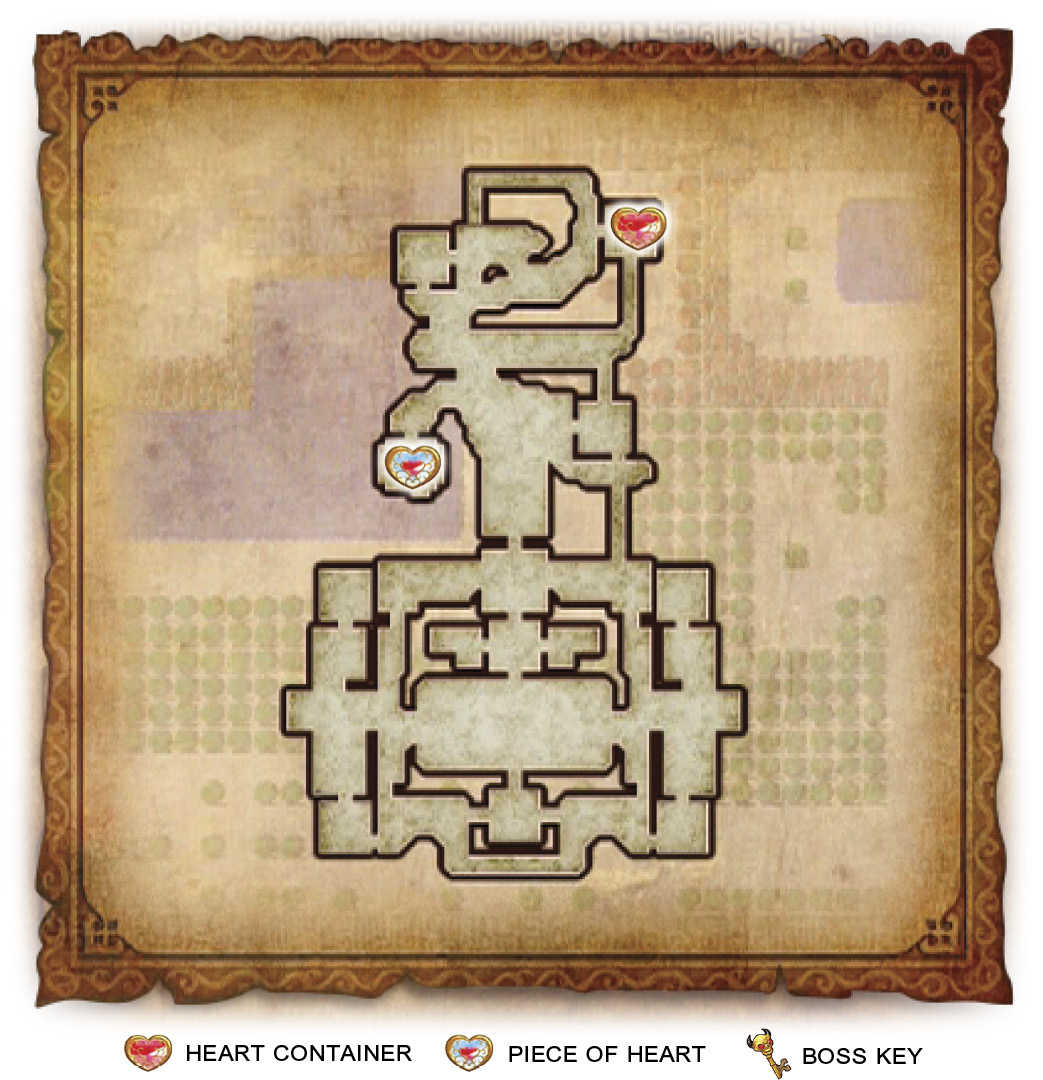
UnlockablesZelda—Heart Container (in the King’s Hall Keep) Zelda—Piece of Heart (in the Lakeside Keep) Search ItemCandle: Zelda’s Wind Waker (Victory Reward) |
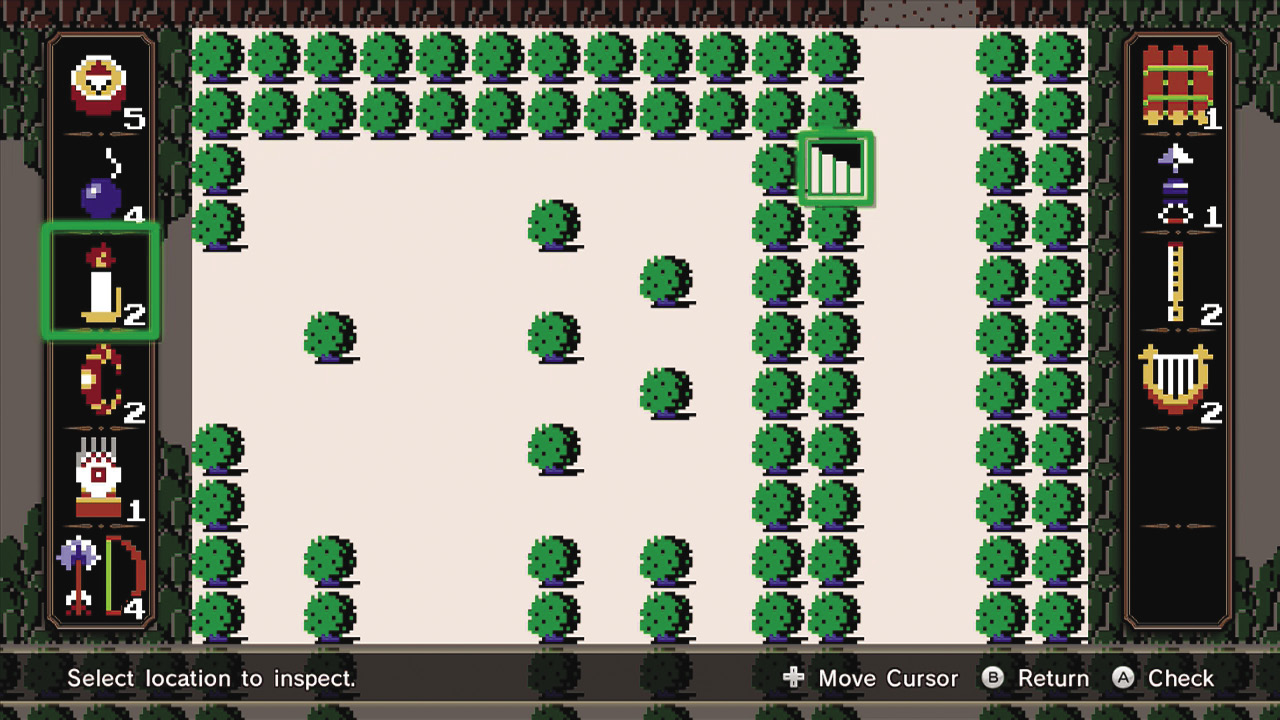
Adventure Battle Scenarios are almost identical to the Scenarios in Legend Mode. You have the full battlefield at your disposal, an enemy Captain/Warrior to defeat to win the Scenario, and teammates to assist you. The key difference is that you typically have only a single mission that appears at the start of the battle, which makes up the bulk of the entire fight. Once that mission is completed, you need only to defeat the enemy Commander to win the Scenario.
Lake Hylia
Defend allied Keeps and defeat enemy forces
Your job is to stop the enemy forces from taking any of your Keeps. If they do, they’ll gain a morale boost, making the battle that much harder, and you’ll then be tasked with recapturing that Keep.
There are three Bombchus on the map that will begin going after your Keeps one at a time. The south Bombchu will move first, followed by the eastern one, then the northern one. Take them out in that order and waste no time doing so; if one of them blows up in a Keep, you will instantly lose it. Once you’ve finished defeating all of the Bombchus, you will have completed the mission and the enemy Commander’s gates will open up.
Defend Cucco while defeating enemies
An allied Cucco appears shortly after the start of the Scenario. Keep it safe and it’ll continuously call more Cucco fighters to fight for your army as you defeat more enemies.
Defeat the enemy Commander
You can find Darunia in the Enemy Base Keep.
E-13
Fight through the tribe quiz!
Quizzes are Scenarios where you have to answer three questions about a specific Zelda title or element in Hyrule Warriors. The questions will always be answered by defeating the enemy that matches the description. For example: a question could say, “Defeat the enemy that holds a shield.” Two enemies will appear: a Big Poe and a Shield Moblin. Just defeat the enemy holding the shield and you’ll have successfully answered the question. It’s that easy. Just be careful not to defeat the wrong enemy while fighting the right one and you’ll have no issues with these challenges.
Defeat the one who lives in water
The correct answer is Ruto.
Defeat the chief of the Sheikah tribe
The correct answer is Impa.
Defeat the one from the mountain
The correct answer is Darunia.
E-14
Watch out! All attacks are devastating!
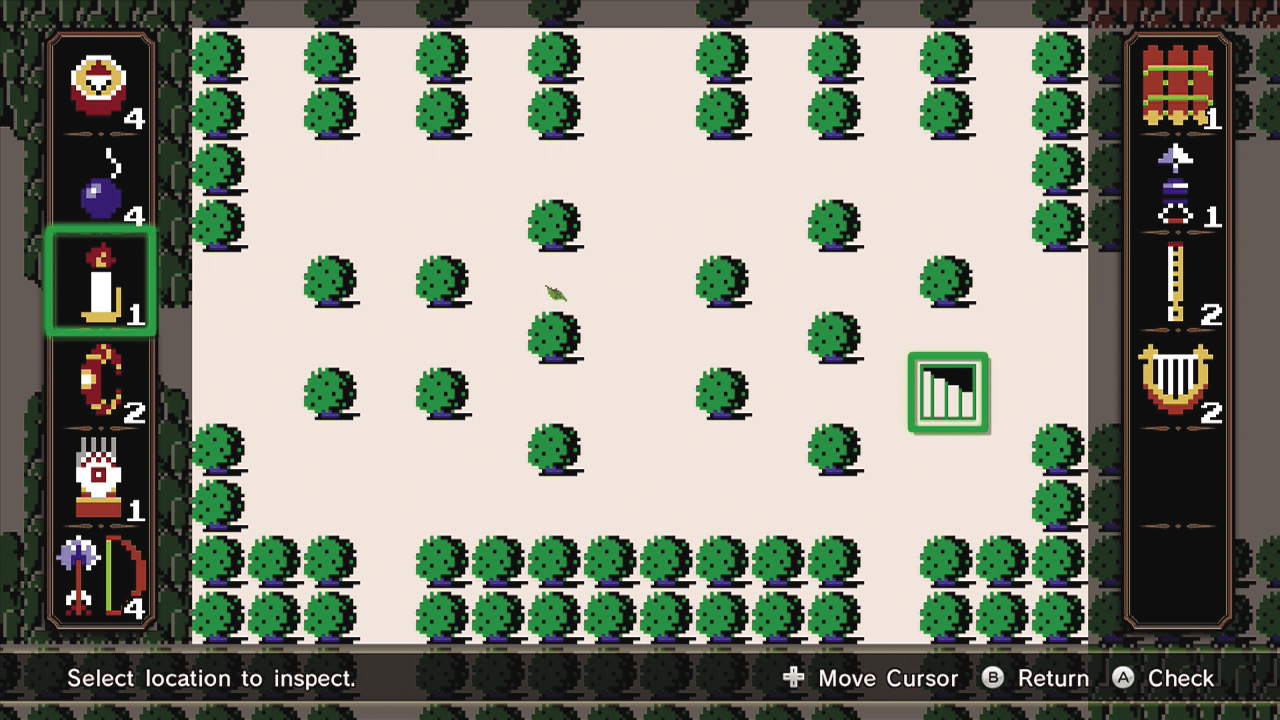
Watch Out! Scenarios can get pretty hairy if you don’t, well, watch out! Any enemy in these battles—even the basic soldier—can take you down to a quarter heart in a single hit. Basically, you can take two hits before you fail the Scenario. Luckily, these are incredibly straightforward fights, working similarly to the Defeat all enemies! Scenarios. Your goal is to defeat a certain number of Captains. Your best bet is to stick to ranged weapons and use your Bow and Arrow frequently. Carve your way into groups of enemies, instead of running through them, and don’t linger. You’ve got this!
Defeat 20 enemy Captains
The enemy Captains in need of slaying in this Scenario are Darknuts. They are sluggish, melee-focused monsters that will pose very little threat to you. They can throw their swords, but the swords fly rather slowly and the Darknuts telegraph the attack. Their sword hand glows bright blue just before they throw it.
Princess Ruto is actually a pretty good match-up for these stages. All of her Combo Attacks fill the bar underneath her Health Bar. If you press when you have a bit of that bar full, then press it again, Ruto will throw out a wave that can travel great distances, moves at incredible speeds, and will destroy all enemies it touches—it works a lot like Link’s Combo Attack with the Master and Hylian Sword. To top it off, once she depletes that bar, she’ll create an enormous wave that will sweep an area clean of any enemies you haven’t yet defeated. Make sure to use Combo Attacks frequently to fill up her water bar—you don’t even need to use them on enemies to fill up the bar—and you’ll be able to take out these enemies with little to no trouble.
E-15
Fight as a warrior of water!
Limited Warrior: Ruto (Recommended Level: 25)
UnlockablesRuto—Heart Container (In the King’s Hall Keep) Ruto—Piece of Heart (In the East Room Keep) Search Item |

Adventure Battle Scenarios are almost identical to the Scenarios in Legend Mode. You have the full battlefield at your disposal, an enemy Captain/Warrior to defeat to win the Scenario, and teammates to assist you. The key difference is that you typically have only a single mission that appears at the start of the battle, which makes up the bulk of the entire fight. Once that mission is completed, you need only to defeat the enemy Commander to win the Scenario.
Lake Hylia
Victory ConditionsDefeat Volga. Defeat ConditionsIf Darunia flees or the Allied Base falls. |
Capture all Keeps to weaken the enemy
You need to capture the Lakeside, Temple Face, and East Room Keeps to complete this mission. The enemy’s Keeps will continuously produce Aeralfos with boosted morale until you capture the marked Keeps, so don’t delay!
Defeat the Fortifier Captains
Shortly after the Scenario begins, Fortifier Captains will enter the battlefield. Take them out immediately or else they fortify any Keeps they come across, which makes it a royal pain to capture them.
Defeat the enemy Commander
You can find Volga in the Enemy Base Keep.
E-16
Defeat all enemies!
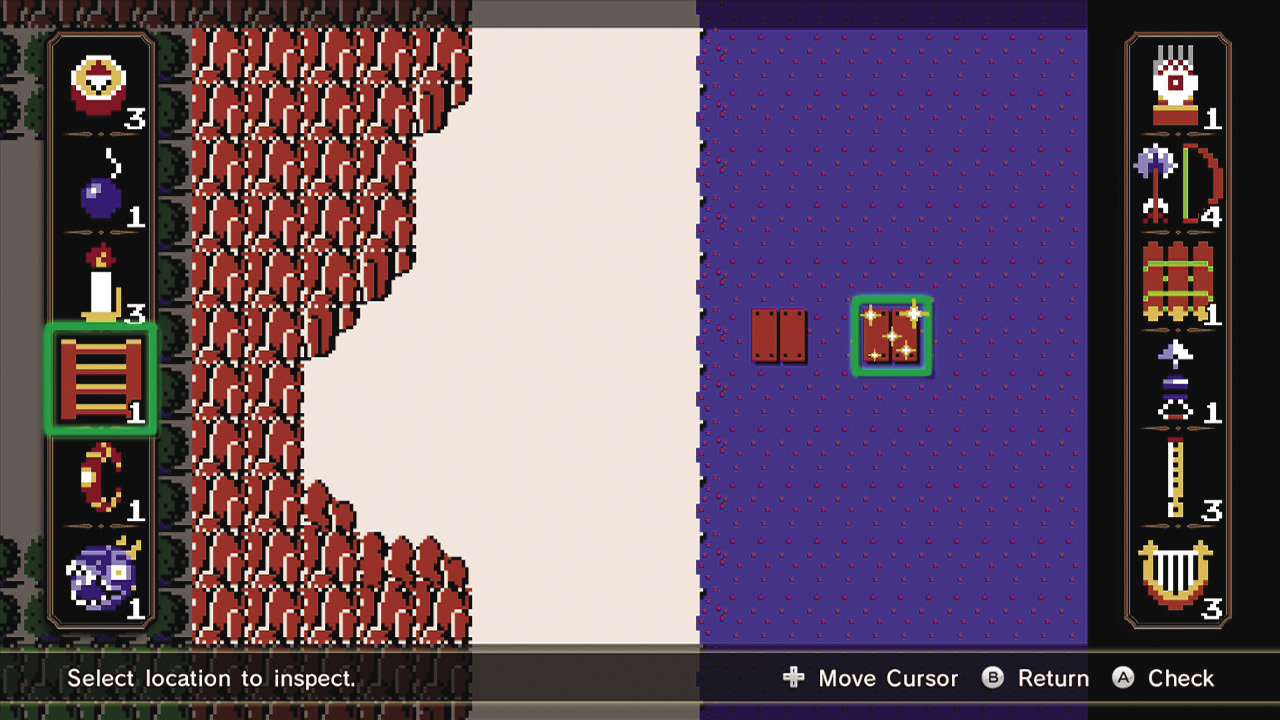
Defeat all Enemies! Scenarios are incredibly straightforward. If you’ve done Quiz and Defeat X Enemies Within X Time Scenarios, you’re pretty much prepared for what these will throw at you. Your job is to fight two or more Captains/Warriors/Bosses at the same time, defeat them, and then move on to another Keep to fight a new set of Captains/Warriors/Bosses. Avoid taking too much damage and defeat the enemies swiftly and you’ll walk out of these battles with an A-Rank.
Two ReDead Knights and a Fiery Aeralfos
ReDead Knights are the same as Gibdo in that they will constantly and relentlessly freeze you if you stand to close to them. You can tackle this group however you like, just be careful not to get stuck between two ReDead Knights or you’ll risk being continuously frozen by the pair.
Wizzro and a ReDead Knight
Take out the ReDead Knight first. Wizzro is a Warrior, so performing Weak Point Smashes on him is important for defeating him; the ReDead Knight’s freeze attack will only get in the way of your efforts to defeat Wizzro. Keep you guard up and bait Wizzro into attacking you. He’ll eventually reveal his Weak Point Mark. Perform some Weak Point Smashes to defeat him.
Argorok, Volga and a Fiery Aeralfos
Take out Volga and the Fiery Aeralfos before challenging the Argorok. Volga and the Fiery Aeralfos can be defeated in much the same way: Attack them until they evade you, then watch out for their counterattack. In Fiery Aeralfos’ case, it’ll fly into the air to escape your attacks. At this point, stand to its side or behind it and wait for it to either breath fire or do a downward stab—either will lead to its Weak Point Mark being revealed.
Once Volga and Fiery Aeralfos have been defeated, face the Argorok by staying on its side or behind it. This will allow you to avoid most of its attacks. When you see its tale glow blue, shoot it with your Hookshot to bring it down and reveal its Weak Point Mark. Perform some Weak Point Smashes to defeat it.