
Hyrule Warriors Guide Walkthrough Adventure Mode
A
A-1
Defeat 1,000 enemies within 10 minutes!
|
Unlockables Agitha—Heart Container (Victory Reward) Search Item None |
This is one of the more straightforward Scenario types in Adventure Mode. Defeat the listed number of enemies in the given amount of time to win. Don’t linger on individual enemies and do your best to ignore enemy Warriors, Captains, and Bosses; they are only there to distract you from your goal. Enemy Warriors and Captains will boost the morale of the enemy troops currently in the battlefield, but unless you’re struggling to survive, you can feel free to carry on defeating enemies as usual.
Quick Tips
This one gets chaotic really quickly—by the end you’ll have four of The Imprisoned on the battlefield at once. Your best bet is to use Link with the Master Sword. If you’re at full health and you use his ^^% combo, he’ll shoot out three beams instead of one. This makes it really ease to sweep an area and move on. Lingering in one place for too long is not really an option during this fight.
Be quick, be thorough, and avoid The Imprisoned and you’ll make it through this one.
A-2
Defend the allied Keeps!
Limited Warrior: Zelda and her Baton (Recommended Level: 45)
|
Unlockables Zelda—Piece of Heart (in the Stronghold Keep) Zelda—Heart Container (in the East Goron Keep) 1,000 KO Gold Skulltula Second Gold Skulltula Search Item Bomb: Zelda’s Glorious Baton (A-Rank) |

Adventure Battle Scenarios are almost identical to the Scenarios in Legend Mode. You have the full battlefield at your disposal, an enemy Captain/Warrior to defeat to win the Scenario, and teammates to assist you. The key difference is that you typically have only a single mission that appears at the start of the battle, which makes up the bulk of the entire fight. Once that mission is completed, you need only to defeat the enemy Commander to win the Scenario.
Death Mountain
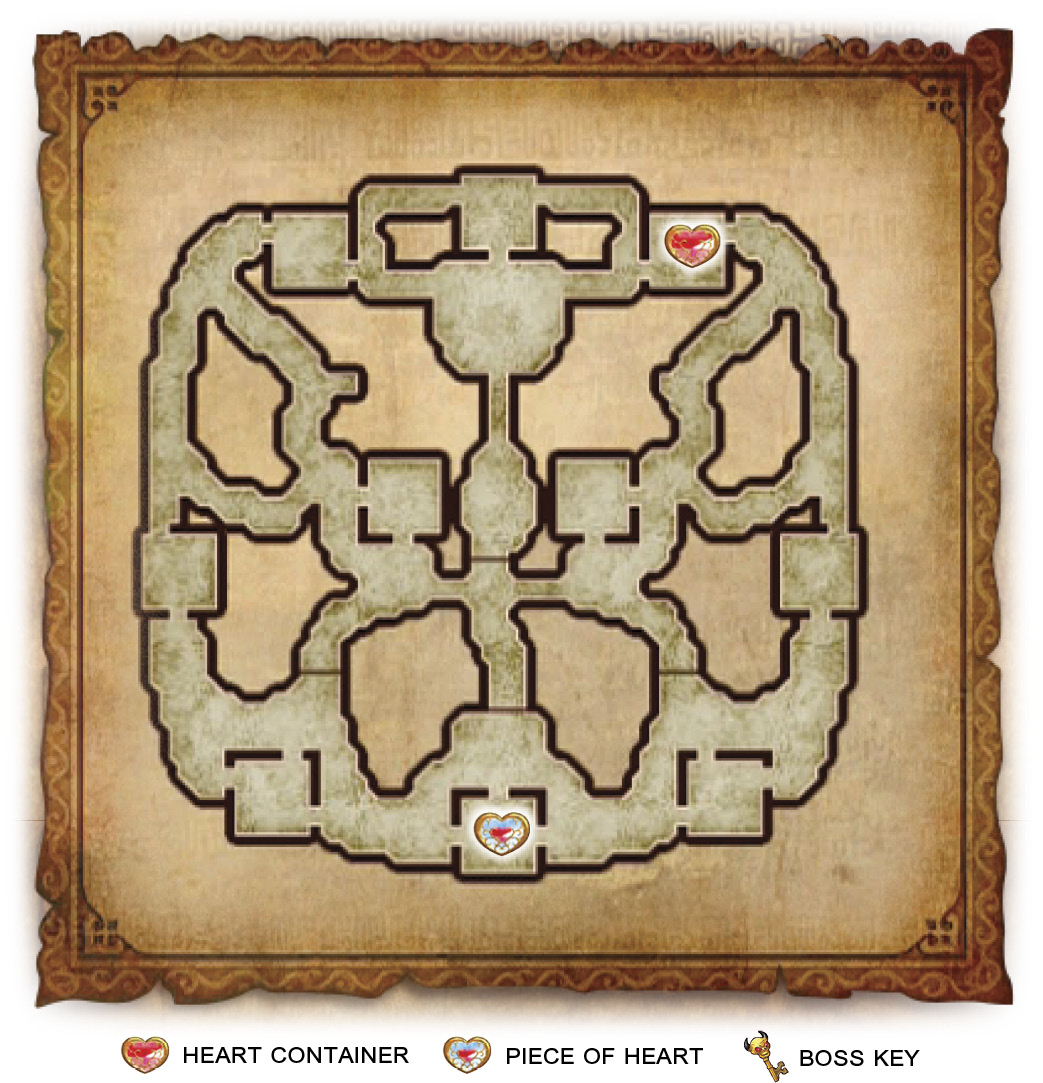
Defend allied Keeps and defeat enemy forces
Your job is to stop the enemy forces from taking any of your Keeps. If they do, they’ll gain a morale boost, making the battle that much harder, you’ll then be tasked with recapturing that Keep.
The enemy forces will use Bombchus to capture your Keeps. Focus on the Bombchus that have arrows on the minimap; these Bombchus are active and are making their move toward one of your Keeps, so stopping them should be top priority.
Start with the Bombchu that’s right by your starting position, just north of the Stronghold Keep. After defeating that Bombchu, head west through the Allied Base, then head east to the W. Boulder Keep. The second Bombchu’s destination is that Keep, so intercept it on its way there, or destroy it while it’s in the Keep. The final Bombchu has a long path leading from the West Goron Keep to the Allied Base, so you shouldn’t have any trouble destroying that one.
After destroying the Bombchus, begin sweeping the map for any Captains that are trying to capture your Keeps.
Defeat the enemy Commander
You can find Ganondorf in the Enemy Base Keep.
A-3
Fight as a warrior of darkness!
|
Unlockables Zelda—Piece of Heart (in the Central Keep) 1,000 KO Gold Skulltula Second Gold Skulltula Search Item Bombs: Agitha’s Princess Parasol (A-Rank) |
Adventure Battle Scenarios are almost identical to the Scenarios in Legend Mode. You have the full battlefield at your disposal, an enemy Captain/Warrior to defeat to win the Scenario, and teammates to assist you. The key difference is that you typically have only a single mission that appears at the start of the battle, which makes up the bulk of the entire fight. Once that mission is completed, you need only to defeat the enemy Commander to win the Scenario.
Temple of the Sacred Sword
|
Victory Conditions Defeat Sheik. Defeat Conditions If Cia flees or Allied Base falls. |
Defeat all enemy Captains to lure the Commander
You need to defeat the three Captains that are marked on your minimap to progress the mission.
Before you even start with this mission, race to Cia’s side and defeat any Captains around her. Impa will eventually come out and attack Cia directly, which is a fight Cia won’t win, so try not to leave until after Impa has been beaten.
Once you’ve secured your ally’s safety, head to the Captain that is near the Allied Base. Several waves of Captains will come after the Allied Base, so make sure you’re paying close attention to it or you’ll lose it without realizing what happened.
Defeat the Manhandla Stalks
After you defeat the marked Captains, Manhandla Stalks will appear on the map and begin pelting the Allied Base with seeds. Don’t delay: Look for their location on the Battlefield Info screen and take them out immediately.
Defeat the enemy Commander
You can find Sheik in the Enemy Base Keep.
A-4
Fight the chosen ones!
Limited Warrior: Agitha (Recommended Level: 50)
|
Unlockables Agitha—Heart Container (in the East Field Keep) Agitha—Piece of Heart (In the Castle Keep) Search Item Bombs: Agitha - Princess Parasol (A-Rank) |
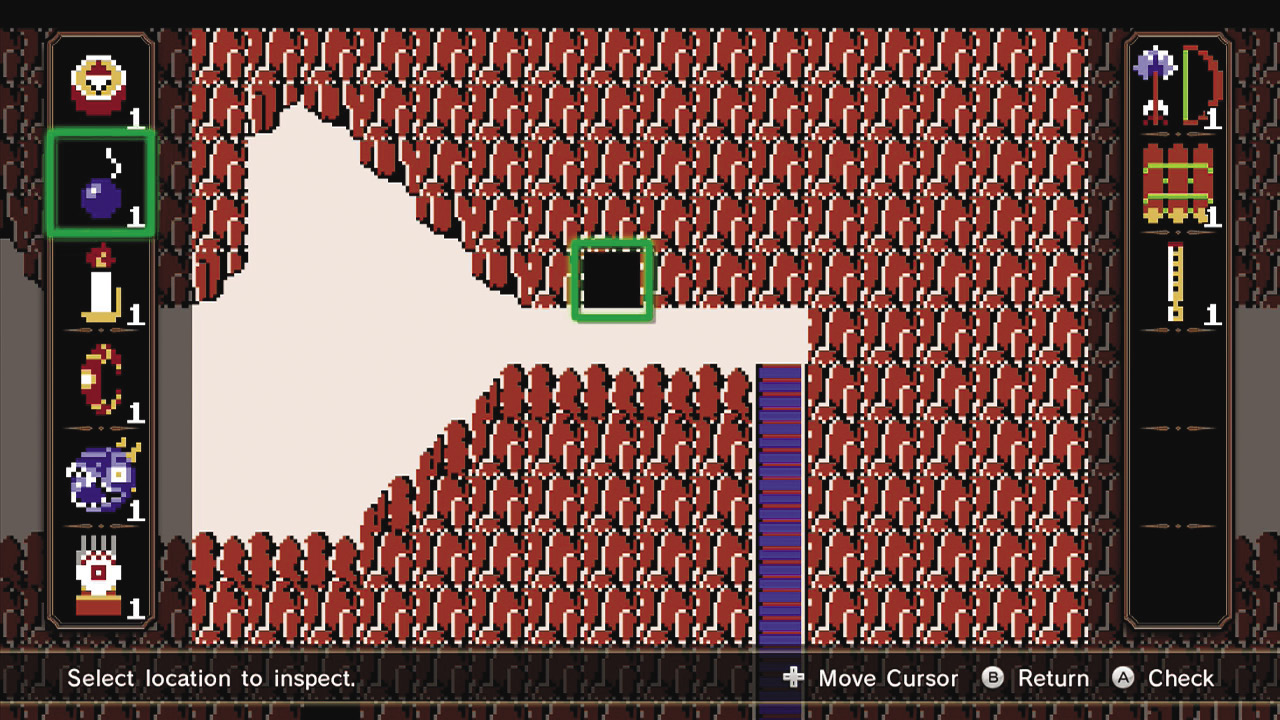
Adventure Battle Scenarios are almost identical to the Scenarios in Legend Mode. You have the full battlefield at your disposal, an enemy Captain/Warrior to defeat to win the Scenario, and teammates to assist you. The key difference is that you typically have only a single mission that appears at the start of the battle, which makes up the bulk of the entire fight. Once that mission is completed, you need only to defeat the enemy Commander to win the Scenario.
Ganon’s Tower

|
Victory Conditions Defeat Link. Defeat Conditions If Cia flees or Allied Base falls. |
Mission Briefing
This is a very straightforward battle, but still an incredibly difficult one. The challenge comes from Agitha being on the weaker side of the Warrior spectrum. Her Regular Attacks aren’t very powerful and they have a very limited range. To remedy this, you must try to add as many “Strength” Weapon Skills to your strongest weapon to make her Combo Attacks as strong as possible. Our suggestion is that you don’t even try this fight until you have her second Parasol unlocked. This is a challenging one, but you can do it!
Defeat all enemy Captains to lure the Commander
You need to defeat the three Captains that are marked on your minimap to progress the mission.
Defeat the Manhandla Stalks
After you defeat all three Captains, Manhandla Stalks will appear on the map and begin pelting the Allied Base with seeds. Don’t delay: Look for their location on the Battlefield Info screen and take them out immediately.
Defeat the enemy Commander
You can find Link in the Enemy Base Keep.
A-5
Fight through the Triforce quiz!
|
Unlockables Bombs Fi—Piece of Heart (A-Rank) Search Item None |
Quizzes are Scenarios where you have to answer three questions about a specific Zelda title or element in Hyrule Warriors. The questions will always be answered by defeating the enemy that matches the description. For example: a question could say, “Defeat the enemy that holds a shield.” Two enemies will appear: a Big Poe and a Shield Moblin. Just defeat the enemy holding the shield and you’ll have successfully answered the question. It’s that easy. Just be careful not to defeat the wrong enemy while fighting the right one and you’ll have no issues with these challenges.
Defeat the owner of the Triforce of Power
The correct answer is Ganondorf.
Defeat the owner of the Triforce of Wisdom
The correct answer is Zelda.
Defeat the owner of the Triforce of Courage
The correct answer is Link.
A-6
Dungeon 9: Defeat the Demon King!
Limited Warrior: Link (Recommended Level: 40)
|
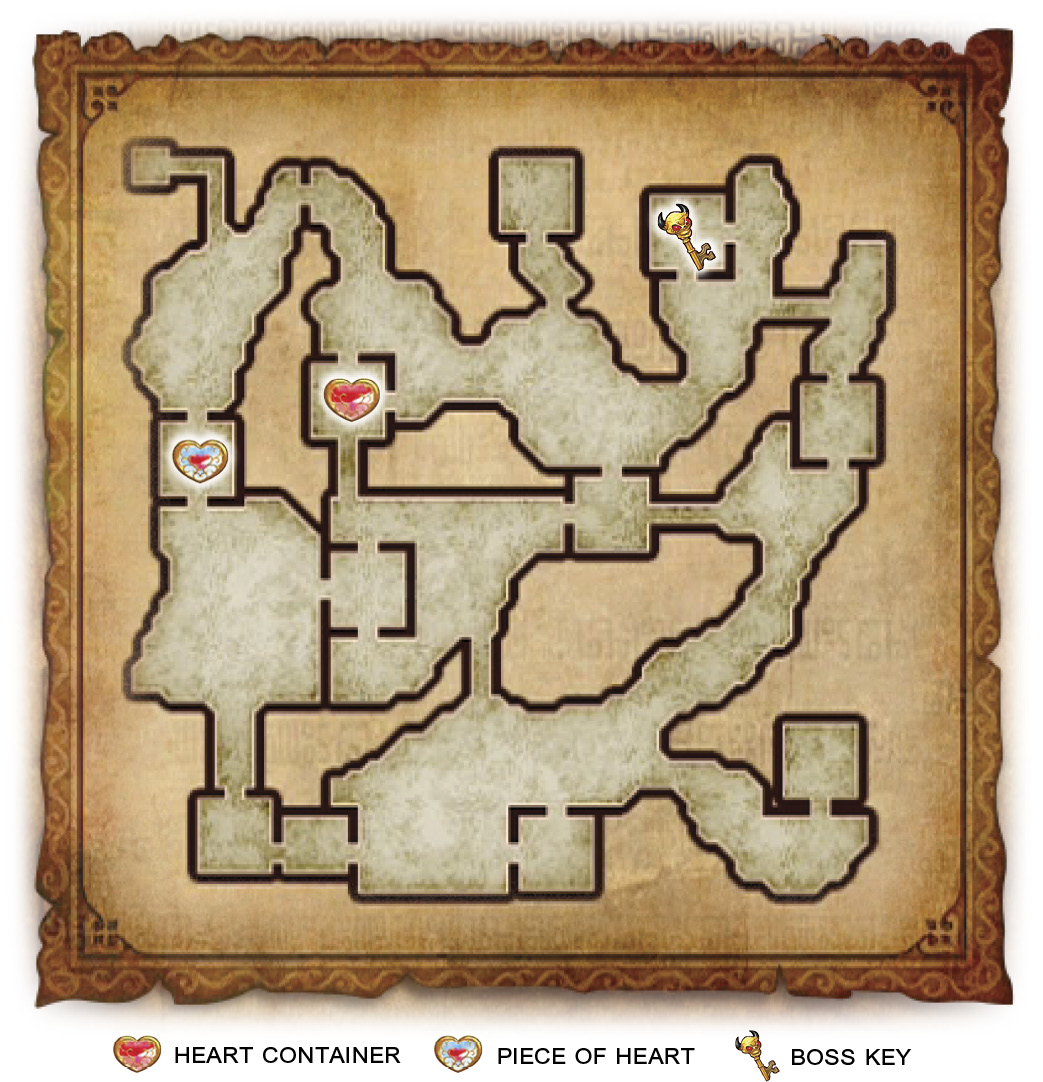
Unlockables Link—Heart Container (in the W. Rockface Keep) Link—Piece of Heart (in the Abandoned Fort) 1,000 KO Gold Skulltula Second Gold Skulltula Boss Key (in the North Field Keep) Search Item None |

Dungeon Scenarios play the same as Adventure Battles, but with a twist: There’s a Giant Boss at the end of each one of them, and you must grab the Boss Key hidden in one of the enemy Keeps to open the Enemy Base’s gates. Other than that, you can expect the same kind of battle you’d get from an Adventure Battle.
Ganon’s Tower
|
Victory Conditions Defeat Cia. Defeat Conditions If Zelda flees or Allied Base falls. |
Defend allied Keeps and defeat enemy forces
Your job is to stop the enemy forces from taking any of your Keeps. If they do, they’ll gain a morale boost, making the battle that much harder. You’ll then be tasked with recapturing that Keep.
The enemy forces will use Bombchus to capture your Keeps. Focus on the Bombchus that have arrows on the minimap; these Bombchus are active and are making their move toward one of your Keeps, so stopping them should be top priority.
Ignore the Bombchu in the north and attack the southern Bombchu near your starting location while keeping an eye on the eastern one. The eastern Bombchu will reach its destination (the Central Keep) before the other two will, but the southern Bombchu is right near your starting location, so taking it out first should be your priority.
Destroy the eastern Bombchu, then the northern one. Now, focus on clearing your Keeps of Captains that have undoubtedly invaded them. Don’t linger in one spot for too long and focus on Keeps that have a lot of enemy Captains in them, instead of trying to protect your Keeps with only one or two enemy Captains.
Once you’ve defeated the Bombchus, the mission will be complete. Now, focus on protecting your Keeps before you challenge Cia. Your troops will start this Scenario with lowered morale, so they won’t be able to put up much of a fight against Cia’s army. For every 100 KOs you get, your troops will receive a small boost in morale. Defeat as many enemy soldiers as you can, as fast as you can to get your soldiers’ morale to a point where they can protect themselves.
Defeat the enemy Commander
You can find Cia in the Enemy Base Keep. You won’t be able to open the Keep until you grab the Boss Key from the North Field Keep first, however.
Defeat Ganon to win
As soon as you take out Cia, Ganon will enter the fray. Pay attention to his attacks: He emulates every Giant Boss except for The Imprisoned, and you must hit him with item that the Giant Boss he’s emulating is weak to. As a refresher, if he holds out his right hand and begins charging a fireball, race in and throw Bombs at his hand. If he lifts his left hand and begins charging a blue energy ball, dodge out of the way of the attack and shoot his hand with the Bow. If his shoulder spikes open up and begin firing small spikes, hit them with the Boomerang as soon as they are finished firing. If he flies into the air, pull him down with the Hookshot.
Once you’ve destroyed each of his parts, he’ll begin performing attacks that make the gem on his head glow. When you see it glow, shoot him with your Bow to make him reveal his Weak Point Mark. Perform a handful of Smashes and you’ll defeat him. Defeating Ganon means you have successfully won the Scenario. Congratulations!
A-7
Go alone—despite the danger!
|
Unlockables Fi—Heart Container (A-Rank) Ghirahim—Piece of Heart (in the Southwest Keep) Search Item None |
Adventure Battle Scenarios are almost identical to the Scenarios in Legend Mode. You have the full battlefield at your disposal, an enemy Captain/Warrior to defeat to win the Scenario, and teammates to assist you. The key difference is that you typically have only a single mission that appears at the start of the battle, which makes up the bulk of the entire fight. Once that mission is completed, you need only to defeat the enemy Commander to win the Scenario.
Sealed Grounds

|
Victory Conditions Defeat Wizzro. Defeat Conditions If Zelda flees or Allied Base falls. |
Defeat all enemy Captains to lure the Commander
You need to defeat the three Captains that are marked on your minimap to progress the mission.
Escort Cucco Chick to Adult Cucco
The Cucco Chick starts in a random Keep; look up its location in the Battlefield Info screen. Approach the Cucco Chick to get it moving. Escort it to its destination to complete the mission. If you fail to rescue it, the Adult Cucco will become enraged, attacking everyone everywhere it goes. If you succeed, Adult Cucco will begin attacking the enemy forces.
Defeat the enemy Commander
You can find Wizzro in the Enemy Base Keep.
A-8
Prevent the sorceress’s scheme!
|
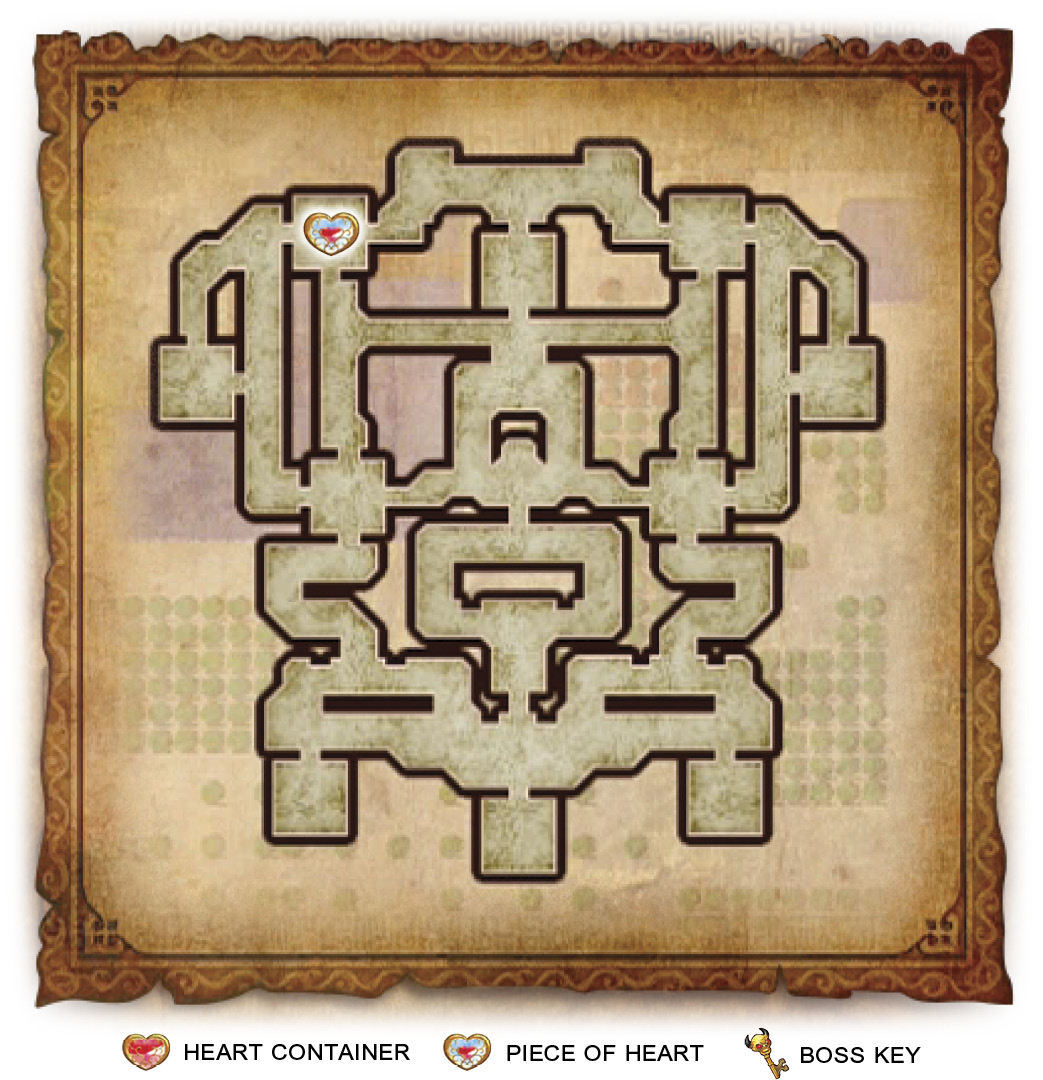
Unlockables Zant—Piece of Heart (in the Northwest Keep) 1,000 KO Gold Skulltula Second Gold Skulltula Search Item Bombs: Midna—Heart Container (A-Rank) |
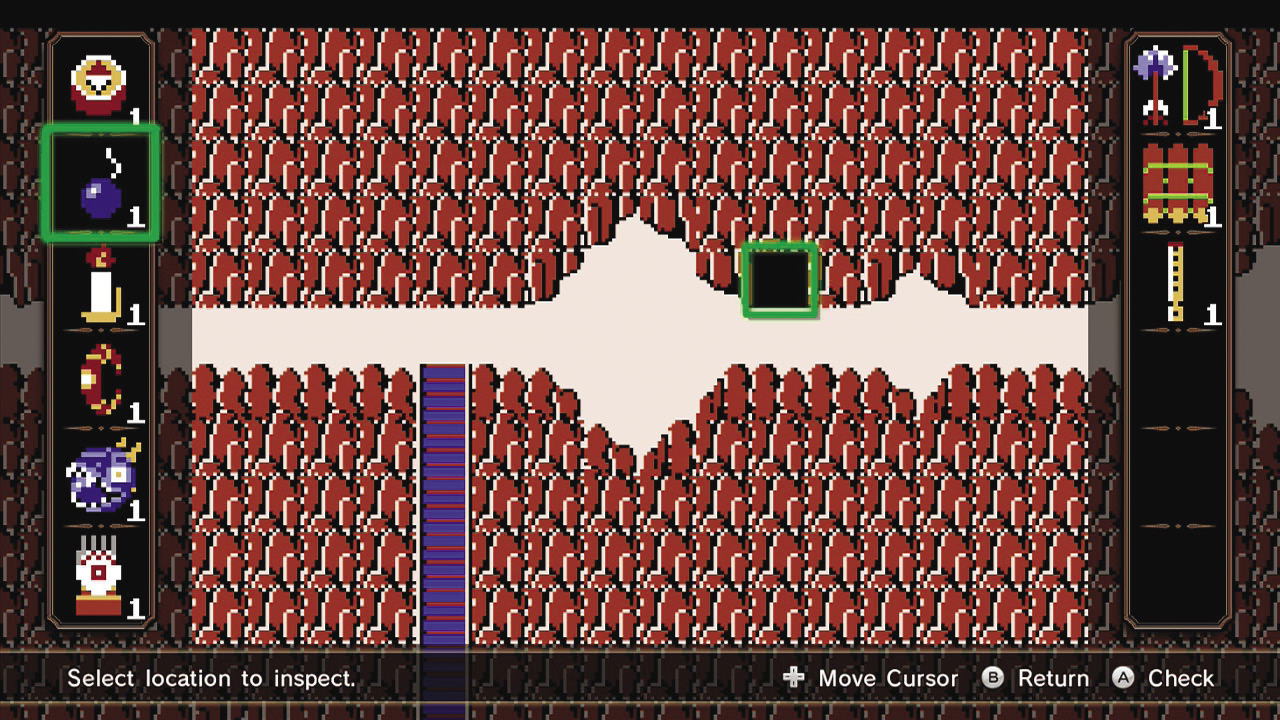
Adventure Battle Scenarios are almost identical to the Scenarios in Legend Mode. You have the full battlefield at your disposal, an enemy Captain/Warrior to defeat to win the Scenario, and teammates to assist you. The key difference is that you typically have only a single mission that appears at the start of the battle, which makes up the bulk of the entire fight. Once that mission is completed, you need only to defeat the enemy Commander to win the Scenario.
Temple of Souls
|
Victory Conditions Defeat Wizzro. Defeat Conditions If Ganondorf or Volga flees. |
Save the Stranded Allied Forces!
One of your allies is stuck on the west side of the battlefield. You need to get over there and defeat the marked enemy Captains to free your ally.
An allied Cucco appears shortly after the start of the Scenario. Keep it safe and it’ll continuously call more Cucco fighters to fight for your army as you defeat more enemies.
Capture One of the Keeps and Break Through!
To reach your allies, you’ll first need to capture either the Northwest or Northeast Keep to gain access to the east side of the map.
After you capture one of the marked Keeps, another pair of marked Keeps will appear. You need to capture either the Southwest or Southeast Keep to reach your allies. Defeat the marked enemy Captains that are attacking your allies to complete the mission.
Defeat the Summoner immediately
As soon as you finish capturing the Keeps to break through to your allies, a Summoner enters the battlefield. It has the ability to summon Captains directly to your location. If you’re not struggling to defeat the Captains, don’t worry about rushing over to take out the Summoner.
Defeat the enemy Commander
You can find Cia in the Enemy Base Keep.
A-9
Weather the storm of enemy forces!!
Limited Warrior: Zelda and her Rapier (Recommended Level: 40)
|
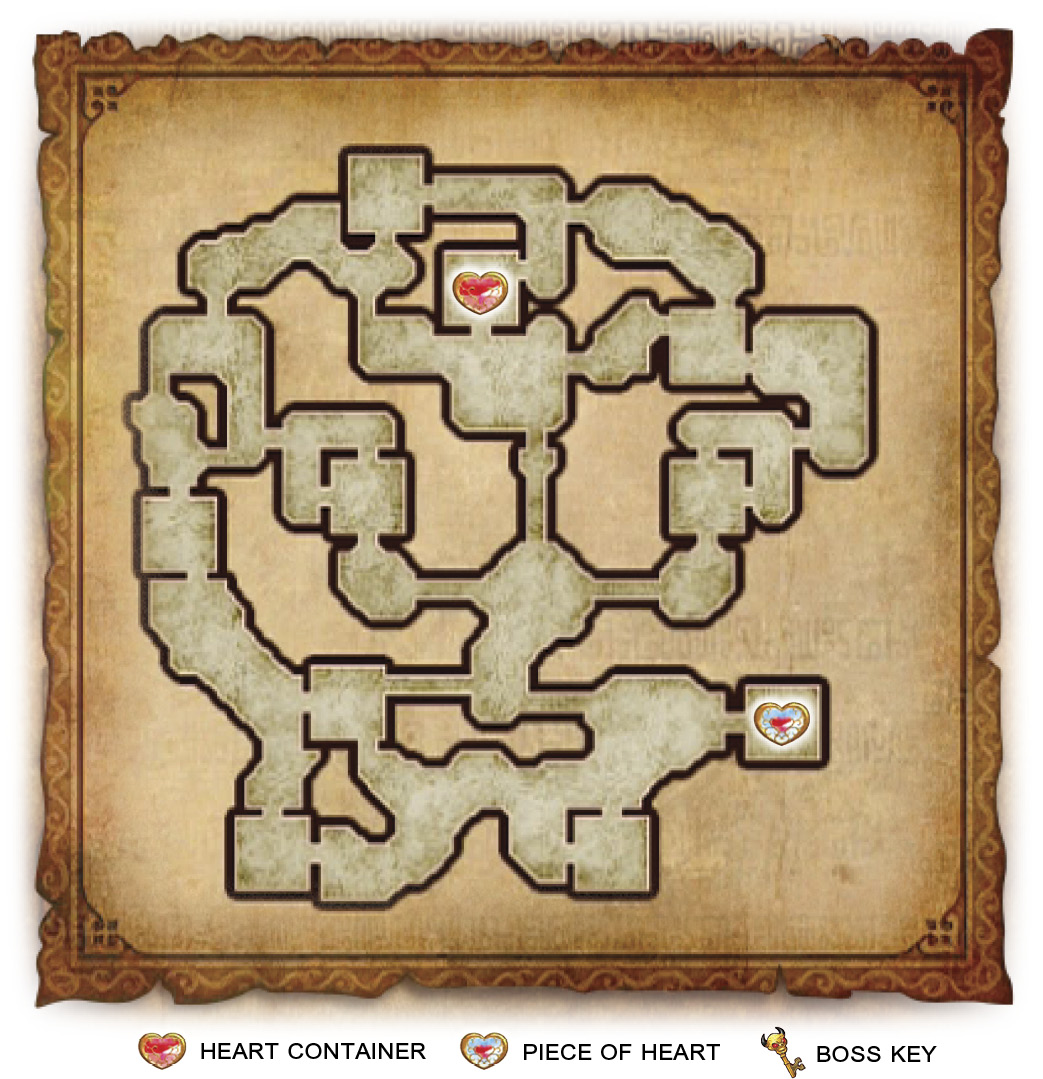
Unlockables Zelda—Heart Container (in the King’s Hall Keep) Zelda—Piece of Heart (in the Fairy Fountain Keep) Search Item Ice Arrow: Zelda’s Gleaming Rapier (A-Rank) |

Adventure Battle Scenarios are almost identical to the Scenarios in Legend Mode. You have the full battlefield at your disposal, an enemy Captain/Warrior to defeat to win the Scenario, and teammates to assist you. The key difference is that you typically have only a single mission that appears at the start of the battle, which makes up the bulk of the entire fight. Once that mission is completed, you need only to defeat the enemy Commander to win the Scenario.
Palace of Twilight
|
Victory Conditions Defeat Cia. Defeat Conditions If Agitha flees or the Allied Base falls. |
Defeat all enemy Captains to lure the Commander
You need to defeat the three Captains that are marked on your minimap to progress the mission.
Defeat the Messengers before they call in reinforcements
Messengers will appear on the field and attempt to make it to a Keep on the opposite side of the battlefield. Defeat them before they reach their destination to prevent them from calling in enemy reinforcements.
Defeat the siege Captains
Siege Captains will begin pouring out of enemy Keeps. They have the ability to capture your Keeps at a remarkable pace. That is why taking them out as they appear on the battlefield should be near the top of your list; the top should be capturing those Keeps to stem the flow of Siege Captains.
Defeat the enemy Commander
You can find Cia in the Enemy Base Keep.
A-10
Watch out! All attacks are devastating!
|
Unlockables Compass Fi—Heart Container (A-Rank) Search Item None |
Watch Out! Scenarios can get pretty hairy if you don’t, well, watch out! Any enemy in these battles—even the basic soldier—can take you down to a quarter heart in a single hit. Basically, you can take two hits before you fail the Scenario. Luckily, these are incredibly straightforward fights, working similarly to the Defeat all enemies! Scenarios. Your goal is to defeat a certain number of Captains. Your best bet is to stick to ranged weapons and use your Bow and Arrow frequently. Carve your way into groups of enemies, instead of running through them, and don’t linger. You’ve got this!
Defeat 30 enemy Captains!
The Captains you’ll face in this Scenario are Goron Captains. If you select Link and use his ^^% Combo Attack, this Scenario shouldn’t be an issue at all. Goron Captains have no projectiles to speak of, so defeating them should be a breeze. Be careful around Goron artillery (the Gorons with stones in their hands); if you don’t take damage from one of their projectiles, you’ll complete this battle with ease.
A-11
Defend the allied Keeps!
Limited Warrior: Lana and her Book of Sorcery (Recommended Level: 40)
|
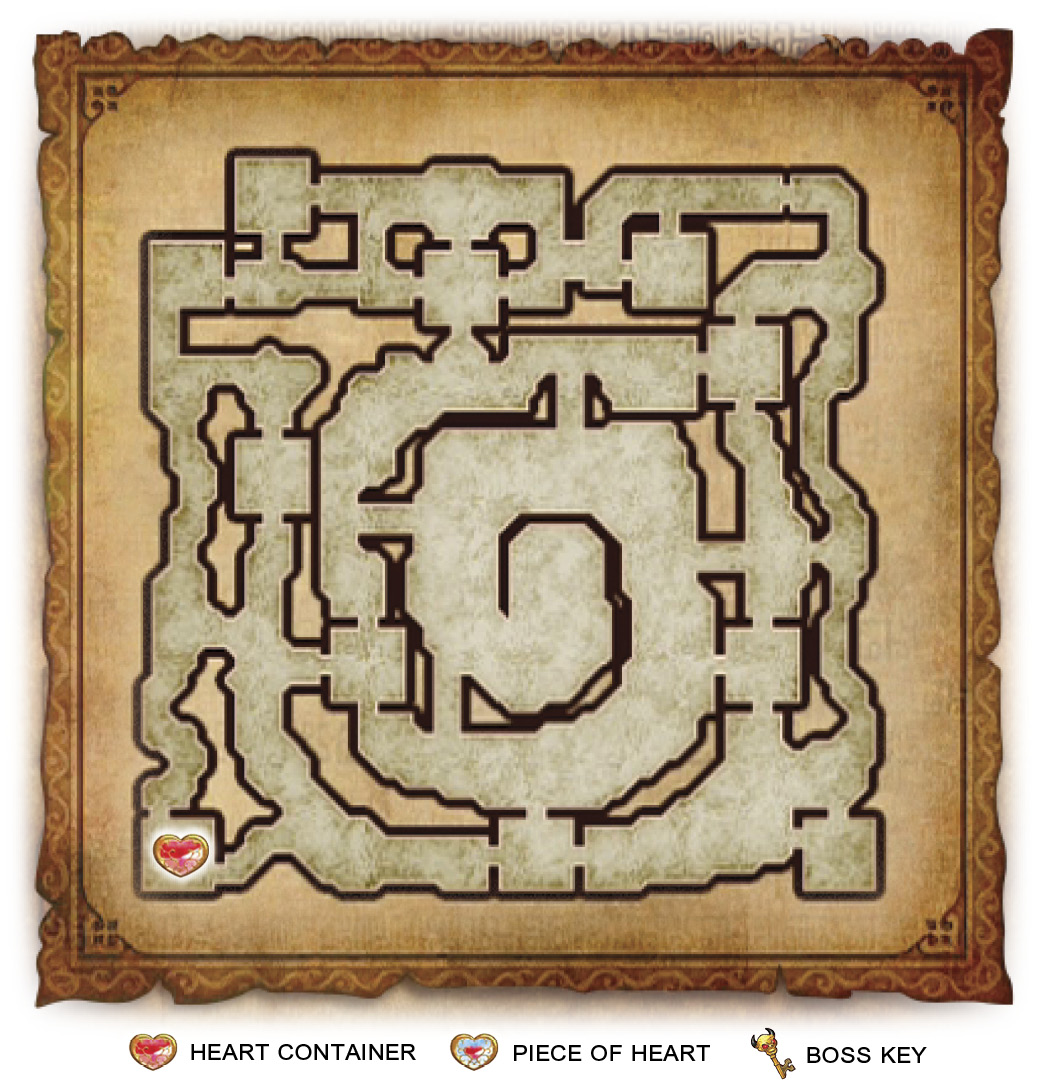
Unlockables Lana—Heart Container (in the Southwest Keep) Search Item Digging Mitts: Lana’s Sorceress Tome (A-Rank) |

Adventure Battle Scenarios are almost identical to the Scenarios in Legend Mode. You have the full battlefield at your disposal, an enemy Captain/Warrior to defeat to win the Scenario, and teammates to assist you. The key difference is that you typically have only a single mission that appears at the start of the battle, which makes up the bulk of the entire fight. Once that mission is completed, you need only to defeat the enemy Commander to win the Scenario.
Sealed Grounds
|
Victory Conditions Defeat Wizzro. Defeat Conditions If Cia flees or the Allied Base falls. |
Defend allied Keeps and defeat enemy forces
Your job is to stop the enemy forces from taking any of your Keeps. If they do, they’ll gain a morale boost, making the battle that much harder; you’ll then be tasked with recapturing that Keep.
The enemy forces will use Bombchus to capture your Keeps. Focus on the Bombchus that have arrows on the minimap; these Bombchus are active and are making their move toward one of your Keeps, so stopping them should be top priority.
Ignore the Bombchu in the southeast and attack the northwestern Bombchu near your starting location while keeping an eye on the northeastern one. The northwestern Bombchu will reach its destination (the West Keep) before the other two will. It’s very close to your starting location, so taking it out, then racing to the northeastern Bombchu should be first on your to-do list.
Convince Stalmaster to join you
A Stalmaster will appear on the map near your starting location. Make a point to get to it as swiftly as possible to avoid having it defeated by the enemy army, or yours. All you need to do is approach it and it’ll join your side of the conflict.
Defeat the Healers
Two Healers will enter the battlefield. They’ll roam around the map, healing any of their allies that need it. To prevent this from happening, you must hunt down the Healers and defeat them.
Defeat the enemy Commander
You can find Cia in the Enemy Base Keep.
A-12
Dungeon 5: Defeat the mountain beast!
|
Unlockables Recorder Darunia—Piece of Heart (in the Stronghold Keep) 1,000 KO Gold Skulltula Second Gold Skulltula Boss Key (in the East Goron Keep) Search Item Ice Arrow: Darunia—Heart Container (A-Rank) |

Dungeon Scenarios play the same as Adventure Battles, but with a twist: There’s a Giant Boss at the end of each one of them, and you must grab the Boss Key hidden in one of the enemy Keeps to open the Enemy Base’s gates. Other than that, you can expect the same kind of battle you’d get from an Adventure Battle.
Death Mountain

Defeat all enemy Captains to lure the Commander
You need to defeat the three Captains that are marked on your minimap to progress the mission.
A Cucco will appear on the battlefield almost immediately after the Scenario starts and begin following you around. Avoid attacking this one to the best of your abilities. It’s not friendly and it will call in a regiment of Cuccos to fight you. Having to challenge so much perilous poultry will make getting an A-Rank much harder.
Defeat the enemy Commander
You can find Sheik in the Enemy Base Keep, but you must grab the Boss Key from the East Goron Keep before the Enemy Base will open for you.
Defeat King Dodongo to win
Keep your distance from King Dodongo and wait for him to open his mouth. The second you see his orange, gaping maw, slide in and toss and Bomb in there to get him to show his Weak Point Mark. Repeat this to take him out and win the battle.
A-13
Defeat all enemies!
Limited Warrior: Ganondorf (Recommended Level: 40)
|
Unlockables Harp Search Item Ice Arrow: Ganondorf—Heart Container (A-Rank) |

Defeat all Enemies! Scenarios are incredibly straightforward. If you’ve done Quiz and Defeat X Enemies Within X Time Scenarios, you’re pretty much prepared for what these ones will through at you. Your job is to fight two or more Captains/Warriors/Bosses at the same time, defeat them and then move on to another Keep to fight a new set of Captains/Warriors/Bosses. Avoid taking too much damage and defeat the enemies swiftly and you’ll walk out of these battles with an A-Rank.
Mission Briefing
Before you even enter a marked Keep, check around the area to find tufts of grass. Cut the grass to find Magic Jars, Hearts, and Triforce Pieces so that you can go into each Keep with as much of an advantage as you can give yourself.
Three of The Imprisoned
You’re tasked with fighting three of The Imprisoned—two miniature ones and a normal one—while inside a Keep. This is one of the toughest fights in the game. Focus on the two smaller versions of The Imprisoned first. The little guys can spit dark energy at you from across the room and they’re incredibly accurate. They can also create shock waves while standing still and wiggling their toes, so run a good distance away from them if you see them lower their heads for an extended amount of time. They’ll frequently interrupt your attempts at lowering the larger Giant Boss’s Weak Point Mark with their attacks.
All of that being said, there is one attack you absolutely much watch for from the larger of The Imprisoned. If you see red electricity cover the ground, run as quickly as you can to the side of the room opposite of the larger of The Imprisoned. After a 10 or so seconds, The Imprisoned will do a devastating electric attack to you if you’re standing in its electric circle. It can be tough to find a safe spot to hide from this attack inside this Keep, but if you aim for any point that is farthest from The Imprisoned, you should be able to find a spot that the electricity doesn’t reach.
Use you Special Attack on the smaller versions of The Imprisoned every time you fill up a bar of your Special Attack Meter. Once you’ve defeated the two smaller Giant Bosses, attack the larger of The Imprisoned the same as you would in a normal fight with it: by attacking its toes. Whenever you fill up a bar of your Special Attack Meter, run directly behind its feet and use your Special Attack. We found that the Special Attack has a better chance of destroying all of The Imprisoned’s toes at once if you’re standing directly behind its feet.
Two Shield Moblins and Two Dinolfos
A far cry from the difficulty of the last fight, but still challenging nonetheless. Focus on the Dinolfos first, they are easier to defeat and are faster than the Shield Moblins, so you can have them chase you to separate them from the other Captains in the Keep. Pick off each Captain one by one, and dash away from the Captains whenever they group together.
Ruto, Lana, and Fiery Aeralfos
This is more of a patience fight. As soon as the combatants appear in the Keep, hold your guard up and start circling them. The goal is to focus on one of the Warriors and bait them into revealing their Weak Point Mark. None of the enemies here are particularly fast, so you can slowly circle them with ease. Wait for your Warrior of choice to reveal the Weak Point Mark, Smash them, then repeat until all three enemies are defeated. Just be careful about holding $ whenever you dash to reach a Warrior’s Weak Point Mark. Holding $ will cause you to run and you can’t guard while you’re running.
A-14
Fight the chosen ones!
Limited Warrior: Darunia (Recommended Level: 40)
|
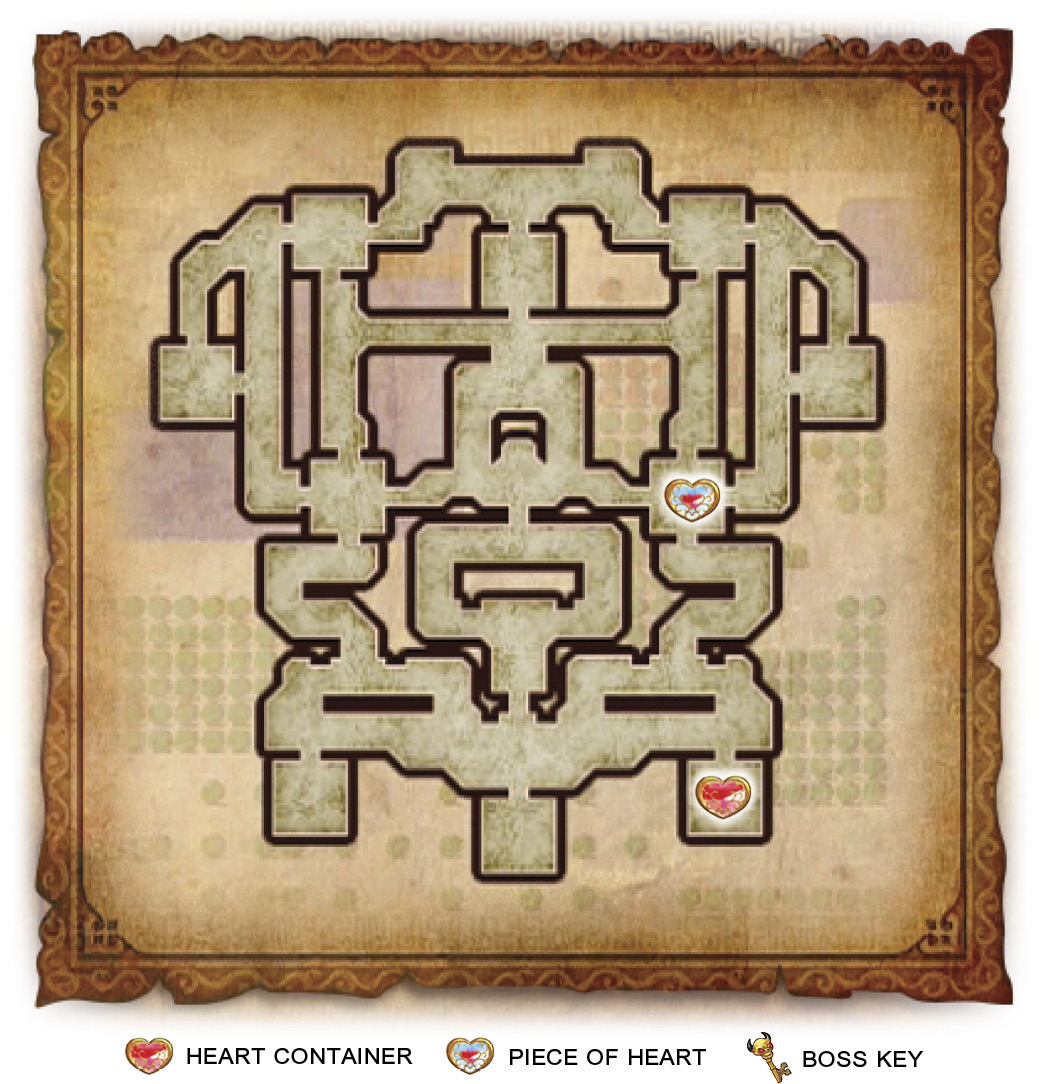
Unlockables Darunia—Heart Container (in the East Garden Keep) Darunia—Piece of Heart (in the Southeast Keep) Search Item Bombs: Darunia’s Megaton Hammer (A-Rank) |

Adventure Battle Scenarios are almost identical to the Scenarios in Legend Mode. You have the full battlefield at your disposal, an enemy Captain/Warrior to defeat to win the Scenario, and teammates to assist you. The key difference is that you typically have only a single mission that appears at the start of the battle, which makes up the bulk of the entire fight. Once that mission is completed, you need only to defeat the enemy Commander to win the Scenario.
Temple of Souls
Mission Briefing
Darunia is not a fast-moving Warrior by any stretch, but luckily this Scenario plays out at a pace perfect for him. You will have to run back and forth across the battlefield during this fight, but not as frantically as you most likely have in many other battles. This is a battle of strategy and tactics, not speed. Select your objectives carefully and, above all, protect the Allied Base and you’ll win this battle for certain.
Capture all Keeps and weaken the enemy
To complete this mission, you must first capture the Northeast, Central Chamber, West Garden, and East Garden Keeps. The Keeps will constantly create Captains with boosted morale, so capturing these Keeps as quickly as possible is definitely what you want to do.
After you capture your first marked Keep, all of the remaining marked Keeps will create a Shield Moblin and send it toward the Allied Base. You can largely ignore them until they reach one of your Keeps; the Shield Moblins are not particularly fast, so you can pace yourself and focus on other matters until you see one of the Keeps near the Allied Base being invaded.
Defeat the Siege Captains
Siege Captains will enter the battlefield shortly after you start this Scenario. They have the ability to capture your Keeps at a remarkable pace. That is why taking them out as they appear on the battlefield should be near the top of your list; the top should be capturing those Keeps to stem the flow of Siege Captains. Both of the Siege Captains will likely end up in the Southwest Keep, so you can attempt to intercept them there and take them both out at the same time.
Defeat Shield Moblin immediately
After you capture your second marked Keep, a Shield Moblin will charge directly toward the Allied Base. Intercept him and lower his health to half and he’ll flee the battlefield for a moment. He’ll eventually reappear directly inside the Allied Base. Don’t leave him to his own devices: Find him and defeat him immediately.
Defeat the enemy Commander
You can find Link in the Enemy Base Keep.
A-15
Fight through the legendary warrior quiz!
|
Unlockables Digging Mitts Zant—Heart Container (A-Rank) Search Item None |
Quizzes are Scenarios where you have to answer three questions about a specific Zelda title or element in Hyrule Warriors. The questions will always be answered by defeating the enemy that matches the description. For example: a question could say, “Defeat the enemy that holds a shield.” Two enemies will appear: a Big Poe and a Shield Moblin. Just defeat the enemy holding the shield and you’ll have successfully answered the question. It’s that easy. Just be careful not to defeat the wrong enemy while fighting the right one and you’ll have no issues with these challenges.
Defeat the Sage of Water
The correct answer is Ruto.
Defeat the insect princess
The correct answer is Agitha.
Defeat the horse rider
The correct answer is Ganondorf.
A-16
Take on the sword masters!
Limited Warrior: Lana and her Summoning Gate (Recommended Level: 60)
|
Unlockables Lana—Piece of Heart (in the North Settlement Keep) 1,000 KO Gold Skulltula Second Gold Skulltula Search Item Digging Mitts: Lana’s Gate of Souls (A-Rank) |

Adventure Battle Scenarios are almost identical to the Scenarios in Legend Mode. You have the full battlefield at your disposal, an enemy Captain/Warrior to defeat to win the Scenario, and teammates to assist you. The key difference is that you typically have only a single mission that appears at the start of the battle, which makes up the bulk of the entire fight. Once that mission is completed, you need only to defeat the enemy Commander to win the Scenario.
Gerudo Desert
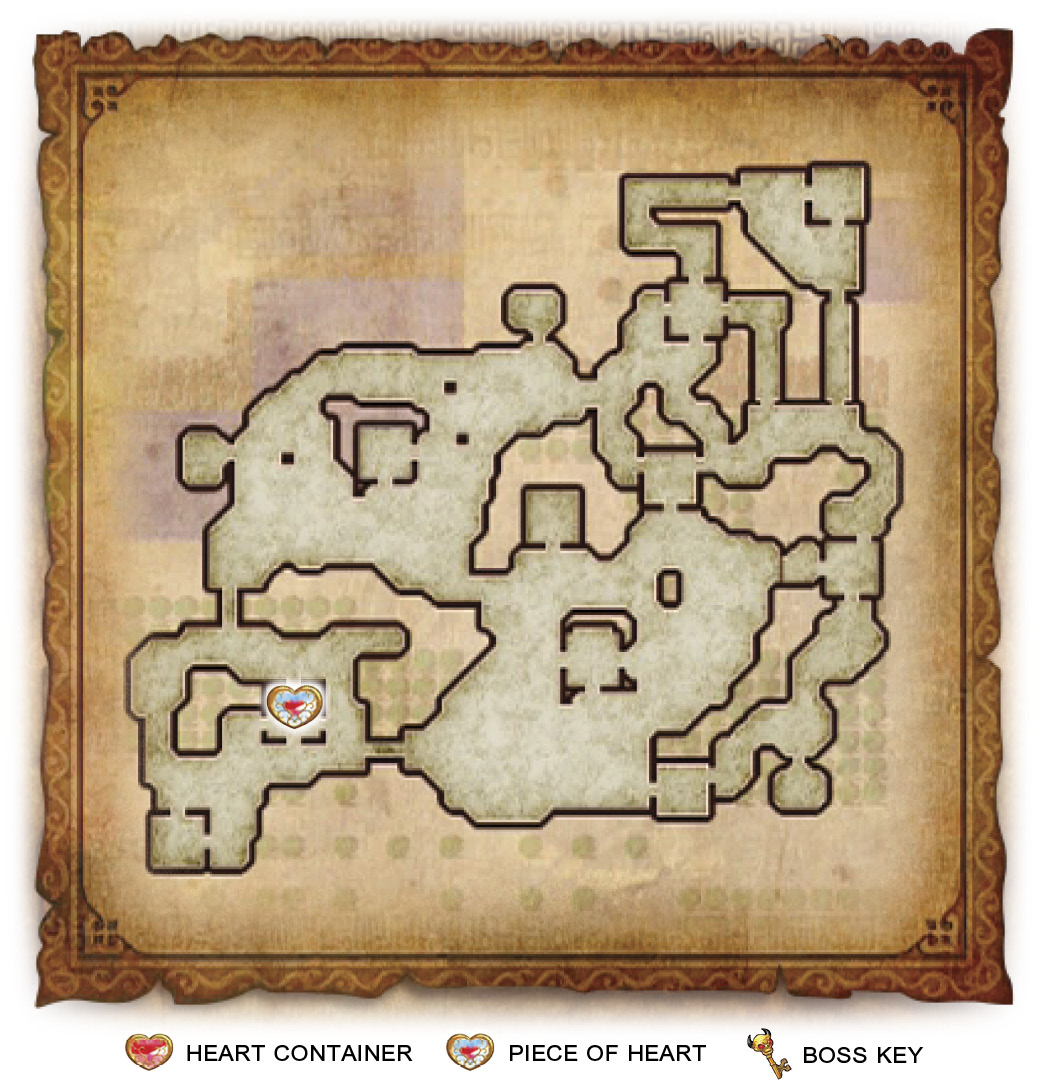
Mission Briefing
This is undoubtedly one of the hardest fights in the game. Lana’s Summoning Gate, fun though it is, isn’t a great weapon to use in a challenging Scenario. It’s slow, lacks attack power, and has poor range. Luckily, this is an incredibly straightforward battle. Just take on the missions as you would in any other Scenario and make sure to watch your health—these enemies pack a punch.
Defeat all enemy Captains to lure the Commander
You need to defeat the three Captains that are marked on your minimap to progress the mission.
Defeat the Gold Cucco
An enemy Cucco will appear on the battlefield almost immediately after the Scenario starts and will begin eating everywhere it goes. As it eats, it grows more and more powerful. Make a point to defeat the Gold Cucco immediately to keep it from growing stronger and causing you unnecessary problems.
Convince Darknut to join you
A rogue Darknut will appear on the map. Make a point to get to it as swiftly as possible to avoid having it defeated by the enemy army, or yours. All you need to do is approach it and it’ll join your side of the conflict.
Defeat the enemy Commander
You can find Link in the Enemy Base Keep.