
Battlefield 3 DLC Guide — Premium Maps End Game Battlefields
Kiasar Railroad
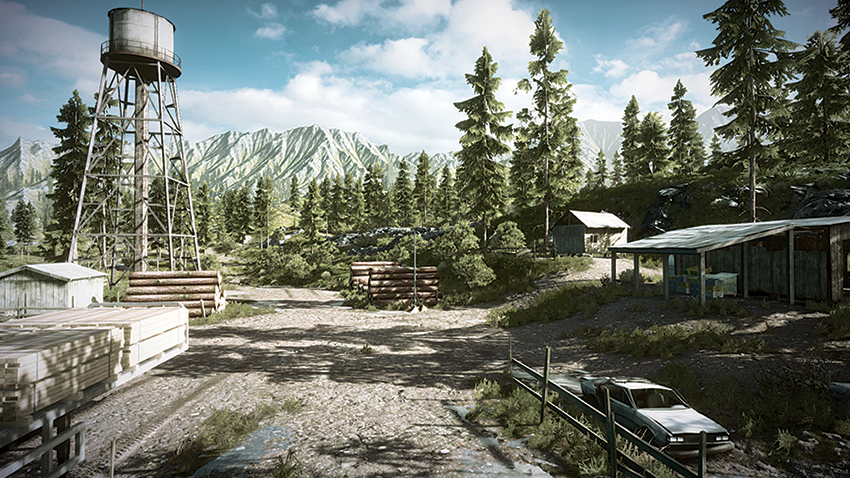
Conquest
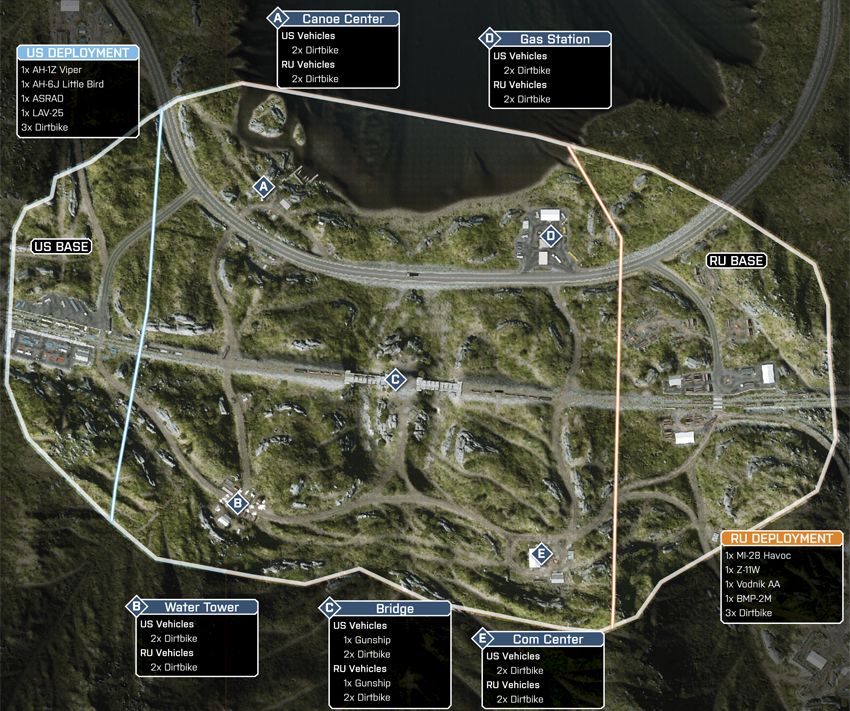
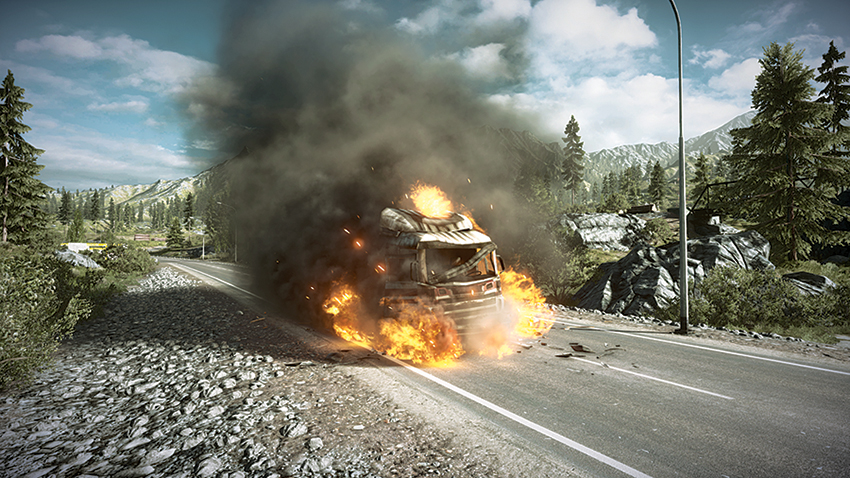
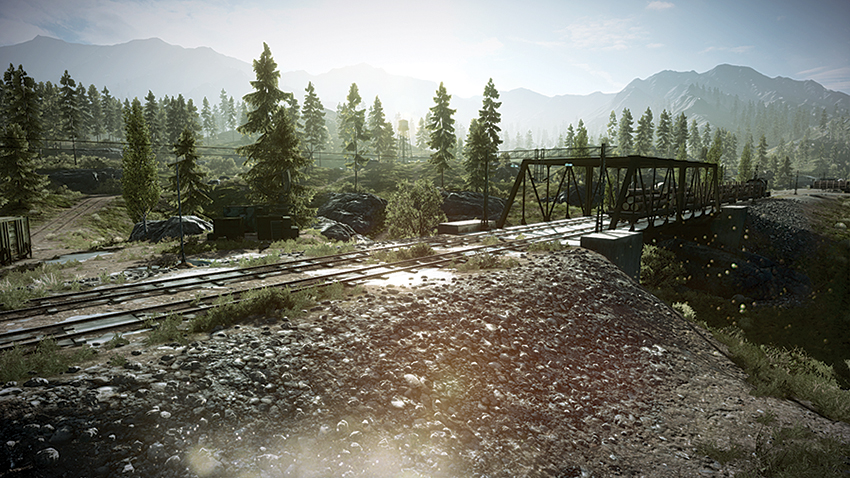
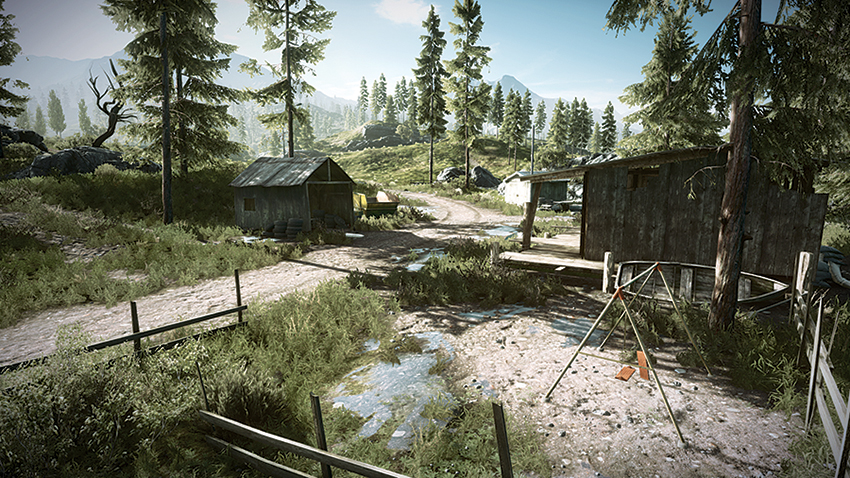
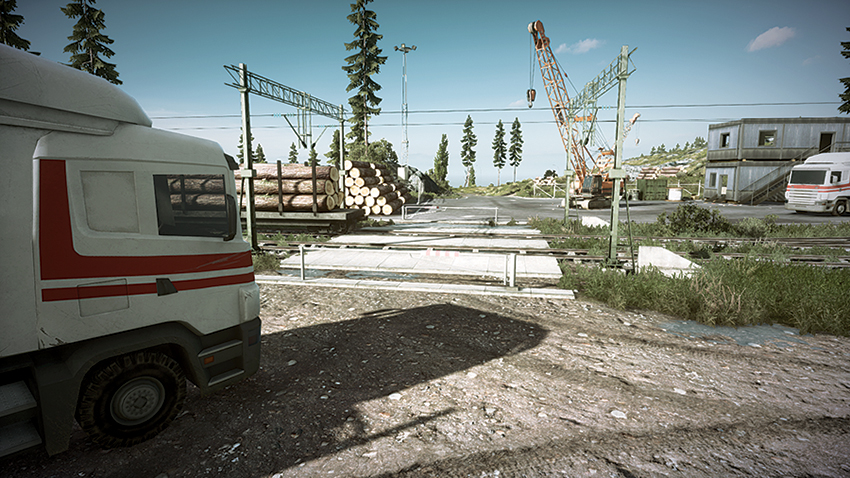
The stage for the battle at Kiasar Railroad is a majestic alpine setting. This land is also home to a large logging operation that makes use of this railway to maintain its supply line, with shipments of timber and other supplies coming to and fro several times a day. Aside from being the lifeblood for the timber industry in these mountains, the rail lines also serve a major strategic purpose for the two forces engaged in combat here. This battle is for the five control points. Deploying from the Train Station on the map’s western edge, the US team is poised to capture and control the Canoe Center (A) and the Water Tower (B) as they make their way east. Launching their assault from the Lumber Yard to the east, the RU team will capture both the Gas Station (D) and the Com Center (E) as they advance west. This will leave the Bridge (C), which is central on the map, as a highly contested point. None of the points except the Bridge (C) affords the capturing team with more than two dirtbikes, further cementing the strategic value of the Bridge (C) and the Dropship it provides. Given the positions of the control points on the map, though, teams should expect the focus of the battle to migrate frequently. Given the distance between points and the uneven terrain, teams are prone to focus their attention on either the southern control points in the mountains or the lakeside northern control points. The advantage to following this attack order is that one control point can be used to push back the opposing team’s reinforcements as they deploy from their base.
US Base
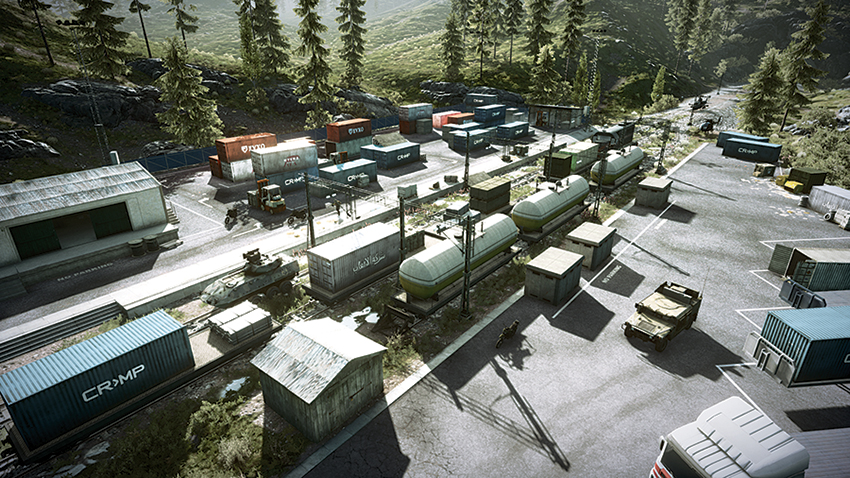
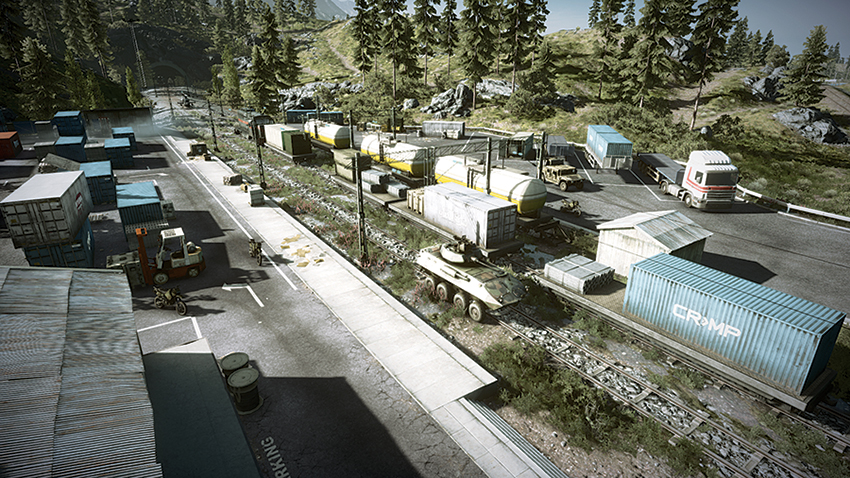
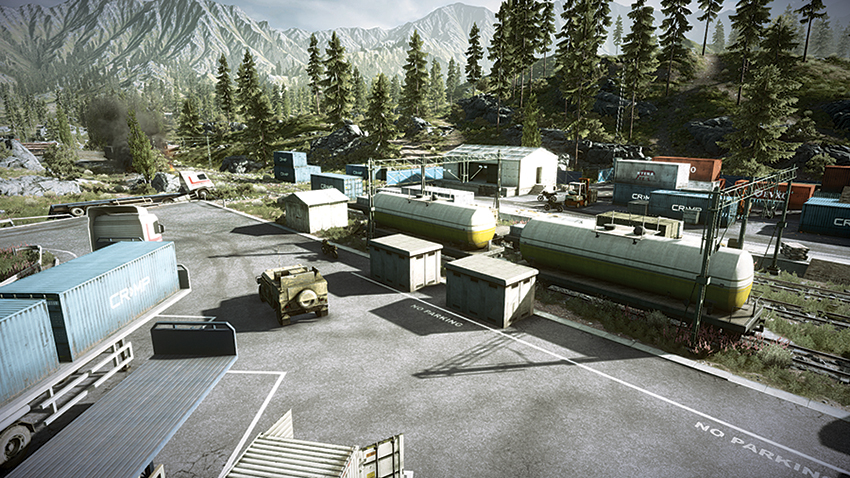
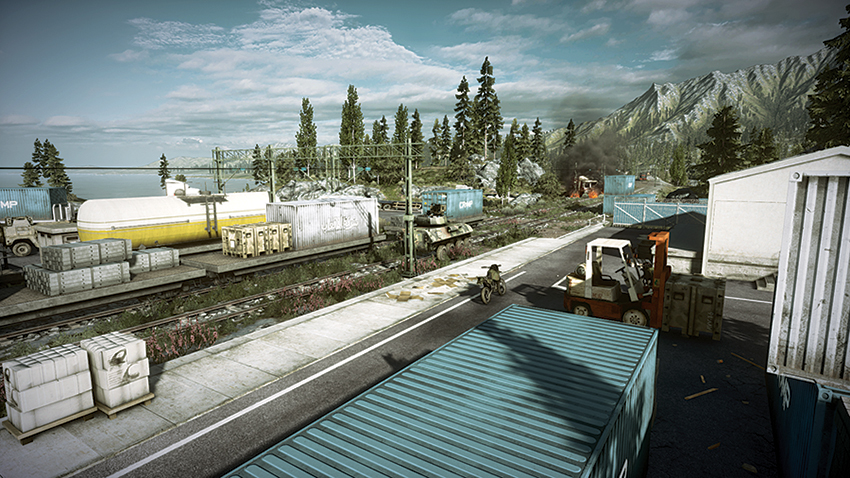
Deploying from the west at the Train Station, the US team can quickly make their way east and claim control of the Canoe Center (A) and the Water Tower (B). While this may seem the most convenient way to dominate the field, nevertheless the team should focus on securing the Bridge (C) before the RU team can do so. After taking control of the Bridge (C), the Dropship should be used to push back the RU team and maintain control of this point while the team moves to secure the Water Tower (B). An alternative to moving to capture the Water Tower is for the team to gain control of the Gas Station (D) to the northeast. If this point is held, the US team can control the deployment of the RU team’s vehicles from their base. Both of the team’s helicopters should focus on clearing hostiles from the control points and spotting enemies for infantry units to move in. Because the varied terrain is full of potential hiding spots, the helicopters are a valuable tool for threat assessment as well as effective weapons platforms to clear a path.
RU Base
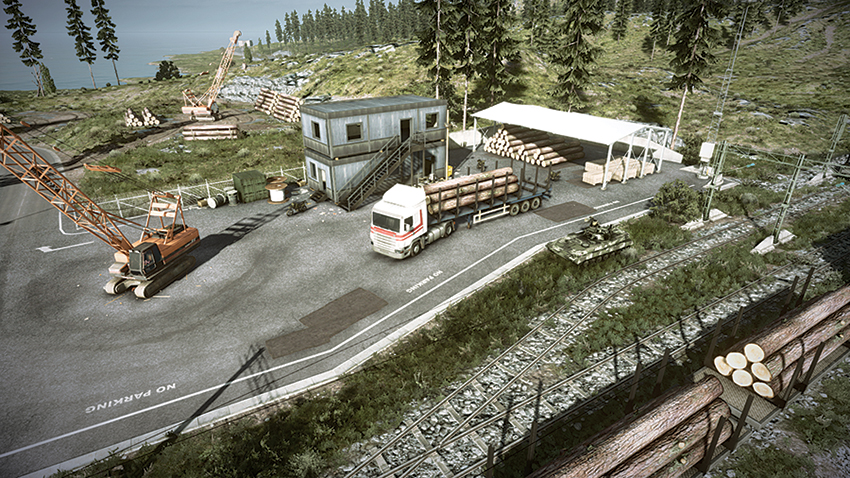
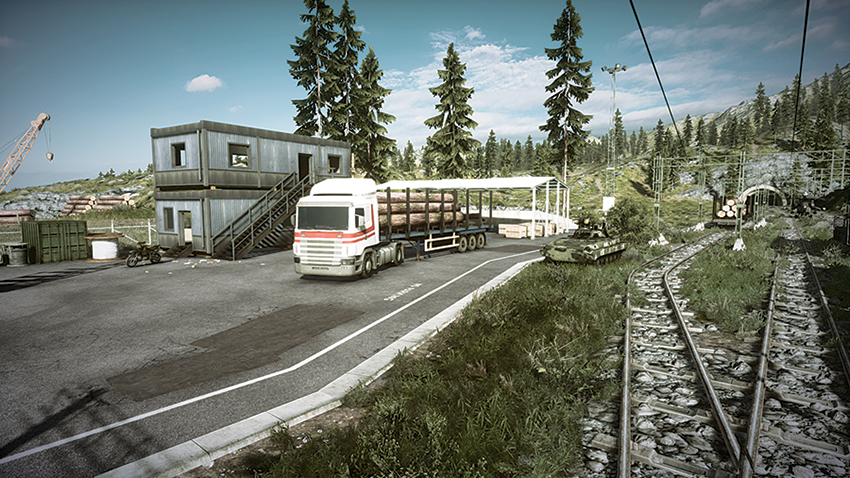
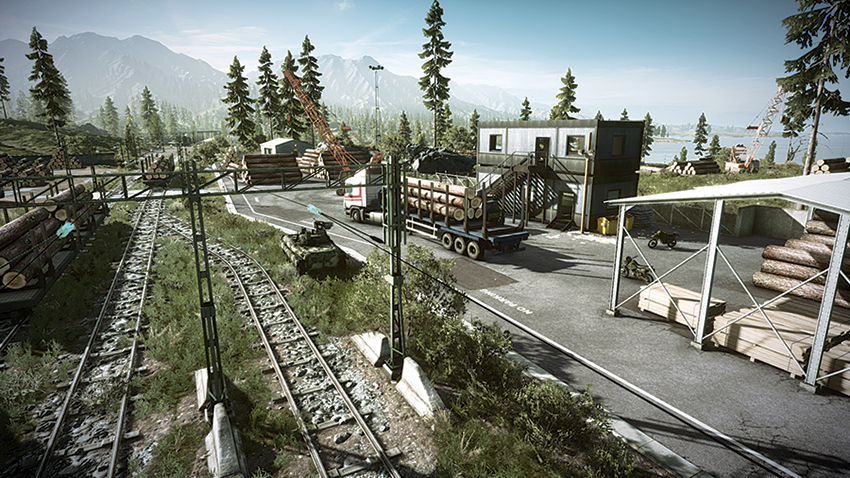
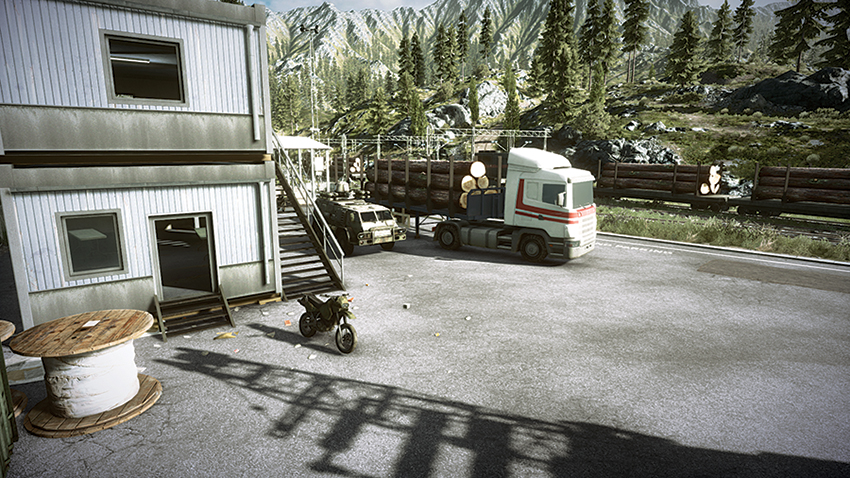
The RU team deploys from the Lumber Yard on the east side of the map. From this position, the RU team can quickly capture the Gas Station (D) or the Com Center (E). The Bridge (C) located in the center of the map should be the focus of the dirtbikes early on, so that the Dropship can be used to push back the US team as they attempt their trek to the east. Both helicopters should split up to cover the north and south ends of the map, clearing the area around control points of hostiles while the slower Vodnik AA and BMP-2M move to defend control points from being captured. While the Gas Station (D) and Com Center (E) are nearest to the RU team’s deployment, pushing forward to capture either the Canoe Center (A) or the Water Tower (B) is a useful tactic to hold back the US team’s vehicles as they deploy from their base. The RU team should be careful if the Com Center (E) is captured by the US team, as its position uphill from the RU deployment can be used by the US team’s IFV or AA jeep to bombard the deployment area.
Canoe Center
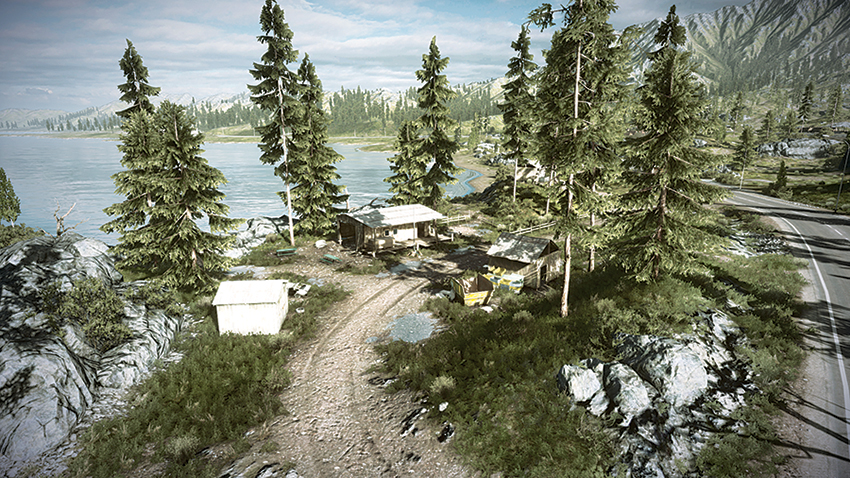
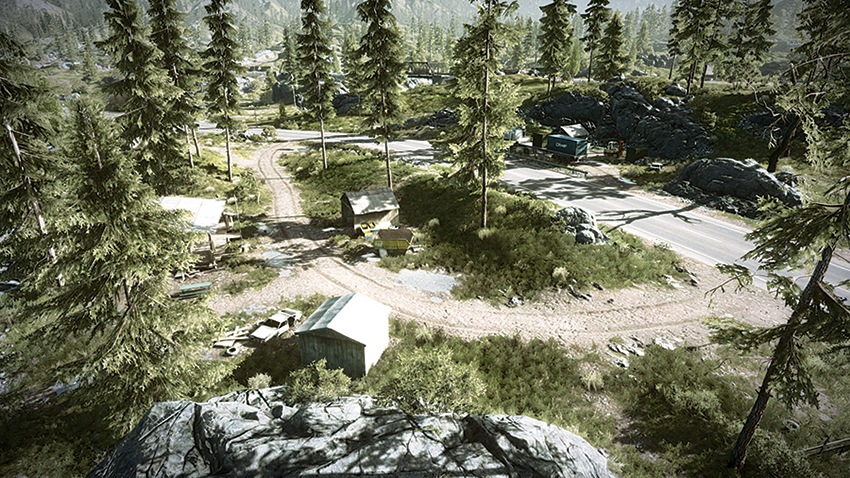
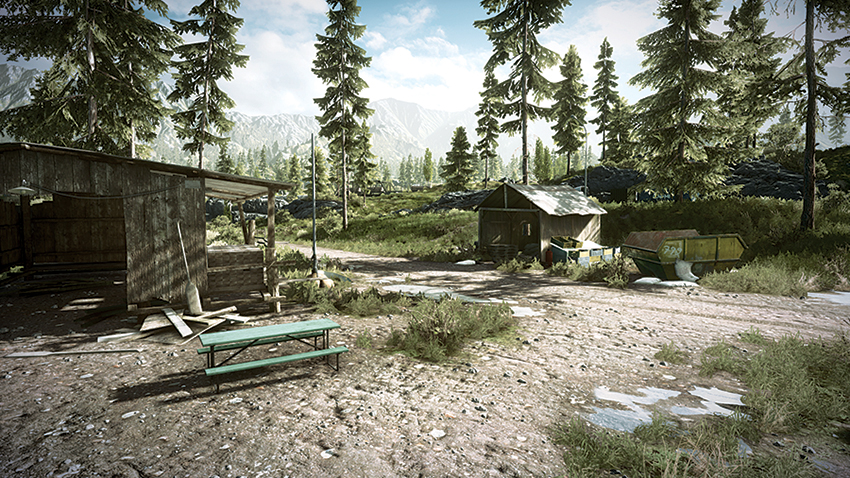
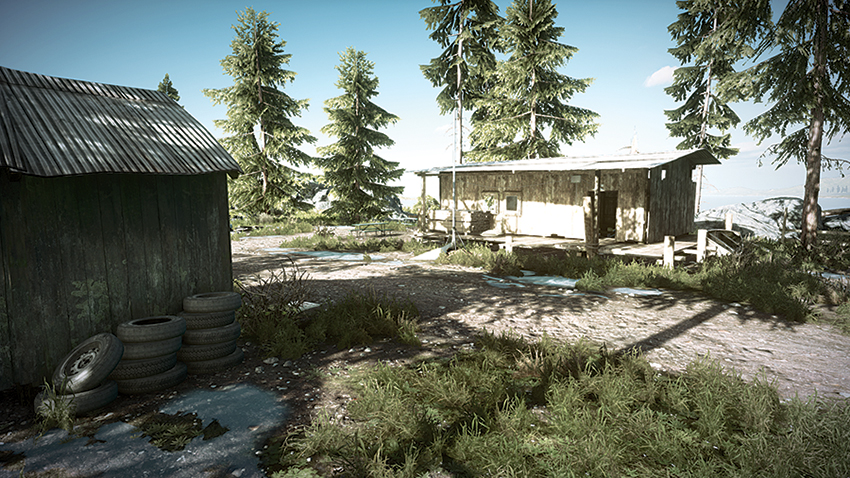
Positioned on the northwest corner of the map, the Canoe Center (A) flag is located in front of the hollowed-out lakeside building. When attempting to capture this control point, teams should move into the building since the area’s exposure leaves infantry vulnerable to attack from the opposing team’s helicopters. An approach can be made either from the road (which leads directly from the US team’s deployment) or the lake. To the east of the flag is a rocky hill that can be used to clearly view the flag area. This sniper perch also affords a view of inside the north building, which is prone to hosting campers. While the building on the south side can provide cover, the nearby red gas tank can be exploded to eliminate threats hiding within the building or near the yellow dumpster.
Water Tower
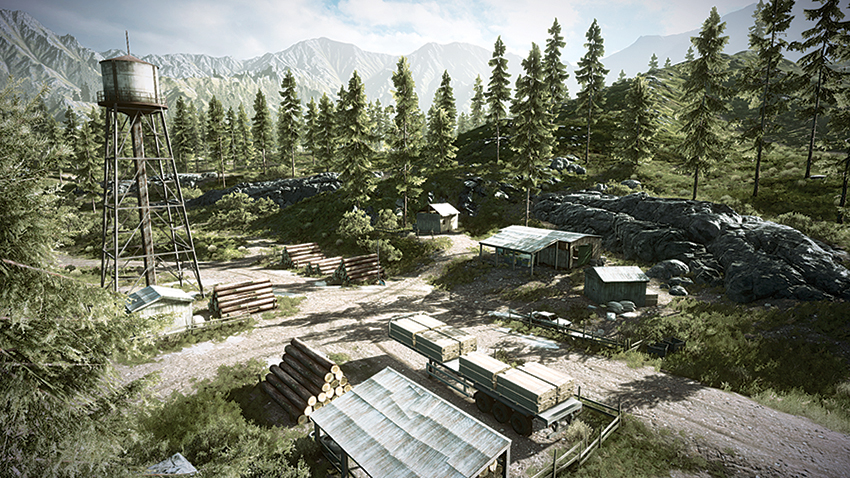
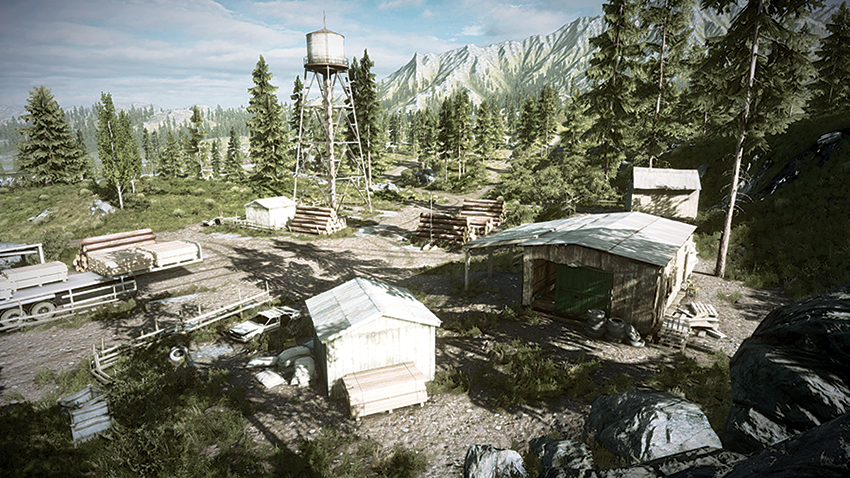
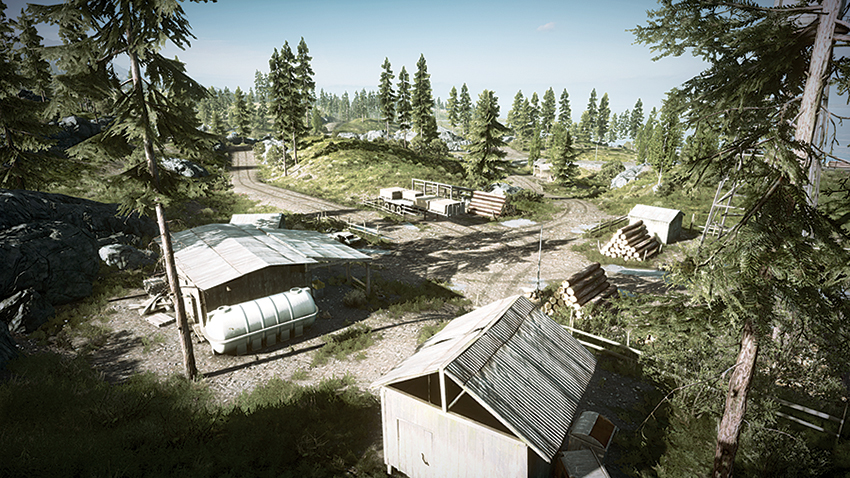
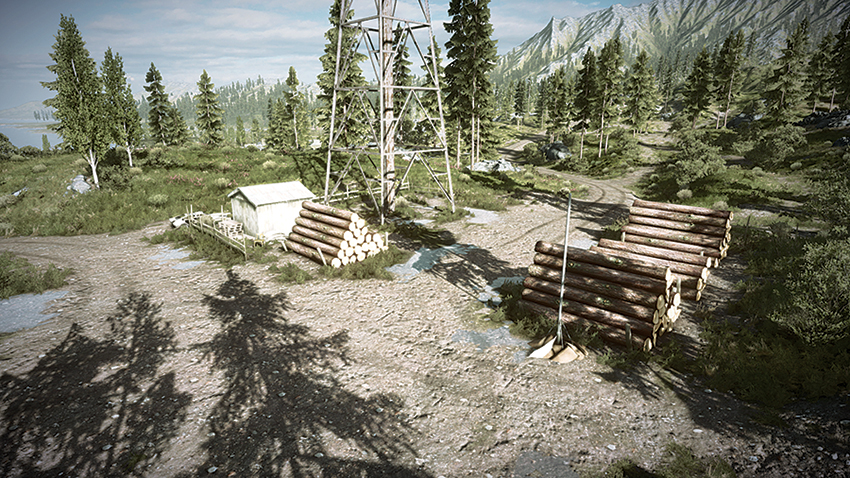
Located on the southwest corner of the map, the Water Tower (B) flag is exposed near a timber pile, between three buildings. When capturing this point, teams should be watchful for hostiles attempting to flank the area by approaching from the map’s southern edge. As the point is being captured, it would be best to take cover on the east side of the timber pile near the flag, thereby reducing the chance of being fired upon by the opposing team’s IFV, which can use the roads cutting through this region to access the control point. The advantage to this control point being exposed is that helicopters can be used to escort infantry units into the area and clear the way for their advance. Helicopters should be wary when entering the area, though, as engineers can use the buildings to hide while attempting to get a lock with their anti-aircraft weapons.
Bridge
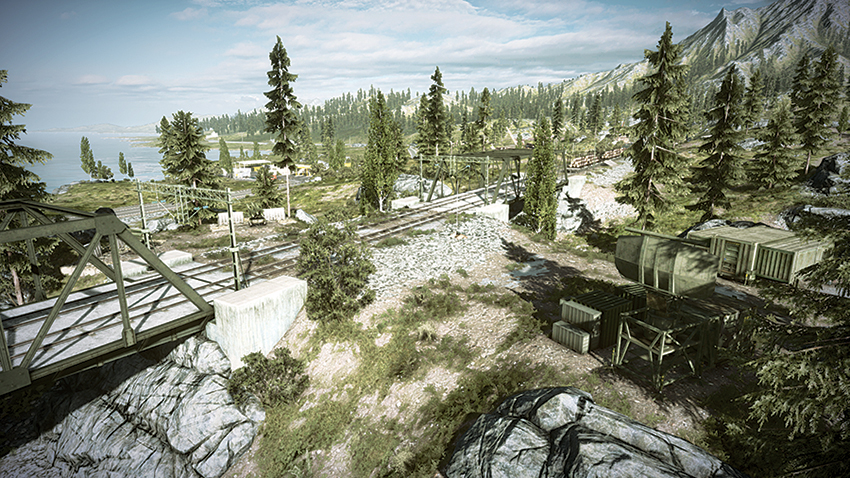
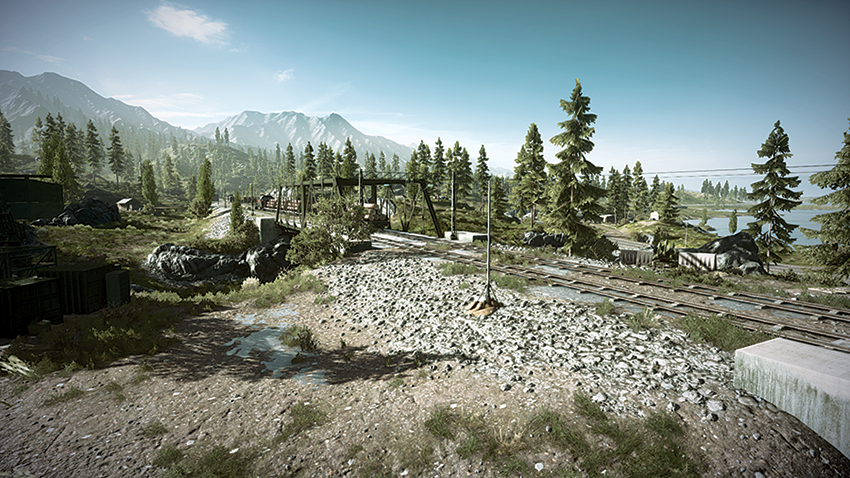
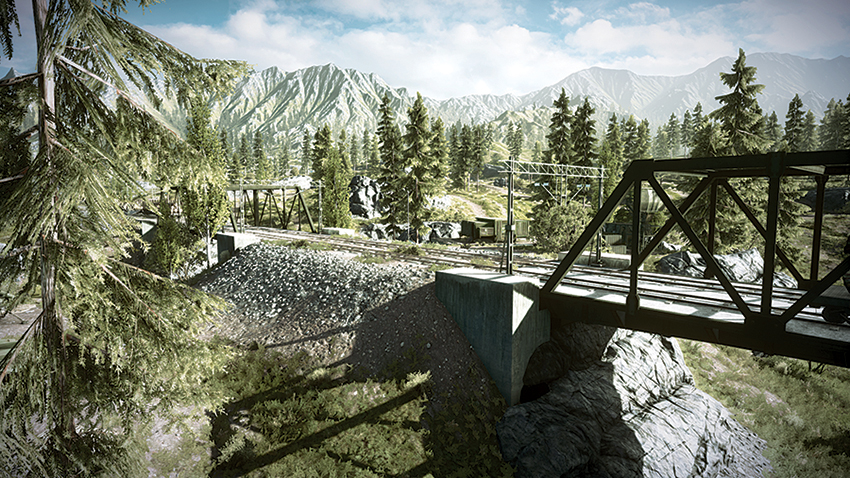
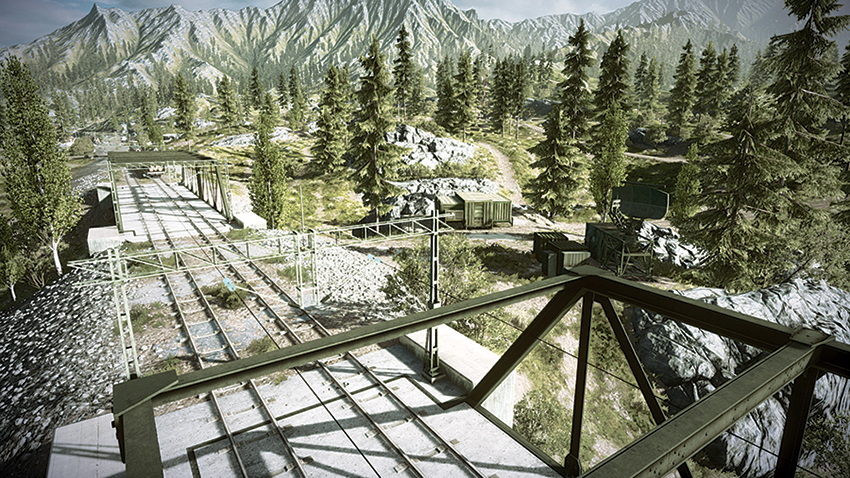
Easily the most contested point on the map, the Bridge (C) is in the center of the map, with its flag on the hill between the two bridges. Teams should not allow their IFVs or AA jeeps to stay on the bridges for any length of time, as helicopters can pick off these vehicles that have difficulty turning on a bridge. Dirtbikes, on the other hand, can rush through the bridges and approach the flag with ease. Planting mines underneath these bridges is helpful in preventing traffic from passing beneath them and flanking your team while the point is being captured. Once it is captured, teams should coordinate their movements with the Dropship, spotting enemy positions so that deployed allies can pick them off as they move through the uneven terrain. From the north side of the Bridge (C) area, IFVs can fire on the Gas Station (D) to the northeast and eliminate threats entrenched there.
Gas Station
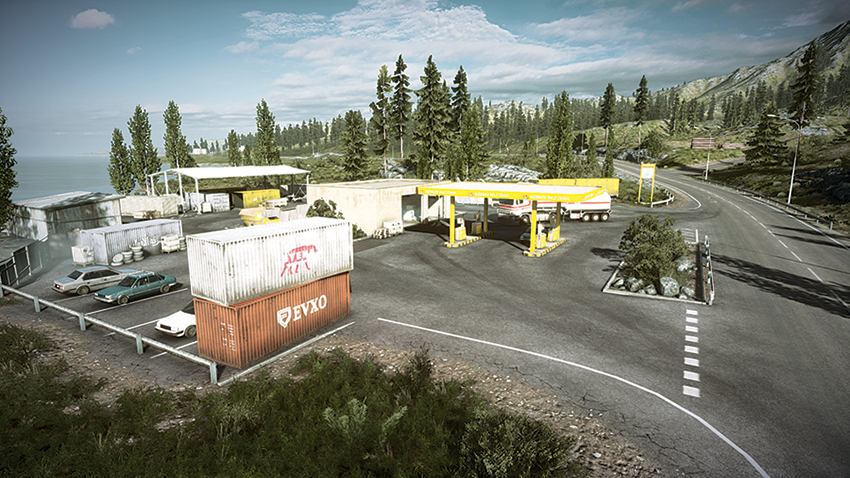
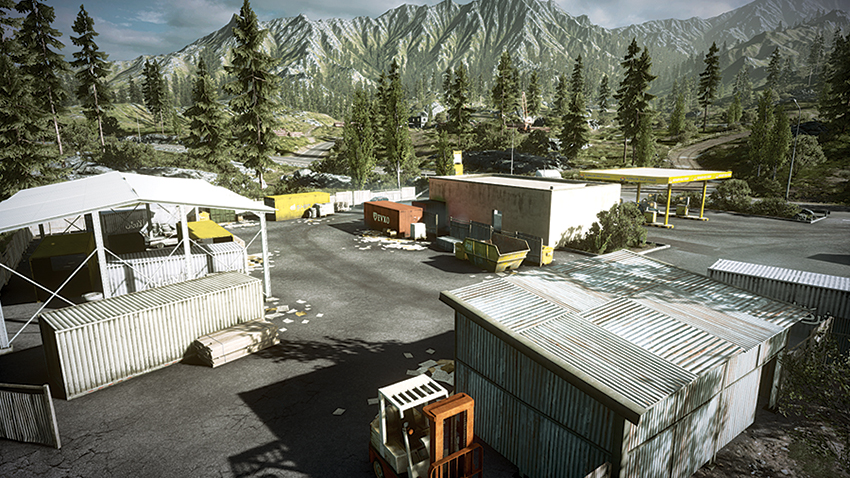
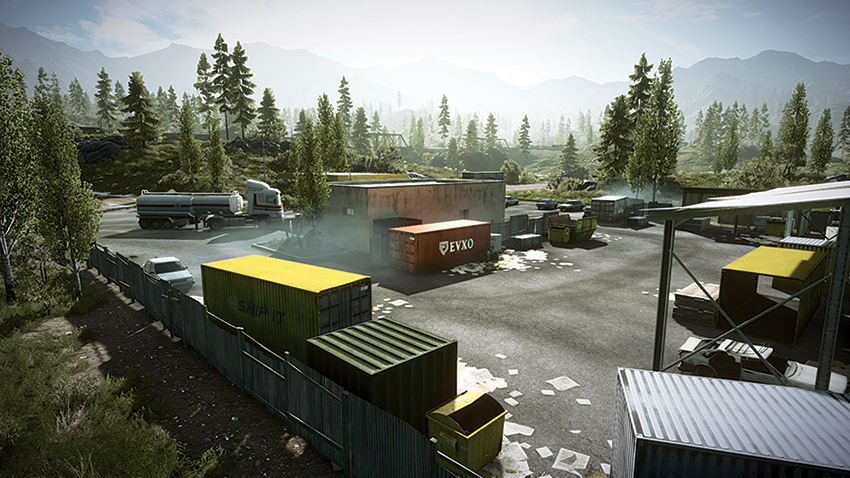
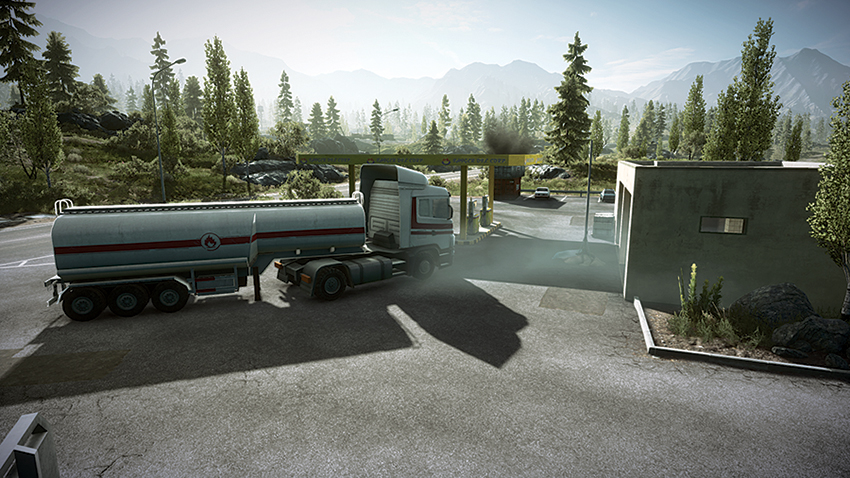
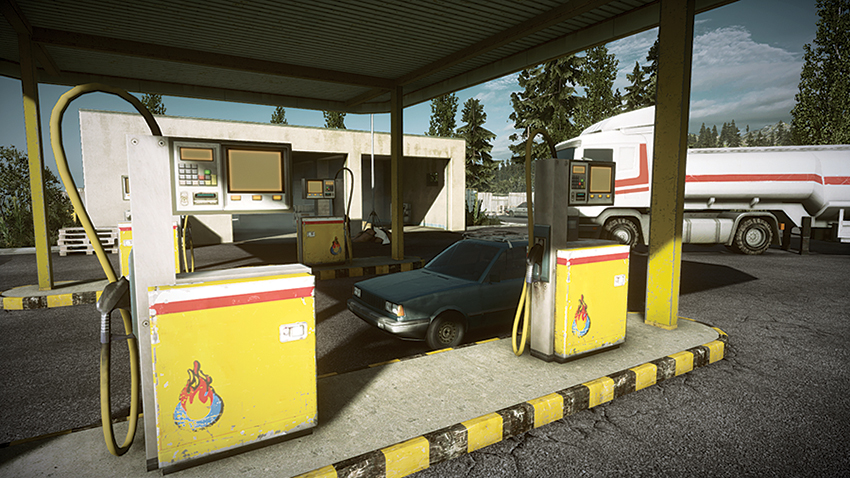
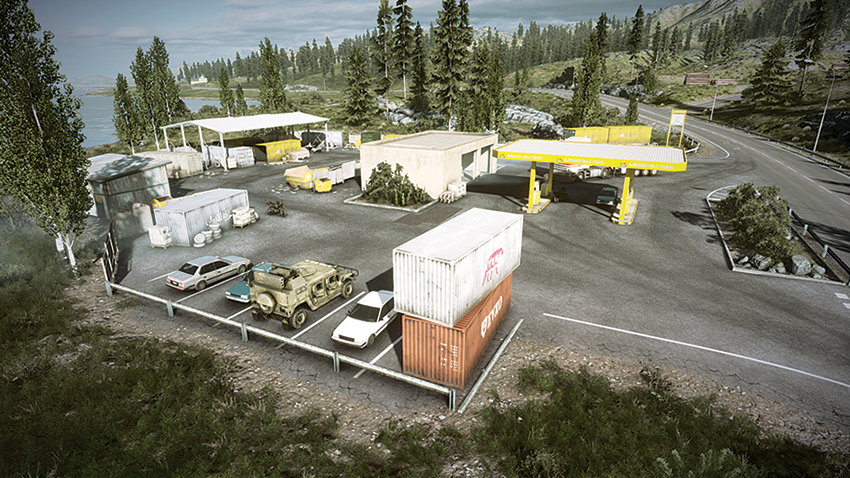
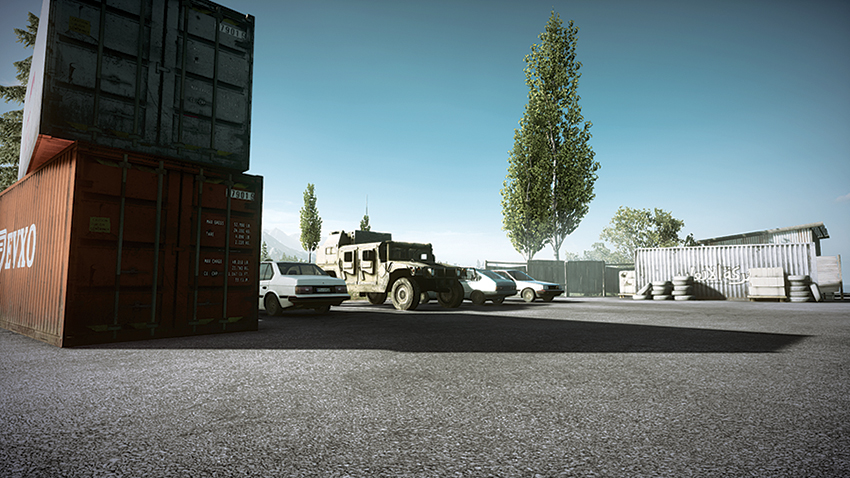
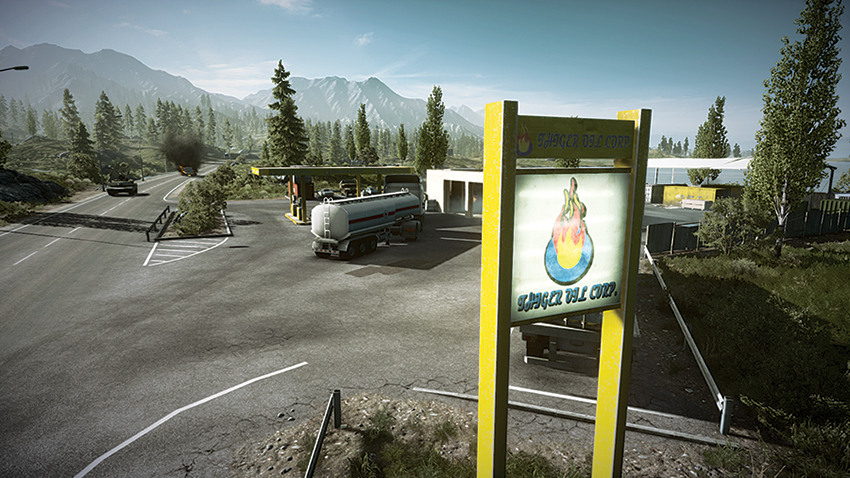
Located on the northeast side of the map, the Gas Station (D) flag is exposed near the building to the north of the gas pumps. This control point is accessible from multiple angles. The point can be captured from within the building, which is a far better option than capturing while standing near the semi-truck. Teams should be careful to watch for hostiles that try to flank by approaching from the lake to the north and passing through the rear door of the building. While capturing this point, a squad mate should take position on top of the nearby building to be a lookout for the enemy. When moving in on the control point from the west, stay off the road and use the shipping containers on the edge of the lot to scout the location before advancing. Deployment of a MAV helps when scouting this large area for enemy campers, as well as for monitoring the rear of the lot while capturing the point.
Com Center
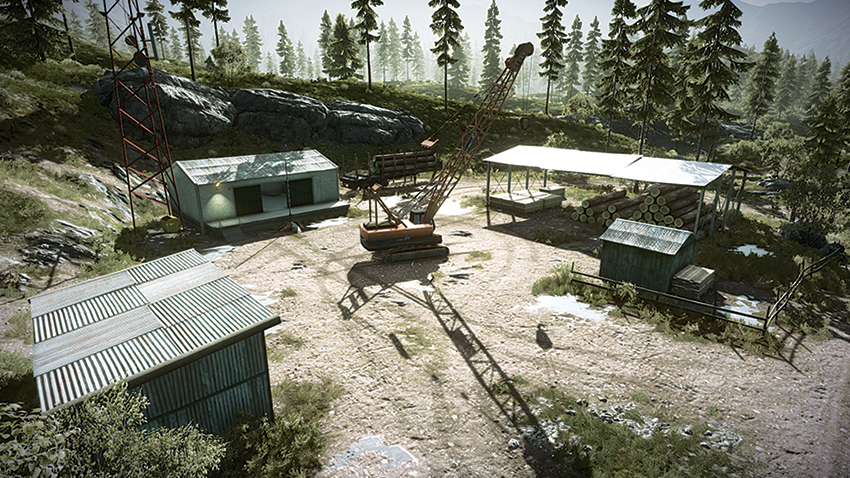
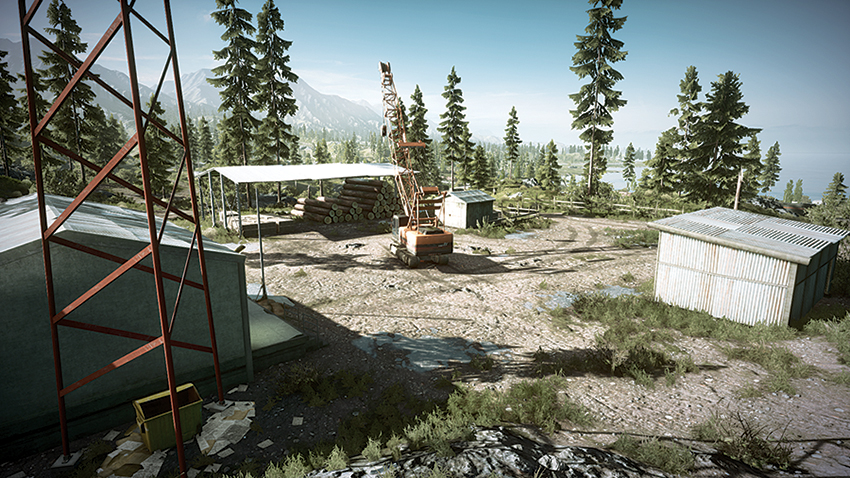
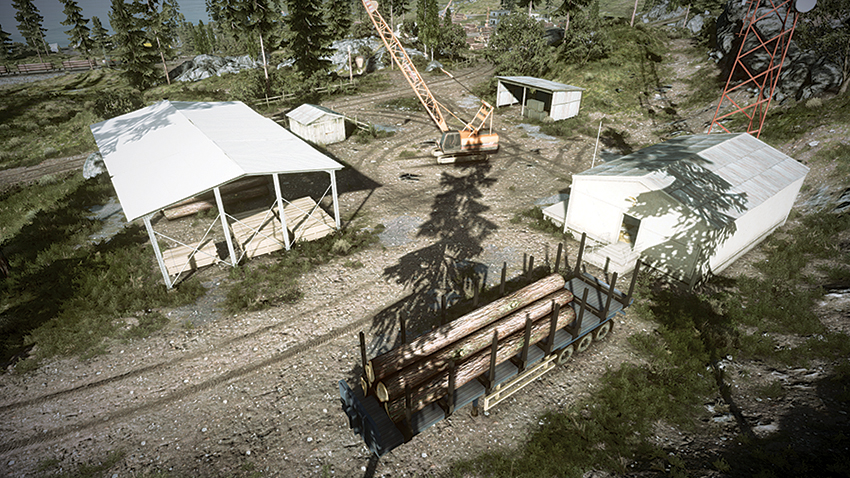
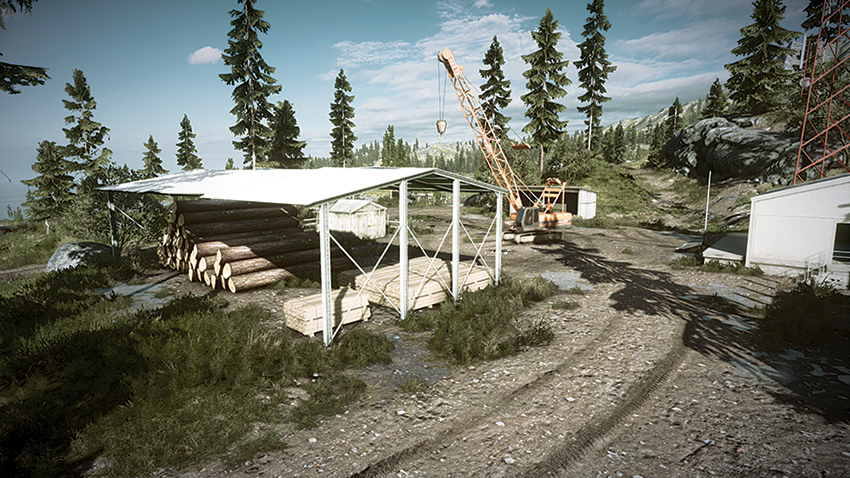
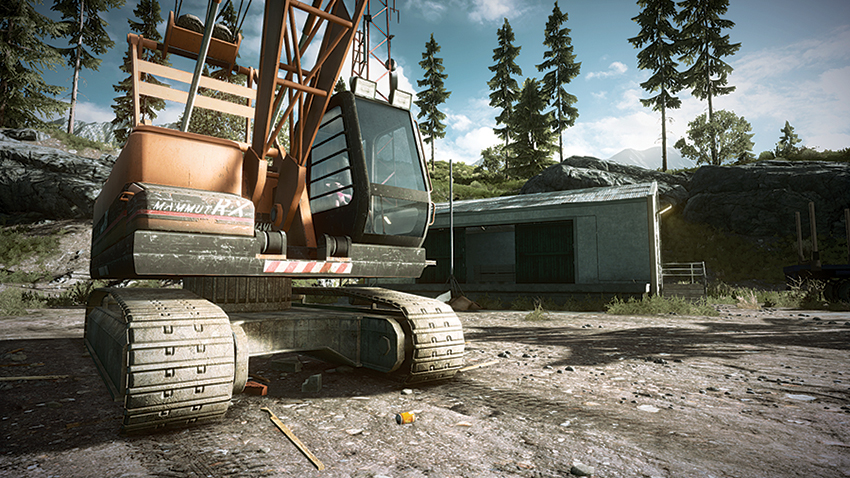
On the southeast end of the map is the Com Center (E). Its flag is exposed within the center of three structures. When capturing this control point, a squad should divide up to cover the surrounding area while one member captures the point. While capturing the point, the other squad mates should plant mines around the crane in the center of the yard. As dirtbikes rush into the area, these mines will ensure that the point is not easily captured. The shack on the east side of the yard can be used for cover when maintaining control of this point. Should the firefight get too intense, the door on the east side of the shack can provide a quick escape north into the brush. Approaching this area from the north requires an uphill climb, and since this hinders visibility of the control point, infantry units should deploy a MAV to scout the area during their approach.
Conquest 64
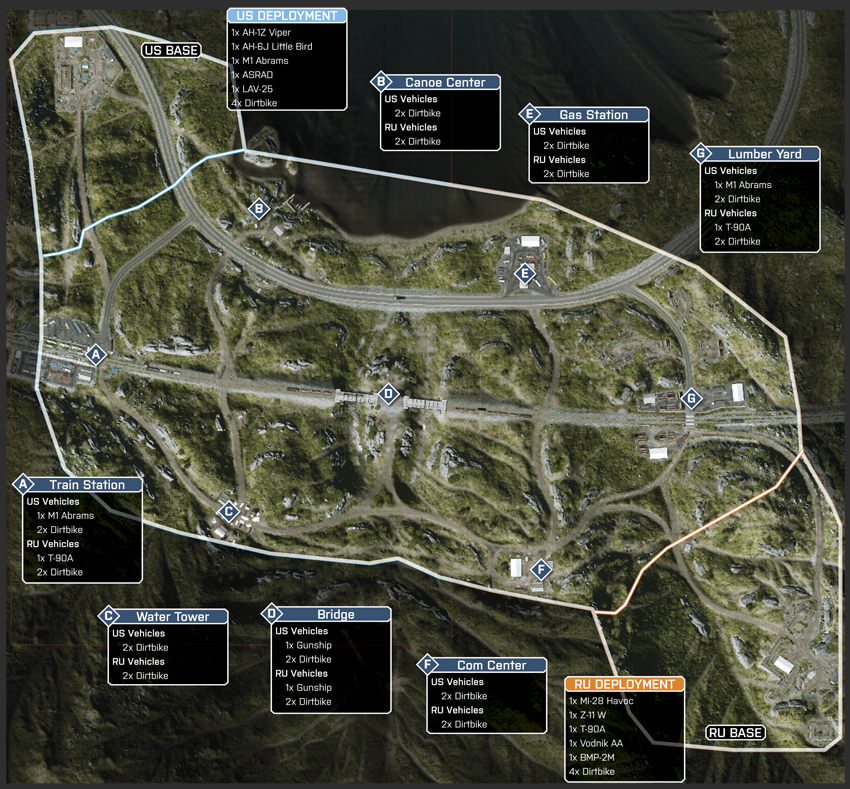
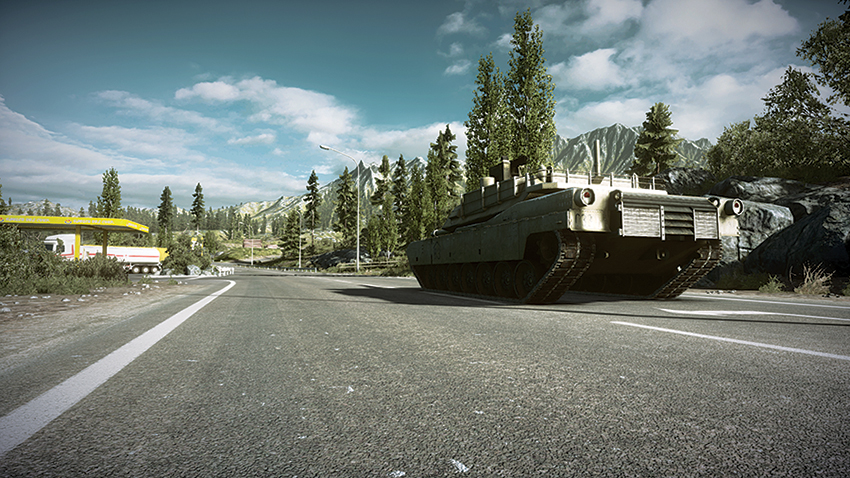
During Conquest 64, the map territory is expanded to include the Train Station (A) and Lumber Yard (G) as control points, resulting in seven control points being contested. This expansion also pushes back the deployment zones of both teams, with the US team deploying from the northwest edge of the map and the RU team deploying from the southeast. This shift in deployment positions also results in a staggered advantage for both teams, with the Train Station (A) and Canoe Center (B) being quickly captured by the US team and the Lumber Yard (G) and Com Center (F) being captured early on by the RU team. Once again, the Bridge (D) is in the center, and is flanked by the Water Tower (C) and the Gas Station (E). This distribution of control points leaves the central three points up for contention by both teams, as neither team deploys within their immediate vicinity. The result is a frantic battle in which beating your enemy requires consideration of how to best defend against attacks on the map’s uneven terrain. One advantage afforded to both teams in is the tank, but this lumbering vehicle is better suited to performing patrols through the map’s north side on the road near the lake.
US Base
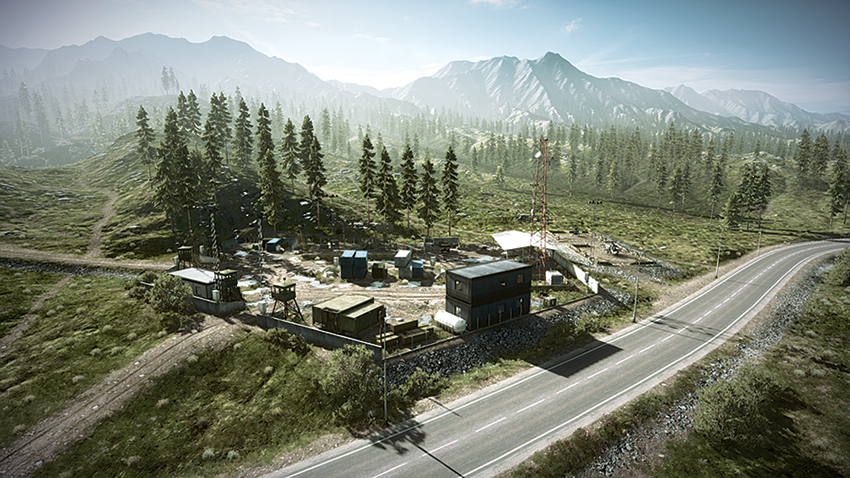
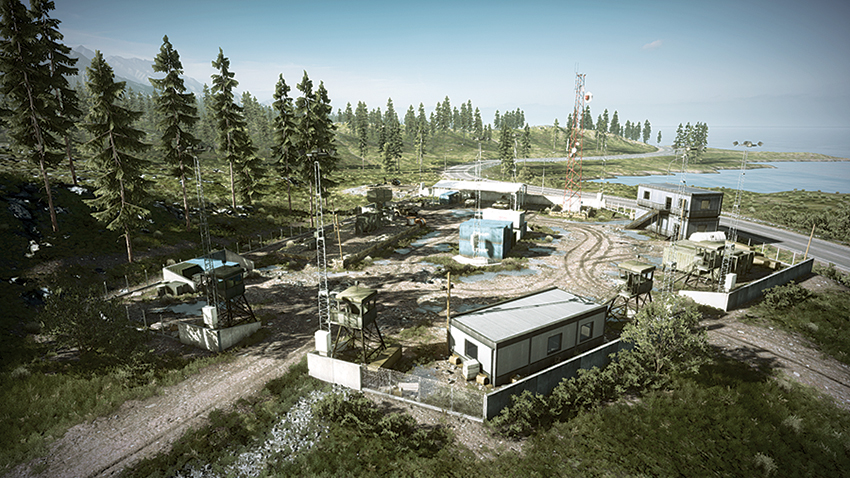
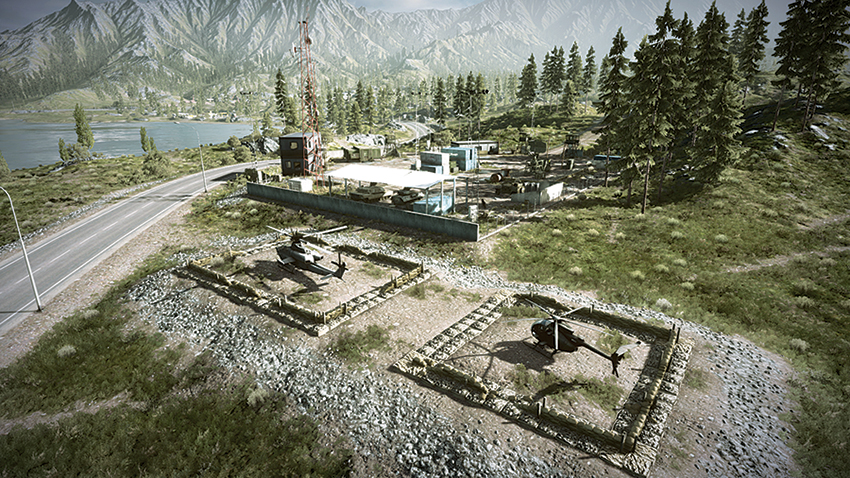
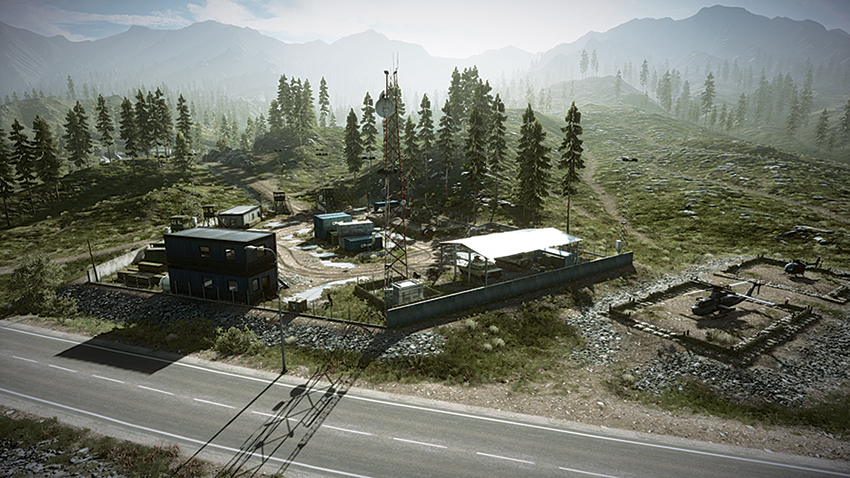
Deploying from the northwest, the US team is poised to quickly capture the Canoe Center (B), which is located on the edge of the lake. After claiming this point, the team can proceed to the southwest and claim the Train Station (A) with little resistance. The team would be wise to divide its resources to accomplish this, with squads moving to the Train Station (A) while others proceed southeast to gain control of the Bridge (D). While infantry are moving toward the Bridge (D), the team’s helicopters should advance to the area to hold back hostiles that are approaching the area from the southeast. The M1 Abrams should avoid the area around the Bridge (D) and continue from the Canoe Center (B) to the Gas Station (E) by way of the northern road. The tank is more than equipped to capture this point single-handedly, as well as push back resistance it encounters along the way.
RU Base
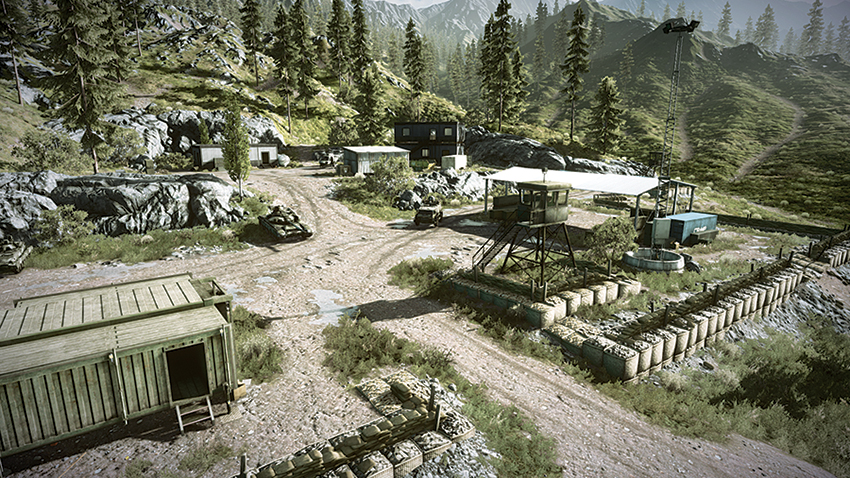
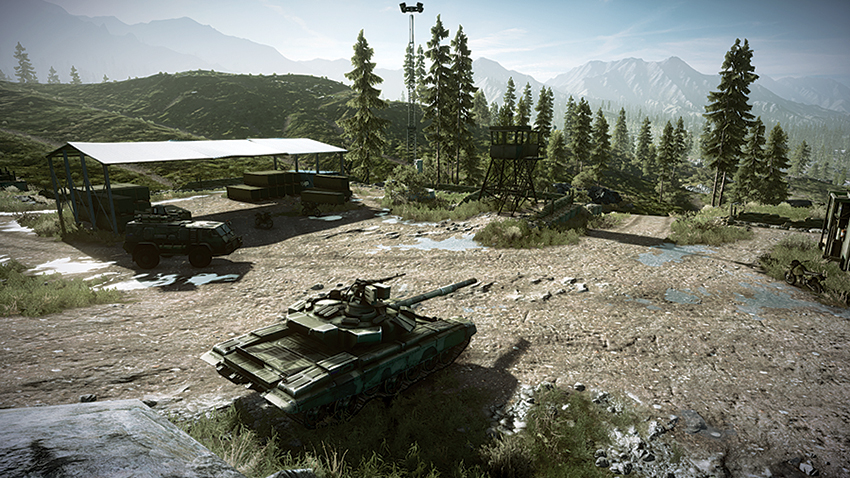
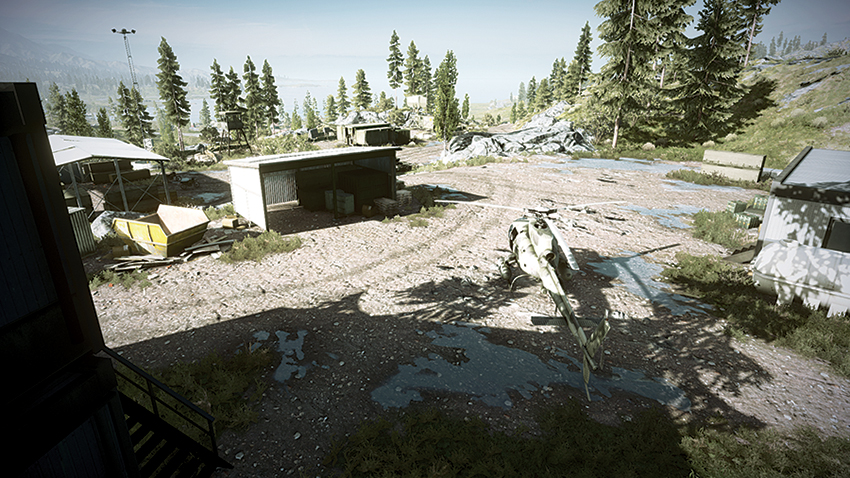
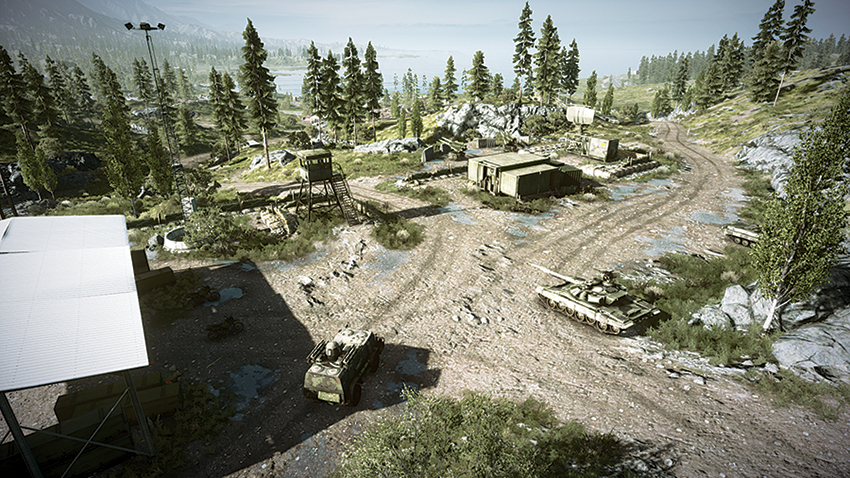
Deploying uphill from the southeast end of the map, the RU team will quickly move in and control the Com Center (F), which is immediately west of the deployment area. From this point, the team can move to control the Lumber Yard (G) to the northeast or continue west to capture the Water Tower (C). One advantage to controlling the southern control points is that the entire region is uphill from the rest of the battlefield. Taking advantage of this elevated position allows the team’s Vodnik AA and T-90A to fire upon enemy helicopters and the northern control points. The team’s helicopters should move toward the Bridge (D) early on and patrol this location until infantry can arrive to secure the point. Once the Bridge (D) is secured, the Dropship can be used to deploy units near the US team-controlled north and push back hostiles that are attempting to make their way uphill.
Train Station
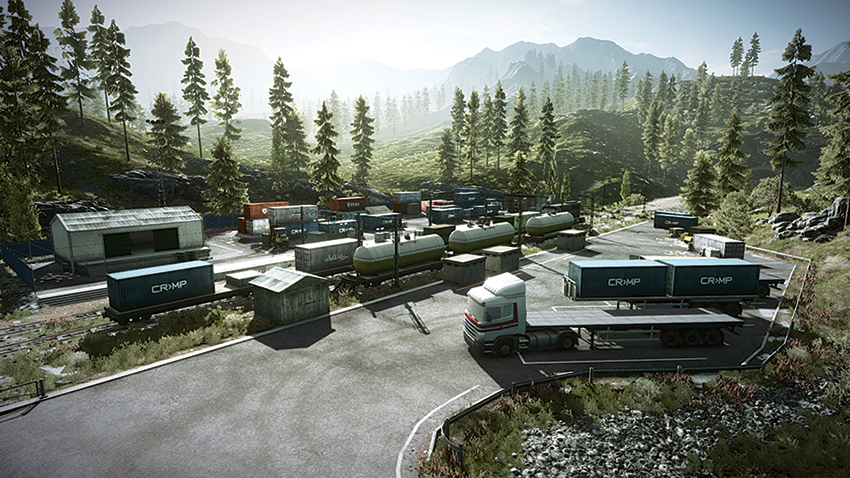
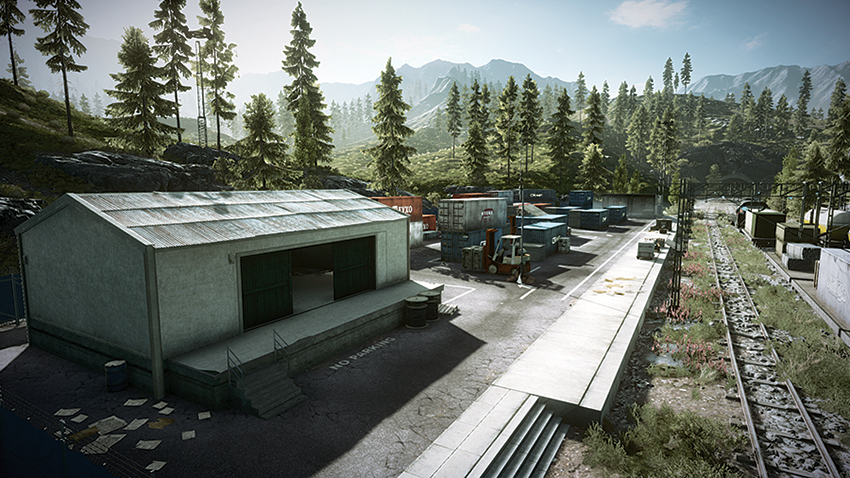
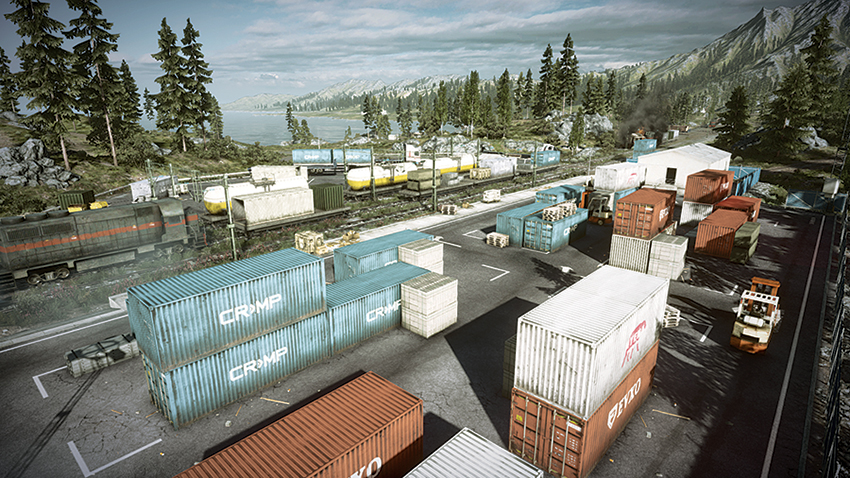
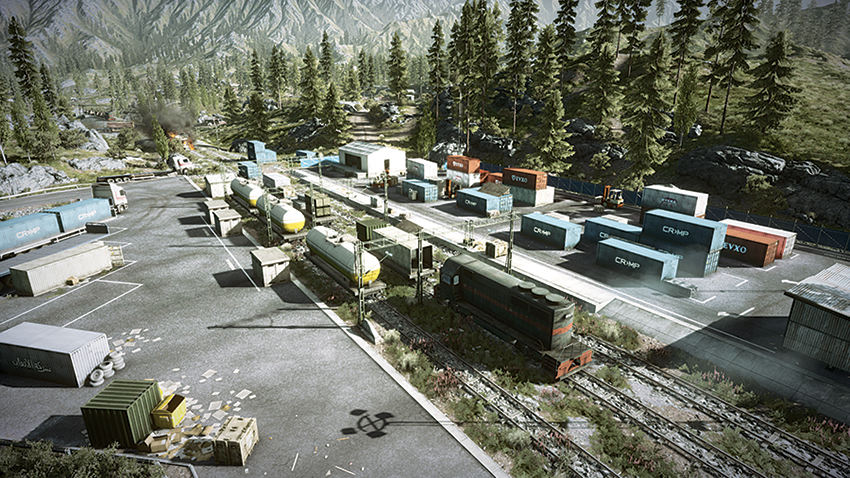
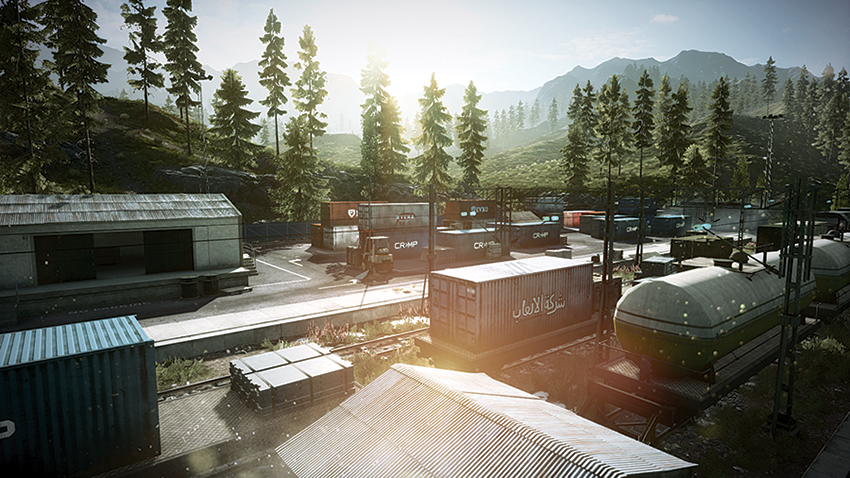
Located in the far west, the Train Station (A) is likely to be controlled through most of the battle by the US team given its proximity to the US team’s deployment. Its flag is exposed on the south side of the station near a forklift. Although it is exposed to attack from the east and from the air, the flag is obscured from view by train cars and shipping containers to attackers advancing on this control point from the north,. Larger vehicles should not stay near the shipping containers here, as avoiding mines and C4 attack can be difficult when navigating the confines of the station. Instead, these vehicles should opt to escort infantry units into the station and fire on hostiles from afar, making sure that escape is possible if engineers or support class soldiers are in the area. When approaching this area, watch the hills behind the station to the south for snipers that have taken position atop the rocky ridge there.
Canoe Center
Positioned on the northwest corner of the map, the Canoe Center (B) flag is located in front of the hollowed-out lakeside building. When attempting to capture this control point, teams should move into the building since the exposure of this area leaves infantry vulnerable to attack from the opposing team’s helicopters. An approach can be made either from the road (which leads directly from the US team’s deployment) or the lake. To the east of the flag is a rocky hill that can be used to clearly view the flag area. This sniper perch also affords a view of inside the north building, which is prone to hosting campers. While the building on the south side can provide cover, the nearby red gas tank can be exploded to eliminate threats hiding within the building or the nearby yellow dumpster.
Water Tower
Located on the southwest corner of the map, the Water Tower (C) flag is exposed near a timber pile, between three buildings. When capturing this point, teams should be watchful for hostiles attempting to flank the area by approaching from the map’s southern edge. As the point is being captured, it would be best to take cover on the east side of the timber pile, near the flag, thereby reducing the chance of being fired upon by the opposing team’s IFV, which can use the roads cutting through this region to access the control point. The advantage to this control point being exposed is that helicopters can be used to escort infantry units into the area and clear the way for their advance. Helicopters should be wary when entering the area, though, as engineers can use the buildings to hide while attempting to get a lock with their anti-aircraft weapons.
Bridge
Easily the most contested point on the map, the Bridge (D) is in the center of the map, with its flag being on the hill between the two bridges. Teams should not allow their IFVs or AA jeeps to stay on the bridges for any length of time, as helicopters can pick off these vehicles that have difficulty turning on a bridge. Dirtbikes, on the other hand, can rush through the bridges and approach the flag with ease. Planting mines underneath these bridges is helpful in preventing traffic from passing beneath them and flanking your team while the point is being captured. Once it is captured, teams should coordinate their movements with the Dropship, spotting enemy positions so that deployed allies can pick them off as they move through the uneven terrain. From the north side of the Bridge (D) area, IFVs can fire on the Gas Station (E) to the northeast and eliminate threats entrenched there.
Gas Station
Located on the northeast side of the map, the Gas Station (E) flag is exposed near the building to the north of the gas pumps. This control point is accessible from multiple angles. The point can be captured from within the building, which is a far better option than capturing while standing near the semi-truck. Teams should be careful to watch for hostiles that try to flank by approaching from the lake to the north and passing through the rear door of the building. While capturing this point, a squad mate should take position on top of the nearby building to be a lookout for the enemy. When moving in on the control point from the west, stay off the road and use the shipping containers on the edge of the lot to scout the location before advancing. Deployment of a MAV helps when scouting this large area for enemy campers, as well as for monitoring the rear of the lot while capturing the point.
Com Center
On the southeast end of the map is the Com Center (F). Its flag is exposed within the center of three structures. When capturing this control point, a squad should divide up to cover the surrounding area while one member captures the point. While capturing the point, the other squad mates should plant mines around the crane in the center of the yard. As dirtbikes rush into the area, these mines will ensure that the point is not easily captured. The shack on the east side of the yard can be used for cover when maintaining control of this point. Should the firefight get too intense, the door on the east side of the shack can provide a quick escape north into the brush. Approaching this area from the north requires an uphill climb, and since this hinders visibility of the control point, infantry units should deploy a MAV to scout the area during their approach.
Lumber Yard
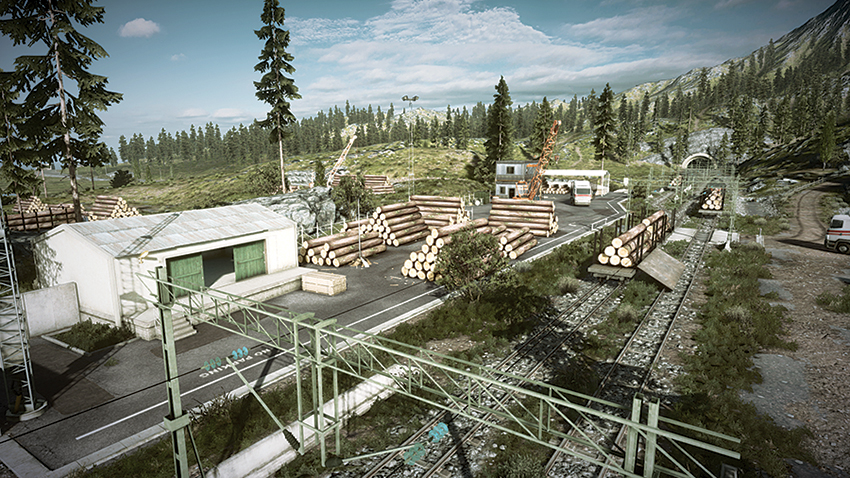
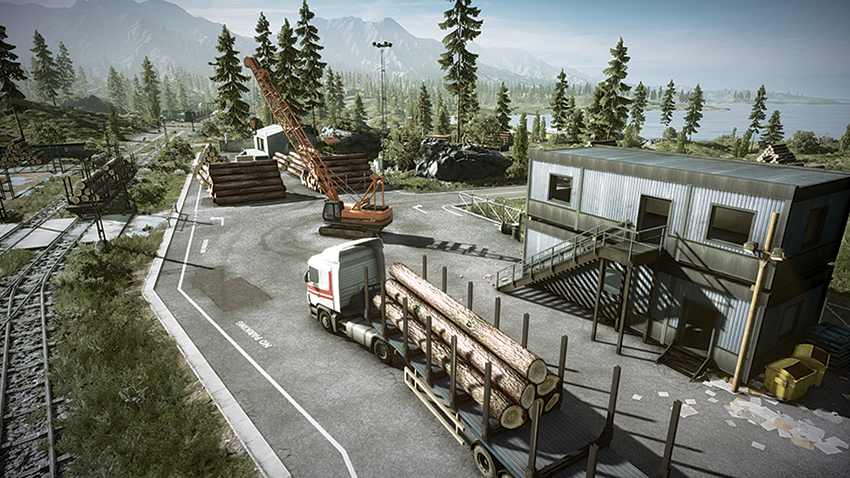
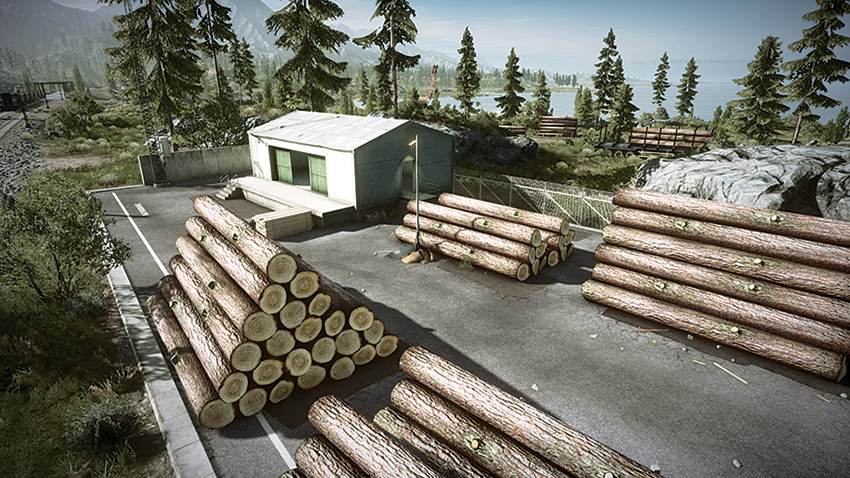
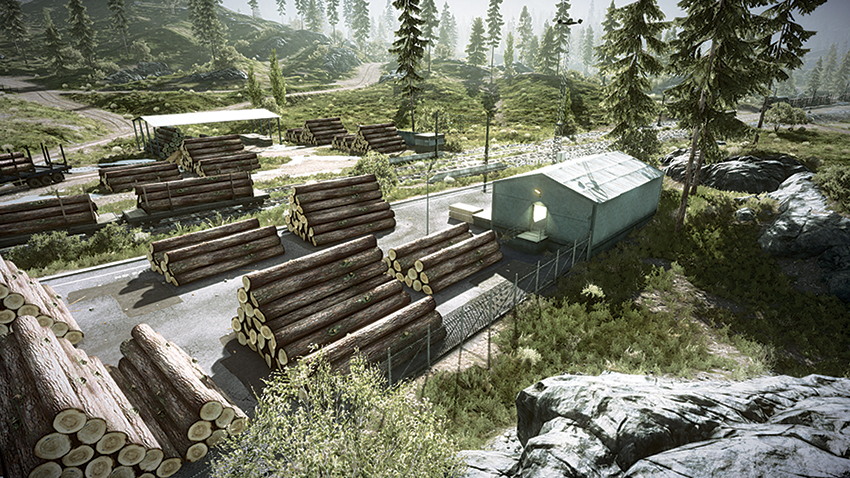
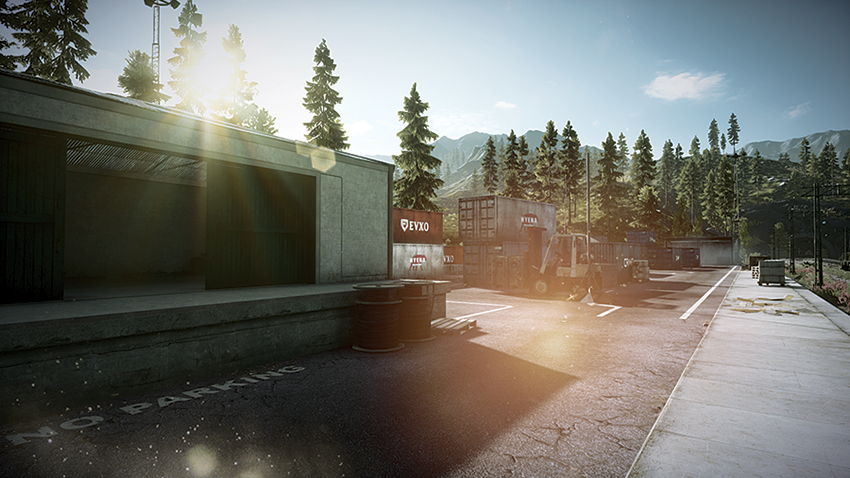
Because it is the farthest east control point on the map, the Lumber Yard (G) will most likely be controlled by the RU team throughout most of the battle. The flag is located on the Lumber Yard’s west side and is surrounded by piles of timber. It may seen exposed but is actually one of the map’s most fortified control points. For a team trying to capture this point, these piles of timber can also provide hostile squads with an opportunity to flank the unobservant. While a squad is capturing this point, it would be wise to position a sniper in the second-floor window of the office to the east. This sniper can spot and pick off hostiles that are approaching the flag area. When entering this area, it is a good idea to make sure this office building is clear before approaching the flag. For the team looking to maintain this point with minimal effort, placing claymores near the timber piles is an efficient method to retain control.
Capture the Flag
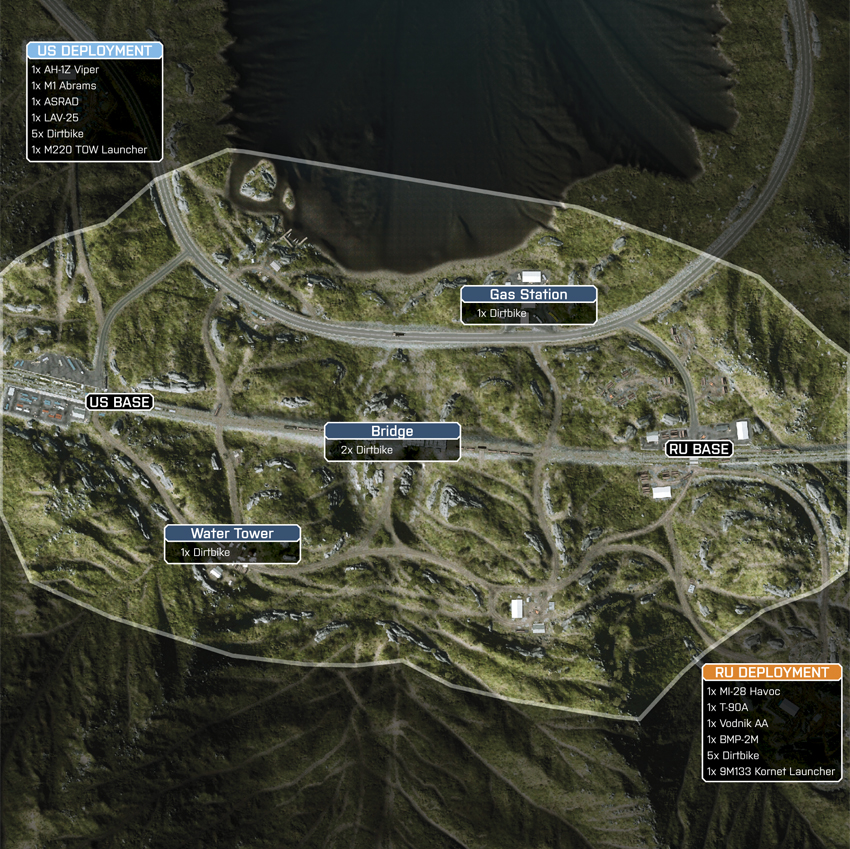
During Capture the Flag, the Kiasar Railroad map boundaries are wide enough to include the north shore and southern hillside. The US team’s flag is located at the Train Station on the map’s western edge. The flag is on the west side of a stack of shipping containers standing along the railway. The RU team’s flag is on the east side of the map, at the Lumber Yard, west of the timber piles. Both bases are situated on the rail line that cuts through the region. Because the flags are situated along the rail, both teams will make use of dirtbikes to rush their enemy’s base by following the rails. Although this method is perfect when in combat against a novice team, more experienced teams will booby-trap the railway to eliminate vehicles that attempt this. Both teams are allotted an assortment of vehicles at their base to utilize in battle. In addition to these, there are two extra dirtbikes at the Bridge, as well as a single dirtbike at both the Gas Station to the northeast and the Water Tower to the southwest. While the dirtbikes at the Bridge are convenient when passing though, the dirtbikes located at the Gas Station and the Water Tower can be more of a distraction than an asset while moving to capture the opposing team’s flag.
US Base
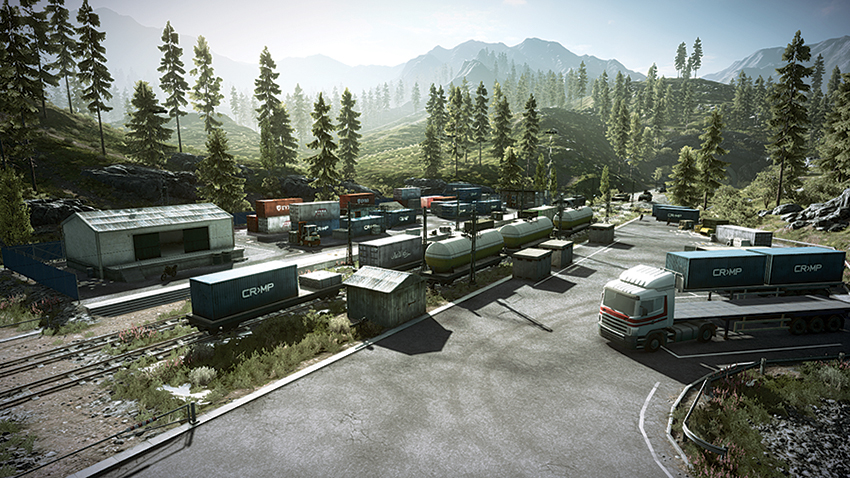
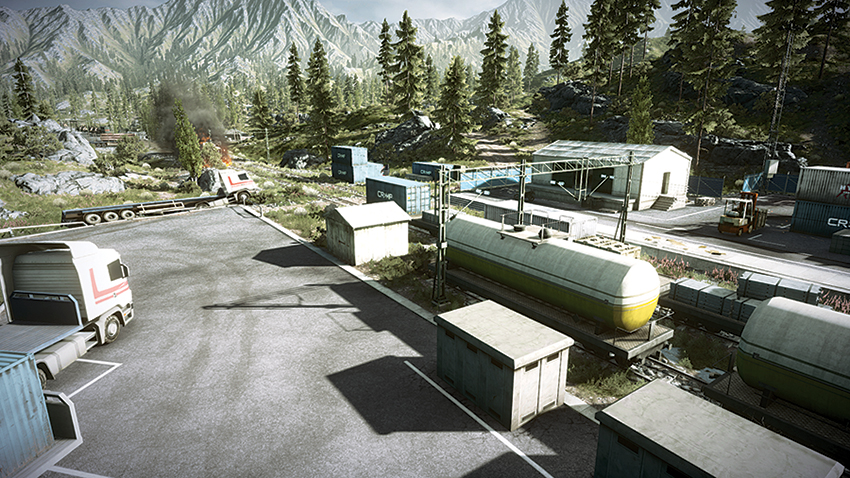
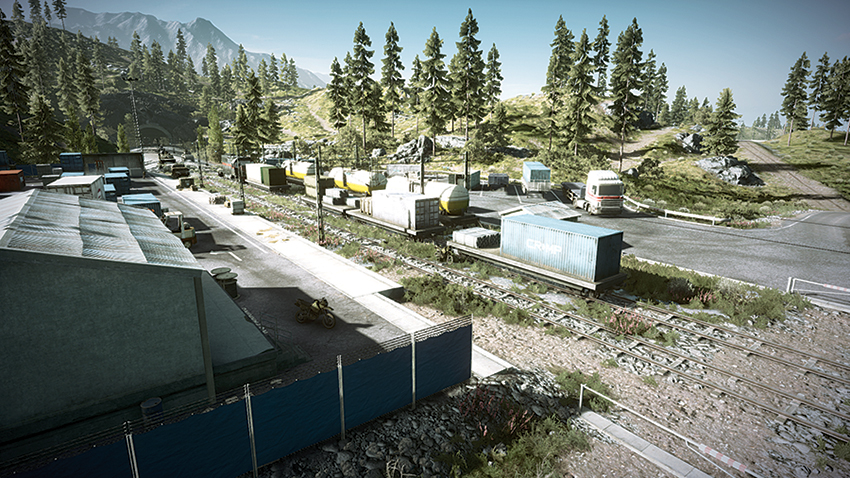
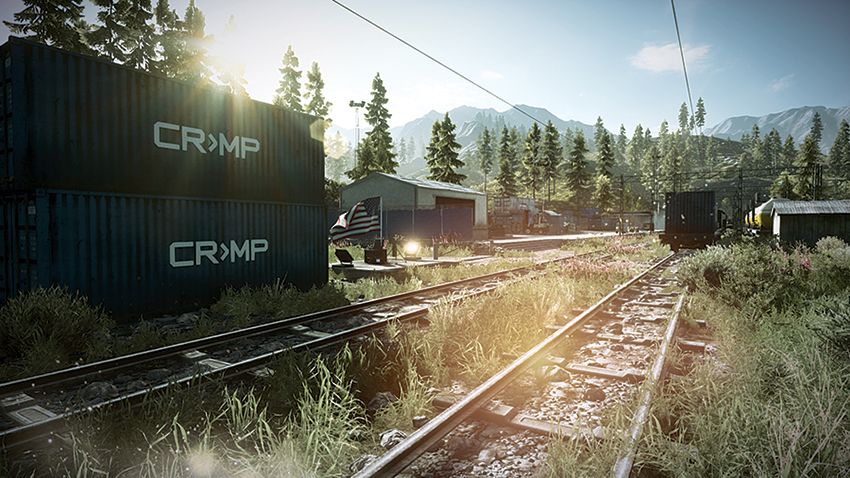
Located at the Train Station on the maps west side, the US Base is vulnerable to being flanked from both the north and the south. An efficient tactic to monitor the base and the surrounding area is for the team’s helicopter to maintain a presence above the Train Station. This means infantry units can be alerted early to fast moving dirtbikes that are closing in to capture the flag. Another vehicle that should stay within the vicinity of the base is the ASRAD, which can defend the base from both land vehicles and the enemy helicopter. While these two vehicles maintain a presence here, the M1 Abrams and LAV-25 can advance southeast to bombard the RU base from afar and the US team’s dirtbikes enter the Lumber Yard to take possession of the flag. When returning, vehicles should avoid staying on the rails, as they are sure to be littered with mines.
RU Base
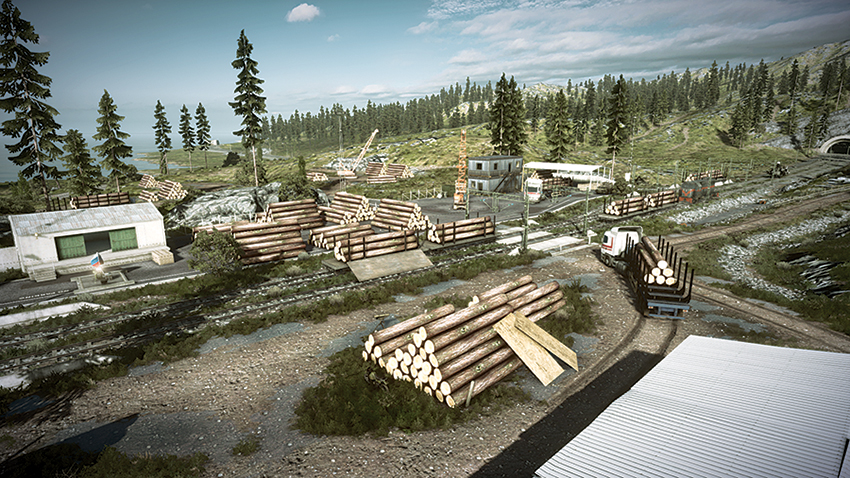
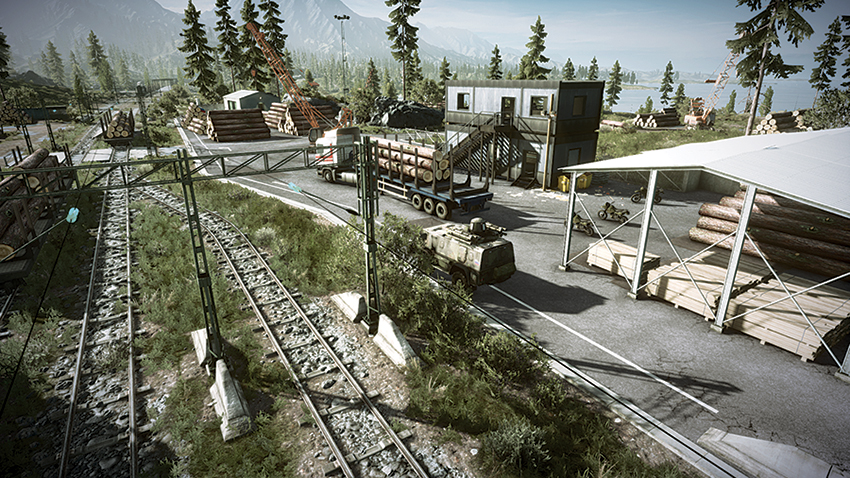
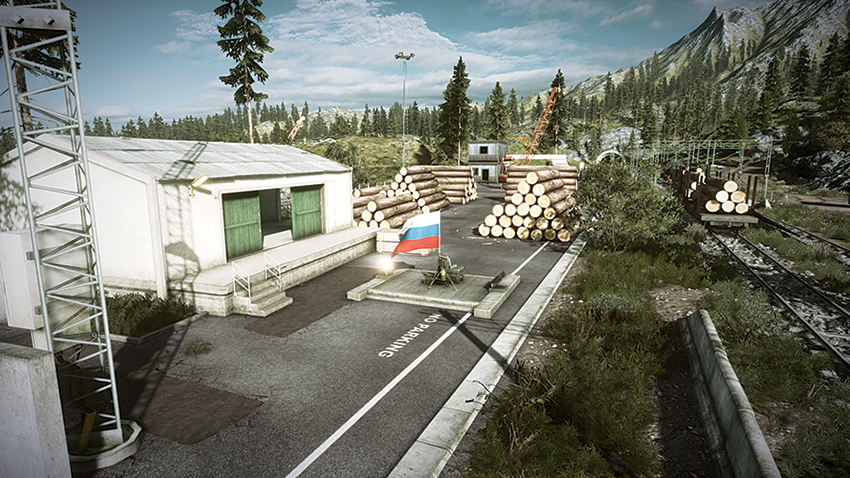
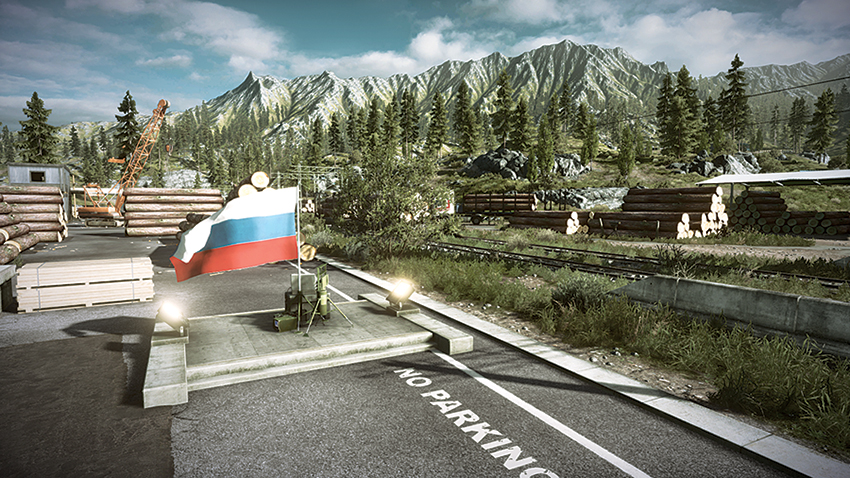
Located at the Lumber Yard on the east side of the map, the flag of the RU Base is among timber piles on the yard’s west side. To provide a vantage point over the flag, a recon soldier should take position inside of the office on the east side of the yard. From the second-floor windows, a sniper can observe the flag and the surrounding area. A helicopter should circle the Lumber Yard and maintain a presence over this area to spot enemies as they approach. While this task can be performed by the sniper in the office building, the helicopter has the firepower sufficient to eliminate the threat presented by larger vehicles. Placing mines along the tracks near the west entrance to the Lumber Yard can prevent fast-moving dirtbikes from taking the flag by surprise. Placing the Vodnik AA at the yard’s north entrance can help push back hostiles coming from the northern road, as well as pose a significant threat to the enemy helicopter if it comes within the Lumber Yard’s airspace. When advancing on the US team’s base, the attack should be directed from the south, as the hills provide an elevated position to fire on the base with the T-90A and BMP-2M.
Rush
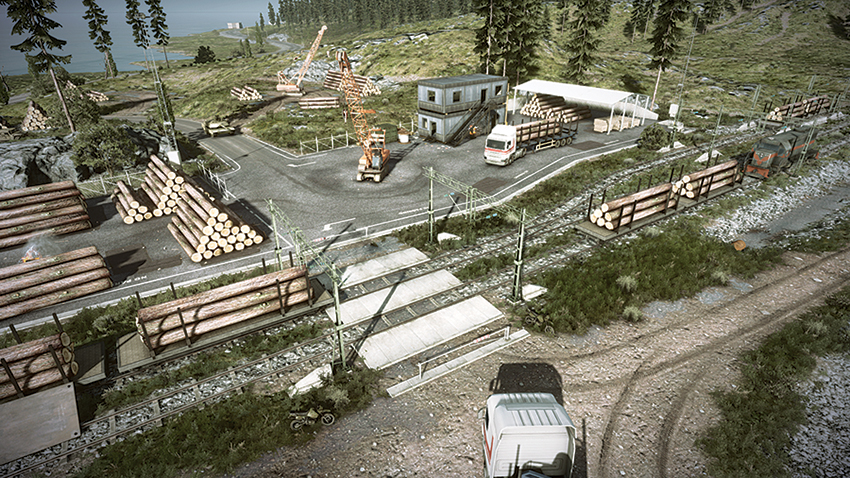
The Rush battle of Kiasar Railroad follows the northern road, moving south along the lake into the Lumber Yard before concluding at the hillside base in the southeast. The placement of M-COM Stations in each stage of this battle forces teams to engage in open conflict as the landscape offers opportunities to flank and overwhelm the opposition. While attackers are afforded the benefit of the ASRAD and dirtbikes throughout the battle, the defenders’ MI-28 Havoc, in the hands of an experienced pilot, will provide a firm resistance to attacks. An essential tactic is to use the elevated positions of the terrain to gain the advantage through each stage in the battle. For attackers, the greatest threat on this map comes from a defending team that is well versed in the use of MAVs to reveal the positions of attackers and coordinate the placement of booby traps to disable their vehicles.
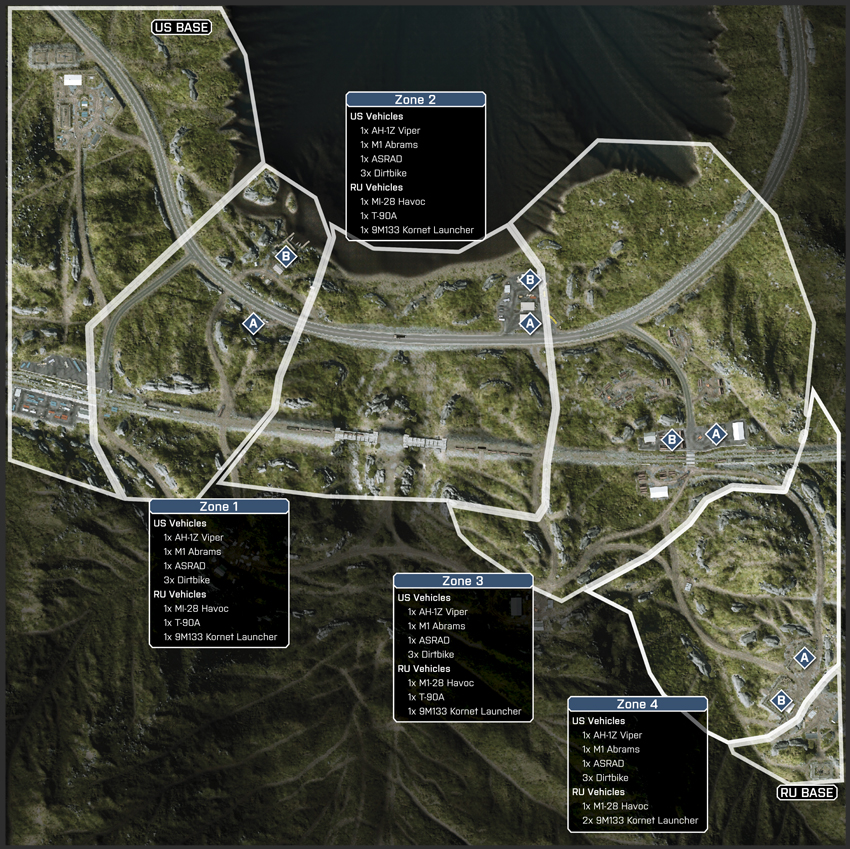
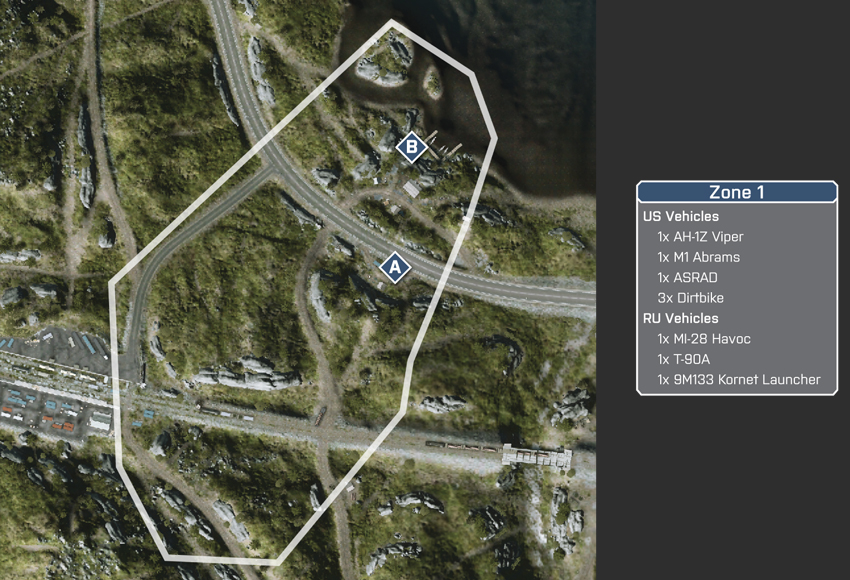
Zone 1: Canoe Center
US Deployment
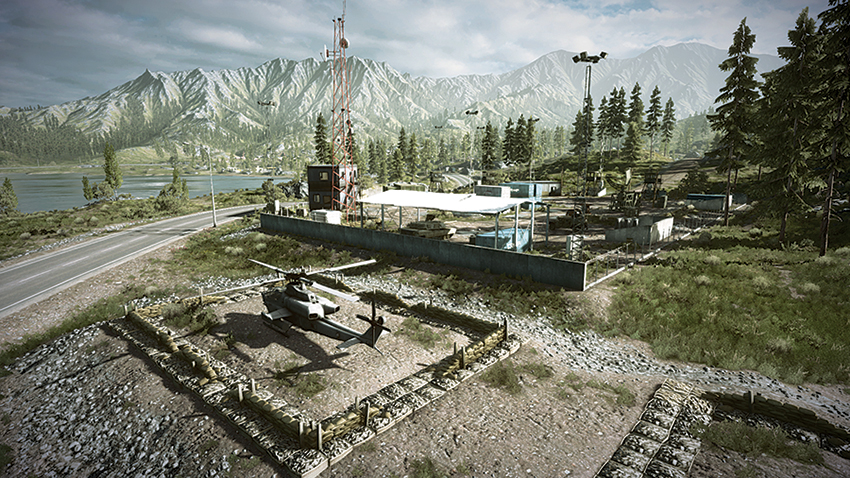
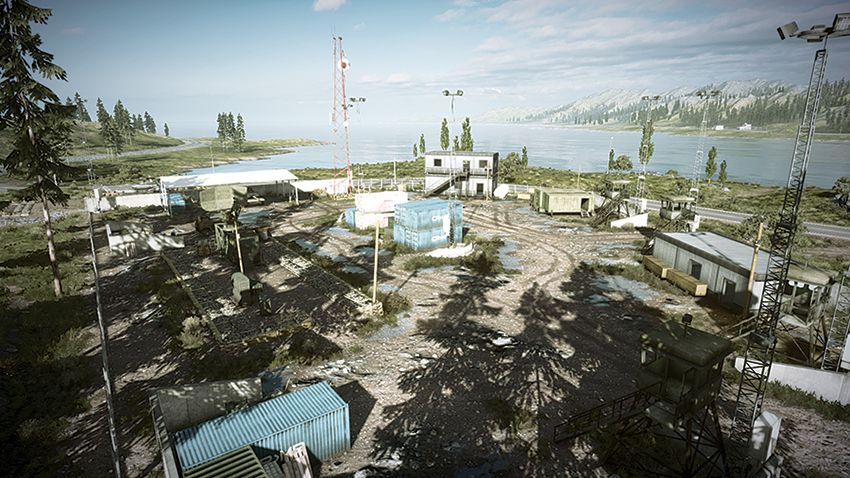
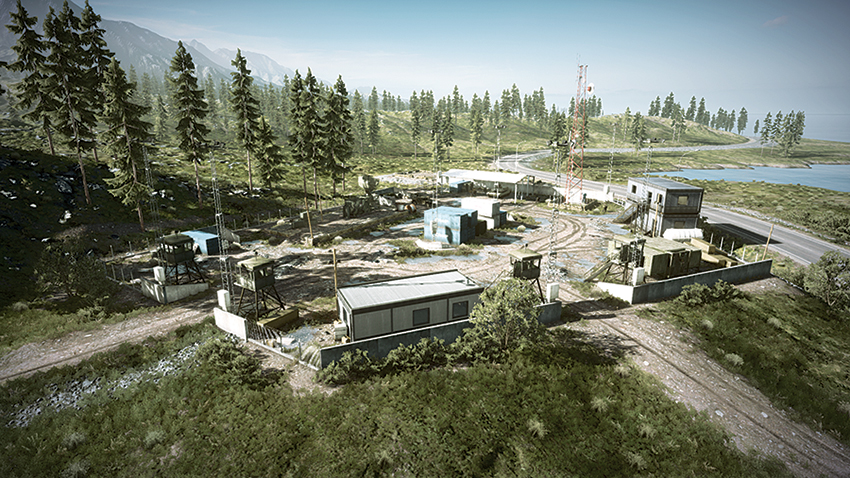
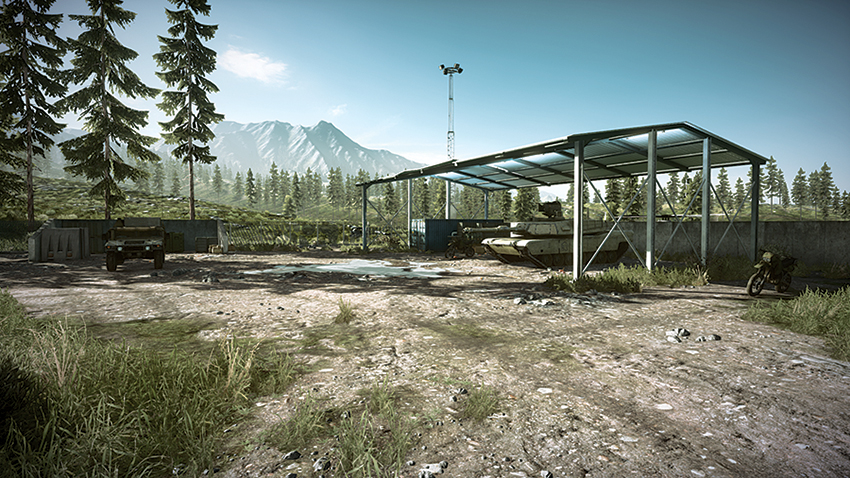
Deploying from their base to the northwest, the US team has the advantage of using the road to advance the M1 Abrams and ASRAD to the objectives quickly. This is overshadowed, however, by the 9M133 Kornet Launcher at the Canoe Center, which the defenders will use to push back the armored assault. While these vehicles approach the objective site, the AH-1Z Viper should be in the air above the Canoe Center to clear the area of defenders while infantry units descend upon the area. Attackers on dirtbikes would be wise to follow the lakeshore as they make their approach on the objective, avoiding the defenders that are descending on the area from the southeast. This approach from the north allows dirtbikes to drop off their passengers to plant a charge on the objectives and continue their path east, drawing enemy fire away from the objective area.
RU Deployment
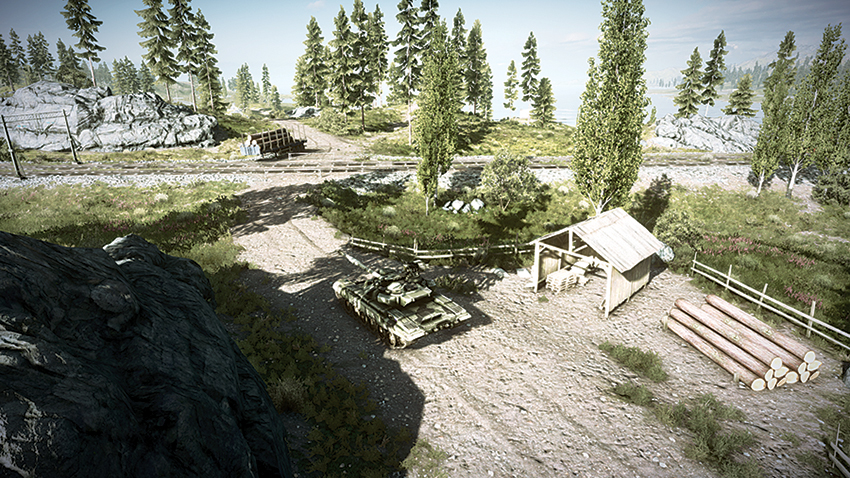
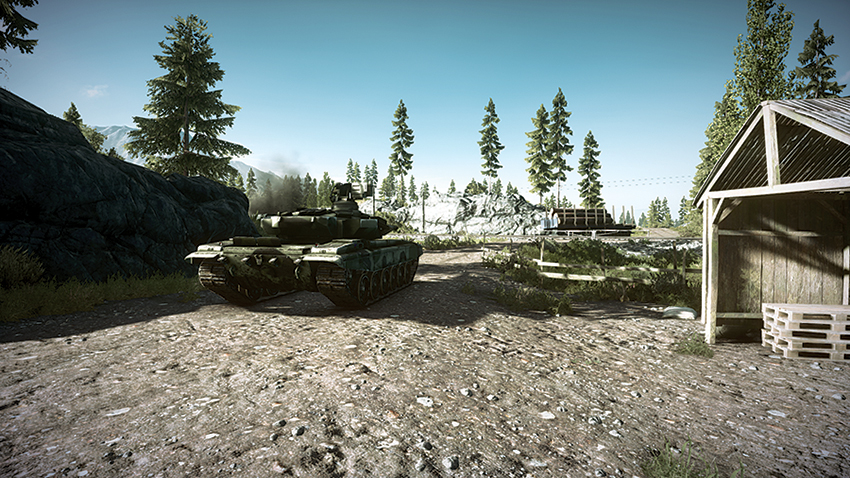
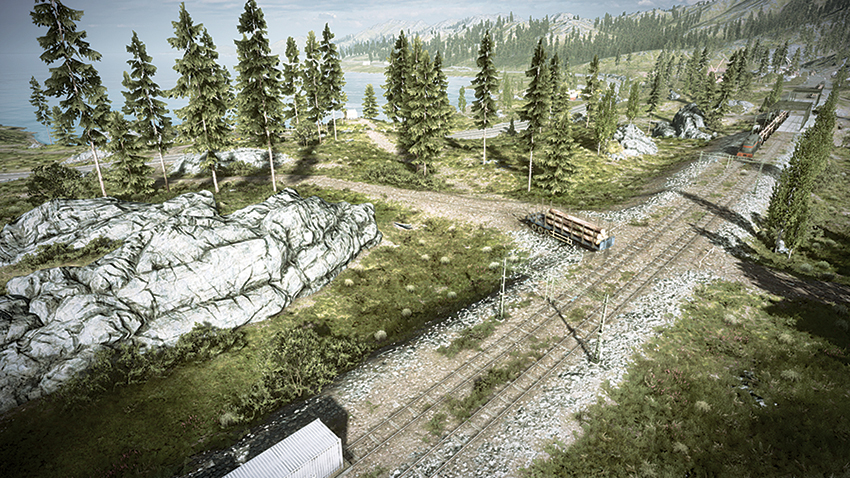
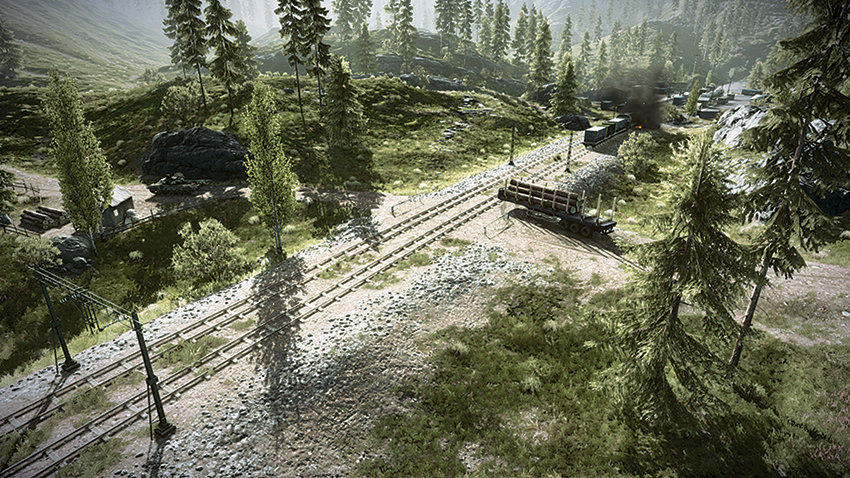
Deploying from the hills southeast of the Canoe Center, the defending team can quickly fortify the hill south of the road with a squad while other team members move north to entrench themselves at the Canoe Center. Because the T-90A deploys south of the objective, it can be placed on the hill overlooking the objective and fire upon attackers’ vehicles as they move into the area from the northwest. Once in the air, the MI-28 Havoc should focus on patrolling the road leading northwest from the Canoe Center. As attackers approach from this direction, the MI-28 Havoc is more than capable of pushing back armored resistance moving from the US team’s deployment area. Through coordinated efforts of the MI-28 Havoc and the T-90A to keep the attackers’ vehicles at bay, defenders can force the attackers into a stalemate early on.
M-COM Station A
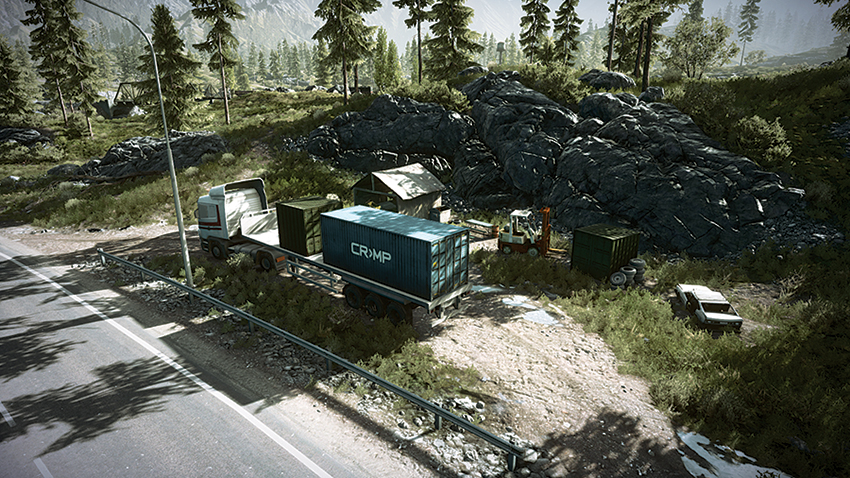
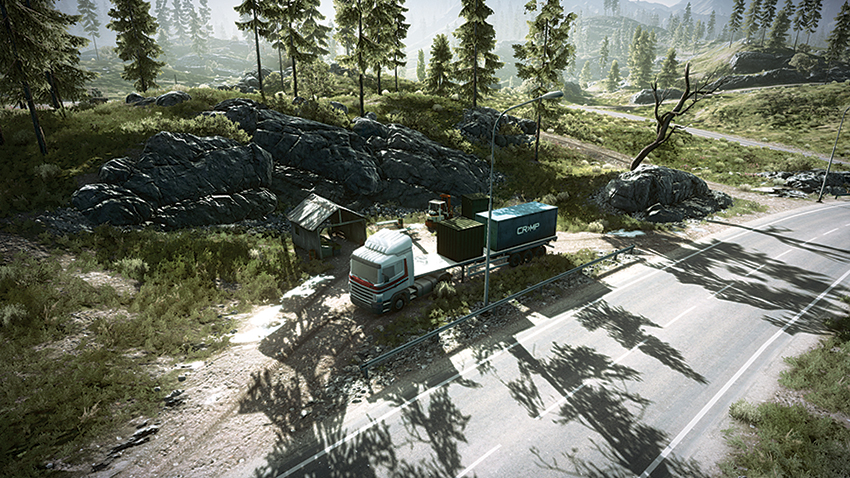
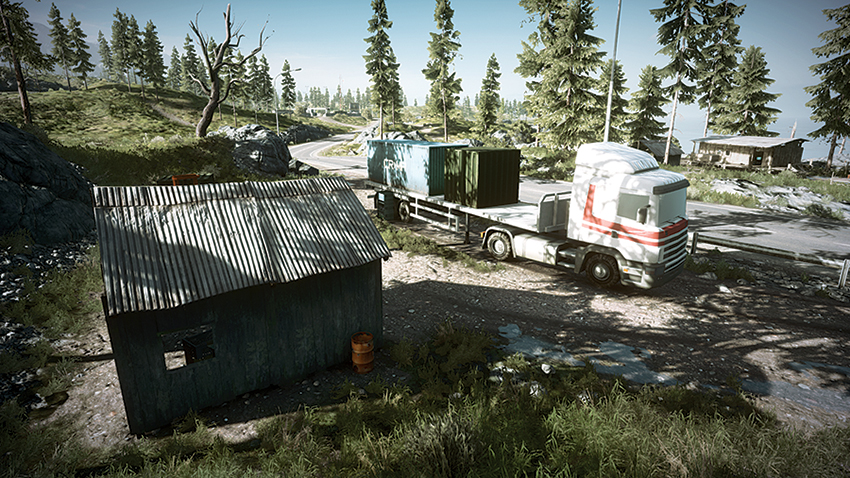
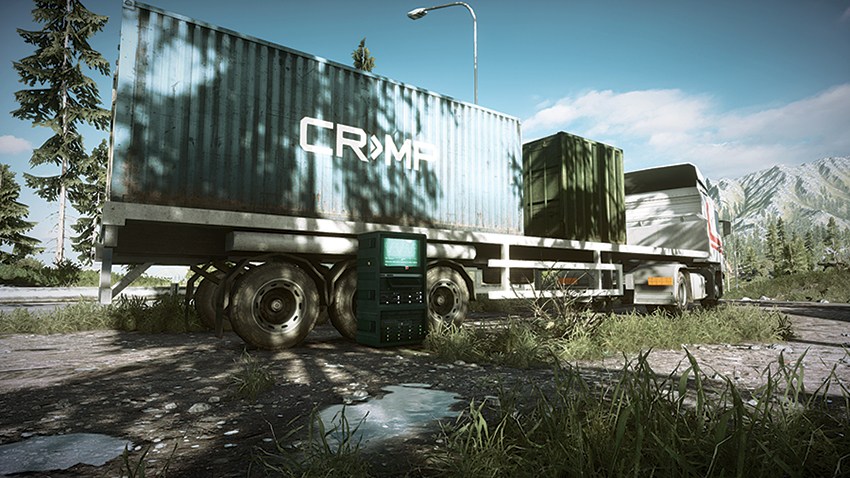
Positioned south of the Canoe Center, M-COM Station A is exposed on the south side of the parked semi-trailer here. For attackers, the difficulty in approaching the objective comes from the tendency for defenders to camp within the wooden shack nearby. Defenders making use of this tactic to defend the objective should be ready to retreat if the attackers’ helicopter discovers them, as the wooden shack does not provide much cover against explosive weapons. Not only should attackers be wary of the shack when approaching the objective, but also the hill to the south, which serves as a sniper perch. Sight lines on this objective are limited, though, so defending this objective will require vigilance by helicopter and infantry set atop the nearby rocky ledge. Defenders and attackers would both benefit by deploying a MAV to survey this area before infantry approach the objective.
M-COM Station B
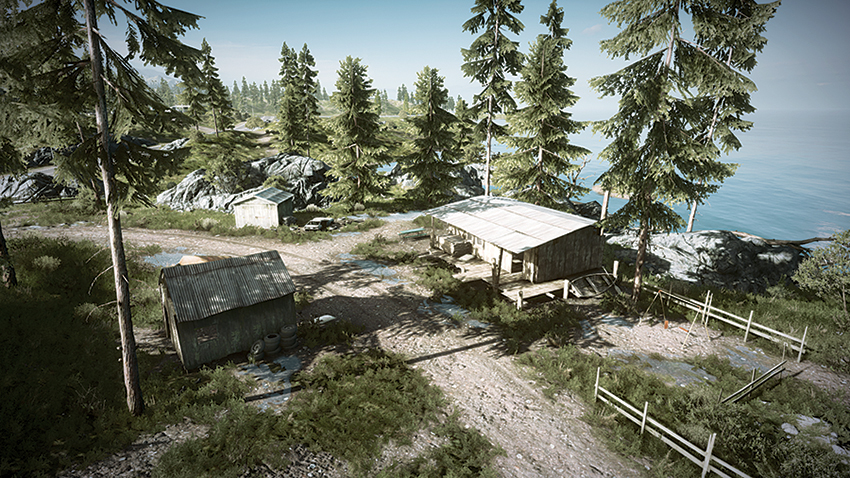
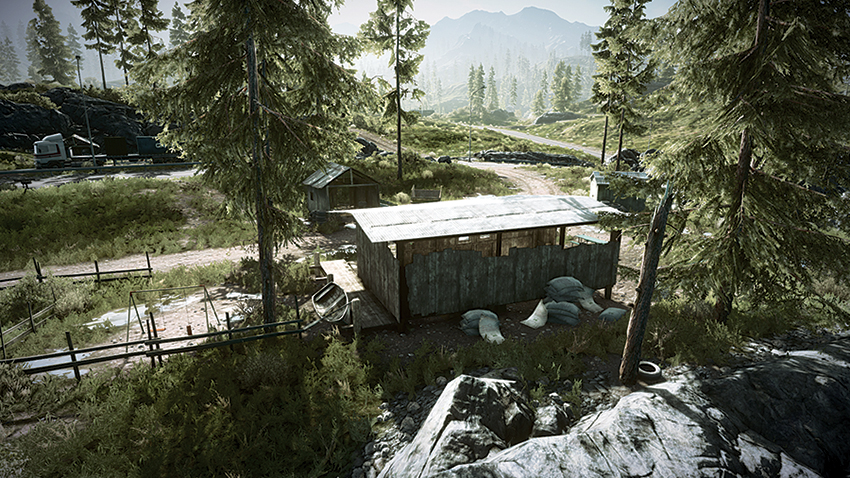
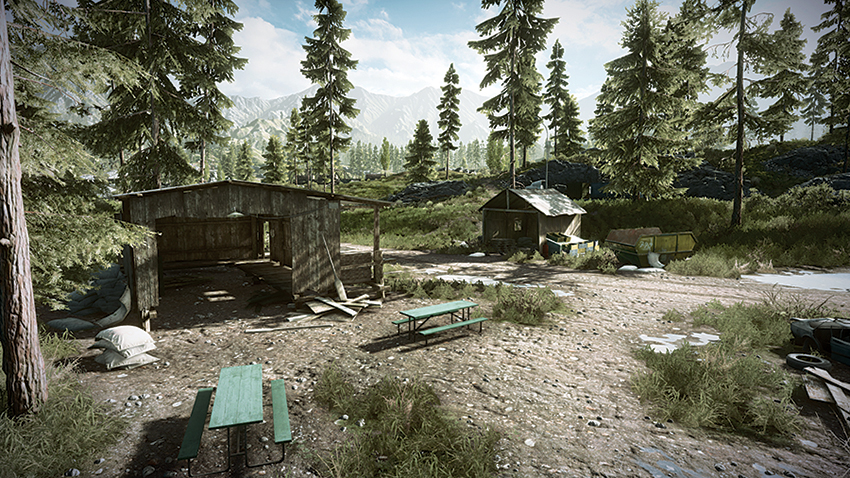
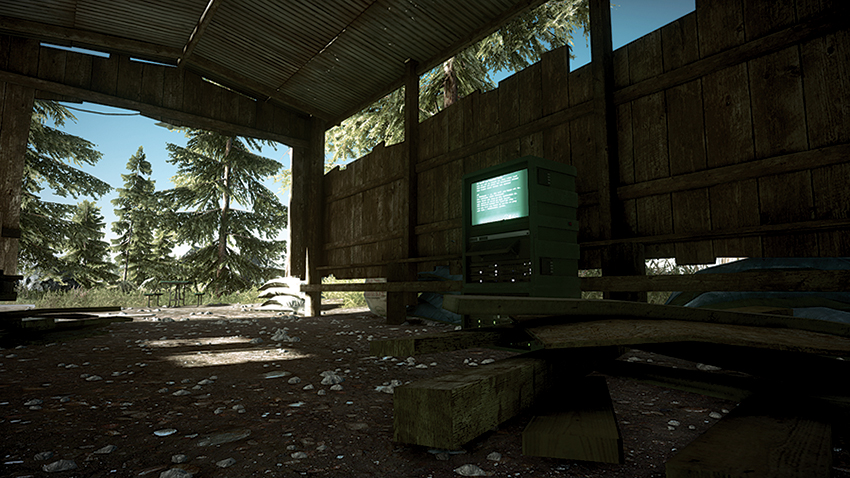
Located within the northern building at the Canoe Center at the lakeshore, M-COM Station B is a difficult prospect for attackers attempting to enter the area by the road to the south. Attackers on dirtbikes should make their move on this site by following the lakeshore southeast from their deployment. While the other attackers advance on the site by way of the road, stealthy attackers can approach the objective unseen while defenders are spread thin protecting M-COM Station A to the south from their armored vehicles. Defenders looking to protect the objective should place claymores inside of the building that houses it, and lie in wait near the shack west of the objective for attackers to cross their path. While it is possible to survey the area by helicopter, the nearby trees conceal the movements of infantry as they move around the objective and the buildings here.
Zone 2: Gas Station
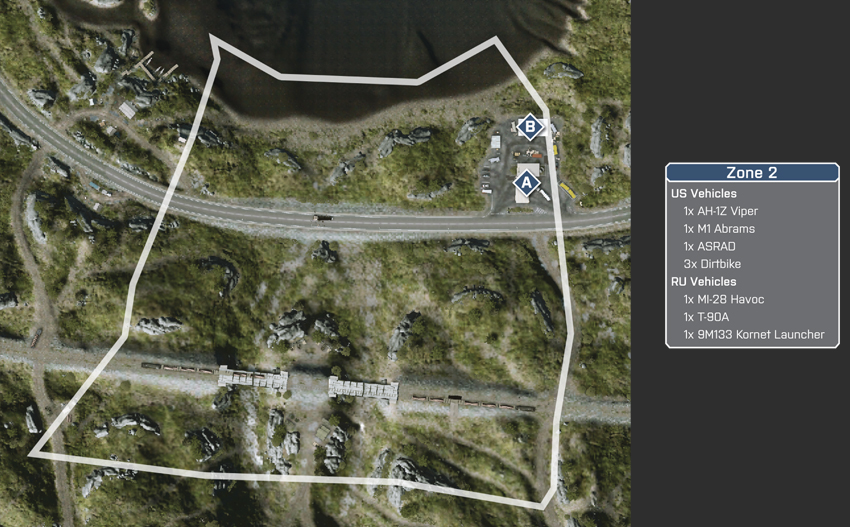
US Deployment
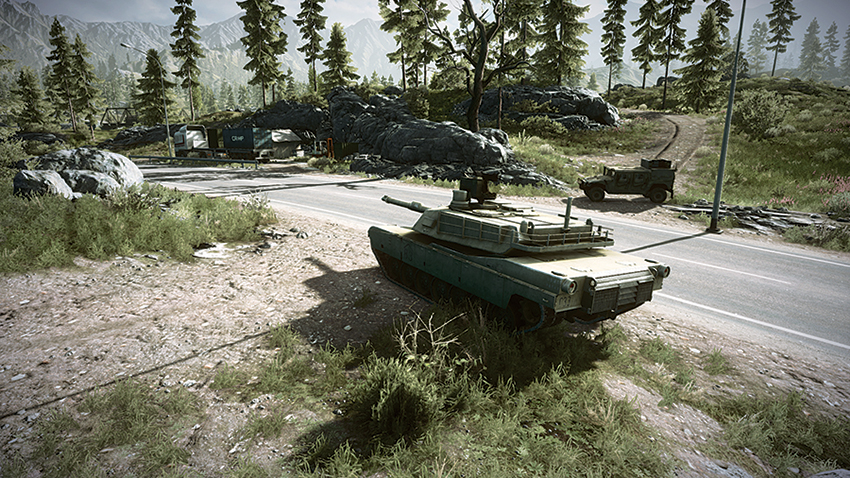
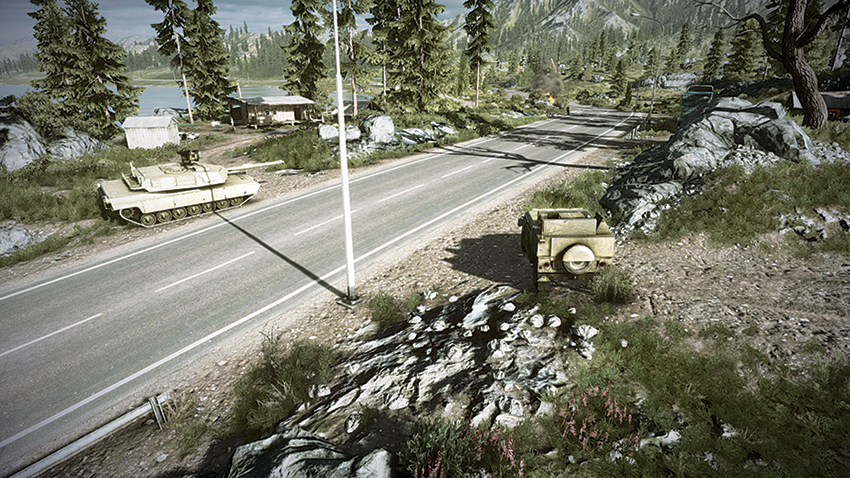
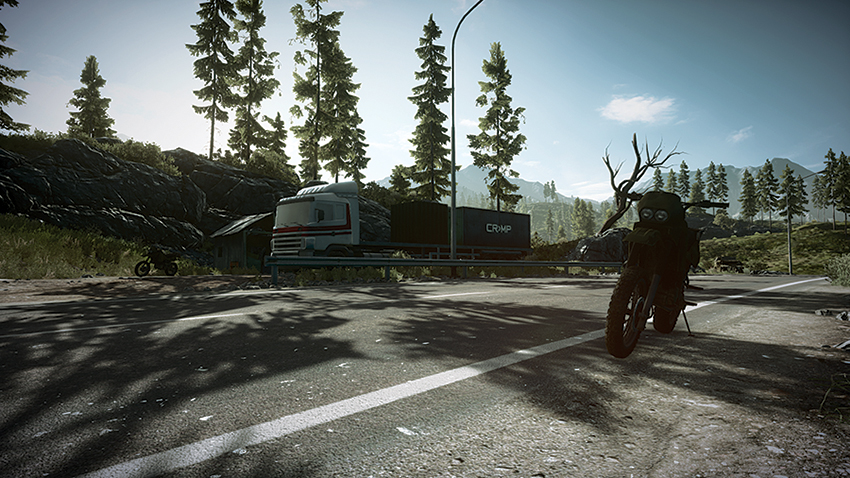
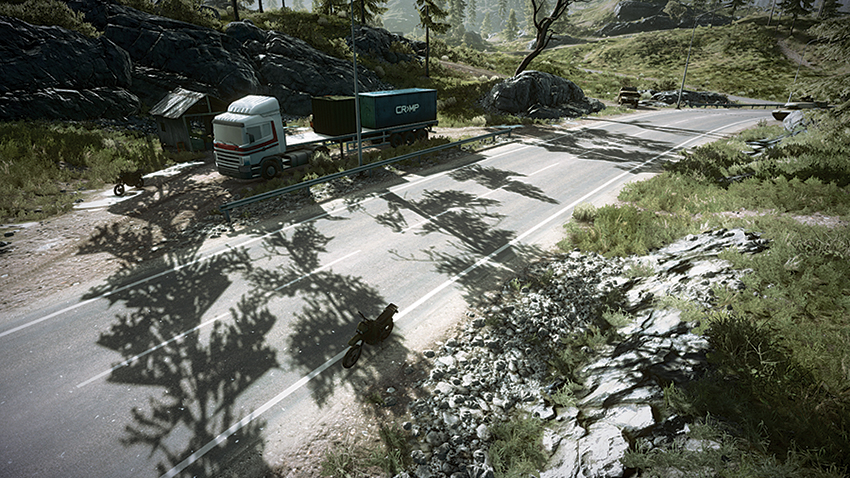
Deploying from the Canoe Center, the US team will have to proceed east to reach the objectives. As in Zone 1, this stage of the battle sees attackers using the road to advance to the Gas Station. While this is the most direct way to approach the area, it is possible for the M1 Abrams and ASRAD to traverse the lakeshore to the north of the road. By traveling along the lakeshore, it is possible to flank the objective area by moving through the Gas Station’s north side. Dividing up the heavy vehicles is a good tactic to take the defenders by surprise, with the M1 Abrams moving to the objective by way of the road and the ASRAD cutting through the rear of the Gas Station and using its cannons’ secondary fire to bombard the objective area during approach. Throughout the course of the battle, the AH-1Z Viper should take to the skies and patrol the area surrounding the Gas Station for defenders moving in from the east of the station and attempting to cut off attacking troops moving between the two objectives found there..
RU Deployment


Deploying from the east near the lakeshore, the RU team is able to quickly fortify the Gas Station objectives early on. Defenders should place snipers on the roof of the Gas Station to pick off attackers as they approach from the west. Setting a T-UGS motion sensor on the north side of the Gas Station lot is useful to monitor the activity around the station. . While this motion sensor can alert of attackers as they pass through, a MAV is an even better choice for detecting hostile troop movements because you can relocate the device easily. Once the MI-28 Havoc is in the air, the vehicle should proceed to the west of the Gas Station to cut off the attackers’ tank and AA jeep as they approach and prevent these heavy-hitting vehicles from establishing a foothold at the Gas Station. With the MI-28 Havoc doing the heavy lifting outside of the Gas Station’s vicinity, the T-90A can remain at the Gas Station to eliminate dirtbike and infantry units that enter the area.
M-COM Station A
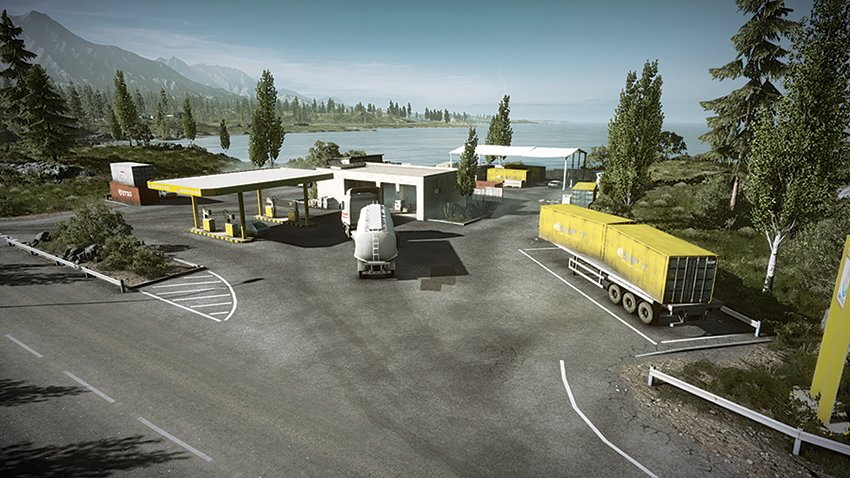
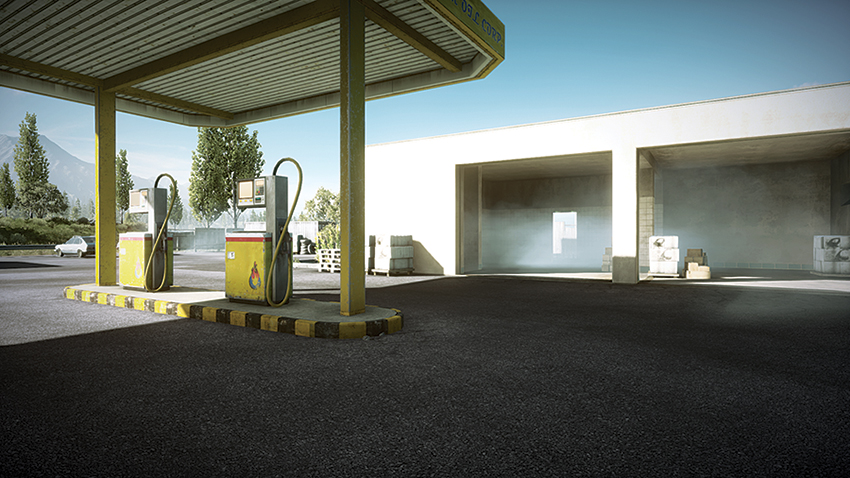
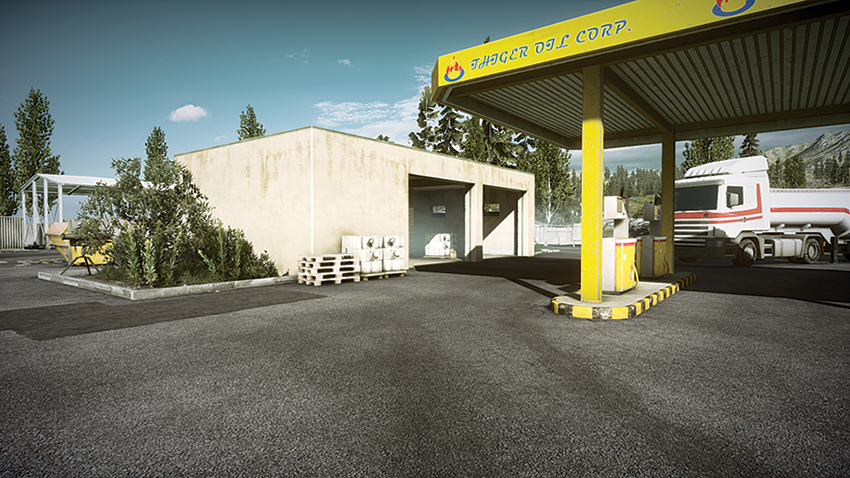
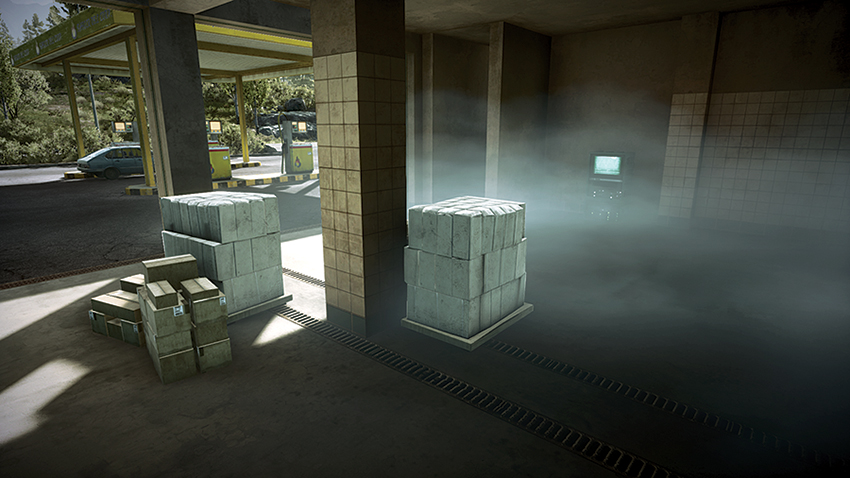
M-COM Station A is inside the garage building at the Gas Station. Attackers should approach by flanking the building to reduce their number of casualties. Dirtbikes should approach the building from the north and the south, and drop off their passengers as they continue past to draw fire away from teammates that are planting the charge. Defenders looking to maintain a presence near this objective should place claymores within the building and take positions on the rooftop. There are very few sight lines to directly monitor the objective and they usually require camping beside the nearby semi-trailer or going prone near the end of the Gas Station lot to the east. Attackers should deploy a MAV as they advance from the west to observe the building’s rooftop, as well as get an overview of the Gas Station’s east side.
M-COM Station B
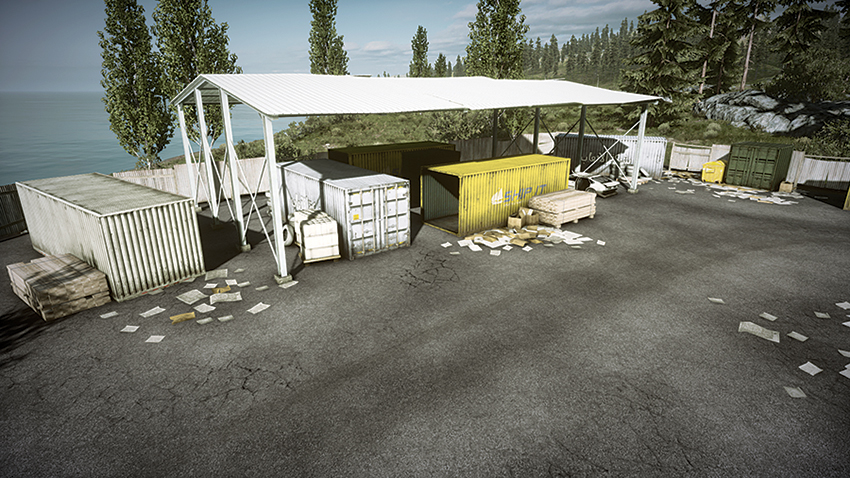
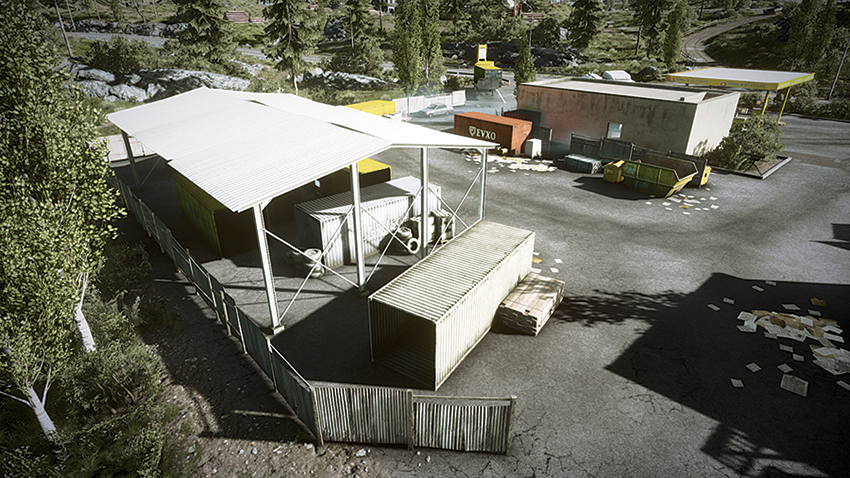
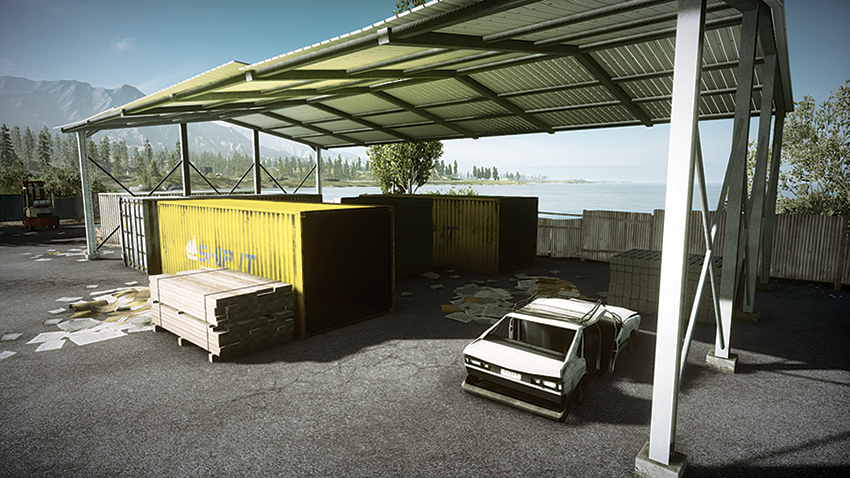
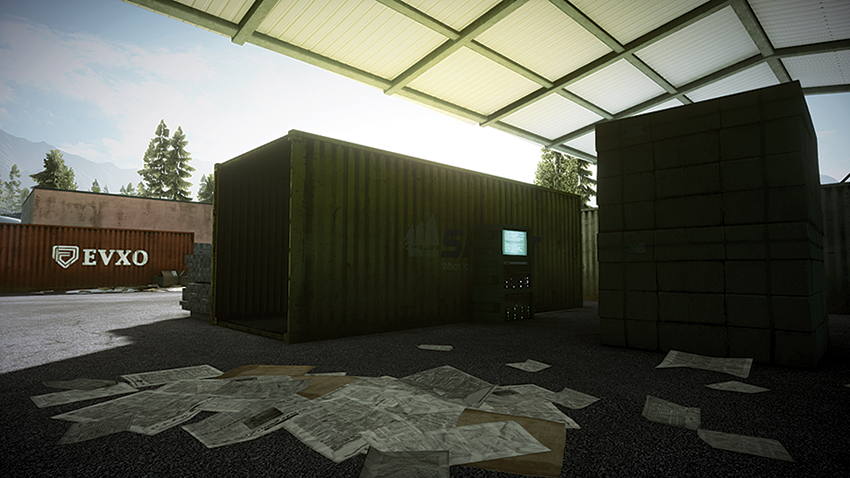
Located beneath a storage area between two yellow shipping containers on the north side of the Gas Station, M-COM Station B does not offer sight lines to observe the activity around it. While MAVs work great for monitoring the activity that occurs on the Gas Station property, MAVs have difficulty seeing soldiers that are concealed under the roof of the storage area. This means defenders must make use of T-UGS motion sensors—usually placed within the shipping containers themselves—to monitor the activity of the objective area. Given the confines of the area, attackers and defenders alike will not be able to approach the M-COM Station with a vehicle. Instead, defenders and attackers alike will be passing tanks through the north side of the Gas Station lot in an attempt to control this objective. Tank commanders that want to establish a presence here should remain on the grassy area to the north and the east after destroying the fence line to offer at least some visibility. By remaining off the pavement, tanks can avoid the mines that are littered around the Gas Station.
Zone 3: Lumber Yard
US Deployment
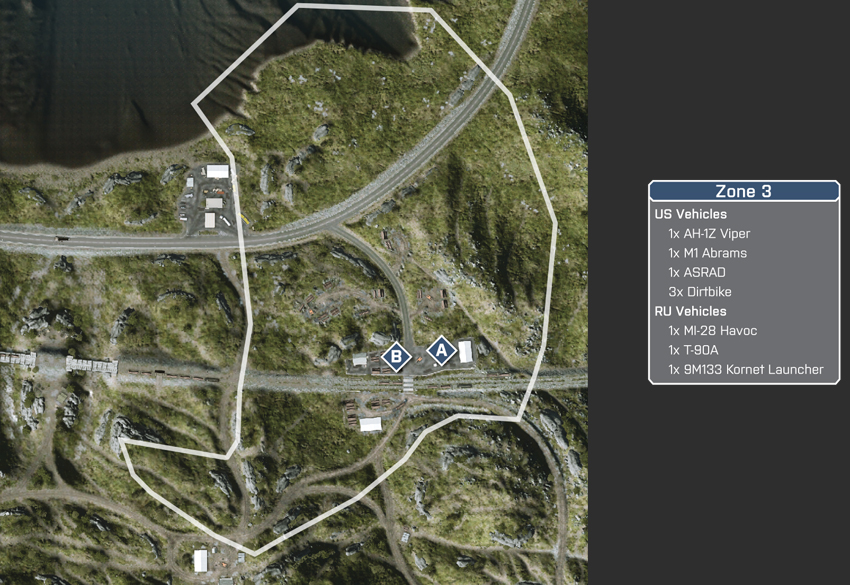
Deploying from the Gas Station, the US team will have to work their way uphill and to the south to approach the objectives. While the team can approach the Lumber Yard relatively unnoticed, securing the objectives will require a coordinated effort by both the armored vehicles and infantry units. When attacking the objectives, infantry should focus on flanking from the west and the east sides of the yard, while the heavily armed M1 Abrams and ASRAD take up positions in the center of the area to focus their firepower on the defenders that are deploying from the south. While this chaos ensues, the AH-1Z Viper can proceed south and approach the Lumber Yard from behind the defenders’ deployment to eliminate threats en route to the yard. The team should focus its attention on one objective at a time to keep from being spread too thin between the objectives.
RU Deployment
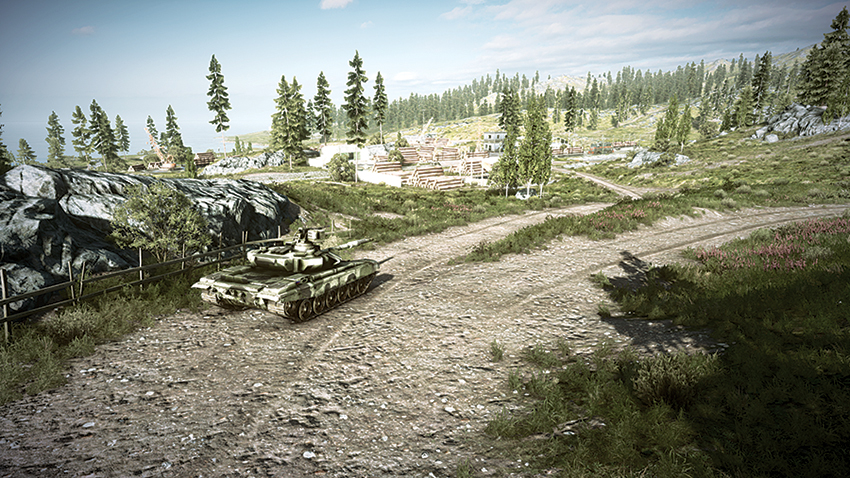
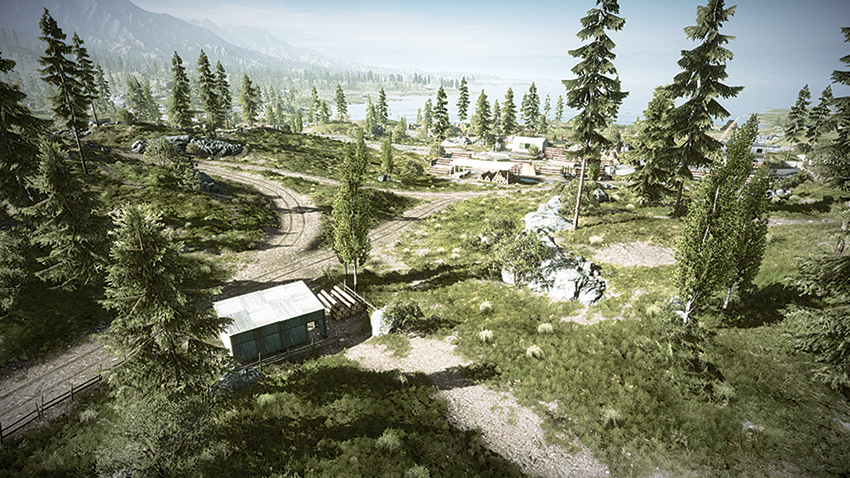
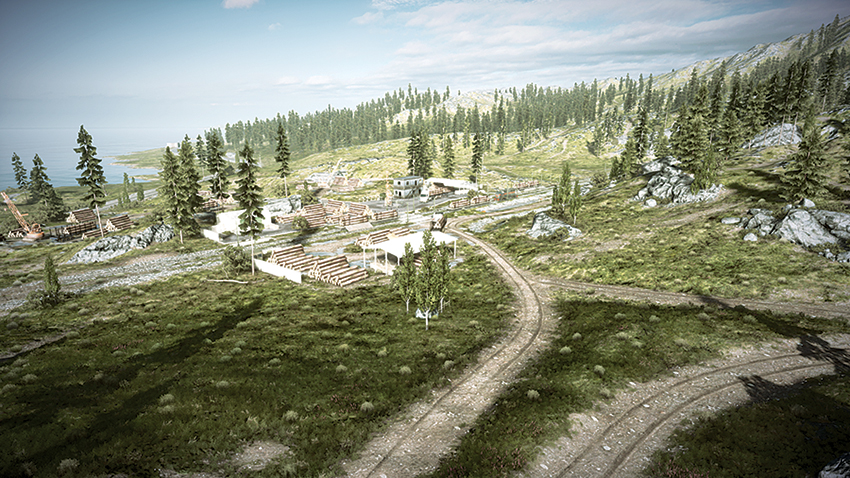
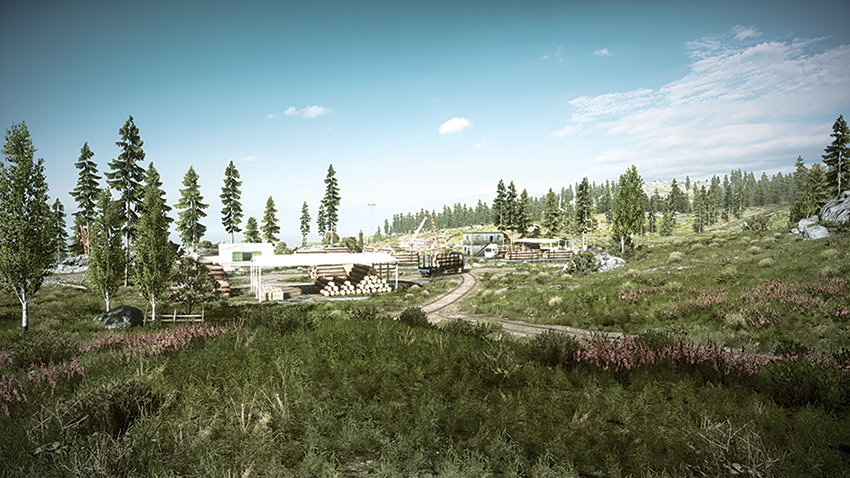
Deploying south of the Lumber Yard, the RU team can advance and quickly take up positions throughout the yard. Fortifying the yard is essential when defending the objectives here. One opportunity to secure the area is from within the two-story office building on the east side of the yard. From the second floor, defender snipers can cover the west side of the yard and attack hostiles that are approaching the timber piles there, as well as observe movements slightly to the north. The MI-28 Havoc should monitor the approach of vehicles from the north and alert infantry units if heavy vehicles attempt to flank the yard by keeping off the road to the north. The lumber piles to the west side of the yard can be destroyed by the heavy weapons found on tanks and AA jeeps. These large piles form good cover for the attacking forces and should be destroyed to allow for greater visibility of enemy movements.
M-COM Station A
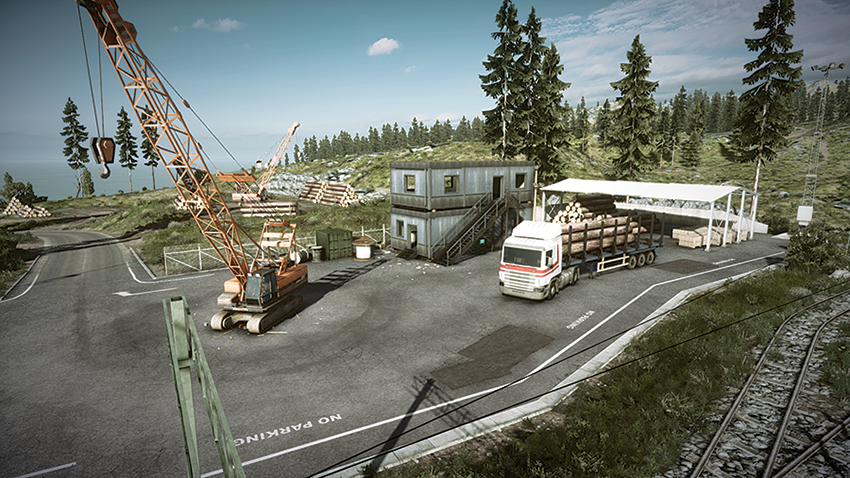
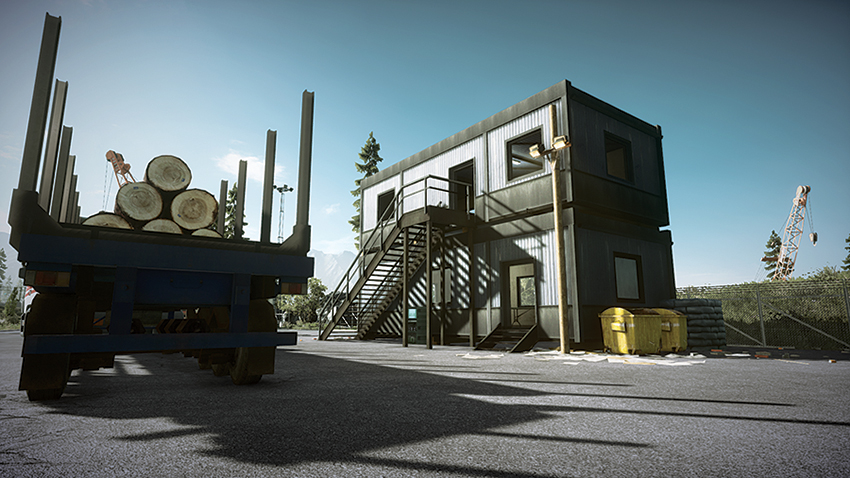
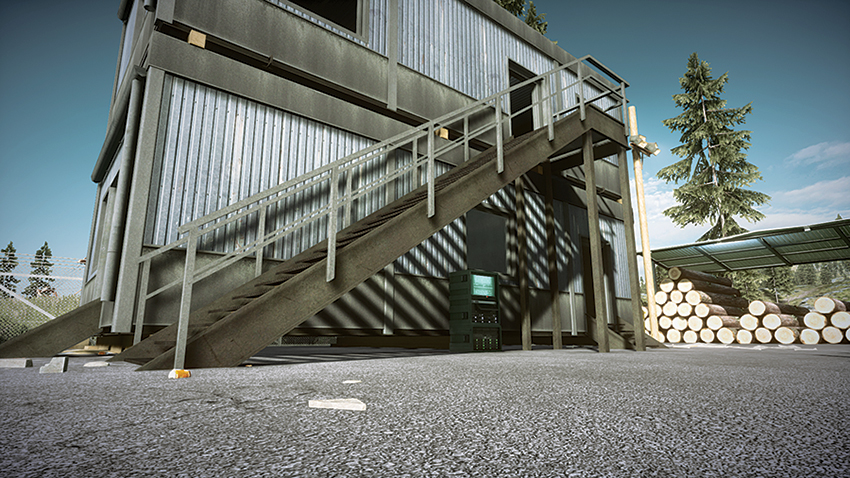
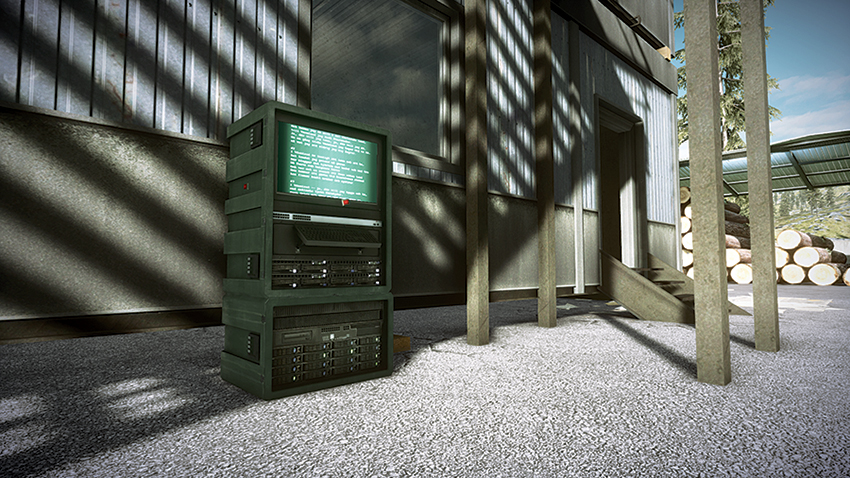
M-COM Station A is positioned below the stairs leading to the second floor of the office building on the east side of the Lumber Yard. The objective is exposed, so attackers should use care when attempting to plant a charge. Defenders looking to keep the objective in their view can take position on the rocky hill to the southeast of the objective. Although not concealed while here, a skilled sniper can eliminate threats that approach the objective and then relocate before being spotted. Attackers should also clear the first floor of the office building while their teammates are planting the charge, as the building is a home for camping defenders. Defenders looking to protect the objective can use the covered storage area on the east side of the yard to maintain cover while firing on the objective area.
M-COM Station B
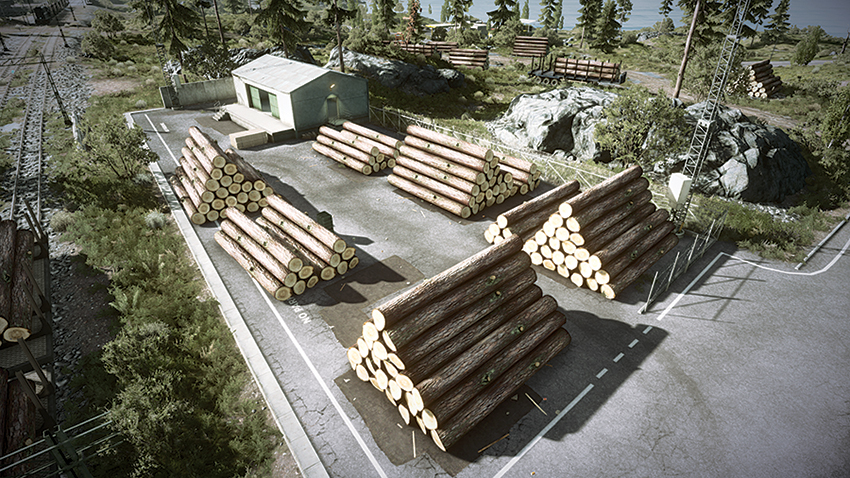
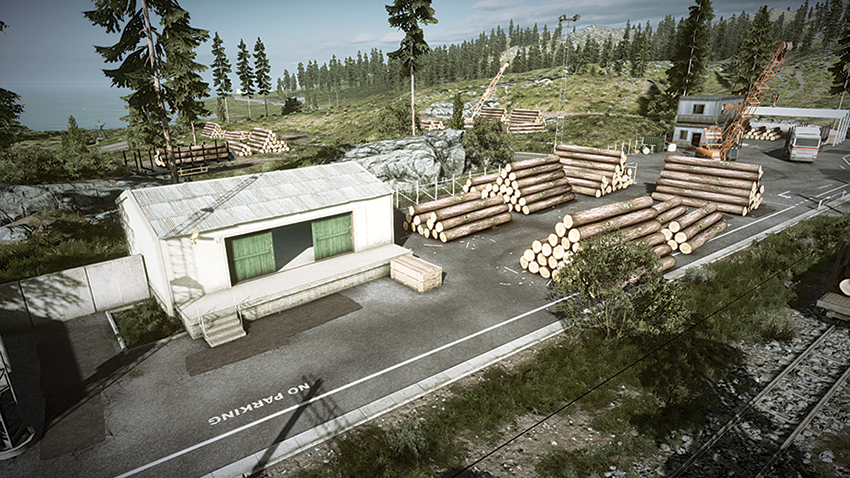
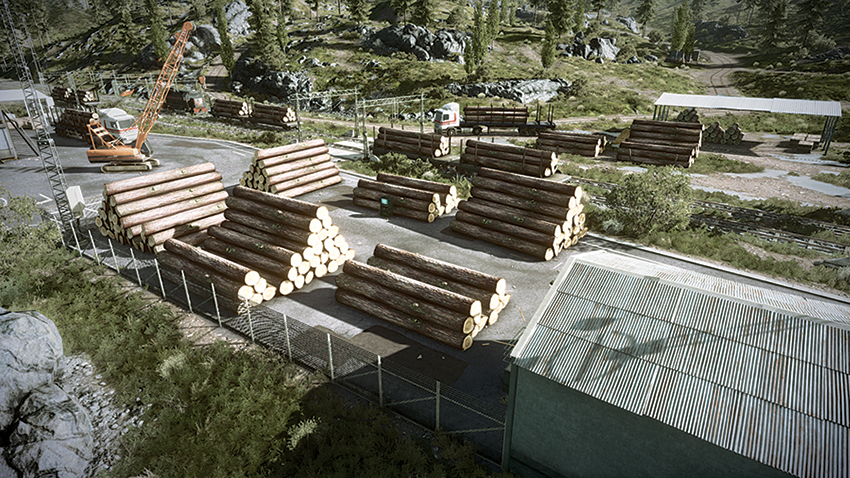
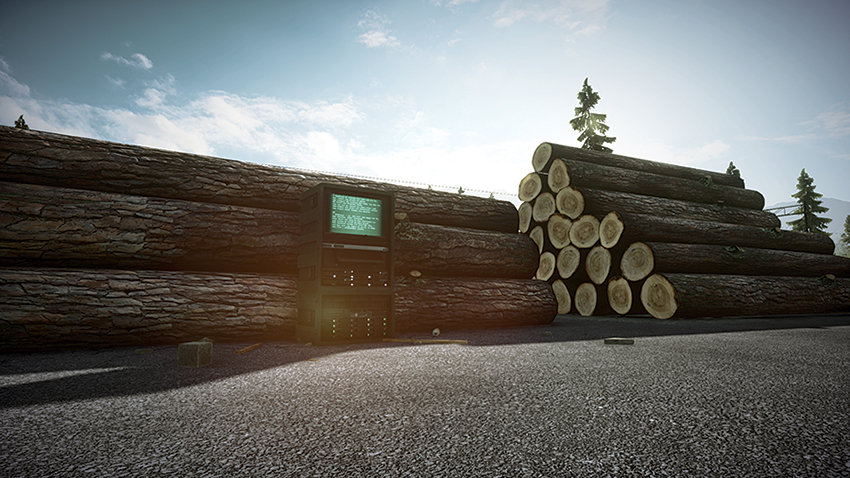
Located among piles of timber on the Lumber Yard’s west side, M-COM Station B is open to attack from the north. Attackers looking to approach the objective should break through the chain-link fence north of the lumber piles to avoid the attention of defenders that will be focusing on the M1 Abrams and ASRAD as they enter the Lumber Yard. Defenders should use the T-90A to blow apart the timber piles and remove some of the potential cover so that it can’t be exploited by attackers. The defenders’ narrow sight line requires a sniper to be within the building on the west side of the yard and peer out from the large double doors toward the objective. Helicopters from both teams will be circling this objective, so engineers should be focused on destroying these prying eyes as their teammates make their approach.
Zone 4: Hillside Base
US Deployment
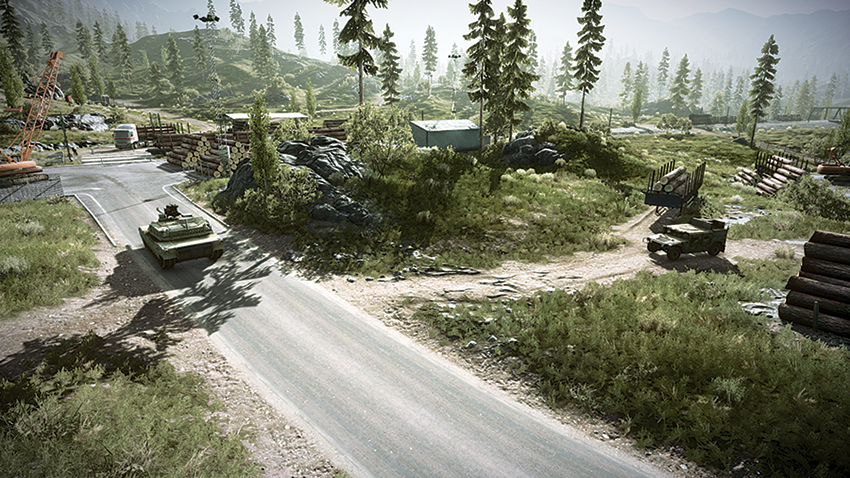
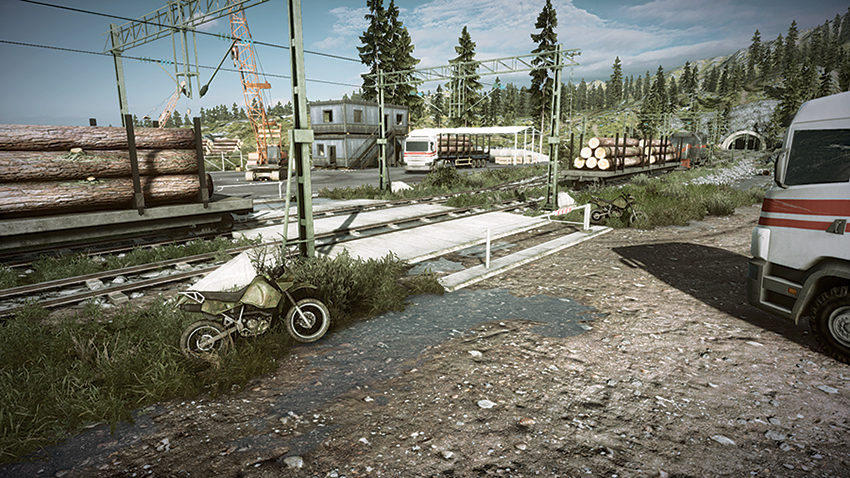
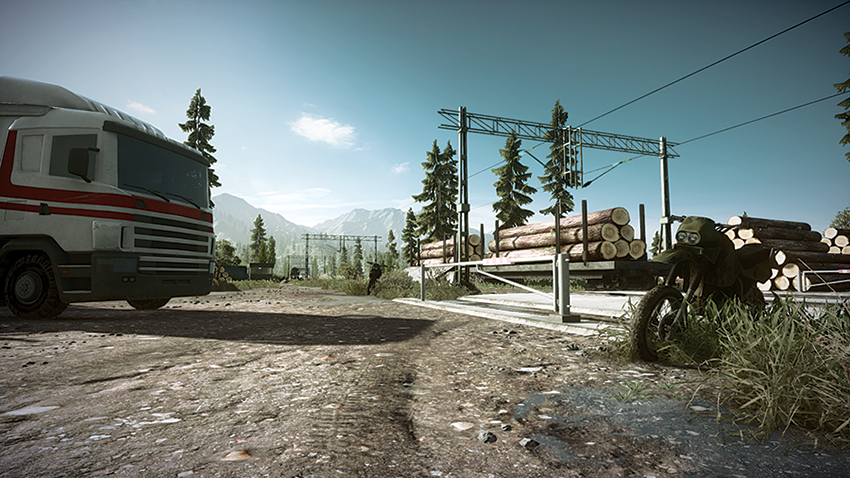
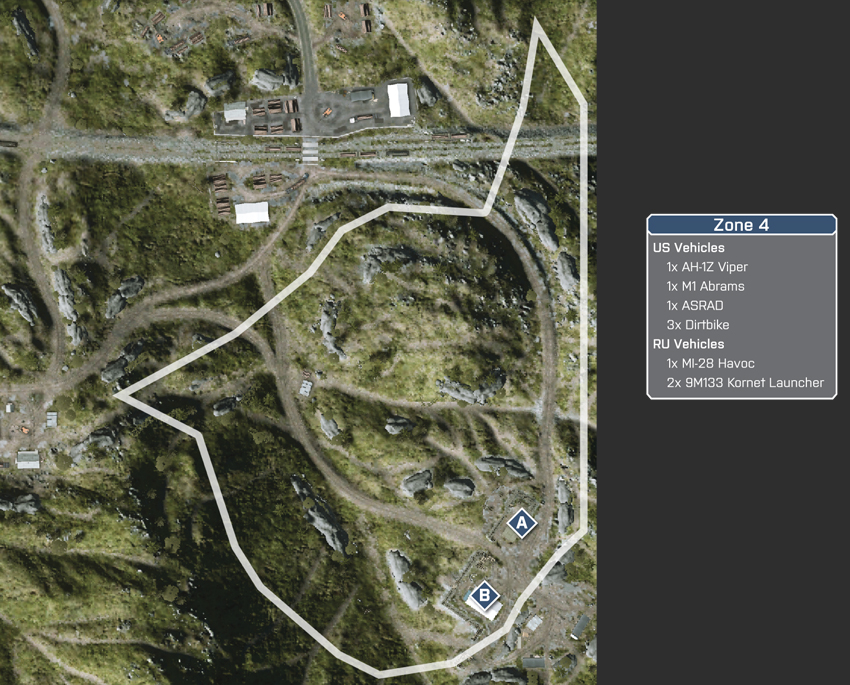
This final stage of the battle sees the US team deploying from the Lumber Yard. With the objectives located at the hillside base to the southeast, the attackers will have to make their way uphill as they move southeast to engage their target. While two roads lead to the base from the Lumber Yard, it would be wise to keep the M1 Abrams and ASRAD off them with and move directly south to approach the objectives from the west, flanking defenders in the process. If the AH-1Z Viper can eliminate the MI-28 Havoc and keep it out of the skies, the US team will have only infantry units to contend against. By making use of the M1 Abrams and ASRAD, the attackers can overpower and maintain a firm presence at the hillside base throughout this final stage of the battle.
RU Deployment
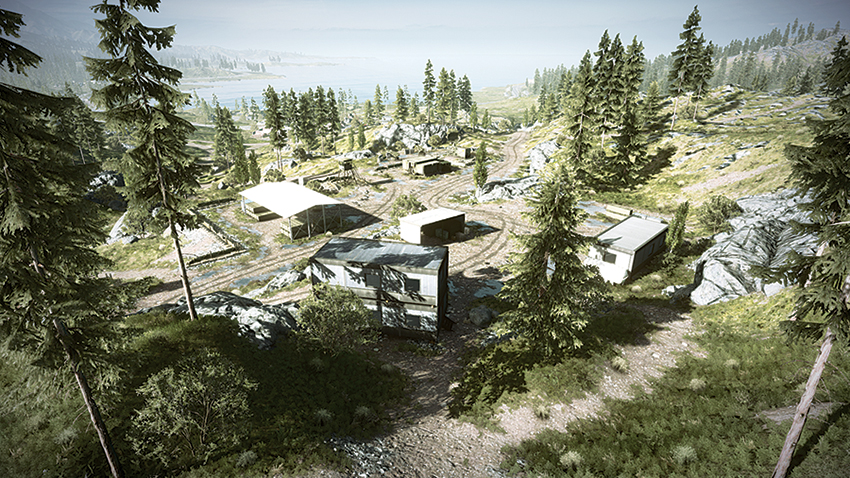
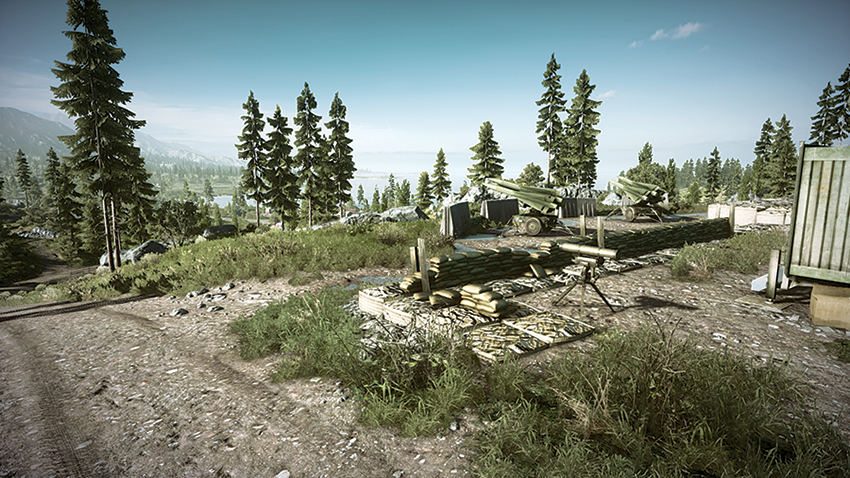
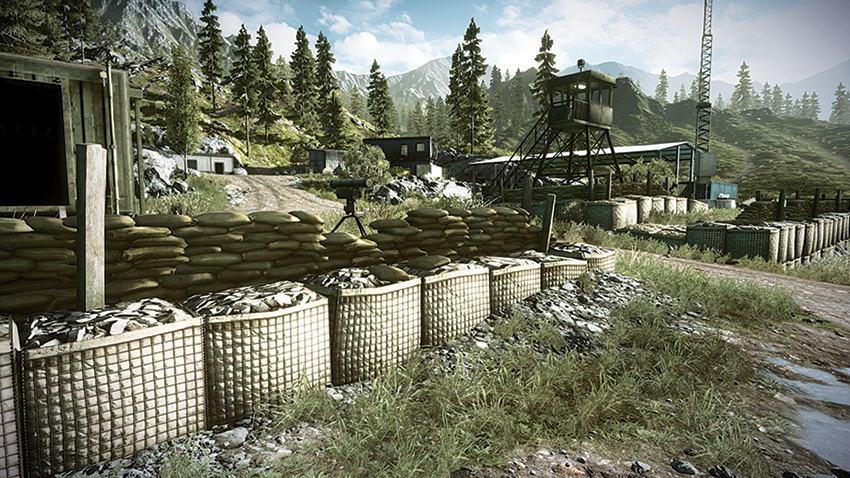
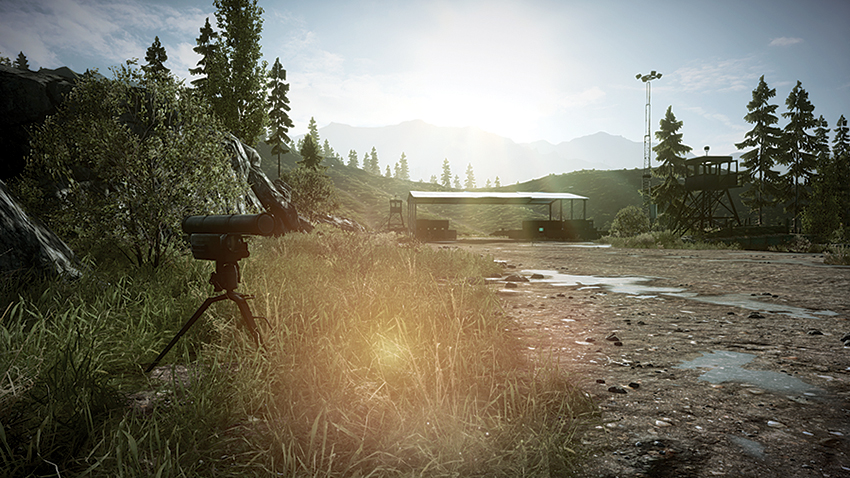
At this stage of the battle, the RU team is at a great disadvantage. With only the MI-28 Havoc and two 9M133 Kornet Launchers to provide defense, the team will have to coordinate their movements to prevent the attackers from making their way uphill from the north. Defending engineers should focus their attention on destroying the AH-1Z Viper and free up the skies for their MI-28 Havoc to handle the task of eliminating the threat presented by the opponents’ tank and AA jeep. To control the flow of dirtbikes into the area, mines should be placed within the central area of the base. The south side of the base provides a watchtower and a two-story office for sight lines of the objective areas. These can both be used to pick off attackers as they approach to plant their charges.
M-COM Station A
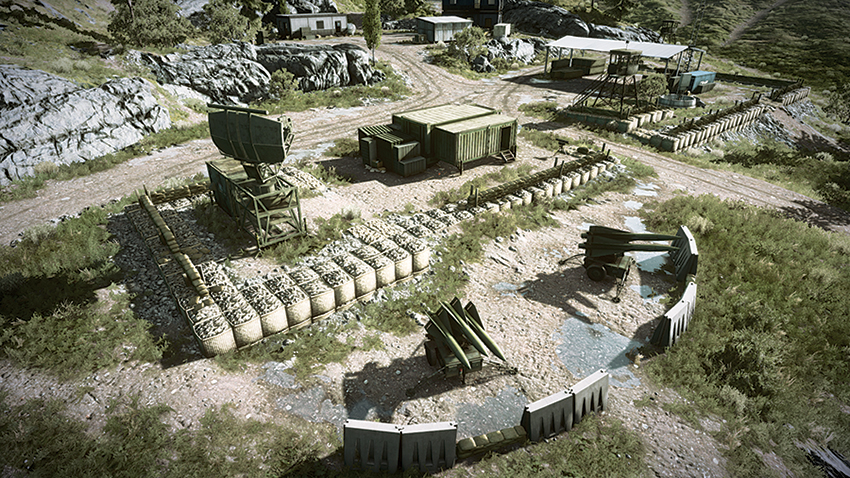
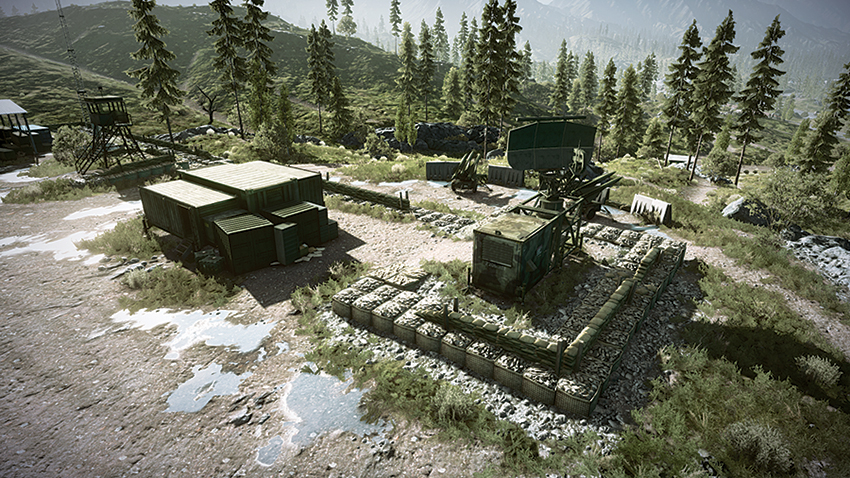
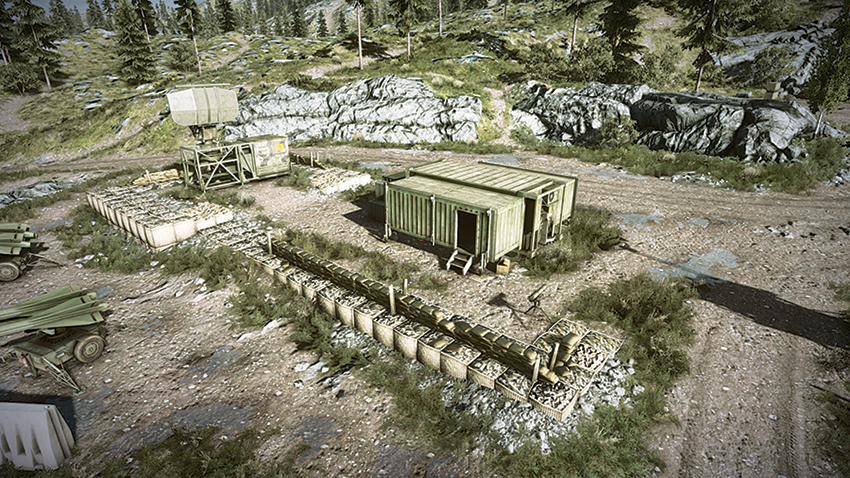
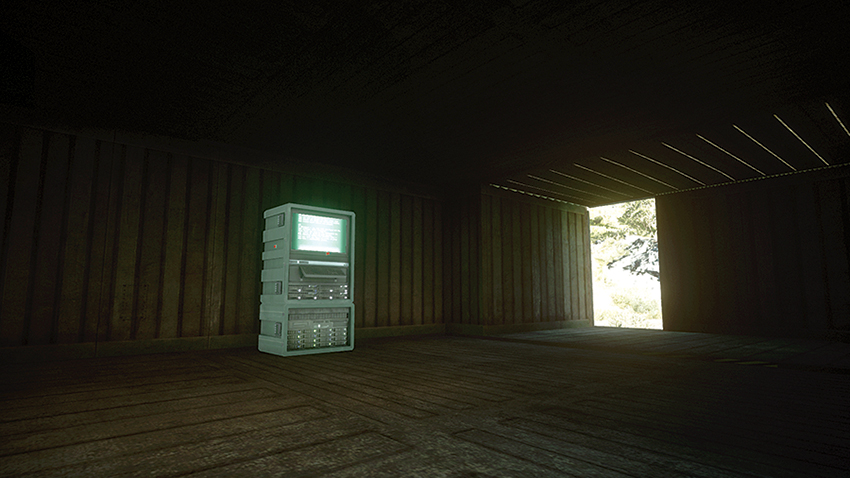
Located within a makeshift bunker of the north side of the base, M-COM Station A has only one possible sight line. This sight line requires taking position atop a rocky hill due east of the bunker. Even though the objective can not be easily observed, the area surrounding the bunker lacks any real opportunity to approach undetected. For attackers, this means that planting the charge will result in a high number of casualties unless defenders can be kept away from the objective by using a helicopter or by heavy weapons fire from vehicles. Defenders will try to camp this location, so attackers should throw in a grenade to flush out any threats prior to entering. The same can be said about attackers, who will remain within the bunker after planting the charge. Defenders will have to clear the room before entering to safely disarm the charge. Defenders would be wise to place C4 within the bunker and wait for an attacking squad to enter before detonating to maximize the potential of this booby trap.
M-COM Station B
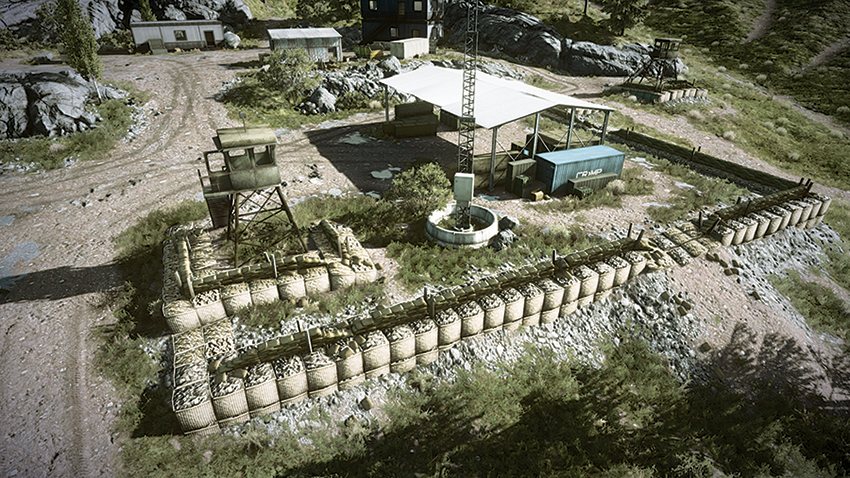
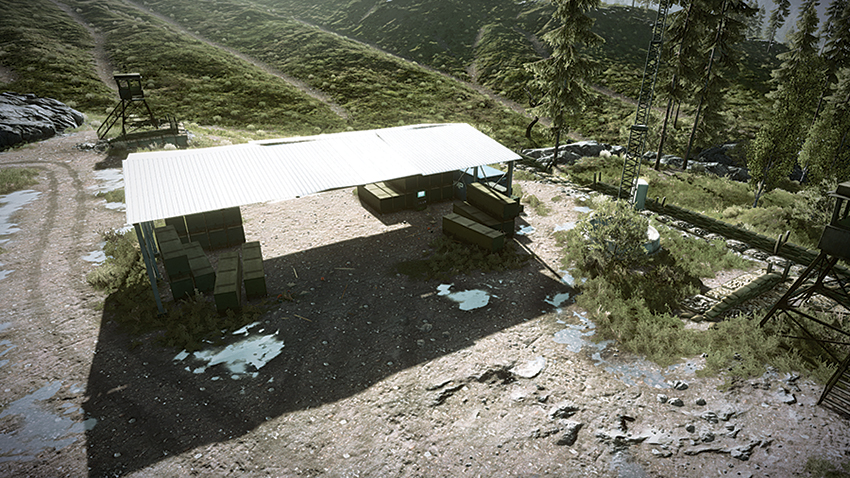
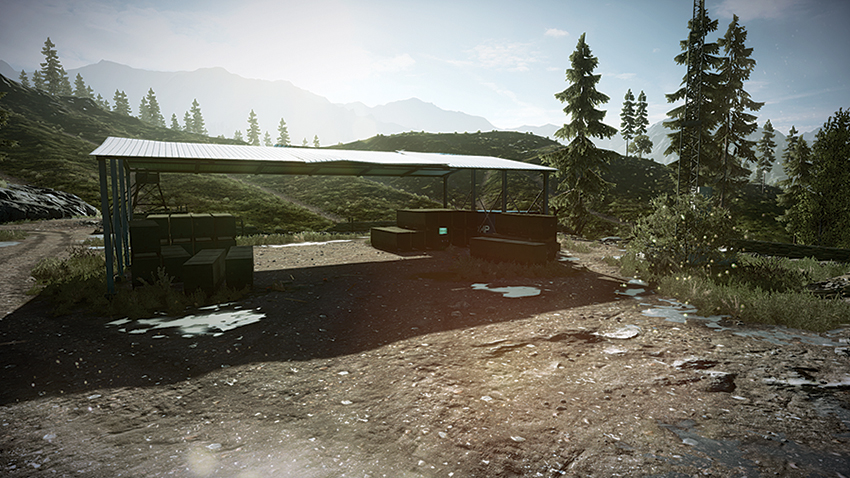
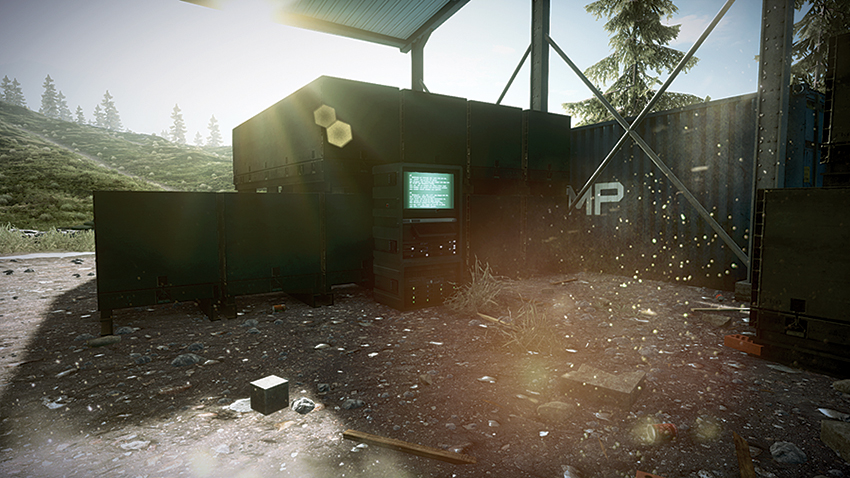
Located beside weapons crates under a covered area on the south side of the base, M-COM Station B cannot be observed easily. However, you can observe units approaching this area by taking position atop the watchtower or the second story of the building on the base’s south side. Attackers attempting to arm a charge on this objective should approach from the west and climb over the sandbags there. Defenders benefit from having their helicopter maintain a presence west of the base, guarding against the approach of vehicles from the north and bombarding enemy infantry as they approach. Engineers should be in place to target and destroy the attackers’ helicopter when it comes to threaten the MI-28 Havoc. Attackers should bring their ASRAD in close from the north and use its secondary fire option to fire upon the objective site and suppress defenders that are encamped there and in the building on the south side of the base.
Squad Rush
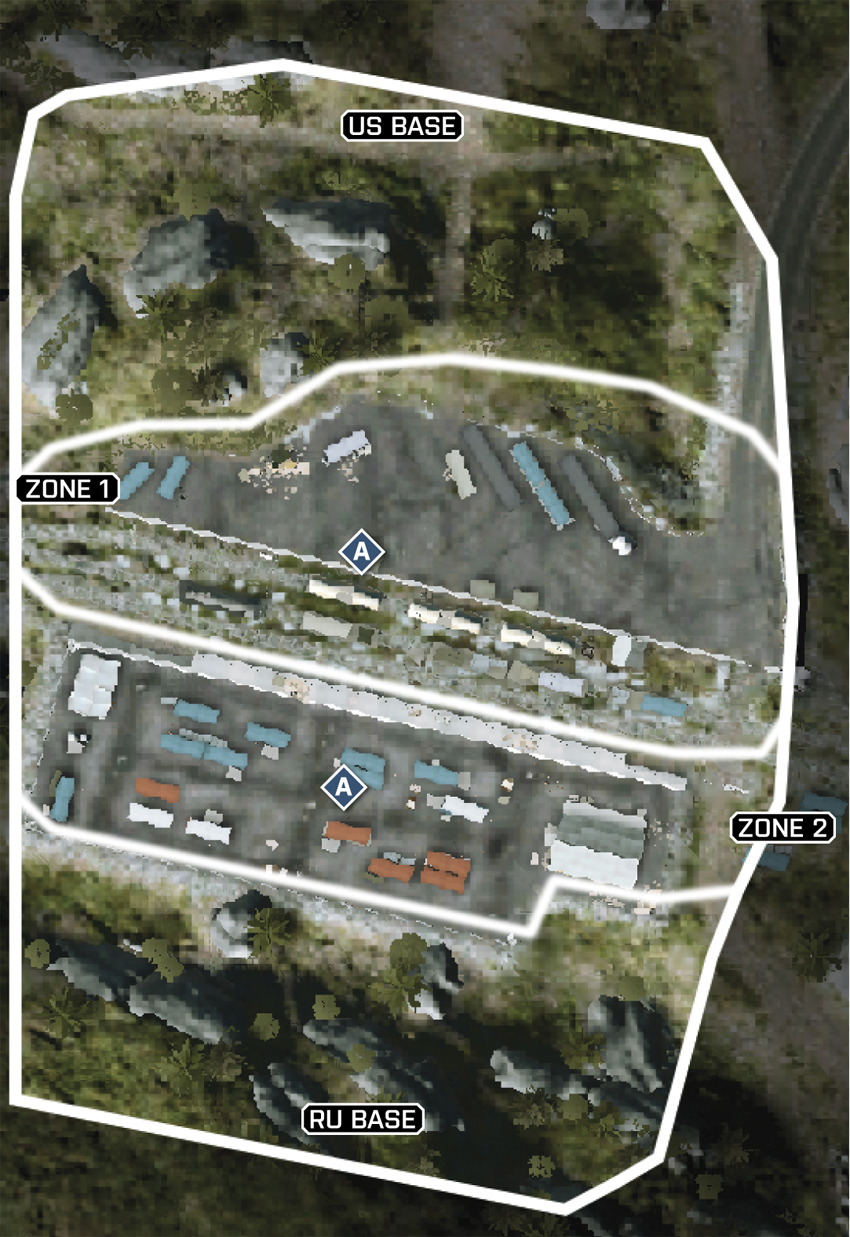
Kiasar Railroad’s Squad Rush battle is focused around the Train Station. This location provides plenty of opportunities for cover and flanking your enemy by using the train cars and shipping containers that stand about the station. Sight lines are few and far between, so recon soldiers should opt to use shotguns or PDWs instead of their sniper rifles. During this face-paced firefight, deployment of MAVs is useful when approaching objectives to ensure that hostiles are not hiding around the next bend. Attackers and defenders alike will find that fanning out as they advance upon the objective works well to root out hostiles that may be camping around the objective. The fight here may be reminiscent of a deathmatch round, but the placement of booby traps like C4 and claymores will help your team maintain control of the chaos in the field. For soldiers looking to camp objectives, expect to be stabbed in the back frequently if a squad mate is not there to cover your back.
Zone 1
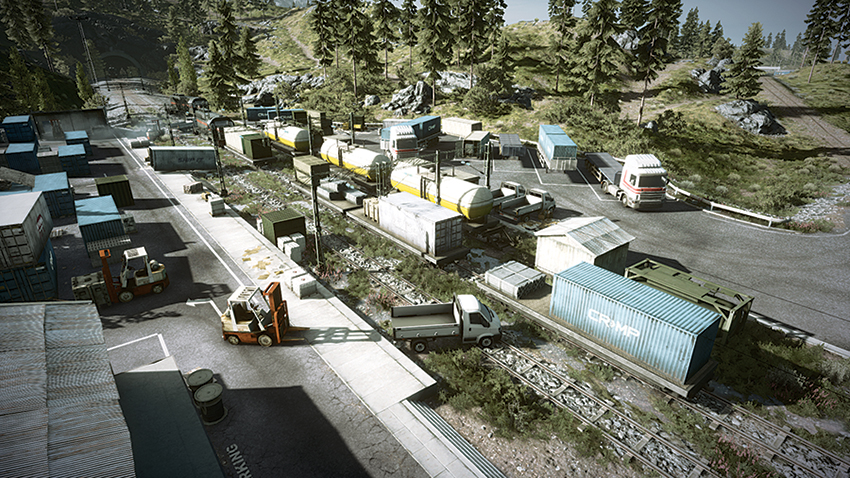
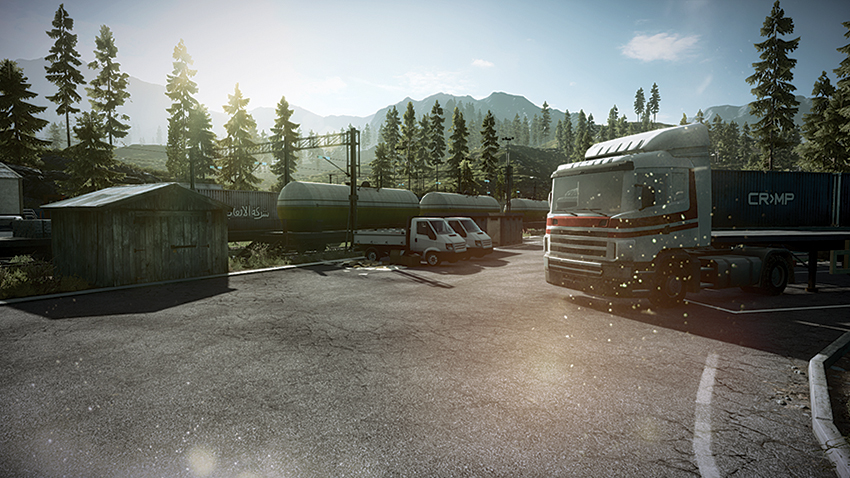
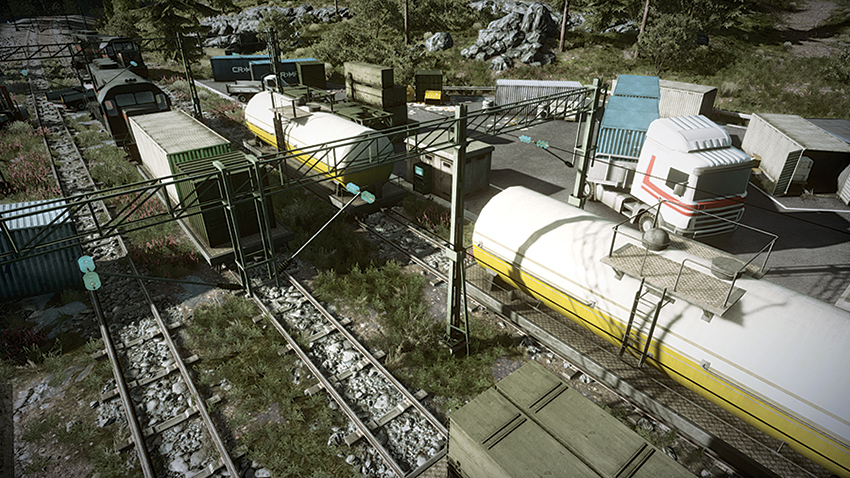
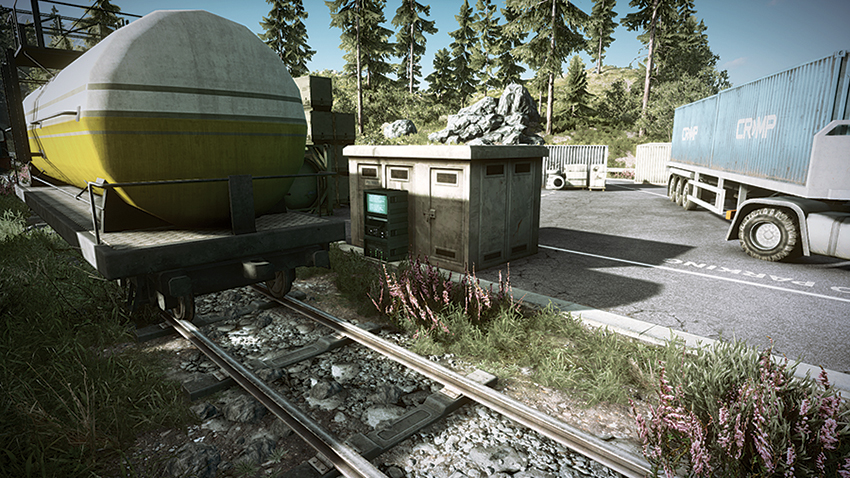
During the first stage of this battle, the M-COM is on the north side of the Train Station against a power box near a tanker car. Defenders should deploy a MAV to observe the movements of attackers entering the area from the north. When camping this objective, defenders should take positions north of the objective since attackers will run through the area without looking back at the container or vehicle they just ran past. Attackers should approach from the west, as the train cars run parallel with the objective, offering sight lines past the objective to spot oncoming defenders while providing cover positions that attackers can duck into. Soldiers proficient with grenades can use the train cars and shipping containers here to deflect their grenades and limit the amount of time they are exposed while throwing them.
Zone 2
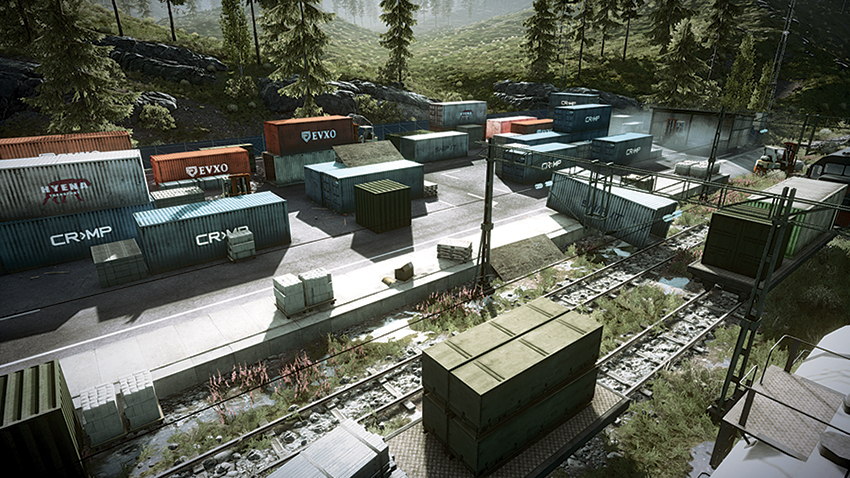
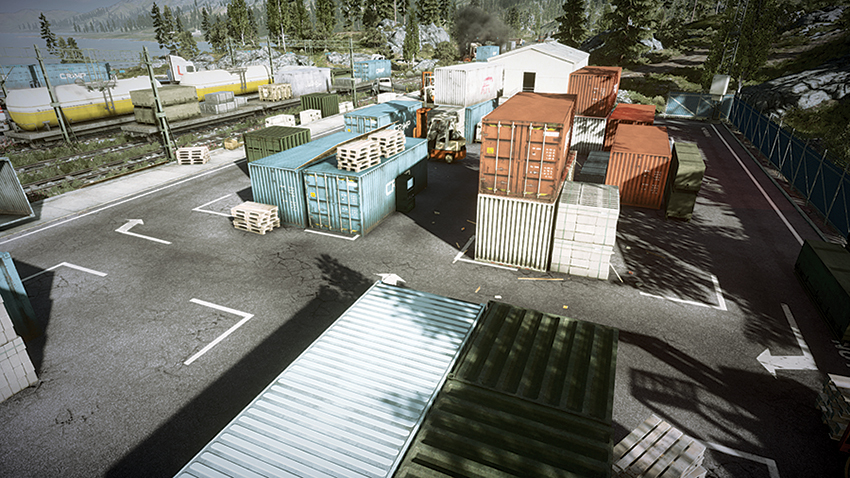
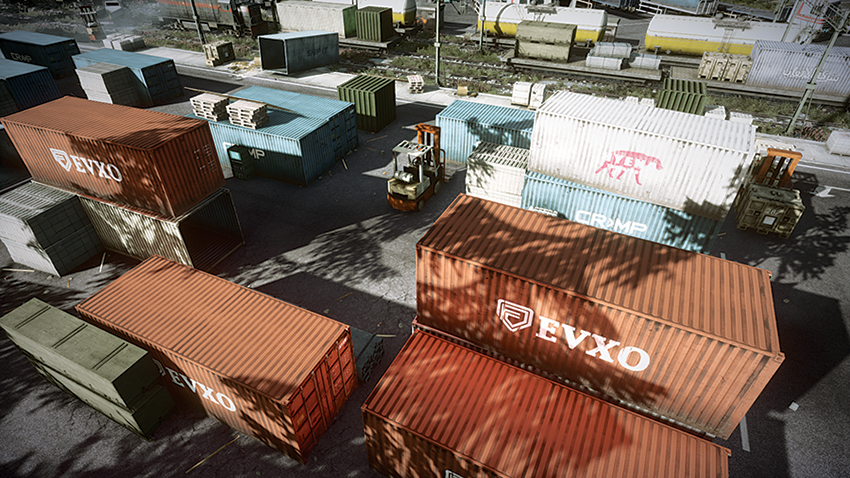
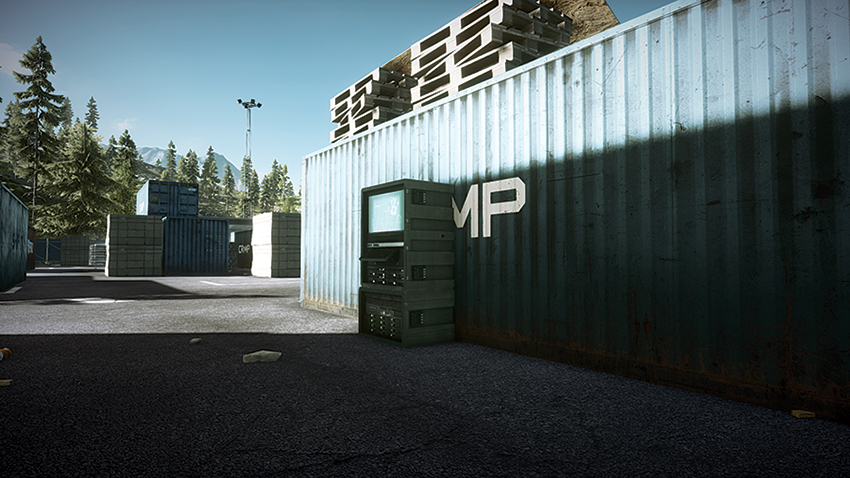
The objective of the second stage of this battle is on the south side of the Train Station, positioned against a blue shipping container. Defenders are afforded a sight line of the objective. This sight line is on the southeast side of the Train Station, behind a building near the fence line. From this position, defenders can fire on hostiles as they attempt to plant a charge and bleed the enemy of tickets until they are aware of the direction of fire. Savvy attackers will also exploit this position, as they will be able to cover their squad mates from here after the charge is planted and pick off defenders attempting to disarm. With most of the firefight occurring in the southeast corner of the station, deployment of T-UGS motion sensors can assist squads in detecting the enemy’s movements. While this fight will be bloody and cutthroat to the end, the first team to place booby traps and maintain them on the field will quickly overpower their foe.
Air Superiority
Unlike other maps, Air Superiority over Kiasar Railroad offers few advantages for pilots. Teams should prioritize their loadouts to include fire extinguishers and air radar. The objectives are suspended above the lake, except for Objective A, which is above the foot of the mountain range. Combat will see enemies attempting to stay on a plane’s six. If the enemy begins to tail, planes can be brought in low and skim across the lake. Less experienced pilots may follow and crash into the water or the lakeshore, as they are unable to pull up in time. Teams should maintain contact with one another and fly in formation. This tactic offers even unexperienced pilots a fighting chance here, as their wingmen can attract the fire of enemy fighters while one of the squadron moves in to claim the objectives. When attempting to shake enemy fighters, use hard banks and air brakes to break their weapon locks. Outflying and outwitting the enemy is the name of the game.
Jet Unlock Progression
| Image | Name | Loadout Slot | Points | Description |
|---|---|---|---|---|

|
IR Flares | Gadget | 300 | Infrared flare launchers that when launched will distract incoming missiles and cause them to miss their locked target. |

|
Heat Seekers | Weapon | 700 | Heat-seeking missiles launched by the pilot that lock on to and track enemy aircraft. |

|
Stealth | Upgrade | 1,500 | Engine tuning and fuselage coating materials disguise your vehicle’s infrared signature, thereby increasing enemy locking and tracking difficulty and decreasing the time you are revealed to the enemy when spotted. |

|
Belt Speed | Upgrade | 2,700 | An enhanced mechanism that decreases the minimum time between firing bursts with your main weapon. |

|
Proximity Scan | Upgrade | 4,200 | External sensors detect and reveal enemy units on your minimap. |

|
Rocket Pods | Weapon | 6,200 | A set of unguided FFAR Rocket Pods mounted under the wings. |

|
Air Radar | Upgrade | 8,600 | The range of your minimap increases greatly and reveals all friendly and enemy aircraft. |

|
Extinguisher | Gadget | 11,600 | A controlled air pressure release in the engine compartment will extinguish engine fires when activated, helping a disabled aircraft return to normal operation and recover from damage. |

|
Below Radar | Upgrade | 15,000 | When flying at low altitudes, your heat signature is decreased, hiding you from enemy radar and preventing enemy air-to-air missile systems from locking on to you. |

|
Maintenance | Upgrade | 19,000 | Preventative maintenance procedures improve your vehicles recovery from damage. |

|
Guided Missile | Weapon | 24,000 | Laser-guided missiles launched by the pilot which lock on to and track enemy land vehicles and can acquire laser-designated targets even if they are out of line of sight. |

|
Beam Scanning | Upgrade | 29,000 | A computer upgrade for advanced weapon systems that helps you lock on to enemy targets faster when using heat-seeking or laser-guided missiles. |

|
ECM Jammer | Gadget | 35,000 | Electronic countermeasures including chaff launchers and deceptive transmitters prevent your aircraft from being locked on to by enemy weapon systems for a short time when activated. |
Squad Deathmatch
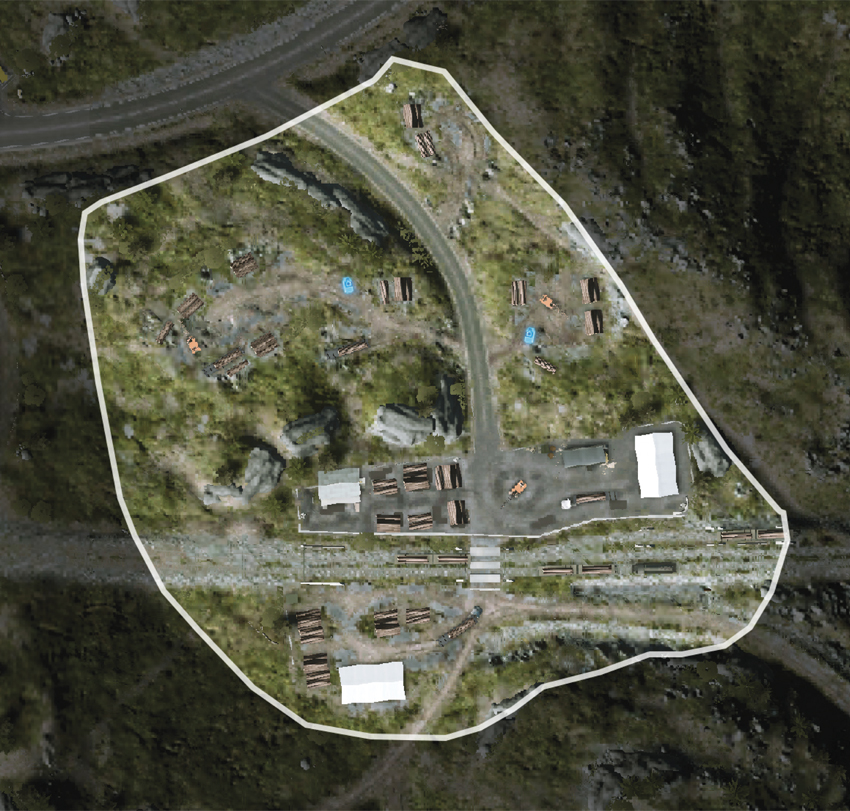
In this mode, the action is focused around the Lumber Yard of Kiasar Railroad and the surrounding hills. While the squads can exploit the IFV to maintain the Lumber Yard area itself, once it’s off-road the vehicle is susceptible to being destroyed by engineers and support-class soldiers that entrench themselves among the timber piles that surround the yard. When driving the IFV through these roads, keep an eye out for mines and the occasional SOFLAM on a hill. Gaining the advantage in this battle will require maintaining a presence at the Lumber Yard, using the sight lines that are available here—like the two-story office and storage area to the southwest—to pick off enemy squads as they pass through the area. During the battle, uncoordinated squads lacking experience or lone wolves will have a difficult time ripping the Lumber Yard from the grasp of more experienced squads working as a unit to shut down the enemy advance.
Team Deathmatch
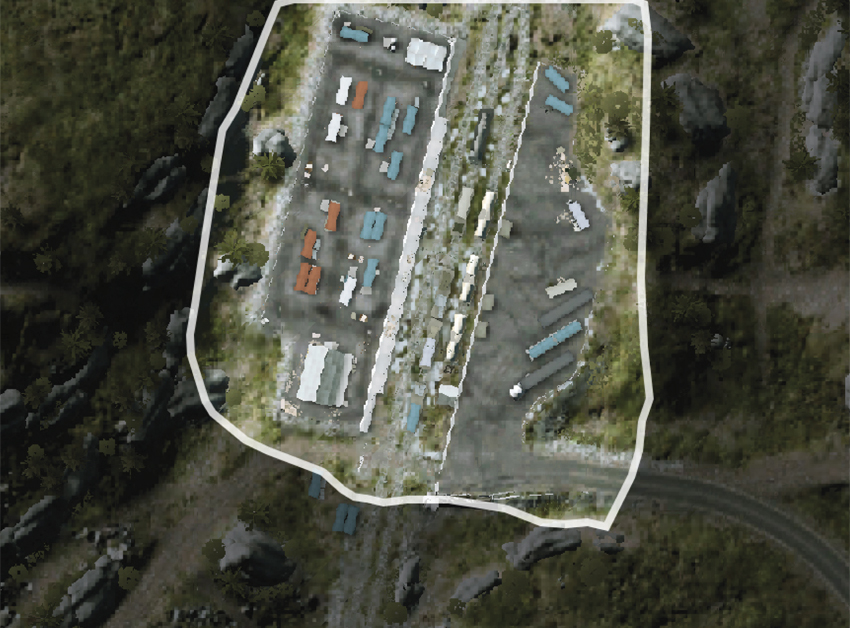
For Team Deathmatch, the carnage enfolds in the Train Station, where there is plenty of cover in the form of train cars, shipping containers, and semi-trucks. The battle will play out through close-quarters combat, with the only sight lines running east and west between the cover spots that sit parallel to one another in the field. Experienced teams will opt to keep the conflict on the south side of the Train Station, making use of the shipping containers to flank and overpower their opposition. While T-UGS motion sensors are commonly used during a Team Deathmatch battle, the deployment of MAVs can be much more beneficial here given the exposure of the field from above. This tactic will alert the team of enemy positions as the frantic combat below comes to a head. While shotguns are the go-to weapon for this mode, the long corridors created by the train cars let the worth of carbines shine. While weaving in and out of cover, teams should be placing claymores to dominate the opposition as they negotiate the confines of the rail yard.
Conquest 64
During Conquest 64, the map territory is expanded to include the Train Station (A) and Lumber Yard (G) as control points, resulting in seven control points being contested. This expansion also pushes back the deployment zones of both teams, with the US team deploying from the northwest edge of the map and the RU team deploying from the southeast. This shift in deployment positions also results in a staggered advantage for both teams, with the Train Station (A) and Canoe Center (B) being quickly captured by the US team and the Lumber Yard (G) and Com Center (F) being captured early on by the RU team. Once again, the Bridge (D) is in the center, and is flanked by the Water Tower (C) and the Gas Station (E). This distribution of control points leaves the central three points up for contention by both teams, as neither team deploys within their immediate vicinity. The result is a frantic battle in which beating your enemy requires consideration of how to best defend against attacks on the map’s uneven terrain. One advantage afforded to both teams in is the tank, but this lumbering vehicle is better suited to performing patrols through the map’s north side on the road near the lake.
US Base
Deploying from the northwest, the US team is poised to quickly capture the Canoe Center (B), which is located on the edge of the lake. After claiming this point, the team can proceed to the southwest and claim the Train Station (A) with little resistance. The team would be wise to divide its resources to accomplish this, with squads moving to the Train Station (A) while others proceed southeast to gain control of the Bridge (D). While infantry are moving toward the Bridge (D), the team’s helicopters should advance to the area to hold back hostiles that are approaching the area from the southeast. The M1 Abrams should avoid the area around the Bridge (D) and continue from the Canoe Center (B) to the Gas Station (E) by way of the northern road. The tank is more than equipped to capture this point single-handedly, as well as push back resistance it encounters along the way.
RU Base
Deploying uphill from the southeast end of the map, the RU team will quickly move in and control the Com Center (F), which is immediately west of the deployment area. From this point, the team can move to control the Lumber Yard (G) to the northeast or continue west to capture the Water Tower (C). One advantage to controlling the southern control points is that the entire region is uphill from the rest of the battlefield. Taking advantage of this elevated position allows the team’s Vodnik AA and T-90A to fire upon enemy helicopters and the northern control points. The team’s helicopters should move toward the Bridge (D) early on and patrol this location until infantry can arrive to secure the point. Once the Bridge (D) is secured, the Dropship can be used to fire upon the US team-controlled north and push back hostiles that are attempting to make their way uphill.
Train Station
Located in the far west, the Train Station (A) is likely to be controlled through most of the battle by the US team given its proximity to the US team’s deployment. Its flag is exposed on the south side of the station near a forklift. Although it is exposed to attack from the east and from the air, the flag is obscured from view by train cars and shipping containers to attackers advancing on this control point from the north,. Larger vehicles should not stay near the shipping containers here, as avoiding mines and C4 attack can be difficult when navigating the confines of the station. Instead, these vehicles should opt to escort infantry units into the station and fire on hostiles from afar, making sure that escape is possible if engineers or support class soldiers are in the area. When approaching this area, watch the hills behind the station to the south for snipers that have taken position atop the rocky ridge there.
Canoe Center
Positioned on the northwest corner of the map, the Canoe Center (B) flag is located in front of the hollowed-out lakeside building. When attempting to capture this control point, teams should move into the building since the exposure of this area leaves infantry vulnerable to attack from the opposing team’s helicopters. An approach can be made either from the road (which leads directly from the US team’s deployment) or the lake. To the east of the flag is a rocky hill that can be used to clearly view the flag area. This sniper perch also affords a view of inside the north building, which is prone to hosting campers. While the building on the south side can provide cover, the nearby red gas tank can be exploded to eliminate threats hiding within the building or the nearby yellow dumpster.
Water Tower
Located on the southwest corner of the map, the Water Tower (C) flag is exposed near a timber pile, between three buildings. When capturing this point, teams should be watchful for hostiles attempting to flank the area by approaching from the map’s southern edge. As the point is being captured, it would be best to take cover on the east side of the timber pile, near the flag, thereby reducing the chance of being fired upon by the opposing team’s IFV, which can use the roads cutting through this region to access the control point. The advantage to this control point being exposed is that helicopters can be used to escort infantry units into the area and clear the way for their advance. Helicopters should be wary when entering the area, though, as engineers can use the buildings to hide while attempting to get a lock with their anti-aircraft weapons.
Bridge
Easily the most contested point on the map, the Bridge (D) is in the center of the map, with its flag being on the hill between the two bridges. Teams should not allow their IFVs or AA jeeps to stay on the bridges for any length of time, as helicopters can pick off these vehicles that have difficulty turning on a bridge. Dirtbikes, on the other hand, can rush through the bridges and approach the flag with ease. Planting mines underneath these bridges is helpful in preventing traffic from passing beneath them and flanking your team while the point is being captured. Once it is captured, teams should coordinate their movements with the Dropship, spotting enemy vehicle positions so that this powerful weapon can pick them off as they move through the uneven terrain. From the north side of the Bridge (D) area, IFVs can fire on the Gas Station (E) to the northeast and eliminate threats entrenched there.
Gas Station
Located on the northeast side of the map, the Gas Station (E) flag is exposed near the building to the north of the gas pumps. This control point is accessible from multiple angles. The point can be captured from within the building, which is a far better option than capturing while standing near the semi-truck. Teams should be careful to watch for hostiles that try to flank by approaching from the lake to the north and passing through the rear door of the building. While capturing this point, a squad mate should take position on top of the nearby building to be a lookout for the enemy. When moving in on the control point from the west, stay off the road and use the shipping containers on the edge of the lot to scout the location before advancing. Deployment of a MAV helps when scouting this large area for enemy campers, as well as for monitoring the rear of the lot while capturing the point.
Com Center
On the southeast end of the map is the Com Center (F). Its flag is exposed within the center of three structures. When capturing this control point, a squad should divide up to cover the surrounding area while one member captures the point. While capturing the point, the other squad mates should plant mines around the crane in the center of the yard. As dirtbikes rush into the area, these mines will ensure that the point is not easily captured. The shack on the east side of the yard can be used for cover when maintaining control of this point. Should the firefight get too intense, the door on the east side of the shack can provide a quick escape north into the brush. Approaching this area from the north requires an uphill climb, and since this hinders visibility of the control point, infantry units should deploy a MAV to scout the area during their approach.
Lumber Yard
Because it is the farthest east control point on the map, the Lumber Yard (G) will most likely be controlled by the RU team throughout most of the battle. The flag is located on the Lumber Yard’s west side and is surrounded by piles of timber. It may seen exposed but is actually one of the map’s most fortified control points. For a team trying to capture this point, these piles of timber can also provide hostile squads with an opportunity to flank the unobservant. While a squad is capturing this point, it would be wise to position a sniper in the second-floor window of the office to the east. This sniper can spot and pick off hostiles that are approaching the flag area. When entering this area, it is a good idea to make sure this office building is clear before approaching the flag. For the team looking to maintain this point with minimal effort, placing claymores near the timber piles is an efficient method to retain control.
Capture the Flag
During Capture the Flag, the Kiasar Railroad map boundaries are wide enough to include the north shore and southern hillside. The US team’s flag is located at the Train Station on the map’s western edge. The flag is on the west side of a stack of shipping containers standing along the railway. The RU team’s flag is on the east side of the map, at the Lumber Yard, west of the timber piles. Both bases are situated on the rail line that cuts through the region. Because the flags are situated along the rail, both teams will make use of dirtbikes to rush their enemy’s base by following the rails. Although this method is perfect when in combat against a novice team, more experienced teams will booby-trap the railway to eliminate vehicles that attempt this. Both teams are allotted an assortment of vehicles at their base to utilize in battle. In addition to these, there are two extra dirtbikes at the Bridge, as well as a single dirtbike at both the Gas Station to the northeast and the Water Tower to the southwest. While the dirtbikes at the Bridge are convenient when passing though, the dirtbikes located at the Gas Station and the Water Tower can be more of a distraction than an asset while moving to capture the opposing team’s flag.
US Base
Located at the Train Station on the maps west side, the US Base is vulnerable to being flanked from both the north and the south. An efficient tactic to monitor the base and the surrounding area is for the team’s helicopter to maintain a presence above the Train Station. This means infantry units can be alerted early to fast moving dirtbikes that are closing in to capture the flag. Another vehicle that should stay within the vicinity of the base is the ASRAD, which can defend the base from both land vehicles and the enemy helicopter. While these two vehicles maintain a presence here, the M1 Abrams and LAV-25 can advance southeast to bombard the RU base from afar and the US team’s dirtbikes enter the Lumber Yard to take possession of the flag. When returning, vehicles should avoid staying on the rails, as they are sure to be littered with mines.
RU Base
Located at the Lumber Yard on the east side of the map, the flag of the RU Base is among timber piles on the yard’s west side. To provide a vantage point over the flag, a recon soldier should take position inside of the office on the east side of the yard. From the second-floor windows, a sniper can observe the flag and the surrounding area. A helicopter should circle the Lumber Yard and maintain a presence over this area to spot enemies as they approach. While this task can be performed by the sniper in the office building, the helicopter has the firepower sufficient to eliminate the threat presented by larger vehicles. Placing mines along the tracks near the west entrance to the Lumber Yard can prevent fast-moving dirtbikes from taking the flag by surprise. Placing the Vodnik AA at the yard’s north entrance can help push back hostiles coming from the northern road, as well as pose a significant threat to the enemy helicopter if it comes within the Lumber Yard’s airspace. When advancing on the US team’s base, the attack should be directed from the south, as the hills provide an elevated position to fire on the base with the T-90A and BMP-2M.
Rush
The Rush battle of Kiasar Railroad follows the northern road, moving south along the lake into the Lumber Yard before concluding at the hillside base in the southeast. The placement of M-COM Stations in each stage of this battle forces teams to engage in open conflict as the landscape offers opportunities to flank and overwhelm the opposition. While attackers are afforded the benefit of the ASRAD and dirtbikes throughout the battle, the defenders’ MI-28 Havoc, in the hands of an experienced pilot, will provide a firm resistance to attacks. An essential tactic is to use the elevated positions of the terrain to gain the advantage through each stage in the battle. For attackers, the greatest threat on this map comes from a defending team that is well versed in the use of MAVs to reveal the positions of attackers and coordinate the placement of booby traps to disable their vehicles.
Zone 1: Canoe Center
US Deployment
Deploying from their base to the northwest, the US team has the advantage of using the road to advance the M1 Abrams and ASRAD to the objectives quickly. This is overshadowed, however, by the 9M133 Kornet Launcher at the Canoe Center, which the defenders will use to push back the armored assault. While these vehicles approach the objective site, the AH-1Z Viper should be in the air above the Canoe Center to clear the area of defenders while infantry units descend upon the area. Attackers on dirtbikes would be wise to follow the lakeshore as they make their approach on the objective, avoiding the defenders that are descending on the area from the southeast. This approach from the north allows dirtbikes to drop off their passengers to plant a charge on the objectives and continue their path east, drawing enemy fire away from the objective area.
RU Deployment
Deploying from the hills southeast of the Canoe Center, the defending team can quickly fortify the hill south of the road with a squad while other team members move north to entrench themselves at the Canoe Center. Because the T-90A deploys south of the objective, it can be placed on the hill overlooking the objective and fire upon attackers’ vehicles as they move into the area from the northwest. Once in the air, the MI-28 Havoc should focus on patrolling the road leading northwest from the Canoe Center. As attackers approach from this direction, the MI-28 Havoc is more than capable of pushing back armored resistance moving from the US team’s deployment area. Through coordinated efforts of the MI-28 Havoc and the T-90A to keep the attackers’ vehicles at bay, defenders can force the attackers into a stalemate early on.
M-COM Station A
Positioned south of the Canoe Center, M-COM Station A is exposed on the south side of the parked semi-trailer here. For attackers, the difficulty in approaching the objective comes from the tendency for defenders to camp within the wooden shack nearby. Defenders making use of this tactic to defend the objective should be ready to retreat if the attackers’ helicopter discovers them, as the wooden shack does not provide much cover against explosive weapons. Not only should attackers be wary of the shack when approaching the objective, but also the hill to the south, which serves as a sniper perch. Sight lines on this objective are limited, though, so defending this objective will require vigilance by helicopter and infantry set atop the nearby rocky ledge. Defenders and attackers would both benefit by deploying a MAV to survey this area before infantry approach the objective.
M-COM Station B
Located within the northern building at the Canoe Center at the lakeshore, M-COM Station B is a difficult prospect for attackers attempting to enter the area by the road to the south. Attackers on dirtbikes should make their move on this site by following the lakeshore southeast from their deployment. While the other attackers advance on the site by way of the road, stealthy attackers can approach the objective unseen while defenders are spread thin protecting M-COM Station A to the south from their armored vehicles. Defenders looking to protect the objective should place claymores inside of the building that houses it, and lie in wait near the shack west of the objective for attackers to cross their path. While it is possible to survey the area by helicopter, the nearby trees conceal the movements of infantry as they move around the objective and the buildings here.
Zone 2: Gas Station
US Deployment
Deploying from the Canoe Center, the US team will have to proceed east to reach the objectives. As in Zone 1, this stage of the battle sees attackers using the road to advance to the Gas Station. While this is the most direct way to approach the area, it is possible for the M1 Abrams and ASRAD to traverse the lakeshore to the north of the road. By traveling along the lakeshore, it is possible to flank the objective area by moving through the Gas Station’s north side. Dividing up the heavy vehicles is a good tactic to take the defenders by surprise, with the M1 Abrams moving to the objective by way of the road and the ASRAD cutting through the rear of the Gas Station and using its cannons’ secondary fire to bombard the objective area during approach. Throughout the course of the battle, the AH-1Z Viper should take to the skies and patrol the area surrounding the Gas Station for defenders moving in from the east of the station and attempting to cut off attacking troops moving between the two objectives found there..
RU Deployment
Deploying from the east near the lakeshore, the RU team is able to quickly fortify the Gas Station objectives early on. Defenders should place snipers on the roof of the Gas Station to pick off attackers as they approach from the west. Setting a T-UGS motion sensor on the north side of the Gas Station lot is useful to monitor the activity around the station. . While this motion sensor can alert of attackers as they pass through, a MAV is an even better choice for detecting hostile troop movements because you can relocate the device easily. Once the MI-28 Havoc is in the air, the vehicle should proceed to the west of the Gas Station to cut off the attackers’ tank and AA jeep as they approach and prevent these heavy-hitting vehicles from establishing a foothold at the Gas Station. With the MI-28 Havoc doing the heavy lifting outside of the Gas Station’s vicinity, the T-90A can remain at the Gas Station to eliminate dirtbike and infantry units that enter the area.
M-COM Station A
M-COM Station A is inside the garage building at the Gas Station. Attackers should approach by flanking the building to reduce their number of casualties. Dirtbikes should approach the building from the north and the south, and drop off their passengers as they continue past to draw fire away from teammates that are planting the charge. Defenders looking to maintain a presence near this objective should place claymores within the building and take positions on the rooftop. There are very few sight lines to directly monitor the objective and they usually require camping beside the nearby semi-trailer or going prone near the end of the Gas Station lot to the east. Attackers should deploy a MAV as they advance from the west to observe the building’s rooftop, as well as get an overview of the Gas Station’s east side.
M-COM Station B
Located beneath a storage area between two yellow shipping containers on the north side of the Gas Station, M-COM Station B does not offer sight lines to observe the activity around it. While MAVs work great for monitoring the activity that occurs on the Gas Station property, MAVs have difficulty seeing soldiers that are concealed under the roof of the storage area. This means defenders must make use of T-UGS motion sensors—usually placed within the shipping containers themselves—to monitor the activity of the objective area. Given the confines of the area, attackers and defenders alike will not be able to approach the M-COM Station with a vehicle. Instead, defenders and attackers alike will be passing tanks through the north side of the Gas Station lot in an attempt to control this objective. Tank commanders that want to establish a presence here should remain on the grassy area to the north and the east after destroying the fence line to offer at least some visibility. By remaining off the pavement, tanks can avoid the mines that are littered around the Gas Station.
Zone 3: Lumber Yard
US Deployment
Deploying from the Gas Station, the US team will have to work their way uphill and to the south to approach the objectives. While the team can approach the Lumber Yard relatively unnoticed, securing the objectives will require a coordinated effort by both the armored vehicles and infantry units. When attacking the objectives, infantry should focus on flanking from the west and the east sides of the yard, while the heavily armed M1 Abrams and ASRAD take up positions in the center of the area to focus their firepower on the defenders that are deploying from the south. While this chaos ensues, the AH-1Z Viper can proceed south and approach the Lumber Yard from behind the defenders’ deployment to eliminate threats en route to the yard. The team should focus its attention on one objective at a time to keep from being spread too thin between the objectives.
RU Deployment
Deploying south of the Lumber Yard, the RU team can advance and quickly take up positions throughout the yard. Fortifying the yard is essential when defending the objectives here. One opportunity to secure the area is from within the two-story office building on the east side of the yard. From the second floor, defender snipers can cover the west side of the yard and attack hostiles that are approaching the timber piles there, as well as observe movements slightly to the north. The MI-28 Havoc should monitor the approach of vehicles from the north and alert infantry units if heavy vehicles attempt to flank the yard by keeping off the road to the north. The lumber piles to the west side of the yard can be destroyed by the heavy weapons found on tanks and AA jeeps. These large piles form good cover for the attacking forces and should be destroyed to allow for greater visibility of enemy movements.
M-COM Station A
M-COM Station A is positioned below the stairs leading to the second floor of the office building on the east side of the Lumber Yard. The objective is exposed, so attackers should use care when attempting to plant a charge. Defenders looking to keep the objective in their view can take position on the rocky hill to the southeast of the objective. Although not concealed while here, a skilled sniper can eliminate threats that approach the objective and then relocate before being spotted. Attackers should also clear the first floor of the office building while their teammates are planting the charge, as the building is a home for camping defenders. Defenders looking to protect the objective can use the covered storage area on the east side of the yard to maintain cover while firing on the objective area.
M-COM Station B
Located among piles of timber on the Lumber Yard’s west side, M-COM Station B is open to attack from the north. Attackers looking to approach the objective should break through the chain-link fence north of the lumber piles to avoid the attention of defenders that will be focusing on the M1 Abrams and ASRAD as they enter the Lumber Yard. Defenders should use the T-90A to blow apart the timber piles and remove some of the potential cover so that it can’t be exploited by attackers. The defenders’ narrow sight line requires a sniper to be within the building on the west side of the yard and peer out from the large double doors toward the objective. Helicopters from both teams will be circling this objective, so engineers should be focused on destroying these prying eyes as their teammates make their approach.
Zone 4: Hillside Base
US Deployment
This final stage of the battle sees the US team deploying from the Lumber Yard. With the objectives located at the hillside base to the southeast, the attackers will have to make their way uphill as they move southeast to engage their target. While two roads lead to the base from the Lumber Yard, it would be wise to keep the M1 Abrams and ASRAD off them with and move directly south to approach the objectives from the west, flanking defenders in the process. If the AH-1Z Viper can eliminate the MI-28 Havoc and keep it out of the skies, the US team will have only infantry units to contend against. By making use of the M1 Abrams and ASRAD, the attackers can overpower and maintain a firm presence at the hillside base throughout this final stage of the battle.
RU Deployment
At this stage of the battle, the RU team is at a great disadvantage. With only the MI-28 Havoc and two 9M133 Kornet Launchers to provide defense, the team will have to coordinate their movements to prevent the attackers from making their way uphill from the north. Defending engineers should focus their attention on destroying the AH-1Z Viper and free up the skies for their MI-28 Havoc to handle the task of eliminating the threat presented by the opponents’ tank and AA jeep. To control the flow of dirtbikes into the area, mines should be placed within the central area of the base. The south side of the base provides a watchtower and a two-story office for sight lines of the objective areas. These can both be used to pick off attackers as they approach to plant their charges.
M-COM Station A
Located within a makeshift bunker of the north side of the base, M-COM Station A has only one possible sight line. This sight line requires taking position atop a rocky hill due east of the bunker. Even though the objective can not be easily observed, the area surrounding the bunker lacks any real opportunity to approach undetected. For attackers, this means that planting the charge will result in a high number of casualties unless defenders can be kept away from the objective by using a helicopter or by heavy weapons fire from vehicles. Defenders will try to camp this location, so attackers should throw in a grenade to flush out any threats prior to entering. The same can be said about attackers, who will remain within the bunker after planting the charge. Defenders will have to clear the room before entering to safely disarm the charge. Defenders would be wise to place C4 within the bunker and wait for an attacking squad to enter before detonating to maximize the potential of this booby trap.
M-COM Station B
Located beside weapons crates under a covered area on the south side of the base, M-COM Station B cannot be observed easily. However, you can observe units approaching this area by taking position atop the watchtower or the second story of the building on the base’s south side. Attackers attempting to arm a charge on this objective should approach from the west and climb over the sandbags there. Defenders benefit from having their helicopter maintain a presence west of the base, guarding against the approach of vehicles from the north and bombarding enemy infantry as they approach. Engineers should be in place to target and destroy the attackers’ helicopter when it comes to threaten the MI-28 Havoc. Attackers should bring their ASRAD in close from the north and use its secondary fire option to fire upon the objective site and suppress defenders that are encamped there and in the building on the south side of the base.
Squad Rush
Kiasar Railroad’s Squad Rush battle is focused around the Train Station. This location provides plenty of opportunities for cover and flanking your enemy by using the train cars and shipping containers that stand about the station. Sight lines are few and far between, so recon soldiers should opt to use shotguns or PDWs instead of their sniper rifles. During this face-paced firefight, deployment of MAVs is useful when approaching objectives to ensure that hostiles are not hiding around the next bend. Attackers and defenders alike will find that fanning out as they advance upon the objective works well to root out hostiles that may be camping around the objective. The fight here may be reminiscent of a deathmatch round, but the placement of booby traps like C4 and claymores will help your team maintain control of the chaos in the field. For soldiers looking to camp objectives, expect to be stabbed in the back frequently if a squad mate is not there to cover your back.
Zone 1
During the first stage of this battle, the M-COM is on the north side of the Train Station against a power box near a tanker car. Defenders should deploy a MAV to observe the movements of attackers entering the area from the north. When camping this objective, defenders should take positions north of the objective since attackers will run through the area without looking back at the container or vehicle they just ran past. Attackers should approach from the west, as the train cars run parallel with the objective, offering sight lines past the objective to spot oncoming defenders while providing cover positions that attackers can duck into. Soldiers proficient with grenades can use the train cars and shipping containers here to deflect their grenades and limit the amount of time they are exposed while throwing them.
Zone 2
The objective of the second stage of this battle is on the south side of the Train Station, positioned against a blue shipping container. Defenders are afforded a sight line of the objective. This sight line is on the southeast side of the Train Station, behind a building near the fence line. From this position, defenders can fire on hostiles as they attempt to plant a charge and bleed the enemy of tickets until they are aware of the direction of fire. Savvy attackers will also exploit this position, as they will be able to cover their squad mates from here after the charge is planted and pick off defenders attempting to disarm. With most of the firefight occurring in the southeast corner of the station, deployment of T-UGS motion sensors can assist squads in detecting the enemy’s movements. While this fight will be bloody and cutthroat to the end, the first team to place booby traps and maintain them on the field will quickly overpower their foe.
Air Superiority
Unlike other maps, Air Superiority over Kiasar Railroad offers few advantages for pilots. Teams should prioritize their loadouts to include fire extinguishers and air radar. The objectives are suspended above the lake, except for Objective A, which is above the foot of the mountain range. Combat will see enemies attempting to stay on a plane’s six. If the enemy begins to tail, planes can be brought in low and skim across the lake. Less experienced pilots may follow and crash into the water or the lakeshore, as they are unable to pull up in time. Teams should maintain contact with one another and fly in formation. This tactic offers even unexperienced pilots a fighting chance here, as their wingmen can attract the fire of enemy fighters while one of the squadron moves in to claim the objectives. When attempting to shake enemy fighters, use hard banks and air brakes to break their weapon locks. Outflying and outwitting the enemy is the name of the game.
Jet Unlock Progression
| Image | Name | Loadout Slot | Points | Description |
|---|---|---|---|---|
|
|
IR Flares | Gadget | 300 | Infrared flare launchers that when launched will distract incoming missiles and cause them to miss their locked target. |
|
|
Heat Seekers | Weapon | 700 | Heat-seeking missiles launched by the pilot that lock on to and track enemy aircraft. |
|
|
Stealth | Upgrade | 1,500 | Engine tuning and fuselage coating materials disguise your vehicle’s infrared signature, thereby increasing enemy locking and tracking difficulty and decreasing the time you are revealed to the enemy when spotted. |
|
|
Belt Speed | Upgrade | 2,700 | An enhanced mechanism that decreases the minimum time between firing bursts with your main weapon. |
|
|
Proximity Scan | Upgrade | 4,200 | External sensors detect and reveal enemy units on your minimap. |
|
|
Rocket Pods | Weapon | 6,200 | A set of unguided FFAR Rocket Pods mounted under the wings. |
|
|
Air Radar | Upgrade | 8,600 | The range of your minimap increases greatly and reveals all friendly and enemy aircraft. |
|
|
Extinguisher | Gadget | 11,600 | A controlled air pressure release in the engine compartment will extinguish engine fires when activated, helping a disabled aircraft return to normal operation and recover from damage. |
|
|
Below Radar | Upgrade | 15,000 | When flying at low altitudes, your heat signature is decreased, hiding you from enemy radar and preventing enemy air-to-air missile systems from locking on to you. |
|
|
Maintenance | Upgrade | 19,000 | Preventative maintenance procedures improve your vehicles recovery from damage. |
|
|
Guided Missile | Weapon | 24,000 | Laser-guided missiles launched by the pilot which lock on to and track enemy land vehicles and can acquire laser-designated targets even if they are out of line of sight. |
|
|
Beam Scanning | Upgrade | 29,000 | A computer upgrade for advanced weapon systems that helps you lock on to enemy targets faster when using heat-seeking or laser-guided missiles. |
|
|
ECM Jammer | Gadget | 35,000 | Electronic countermeasures including chaff launchers and deceptive transmitters prevent your aircraft from being locked on to by enemy weapon systems for a short time when activated. |
Squad Deathmatch
In this mode, the action is focused around the Lumber Yard of Kiasar Railroad and the surrounding hills. While the squads can exploit the IFV to maintain the Lumber Yard area itself, once it’s off-road the vehicle is susceptible to being destroyed by engineers and support-class soldiers that entrench themselves among the timber piles that surround the yard. When driving the IFV through these roads, keep an eye out for mines and the occasional SOFLAM on a hill. Gaining the advantage in this battle will require maintaining a presence at the Lumber Yard, using the sight lines that are available here—like the two-story office and storage area to the southwest—to pick off enemy squads as they pass through the area. During the battle, uncoordinated squads lacking experience or lone wolves will have a difficult time ripping the Lumber Yard from the grasp of more experienced squads working as a unit to shut down the enemy advance.
Team Deathmatch
For Team Deathmatch, the carnage enfolds in the Train Station, where there is plenty of cover in the form of train cars, shipping containers, and semi-trucks. The battle will play out through close-quarters combat, with the only sight lines running east and west between the cover spots that sit parallel to one another in the field. Experienced teams will opt to keep the conflict on the south side of the Train Station, making use of the shipping containers to flank and overpower their opposition. While T-UGS motion sensors are commonly used during a Team Deathmatch battle, the deployment of MAVs can be much more beneficial here given the exposure of the field from above. This tactic will alert the team of enemy positions as the frantic combat below comes to a head. While shotguns are the go-to weapon for this mode, the long corridors created by the train cars let the worth of carbines shine. While weaving in and out of cover, teams should be placing claymores to dominate the opposition as they negotiate the confines of the rail yard.