
Battlefield 3 DLC Guide — Premium Essentials End Game Vehicles
End Game Vehicles
Vehicles are an integral part to maintaining control and domination of your enemies on the battlefield. Whether on land or in the air, efficient use of these machines can turn the tide of a battle in either your favor or your enemies’. With Battlefield 3: End Game three new vehicles are cast into the fray, including a major strategic deployment platform, the imposing dropship. All of these prove to be highly capable and deadly additions to the battlefield.
Light Vehicles
While the Vodnik AA and the ASRAD may appear familiar to Battlefield veterans, their outfitting with an ASRAD cannon proves them to be highly capable assault vehicles across the landscapes presented in End Game. While still vulnerable to high explosives and particularly in direct combat with more powerful vehicles such as tanks and IFVs, these maneuverable light vehicles are efficient in the transport of troops to control points and M-COM stations and have enough firepower to stand on their own if the need arises. If direct conflict is not your style though, you can always opt for the newest addition to the light vehicle class: the dirtbikes. These swift and nimble vehicles may not be armored or outfitted with cannons, but the fact that they can outmaneuver any other vehicle that you may encounter makes them especially useful when flanking the enemy or taking position as a recon. Also, they are able to carry an additional passenger on board, so you can give teammates a ride with you as well. There are no vehicle unlocks or loadout options for these vehicles.
ASRAD
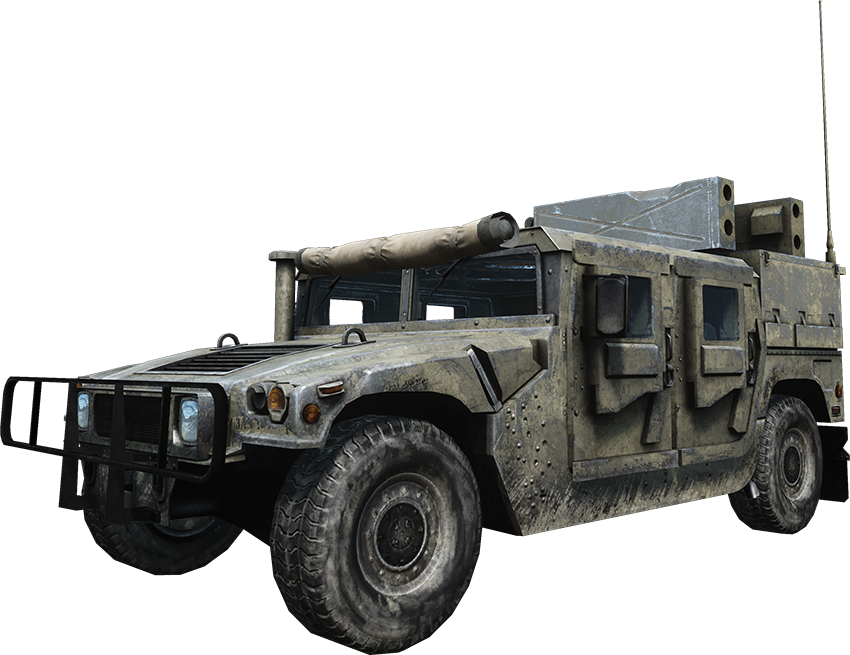
Nationality: US
Description: Armored jeep modified with a roof-mounted ASRAD cannon.
Vehicle Performance
| Speed |

|
| Armor |
|
| Firepower |

|
Vehicle Occupancy
| Seat | Position | Weapon |
|---|---|---|
| 1 | Driver | None |
| 2 | Gunner | ASRAD |
| 3 | Passenger | Troop Kit |
| 4 | Passenger | Troop Kit |
Field Notes
The ASRAD is a M1114 HMMWV that has been outfitted with a rooftop-mounted ASRAD cannon. While identical to the familiar HMMWV in terms of armor and speed, the addition of an ASRAD cannon makes this vehicle especially efficient in the destruction of aircraft. Aside from being an anti-aircraft vehicle, switching to secondary fire when in the gunner’s position disables the lock-on capability of the cannon, enabling the gunner to fire upon land-based targets as well. With this in mind, it is possible to engage a tank or IFV, but given the lighter armor of the ASRAD it is best to attack these heavier vehicles while passing or make use of the vehicle’s maneuverability to fire on them from behind.
Vodnik AA
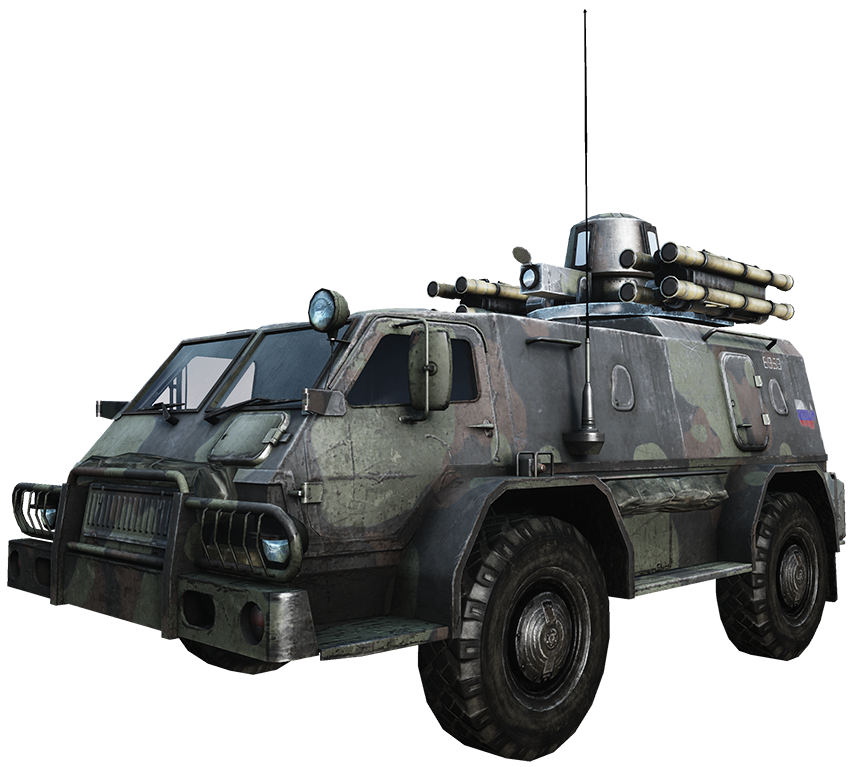
Nationality: RU
Description: Armored jeep modified with a roof-mounted ASRAD cannon.
Vehicle Performance
| Speed |
|
| Armor |
|
| Firepower |
|
Vehicle Occupancy
| Seat | Position | Weapon |
|---|---|---|
| 1 | Driver | None |
| 2 | Gunner | ASRAD |
| 3 | Passenger | Troop Kit |
| 4 | Passenger | Troop Kit |
Field Notes
The Vodnik is no stranger to the battlefield. This time, it has been outfitted with an ASRAD cannon, making it particularly deadly to aircraft. As with its US counterpart, the ASRAD , switching to secondary fire while in the gunner’s position enables the ability to fire the ASRAD unguided against targets. One advantage to the Vodnik AA over the ASRAD is that the Vodnik AA is an amphibious vehicle, meaning that traversal of waterways is possible should the vehicle be used for flanking or if it needs to make a quick escape. Like the ASRAD , though, the addition of an ASRAD cannon makes the vehicle useful against land-based targets and infantry.
Dirtbikes
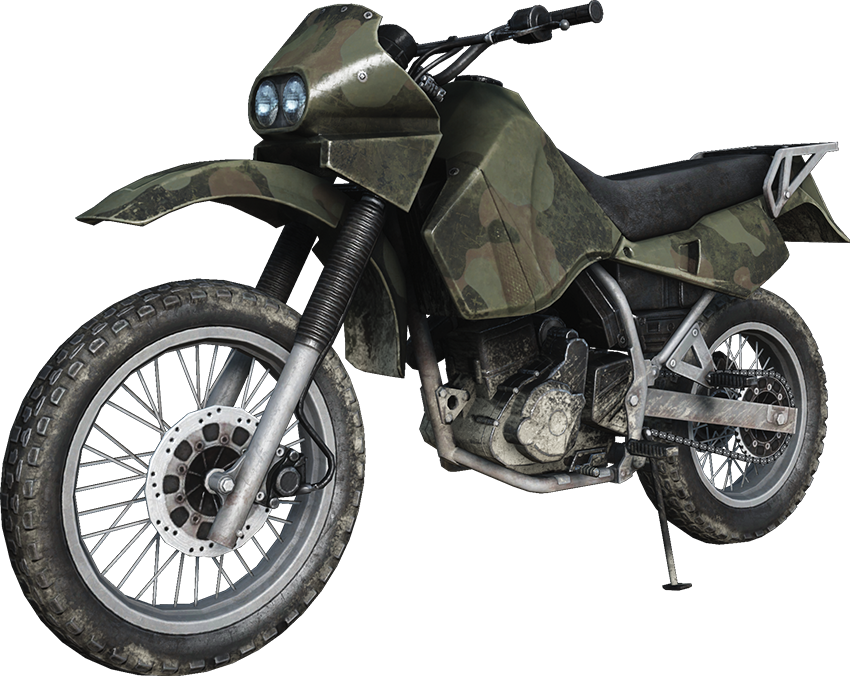
Nationality: US and RU
Description: Fast unarmored transport vehicle capable of carrying two persons.
Vehicle Performance
| Speed |

|
| Armor |

|
| Firepower |
|
Vehicle Occupancy
| Seat | Position | Weapon |
|---|---|---|
| 1 | Driver | None |
| 2 | Passenger | Troop Kit |
Field Notes
One of the fastest and the most maneuverable of the ground vehicles, the dirtbike is an unimposing transport vehicle that can quickly and efficiently navigate the battlefield, and it’s small enough to enter buildings as well. While the driver may be unarmed, the passenger has full access to his own troop kit. While accuracy with a firearm is difficult when traveling at the high speeds the dirtbike is capable of, explosives, such as grenades and C4, are highly effective drive-by weapons.
Light Vehicle-Related Assignments
Defender of the Earth

Criteria:
- Destroy five air vehicles using the AA jeeps.
| Reward: | |
| Fly Swatter Dog Tag |
|
Road Warrior

Criteria:
- Destroy 20 vehicles.
- Get a roadkill with a dirtbike.
| Reward: | |
| Road Warrior Dog Tag |
|
| All About Precision Assignment | |
Light Vehicle Tactics
- Before riding a dirtbike, it is possible to throw an ammo crate or medic kit onto it. This effectively heals and resupplies the driver and passenger while they are on it.
- Sometimes, the most direct path is not the safest. In times like these, keep an eye out for the ramps that are located throughout the maps. Dirtbikes can take advantage of these to make quick escapes or get the jump on enemy forces.
- Dirtbikes make great bombs, too! These vehicles tend to be plentiful and maintain their momentum for some time after bailing out. So, if you don’t mind destroying yours, strap some C4 to it and drive at breakneck speed toward your target and bail out; just don’t forget to detonate the charge.
- The cannon on both the ASRAD and Vodnik AA has a high effective range. Use this to your advantage to protect control points and M-COMs from afar, instead of engaging the enemy at close range, where the vehicles’ vulnerability to explosives can be exploited.
Dropship
One of the most strategically viable additions to the battlefield is the Dropship. This heavily armored support vehicle is afforded to a team that can control and maintain a specific control point within the field. While the aircraft itself is unarmed, the ability to deploy infantry and IFVs into the fray at a moment’s notice will make this deployment platform a highly contested asset throughout the course of any battle.
Dropship
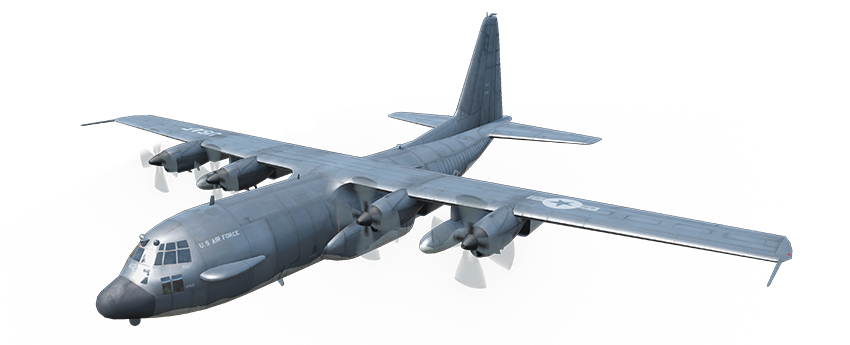
Nationality: US and RU
Description: Heavily armored airborne deployment platform capable of deployment of infantry and IFVs.
Vehicle Performance
| Speed |

|
| Armor |
|
| Firepower |

|
Vehicle Occupancy
| Seat | Position | Weapon |
|---|---|---|
| N/A | N/A | N/A |
Field Notes
Logistically, the dropship is an invaluable asset for the team in control of it. Able to drop infantry units and formidable IFVs into the field, the controlling team should expect the dropship to be subject to enemy attack the moment it appears over the battlefield. Any nearby allied aircraft should work to defend the vehicle from attack, keeping in mind that the countermeasures deployed from the dropship against locked-on weapons take a moment to reload after use. Paratroopers should also keep in mind that they are susceptible to splash damage while standing within the cargo bay of the aircraft prior to deployment.
Dropship Tactics
- For units deploying into the field, they should be mindful of the dropship’s position (indicated by a flashing beacon on the spawn screen minimap). Coordination of the airdrop behind enemy lines provides a chance to flank them.
- Only one airdropped IFV can be deployed at a time (except for Conquest 64 that affords two IFVs). Should the IFV be destroyed, there is a brief waiting period before another IFV can be deployed.
- During its descent, an airdropped IFV is vulnerable to attack. On the same note, the IFV can also fire its weapons, but its accuracy is greatly reduced when in the air.
- Before an airdrop, coordinate with your teammates on the ground to bombard the drop site prior to deployment