
Far Cry 3 with Interactive Map Essentials The Basics
Experience and Skill Points
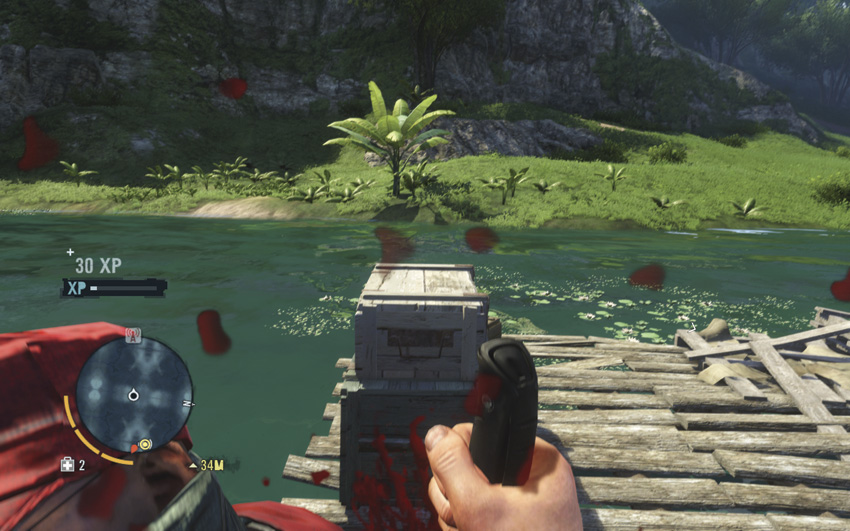
Completing the mandatory mission “Secure the Outpost” unlocks the Skill tree system. Initially, very few of your skills are available for purchase, but they are gradually unlocked for your use over the course of the game’s story missions.
Finishing missions, killing human opponents, or finding certain collectible items are all worth varying amounts of experience points (EXP). Every time you reach a certain amount of EXP, they’re automatically traded in for a Skill Point. The more Skill Points you’ve earned, the more EXP you’ll need for the next one.
Every Skill Point you earn also adds to the tribal design on Jason’s left forearm, until it’s an intricate sleeve tattoo that stretches from his elbow to wrist. Spending three Skill Points after the two you are forced to spend to complete “Harvest the Jungle” unlocks the Inked Up Achievement/Trophy, and obtaining all the skills in the game (which requires you to complete the story campaign at least up to the “New Rite of Passage” mission) gives you the Fully Inked Achievement/Trophy.
The fastest way to grind Skill Points, outside of deliberately killing every pirate you can find (which, to be fair, is probably going to happen anyway), is to search the island for collectibles. Relics are worth 250 EXP and there are dozens of them on the North Island, most of which aren’t that hard to find. Letters of the Lost are a bit trickier to come by, but any of them that you can pick up are worth 500 EXP. Between that and the bonuses you receive for liberating outposts and disabling scramblers, Skill Points should be flowing freely.
| Experience Gained | |
|---|---|
| Normal Enemy Kill | 10/20 points* |
| Headshot | 25/50 points |
| Takedown | x3 multiplier |
| Heavy Kill | 100 points |
| Explosive Kill | x3 multiplier |
| Multi-Target Takedown | 100 points per additional target |
| Found Relic | 250 points |
| Multi-Kill | x3 points per enemy |
| Disable Radio Tower Scrambler | 500 points |
| Found Letter of the Lost | 500 points |
| Heavy Beatdown | 500 points |
| Liberated Outpost | 500 points |
| Liberated Outpost, no alarms | 550 points |
| Liberated Outpost, undetected | 1500 points |
| Story Mission | 1000/2000/3000/4000 points |
| Skill Points | |
|---|---|
| 1-13 | 1000 EXP |
| 14-15 | 2000 EXP |
| 16-17 | 2500 EXP |
| 18-25 | 3000 EXP |
| 26-29 | 3500 EXP |
| 30+ | 4000 EXP |
Skills
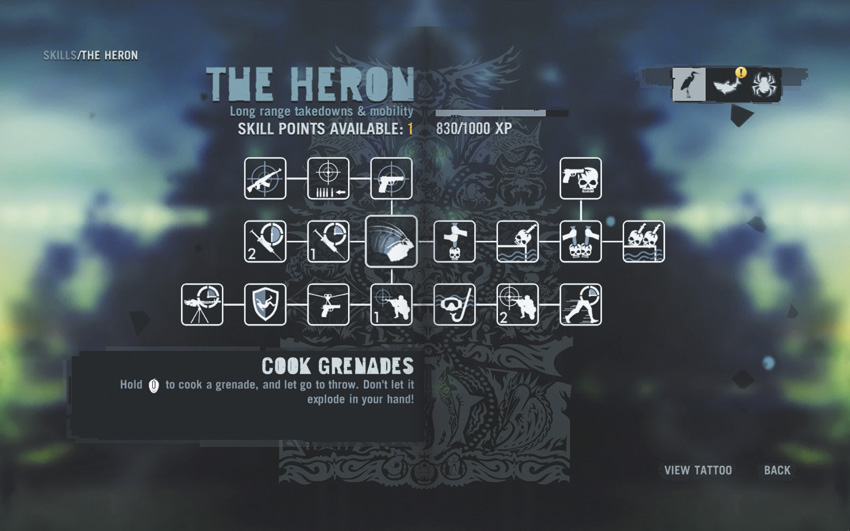
You don’t have to worry about spending points “wrong” in Far Cry 3 , as most of the abilities are useful for any strategy or approach, and it’s actually quite easy to simply purchase all of them once you’ve managed to get them unlocked. There are enough sniper missions in the early to mid game that it’s a good idea to pick up Steady Aim early on, and the Horticulture and Zoology skills in the Spider tree help you get the most out of your hunting and foraging.
Each skill you acquire costs a single Skill Point, although it may have other conditions attached to it. Purchasing a skill also fills in a predetermined section of the tattoo on Jason’s left forearm.
Heron
The skills in this tree cover mobility, Takedowns, and attacks from long range. The Syringe Potency skills come in handy when exploring the island, as it gives you more underwater time from Deep Dive, and the Death From Above Takedown is a lot of fun.

Cook Grenades
Prerequisite: finish “Harvest the Jungle”
You can prime a grenade for a few seconds before throwing it by holding down the throw button. Most human opponents dive for cover the moment they see a grenade out, so this is useful for ensuring a kill.

Hip Shooter
Prerequisite: Cook Grenades, finish “Secure the Outpost”
When firing a pistol, SMG, or shotgun from the hip, or without aiming along its sights, there’s a certain amount of target drift. This skill minimizes it, which improves the gun’s damage output.

Aimed Reload
Prerequisite: Hip Shooter
While aiming along iron sights, you can quickly reload a pistol or sniper rifle. This has the useful side effect of allowing you to chamber a new round in the M-700 without losing your sight picture.

Long Gun Expert
Prerequisite: Aimed Reload
Same benefits as with Hip Shooter, but now applicable to assault rifles and LMGs.

Syringe Potency
Prerequisite: Cook Grenades
Syringes that confer a timed bonus last 25% longer.

Enhanced Syringe Potency
Prerequisite: Syringe Potency, finish “Meet Citra”
Syringes that confer a timed bonus last 50% longer.

Steady Aim
Prerequisite: Cook Grenades
You can hold your breath longer while aiming with a sniper rifle, thus steadying the crosshair. This is almost required before you can get any real work done with a sniper rifle.

Line Gunner
Prerequisite: Steady Aim, finish “Meet Citra”
Line Gunner allows you to fire a pistol or small SMG, such as a Skorpion, while you’re sliding down a zipline. This isn’t as useful as it sounds, and there are remarkably few situations where it comes in handy. One of those situations is during a difficult story mission, however, which makes this skill worth the (low) price of admission.

Soft Landing
Prerequisite: Line Gunner
As you’ll notice early on, it doesn’t take a very long fall to injure you in Far Cry 3 . This helps with that, and is particularly handy during “The Motherlode.”

Cool Gunner
Prerequisite: Soft Landing, finish “New Rite of Passage,” kill ten human opponents with a mounted gun
It takes about 50% longer for a mounted gun to overheat from use with this skill. This skill would be more useful if you could pick it up before “Saving Oliver,” but it sees some use anyhow. One of the most satisfying ways to deal with an enemy outpost is to steal a patrol boat or jeep and use its turret to sweep the place clean of life.
Deep Breath

Prerequisite: Steady Aim, finish “Meet Citra”
Jason can hold his breath for 25% longer. There are more than enough Relics and other undersea collectibles to justify your purchase of this skill. It’s also handy when using a river or lake to stealthily approach a location.
Breath Control

Prerequisite: Deep Breath, finish “Meet Citra”
An improvement on Steady Aim, this gives you a surprisingly long window of stability when using a sniper rifle. You’ll want to pick this up soon after it becomes available, as there are a couple of story missions shortly after “Meet Citra” that either require or reward the use of a sniper rifle.
Marathon Man

Prerequisite: Breath Control, finish “New Rite of Passage”
Jason can already sprint a considerable distance without losing his breath and slowing down, but with Marathon Man, he never gets tired at all. This really comes into its own on the South Island, where Hoyt’s mercenaries control most of the territory and the roads can be deathtraps.
Death From Above

Prerequisite: Cook Grenades
This skill allows you to use a Takedown automatically on any enemy you’re able to jump on from above, even if they’re aware of your presence. You can ramp off of hills or bounce off short objects like some kind of stabby parkour runner, then leap on an enemy to automatically finish them off with your knife. Naturally, this does not render you bulletproof, so doing it in mid-combat is a lousy plan, but it’s a great opening move.
Death From Below

Prerequisite: Death From Above, finish “Meet Citra”
If you can approach an enemy standing at the edge of a platform from below, you’re able to yank them over the side for a quick stabbing. This is primarily useful for taking out sentries who are on piers or docks. You can drag them into the water to quietly eliminate them.
Dual Death From Above

Prerequisite: Death From Below, perform at least one Death From Above Takedown, finish “New Rite of Passage”
You won’t see this situation happen naturally, but if you can use a few thrown rocks to decoy a pair of guards over beneath you, this lets you gank them both at once.
Dual Death From Below

Prerequisite: Dual Death From Above, perform at least one Death From Below Takedown, finish “New Rite of Passage”
Finding this situation under ordinary circumstances is only slightly less likely than seeing a unicorn, but it’s great for dealing with nests of snipers.
Gunslinger Takedown
Prerequisite: Dual Death From Above
If an enemy is carrying a pistol, you can follow up a successful Takedown by using his pistol to fire at nearby enemies. This requires some practice before you can get it to work, but a Gunslinger Takedown can eliminate a large crowd of enemies in seconds. It’s more useful against pirates, since they aren’t wearing body armor and the pistol is thus more effective against them.
Shark
The Shark tree is one of the best options to start with, as it contains the skills that give you more health and improve the efficacy of your syringes and first aid.
Takedown

Prerequisite: finish “Harvest the Jungle”
You must take this skill as part of a mandatory story mission, and its various uses are covered in detail elsewhere in the guide. Long story short, this lets you stab people to death, and that is surprisingly useful.
Physical Conditioning

Prerequisite: Takedown, finish “Secure the Outpost”
You get another block of health. Handy!
Improved First Aid

Prerequisite: Physical Conditioning
This powers up the efficacy of standard first aid, which is only used if you’re completely out of Medical syringes. This skill is rarely useful unless you’ve truly screwed up, but there are missions near the end of the story campaign where the bonus to first aid is a lifesaver.
Advanced Conditioning

Prerequisite: Improved First Aid, finish “Meet Citra”
You get a fourth block of health. Great!
Advanced First Aid

Prerequisite: Advanced Conditioning
First aid now restores three blocks of health. You have to take this anyway to get to Expert Conditioning, but as noted previously, it’s much more useful late in the game.
Expert Conditioning

Prerequisite: Advanced First Aid, complete “New Rite of Passage”
You get a fifth block of health. Useful!
Peak Conditioning

Prerequisite: Expert Conditioning, finish “Meet Citra,” craft 10 Medical syringes
You get a sixth and final block of health. Excellent!
Adrenaline

Prerequisite: Takedown, finish “Secure the Outpost”
Any partially depleted blocks of health regenerate faster. This is an obvious must-have.
Field Medic

Prerequisite: Adrenaline, finish “Meet Citra”
Medical syringes now restore four blocks of health.
Field Surgeon

Prerequisite: Field Medic
Medical syringes now restore six blocks of health.
Button Up

Prerequisite: Field Surgeon, buy three suits of body armor at a vendor, complete “New Rite of Passage”
Body armor absorbs 50% more damage. You gain access to this skill right about the same time you’re heading to the South Island, where the general quality of your antagonists takes a sharp upward turn. It’s worth getting, as you’re about to start picking fights with a higher class of mercenary and the extra protection can save your life. The secondary requirement should be satisfied well before you unlock the skill for purchase.
Adrenaline Surge

Prerequisite: Button Up, finish “Three Blind Mice,” complete three Supply Drops
Your partially drained health blocks refill themselves 100% faster. That really speaks for itself.
Ironsides

Prerequisite: Takedown, finish “Secure the Outpost”
You take 50% less damage from explosions. This takes the damage from an indirect RPG hit down from “nearly lethal” to “survivable,” and by the time you reach the game’s halfway point, this is a legitimate concern.
Fire Retardant

Prerequisite: Ironsides, finish “Meet Citra”
You take 50% less damage from fire. Given the love of Molotov cocktails among certain elements of Vaas’s men, this skill is more than worthwhile. You should try to pick it up before you undertake the “Kick the Hornet’s Nest” story mission.
Evasive Driving

Prerequisite: Ironsides, finish “Meet Citra”
Any car you drive takes 50% less damage from all sources. This is virtually required to complete any of the Supply Drop side missions, since they almost require you to crash through foliage like a maniac, and losing the car before the finish line is a legitimate concern.
Chained Takedown

Prerequisite: Takedown, finish “Meet Citra”
If you land a Takedown on an enemy, you can use a quick motion command to instantly chain your attack to a nearby enemy and kill him as well. You can keep doing this until you run out of living enemies in the area or miss the motion command, which makes it great for both grinding EXP and clearing out enemies in close quarters.
Grenade Takedown

Prerequisite: Chained Takedown, finish “The Motherlode,” kill 5 human enemies with grenades
This is more useful for style points than anything else, but like the Gunslinger Takedown, you can use it to eliminate an entire group of enemies in seconds. During a standard Takedown, push your throwables button (RB/R2/grenade) to yank the pin on your target’s grenade and kick him away, then back up before it goes off.
Heavy Beatdown

Prerequisite: Grenade Takedown, kill a shark, complete “New Rite of Passage”
This allows you to use standard Takedowns to kill heavy machine gunners and flamers, and as such, is virtually required. Before this skill becomes available, your strategy with these guys requires a lot of explosives and ambushes; after that, you can sneak up on them like anyone else.
Spider
The Spider tree of skills involve hunting, stealth, and survival. The Horticulture 101 and Zoology 101 skills are must-haves.
Sprint Slide

Prerequisite: finish “Harvest the Jungle”
You have to pick this up anyway, so it’s good that it’s worthwhile. You can use this to end a sprint by sliding into cover, such as dense foliage or underneath furniture, which has a lot of use both in evasion and avoiding gunfire.
Expert Swimmer

Prerequisite: Sprint Slide, finish “Secure the Outpost”
This is a “sprint” for swimming. Before you can pick up Deep Breath or the Deep Dive recipe, this is a lifesaver as it lets you reach the surface that much faster. Grab this before you go on the “Mushrooms in the Deep” mission.
Jungle Run

Prerequisite: Expert Swimmer, finish “Meet Citra”
This actually makes you slightly faster when you’re moving in a crouched position. This has a slight drawback in that you can’t use your crouch as a way to carefully navigate narrow platforms anymore, but it more than compensates by letting you land faster Takedowns from stealth.
Ninja Step

Prerequisite: Jungle Run, liberate two outposts without being detected, complete “New Rite of Passage”
You’re now almost as quiet when you’re walking or sprinting as you are when you’re crouched. By the time an enemy hears you, you’re in Takedown position.
Horticulture 101

Prerequisite: Sprint Slide, finish “Secure the Outpost”
You receive double the leaves from any plant you harvest. This is an easy way to accidentally fill your rucksack, but there’s nothing wrong with having extra syringe materials around.
Zoology 101

Prerequisite: Horticulture 101, finish “Meet Citra”
Any animal you skin is worth two hides instead of one. This allows you to not have to hunt any extra tigers, leopards, or bears, and as such is well worth the effort to acquire. Late in the game when you don’t need the skins for equipment, this is also a license to print money.
Stone Wall

Prerequisite: Zoology 101
You spend a lot of the early game getting stock-checked to the floor by pirates, and Stone Wall prevents that. Animals won’t use their grab or maul attacks as often and it’s harder to knock you over. Some attacks can still manage it, such as the story boss in “New Rite of Passage” or a charging buffalo, but this takes a lot of pain out of combat.
Penny Pincher

Prerequisite: Zoology 101, finish “New Rite of Passage”
An enemy corpse usually doesn’t have more than $15 on it when you loot it. With Penny Pincher, the cash take from a looted body goes up to $20 or more, about the same as a common loot chest.
Dealmaker

Prerequisite: Penny Pincher, complete three “Wanted Dead” quests
By the time you can pick this up, money isn’t that big of a deal anymore unless you’ve totally ignored any and all bonus missions. This skill trivializes making vast sums of cash, particularly with high-end loot items like the relics you can find inside old ruins.
Expert Archery

Prerequisite: Sprint Slide, finish “Meet Citra”
You gain additional stability when aiming a bow. This makes it a much more viable option as a go-to weapon throughout the game. If you don’t care to use one, try to pick this skill up anyway before “New Rite of Passage,” as you’re required to use a bow as part of that mission.
Combat Archery

Prerequisite: Expert Archery
Quick shots with the bow don’t fly very far or do very much damage. With Combat Archery, you draw the bow fast enough to eliminate that problem. As with Expert Archery, take this skill before “New Rite of Passage” to make that mission a little easier.
Takedown Drag

Prerequisite: Sprint Slide, finish “Secure the Outpost”
It requires a bit of practice to use effectively and you still can’t move a body once you’ve let it drop, but this can greatly assist your stealth operations by letting you drag all these corpses you’re creating into less obvious places.
Knife Throw Takedown

Prerequisite: Takedown Drag, finish “Meet Citra”
The last of the “extra style” Takedown options, this lets you deal with a second enemy by throwing a Takedown victim’s knife at him. It’s a good option for when you’ve got two targets that are far apart, and has the additional advantage over the Gunslinger Takedown of remaining quiet.
Loot Takedown

Prerequisite: Knife Throw Takedown, finish “New Rite of Passage”
You automatically loot any human you kill with a Takedown. This is a timesaving device more than anything. Waste not, want not.
Running Reload

Prerequisite: Takedown Drag
This is one of those skills that’s so useful on a regular basis that after you take it, it’s hard to remember it was something you had to actually unlock. This lets you reload while you’re sprinting.
Nimble Fingers

Prerequisite: Running Reload, finish “Meet Citra”
You reload pistols, SMGs, and shotguns 25% faster. The last is the most important, as the later models of shotgun have a glacial reload time, particularly the SPAS-12.
Quick Swap

Prerequisite: Nimble Fingers
You switch weapons and aim along iron sights much faster than you do without this skill. Like Running Reload, this skill fades into invisibility shortly after you take it. It’s a good quality-of-life bonus.
Nimble Hands

Prerequisite: Quick Swap, finish “Meet Citra,” buy three types of gun attachments
This skill is useful because it removes one of the major problems with the M-700 sniper rifle. You can keep your sight picture while working its action, which makes lining up your next target that much easier. Its benefits for LMGs and assault rifles are just icing on the cake.