
Assassin's Creed: Brotherhood Guide Essentials Extras (Spoiler Alert)
Secrets
If you happened to miss anything on your travels, here's a recap of the features and rewards that can be unlocked by completing optional memories and challenges.
Unlockables Overview
|
Category |
Name |
Unlock Condition |
Reward Location / Notes |
-- |
|
Cristina memories |
A Second Chance |
Achieve 15% Total Synch. |
You can access these repressed memories of Ezio's life by going to the broken heart icon () that appears on the map. |
-- |
|
Last Rites |
Achieve 30% Total Synch. |
|||
|
Best Man |
Achieve 45% Total Synch. |
|||
|
Persona Non Grata |
Achieve 60% Total Synch. |
|||
|
Love's Labour's Lost |
Achieve 75% Total Synch. |
|||
|
Capes |
Auditore Cape |
Complete the Rebuilding Rome metagame to 100%. |
Capes are accessed through the Inventory Outfits menu. |
-- |
|
Borgia Cape |
Collect 100 Borgia Flags. |
|||
|
Medici Cape |
Reach Level 30 on the "Assassin's Creed: Project Legacy" Facebook game. |
|||
|
Venetian Cape |
||||
|
Outfits |
Raiden Skin |
Receive at least a Bronze Medal in all Virtual Training challenges. |
Outfits are accessed through the Inventory menu. |
-- |
|
Florentine Noble Attire |
Purchase for 2 tokens through Ubisoft's Uplay service. |
|||
|
Altaïr's Robes |
||||
|
Armor of Altaïr |
||||
|
Borgia Flag & Treasure Maps |
Centro Flags Map |
Finish the game or collect 25 Borgia Flags. |
Once unlocked, purchase these maps from an Art Merchant. |
-- |
|
Antico Flags Map |
||||
|
Campagna Flags Map |
||||
|
Vaticano Flags Map |
||||
|
Feathers Map |
||||
|
Shop Quest rewards |
Seusenhofer Pauldrons and Chest Guard |
Complete the Exotica Shop Quest (Blacksmith). |
These rewards are all equipped automatically. |
-- |
|
Spada Lunga |
Complete the Blood Money Shop Quest (Blacksmith). |
|||
|
Captain's Sword |
Complete the Faith Shop Quest (Blacksmith). |
|||
|
Vaticano Treasures Map |
Complete the Trendsetting Shop Quest (Art Merchant). |
|||
|
Large Quiver |
Complete the Pulling Threads Shop Quest (Tailor). |
|||
|
Fast Poison |
Complete the Venomous Shop Quest (Doctor). |
|||
|
Rebuilding Rome metagame rewards |
Cavalieri Mace & Butcher Knife |
Open 5 Blacksmiths. |
Items become available for purchase when unlocked. |
-- |
|
Spadone |
Open 10 Blacksmiths. |
|||
|
Knife Belt Upgrade |
Open 4 Tailor Shops. |
|||
|
Large Medicine Pouch |
||||
|
Knife Belt Upgrade |
Open 8 Tailor Shops. |
|||
|
Large Poison Vial |
||||
|
Guild rewards |
Courtesans Guild Crest |
Advance each Guild to Level 2. |
Unlocked at Ezio's Hideout. |
-- |
|
Thieves Guild Crest |
||||
|
Mercenaries Guild Crest |
||||
|
Maria's Dagger |
Advance each Guild to Level 3. |
|||
|
La Volpe's Bite |
||||
|
Bartolomeo's Axe |
||||
|
Assassins Guild Crest |
Complete all Assassins Guild Challenges. |
|||
|
Sword of Altaïr |
||||
|
Rare Paintings |
Self Portrait |
Complete Sequence 08 or collect 15 Borgia Flags. |
Paintings become available for purchase from Centro, Antico and Campagna Art Merchants respectively. |
-- |
|
Young Man with an Apple |
||||
|
Christ Blessing |
||||
|
Portraits |
Portrait of Cesare Borgia |
Defeat the target to acquire their portrait. |
These appear on a wall of Ezio's Hideout. |
- |
|
Portrait of Rodrigo Borgia |
||||
|
Portrait of Lucrezia Borgia |
||||
|
Portrait of the Baron de Valois |
||||
|
Portrait of Juan Borgia |
||||
|
Portrait of Micheletto |
||||
|
War Machine Models |
Tank Model |
Complete the Hell on Wheels War Machine mission. |
Appear as trophy models in Ezio's Hideout. |
-- |
|
Bomber Model |
Complete the Flying Machine 2.0 War Machine mission. |
|||
|
Machine Gun Model |
Complete the Outgunned War Machine mission. |
|||
|
Naval Cannon Model |
Complete the Loose Cannon War Machine mission. |
|||
|
Leonardo Inventions |
Parachute |
Complete all 4 War Machine missions. |
Leonardo offers you this reward. |
-- |
|
Ultimate Equipment |
Dagger and Armor of Brutus |
Collect all six Keys of Romulus from Followers Lairs. |
These treasures are hidden in a vault below Prospero da Siena's Borgia Tower. |
-- |
|
Cheats (once unlocked, can be activated from the Options menu while replaying memories) |
Ride the Unicorn |
Complete Sequence 01 with 100% Total Synch. |
All horses are turned into unicorns; all weapons sport a lightning effect. |
- |
|
Buns of Steel |
Complete Sequence 02 with 100% Total Synch. |
Makes yourself immune to injury. |
||
|
Killing Spree |
Complete Sequence 03 with 100% Total Synch. |
Assassinations cannot be blocked. |
||
|
Sisterhood |
Complete Sequence 04 with 100% Total Synch. |
Makes all Assassins Guild recruits female. |
||
|
Ultimate Guild |
Complete Sequence 05 with 100% Total Synch. |
Raises all Assassins Guild recruits to the rank of Assassino. |
||
|
Unlimited Assassin Signals |
Complete Sequence 06 with 100% Total Synch. |
No cooldown timer when calling Assassins. |
||
|
Desmond Everywhere |
Complete Sequence 08 with 100% Total Synch. |
Desmond skin is unlocked. |
||
|
Subject 16's Secret |
The Truth |
Find all 10 Rifts and solve all Cluster puzzles. |
A secret area of the Animus. |
-- |
|
Uplay rewards |
PS3/Xbox 360 Theme |
Purchase for 1 token through Ubisoft's Uplay service. |
Platform-specific reward. |
- |
|
The Hellequin |
New playable character in Multiplayer mode. |
|||
|
Pistol Upgrade |
Purchase for 3 tokens through Ubisoft's Uplay service. |
Equipped automatically. |
||
|
Artifacts |
Mario's Sword |
Leave the Animus and pick them up in present day Monteriggioni. |
Appear as trophies on shelves in the Sanctuary. |
-- |
|
Medici Cape |
||||
|
Claudia's Record Book |
||||
|
Maria's Feather Chest |
||||
|
Ezio's Belt |
The Truth:
Rift Puzzle Solutions
Discovering all ten Rift locations is when this challenge merely begins. To reveal Subject 16's secret, you must then solve his puzzles directly or by returning to them through the Database The Truth menu. Each of the seven puzzle types has its own interface, with relevant button commands displayed onscreen.
- Theme puzzles: these challenge you to discover a theme that connects five pictures out of ten. The order in which you select them doesn't matter.
- Ring puzzles: a picture is divided into four rings with a fixed point at the center. You must rotate these rings to display the complete image. Our solutions refer to the innermost ring as Ring 1 and the outermost as Ring 4. Push the Movement Stick up and down to select the ring; push right to rotate clockwise and left to rotate anti-clockwise, with each small acute turn marked by an audible combination lock "click". As a rule, if any ring spins a dependent ring, it must be placed correctly beforehand and the dependent ring moved later.
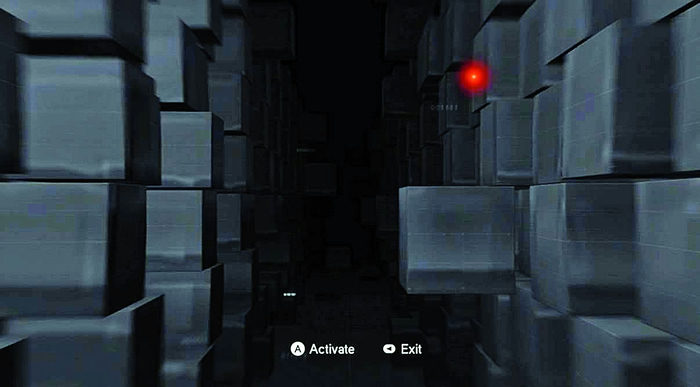
- Observation puzzles: scan a selection of images with a magnifying tool to find hidden details and access a Cipher puzzle. Upon zooming in to any image, your scanning reticle highlights a square area in red. When this cursor flashes, you have uncovered information and a possible link to a Cipher puzzle. But there are many dead ends, and you will be warned if you have incorrect coordinates. That means going back to the Observation puzzle and trying again to find the correct answer. It's important to note that the coordinates appear as tiny symbols above the scanning cursor itself, and these relate directly to the symbols of the subsequent Code Wheel.
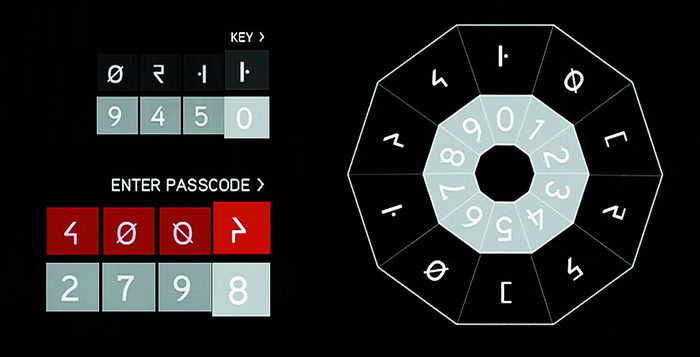
- Cipher puzzles: rotate a Code Wheel using a numerical key to discover the correct symbols of a Passcode.
- Chessboard puzzles: playing as white, move your chess pieces in response to a cryptic riddle.
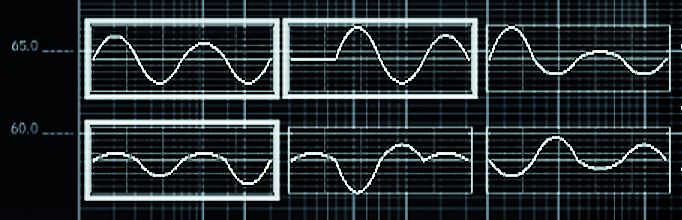
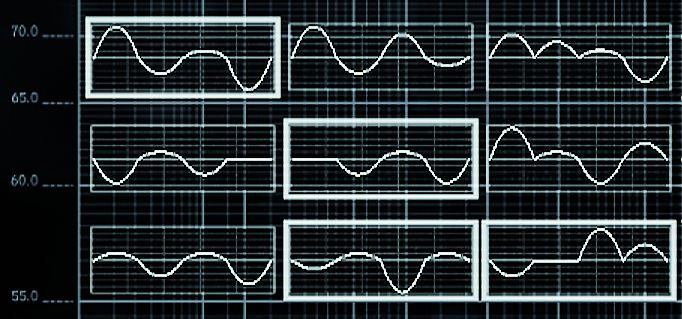
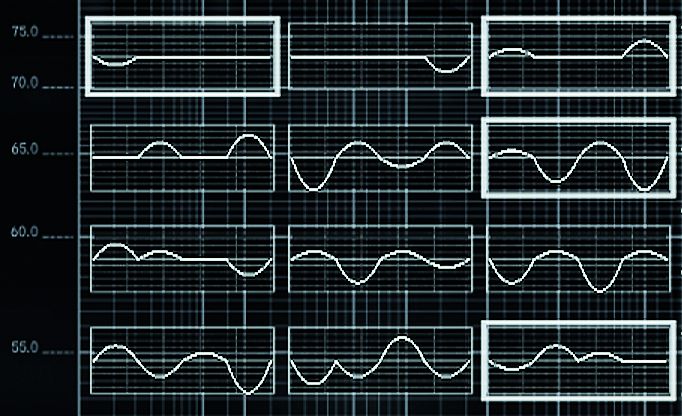
- Amplitude puzzles: the concept here is to remove an interference signal from an audio recording. The blue line is your goal wave, and the idea is to match it perfectly by selecting and combining two or more of the filter waves to the left. The waves reinforce or cancel each other over four segments, so if a positive wave is too high above the goal wave in one segment then look for a wave with a negative amplitude (below the line) in that segment to reduce it.
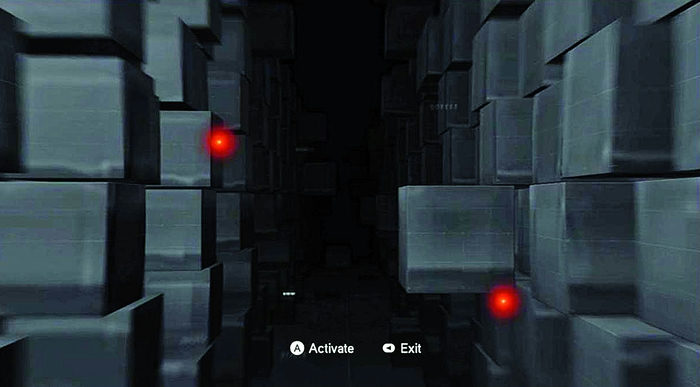
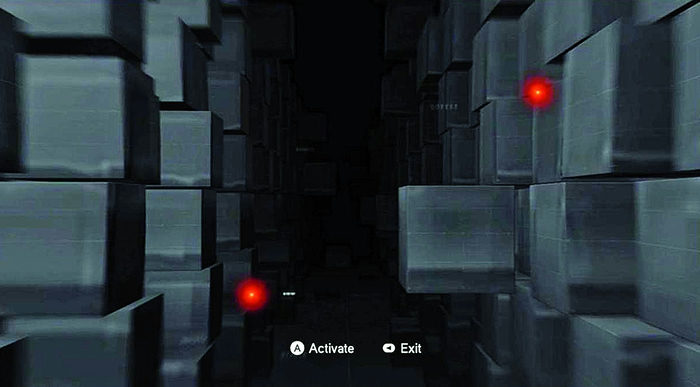
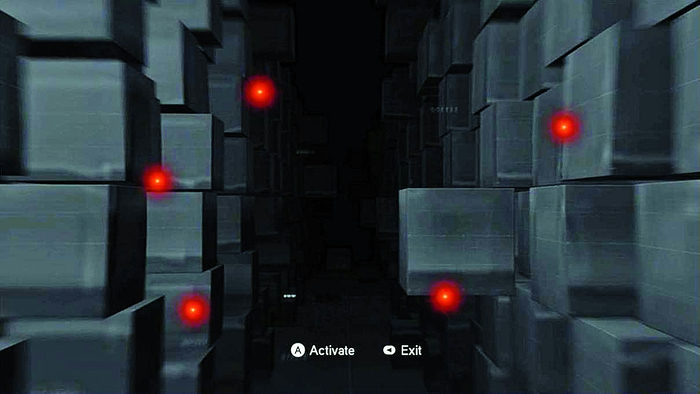
- Quarantine puzzles: uncover and neutralize a series of tracking devices in swift succession. The pulse of your detector increases with proximity to the target, slowing as it gets further away. When you have more than one target to find, note the red bar that fills around your cursor. After neutralizing a target, this shows your time limit in which to reach the next – or the operation fails. So the best tactic is to find them all first, at leisure, remember their locations, then race efficiently around the screen.
For most puzzles, you have the option of consulting in-game advice from Shaun Hastings if you fail to reach a solution in three minutes. Our hints assume you have consulted these first, and we explain some of Shaun's more obscure suggestions so that you may still attempt the solution yourself.
Note that it doesn't matter which Rifts you find first: you will always have to solve the puzzles in the same order. Each Rift unlocks a new data Cluster of puzzles to attempt.
Cluster 1
|
Theme Puzzle |
|
Riddle |
|
MASTERS ALL, THEY DID NOT WORK, BUT RULED FROM ON HIGH. |
|
Hint |
|
The Templar lifestyle is one of power and privilege, not servitude. Pick out the ruling classes enjoying the luxury of their exalted position. |
|
Solution |
|
|

|
Chess Puzzle |
|
Riddle |
|
MOVING AWAY FROM THE SOVEREIGN AND HIS CROSSED BROW, THE PEOPLE TAKE TWO STEPS FORWARD. |
|
Hint |
|
The sovereign is a ruler; the crossed brow further identifies the king by the shape of his playing piece (E1). The people are the pawns. In an opening chess move, the pawns can take two steps forward. Put this together and you have the pawn in front of the king moving two squares forward. |
|
Solution |
|
Select white pawn on E2 and move to square E4. |
|
Quarantine Puzzle |
|
Solution |
|
|
Cluster 2
|
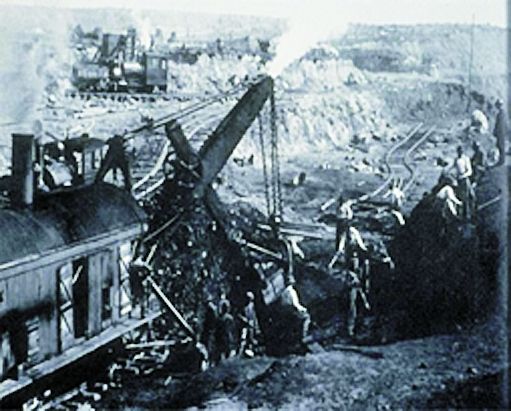
Ring Puzzle 1 |
|
|
Visual Hint |
|
|
Match the iron chain links of the crane running vertically to the top to get the picture in the correct orientation. |
|
|
Solution |
|
|
|
|
|
|
|
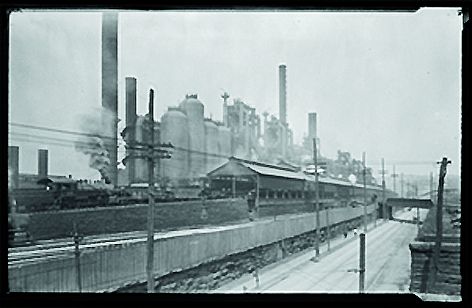
Ring Puzzle 2 |
|
|
Visual Hint |
|
|
There is a skyline to rotate to the top of the screen and chimneys to align vertically. |
|
|
Solution |
|
|
|
|
|
Ring Puzzle 3 |
|
|
Visual Hint |
|
|
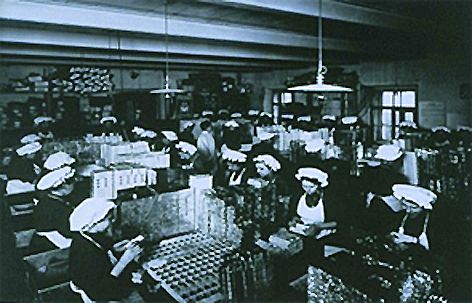
Working inwards, the outer edge of the image should show a production line of female workers. |
|
|
Solution |
|
|
|
|
|
Chess Puzzle |
|
Riddle |
|
THE WORKFORCE INCREASES. BROTHER RIGHT BESIDE BROTHER. |
|
Hint |
|
The brother is another pawn. So you need to move a pawn to stand beside the one already played at E4. "Right" rules out pawn D2 to the left. |
|
Solution |
|
Pawn F2 to F4. |
|
Quarantine Puzzle |
|
Solution |
|
|
Cluster 3
|
Observation Puzzle |
|
Riddle |
|
WASHINGTON SITS ABOVE THE GREEN, IN 1944, KEEPING A COOL HEAD. BELOW THE RIGHT 1, IS THE STANDARD BEARING 48. BEHIND, THERE IS A COMPANY WHOSE POWER IS GROWING. |
|
Hint |
|
The right-hand image of the Mount Washington Golf Course ("the green") is your search area. "The right 1" means the numbers on the dollar bill; a standard is another word for a flag. |
|
Solution |
|
Scan the left turret of the Mount Washington Resort for an Abstergo flag. |
|
|
|
Cipher Puzzle |
|
Solving Cipher Puzzles |
|
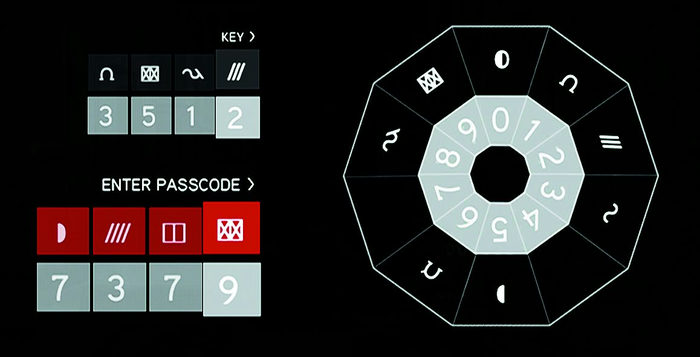
The top line of numbers is your numerical key. For the first digit, the key shows a gray box containing number 9 and a numerical zero symbol above it. Align the Code Wheel by rotating it until that numerical symbol sits next to the inner 9. Now the Code Wheel matches the first digit of the key. In the Passcode box below, the first digit in the series corresponding to the 9 is a 2. So look at the Code Wheel and read off the symbol that is associated with number 2. Push up or down on the Movement Stick to scroll to that symbol. That's the first symbol of the Passcode entered. Push right to move to the next. |
|
Hint |
|
If you draw a line through the Code Wheel in the right place, the symbols are mirror images of their opposite. Taking care to enter the correct symbols for the rest of the Passcode, this mirror will help you fill in the missing symbols by looking at their mirror images. |
|
Solution |
|
|
|
Chess Puzzle |
|
Riddle |
|
AS A CONCESSION, A SMALL PIECE IS SACRIFICED FOR THE GREATER GOOD TO COME. |
|
Hint |
|
One of your pawns can take the opponent's pawn, even though this places it undefended at the mercy of the black knight's next move. That's the sacrifice. |
|
Solution |
|
White Pawn F4 takes Black Pawn at E5. |
|
Quarantine Puzzle |
|
Solution |
|
|
Cluster 4
|
Theme Puzzle |
|
Riddle |
|
THESE INTELLIGENT WORKERS HAVE NO SELF-CONTROL. |
|
Hint |
|
Smart machines aren't enough – you need those dependent on a human controller. |
|
Solution |
|
The correct images are those that do not imply human workers being controlled, including the traffic light giving orders to drivers and pedestrians. |
|
|
|
Ring Puzzle |
|
|
Visual Hint |
|
|
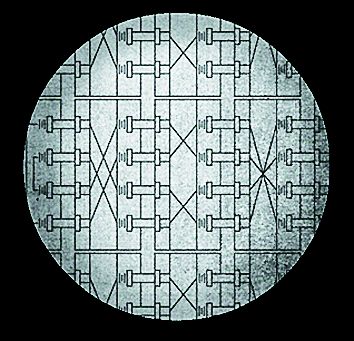
The static centerpiece shows the correct alignment of gridlines and components. |
|
|
Solution |
|
|
|
|
|
Chess Puzzle |
|
Riddle |
|
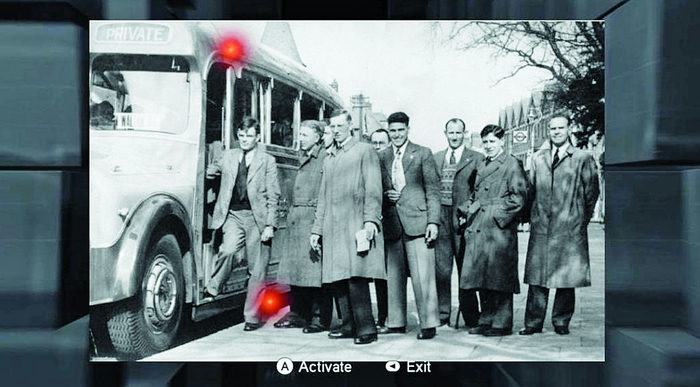
ALAN TURING SET OUT TO SOLVE THE PLIGHT OF THE WORKERS: M = (Q, Γ , B, Σ , Δ , Q0, F) WHERE Γ = {2, 3} Σ = {G}. |
|
Hint |
|
The white king (E1) is in check, so a normal chess play would be to defend him against the black queen (H4). The only legal move available rests with a "worker", both blocking and threatening the queen. |
|
Solution |
|
Pawn G2 to G3. |
|
Amplitude Puzzle |
|
Solution |
|
|

|
Quarantine Puzzle |
|
Solution |
|
|
Cluster 5
|
Chess Puzzle |
|
Riddle |
|
DEMOCRATIC NATIONS WERE BUILT, EACH LED BY A POWERFUL VIZIER (KNOWN TODAY BY A DIFFERENT NAME), WHO MADE A MOVE TO BLOCK THE TEMPLAR ADVANCE. |
|
Hint |
|
You need to use your queen to block the advance. The correct move threatens the "Templar" black queen from a protected position. |
|
Solution |
|
Queen D1 to E2. |
|
Observation Puzzle |
|
Riddle |
|
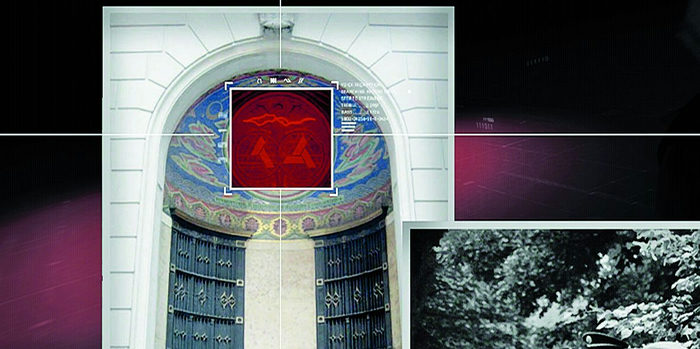
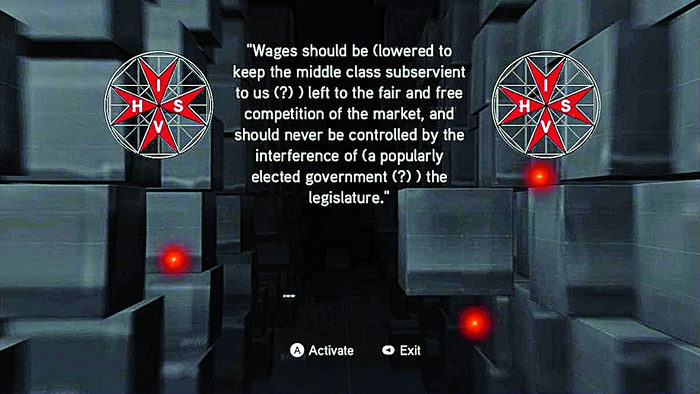
FROM A BOLT OF ELECTRICITY, GOVERNMENTS FELL. |
|
Hint |
|
Despite all the data here about the Chilean and Iranian coups, you're actually looking for an electrical bolt. |
|
Solution |
|
Scan the top of the top-left picture. |
|
|
|
Cipher Puzzle |
|
Hint |
|
Of the ten symbols on this Code Wheel, five are identical to their opposing symbol except for extra strokes or oblique lines added. So when you align the wheel for number 5 and find the symbol for 3 is missing, look on the opposite side of the wheel for a symbol and add the extra stroke. For number 7, you need to remove some oblique lines to find the symbol. |
|
Solution |
|
|
|
Quarantine Puzzle |
|
Solution |
|
|
Cluster 6
|
Observation Puzzle |
|
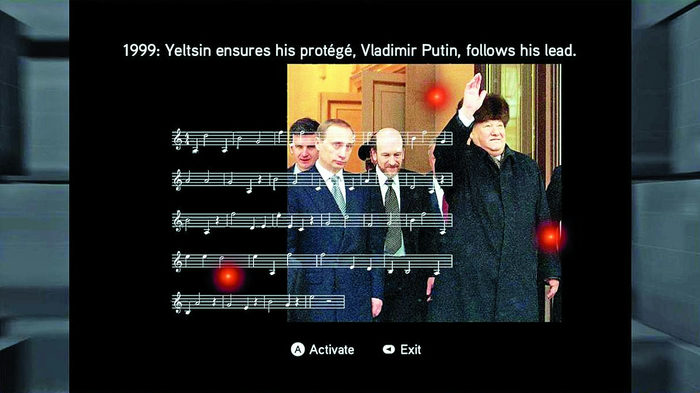
Riddle |
|
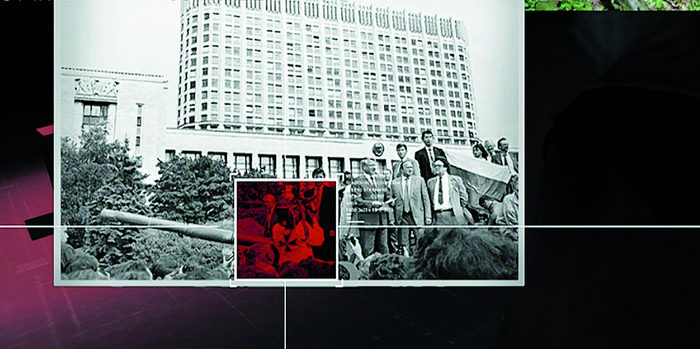
IMPORTANT MEN BEFRIENDED RUSSIA AS THE IRON CURTAIN WAS BLOWN APART. BUT THE MOST INFLUENTIAL COMRADE STAYED OUT OF THE SPOTLIGHT. |
|
Hint |
|
A wealth of messages give conspiratorial facts but incorrect coordinates. "Blown apart" should instead direct you to a prominent cannon. |
|
Solution |
|
Boris Yeltsin was in the spotlight when he stood on a tank to defy a military coup. But it is the cameraman filming him who has a Templar cross on his back when highlighted. |
|
|
|
Cipher Puzzle |
|
Hint |
|
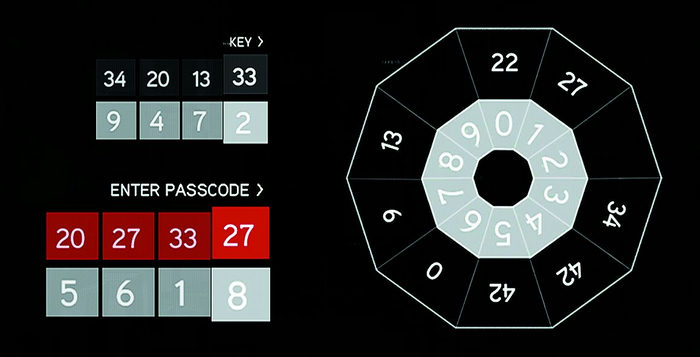
Since the Code Wheel sequence of "0 9 13 __ 22 27 __ 34 42 42" is constantly increasing, the missing numbers are easy to place in order. |
|
Solution |
|
You can get the missing numbers from the numerical key on the Cipher Puzzle screen (or from the Observation Puzzle reticle). |
|
|
|
Amplitude Puzzle |
|
Solution |
|
|
|
Chess Puzzle |
|
Riddle |
|
ALTHOUGH HIS PIECE REPRESENTS A SAVIOR, HIS SELF-SERVING ACTIONS REVEAL HIM AS A COUNTERFEIT. |
|
Hint |
|
A synonym for a savior is a white knight, a term for a champion or rescuer, And since the F of "counterfeit" is highlighted in red, it indicates the piece to play. |
|
Solution |
|
White knight G1 to F3. |
|
Quarantine Puzzle |
|
Solution |
|
|
Cluster 7
|
Theme Puzzle |
|
Riddle |
|
FIRE, WATER AND EARTH ARE CONTRACTED, WITH THE COMPLACENCY OF THE PEOPLE, AWAY FROM THE PEOPLE. |
|
Hint |
|
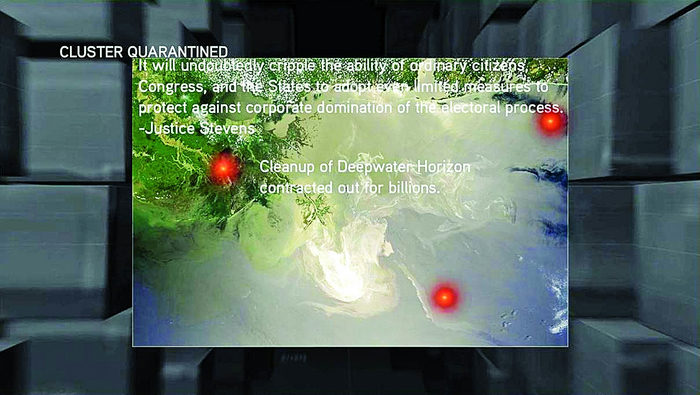
Many photos show people cleaning up after the recent Deepwater Horizon oil spill. Human error has been blamed for the disaster. |
|
Solution |
|
The correct images have workers engaged with tackling the elements. Distracting pictures show fire ships and satellite images. |
|
|
|
Observation Puzzle |
|
Riddle |
|
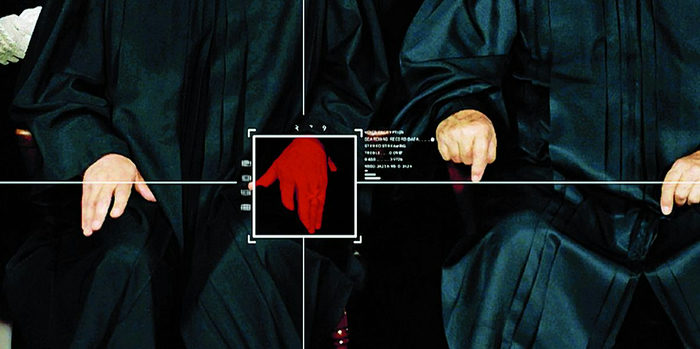
MAKING USE OF THAT CREATED BY 3, THE CENTER BEHIND THE SCENES WAITED FOR CITIZENS UNITED TO WED THE U.S. TO THE TEMPLARS' WILL. |
|
Hint |
|
The main image is of the Judges of the US Supreme Court, 2009. Subject 16's wedding reference relates to the popular token that people wear to signify their marital status. |
|
Solution |
|
In the main image, zoom in on the hand of Justice Roberts. |
|
|
|
Cipher Puzzle |
|
Hint |
|
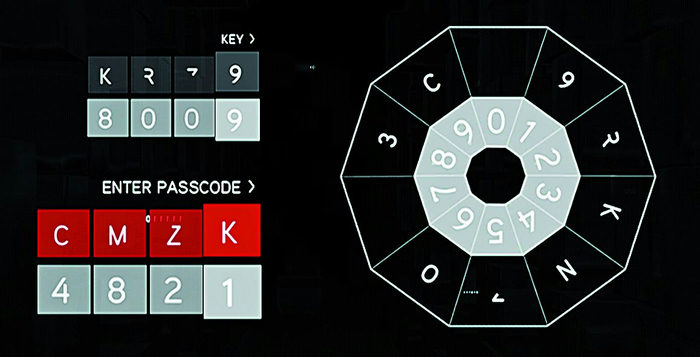
All Code Wheel symbols come from the aircraft carrier images you've just seen. Return to find NK on a jet's tail, a 3 on a helmet, the truncated 70 on the cockpit, a C on the photo above Paul Wolfowitz... Whenever you move the zoomed reticle over a relevant area, it will flash those symbols as coordinates for the Code Wheel. |
|
Solution |
|
The missing symbols are a Z on the tarmac and a truncated M. |
|
|
|
Chess Puzzle |
|
Riddle |
|
B8-C6 6C-8B. OUR MOVES ARE ECHOES, THEY ARE NOT OUR OWN. |
|
Hint |
|
The clue spells out the move that the black knight has taken from its starting point. You can echo this move with your own white knight at the bottom of the board so that it mirrors the black knight above it. |
|
Solution |
|
White Knight B1 to C3. |
|
Quarantine Puzzle |
|
Solution |
|
|
Cluster 8
|
Ring Puzzle |
|
|
Visual Hint |
|
|
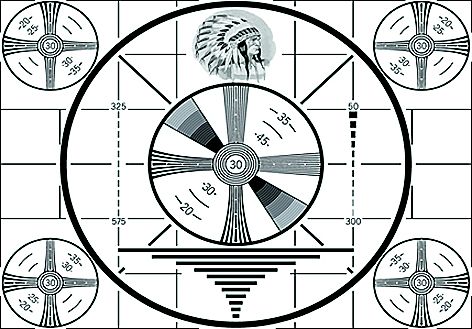
Align the old US TV test card with the chief's head at the top. |
|
|
Hint |
|
|
Interdependency makes this one much harder, so a useful hint is not to move Ring 3. You can do it all with 1, 2 and 4. |
|
|
Solution |
|
|
|
|
|
|
Amplitude Puzzle |
|
Solution |
|
|
|
Chess Puzzle |
|
Riddle |
|
WATCH! MOVE FAST! SHIFT FROM 1ST TO 2ND. 0-60, DON'T THINK. |
|
Hint |
|
TVs and sports cars are the distractions you shouldn't think about. There's only one piece that can legitimately move from Row 1 to Row 2, as the other would place white in checkmate. |
|
Solution |
|
King E1 to F2. |
|
Quarantine Puzzle |
|
Solution |
|
|

Cluster 9
|
Theme Puzzle |
|
Riddle |
|
THEY LISTEN TO US WITH THESE VEHICLES THAT ARE FASTER THAN RACE CARS. |
|
Hint |
|
Look for a vehicle of communication rather than transport. |
|
Solution |
|
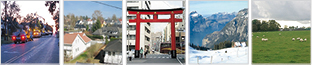
The correct images all have telephone wires. |
|
|
|
Amplitude Puzzle |
|
Solution |
|
|
|
Chess Puzzle |
|
Riddle |
|
THE DARK HORSEMAN APPROACHES! MESSENGER AND FOOL, SHE CAN HEAR YOU ALONG THE STRAIGHT AND NARROW. BUT ONCE ON THE ADJACENT SLOPE, OBSERVE THE WHITES OF HER EYES. |
|
Hint |
|
Shaun's cryptic advice is to move to an adjacent white square. Ignore the black knight reference; the threat is from the black queen on your side of the board. The right move here is to both block the queen and attack her. |
|
Solution |
|
Bishop F1 to G2. |
|
Quarantine Puzzle |
|
Solution |
|
|
Cluster 10
|
Ring Puzzle |
|
|
Visual Hint |
|
|
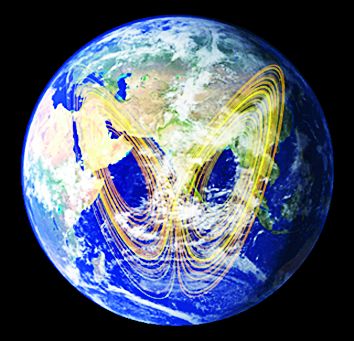
Don't be surprised if you recognize those electromagnetic rings from Subject 16's blood scrawls in Desmond's lab cell. |
|
|
Hint |
|
|
Again, leave Ring 3 in place. |
|
|
Solution |
|
|
|
|
|
Theme Puzzle |
|
Riddle |
|
A PRODUCT THAT WE MAKE WITHOUT HANDS OR MACHINES. |
|
Hint |
|
Shaun's advice is completely misleading on this one; he's been fooled himself by the picture of Albert Einstein. There's a far more obvious theme in the pictures themselves, especially if you're family-minded. |
|
Solution |
|
The correct images all show children, not ideas. |
|
|
|
Observation Puzzle |
|
Riddle |
|
WITH EACH PASSING DAY, THE PEOPLE GET STRONGER. FREEDOM ASCENDS, HERALDING A REVOLUTION. |
|
Hint |
|
There are plenty of distracting Assassin symbols, one to locate in each photo, and they will help you with the Cipher puzzle. But with Shaun's advice in mind, only some of the images have a sky to search. |
|
Solution |
|
For the correct coordinates, scan the upper image to reveal an eagle in flight. |
|
|
|
Cipher Puzzle |
|
Hint |
|
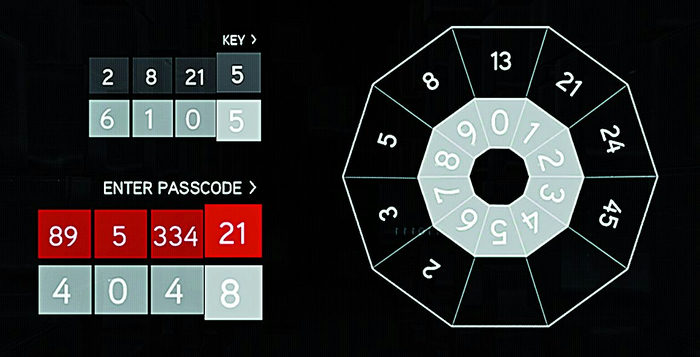
This looks like a Fibonacci series but it's more complicated, as per Shaun's advice. If you multiply the two previous tens columns and add the two previous ones columns then you get the missing numbers. |
|
Solution |
|
So from 24, 45 you get (2x4x10) + (4+5) = 89; from 45, 89 you get (4x8x10) + (5+9) = 334. |
|
|
|
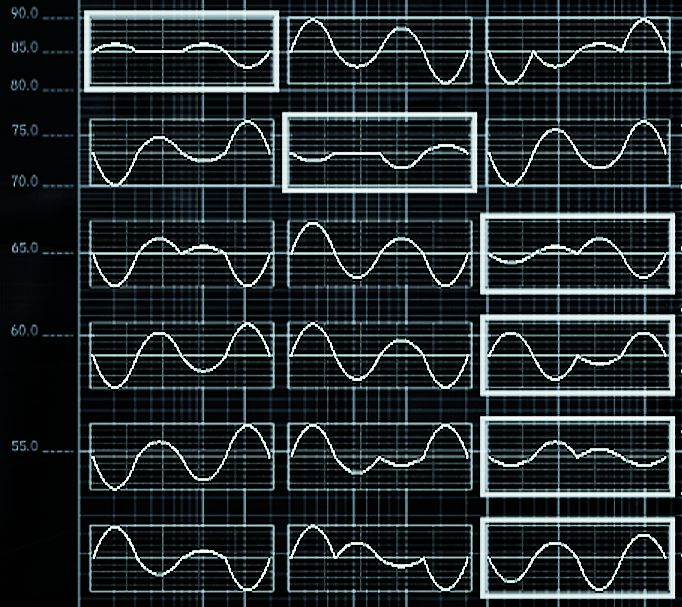
Amplitude Puzzle |
|
Solution |
|
|
|
Chess Puzzle |
|
Riddle |
|
+ 64 SQUARES, ALL RANKS AND FILES, EVERY MOVE ANTICIPATED. EVERY RESPONSE ENGINEERED. ABSTERGO CREATED IT. IT'S THE COMPANY'S GAME, THERE IS NO WAY OUT. + H. ACT II, SC.2 192. ABRAN LOS OJOS. TUAM LIBERA MENTEM. THE KING. F2. YOUR MOVE. |
|
Hint |
|
"Words, words, words!" Hamlet Act II, Scene 2 is when Lord Polonius makes famous reference to there being a method in the madness. Open your eyes. Free your mind! |
|
Solution |
|
The method in the madness is to refuse to play by Abstergo's rules. Remove your king from the board and plant it anywhere, even on the left-hand text, stamping the Assassin logo on the screen. |
|
Quarantine Puzzle |
|
Solution |
|
There is one long spiral to keep clicking through, so just take it slowly and be sure to catch every one. |
The Truth: Reward
Besides granting an Achievement or Trophy, solving all Cluster puzzles grants access to Subject 16's secret area of the Animus. A cookie-crumb trail of mission markers leads you through the darkness, building and rebuilding a simple (but disorienting) world around you with each step. Glowing stairs, beams and walls of handholds eventually lead you to sets of three climbing elements – beams, bars and stairs – and you may pick only one in each instance. When you've collected four pieces, your choices will determine the type of path you then take to reach your rendezvous.
Rumors of Subject 16's death may have been slightly exaggerated, but those regarding his sanity don't seem too wide of the mark. Having somehow transferred an imprint of his consciousness to the Animus, Subject 16 babbles nervously of what is about to befall those around you and urges you to find Eve in Eden. Which leads us nicely into our story analysis overleaf...