
Star Trek Guide Essentials Starfleet Academy
Starfleet Academy
The Final Frontier
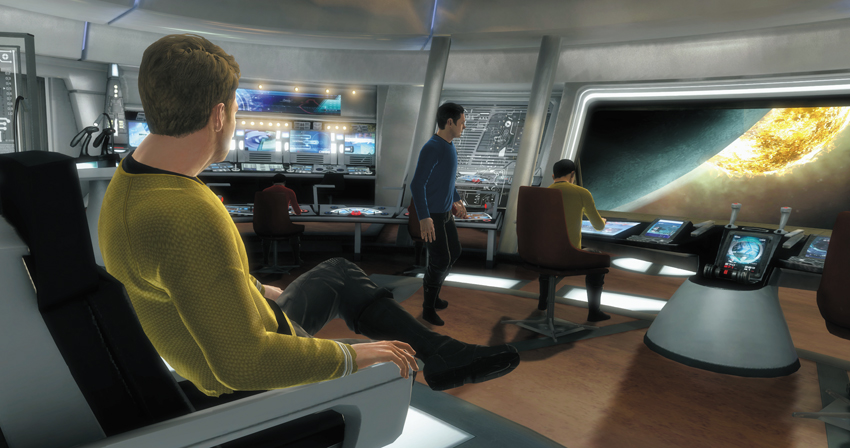
Shortly following the defeat of Nero and his Romulan mining vessel, the Narada, work on establishing a Vulcan colony began in earnest. Nero’s destruction of the Vulcan homeworld left the few surviving Vulcan people with no planet of their own. Vulcan scientists began terraforming a planet with characteristics similar to the original Vulcan homeworld. But the terraforming process wasn’t proceeding quickly enough for some. Enter the Helios Device, an experimental Vulcan invention intended to reduce the time necessary to complete terraforming the New Vulcan colony. But when the Helios Device malfunctions, a rip in the fabric of space time is created, allowing a conquest-hungry reptilian race known as the Gorn to emerge from the anomaly and putting New Vulcan and the entire Federation at risk. Only Captain Kirk, First Officer Spock, and the crew of the Enterprise stand in the way of the Gorn, setting the stage for another epic struggle.
Welcome to the official game guide for Star Trek The Video Game. With the help of this guide you have everything you need to confront the Gorn and secure the future of the Vulcan people. Whether playing as Kirk or Spock, the step-by-step walkthrough guides you through the entire adventure to make sure that you find each hidden collectable and earn every commendation along the way. While the walkthrough provides everything you need to complete the game, even more details can be found in the preceding chapters. For example, reference the Allies, Enemies and Weapons chapter for tactics pertaining to each weapon as well as helpful hints for defeating every enemy you encounter. When you’re not busy saving the Federation, take a look at the Behind the Scenes chapter to view some of the concept art that was integral in creating the various original environments and characters seen in the game. If you’re more interested in uncovering every secret and collectable the game has to offer, flip to the Compendium chapter at the back of the guide for a complete listing of all research data, audio logs, Tribbles, achievements and trophies. With this guide in your hands, the Gorn don’t stand a chance.
Getting Started
You’re only moments away from beginning your epic adventure. But before you get started, take a moment to review the options available from the main menu as well as the game’s interface and controls. This will give you a basic understanding of the game’s mechanics before you dive in.
Main Menu
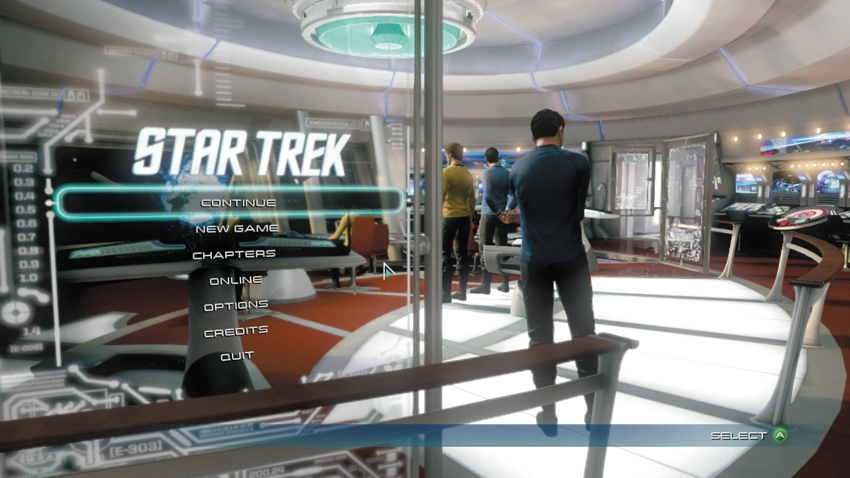
Continue: If you’ve already started a game, select this option to resume your adventure from the latest save checkpoint.
New Game: Select this option to create a new game. But note, any previous saves will be deleted, along with any collectables you may have found. When starting a new game you’re prompted to select your character (Kirk or Spock) as well as a game type; you’ll determine whether you’ll be playing a public, private, or offline game.
Chapters: Once you’ve completed a chapter, it is available in this section so you can replay it. Some chapters are broken up into different parts, and you can jump directly to a particular point in the chapter. However, when replaying a chapter, any previous saves are overwritten.
Online: If you want to play the game with a friend or stranger, go here to start an online co-op game. You can either join a game in progress or create a new game. You can also invite friends to join your game or simply leave the option open for a friend to join you at their convenience.
Options: Select this option to customize a variety of settings pertaining to the game’s display, controls, and audio.
Credits: Roll the game’s credits by selecting this option to see the names of everyone involved in its development.
Quit: Select this option to quit the game.
Interface
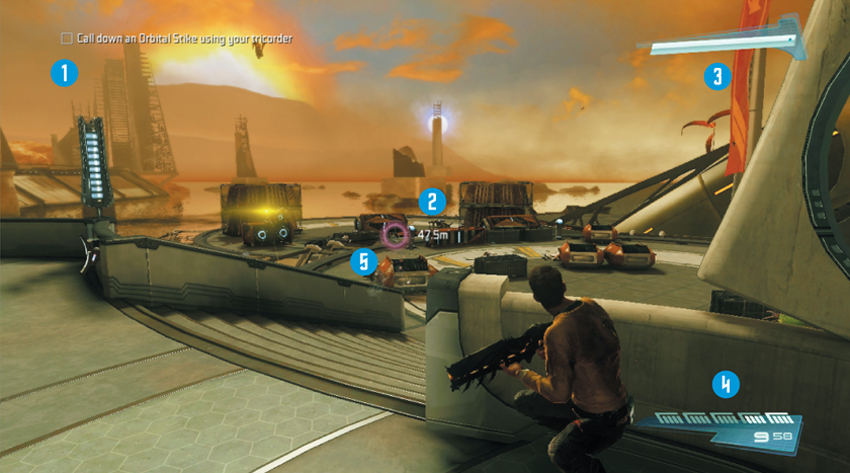
1. Current Objective: This line of text appears when the tricorder is active or when a new objective is assigned. This line provides a brief reminder of where you need to go and what you need to do. Criteria for active commendations also appear here. Commendations are optional objectives; they require you to complete certain tasks in exchange for XP.
2. Aiming Reticle: This tiny white dot at the center of the HUD indicates the direction your character is facing as well as the direction the weapon will be fired. But when engaging enemies, it’s better to hold down the aim button to bring up a larger and more accurate aiming reticle for your weapon. While it’s possible to fire a weapon without entering aim mode, your accuracy is greatly diminished when firing a weapon from the hip.
3. Health and Shield Strength: This meter shows the status of your health and shields. Both Kirk and Spock are defended by a small personal deflector shield. The shield degrades upon taking hits from incoming fire. Once the shield is depleted, all further damage depletes the character’s health, causing the screen to turn black and white—find cover before you’re injured and require medical assistance from your partner. Health and shields recharge over time. So simply stay behind cover and wait to recover before exposing yourself to incoming fire.
4. Weapon/Ammo Gauge: This gauge appears when a weapon is equipped and fired. The meter changes based on the type of weapon equipped, but usually represents the weapon’s current ammo count—for phasers the meter represents the weapon’s heat. The numbers below the meter show how much ammo is remaining. The large number represents the ammo count in the weapon and the smaller number shows how much reserve ammo the character is carrying. More ammo can be retrieved from Energy Stations.
5. Waypoint Marker: This red circular icon on the HUD appears whenever you activate your tricorder and it shows you the direction to the current objective. The distance to the waypoint (in meters) is also shown beneath the icon. In some instances, you must pass through multiple waypoint markers to reach an objective. But if you’re ever lost, activate your tricorder and look for this icon to find your way to the next objective.
Controls
PlayStation 3

Xbox 360

Officer Training
Commanding a Starfleet vessel is much more complicated than sitting in a captain’s chair and issuing orders to subordinates. The responsibilities and expectations are even greater for Captain Kirk and First Officer Spock, serving on Starfleet’s flagship the U.S.S. Enterprise. In addition to overseeing operations aboard the Enterprise, Kirk and Spock often take an active role in away team missions, during which they must perform at peak physical condition. In this section we take a close look at everything required of Starfleet officers in the field. So read up before reporting for duty.
Movement Fundamentals
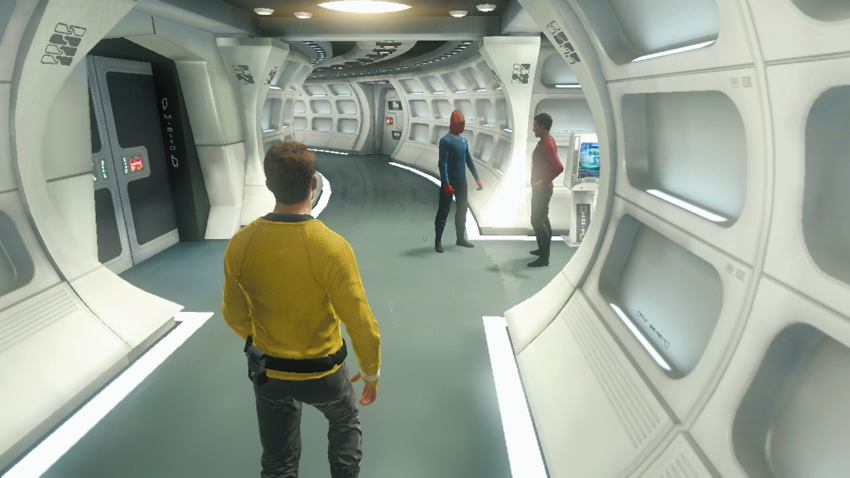
By default, your character walks or runs while moving. Sprint to gain a temporary boost in speed.
As a Starfleet officer, it’s important to maintain top physical condition in preparation for away team missions. Such missions often require officers to overcome a variety of obstacles while traversing challenging terrain. Walking and running are the simplest and most common forms of movement and are sufficient for reaching most objectives. But when speed is essential, break out into a sprint. You can only sprint for a limited time before eventually slowing to a run to catch your breath. Lateral control is also reduced while sprinting, preventing you from making sharp turns or deviations. So use the sprint function sparingly, such as when rushing to cover or evading immediate hazards.
Stealth
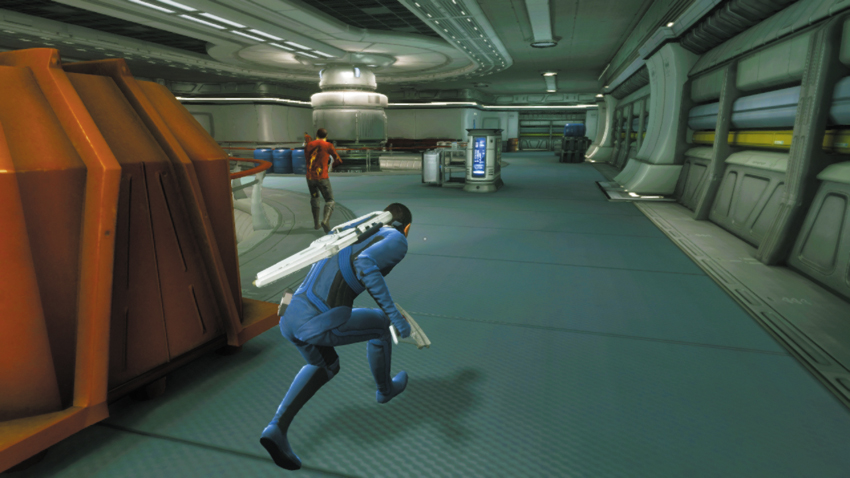
Make an effort to sneak up behind enemies to take them by surprise—they won’t hear you approach as long as you move while crouched.
While walking, running, and sprinting, the sound of your footsteps carries and could alert nearby enemies and prompt them to investigate or attack. Detection and confrontations can often be avoided by crouching. During crouched movement, your speed is reduced significantly as your character hunches over and creeps along at a slow pace, maintaining a low profile and producing little noise. Crouching is essential for sneaking past enemies without being detected. Or if you prefer, you can creep up directly behind most enemies and perform a melee takedown to render them unconscious. Crouching also allows you to remain concealed behind low objects to prevent enemy units from spotting you.
Jumping
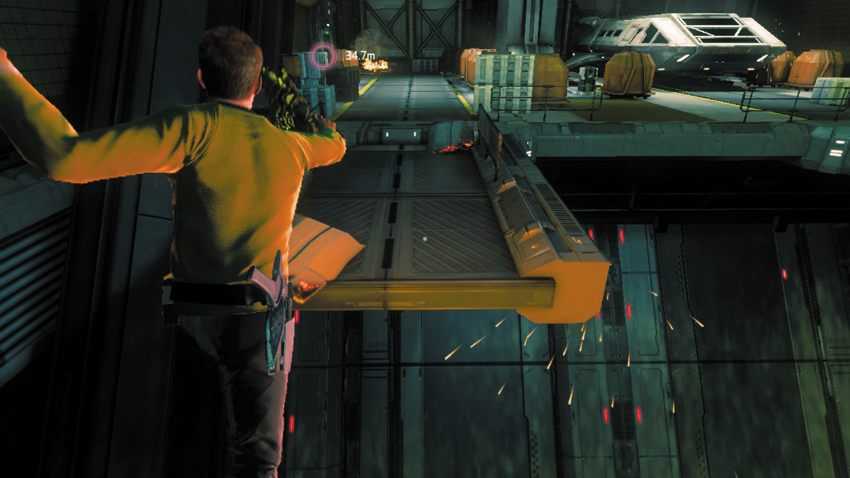
Always sprint before leaping across large gaps like this one. Sprinting allows you to jump greater distances.
Sometimes jumping is the only way to reach an objective, and sometimes you must leap across gaps in damaged catwalks, walkways, or geographical chasms. Before attempting a jump, make sure there’s no other way to reach your desired location—sometimes you can traverse along ledges or climb ladders to reach new areas. If there are no other options, get ready to jump. When attempting to leap across wide gaps, back up and start sprinting, then jump as you near the edge. By sprinting, you greatly increase the distance you can jump, often clearing most gaps with ease. You can also jump over low objects, too—run toward a crate or other small objects and press the jump button to perform a vault. This allows you to keep moving in one direction without breaking your stride, which is ideal during combat.
Dive Roll
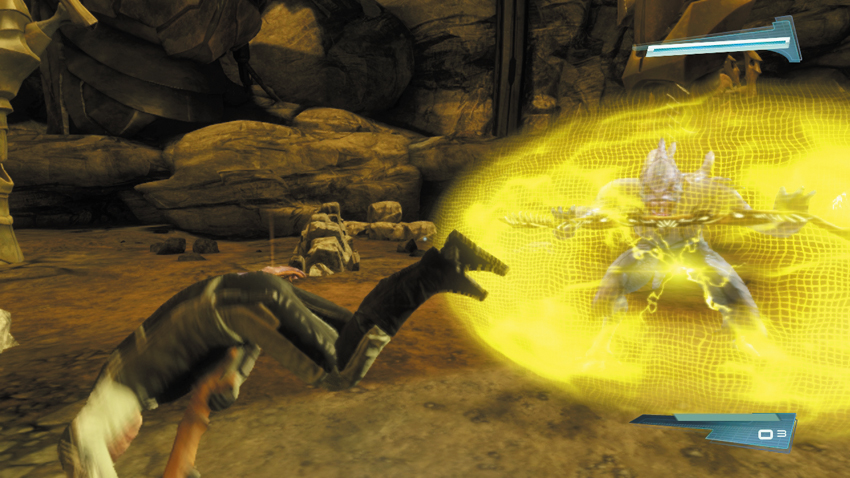
Use dive rolls to evade charging enemies or escape the blasts of explosive weapons.
Although similar to jumping, the dive roll is primarily an evasive maneuver that is ideal for avoiding enemy attacks. The dive roll is most effective when you are attempting to evade the charging attacks of certain enemies. When confronting an enemy that charges, dive away at a perpendicular angle to prevent getting trampled—do not dive toward the enemy or in the direction the enemy is charging. The dive roll is also well suited for evading explosive attacks, such as incoming grenades. If you see a white grenade icon on the HUD, perform a dive roll to leap away from the grenade before it explodes.
Ledge Maneuvers
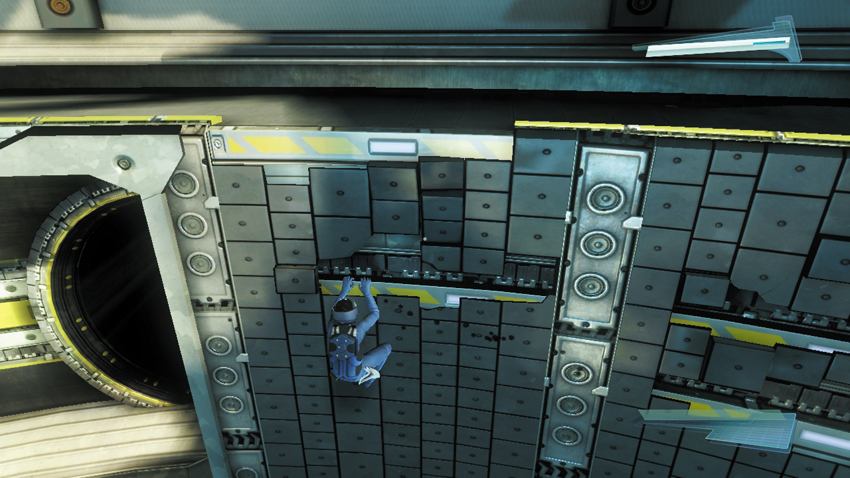
While clinging to a ledge, look around for other ledges nearby and carefully plan your movements until you can gain solid footing.
If you ever find yourself clinging to a ledge, don’t worry—take a look at your surroundings to determine where to go next, looking for nearby ledges if necessary. While clinging to a ledge you can still move in several possible directions. By moving to the left or right, you perform hand-over-hand traversals and move horizontally along the ledge. If there’s a ledge above you, jump to mantle upward and grip the new ledge. If there’s a ledge below, you can drop down to it by simply pressing the take cover/dive roll button—as you let go of the ledge and fall, your character automatically grips the ledge directly beneath. Only drop from a ledge when there’s another ledge directly beneath you, otherwise you may fall to your death. In addition to moving vertically and horizontally, you can also jump from a ledge to other graspable surfaces. While still holding a ledge, move out toward a new object—this makes your character reach out toward the desired direction. At this point you can jump to the next object. Such jumps are necessary when moving between multiple pillar-like objects.
Swimming
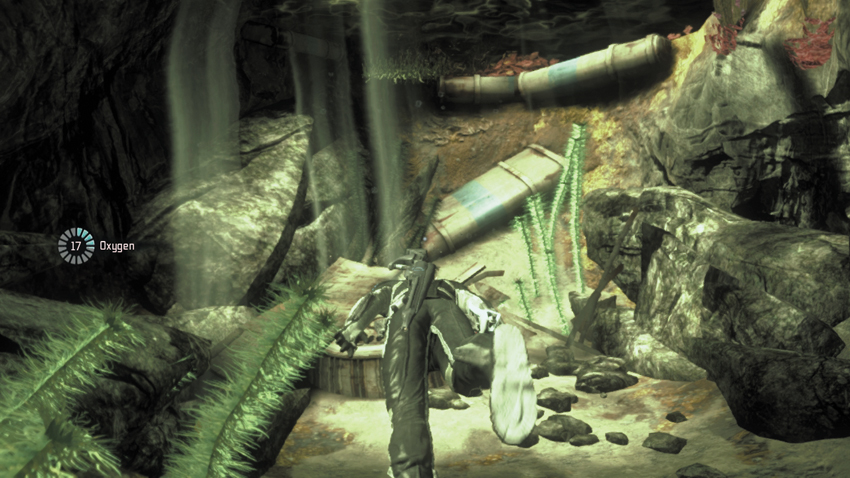
Keep an eye on the oxygen meter while swimming underwater—return to the surface to catch your breath.
During some missions, swimming may be the only way to reach an objective. Swimming functions just like walking and running, but while underwater you can swim in multiple directions—up, down, forward, backward, and laterally. At first, swimming can be a bit disorienting, so always activate your tricorder to bring up the current waypoint marker, giving you a visible beacon to swim toward. While underwater, an oxygen gauge appears on the left side of the HUD and counts down how much air you have. Simply swim to the surface to reset the oxygen gauge. At times you may need to swim great distances through underwater caves. Look for beams of light shining down through the water to locate small air pockets, where you can surface and catch your breath before resuming swimming underwater. If you’re running low on oxygen or simply want to swim faster, you can sprint while underwater to gain a sudden (but temporary) burst in speed.
Rocket Jump/Gliding
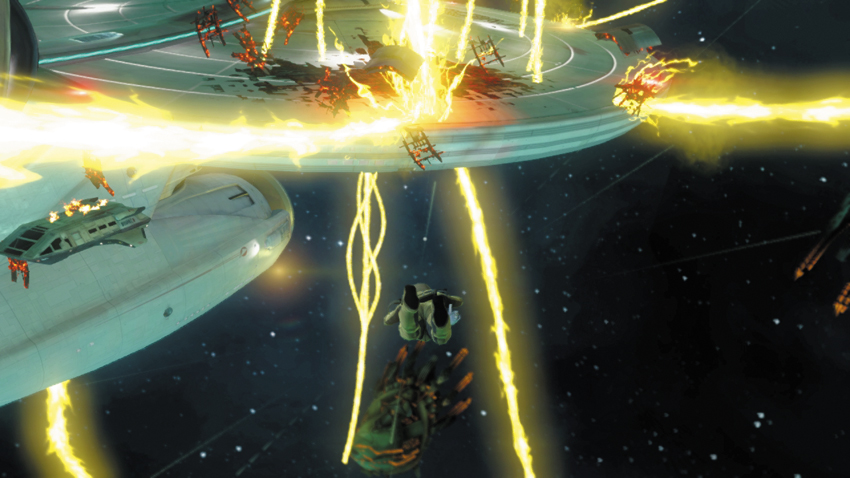
Maneuver to avoid debris and other hazards during rocket jumps and gliding sequences.
Whether performing a rocket jump through space or gliding over the terrain of a planet, it’s important master these aerial forms of locomotion. During some space sequences, you must perform a rocket jump using a Rocket Sled, a small personal propulsion device designed for short-range space walks. During rocket jumps and gliding sequences, the biggest threat is obstacles and debris. While you don’t need to worry about speed or forward momentum, you do need to make slight deviations to your flight path to avoid collisions. You can move both vertically and horizontally to alter your course and dodge incoming debris and terrain features. Given the high speeds involved, colliding with any object is fatal, and you must restart the sequence from the previous save checkpoint.
Tricorder Operation
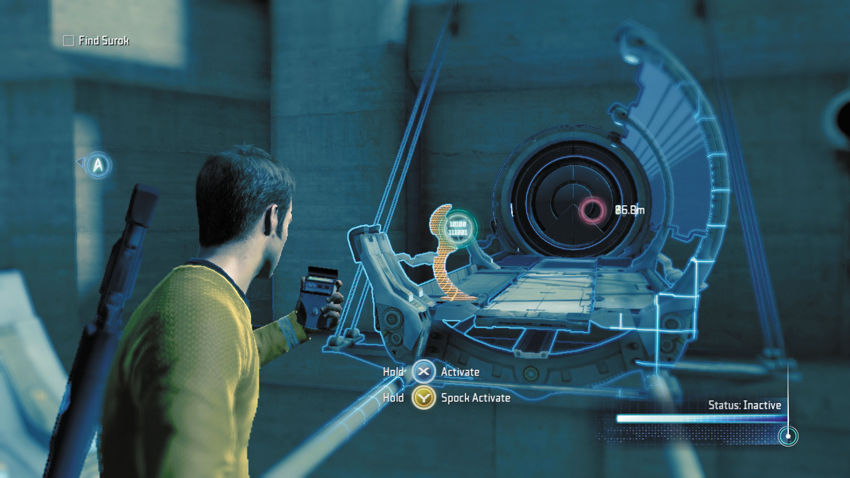
The tricorder is ideal for interacting with distant consoles and control panels.
Your Starfleet-issued tricorder is perhaps the most valuable piece of equipment in your inventory. Not only does it give you the latest information on your current objective, but it’s also vital for picking up readings and interacting with your environment. To activate the tricorder, press and hold down the tricorder button. This causes the HUD to take on a blue hue and displays your surroundings with a wireframe mesh as the device pings the environment for points of interest. There is a circular reticle at the center of the HUD while the tricorder is active. Place this reticle over different objects to learn more about them or perform interactions.
Hacking
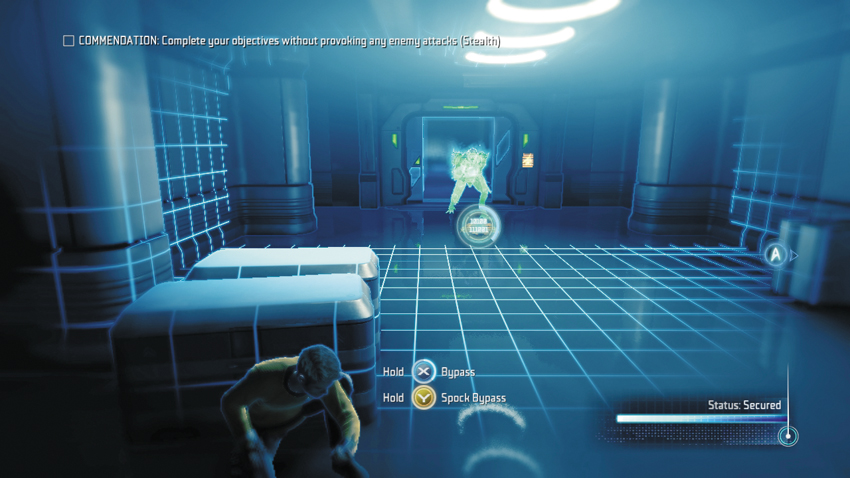
A variety of consoles, control panels, and other devices can be hacked. You can even hack enemy drones, mines, and turrets.
Many devices, doors, consoles, and control panels can by hacked or bypassed using the tricorder. Simply place the tricorder’s reticle over your intended target, then press the button shown on-screen to initiate the hack. This brings up a minigame that requires you to complete a simple task. There are three different types of hacking minigames that are based on the object you’re attempting to crack. If a hack is successful, the device is overridden and you can proceed. But if a hack is unsuccessful, there’s a chance you may take damage, as the console or terminal overloads. This can sometimes lead to the sounding of an alert that causes enemy units to investigate. In addition to hacking doors and terminals, you can also hack (or bypass) enemy turrets, drones, and mines to cause them to turn on your enemies. Each completed hack earns you 100 XP, which in turn can be spent to purchase upgrades for your tricorder and phaser through the upgrade menu.
Hacking Minigames
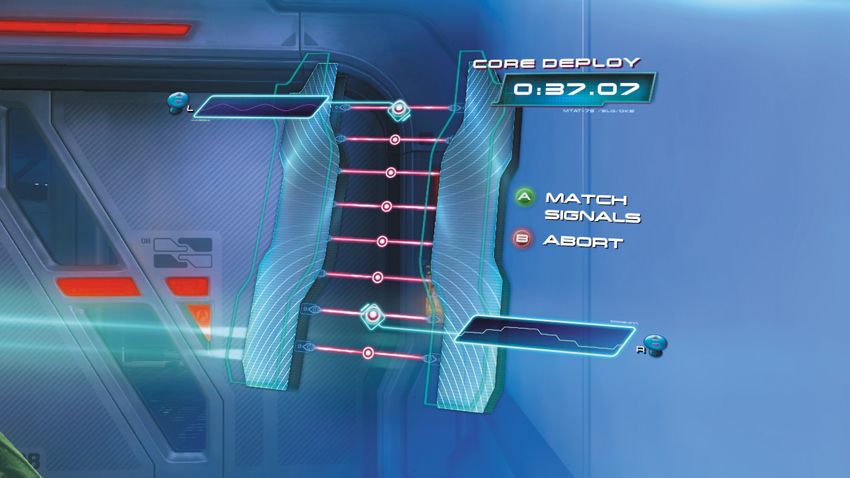
The most common hacking minigame requires you to match pairs of identical waves within a limited time—this type is most common when you’re hacking doors or consoles. Scroll up and down the different pink nodes until you find two waves that match, then press the Match Signals button. Match all four pairs to complete the hack in the allotted time, which is shown in the upper right corner of the HUD.
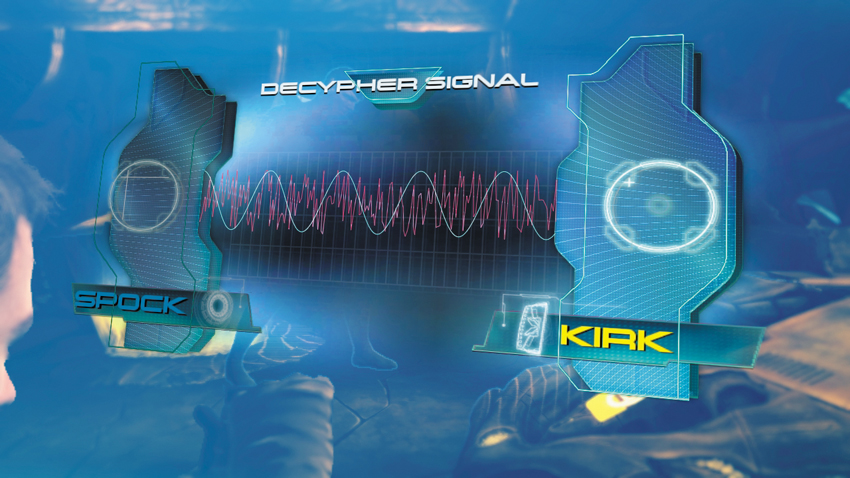
Some consoles require you and a partner to work together to hack, using dials to synchronize two wave pattens. These consoles have two interface points. If hacking the point on the left, you’re responsible for tuning the wave. If you hack the interface point on the right, you must filter the wave. Work together to until both waves are synchronized to complete the hack—there is no time limit during this minigame.
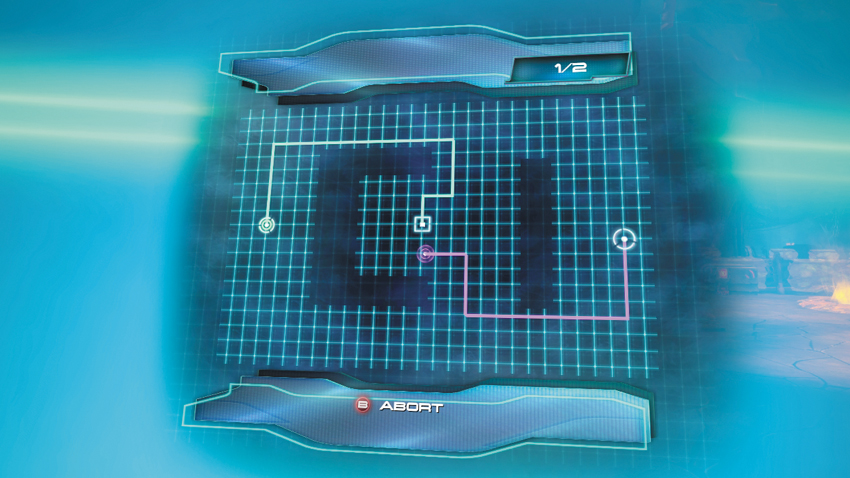
When attempting to bypass enemy mines, turrets, security cameras, and other enemy devices, you must complete a mazelike puzzle on a grid pattern, moving a pink line from the start point to an end point—in some instances, there are multiple pink lines to connect, without intersecting. When you must connect multiple lines, plan out your moves before starting to ensure that each line has a clear, unobstructed path to the end point.
Enemy Detection
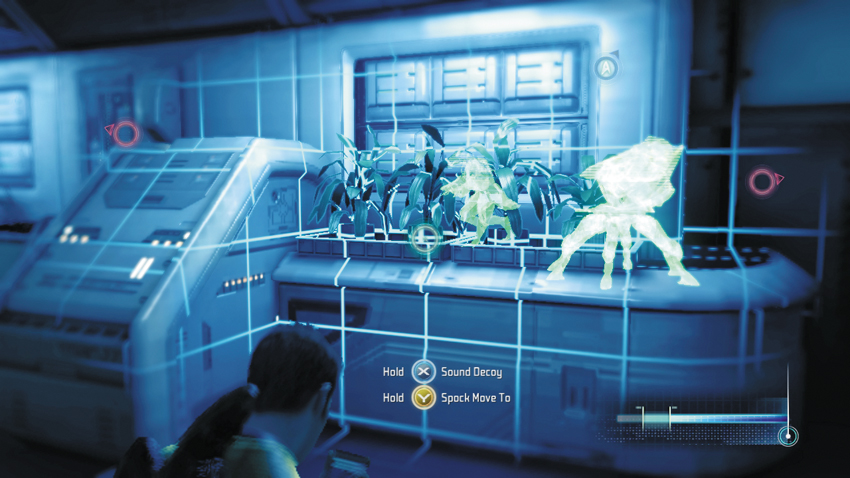
The tricorder can detect enemies through solid objects, which allows you to keep tabs on enemy movement.
If you suspect enemies are nearby, activate your tricorder—it can detect enemies within a wide radius, even if they’re concealed behind solid objects. While the tricorder is active, enemies appear as colored silhouettes on the HUD. The color of the silhouette indicates the alert status of the enemy. If the silhouette is green, it means the enemy is unaware of your presence. If the silhouette is yellow, the enemy is currently investigating a disturbance—don’t let them see you. And if the silhouette is red, the enemy is on alert and actively trying to target you—take cover and get ready for a firefight. After stowing your tricorder, silhouettes stay visible on the HUD for a few seconds, which is ideal for keeping tabs on enemies that are concealed behind cover.
AI Orders
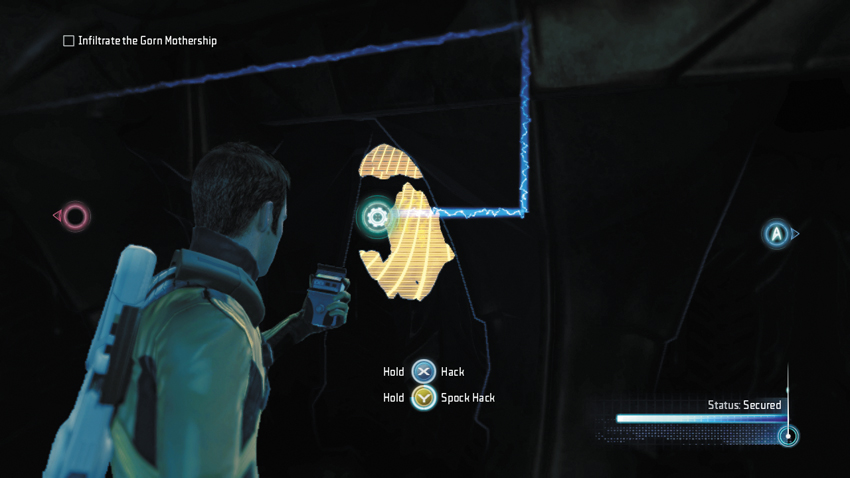
Don’t have confidence in your hacking skills? Ask you AI-controlled partner to do it for you.
When playing the game on your own, the tricorder is instrumental in issuing orders to your AI-controlled partner. While the tricorder is active, you can give your partner a move order by aiming at a point on the ground and pressing the move command button shown on-screen—your AI partner will move to the location and remain there until you tell him to move again. But your AI partner can do a lot more than just move. Using the tricorder, you can also give your AI partner a variety of other orders, such as attacking enemies, performing hacks, or activating devices and consoles. So even when you’re playing alone, you don’t have to go it alone—put your AI partner to work.
Collectables
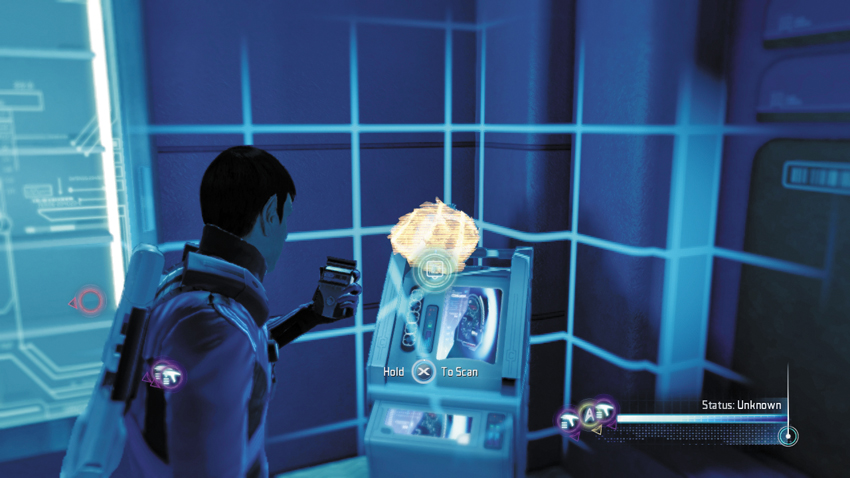
Research data, audio logs, and Tribbles must be scanned with your tricorder to unlock a new entry for your collection.
The tricorder can also be used to scan a variety of items and unlock new entries in the research data menu and earn you XP in the process. There are three different types of collectables: research data, audio logs, and Tribbles. Simply place a scannable item in the center of the tricorder’s reticle, then press and hold down the scan button shown on-screen. Once the scan is complete, you earn XP and a new entry appears in your collection; it reveals more story information through text and audio entries by different Federation personnel, including crew members of the Enterprise. The collectables are tied to four different achievements and trophies including Listening In, The Whole Story, Researcher, and Fascinating. Study the maps and checklists in the walkthrough to find them all.
Tricorder Upgrades
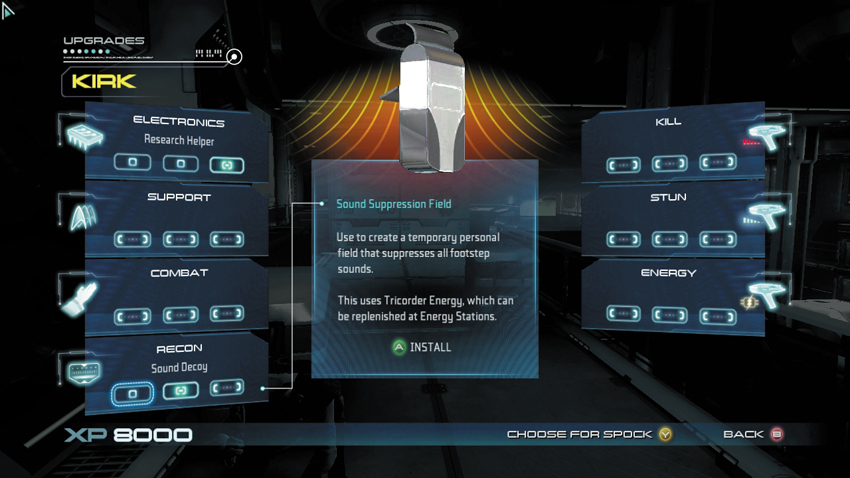
Browse through the upgrade options before making your first upgrade purchase. Return to the upgrade menu to alter your configurations based on each tactical situation you encounter.
Throughout the game you earn XP by scanning research items (collectables), performing hacks and bypasses, and completing commendations. The accumulated XP can then be spent on upgrades for your tricorder and phaser. There are 21 upgrades, divided into seven categories, available to each character. While you can purchase all the upgrades, you can only install a maximum of seven at any given time—one per tricorder or phaser module. Kirk and Spock can choose from the same upgrades when modifying their tricorders, but have different upgrades available for their phasers.
Once purchased, upgrades can easily be installed and uninstalled by accessing the upgrade menu. This allows you to alter your upgrades on the fly, according to each tactical situation you encounter. For instance, some situations may call for a stealthy approach while others may require a frontal assault. Installing the proper upgrades for the situation can give you a significant advantage. The upgrades you choose largely depend on your style of play, current objectives, and the commendations you’re attempting to earn. Here are a few sample loadouts for stealth, non-lethal, and lethal combat situations.
Earning XP
| Action | Reward |
|---|---|
| Complete hack/bypass | 100 XP |
| Complete commendation | 300 XP |
| Scan research data collectable | 100 XP |
| Scan audio log collectable | 50 XP |
| Scan Tribble collectable | 250 XP |
| Complete research data set | 500 XP |
| Complete Tribble Set | 1,500 XP |
Recommended Stealth Upgrades:
- Software Suite
- Sound Decoy
- Knockout Shot/Memory Lapse Shot
- Cooling System/Heat Diffuser
Recommended Non-Lethal Upgrades:
- Weapon Jammer
- Sound Suppression Field
- Knockout Shot/Stun Charger
- Cooling System/Heat Diffuser
Recommended Lethal Combat Upgrades:
- Weapon Charger
- Grenade Hacker
- Automatic Fire/Piercing Shot
- Cooling System/Propulsion System
Tricorder Upgrades - Electronics
| Upgrade | Research Cost | Description |
|---|---|---|
| Software Suite | 1,100 XP | Use on solo hack or bypass actions to clear them instantly, sacrificing potential XP gain. This uses tricorder energy, which can be replenished at Energy Stations. |
| Remote Connector | 1,000 XP | Automatically increases tricorder’s interaction range. |
| Research Helper | 2,400 XP | Automatically highlights all research items in tricorder view. |
Tricorder Upgrades - Support
| Upgrade | Research Cost | Description |
|---|---|---|
| Shield Booster | 100 XP | Use on your partner to overcharge his shields. This uses tricorder energy, which can be replenished at Energy Stations. |
| Techno-Doctor | 900 XP | Use on your partner to heal him. This uses tricorder energy, which can be replenished at Energy Stations. |
| Weapon Charger | 2,500 XP | Use on your partner to temporarily increase his damage output. This uses tricorder energy, which can be replenished at Energy Stations. |
Tricorder Upgrades - Combat
| Upgrade | Research Cost | Description |
|---|---|---|
| Weak Spot Analyzer | 1,600 XP | Use on an enemy to temporarily expose their weak point. This uses tricorder energy, which can be replenished at Energy Stations. |
| Weapon Jammer | 1,500 XP | Use on an enemy carrying a weapon to jam it and prevent the enemy from attacking until it’s repaired. This uses tricorder energy, which can be replenished at Energy Stations. |
| Grenade Hacker | 1,400 XP | Use on an enemy carrying grenades to cause early detonation or malfunctions, depending on the type. This uses tricorder energy, which can be replenished at Energy Stations. |
Tricorder Upgrades - Recon
| Upgrade | Research Cost | Description |
|---|---|---|
| Sound Suppression Field | 3,000 XP | Use to create a temporary personal field that suppress all footstep sounds. This uses tricorder energy, which can be replenished at Energy Stations. |
| Sound Decoy | 700 XP | Use on a surface to create a decoy sound that enemies will investigate. This uses tricorder energy, which can be replenished at Energy Stations. |
| Dematerializer | 800 XP | Use on a downed enemy to hide the body to prevent enemy detection. This uses tricorder energy, which can be replenished at Energy Stations. |
Combat
As a Starfleet officer, you should avoid confrontation whenever possible. However, there are circumstances where combat is unavoidable. In such dire situations it’s important to be well versed in a variety of non-lethal and lethal tactics. But before opening fire, you must learn the basics of taking cover.
Cover
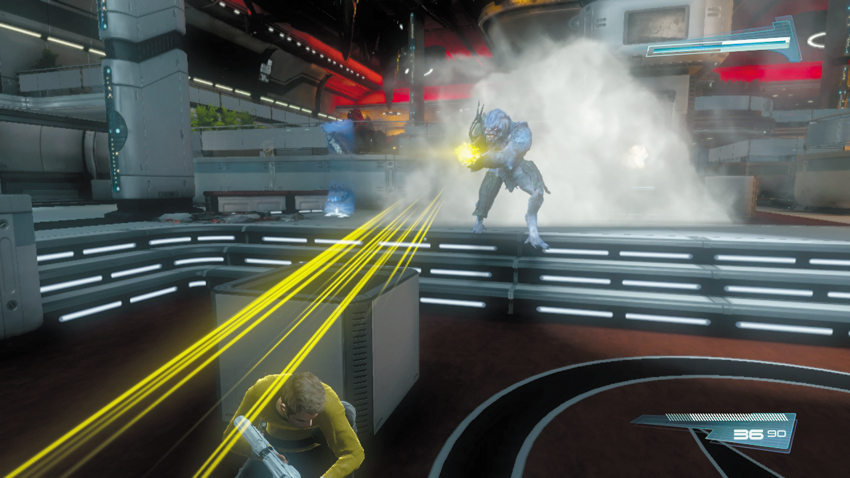
Before you start firing, make an effort to find some cover. Otherwise you won’t last long out in the open.
Whether seeking protection or concealment, make an effort to utilize cover whenever you encounter enemies—press the cover button to snap to cover. This places your character behind an object, significantly reducing the chances of being seen or hit by incoming fire. While behind cover, you can move laterally to peek around the sides of the cover. This makes it possible to take aim around corners while keeping most of your body protected—if you’re hiding behind a low object, you can also fire over the object. However, while aiming from behind cover you’re more likely to be hit, so limit your exposure—aim, take a shot, then quickly duck back behind cover. You can also fire from behind cover without aiming; use the white aiming reticle in the center of the HUD to take aim, then simply press the fire button. This form of blind firing around or over cover isn’t very accurate, but is a great way to return fire without exposing yourself—use this tactic against Gorn Enforcers who prefer to attack at close range.
Cover Transition
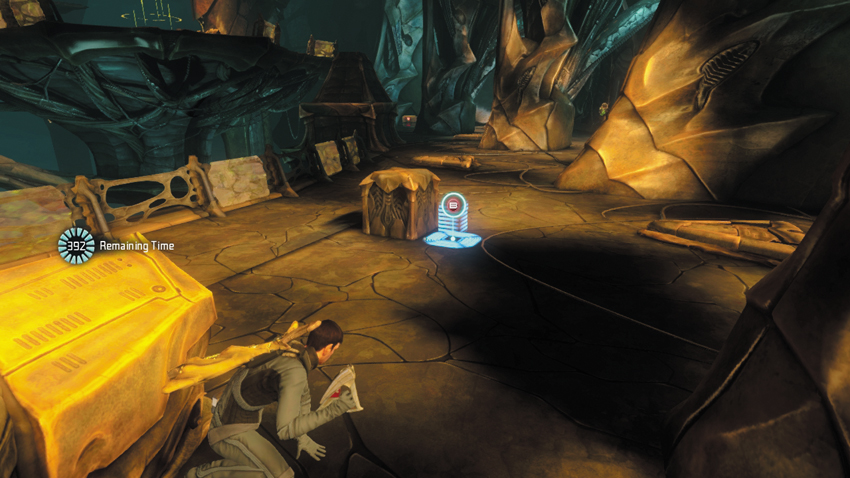
Move from one piece of cover to the next to minimize your chances of being spotted or targeted while you advance through enemy-controlled areas.
By pushing out to the edge of cover you can move to a nearby cover object. Look for the yellow (Kirk) or (Blue) icon that appears next to an adjacent object—this indicates that a transition to a new piece of cover is possible. To complete the transition, simply press the button shown on-screen—your character automatically rushes to the new piece of cover. While moving from one piece of cover to the next is advisable, you can still take damage while making the move. So time your transitions carefully, preferably when incoming fire has subsided, such as when an enemy pauses to reload.
Non-Lethal Takedowns
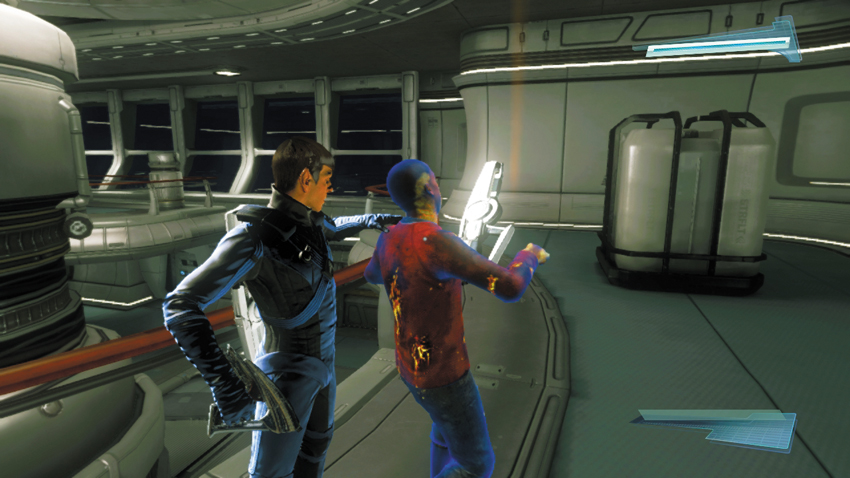
When stalking enemies from behind, stun them first before attempting a takedown—otherwise they may turn around and spot you.
If you must neutralize an enemy, it’s best to do it while undetected. Study an enemy’s patrol pattern, then sneak up behind them while crouched—you must crouch or else they will hear you moving. When you’re within a few feet of the enemy, you’re prompted to perform a takedown—tap the button shown on-screen to reach out and incapacitate the enemy with your bare hands. Such takedowns are possible only against enemies that have not detected you. However, an alert enemy can still be taken down if you stun them first. Stun them with your phaser, then rush up to them and perform the takedown before they recover—a stunned enemy is coated in a blue hue, indicating a state of temporary paralysis. A phaser’s stun setting is effective against most enemies, but not all, so choose your targets carefully—Gorn Enforcers, Gorn Guardians, and other large enemies are merely annoyed by stun shots. Perform at least 30 non-lethal takedowns to earn the Non-Lethal Master achievement/trophy.
Phaser Familiarization
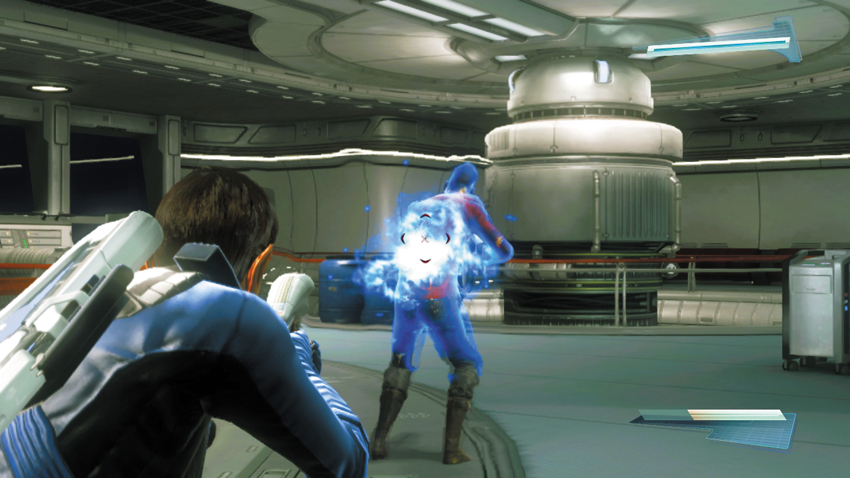
Be careful when firing stun shots from a phaser—the weapon may overheat, and then it is useless while it cools down.
Phaser pistols are standard-issue Starfleet weapons equipped during away team missions. Kirk and Spock carry custom phasers, each with a kill and stun setting—primary fire button for kill and alternate/secondary fire for stun. The Captain’s phaser, carried by Kirk, and the Vulcan Repeater, carried by Spock, function similarly despite their different appearances—the only major difference is that Spock’s Vulcan Repeater fires a two-round burst on the kill setting. Unlike most weapons, phasers don’t consume ammo. However, they can overheat, which renders them inoperable for a few seconds while they cool down. You can monitor the phaser’s heat by studying the weapon gauge in the bottom right corner of the HUD—each shot fired causes the heat meter to fill from right to left. As the temperature increases, lay off the trigger momentarily to prevent the weapon from overheating. Firing the phaser’s secondary stun setting causes an immediate spike in heat, so much so that firing two rapid stun shots is enough to make the weapon overheat. So make those stun shots count—the last thing you want is an angry enemy bearing down on you while you’re holding an overheated phaser.
Phaser Upgrades
Like the tricorder, phasers can be upgraded (from the upgrade menu) using XP that you earn from finding collectables or completing hacks and commendations. But unlike the tricorder, the upgrades available differ depending on the character you’re playing. There are nine phaser upgrades per character, divided into three modules: kill, stun, and energy. While you can purchase every upgrade, only three upgrades can be installed at any given time—one upgrade per module. The upgrades you choose depend largely on your style of play. Here’s a complete rundown of the upgrades available for the Captain’s phaser and Vulcan Repeater.
Captain’s Phaser Upgrades: Kirk
Kill
| Upgrade | Research Cost | Description |
|---|---|---|
| Automatic Fire | 1,200 XP | Switches firing mode to full automatic. |
| Power Amplifier | 2,200 XP | Boosts damage output of each fourth short fired. |
| Ricochet Shot | 1,100 XP | Allows shots to bounce off surfaces for additional damage output. |
Stun
| Upgrade | Research Cost | Description |
|---|---|---|
| Heat Efficient Shot | 700 XP | Reduces heat cost of fired stun shots. |
| Knockout Shot | 2,400 XP | Enhances power of stun shots to knock out weaker enemies instantly. Heat cost greatly increases. |
| Weakening Shot | 1,400 XP | Adds an effect to stun shots that temporarily exposes the enemy’s weak spot. |
Energy
| Upgrade | Research Cost | Description |
|---|---|---|
| Firing Stabilizer | 100 XP | Increases accuracy for both kill and stun firing modes. |
| Cooling System | 1,700 XP | Modifies heat management to allow immediate cooldown after firing. |
| Fire Rate Booster | 1,200 XP | Increases fire rate for both kill and stun firing modes. |
Vulcan Repeater Upgrades: Spock
Kill
| Upgrade | Research Cost | Description |
|---|---|---|
| Kill Charger | 1,500 XP | Allows for powerful charged shots that detonate on impact, causing damage in the blast radius. |
| Triple Burst | 1,400 XP | Switches firing mode to a three-shot burst. |
| Piercing Shot | 1,600 XP | Boosts power of fired shots to allow them to pierce through any surface. |
Stun
| Upgrade | Research Cost | Description |
|---|---|---|
| Stun Booster | 1,800 XP | Increases power to fired shots, making them stun enemies for a longer duration. |
| Memory Lapse Shot | 800 XP | Adds an effect to stun shots that prevents stunned enemies from recovering to an alert state. |
| Stun Charger | 1,900 XP | Allows for powerful charged shots that detonate on impact, stunning enemies in the blast radius. Heat cost greatly increases when firing charged shots. |
Energy
| Upgrade | Research Cost | Description |
|---|---|---|
| Improved Heat Vents | 100 XP | Modifies heat management to allow a faster cooldown rate after firing. |
| Heat Diffuser | 2,200 XP | Modifies heat management to decrease heat production in both kill and stun firing modes. |
| Propulsion System | 700 XP | Increase travel speed of all fired shots for both kill and stun firing modes. |
Rifles
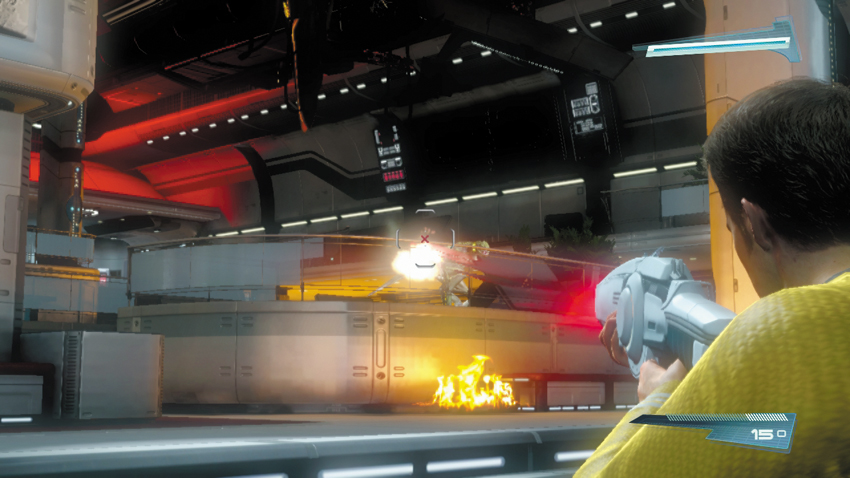
All rifles, and similar weapons, consume ammo. Keep an eye on the weapon gauge to monitor your stock.
In addition to your character’s phaser, you can also equip one rifle. These weapons inflict more damage and have a higher rate of fire than their compact, handheld counterparts. But unlike phasers, rifles consume ammo, which means you need to keep a close eye on the weapon gauge to avoid running dry. Make a habit of reloading your weapon after every engagement—you don’t want to start another fight with a half-empty magazine. But you can carry only so much ammo for your rifle. There are a couple of ways to replenish your ammo count. The easiest is by interacting with an Energy Station. These devices completely replenish your ammo as well as energy for your tricorder. You can also stock up on ammo by walking over a similar weapon lying on the floor. For example, if you are carrying a Starfleet Phaser Rifle, simply walk over another Starfleet Phaser Rifle on the ground to automatically retrieve its ammo. If no ammo is to be found, consider swapping weapons. You can pick up any weapon you find on the ground, including those formerly belonging to enemies. Make an effort to familiarize yourself with each weapon you encounter—you may have to use one when ammo runs scarce.
Grenades
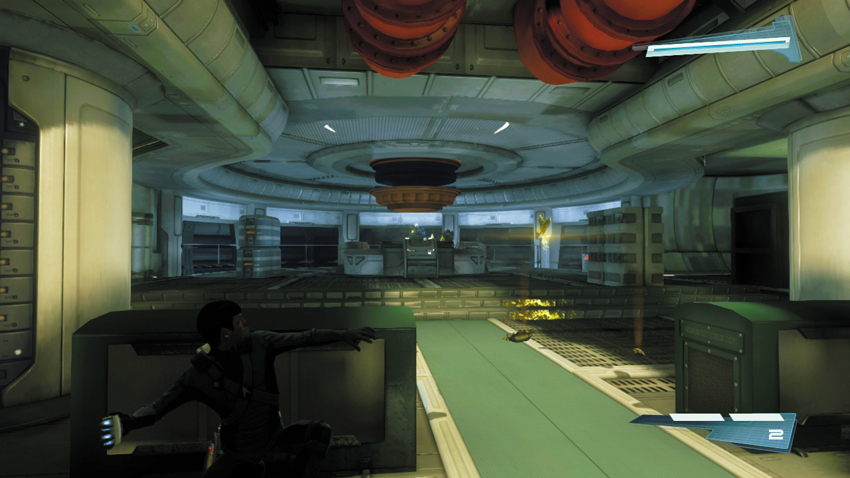
Take cover before tossing a grenade—this gives you time to properly line up your throw.
There are two types of grenades you encounter during your adventure; the Starfleet-issued Stun Grenade and the Gorn’s Plasma Grenade. Although these grenades have two very different capabilities, they are deployed the same way—you throw them. When a grenade is equipped, a curved vertical line appears on the HUD, representing the grenade’s trajectory. Line up the grenade’s trajectory with your intended target, then press the fire button to throw it. Stun Grenades detonate upon contact with any surface, temporarily stunning any enemies within its blast radius. The Plasma Grenade, on the other hand, has a delayed fuse and sticks to any surface it strikes before eventually exploding, inflicting massive, lethal damage. You can carry a maximum of two Stun Grenades and two Plasma Grenades at any given time, so don’t forget to use these powerful weapons. More grenades can often be found in crates—loot the bodies of neutralized Gorn soldiers, too, for more Plasma Grenades.
Logistics and Resupply
During combat situations, away team personnel are often separated from their usual supply chains. This calls for improvisation: Away teams often have to scavenge supplies from various sources. Fortunately there three key interactive objects capable of dispensing everything you need. You just need to know what to look for.
Energy Stations
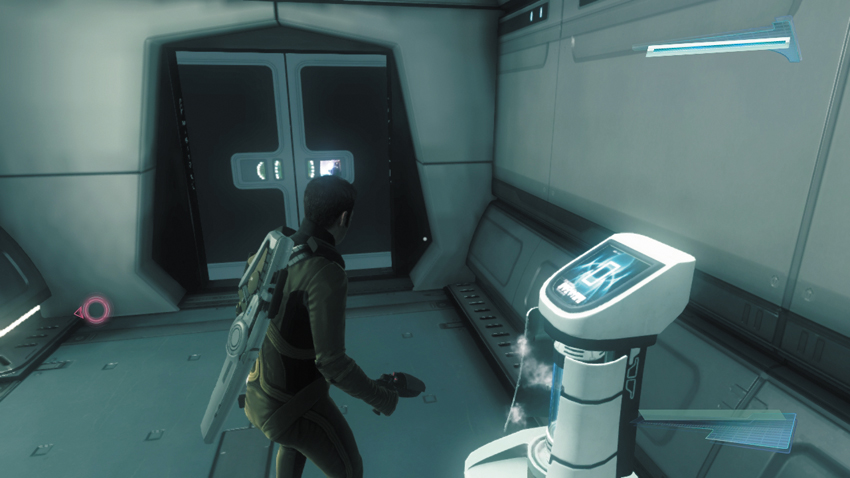
Running low on ammo? Look no further. Simply interact with one of these console-like devices, usually found against a wall on the perimeter of a room. Energy Stations fully replenish the ammo for your rifle and fully recharge your tricorder—some of the upgrades installed on the tricorder consume energy and require occasional recharging. There are three different type of Energy Stations you’ll encounter, including Vulcan, Starfleet, and Gorn models. Although they look slightly different, they all perform identically. Simply walk up to an Energy Station and press the button shown on-screen to activate it. Make a habit of stocking up on ammo each time you encounter an Energy Station.
Med Stations
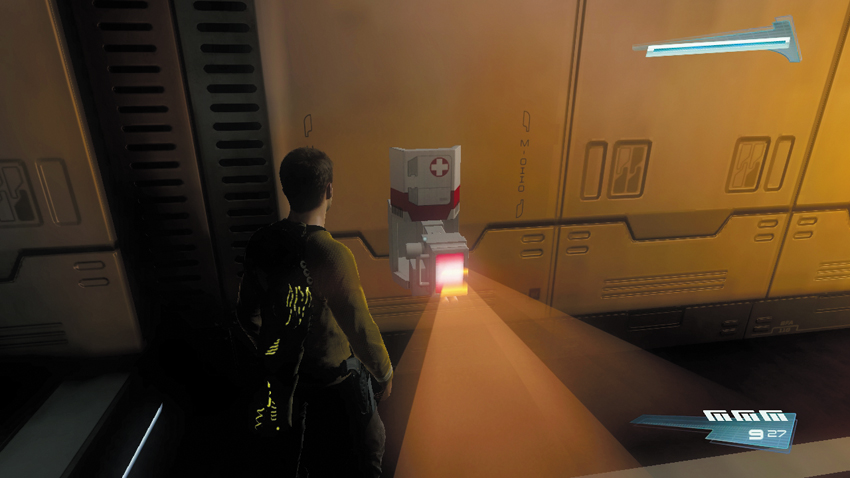
Med Stations are small wall-mounted devices that instantly replenish your character’s health. These devices are usually found near Energy Stations and operate in the same fashion—stand next to the Med Station and press the button shown on-screen to receive medical attention. Med Stations only function if you need health, otherwise they’re not interactive. Although they look different, Starfleet and Gorn Med Stations perform the same function.
Crates
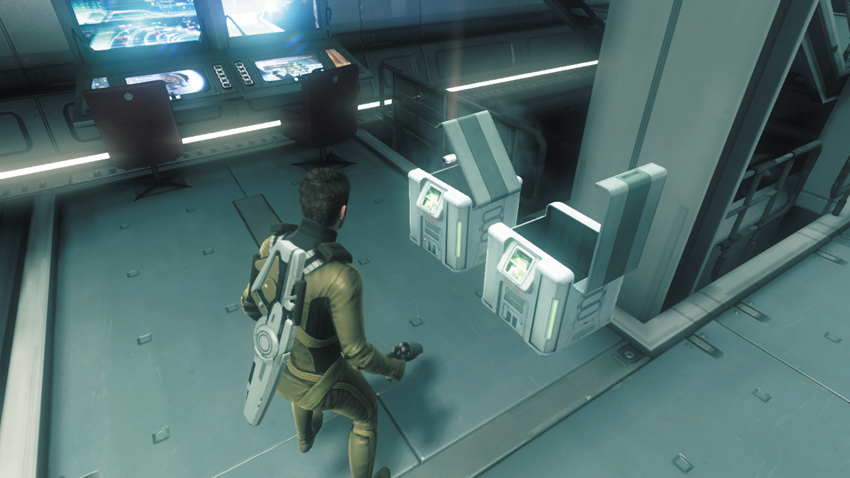
Keep an eye open for crates containing supplies. There are two types of crates: Starfleet and Gorn. Starfleet crates usually contain a single Stun Grenade while Gorn Crates often contain one Plasma Grenade. But there are instances when crates also contain a weapon. Crates can be opened by standing next to them and pressing the button shown on-screen. Alternatively, crates can be opened remotely with your tricorder.
Co-Op Interactions
Star Trek has been designed from the ground up as a two-player experience, so that you and a friend can take on the roles of Kirk and Spock in an original adventure. But even if you don’t have a friend available to play through the whole game, both characters are present in the game at all times—the character you’re not playing is controlled by AI. As a result, there are many sequences throughout the game that require cooperation from your partner, whether he is being played by a friend or the AI. Here are a few key examples where you’ll need the help of your partner to proceed.
Partner Revive
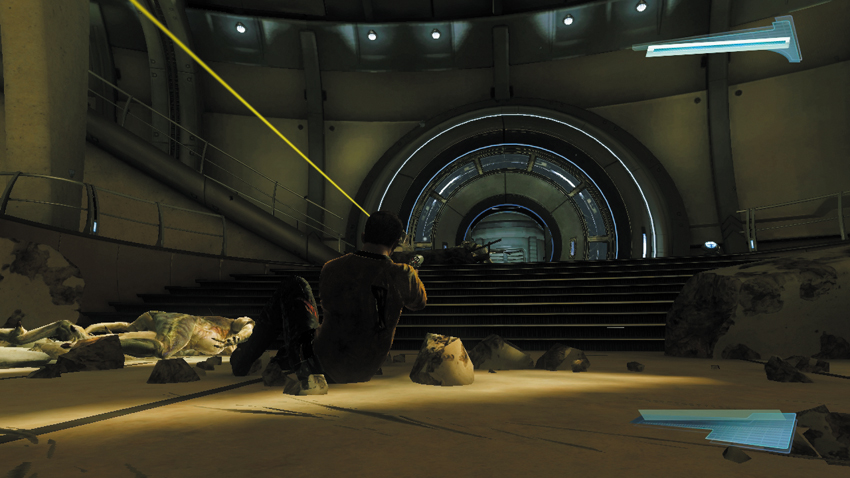
While injured and in a downed state, mobility is reduced. But you can still defend yourself with your phaser until help arrives.
If your shields and health are completely depleted, you enter a downed state. While injured, your character sits on the ground and can only defend himself with his phaser. It’s possible to make slight and very slow movements—try to inch your way behind cover if possible. While downed, you require the assistance of your partner to revive you. Before approaching your downed partner to revive him, make sure the area is safe. If you’re both injured and enter a downed state, the game is over, and you must restart from the previous save checkpoint. So take your time eliminating any enemies nearby before attempting to revive your partner.
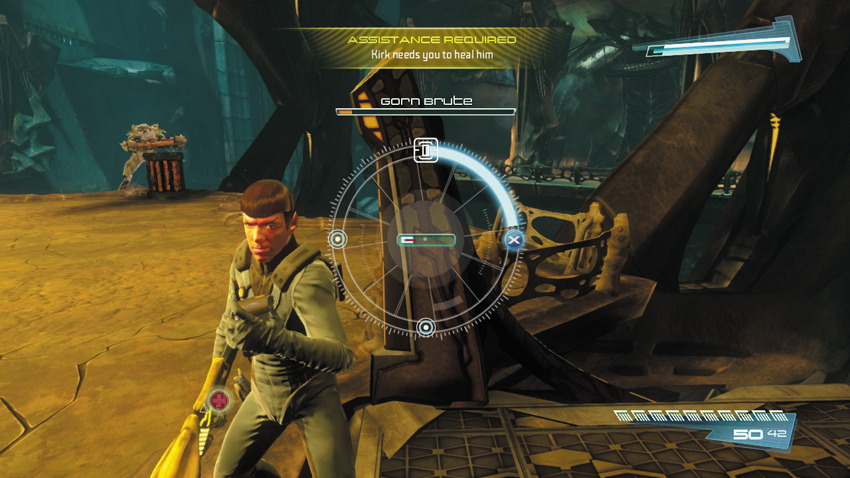
If your partner is injured during a boss battle, attempt a quick revive, but only when the enemy is far away.
Once the area is clear of threats, stand next to your downed partner and press the button shown on-screen to start reviving him. Once the revival process has begun, a circular interface appears in the center of the HUD and you must complete a minigame. A meter on the perimeter of the circle begins filling in a clockwise fashion. As the meter fills, press the button shown on-screen as the blue line hits three different points along the meter. With each success, the meter increases in speed, making it tougher to time the remaining button presses. But with each success, your partner gains more health. Even if you don’t succeed, your partner will return to his feet, albeit with diminished health and shielding. But health and shielding recovers quickly on its own, as long as your partner stays out of danger.
Jammed Doors
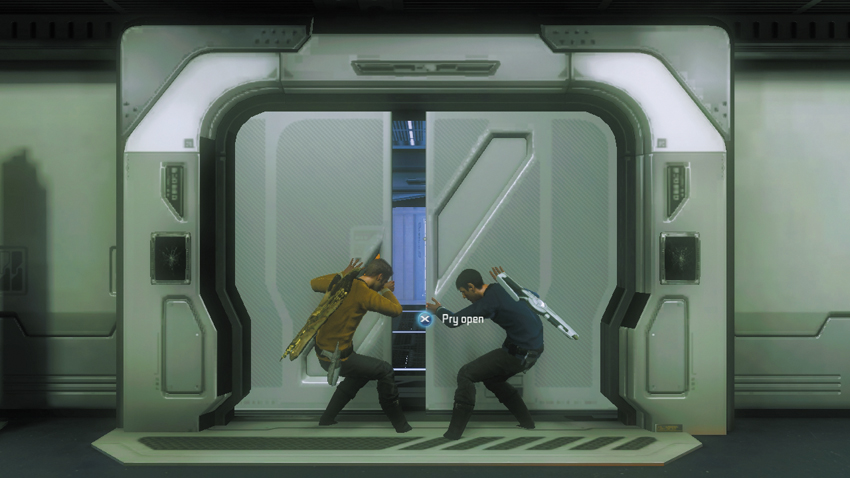
Work together with your partner to pry open jammed doors.
Occasionally you’ll come to doors that are jammed shut. Working together, you can pry open these doors. Simply approach the jammed door and press the button shown on-screen to begin prying it open. During this sequence, rapidly press the button shown on-screen to force the door open and then you and your partner can pass through.
Partner Boost
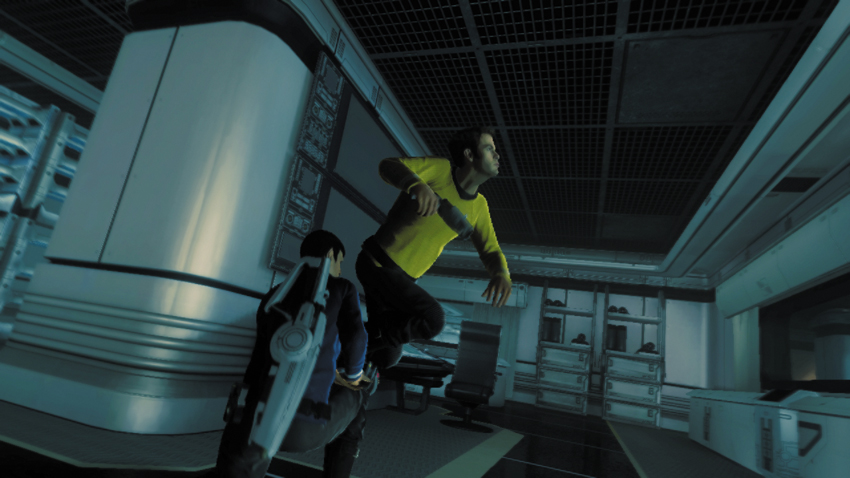
Before boosting a partner into an overhead vent, open the vent’s hatch using your tricorder.
There are certain ledges and hatches that are simply too high to reach by yourself. But by working together you can overcome most of these obstacles. Stand just below the ledge or hatch, and press the button shown on-screen to give your partner a boost. Upon reaching the ledge or hatch, your partner will then reach down and help you up. Sometimes it’s difficult to tell where a partner boost is possible. But by using your tricorder, you can find these spots—just look for the holographic image of a crouching character, indicating that a boost is possible.