
Baldur’s Gate 3: Act 2 Checklist – What to Do Before Act 3 (BG3)
Is this a checklist or a novel?

If you thought there was a lot to do in Act 1, wait until you see the Act 2 checklist. Here’s everything you should do in Act 2 before Act 3 in Baldur’s Gate 3.
Baldur’s Gate 3: Act 2 Checklist – What to Do Before Act 3 (BG3)
The Shadow Cursed lands stretch far and wide, corrupting everything they touch. But you’ll find quests, items, and lore aplenty to keep you occupied in that darkness. Here’s everything you need to tackle to truly experience every aspect of Baldur’s Gate 3, Act 2.
Expect mild spoilers.
Everything You Should Do in the Shadow Cursed Lands in Baldur’s Gate 3
You’ll enter the Shadow Cursed Lands through the Mountain Pass or the Grymforge. Either way, once you’re in this gray-toned landscape, you’ll find quite a lot to do.
- Speak to He-Who-Was
- You can find this drow in the Ruined Battlefields, east of the Last Light Inn. He’ll grant you the quest Punish the Wicked.
- Uncover the Hidden (but not quest or plot relevant) Loot
- In three areas of the Shadow Cursed Lands, you can find loot after surviving an ambush. There’s an ambush Southeast of He-Who-Was, an ambush northwest of the House with Flowers in the Shadowed Battlefields, and Southeast of the Shadowed Battlefield waypoint.
- Play Hide-and-Seek with Oliver
- So, the quest relating to Oliver will trigger if you have Halsin in your party and you speak to him. This is Halsin’s major character quest, and it will eventually lead you to Oliver. However, you can play with Oliver without Halsin by going to the House with Flowers in the Shadowed Battlefields.
- Start the Investigate the Selunite Resistance Quest
- To start off this quest, head to the Potter’s Chest in the Ruined Battlefield, found at X:-54, Y:12. Reading the note within the chest will give you the quest.
- Find a Night Orchid
- A certain Shar worshipper in your party simply adores Night Orchids. These blackened blooms can be found through the Ruined Battlefield, including at the coordinates X: 54 Y: 175.
Everything You Should Do in the Last Light Inn in Baldur’s Gate 3
- Speak to Dammon in the Stable
- If Dammon has survived the trek, you can find him in the stable. He’ll help you progress Karlach’s companion quest. If you have the Devilfoil Masks from the Grymforge, he’ll also make you a few bombs.
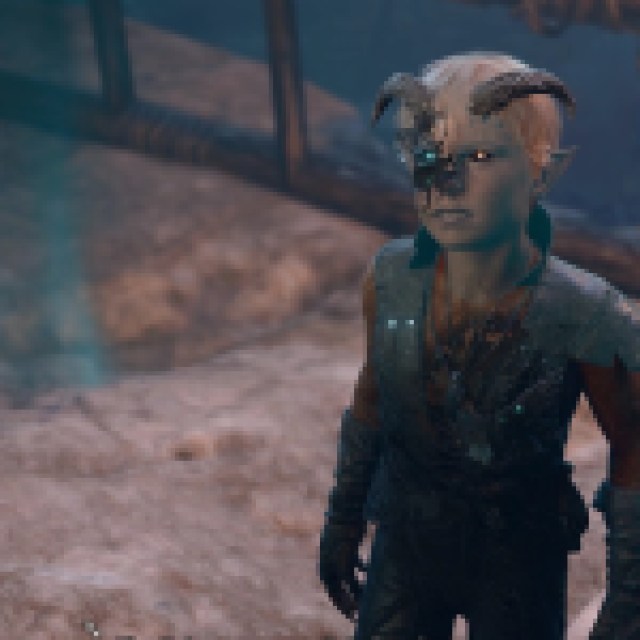
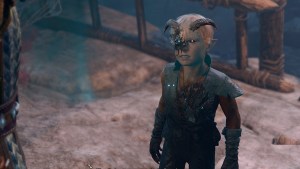
- Speak to the Strange Ox
- The Strange Ox in the Emerald Grove will be in the stable near Dammon. You can opt to press it for its identity… but is that a good idea?
- Get the Tower-Shaped Key from Mattis
- If Mattis survived the journey to Last Light, you can find him in the inn on the first floor, hawking wares. It’s a good idea to grab the Tower-Shaped key off him, either by paying or persuading him to give it to you.
- Speak to All the Important People
- Important people, in this case, are Alfira, Rolan, and Jaheira. But speaking to Rolan seems to trigger him leaving, which is good if you want to complete a quest.
- Speak to His Majesty, the Cat
- There’s a cat in Last Light Inn named His Majesty. All the cats in the game have great dialogue, and while it doesn’t give you anything to speak to him, I recommend it anyway.
- You can get approval points from pretty much everyone but Lae’zel by calling him a noble beast and then admiring his majesty.
- Speak to Mol in the Last Light Inn
- While in the Last Light Inn, you can find Mol and Rafael playing chess. After the game is done, and Mol is by herself, speak to her again. You may have to progress the plot to get this to trigger.
- Investigate the Last Light Inn cellar.
- Be sure to investigate carefully and find the cracked wall. Break the wall that has a crack in it and explore.
- Investigate Art Cullagh
- Art is at the center of a quest that bleeds into Halsin’s character quest. You can speak to him and his attendants to get the quest Wake Up Art Cullagh.
- It may be a good idea to finish Art’s quest before speaking to Isobel. Many players have struggled with the part that follows speaking with Isobel.
- Speak to Isobel
- I implore you. Please save before tackling this. Isobel is on the second floor of Last Light Inn. This is also a major plot point, so you really can’t miss it.
- Finish Halsin’s Companion Quest
- So, technically, you won’t be able to finish this until you’ve done a little exploration in Reithwin Town. However, once you’ve gotten the Battered Lute, you have everything you need to start and finish Halsin’s companion quest.
- Once Halsin enters the Shadow Portal, he can die if you choose to take a long rest. So, endure the fight and wait for him to return. (Time Sensitive)
- So, technically, you won’t be able to finish this until you’ve done a little exploration in Reithwin Town. However, once you’ve gotten the Battered Lute, you have everything you need to start and finish Halsin’s companion quest.


Everything You Should Do in Reithwin Town in Act 2 of Baldur’s Gate 3
Speaking to Isobel is a big moment in Act 2. But once you’ve accomplished that, you’ll be able to move on to the second part of the act.
- Get the Moonlantern from the Drider (Time Sensitive)
- Here is our first time-sensitive quest. After visiting the Harpers in Last Light, you’ll get approached and asked to join them for an ambush. Joining them will get you the Moonlantern, which will make your life significantly easier. However, you can miss this moment. It’s unknown how long of a period you get before the Drider and his caravan leave, but it’s a good idea to join the ambush before you take too many long rests.
- Release the Pixie in the Moonlantern (Time Sensitive)
- Once you’ve got a Moonlantern, you have until the end of Act 2 to release it. When you’ve reached Act 3, the Moonlantern will vanish.
- Opening the Moonlantern is a good idea, as it will help you with a certain side quest in Act 3.
- Once you’ve got a Moonlantern, you have until the end of Act 2 to release it. When you’ve reached Act 3, the Moonlantern will vanish.
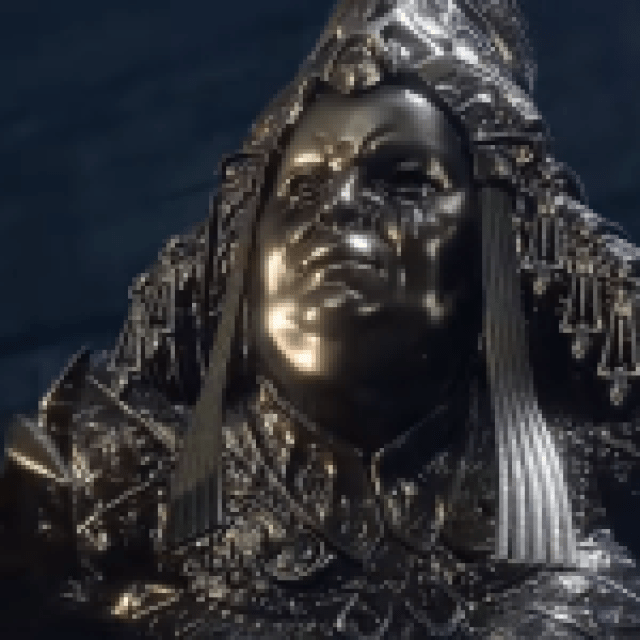
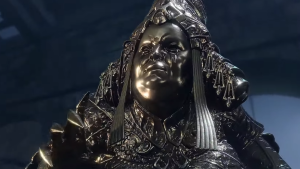
- Investigate the statue of Ketheric Thorm in the Town Square
- Once you reach the center of town, you’ll find a landmark and an ambush. However, the statue has a secret.
- Speak to Arabella
- Near the town square and the House of Healing, you’ll find Arabella. Speak with her.
- Destroy the Corrupted Kuo-Toa
- If you hate fish people, then I have a locale for you. The Fishing Shack, close to the Grand Mausoleum entrance, just below the cliff, is full of corrupted Kuo-Toa. They’ve been corrupted by the curse, and you can kill them. Doing so will get you a little loot and a little experience, but not much else.
- Save Rolan (Time Sensitive)
- If you spoke to Rolan at the bar, he’ll leave to go find his friends. Rolan will die if you stumble upon him and don’t step in to help him fight the shadow thralls that are attacking him. His survival is purely proximity-based. So long as you don’t stumble upon him, you’re fine to explore and go to Moonrise Towers.
- To find him, go to the Ruined Battlefields on the eastern shore of the river, south of the bridge that leads up to Reithwin Tollhouse.
Everything You Should Do in the Mason Guild in Act 2 of Baldur’s Gate 3
There are certain macabre elements in the Mason Guild, but the most interesting items are in the basement.
- Get the Infernal Iron
- There is Infernal Iron in the back of the Mason guild, which you can bring to Dammon.
- Investigate the Mason Guild Basement
- It’s a good idea to bring someone with high perception here. Mattis’ Tower-Shaped Key will also come into play. You can conclude the Selunite Resistance quest here.

Everything You Should Do in the House of Healing in Act 2 of Baldur’s Gate 3
The House of Healing was once a hospital, and now… it is most definitely not.
- Find Arabella’s parents.
- You can find Arabella’s parents in the House of Healing. It’s a good idea to use a certain spell on them to get a little more information before going back to Arabella to tell her the news. After that, let her stay in your camp.
- Speak to and Defeat Malus Thorm
- Thorm is just one of the many Throm siblings we’ll have to overcome. And, like all the Thorm siblings, you can convince him to kill himself. How fun! Be sure to grab the Battered Lute, which you can bring to Arthur back in Last Light Inn.
- Investigate the House of Healing Morgue
- This is one of the most macabre places in the game, and it’s where the House of Healing leaves its many, many corpses. There’s plenty of loot to be found here, including the Fleshmelter Cloak at the bottom of the Ominous Crevice.
Everything You Should Do in Waning Moon in Act 2 of Baldur’s Gate 3
After the House of Healing, you surely need a drink. Head over to the Waning Moon pub for more ale than you know what to do with and ample entertainment.
- Deal with Thisobald
- The bartender will engage you in conversation. And by passing a series of dialogue checks, you can help him pass into the great beyond. Or you can kill him the old-fashioned way.
- Find Madeline’s Ledger
- Hidden beneath a loose plank is Madeline’s ledger, which is a quest item for He-Who-Was. You know, that guy with the crow and some barely concealed fetishes we met near the Ruined Battlefield? You can give it to him and then choose how you want to finish the quest.
- Investigate the Backroom
- Once you’ve defeated Thisobald, you can explore the backrooms. There’s loot and lore aplenty back here, including the Ichorous Gloves and alchemy ingredients.
- Find the Trader’s Hidden Stash
- If you read through Thisobald’s books in the backrooms, you’ll learn there’s a hidden stash by one of his suppliers in Reithwin. It will be marked on your map. Just go dig it up.
Everything You Should Do in the Reithwin Tollhouse in Act 2 of Baldur’s Gate 3
Do you have enough to pay the toll?
- Speak to and Defeat Gerringothe Throm
- Like the rest of the Throm family, Gerringothe can be defeated without laying a single finger on her. Either through persuasion or by giving her a truly unseemly amount of gold. Or you can kill her the old-fashioned way.
- (DON’T) Lockpick the safes
- Honestly, I’m putting this here to save you the trouble. There is nothing in the safes. The most you’ll get is one gold coin, literally. Don’t bother.
- Investigate the Tollhouse Master’s Office
- There’s some loot to be found in the Master’s Office, but be sure to break through the rotten floorboards to get to more loot. Once broken through the floors, you can then find a button that will open the door to the outside.
- Get the Seized Inventory
- Near the ladder to the roof, there’s a plaque that says “seized inventory” but it’s blocked off. Climb onto the roof, then break through the rotten floorboards to get the seized items. It’s a Greataxe and a Fireheart amulet.
- Investigate the Basement
- To get to it, go to the back of the tollhouse and find the button, which will open the door. The bookcase hides the secret room.
Everything You Should Do in the Reithwin Graveyard in Act 2 of Baldur’s Gate 3
All bones, no action.
- Collect loot
- There’s not much happening in the graveyard outside of the House of Healing. However, there are three items you can loot here: Boots of Apparent Death, Icebite Robe, True Love’s Caress.
- Fun fact, the True Love’s Caress is sort like a wedding band, and there are two in the game. If you want to give your romantic interest one, and your Tav one, here are the coordinates: X: -147 Y: 43 and X: -212 Y: 0.
Everything You Should Do in Moonrise Tower in Act 2 of Baldur’s Gate 3
There is so much to do in Moonrise Tower. It’s a massive section of the game, and it signifies the third and final part of Act 2. So, let’s dive right in.
- Speak to Lann Tarv
- Lann Tarv is a merchant near the entrance of Moonrise Tower. And if you have Karlach in your party, you can get some interesting lore and some free Soul Coins. But at what cost?
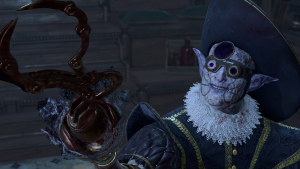
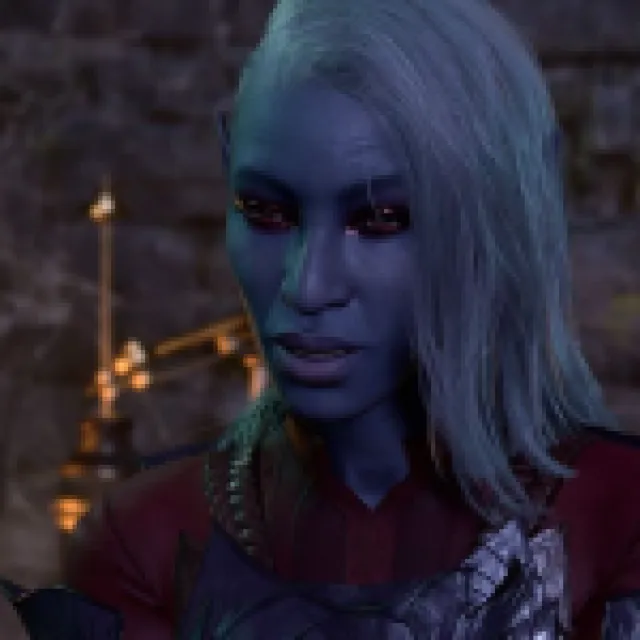
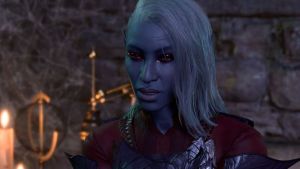
- Speak to Araj Oblodra
- Araj Oblodra is drow from a disgraced family with a keen interest in what runs through your veins. Particularly yours and Astarion’s. Giving her your blood will open up an interesting encounter in Act 3, but having her interact with Astarion might have consequences.
- Speak to Linsella and the Gnolls
- If you go to the kitchen first floor, you can find Linsella and her “tamed” gnolls. You can speak to her and, potentially, cut her dominance over the gnolls, setting them free.
- Find the Treasure
- On the southern exterior of Moonrise Tower, you can find a hidden stash.
- Investigate the Meat Sound
- If you head into the rafters on the first floor, you can encounter a cracked wall. Insert your hand, and a whole series of things can happen. Including a dislocated shoulder, some aggressive foreshadowing, and getting dragged into the Oubilette beneath the Moonrise Tower prison.
- Recruit Minthara
- If you didn’t kill Minthara in Act 1, it’s possible she’ll be in the throne room, where you can recruit her.
- Convince Z’rell to Give You Her Secret Stash
- While speaking to Z’rell on the second floor, there’s a chance you’ll get an Insight check. If you do, and pass a persuasion check, she’ll have Lann Tarv expand his inventory.
- Investigate Balthazar’s Room
- After speaking to Z’rell, you can enter Balthazar’s room to find a Moonlantern. There’s quite a bit going on in this room. Here’s what you’ll need to get.Grab the Engraved Githyanki Disc on Balthazar’s bookshelf, to the right after you enter.
- Solve Balthazar’s bookshelf puzzle.
- Complete or destroy Balthazar’s ritual circle.
- Grab the Moonlantern.
- Go to Ketheric Thorm’s Room
- Investigate the bedroom and use Speak to Animal to chat with the skeletal dog.
- Be sure to grab as many letters and lore as possible.
- Go to Isobel’s Room
- In Isobel’s room, there are plenty of things to loot. However, interact with the mimic at the foot of her bed to get the Spineshudder Amulet. After a fight, of course.
- Free the Prisoners in Moonrise Tower
- Depending on how you’ve played the game, there will be Tieflings and gnomes in the prison. Save them all for the best rewards. If Wulbren is there and you save him, you’ll also unlock a quest in Act 3.
- Be sure to speak to Rolan, Alfira, and Bex in Last Light Inn to complete this quest! Otherwise, you’ll permanently miss out on some really great loot.
- Loot the Warden and Warden’s Office
- While you can save everyone without killing anyone, you can opt to kil the guards and Warden to get the Spellcrux Amulet and the Browbeaten Circlet.
- Find the Treasure Near the Docks
- Once you’ve freed the prisoners, you can find buried treasure near the docks. If you’re struggling to find it, summon Scratch.
- Investigate the Oubliette
- There are two ways to get into the Oubliette. You can go through the prison or through the crack in the wall on the first floor of Moonrise Tower. Once there, you can loot a Mind Flayer Parasite and a Harp-Shaped Pin. But honestly, just go because it’s interesting.
Everything You Should Do in the Grand Mausoleum in Act 2 of Baldur’s Gate 3
- Speak to Rafael.
- Rafael offers you a deal at the front of the Grand Mausoleum. You can bring Astarion for more dialogue. This will trigger the quest Kill Rahael’s Old Enemy.
- Collect Lore Books
- There are three diaries of Ketheric Thorm which can be collected. The more lore you get, the more likely you are to get unique dialogue when facing Ketheric.
- Solve the Puzzle
- To be honest, you don’t have a choice. This is part of the main quest.


Everything You Should Do in the Gauntlet of Shar in Act 2 of Baldur’s Gate 3
Honestly, just keep Shadowheart in your party for this entire section.
- Speak to Balthazar
- In the West Room, you can find Balthazar. You know, that weird necromancer whose room we raided. He’s here! And he’s weird. You can opt to fight him and his minions or persuade him to give you a summon bell that will let you summon Flesh.
- Complete all three Trials of Shar.
- Again, have Shadowheart in your party. There are three trials you’ll have to overcome: the Soft-Step Trial, the Self-Same Trial, and the Faith-Step trial.
- Solve the Silent Library Puzzle
- To get the Spear of Night, you’ll need to conquer the Silent Library’s puzzle. This is located south of the Faith-Step trial and requires you to discern which books are traps and which aren’t.
- Break Yurgir’s Contract… Or Not
- Once you explore the Gauntlet, you’ll stumble across Yurgir, who’s been haunting these halls for quite some time. You can speak to him and forego a fight by offering to break his contract for him. Or you can kill him. Whatever suits you.
- Lick a Spider
- Near where you find Yurgir, you’ll find a dead spider. Have Gale in your party and opt to lick it. Twice. It’s very funny.
- Solve the Rat Mystery
- You’ll notice that there are quite a few rats in the Gauntlet of Shar. Unravel the mystery behind their strange behavior. Doing so will get you some interesting lore and items.
- Convince the Displacer Beast, Nessa
- Near Yurgir you can find his Displacer Beast, Nessa. By investigating the spider and speaking to Nessa with Speak with Animals, you can convince her to join your side if you opt to fight against Yurgir.
- Get All the Loot
- There is so much loot here. Here’s everything you can find: Boots of Brilliance, Hellfire Hand Crossbow (dropped by Yurgir), Dark Justiciar Gauntlets, Least Expected, Callous Glow Ring, Justiciar’s Scimitar (dropped by Lyrthindor), Justiciar’s Greatshield (dropped by Lyrthindor), Killer’s Sweetheart (Self-Same Trial), Circle of Bones (dropped by Balthazar), Dark Justiciar Helmet, Dark Justiciar Half-Plate.
- Find Nightsong
- This should be the very last thing you do in the Gauntlet of Shar. You’ll have a waypoint right before it. Once you find the Nightsong, you’ve reached the point of no return.
- Assault at Moonrise Tower (Time Sensitive)
- The assault on Moonrise Towers can lead to a certain recruitable character dying if you take too many long rests. However, the triggers for this are still being discovered. I could take a long rest before joining the attacking force at Moonrise Towers, and did so at the tower’s gate, and no one died. Still, keep this in mind.
Everything You Should Do in the Mind Flayer Colony in Act 2 of Baldur’s Gate 3
And here we are. The final stretch.
- Find Mizora
- Mizora is the important resource that she tasked you with finding. Yeah, what a roundabout way of asking for help. Free her once you find her in a Mindflayer pod.
- Rescue Zevlor
- Inside a hall with Mindflayer pods, you’ll find Zevlor. Free him and his friends, though you’ll have to fight a few Mindflayers to ensure their safety.
- Solve the Brain-Mapping Puzzle
- The Brain-Mapping Puzzle can be found near the Necrotic Laboratory and requires you to map emotions, speech, memory, and reason. Once you solve it, you’ll get access to the blade of Oppressed Souls and the Waking Mind.
- Find the Mind-Archive
- Near the Necrotic Laboratory, you can find the Mind-Archive Interface. Here, you can listen to the minds of heads you’ve collected. That includes the Waking Mind that you obtained from the Brain-Mapping Puzzle. The Waking Mind can provide you with a permanent buff called the Githzerai Mind Barrier. The other heads will only provide lore.
- Get Mol’s Eyepatch
- On a table near the Mind-Archive, you can find Mol’s Eyepatch, which will further advance the quest “Find Mol,” which triggers after the attack on Last Light Inn.
- Kill Chop
- Poor Chop is a bugbear who butchers humanois to create Intellect Devourers. You know, the brains. If you ask him if wants to be free, the answer is yes. Kill him and put him out of his misery.
- Free Us
- In the same room you’ve found Chop, you can find Us. But only if you freed that brain on the Nautoloid at the very start of the game. Us will then become a permanent summon.
- Speak to Kressa Bonedaughter
- If you’re playing as the Dark Urge, be sure to speak to Kressa Bonedaughtter in the barracks. There’s some interesting backstory there. You can also deceive her to get a blessing for you and all of your companions, turning her friendly. But only if you’re Dark Urge. I opted to kill her.
- Fight Ketheric Throm
- The last item on the list. Find and defeat Ketheric Thorm. And once you’re done with that… it’s on to Act 3.