
Little Big Planet: Karting Guide Essentials Create Mode
Advanced
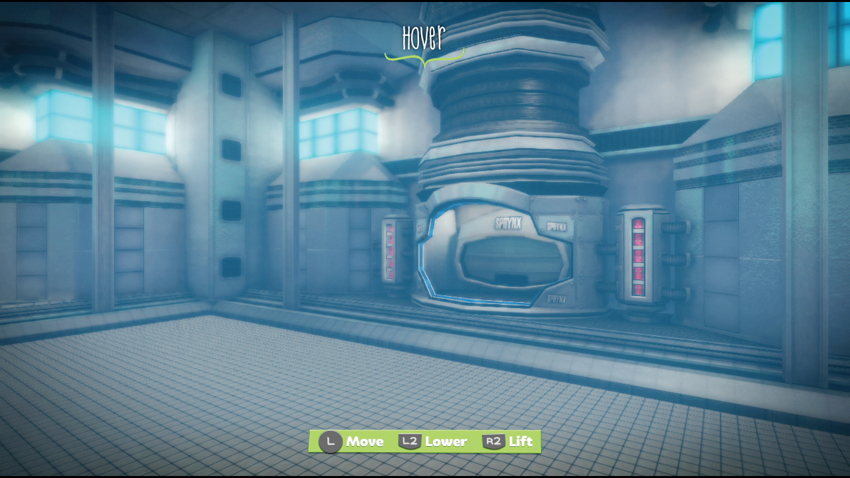
Now that you’re familiar with all manner of gadgets, doo-dads, and what-nots, it’s time to get your thinking cap on. It takes a crafty noggin to take advantage of these tools.
Kartinator & Kart Controlinator
Kart Controlinator
In the Craftverse, the possibilities are endless and that’s even the case with your controller’s buttons. The Kart Controlinator kart tweaker lets you customize the controls for every button on your controller with ease.
Go to the Gadgets page in your Tools Bag and scroll down to the Kart Tweakers section. Select the Kart Controlinator and attach it to your spawn point. The Kart Controlinator can only function when connected to a spawn point.
After it is set, a large cardboard controller with a circuit board like the Microchip’s appears. The cardboard controller’s directional buttons, analog sticks, and the face buttons are all equipped with their own output. There are even outputs for motion controls! With this you can customize controls as you see fit.
To see the Kart Controlinator in action, send in the Archies. Bring out the Straight Shot spittin’ Angry Archie, and the unstable Danger Archie.
Connect the directional button
 /
/
 output to Angry Archie’s Emitter input. Next, connect the directional buttons
 /
/
 output to Danger Archie’s input. Now, when you drive around the track, Angry Archie fires his missiles when you hit the directional buttons
/
, and Danger Archie bursts into flames whenever you hit the directional button
/
. Soon you can control an entire Archie army and take over the Craftverse! Or maybe just start your own chorus line.
output to Danger Archie’s input. Now, when you drive around the track, Angry Archie fires his missiles when you hit the directional buttons
/
, and Danger Archie bursts into flames whenever you hit the directional button
/
. Soon you can control an entire Archie army and take over the Craftverse! Or maybe just start your own chorus line.
Kartinator
Quite similar to the Kart Controlinator, the Kartinator kart tweaker is attached to spawn points and has a variety of inputs as well as a circuit board. But instead of mapping out the controller, the Kartinator tweaker has inputs for every kart action.
Not happy with the controls? When the Kartinator is used in combination with the Kart Controlinator, you can reassign kart functions to whatever controls you please.
To use the Kartinator, select it from the Gadgets page in the Tools Bag. Attach both the Kartinator and a Kart Controlinator to a spawn point. Then connect the desired controller input to the desired kart function. For instance, connect the
 output from the Kart Controlinator to the Kartinator’s Weapon input to make firing weaponators more trigger-like.

Kart Controlinator Outputs

| Output |
|---|
|
Left Stick
/
|
|
Left Stick
/
|
|
Right Stick
/
|
|
Right Stick
/
|
|
Directional Buttons
/
|
|
Directional Buttons
/
|

|

|

|

|

|

|

|
|
|

|

|
|
Tilt
/
|
Kart Controlinator Tweak Menu
| Type | Tweak | Description |
|---|---|---|
| Visuals | Show Circuit Board | Toggles the visibility of the circuit board. |
Kartinator Outputs

| Output |
|---|
| Hop/Drift |
| Weapon Direction |
| Weapon |
| Brake |
| Steering |
| Horn |
| Ability |
| Accelerate |
| Spin |
| Slap |
| Up/Down Direction |
| Left/Right Direction |
Kartinator Tweak Menu
| Type | Tweak | Description |
|---|---|---|
| Actions | Engine Input | Select the kart engine’s input. Choose from Normal, Always on, Hop, Brake, Steering, Spin, Weapons, Secondary, Ability, Look Back, Left/Right, Up/Down. |
| Behavior | Control Available if not Connected | Toggle on or off, whether unconnected outputs default to the normal controls. |
| Visuals | Show Circuit Board | Toggles the visibility of the circuit board. |
Simple Logic
Mastering Logic is key to unlocking an even larger world of possibilities in the Craftverse. You can find them all in your Tools Bag on the Gadgets page under the Simple Logic section.
AND Gate
Imagine designing a level that plays some triumphant tunes for accomplishing the goal set before them. But what if you felt like requiring players to do more than one thing to earn such a reward? Well, combining inputs is what the AND Gate logic excels at.
Open your Popit’s Goodies Bag and place a chunk of whatever material you care to. Attach the Music of your choice to it. Open the Music’s tweak menu and enable Stop On No Input. Next, drop in an Archie and a Specific Weaponator set to provide Straight Shots.

After that, place two sensors in the level: a Pressure Sensor in front of Archie and a Weapon Blast Sensor on his face.
So here’s the puzzle: how to trigger the Sackbot’s sound only when your sack person is parked on the Pressure Sensor AND has shot poor Archie? The Music has only one input, yet we want it to be controlled by two outputs. The answer? The AND Gate!
Simply place the AND Gate onto your material’s surface. Notice that it has two inputs and one output. That’s because it requires the top input AND the bottom input to trigger its own output. Get it?
Connect the two sensors’ outputs to the AND Gate’s two inputs. Then connect the AND Gate’s output to the Music. Presto-chango, that’s it!
Switch to Test Drive Mode and pick up the weaponator before parking the kart on top of the Pressure Sensor. Fire at the defenseless Archie and enjoy the music!
If you try shooting Archie while off the Pressure Sensor or try sitting on the Pressure Sensor alone, nothing happens. That’s because the AND Gate is waiting for both sensors to trigger at once. Not so scary anymore, right? And remember, you can set the AND Gate to use more than two inputs via the tweak menu.
AND Gate Tweak Menu
| Type | Tweak | Description |
|---|---|---|
| Ports | Number of Ports | Set the number of inputs on the gadget. Toggle between 2 and 20. |
| Output | Invert Output | When enabled, it sends a negative signal when both inputs are triggered. |
OR Gate
But what if instead of asking more of your players, you’d prefer to go easy on them and give them more options? Well, the OR Gate has you covered. Instead of requiring two simultaneous inputs, it offers players the choice of two different inputs to trigger the same effect.
Try replacing the AND Gate with an OR Gate. Once everything is reconnected, switch to Test Drive Mode where you can see that shooting Archie with the Straight Shot OR rolling onto the Pressure Sensor activates the music. Aren’t options grand?
OR Gate Tweak Menu
| Type | Tweak | Description |
|---|---|---|
| Ports | Number of Ports | Set the number of inputs on the gadget. Toggle between 2 and 20. |
| Output | Invert Output | When enabled, it sends a negative signal when either input is triggered. |


XOR Gate
It may be named similarly to the OR Gate but rest assured that the extra X makes the XOR Gate quite a different beast. It is capable of taking multiple outputs and then triggering whatever you desire, but the key difference is that it accepts one and only one of these available options.

Replace the OR Gate from before with the XOR Gate, and after picking up the weaponator, drive onto the Pressure Sensor. The music begins playing, but the moment your sack person fires at Archie, it stops and then resets.

Seem strange? That’s because at the moment of impact when both inputs are active, the XOR Gate cuts off the music. But since your sack person is still on the Pressure Sensor, the moment after Archie is hit, the XOR Gate once again detects only one input and restarts the music.
Remember: the XOR Gate triggers when one and ONLY one input is active.
XOR Gate Tweak Menu
| Type | Tweak | Description |
|---|---|---|
| Ports | Number of Ports | Set the number of inputs on the gadget. Toggle between 2 and 20. |
| Output | Invert Output | When enabled, it sends a negative signal when one and only one input is triggered. |
NOT Gate

Coming off of the XOR Gate, the NOT Gate is child’s play. It’s essentially the external version of many tweak menus’ Invert Output setting. It takes an input and then sends out the opposite signal. Place it and connect the Pressure Sensor’s output to its input and its output to an Effects Emitter.

Switch to Test Drive Mode where the Emitter keeps showering sparks until your sack person drives onto the Pressure Sensor.
NOT Gate Tweak Menu
| Type | Tweak | Description |
|---|---|---|
| Output | Invert Output | Enabled by default, it sends a negative signal when its input is triggered. |
Battery
Simple Logic is rounded out by one last gadget, and it’s as simple as it gets. The Battery logic sends a perpetual positive signal through its output to whatever you connect it to. Perfect for keeping the lights on.
Battery Tweak Menu
| Type | Tweak | Description |
|---|---|---|
| Output | Output | Determines the strength of the output signal. Toggle between -100% and 100%. |
Advanced Logic
So far, so good. Now that you’ve got your logic bases—or should it be basics?—covered, it’s high time you advanced onward to Advanced Logic!
Microchip
As you start to integrate more and more logic to your levels, it’s easy to run out of surface space to place those gadgets. Luckily, there’s a piece of logic designed to remedy just that. The Microchip is a gadget that, when expanded, provides a nearly-infinitely expandable surface area to place your gadgets. Use the directional buttons to make it as large as you wish.
Microchip Tweak Menu
| Type | Tweak | Description |
|---|---|---|
| Visuals | Show Circuit Board | Toggles the visibility of the circuit board. |
Counters
The Counter logic should look familiar, being nearly identical to the Weapon Blast Sensor. But pay closer attention and notice that the Counter has an input as well as a curious third glowing connection point. Shiny.

This is no ordinary input or output. It’s a Reset connection. When it receives a positive signal, it resets the Counter all the way back. This has to happen sooner or later; otherwise, a Counter only triggers its output once.

The Counter is perfect for keeping track of whatever sensor you care to hook up to it. Grabs, points, hits, you name it. Once the target count is reached, it triggers its output. You can count on it.
Counter Tweak Menu
| Type | Tweak | Description |
|---|---|---|
| Count | Target Count | Set the Counter’s target count. Toggle between 0 and 100. |
| Count | Current Count | Choose the starting Counter value. Toggle between 0 and the Target Count. |
| Output | Inverse Output | Toggles if the Counter sends a negative signal when it reaches its target. |
Timers
Ah, how time slips through our fingers. The Timer is always measuring imaginary grains of sand in the hourglass. Another dead ringer for the Counter and Weapons Blast Sensor, the Timer also shares the Counter’s Reset connection.

As the name suggests, this gadget triggers whatever it is attached to after a pre-determined amount of time has elapsed. For example, if you were to hook up the Timer to a Destroyer object tweaker. Voila! Now you have a self-destruct timer. Of course, it’s equally useful counting down to the miracle of creation when paired with an Emitter.
Use your Popit Cursor to connect the Timer’s output to Audible Archie’s Sound gadget. Now Audible Archie will cry out when the Timer has run its course.

Timer Tweak Menu
| Type | Tweak | Description |
|---|---|---|
| Time | Target Time | Set the Timer’s target time. Toggle between 0.1 and 86400 seconds. |
| Time | Current Time | Choose the starting Timer value. Toggle between 0.0 seconds and the Target Count. |
| Output | Inverse Output | Toggles if the Timer sends a negative signal when it reaches its target. |
Toggle

The Craftverse equivalent of a universal light switch, the Toggle logic flips the switch on whatever it’s connected to when its own input is triggered. Connect a Pressure Sensor to a Toggle’s input and the Toggle’s output to an Effects Emitter. Drive over the sensor in Test Drive Mode to switch the Emitter off. Drive over it again to switch it on. Easy.
Toggle Tweak Menu
| Type | Tweak | Description |
|---|---|---|
| Behavior | Default State | Set the default state to On or Off. |
| Output | Inverse Output | Toggles if the Toggle sends a negative signal when triggered. |
Selector

The Selector logic is very outgoing. It’s meant to manage up to 20 different outputs, in fact. That’s quite a bit of responsibility. The Selector can take it all, though.
Place a row of Danger Archies and connect a Selector output to each one’s Danger Tweaker input. Next, place an equal number of Pressure Sensors and connect each of their outputs to an input along the left side of the Selector. Make sure that you connect the sensors in the same order from top to bottom on the Selector as they appear in the level from left to right.

Notice that each sensor activates its own Danger Archie. The Selector is great for managing lots of different inputs and outputs in one place. But that’s not all!
Notice the extra connection at the Selector’s bottom. But instead of causing a Reset, this one is designed to Cycle. What that means is you can connect one simple Pressure Sensor to the Cycle connection and activate each output, one at a time.

The beauty of the Cycle connection is that it can co-exist with all the inputs along the Selector’s left side. That way you can have a sensor for each output plus an additional sensor that cycles through the outputs in order.
Selector Tweak Menu
| Type | Tweak | Description |
|---|---|---|
| Ports | Number of Ports | Set the number of inputs on the gadget. Toggle between 2 and 20. |
| Ports | Current State | Choose the starting Selector position. Toggle between 1 and the Target Count. |
| Output | Inverse Output | Toggles if the Toggle sends a negative signal when triggered. |

Randomizer

Logic is so stupendously splendid but has an Achilles heel—it’s predictable. Of course, that’s why it works so well. Even so, it’s good to liven things up every once in a while with a roll of the dice, even the invisible kind. For you see, the Randomizer logic is just what you need to add the unexpected twists and turns you expect from the latest paperback thriller to your level.
The Randomizer takes one input to activate it and can trigger any number of gadgets connected to its output. When it receives a positive signal, it randomly triggers one of the gadgets connected to its output.
Randomizer Tweak Menu
| Type | Tweak | Description |
|---|---|---|
| Pattern | Pattern | How the Randomizer activates its outputs. Toggle between One at a Time, Add, Add and Reset, or Toggle (randomly sends a positive or negative signal). |
| On Time | Maximum On Time | Determines the maximum length of time the Randomizer sends its positive signal for. Toggle between 0.0 and 360 seconds. |
| On Time | Minimum On Time | Determines the minimum length of time the Randomizer sends its positive signal for. Toggle between 0.0 and the Maximum On Time. |
| Off Time | Maximum Off Time | Determines the maximum length of time the Randomizer sends a negative signal for. Toggle between 0.0 and 360 seconds. |
| Off Time | Minimum Off Time | Determines the minimum length of time the Randomizer sends its negative signal for. Toggle between 0.0 and the Maximum On Time. |
| Output | Invert Output | When enabled, the Randomizer constantly sends a positive signal to all outputs and randomly sends a negative signal based on the pattern setting. |
Direction Splitter
Even the Kart Controlinator’s ample 17 outputs are hardly enough to control an Archie army. Which begs the question, is it possible to take control of two Archies at the same time…with only one input? It IS possible with the wonderful Direction Splitter. This handy logic takes one input and converts it out to two outputs.
If that concept has you splitting hairs, test out this new logic to see it for yourself. Drop down two Angry Archies near your Spawn Point, and attach a Kart Controlinator to it.

Open the Tools Bag and scroll down the Gadgets page to find the Direction Splitter in the Advanced Logic section. Select the Direction Splitter and place it on the Kart Controlinator’s circuit board.

With everything in place, all that’s left is to connect everything. Grab the Kart Controlinator’s
output and connect it to the Direction Splitter’s input.
Tie it all together by connecting the two outputs to each Archie. Now when you drive around the level, one button press signals both Archie to fire their missiles. That’s double the firepower!
Direction Splitter Tweak Menu
| Type | Tweak | Description |
|---|---|---|
| Output | Inverse Output | Reverse the output signal |
Direction Combiner
The disagreeable brother to the Direction Splitter, the Direction Combiner logic is always changing its mind about directions. The Direction Combiner takes two inputs and combines them into one output.
Open your Tools Bag and Grab a Direction Combiner from the Gadgets page. Set the Direction Combiner on an object, and call upon another Archie. Open the Tools Bag and select a Rotator Motor from the Gadgets page and attach it to Archie so that he spins around. Open the Rotator’s Tweak Menu and toggle the Input Action setting to Forwards/Backwards.

Open the Tools Bag to take out two Red Pressure Sensors from the Gadgets page. Connect each sensor’s output into both inputs on the Direction Combiner.

Take the last step in this sensor marriage and connect the single output from the Direction Combiner to the Rotator’s input. Now one sensor sends Archie spinning left while the other sends him spinning right. Looks like he’s ready for the wedding reception.
Direction Combiner Tweak Menu
| Type | Tweak | Description |
|---|---|---|
| Output | Inverse Output | Reverse the output signal |
Transmitter & Receiver

Levels in LittleBigPlanet can span quite a tremendous distance that tests the very limits of Logic connections. Sure, you can still connect them, but imagine the tangle of connector cables strewn about…not a pretty sight. Fortunately, breakthrough wireless technology can banish those messy, strained connections to oblivion!

Transmitters send a color-coded signal just like a Tag. However, unlike a Tag, they send the signal throughout the level to every corner, nook, and cranny. Pair one with the Receiver gadget that—obviously—receives the signal and triggers whatever logic it’s attached to.
Connect a Transmitter’s output to a Pressure Sensor at one end of your level to trigger a Receiver whose output is connected to a Danger Archie aaaall the way at the other end. Distance means nothing to the dynamic duo of the Transmitter and Receiver.
Transmitter Tweak Menu
| Type | Tweak | Description |
|---|---|---|
| Transmitter Type | Color | Set the specific color signal to be transmitted. |
| Transmitter Type | Label | Give the Transmitter a memorable name. |
Receiver Tweak Menu
| Type | Tweak | Description |
|---|---|---|
| Transmitter Type | Color | Set the specific color signal to be detected. |
| Transmitter Type | Label | Give the Receiver a memorable name. |
| Transmitter Type | Only From Owner | Toggle on or off whether reciever signal only activates with the player owner, or everyone. |
| Count | Number of Transmitters | Determines the number of Transmitter signals required to trigger the Receiver. Toggle between 1 and 100. |
| Count | Activation Type | Only available when Number of Transmitters is set to 2 or higher. |
| Count | Invert Output | When enabled, the Receiver sends a negative signal when it detects the associated Transmitter. |

Threshold
Similar to Counters, the Threshold logic measures the output of a signal and sends out a signal when the value exceeds a certain percentage. To demonstrate the Threshold’s measuring abilities, drop another Audible Archie on the track.

To get started, place a Race Position sensor onto your driver’s spawn point. Next, place a Threshold logic onto Audible Archie and connect the Race Position sensor’s output to this Archie’s input so that he may measure your sack person’s success. Finally, connect Threshold logic’s output to the Sackbots Sound’s input.

Tweak the sensor and the gadgets to set Audible Archie’s judgment level. To finalize the sound, set the Input Action to On/Off. Also, change the Position setting to 2D, so your sack person can hear it anywhere on the track.
Now open the Threshold logic’s Tweak menu and adjust the threshold levels. Set the Minimum Threshold to 62% and the Maximum Threshold to 100%. This means Archie is only triggered if your sack person enters the top three. In an eight kart race, the output increases 12.5% with each position (starting at 0% for eighth). Fourth is therefore 50% and third crosses the 62% Threshold with 62.5%.
Voila! Now Audible Archie watches over the race, cheering for your sack person when your standing is in the top three. Press START and switch to Play Mode to check out and receive Audible Archie’s praises in a simulated race.
Threshold Tweak Menu
| Type | Tweak | Description |
|---|---|---|
| Threshold | Minimum | Set the minimum percentage required to activate the gadget. Toggle from 1% to 100%. |
| Threshold | Maximum | Set the maximum percentage required to activate the gadget. Toggle from 1% to 100%. |
| Output | Invert Output | Set on or off to reverse the percentage value required to activate the gadget. |
Sequencer
For those meticulous types who set up dominoes throughout their living room on the weekend for fun, the Sequencer is like a Microchip with a rhythmic sense of timing. Notice that the Sequencer’s circuit board, in addition to being a different color than the Microchip’s, also has alternating vertical stripes. Each stripe represents a span of time to be determined in the tweak menu.

You can set up a series of gadgets in the order you want them to trigger. For instance, a series of sounds that are emitted at 5, 15, and 45 seconds. Sure, you could connect one sound at a time to a Timer counting down from five seconds that outputs both to the first sound and another Timer counting down from 10 seconds whose output is connected to the second sound and another Timer counting down from...well, you get the picture.

Instead of that mess, place a Sequencer and open its tweak menu to set the Seconds Per Stripe to 5.0. Next, resize the circuit board until you see nine vertical stripes. Finally, place the three sounds at the end of the first stripe (five seconds), the end of the third stripe (15 seconds), and the end of the ninth stripe (45 seconds), respectively.

See how easy it was to set up some sounds? All this Sequencer needs is an output connected to it. Attach a Battery and listen to the tune, observing the yellow line that moves along the circuit board as time passes.

Sequencer Tweak Menu
| Type | Tweak | Description |
|---|---|---|
| Timing | Seconds Per Stripe | Adjusts the amount of time represented by each vertical stripe of the Sequencer. Toggle between 0.1 and 100. |
| Timing | Loop | Determines if the Sequencer starts again from the beginning up on completing the sequence. Toggle On or Off. |
| Timing | Input Action | Toggle between Start Playing Forwards!, Start Playing Backwards!, On/Off, Forwards/Backwards, or Positional. |
| Visuals | Show Circuit Board | Toggles the visibility of the circuit board. |
Customized Weaponizers
The available weaponators sure are fearsome, aren’t they? Even so, you’ve probably dreamt up some explosive ideas for weaponators of your own. Thanks to the Weaponizer gadgets, you can make such dreams a reality. They are all found in the Tools Bag on the Gadgets page under the Weaponizer section.
Manual Weaponizer
Attach this weaponizer to an object and that object can then be fired just like a Straight Shot weaponator. Objects modified by this weaponizer can be set to ricochet several times before exploding. The green circle surrounding the object indicates the Hit Radius, the area in which karts are affected by the weaponator’s impact. There are several variants of Manual Weaponizer that lob objects, rapidly fire them, or drop them as obstacles directly behind the kart.
Manual Weaponizer Tweak Menu
| Type | Tweak | Description |
|---|---|---|
| Type | Type | Determine the type of manual weaponator fired. Toggle between Straight Projectile, Lobbed Projectile, Rapid Fire, laser, or Obstacle (fired backwards by default). |
| Type | Launch Height | Set the maximum height of an arcing Lobbed Projectile. Toggle between 0.1 and 10. (Lobbed Projectile only) |
| Type | Ammo Per Burst | Set the number of shots fired by a Rapid Fire weaponator. Toggle between 1 and 20. (Rapid Fire only) |
| Type | Obstacles Fired | Set the number of Obstacles fired at once. Toggle between 1 and 10. (Obstacle only) |
| Type | Lifetime | Set the amount of time the Obstacles persists in the level. Toggle between 1.0 and 600 seconds. (Obstacle only) |
| Type | Allow Forward Fire (Obstacles only) | Determines if players can fire their Obstacle weaponator forwards. Toggle On or Off. |
| Fire Mode | Ammo Type | Determines if the total ammunition for the weaponator is a fixed value or is unlimited for a short window of time. Toggle between Amount and Time. |
| Fire Mode | Ammo Amount | With the Ammo Type set to Amount, this value determines the total ammo the player is given. Toggle between 1 and 1000. (Amount Ammo Type only) |
| Fire Mode | Timer | Set how long the player is armed for. Toggle between 0.1 and 600 seconds. (Timer Ammo Type only) |
| Fire Mode | Rate of Fire | Determines how quickly the manual weaponator fires. Toggle between 0.0 and 10 seconds. |
| Physics | Speed | Set the speed of the weapon fired. Toggle between 15.0 and 300. |
| Physics | Hit Radius | Determines how wide the weapon’s explosion affects upon impact. Toggle between 0.5 and 10. |
| Physics | Max Ground Bounces | Determines how many times the Lobbed Projectile bounces on the ground before exploding. Toggle between 0 and 50. (Lobbed Projectile only) |
| Physics | Max Wall Rebounds | Determines how many walls the weaponator rebounds from before exploding. Toggle between 0 and 50. |
| Physics | Spin | Set the amount of spin on the weaponator. Toggle between -5.0 and 5.0 (negative values are counter clockwise while positive values are clockwise). |
| Visuals | Trail Effect | Set the visual effect used for the weaponator’s trail. Toggle between Smoke, Sparkler, Speed, Water, None, Bubbles, Electricity, Fire, Firecracker, Gas, Hearts, Ice, Plant, Plasma, Rainbows, or Ribbons. |
| Visuals | Destroy Effect | Set the visual effect used for the weaponator’s destruction. Toggle between Explode, Paint, Electricity, Fire, Plasma, Instant, or Gas. |
| Visuals | Color | Set the paint color.(Paint Destroy Effect Only) |
| Stun Type | Stun State | Determines the effect the weaponator’s impact has on the target kart. Toggle between Destroy, Stun, and None (which leaves the player with no weaponator). |
| Stun Type | Destroy | Determines the effect used when destroying another kart with this weaponator. Toggle between Fire, Plasma, Instant, Gas, Explode, or Electricity. (Destroy Stun State Only) |
| Stun Type | Stun | Determines the effect used when stunning another kart with this weaponator. Toggle between No Traction, Reduced Handling, Slow, Up Impulse, Side Impulse, Disable Controls, or Block Vision. |
| Audio | Focus | Adjust the level of focus of the weapon sound from 0.0% to 100%. |
| Audio | Focus Music | When Focus is set to more than 0, apply the focus setting to music as well. |
| Visibility | Can Kart Fire | Set whether the weapon can be fired from a kart. |
| Visibility | Weapon Icon | Choose what appears as the weapon icon. |
Seeking Weaponizer
Give a little guidance to your custom creation before firing it off into the world to menace your opponents. The Seeking Weaponizer gives your custom object the tracking abilities of a bloodhound. You can choose the type of target you want the weaponator to seek in the tweak menu.

Seeking Weaponizer Tweak Menu
| Type | Tweak | Description |
|---|---|---|
| Target | Target | Determine how the weaponator prioritizes targets. Toggle between Flashlight, All Ahead, Target Ahead, or Leader. |
| Flight Mode | Flight Mode | Determines if the weaponator flies wildly or follows the center of the track. Toggle between Turbulent or Track Center. |
| Flight Mode | Vertical Turbulence | Determine the amount of vertical variation in the weaponator’s flight. Toggle between 0.0 and 10. (Turbulent Flight Mode only) |
| Flight Mode | Horizontal Turbulence | Determine the amount of horizontal variation in the weaponator’s flight. Toggle between 0.0 and 10. (Turbulent Flight Mode only) |
| Flight Mode | Random Turbulence | Determine the amount of random variation in the weaponator’s flight. Toggle between 0.0 and 100. (Turbulent Flight Mode only) |
| Fire Mode | Ammo Type | Determines if the total ammunition for the weaponator is a fixed value or is unlimited for a short window of time. Toggle between Amount and Time. |
| Fire Mode | Ammo Amount | With the Ammo Type set to Amount, this value determines the total ammo the player is given. Toggle between 1 and 1000. (Amount Ammo Type only) |
| Fire Mode | Timer | Set how long the player is armed for. Toggle between 0.1 and 600 seconds. (Timer Ammo Type only) |
| Fire Mode | Rate of Fire | Determines how quickly the manual weaponator fires. Toggle between 0.0 and 10 seconds. |
| Physics | Speed | Set the speed of the weapon fired. Toggle between 5.0 and 100. |
| Physics | Hit Radius | Determines how wide the weapon’s explosion affects upon impact. Toggle between 0.5 and 10. |
| Physics | Spin | Set the amount of spin on the weaponator. Toggle between -5.0 and 5.0 (negative values are counter clockwise while positive values are clockwise). |
| Visuals | Trail Effect | Set the visual effect used for the weaponator’s trail. Toggle between Smoke, Sparkler, Speed, Water, None, Bubbles, Electricity, Fire, Firecracker, Gas, Hearts, Ice, Plant, Plasma, Rainbows, or Ribbons. |
| Visuals | Destroy Effect | Set the visual effect used for the weaponator’s destruction. Toggle between Explode, Paint, Electricity, Fire, Plasma, Instant, or Gas. |
| Visuals | Color | Set the paint color. (Paint Destroy Effect Only) |
| Stun Type | Stun State | Determines the effect the weaponator’s impact has on the target kart. Toggle between Destroy, Stun, and None (which leaves the player with no weaponator). |
| Stun Type | Destroy | Determines the effect used when destroying another kart with this weaponator. Toggle between Fire, Plasma, Instant, Gas, Explode, or Electricity. (Destroy Stun State Only) |
| Stun Type | Stun | Determines the effect used when stunning another kart with this weaponator. Toggle between No Traction, Reduced Handling, Slow, Up Impulse, Side Impulse, Disable Controls, or Block Vision. |
| Audio | Focus | Adjust the level of focus of the weapon sound from 0.0% to 100%. |
| Audio | Focus Music | When Focus is set to more than 0, apply the focus setting to music as well. |
| Visibility | Can Kart Fire | Set whether the weapon can be fired from a kart. |
| Visibility | Weapon Icon | Choose what appears as the weapon icon. |
Instant Weaponizer

In the blink of a beaded eye, your rivals won’t know what hit them when you wield the Instant Weaponizer. Use these sparingly in levels as they are unstoppable forces of destruction. You can have the weaponator instantly strike, instantly summon obstacles to the level, or instantly attach a dangerous object to your opponents.
Instant Weaponizer Tweak Menu
| Type | Tweak | Description |
|---|---|---|
| Type | Type | Determine the type of instant effect fired by the weaponator. Toggle between Instant, Obstacle, or Attach Object. |
| Type | Lifetime | Set the amount of time the Obstacles persists in the level. Toggle between 1.0 and 600 seconds. (Obstacle only) |
| Type | Number of Obstacles | Set the number of Obstacles fired at once. Toggle between 1 and 30. (Obstacle only) |
| Type | Offset From Target | Determines how far from the target the instant obstacles are placed. Toggle between 1.0 and 500. (Obstacle only) |
| Type | Course Length | Determine over how long a stretch of the course the obstacles are deployed. Toggle between 1 and 1000. (Obstacle only) |
| Type | Obstacle Spacing | Determines the spacing between deployed obstacles. Toggle between 0.0 and 10. (Obstacle only) |
| Type | Affect Handling | Determines if the attached object negatively impacts the kart’s handling. (Attach Object only) |
| Type | Detonate On Kart Collision | Determines if the target kart explodes upon colliding with any other in the level. (Attach Object only) |
| Type | Detonate On World Collision | Determines if the target kart explodes upon colliding with any surface in the level. (Attach Object only) |
| Type | Detonate On Countdown | Determines if the target kart explodes after a set amount of time. Toggle between 0.0 and 10 seconds. (Attach Object only) |
| Type | Attach Die On Timeout | Determines if the target kart explodes on object timeout. (Attach Object only) |
| Target | Target | Determines which kart the weaponator targets. Toggle between Target Ahead, Leader, Flashlight, All Ahead, or All. |
| Fire Mode | Ammo Type | Determines if the total ammunition for the weaponator is a fixed value or is unlimited for a short window of time. Toggle between Amount and Time. |
| Fire Mode | Ammo Amount | With the Ammo Type set to Amount, this value determines the total ammo the player is given. Toggle between 1 and 1000. (Amount Ammo Type only) |
| Fire Mode | Timer | Set how long the player is armed for. Toggle between 0.1 and 600 seconds. (Timer Ammo Type only) |
| Fire Mode | Rate of Fire | Determines how quickly the manual weaponator fires. Toggle between 0.0 and 10 seconds. |
| Stun Type | Stun State | Determines the effect the weaponator’s impact has on the target kart. Toggle between Destroy, Stun, and None (which leaves the player with no weaponator). |
| Stun Type | Destroy | Determines the effect used when destroying another kart with this weaponator. Toggle between Fire, Plasma, Instant, Gas, Explode, or Electricity. (Destroy Stun State Only) |
| Stun Type | Stun | Determines the effect used when stunning another kart with this weaponator. Toggle between No Traction, Reduced Handling, Slow, Up Impulse, Side Impulse, Disable Controls, or Block Vision. |
| Audio | Focus | Adjust the level of focus of the weapon sound from 0.0% to 100%. |
| Audio | Focus Music | When Focus is set to more than 0, apply the focus setting to music as well. |
| Visibility | Can Kart Fire | Set whether the weapon can be fired from a kart. |
Self Weaponizer

Sometimes to conquer its enemies, your sack person must first look within…and discover that the most powerful weapon is the self! The Self Weaponizer turns your kart into a force to be reckoned with. There are three different variations of this weaponizer. The Boost type simply supercharges the kart’s engine for an incredible surge of speed.
Self Weaponizer Tweak Menu
| Type | Tweak | Description |
|---|---|---|
| Type | Type | Choose the type of self-targeting effect is provided by the weaponator. Toggle between Boost, Portal (teleports the kart forward in time), or Area Effect. |
| Type | Lifetime | Set the length of time the Boost or Area Effect weaponator is active for. Toggle between 1.0 and 360.1 seconds. (Boost and Area Effect Types only) |
| Fire Mode | Ammo Type | Determines if the total ammunition for the weaponator is a fixed value or is unlimited for a short window of time. Toggle between Amount and Time. |
| Fire Mode | Ammo Amount | With the Ammo Type set to Amount, this value determines the total ammo the player is given. Toggle between 1 and 1000. (Amount Ammo Type only) |
| Fire Mode | Random Turbulence | Determine the amount of random variation in the weaponator’s flight. Toggle between 0.0 and 100. (Turbulent Flight Mode only) |
| Fire Mode | Rate of Fire | Determines the rate of fire fro the self weaponizer. Toggle between 0 to 10 seconds. |
| Fire Mode | Timer | Set how long the player is armed for. Toggle between 0.1 and 600 seconds. (Timer Ammo Type only) |
| Physics | Boost Speed Multiplier | Determines the factor by which Boost Speed is increased. Toggle between 0.0 and 3. (Boost Type only) |
| Physics | Hit Radius | Determines how wide the weapon’s explosion affects upon impact. Toggle between 0.5 and 10. (Area Effect Type only) |
| Physics | Hit Radius | Determines how wide the weapon’s explosion affects upon impact. Toggle between 0.5 and 10. |
| Visuals | Trail Effect | Set the visual effect used for the weaponator’s trail. Toggle between Smoke, Sparkler, Speed, Water, None, Bubbles, Electricity, Fire, Firecracker, Gas, Hearts, Ice, Plant, Plasma, Rainbows, or Ribbons. (Boost Type only) |
| Visuals | Destroy Effect | Set the visual effect used for the weaponator’s destruction. Toggle between Explode, Paint, Electricity, Fire, Plasma, Instant, or Gas. (Boost Type only) |
| Visuals | Color | Set the paint color. (Paint Destroy Effect Only) |
| Visuals | Invincible | Enabling this setting causes the kart to be invincible for the duration of the weaponator’s use. (Boost and Area Effect Types only) |
| Visuals | Transform | Enabling this causes the kart to transform into the object the weaponizer is attached to for the duration of the weaponator’s use. (Boost and Area Effect Types only) |
| Stun Type | Stun State | Determines the effect the weaponator’s impact has on the target kart. Toggle between Destroy, Stun, and None (which leaves the player with no weaponator). |
| Stun Type | Destroy | Determines the effect used when destroying another kart with this weaponator. Toggle between Fire, Plasma, Instant, Gas, Explode, or Electricity. (Destroy Stun State Only) |
| Stun Type | Stun | Determines the effect used when stunning another kart with this weaponator. Toggle between No Traction, Reduced Handling, Slow, Up Impulse, Side Impulse, Disable Controls, or Block Vision. |
| Audio | Focus | Adjust the level of focus of the weapon sound from 0.0% to 100%. |
| Audio | Focus Music | When Focus is set to more than 0, apply the focus setting to music as well. |
| Visibility | Audio | Set whether the weapon can be fired from a kart. |
| Visibility | Weapon Icon | Choose what appears as the weapon icon. |
Kart Tweakers

Soup up your standard kart with all manner of whiz-bang widgets that work wonderfully. Kart Tweakers modify a player’s kart in all manner of amazing ways. All Kart Tweakers are found in the Tools Bag on the Gadgets page under the Kart Tweakers section.
Place these on any spawn point or Kartinator to have their effects applied to that position’s player. Of course, the only exception to this is when you’re building a fresh kart from the ground up.
Custom Kart Construction
There are a head-spinning number of possible kart configurations you can experiment with in your Popit by combining various bodies, suspensions, wheels, seats, steering wheels, sounds and horns. But no doubt, somewhere deep down, you’ve got a game-changing idea for a kart the likes of which the Craftverse has never seen before. Create Mode has just what you need to make your idea a road-ready reality.
Kart Chassis / Kart Cockpit
Making a custom kart is as simple as adding one key Kart Tweaker to any object: the Kart Chassis. It may look like the bottom half of tiny toy car, but it’s got plenty of horsepower to spare. Attach it to as large an object as you please to magically turn it into something street legal. Always remember that the chassis must be placed on the underside of the object for it to work…as is usually the case with needing wheels under the car as opposed to above them.
Entirely optional, placing a Kart Cockpit kart tweaker onto an object gives your sack person a place to sit while driving. Unless you plan on getting strange looks, make sure the Kart Cockpit is pointing in the correct direction. Otherwise, the custom kart appears driverless.
Kart Chassis Tweak Menu
| Type | Tweak | Description |
|---|---|---|
| Audio | Engine Sound | Choose a sound theme for the kart’s engine. |
| Audio | Chassis Sound | Choose a sound theme for the kart’s chassis. |
| Audio | Horn Sound | Choose a sound for the kart’s horn. |
Kart Transformer
In order to start the race in your custom kart, a very special Kart Tweaker needs to be brought out. The Kart Transformer is attached to a spawn point, automatically replacing that player’s kart with the customized ride of your choice.

Kart Transformer Tweak Menu
| Type | Tweak | Description |
|---|---|---|
| Object | Object | Choose the custom object to replace the standard kart. The object must possess a Kart Chassis. |

Powerup Loadout
This kart tweaker grants the driver the powerup of choice from the very start (and even still after a reset). This extra gear can give a decisive advantage so distribute them carefully or generously.

Weapon Loadout
This kart tweaker equips the driver with the weaponator of choice from the very start (and even still after a reset). Consider the repercussions of arming your competitors too extensively.

Powerup Loadout Tweak Menu
| Type | Tweak | Description |
|---|---|---|
| Type | Powerup Loadout Type | Set the powerup to be given. Toggle between None, Grapple Hook, or Grabinator. |
Kart Scale Tweaker Tweak Menu
| Type | Tweak | Description |
|---|---|---|
| Scale | Scale | Determines the size of the kart. Toggle between 0.5 to 4.0 (where 1 is normal-sized). |
| Scale | Input Action | Determines how the tweaker operates in response to input. Toggle between On/Off or Strength Scale. |
| Transition Time | Transition Time | Determines how long it takes for the kart to grow or shrink. Toggle between 0.0 to 100 seconds. |
Kart Scale Tweaker
Feel like a monster truck rally? Prefer to keep a low profile and squeeze past the competition? Both of these are possible with the help of the Kart Scale Tweaker. This kart tweaker lets you grow or shrink the size of a kart at will.
Weapon Loadout Tweak Menu
| Type | Tweak | Description |
|---|---|---|
| Choose Object | Weapon | This lets you select from various weaponators to be granted. |
| Choose Object | Replace Current Weapon | Determines if, when equipped with another weaponator or after being reset with another weaponator, the tweaker re-equips the driver with the loadout-specified weaponator. |
Handling Tweaker
Making invisible kart adjustments under the hood is what the Handling Tweaker is all about. This kart tweaker modifies a plethora of handling characteristics to help you make players’ rides as smooth or out of control as you desire. Experiment with different settings to see how they impact gameplay.
Handling Tweaker Tweak Menu
| Type | Tweak | Description |
|---|---|---|
| Drive Mode | Drive Mode | Determines the Toggle between Kart, Tank (no drifting), Direct Control (gas and brake controlled by directional buttons/left stick), or Auto Pilot. |
| Drive Mode | Lock Orientation | Disables the steering to prevent lateral movement. Toggle On or Off. |
| Drive Mode | Camera Relative | Toggle if the kart is controlled relative to the camera’s perspective. (Kart and Direct Control Drive Modes only) |
| Drive Mode | Orientation Speed | Set how quickly the camera follows the kart’s movement. Toggle between 0.0 and 30. |
| Drive Mode | Momentum | Determines how much momentum the kart retains. Toggle between 0.0 and 100% (Direct Control and Tank Drive Modes only) |
| Drive Mode | Tank Turn Radius | Determines how tightly or loosely the tank turns. Toggle between 0.5 and 15. (Tank Drive Mode only) |
| Drive Mode | Strafe Speed | Set how quickly an auto pilot kart strafes. (Auto Pilot Drive Mode only) |
| Drive Mode | Forward Strafe Amount | Set how much the auto pilot kart can strafe forward. (Auto Pilot Drive Mode only) |
| Drive Mode | Auto Dodge Obstacles | Enable this to have the auto pilot kart automatically avoid obstacles. (Auto Pilot Drive Mode only) |
| Drive Mode | Turn While Strafing | Enables the auto pilot kart to turn while strafing (Auto Pilot Drive Mode only) |
| Tuning | Top Speed | Set the maximum top speed the kart can achieve. Toggle between 10.0 and 60. |
| Tuning | Acceleration | Adjust the kart’s rate of acceleration. Toggle between 1.0 and 100% |
| Tuning | Handling | Adjust the smoothness of the kart’s handling. Toggle between 0.0 and 100% |
| Drafting | Drafting | Enable or disable the kart’s ability to draft (pick up speed while driving behind another kart). |
| Drafting | Draft Cone | Determines the width of the cone-shaped area behind a kart that allows a driver to draft. Toggle between 0 and 300. |
| Drafting | Draft Speed | Determines the amount of the speed boost provided by drafting. Toggle between 0 and 300. |
| Drafting | Draft Time | Determines the time it takes to activate a draft boost. Toggle between 1 to 10 seconds. |
| Drafting | Drifting | Enable or disable the kart’s ability to drift. |
| Drafting | Drift Angular Velocity | Determines how tightly the kart turns while drifting. Toggle between 0.0 and 200. |
| Hopping | Hop | Enable or disable the kart’s ability to hop. |
| Hopping | Hop Power | Determines the height of the kart’s hops. Toggle between 0 and 1000. |
| Hopping | Extra Gravity | Determines how quickly the kart falls back to the ground from its hop. Toggle between 0.0 and 15. |
| Spinning | Spin | Enable or disable the kart’s ability to spin. (Kart, Tank, and Direct Control) |
| Spinning | Spin Speed | Determines how fast the kart spins. Toggle between 0 and 200. |
| Air Control | Air Control | Enable or disable the kart’s ability to move laterally while mid-air. (Kart Drive Mode only) |
| Air Control | Air Control Power | Adjust how much control the player has while in the air from 0 to 300. |
| Grapple | Grapple | Enable or disable the kart’s ability to grapple. |
| Slap | Slap | Enable or disable the driver’s ability to move slap opponents. |
| Engine Audio | Engine Audio | Enables or disables the sound of the kart’s engine. |
Reset

Like a Destroyer tweaker for karts only, the Reset kart tweaker causes the kart it’s attached to self-destruct and reset. It can also be set to prevent a kart from resetting at all.
To add the tension of a ticking clock to your arenas, attach a Reset tweaker to every spawn point and connect a Timer to each tweaker. Tweak the Timer to increase the Target Time to 60 seconds. Now every player that spawns into this battle is doomed to burst within a minute. That ought to keep anyone from hoarding weaponators.

If you want to permanently ban a player from the level, you can turn on Block Reset in the tweak menu. For instance, imagine if you wanted players to be able to reset freely—but only before the last lap. Then, it’s sudden death elimination.
This is going to involve a few pieces of logic, so it’s best to place a Microchip on the spawn point. Expand its circuit board and place a Progress Sensor. Connect it to a Threshold Sensor, and for a three-lap race, set the Threshold Sensor’s Minimum to 66%. (The equivalent of two out of three laps.) Finally, connect the Threshold Sensor to the Reset tweaker and set the Reset tweaker’s Input Action to Block Reset.
Now every driver has to watch out during their last lap as the next weaponator could be the one to end their aspirations.
Reset Tweak Menu
| Type | Tweak | Description |
|---|---|---|
| Behavior | Input Action | Toggle between Force Reset or Block Reset. |
| Behavior | Reset To | Enter the label of the desired spawn point for the player to reset at. |
Character Expression

Sack things, despite their adorable exterior, are actually deep wells of emotion. Sometimes a little encouragement is all that’s needed to coax them into expressing themselves. The Character Expression kart tweaker is just the thing to get them to come out of their shells.
Attach one to a spawn point to set specific expressions and animations for your AI drivers. A full range of emotions, from joyfully happy to mind numbing anger, are available And while you can use the Character Expression tweaker to give every AI opponent a mean mug during a race, it is best utilized to add gravitas to your cutscenes. Place both a Character Expression and a Kart Actor kart tweaker to a Movie Spawn Point to give your scenes the right dramatic tension.
Character Expression Tweak Menu
| Type | Tweak | Description |
|---|---|---|
| Behavior | Expression Type | Change the driver’s facial expression. Choose from Neutral, Cheerful, Happy, Ecstatic, Gloomy, Sad, Inconsolable, Nervous, Scared, Terrified, Irritable, Angry, or Livid. |
| Behavior | Animation | Choose the animation the driver performs. Toggle between Look Upward, Look Left, Look Right, Look Back Left, Look Back Right, Look Around, Lean In, Cheering, Reach Out, Shake Fist, Yawn, Asleep, Look Around Up, Nod Yes, or Shake Head No. |
Brains!
The AI karts are pretty competent on their own but only at the most basic racing and battle tasks. For more sophisticated behavior that challenges the best human players, you need to use brains!
Race Brain

A well-designed and dynamic track can still be as boring as picking up the dry cleaning if the level of competition isn’t on par with the level. With the Race Brain kart tweaker you can be the crew chief for every single AI driver that enters a race. To get those opponents up to snuff, grab a Race Brain from the Kart Tweaker section and place it on a spawn point.
Open the Race Brain’s Tweak Menu and browse through each tweak. There are options that oversee the driver’s overall race behavior or look further down the list to see more specific options. Eventually, you can impassion an AI driver to risk it all just to maintain a third place standing, while only employing slapping as a means to do so. It’s up to you! Use the Race Brain to give those dull opponents a little more spunk.
Race Brain Tweak Menu
| Type | Tweak | Effect |
|---|---|---|
| Behavior | Behavior | Select the AI’s overall actions. Choose between Race, Follow Path, Reset, Stop Idle, Block/Chase, or Race to Position. |
| Behavior | Speed Percent | Determines how fast the kart moves through the path. Toggle from 0 to 100. (Follow Path Behavior only) |
| Behavior | Requires Tag | Set if the AI requires a tag or not when following the path. Toggle On or Off. (Follow Path Behavior only) |
| Behavior | Tag Color | Designate a Tag color. |
| Behavior | Target Label | Specify a label for the Tag color target. |
| Behavior | Target | Select which kart the AI targets. Choose from Closest Kart, Closest Player, Closest AI, Lead Kart, Lead Player, Lead AI, Last Kart, Last Player, or Last AI. (Block/Chase Behavior only) |
| Behavior | Offset Along Track | Adjusts the offset of the kart when it is set to block or chase. Toggle between -100.0 and 100. (Block/Chase Behavior only) |
| Behavior | Position | Set the position the AI tries to maintain, from 1 through 8. |
| AI Profile | Base Profile | Set the AI’s difficulty level from Default, Easy, Medium, Hard, or Expert. |
| Weapon Use | Target Bias | Set what targets the AI will tend to attack. Toggle between Neutral, Player, Player Only, AI, or AI Only. (Race, Follow Path, Block/Chase, Race to Position Behavior only) |
| Weapon Use | Item Aiming | Set the AI’s weapon accuracy from -100% to 100%. (Race, Follow Path, Block/Chase, Race to Position Behavior only) |
| Weapon Use | Item Usage | Adjust how often the AI uses weapons. Toggle between -100% to 100%. (Race, Follow Path, Block/Chase, Race to Position Behavior only) |
| Abilities | Abilities | Adjust how often the AI blocks attacks. Toggle between -100% to 100%. (Race, Follow Path, Block/Chase, Race to Position Behavior only) |
| Abilities | Slapping | Adjust how often the AI slaps opponents. Toggle between -100% to 100%. (Race, Follow Path, Block/Chase, Race to Position Behavior only) |
| Abilities | Spinning | Adjust how often the AI spins during jumps. Toggle between -100% to 100%. (Race, Follow Path, Block/Chase, Race to Position Behavior only) |
| Abilities | Drifting | Adjust how often the AI drifts on turns. Toggle between -100% to 100%. (Race, Follow Path, Block/Chase, Race to Position Behavior only) |
| Abilities | Drift Boost | Adjust how often the AI performs drift boosts. Toggle between -100% to 100%. (Race, Follow Path, Block/Chase, Race to Position Behavior only) |
| Abilities | Drafting | Adjust how often the AI drafts. Toggle between -100% to 100%. (Race, Follow Path, Block/Chase, Race to Position Behavior only) |
| Driving | Steer Control | Set the AI’s steering ability from -100% to 100%. (Race, Follow Path, Block/Chase, Race to Position Behavior only) |
| Driving | Speed Control | Set the AI’s general speed from -100% to 100%. (Race, Follow Path, Block/Chase, Race to Position Behavior only) |
| Common | Input Action | Toggle the input to On/Off or On and Expire. |
| Common | Expire After | Adjust how long the input is active after turning on. Toggle between 0.2 and 180 seconds (On and Expire Input Action only) |
Battle Brain

For less linear levels you’ve created, the Battle Brain is adaptable to nearly any situation. It is excellent for instructing the AI on how to handle grabbing and dropping key items as well as navigating to specific destinations.
Battle Brain Tweak Menu
| Type | Tweak | Description |
|---|---|---|
| Behavior | Behavior | Determines the core behavior of the driver. Toggle between Battle, Reset, Stop Idle, Grab Item, Drop Item, Goto Target, Flee, Defend, or Roam. |
| Behavior | Reset To | Enter the label of the desired spawn point for the driver to reset at. (Reset Behavior only) |
| Behavior | Throw at Target | Determines if the driver drops the item at a specific target. Toggle On or Off. (Drop Item Behavior only) |
| AI Targeting | Target | Specify the driver’s target preference. Toggle between Closest Kart, Closest Player, Closest AI, Lead Kart, Lead Player, Lead AI, Last Kart, Last Player, Last AI, Checkpoint, Grabbable, Weaponator, Grapple Hook, Item Pod, Score Bubble, Path, Tag, Goal, or Weapon Target. (Battle, Goto Target, Flee, Defend Behavior only) |
| AI Targeting | Target Is Grabbing Item | Enable this to restrict the driver to only attacking targets that are grabbing an item. (Battle, Goto Target, Flee, Defend Behavior only) |
| AI Targeting | Target Team | Designate a team for the driver to target. Choose from Team 1-8, Any Team, My Team, or Other Team. (Battle, Goto Target, Flee, Defend Behavior only) |
| AI Targeting | Requires Tag | Enable to base targeting on Tag color. (Battle, Grab Item, Goto Target, Flee, Defend Behavior only) |
| AI Targeting | Tag Color | Designate a Tag color target. |
| AI Targeting | Target Label | Specify a label for the Tag color target. |
| AI Targeting | Ignore Checkpoints | Enable this to instruct the driver to ignore Checkpoints placed in the level. (Battle Behavior only) |
| AI Targeting | Ignore Goals | Enable this to instruct the driver to ignore Goals placed in the level. (Battle Behavior only) |
| AI Targeting | Stop at Target | Determines if the driver stops upon arriving at the designated target. (Goto Target, Defend Behavior only) |
| AI Targeting | Safe Distance | Set what the driver considers a safe distance to stop fleeing. Toggle between 20.0 and 500. (Flee Behavior only) |
| AI Targeting | Defend Distance | Set the distance the driver actively defends. Toggle between 20.0 and 500. (Defend Behavior only) |
| AI Targeting | Defend Enemy | Designate the priority target when actively defending. Toggle between Closest Kart, Closest Player, or Closest AI. (Defend Behavior only) |
| AI Targeting | Speed Percent | When the kart is targeting a path, this setting determines its speed. Toggle between 0 and 100. (Path Target only) |
| AI Profile | Base Profile | Set the difficulty of the AI. Toggle between Default, Easy, Medium, Expert, or Hard. |
| Weapon Use | Target Bias | Determines the priority target when firing weaponators. Toggle between Neutral, AI, Only AI, Player, or Only Player. (Battle, Flee, Defend Behavior only) |
| Weapon Use | Item Aiming | Modify the driver’s base accuracy. Toggle between -100%, -66%, -33%, 0%, 33%, 66%, or 100%. (Battle, Flee, Defend Behavior only) |
| Weapon Use | Item Usage | Modify the driver’s inclination to use weaponators. Toggle between -100%, -66%, -33%, 0%, 33%, 66%, or 100%. (Battle, Flee, Defend Behavior only) |
| Abilities | Shield Usage | Modify the driver’s inclination to defend. Toggle between -100%, -66%, -33%, 0%, 33%, 66%, or 100%. (Battle, Goto Target, Flee, Defend Behavior only) |
| Abilities | Slapping | Modify the driver’s inclination to slap. Toggle between -100%, -66%, -33%, 0%, 33%, 66%, or 100%. (Battle, Grab Item, Drop Item, Goto Target, Flee, Defend, Roam Behavior only) |
| Abilities | Spinning | Modify the driver’s inclination to spin. Toggle between -100%, -66%, -33%, 0%, 33%, 66%, or 100%. (Battle, Grab Item, Drop Item, Goto Target, Flee, Defend, Roam Behavior only) |
| Abilities | Drifting | Modify the driver’s inclination to drift. Toggle between -100%, -66%, -33%, 0%, 33%, 66%, or 100%. (Battle, Grab Item, Drop Item, Goto Target, Flee, Defend, Roam Behavior only) |
| Abilities | Drift Boost | Modify the driver’s inclination to drift boost. Toggle between -100%, -66%, -33%, 0%, 33%, 66%, or 100%. (Battle, Grab Item, Drop Item, Goto Target, Flee, Defend, Roam Behavior only) |
| Driving | Steer Control | Modify the driver’s base steering control. Toggle between -100%, -66%, -33%, 0%, 33%, 66%, or 100%. (Battle, Grab Item, Drop Item, Goto Target, Flee, Defend, Roam Behavior only) |
| Driving | Speed Control | Modify the driver’s base speed control. Toggle between -100%, -66%, -33%, 0%, 33%, 66%, or 100%. (Battle, Grab Item, Drop Item, Goto Target, Flee, Defend, Roam Behavior only) |
| Common | Input Action | Toggle the input to On/Off or On and Expire. (Battle, Grab Item, Drop Item, Goto Target, Flee, Defend, Roam Behavior only) |
| Common | Expire After | Adjust how long the input is active after turning on. Toggle between 0.2 and 180 seconds (On and Expire Input Action only) |
Kart Actor Brain

The Kart Actor Brain is a director’s favorite tweaker. The tool lets you direct the perfect thespian, a driver who listens to every command and performs its scenes as you see fit.
Change the tweak settings to have the driver follow your carefully laid out path, hop in place or while moving, or just stand perfectly still. Tell the driver to be or not to be.
Kart Actor Brain Tweak Menu
| Type | Tweak | Effect |
|---|---|---|
| Behavior | Behavior | Select the AI’s overall actions. Toggle between Stop Idle, Jump, Follow Path, or Reset. |
| Behavior | Stationary | Set whether the kart moves or remains in place while jumping. (Jump Behavior only) |
| Behavior | Stop at Target | Set whether the AI stops at the end of the path. Toggle On or Off. (Follow Path Behavior only) |
| Behavior | Speed Percent | Determines how fast the kart moves through its path, set from 0 to 100. (Follow Path Behavior only) |
| Behavior | Requires Tag | Set if the AI requires a tag or not. Toggle On or Off. (Follow Path Behavior only) |
| Behavior | Reset To | Enter the label of the desired spawn point for the kart to reset at (Reset Behavior only) |
| Behavior | Play Reset Animation | Toggle On or Off. (Reset Behavior only) |
World Tweakers
Overseeing the “big picture” features and environments of your level, World Tweakers affect broad gameplay and environmental elements. Select the Tools Bag from the Popit, and scroll to the Gadgets page to find those blue-colored worldly tools under their own dedicated section. Use them to refine your level’s overall experience.
Color Correction Tweaker
For those thinking of making an old-fashioned silent picture level, look no further than the Color Correction Tweaker to cover the level in a black & white hue. The tool adds overlays of color themes onto your level. Look through all of them to find the right filter for your level.

Color Correction Tweaker Tweak Menu
| Type | Tweak | Effect |
|---|---|---|
| Color Correction | Color Correction | Apply a color correction filter. Choose from None, Sepia, Lomo, Black & White, Bleach, Eight Millimeter, Inverted, Red Pop, or Mosey. |
| Color Correction | Opacity | Adjust the color correction filter’s strength. Toggle between 0% to 100%. |
| Trigger | Shape | Change the shape of activation area to a Sphere or Cube. |
| Trigger | Max Range | Increase or decrease the trigger range from 1.0 to 1000. |
| Transistion Time | Fade In Time | Adjust the fade in duration from 0.0 to 100 seconds. |
| Transistion Time | Fade Out Time | Adjust the fade in duration from 0.0 to 100 seconds. |
Game Ender

Races all have to have a beginning and an end, but the journey in between those inevitable points doesn’t have to be predictable. Break away from the confines of the three-lap race with the Game Ender Tweaker. Once activated, the game sends all players in the level to the scoreboard. The requirements you can set to end the level are endless. Connect anything—switches, gadgets, and maybe some genius level logic—to its input to create a fascinating end goal.
Game Ender Tweak Menu
| Type | Tweak | Effect |
|---|---|---|
| Behavior | Success | Toggle whether activating Game Ender ends game in success or failure. |
| Behavior | Failure Message | Enter a message for the loser when Success Behavior is toggled Off. |
| Behavior | AI Can Trigger | Toggle whether an AI driver can activate the Game Ender. |
Score Giver

Score Bubbles, tricks, and good ol’ Weaponator attacks are great for stockpiling points, but pulling off a crazy objective or goal can make a driver really feel they have earned something substantial. With the Score Giver Tweaker, you can reward players for doing just about anything. Connect the Score Giver to a switch in a well-hidden shortcut or to a checkpoint. You can set it to reward the player with modest or astronomical points.
Score Giver Tweak Menu
| Type | Tweak | Effect |
|---|---|---|
| Scorer | Score | Set the points earned or deducted when activated from -9999 to 9999. |
| Scorer | Input Action | Adjust the input’s activation behavior, from One Shot, Every Second, Scaled Every Second, or One Shot Scaled. |
| Scorer | Scorer | Toggle whether Just You or All Players can activate the Score Giver. |
| Scorer | Team | Assign the Score Giver reward only Team 1-8 or Any Team. |
| Multiplier | Multiplier Contribution | Adjust the Score Giver’s role during a multiplier. Choose from Just Score, Score Bubbles Worth, or One Multiplier. |
| Multiplier | Multiplier Timer | Set the length of time the multiplier lasts from 0.0 to 300. |
Prize Giver

Prize Bubbles may be the Craftverse’s preferred gift delivery system, but it’s not the only one. Satisfy that gift-giving compulsion with the Prize Giver world tweaker. Connect an output to the tweaker to reward players with prizes. You can set it up to truly be a gift that keeps on giving.
Prize Giver Tweak Menu
| Type | Tweak | Effect |
|---|---|---|
| Prize | Prize | Assign a prize to be awarded to players who activate the Score Giver. |
Audio Tweaker

The Audio Tweaker can alter sounds or music in your level when activated. You can use this to create unique audio cues throughout your level.
Place an Audible Archie somewhere on the track. Switch out the sound gadget attached to Archie with a music track of your choice. Attach the Audio Tweaker to Archie, open the Audio Tweaker’s tweak menu, and adjust the radius to properly fill the area around him. Before you close the tweak menu, increase the background music volume, and add a little reverb.

Now whenever any player drives by Audible Archie, the background music volume increases. Decorate Archie with a boom box to show he’s the guy carrying some phat beats.
Audio Tweaker Tweak Menu
| Type | Tweak | Effect |
|---|---|---|
| Trigger | Shape | Change the shape of activation area to a Sphere or Cube. |
| Trigger | Max Range | Increase or decrease the activation radius from 1 to 500. |
| Trigger | Trigger Type | Determines if the tweaker gets switched on and off or is triggered. Toggle to On/Off, or Trigger. |
| Trigger | Only Activate Once | Set whether the Audio Tweaker activates only once. Toggle On or Off. |
| Transition Time | Transition Time | Set the amount of time before the sound is affected. Toggle between 0.1 to 500 seconds. |
| Audio | SFX Volume | Adjust sound effect volume level. Toggle between 0% and 100% |
| Audio | Background Volume | Adjust background volume level. Toggle between 0% and 100% |
| Audio | Music Volume | Adjust music volume level. Toggle between 0% and 100% |
| Audio | Dialogue Volume | Adjust dialogue volume level. Toggle between 0% and 100% |
| Audio | Kart Volume | Adjust kart volume level. Toggle between 0% and 100% |
| Audio | Gameplay Volume | Adjust gameplay volume level. Toggle between 0% and 100% |
| Audio | Collision Volume | Adjust collision volume level. Toggle between 0% and 100% |
| Audio | Disable Automatic Gameplay Mixing | Toggle the gameplay mixer On or Off. |
| Reverb Settings | Reverb Settings | Determine the style of the reverb effect applied to the audio. Toggle between None, Padded Cell, Bathroom, Room, Hallway, Sewer Pipe, Cave, Concert Hall, Hangar, Forest, or Underwater. |
| Reverb Settings | SFX Reverb Send | Adjust the degree of reverb applied to sound effects. Toggle between 0% and 100% |
| Reverb Settings | Music Reverb Send | Adjust the degree of reverb applied to the music. Toggle between 0% and 100% |
| Reverb Settings | Dialogue Reverb Send | Adjust the degree of reverb applied to the dialogue. Toggle between 0% and 100% |
| Filter Settings | SFX Filter Amount | Adjust how much sound effects are filtered. Toggle between 0% and 100% |
| Filter Settings | Music Filter Amount | Adjust how much the music is filtered. Toggle between 0% and 100% |
| Filter Settings | Dialogue Filter Amount | Adjust how much dialogue is filtered. Toggle between 0% and 100% |
| Filter Settings | Kart Filter Amount | Adjust how much the kart’s sound effects are filtered. Toggle between 0% and 100% |
Lighting Tweaker

The Lighting Tweaker functions like the Audio Tweaker, but instead an audio alteration, the tool adds mood lighting to any area. The Lighting Tweaker changes the lighting settings within a certain area in a level. Use it to change parts of a course from day to night or bathe Archie in holy light.
Lighting Tweaker Tweak Menu
| Type | Tweak | Effect |
|---|---|---|
| Trigger | Shape | Change the shape of activation area to a Sphere or Cube. |
| Trigger | Max Range | Increase or decrease the activation radius from 1.0 to 500. |
| Trigger | Wait Until Lap | Set the lap number to activate the tweaker. Adjust from 1 to 99. |
| Trigger | Only Player Affected | Choose whether only the player or all drivers view the lighting tweak. |
| Trigger | Team | Choose whether a specific Team 1-8 or Any Team can trigger the tweaker. |
| Transition Time | Transition Time | Set the amount of time before the lighting effect is activated. Toggle between 0.0 to 1000 seconds. |
| Sun Color | Red | Adjust the sun’s red color level. Toggle between 0.0 and 2. |
| Sun Color | Green | Adjust the sun’s green color level. Toggle between 0.0 and 2. |
| Sun Color | Blue | Adjust the sun’s blue color level. Toggle between 0.0 and 2. |
| Sun Color | Brightness | Adjust the sun’s brightness. Toggle between 0.0 and 20. |
| Ambient Color | Ambient Red | Adjust the ambient light’s red color level. Toggle between 0.0 and 2.5. |
| Ambient Color | Ambient Green | Adjust the ambient light’s green color level. Toggle between 0.0 and 2.5. |
| Ambient Color | Ambient Blue | Adjust the ambient light’s blue color level. Toggle between 0.0 and 2.5. |
| Ambient Color | Ambient Brightness | Adjust the ambient light’s brightness. Toggle between 0% and 100% |
| Fog Color | Fog Red | Adjust the fog’s red color level. Toggle between 0.0 and 1. |
| Fog Color | Fog Green | Adjust the fog’s green color level. Toggle between 0.0 and 1. |
| Fog Color | Fog Blue | Adjust the fog’s blue color level. Toggle between 0.0 and 1. |
| Fog Color | Fog Brightness | Adjust the Fog’s brightness. Toggle between 0% and 100% |
| Fog Color | Fog Start Distance | Change how much fog is seen off in the distance. Toggle between 0 and 2000. |
| Fog Color | Fog Distance | Adjust the distance between the fog and the driver. Toggle between 0 and 10000. |
| Fog Color | Fogginess | Adjust the fog’s thickness. Toggle between 0% and 100% |
Water Level Tweaker

They say the moon causes the tides to fall and rise, but here in the Craftverse responsibility for that phenomenon falls squarely on your shoulders. The Water Level Tweaker can alter the water settings in your level when activated.
Attach the Water Level Tweaker anywhere on the level, open its tweak menu, and adjust the Water Level option to increase or decrease it. Attach this world tweaker to a switch or gadget to create a road that was buried at sea.
Game Ender Tweak Menu
| Type | Tweak | Effect |
|---|---|---|
| Water Level | Water Level | Set the water level from 0.0 to 50. |
| Transition Time | Transition Time | Set the amount of time before the Water Level Tweaker is activated. Toggle between 0.0 and 600 seconds. |
Water Color Tweaker

Without the Water Color Tweaker, the water in your levels remain pristine. While that is perfect for most levels, sometimes adding another tone to the water better reflects the surrounding environment.
Attach the Water Color Tweaker to the body of water you want to alter. Open the Water Color Tweak Menu and scroll down to the Scatter and Diffuse sections. Pick a color and change the brightness in each section. The affected radius can also be adjusted to accommodate just that body of water or expanded to the whole level. Use the tweaker to create green colored marshes or grey polluted rivers.
Water Color Tweaker Tweak Menu
| Type | Tweak | Effect |
|---|---|---|
| Trigger | Shape | Change the shape of activation area to a Sphere or Cube. |
| Trigger | Max Range | Increase or decrease the trigger range from 1.0 to 500. |
| Trigger | Wait Until Lap | Set the lap number to activate the Water Color Tweaker. Adjust from 1 to 99. |
| Trigger | Only Player Affected | Choose whether only the player or all drivers view the water color effect. |
| Trigger | Team | Choose whether a specific Team 1-8 or Any Team can trigger the tweaker. |
| Transition Time | Transition Time | Set the amount of time before the lighting effect is activated. Toggle between 0.0 and 500 seconds. |
| Scatter Color | Color | Select a color box to change the water’s scatter color. |
| Scatter Color | Brightness | Adjust the scatter color’s brightness level. Toggle from 0.0% to 100%. |
| Diffuse Color | Color | Select a color box to change the water’s diffuse color. |
| Diffuse Color | Brightness | Adjust the diffuse color’s brightness level. Toggle from 0.0% to 100%. |
Cinematic Tutorials
Once you’re satisfied that your level’s gameplay is fundamentally sound, consider adding a little more excitement to your level by including some cutscenes. To add a back-story to your level, open the Tools Bag and scroll all the way down to the bottom of the Gadgets page. The gadgets in the bottom two sections, Creature Pieces and Cameras, can help you direct your very own movie. Get those cameras ready, it looks like your sack person is ready for a close up.
Game Camera
The default camera view behind your sack person’s kart is great for keeping that kart under control, but the inner director within is crying for some new, dynamic angles. Break up the regular routine with the Game Camera gadget. The Game Camera can be placed on any object in the level or onto a spawn point. Attach them to play around with the camera angles in your level. The Game Camera is found in the Tools Bag on the Gadgets page under the Cameras section.
Place the gadget to an object to set up a static camera angle. Attach the gadget to a spawn point to override the default game camera. You can set the Game Camera to look down on the track to create an overhead view of the race.

To set up the camera’s position, open the Game Camera’s Tweak menu and select Angle and Zoom from the Actions section. Move the camera around the level to find a suitable angle. Once you have found a good spot for the camera, open the tweak menu to further adjust the camera settings.

Angle and Zoom Tweak Controls
| Button | Action |
|---|---|
| Left Stick [left]/[right] | Move Camera |
|
Left Stick
/
|
Zoom in and out. |
|
Directional buttons
/
|
Roll camera. |
|
,
|
Lowers and lifts the camera. |
|
|
Set camera position |
|
+ Right Stick
|
View target distance |
Game Camera Tweak Menu
| Type | Tweak | Effect |
|---|---|---|
| Actions | Angle & Zoom | Select this option to enter the camera view and set the camera’s position. |
| Timing | Return to Race Camera Time | Set the time it takes to return to the default race camera. Toggle between 0.1 and 1,000 seconds. |
| Timing | Transition Time | Set the time it takes to transition between camera angles. Toggle between 0 and 100 seconds. (Pan Transition Type only) |
| Timing | Minimum Display Time | Set the minimum duration of the camera’s angle. Toggle between 0.1 and 1,000 seconds. |
| Movement | Transition Type | Change the transition style to Cut, Soft Pan, or Hard Pan. |
| Movement | Target Type | Sets whether the camera ‘s focus is on a Kart or Gadget. |
| Movement | Label | Add a description to a Kart. (Kart Target Type only) |
| Movement | Local Space | Determines the manner in which the camera follows its target’s motion. Toggle between Follow Position and Rotation, Follow Position Only, or Follow Position and Spin Only. |
| Movement | Camera Shake | Adjust the strength of the camera shake from 1% to 100%. |
| Movement | Springiness | Adjust the degree of the camera’s springiness from 1% to 100%. |
| Effects | Depth of Field | Adjusts the camera’s focus from 1% to 100% |
| Effects | Audio Listener | Change whether sound effects are heard from the Camera or the Kart. |
| Trigger | Shape | Change the shape of trigger range to a Sphere or Cube. |
| Trigger | Max Range | Increase or decrease the activation radius from 0.1 to 500. |
| Visuals | Label | Add a name to the camera. |
Movie Camera

The Hollywood cousin to the Game Camera gadget, the Movie Camera gadget is like its racing relative but with a few key differences. The Movie Camera is set up similarly to the Game Camera, but outputs its video with cinematic black bars on the top and bottom of the screen. Look for the Movie Camera in the Tools Bag on the Gadgets page under the Cameras section.
When active, the Movie Camera forces all players to focus on what it’s looking at. Mainly for use with prerace/postrace cutscenes, connect the Movie Camera gadget to the prerace or postrace inputs on the Scoreboard to set up some cool scenes that set up your level.
Movie Camera Tweak Menu
| Type | Tweak | Effect |
|---|---|---|
| Actions | Angle & Zoom | Select this option to enter the camera view and set the camera’s position. |
| Timing | Return to Race Camera Time | Set the amount of time that elapses when transitioning from the Movie Camera to the default race camera. Toggle between 0.0 and 1000 seconds. |
| Timing | Transition Time | Set the length time it takes for the camera to transition. Toggle between 0.0 to and 1000 seconds, or set to Infinite. (Pan Transition Type only) |
| Timing | Hold Time | Set the duration the camera is active after the transition. Toggle 0.0 and 1000 seconds, or set to Infinite. |
| Movement | Transition Type | Change the transition style to Cut, Soft Pan, or Hard Pan. |
| Movement | Target type | Sets whether the camera follows a Kart or Gadget. |
| Movement | Label | Select target Kart’s label. |
| Movement | Local Space | Determines the manner in which the camera follows its target’s motion. Toggle between Follow Position and Rotation, Follow Position Only, or Follow Position and Spin Only. |
| Movement | Camera shake | Adjust the strength of the camera shake from 1% to 100% |
| Movement | Springiness | Adjust the strength of the camera’s springiness from 1% to 100%. |
| Effects | Fade | Add a fade to the scene. Toggle between Fade In, Fades Out, Fade In and Out, or Both. |
| Effects | Fade Color | Set the fade color to White or Black. |
| Effects | Depth of field | Adjusts the camera’s focus from 1% to 100%. |
| Effects | Audio Listener | Change whether sound effects are heard from the Camera or the kart. |
| Trigger | Skippable | Toggle whether the scene can be skipped. |
| Trigger | Disable Controller | Toggles whether players can input button commands while the camera is active. |
| Visuals | Label | Add a name to the camera. |
Camera Shake Tweaker

Want an earthquake to shake up a part of your track? You can do that visually with the Camera Shake Tweaker, a clever tweaker that shakes the camera in a specific area. It’s found alongside the Game and Movie Cameras in the Tools Bag on the Gadgets page under the Cameras section.
Place the Camera Shake Tweaker onto an object and open its Tweak Menu to adjust its trigger range. When a driver gets close enough to the tweaker, the camera shakes.
Camera Shake Tweaker Menu
| Type | Tweak | Effect |
|---|---|---|
| Visuals | Intensity | Select Adjust the strength of the camera shake from 0% to 100% |
| Trigger | Shape | Set the shape of activation area to be a Sphere or Cube. |
| Trigger | Max Range | Increase or decrease the activation radius from 1.0 to 500. |
Movie Spawn Point

The Movie Spawn Point has exactly the same settings and functions of a regular spawn point. The only difference is that karts only reset from a Movie Spawn Point when a Movie Camera is facing it. You can find it in the Tools Bag on the Gameplay Kits page under the Level Kit section.
To give your sack person proper motivation, place a Race Brain, Kart Actor Brain, or Character Expression kart tweaker on the Movie Spawn Point to stage a scene in front of the camera. Now that’s cinematic magic!
Movie Spawn Point Tweak Menu
| Type | Tweak | Effect |
|---|---|---|
| Actions | Player Type | Switch the type of driver that spawns here. Toggle between Any, Players Only, Player or Sackbot, or Hoard Only. |
| Actions | Team | Determines if only a specific team can spawn here. Choose from Team 1-8 or Any Team. |
| Actions | Human Priority | Give priority to a particular human player. Set to any player or to a specific player number. (Players Only Player Type only) |
| Actions | Label | Add a memorable description. |
Magic Mouth

The Magic Mouth gadget displays text on the screen. It’s the sole occupant of the Creature Pieces section on the Gadgets page of the Tools Bag. Activated either by proximity or with a switch, you can use this handy gadget in a variety of ways. Set one down to inform drivers of certain goals, or use it to tell a brief story in a cutscene. The voice is yours!
Magic Mouth Tweak Menu
| Type | Tweak | Effect |
|---|---|---|
| Text | Text | Enter the text to be displayed on screen here. |
| Speech | Voice | Give the Magic Mouth a voice to accompany the on screen text. Toggle between Gibberish, Recorded, or None. |
| Speech | Choose Voice | Set a voice from a list. (Gibberish Voice only) |
| Speech | Record Voice | Record a voice track. This requires a compatible USB microphone to be connected to the PlayStation 3. |
| Speech | Enable Ducker | Enabling this lowers the volume of other sounds while the Magic Mouth is playing. (Gibberish or Recorded Voice only) |
| Speech | Volume | Adjust the voice volume from 0.0% to 100%. (Gibberish or Recorded Voice only) |
| Speech | Modify | Adjust the voice’s pitch from 0.1 to 12. (Gibberish or Voice selected only) |
| Speech | Position | Change whether the sound is heard in throughout the level (2D), or only when a player is near it (3D). (Gibberish or Recorded Voice selected only) |
| Trigger | Shape | Change the trigger range shape to either a Cube or Sphere. |
| Trigger | Max Range | Adjust the size of the trigger range. Toggle between 1.0 and 500. |
| Trigger | Input Action | Toggle whether the Magic Mouth activates only once, or is set to on/off. |
| Timing | Hold Time | Set the duration the Magic Mouth is activated. Toggle between 0.0 to 100 seconds, or set to Infinite. |
| Timing | Minimum Display Time | Set the minimum amount of time the text appears on the screen. Toggle between 0.0 and 60 seconds. |
| Visuals | Display Type | Determines the shape of the speech bubble. Toggle between Round and Square. |
| Visuals | Subtitles | Enable or disabled the display |
| Actor | Actor | Give the actor a name. |
| Actor | Display Actor | Toggle whether the actor is visible or not. |
HUD
As your players burn up the track, there is plenty of information on the screen to tell them what’s what. All the HUD (head up display) elements can be modified: the counters, meters, and doodads can be moved, or removed, from the screen to fit your track needs. Open your Tools Bag and head over to the HUD Widgets page to view all the available HUD Widgets. There are two types of widgets—general HUD Widgets and Custom HUD widgets.
General HUD Widgets
| Widget | Function |
|---|---|
| Player Score | This bubble displays how many points a player has earned. |
| Weapon Well | A small box that displays an equipped Weaponator. |
| Race Timer | Logs the time during gameplay based on the level’s time settings. |
| Lap Counter | Displays the current lap and total number of laps in the race. |
| Lap Timer | Displays your lap time at the end of each lap. |
| Position | Displays your current position. |
| Minimap | A small map of the race track. |
| Hit Streak Flasher | Informs players when they have an active hit streak. |
| Hit Info Flasher | Indicates on screen who attacks you, who you attack, or who you defend against. |
| Weapon Incoming | Appears on screen to inform you of incoming weapons and also when to defend. |
| Leaderboard | Displays the leaders in the level. |
| Warning Group | Warns when the kart is about to be reset for illegal shortcuts and out of bounds Off Track driving. |
| Score Countdown | This score counter degrades as the race goes on. These bonus points are added to your total score at the end of the race. |
Custom Widgets
If the general HUD Widgets aren’t making the grade, scroll to the bottom of the HUD Widgets page and check out the Custom Widgets. Only Custom HUD Widgets have tweak options that can be customized to fit any scenario in your level. To open the Tweak Menu, highlight a Custom Widget and press
.
Dial: The dial is best served to gauge things like speed, fuel, and other measurable things.
Flasher: Like the Hit and Streak Flasher, this widget splashes text onto the screen, but the contents of the message are up to you!
Meter: Half empty or half full, this widget is best served when paired with sensors that output a percentage.
Counter: Displays outputs in numerical form, in numbers, or percentages.
Sticker Frame: The Craftverse literally lets you decorate anything with stickers, even your screen!
Text Box: Display level objectives, goals, or helpful pop-up tips.
Note: If the Text Box doesn’t pop out enough for your tastes, try the Note, complete with a nice paper background.
Timer: Bring tension to any level with a good ol’ timer.
Custom Widget Tweak Menu
| Type | Tweak | Effect |
|---|---|---|
| Sticker | Sticker | Choose a sticker to decorate the game screen. (Sticker Frame Widget only) |
| Note | Display Type | Change the shape of the note to Square, or Round. (Note Widget only) |
| Properties | Orientation | Toggle between a Horizontal, or Vertical orientation for the widget. |
| Properties | Scale | Adjust the size of the widget from 0.5 to 2. |
| Properties | Shared | Determines if Each Player Has Their Own widget or if it is Shared For All Players. |
| Properties | Style | Toggle between a positive or negative flasher. (Flasher Widget only) |
| Properties | Text Alignment | Align the text to the Center, Right, or Left of the box. (Text Box Widget only) |
| Properties | Format | Toggle between a Number, or Time based timer. (Timer Widget only) |
| Color | Color | Select a color box to change the widget’s color. |
HUD Tweaker

Once you have placed a Custom HUD Widget onto your screen, use the HUD Tweaker in the World Tweakers section in the Tools Bag to set up and customize those HUD elements. Attach the HUD Tweaker to an object to set up a Custom HUD for all players, or attach it to a spawn point so the Custom HUD appears for that player only. Once attached, press
to open its tweak menu. With this much power over the HUD, you can set up a game screen busier than a cable news station’s broadcast.
HUD Tweaker Tweak Menu
| Type | Tweak | Description |
|---|---|---|
| HUD Type | HUD Type | Select the HUD element to customize. Toggle between Meter, Dial, Counter, Range Counter, Percent Counter, Timer, Sticker Frame, Text Box, Flasher, Countdown Score, Note, Minimap, Race Timer, Leaderboard, Radar, Hit Streak Flasher, Hit Info Flasher, Position Indicator, Incoming, Weapon Indicator, Grapple Callout, Weapon Well, Score Counter, Lap Counter, and Lap Timer. |
| HUD Type | HUD Widget | Load the Custom HUD Widget to be tweaked. |
| HUD Type | Input Action | Set whether the input is activated in increments or by position. (Range Counter HUD Type only) |
| HUD Type | Target Count | Set the target value between 1 to 10,000. (Range Counter HUD Type only) |
| HUD Type | Input Action | Toggle the HUD element to On/Off or Timer. (Sticker Frame, Text Box, Flasher, and Note HUD Type only) |
| HUD Type | Target Time | Set the Timer’s run time. (Timer, Sticker Frame, Text Box, Flasher, and Note HUD Type only) |
| HUD Type | Text | Enter the HUD text. (Text Box, Flasher, and Note HUD Type only) |