
Gears of War Guide Locust Horde
Locust Horde
Drone
| Casual | Hardcore | Insane |
|---|---|---|
| 250 HP | 550 HP | 650 HP |
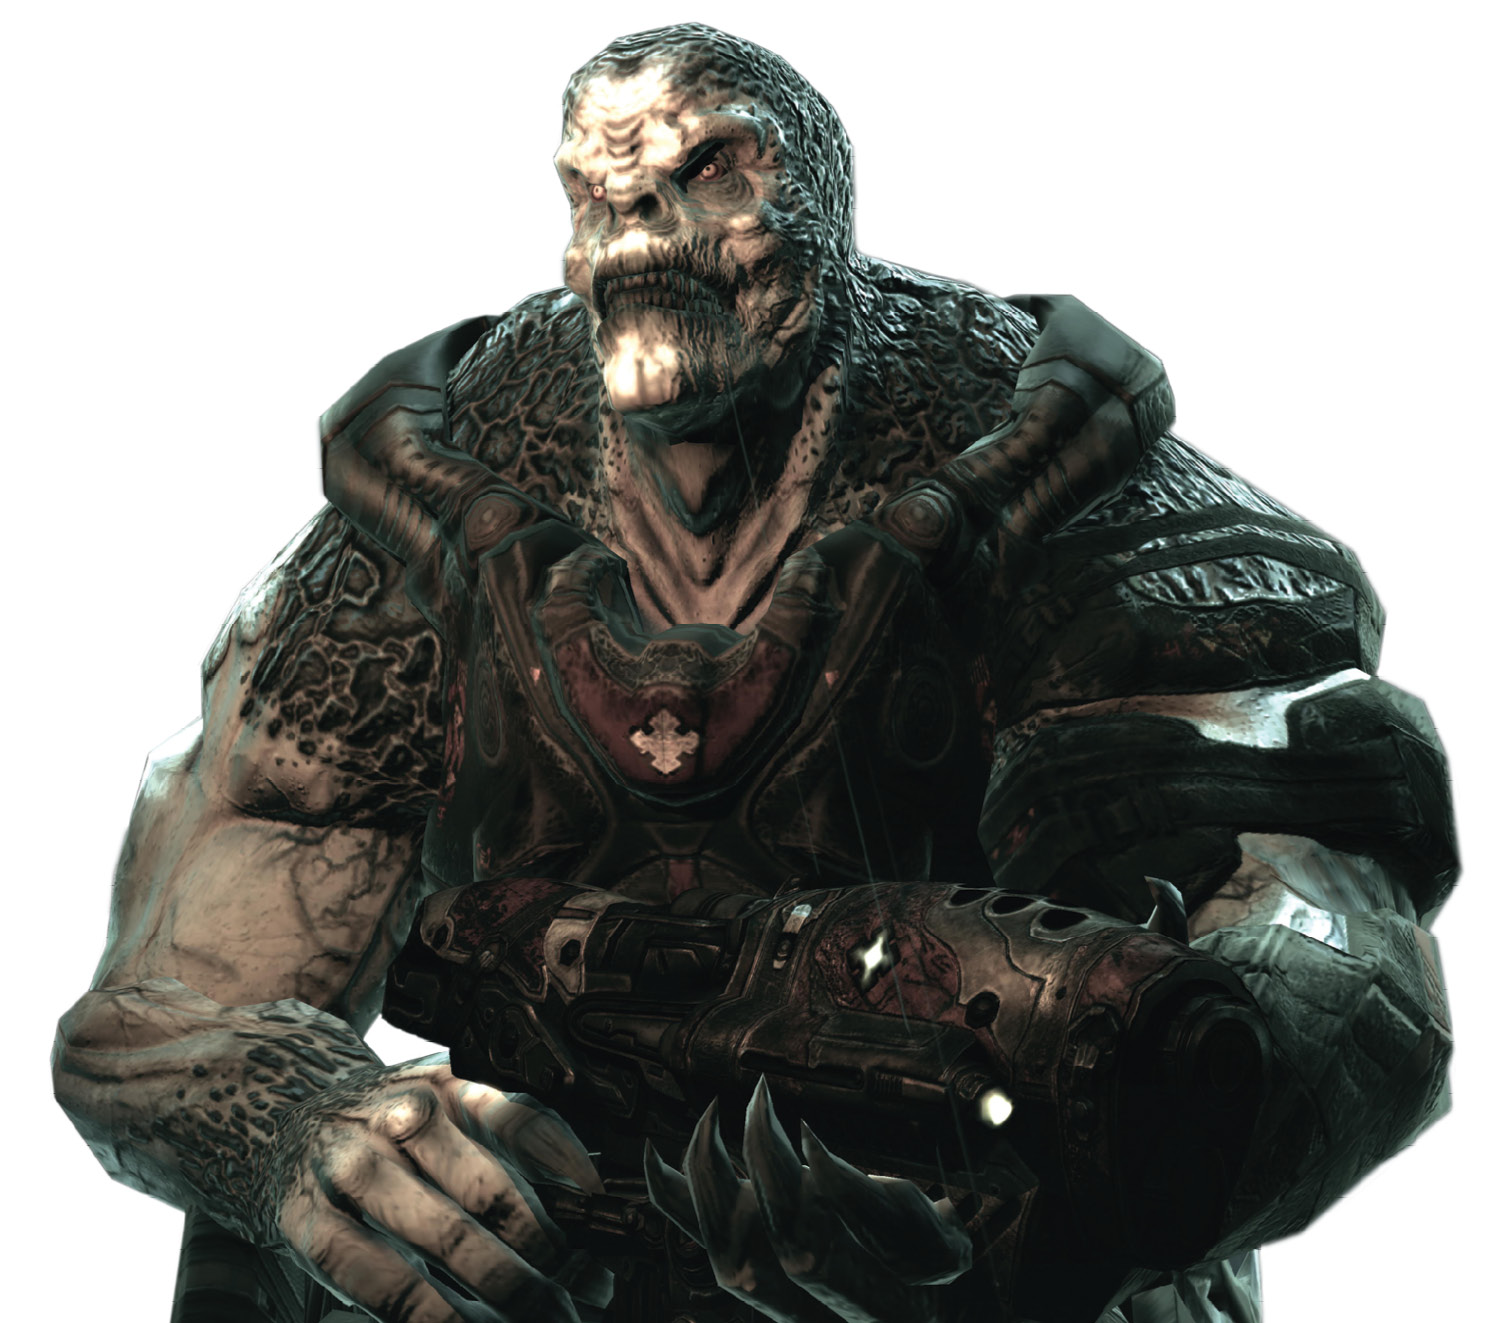
Locust Drones are the most common enemies in Gears of War. They generally attack in groups of three or four and rely heavily on the Hammerburst and Lancer weapons. Drones use cover and try to keep a safe distance from their foes. As their name implies, Drones are among the less intelligent of the Locust Horde and rarely seek to flank or use sophisticated battle tactics. They prefer to attack en masse and hope their sheer numbers win the day.
You can deal with Drones any number of ways, depending on how many there are and the situation. It’s often very easy to flank around a Drone’s side and get a clean shot or a chainsaw opportunity. Despite their relative shortcomings, Drones are accurate marksmen. It’s imperative to use cover when you deal with them, else you’ll get riddled with gunfire.
Grenadier
| Casual | Hardcore | Insane |
|---|---|---|
| 250 HP | 550 HP | 650 HP |
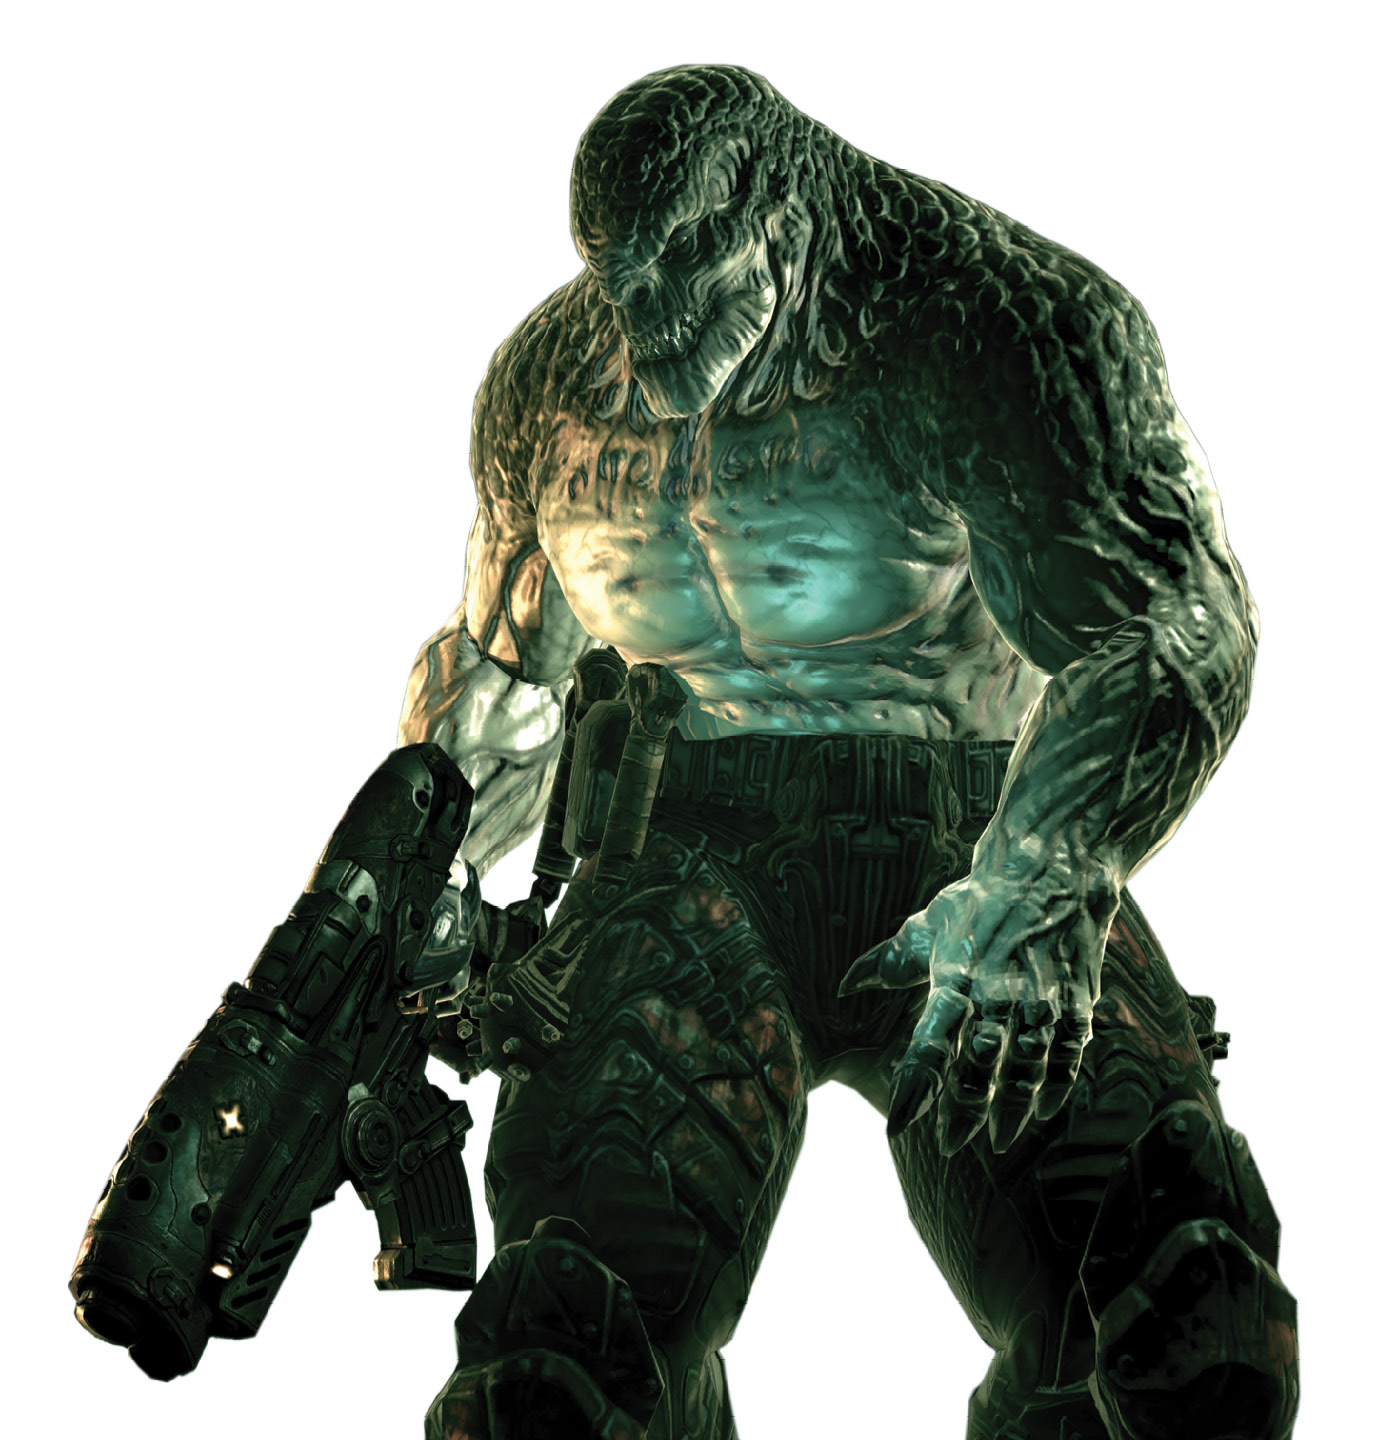
These burly creatures are far more aggressive than the Drones. Armed with the Gnasher and Frag Grenades, they can inflict severe damage from close range. Grenadiers aren’t the most intelligent creatures, and they occasionally rush forward, hurdling objects in their path and foregoing cover in their rush to kill.
The element of surprise definitely works well for Grenadiers, as they often attack alongside other enemies, such as Drones, Boomers, or Wretches. They appear suddenly and move quickly to get within blasting range. The key to besting them is to recognize their intent and either toss a Frag Grenade in their path or retreat to cover and use the Lancer or Longshot’s range to your advantage.
Sniper
| Casual | Hardcore | Insane |
|---|---|---|
| 75 HP | 150 HP | 150 HP |
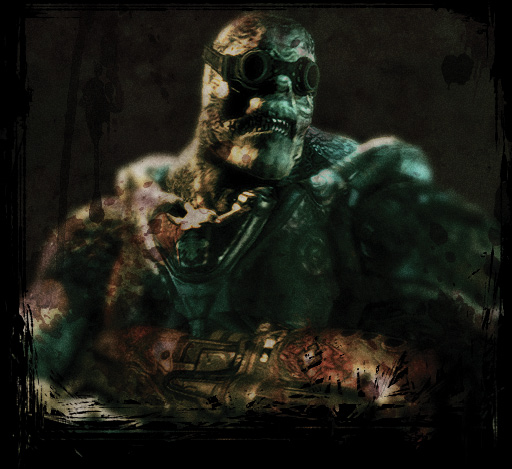
Snipers are very similar to Drones in appearance, but they have far less health and they never engage Marcus at close-range. Instead, Snipers seek out a distant vantage point from which they can shoot with little chance of being seen. Snipers are rather rare, but they are not to be taken lightly. Their bullets pack a terrific punch, and a single head-shot can be enough to down Marcus or an ally. Snipers often occupy the windows or ledges of abandoned buildings.
Snipers are masters of using cover. Combine that with their distant vantage points and you get an enemy that’s very difficult to eliminate without using the Longshot weapon. While you can kill some Snipers with the Lancer or even a Frag Grenade, many require accurate sniping. Still, there are other ways to eliminate Snipers, such as using the environment to your advantage. You’ll get the chance to unleash the Kryll on them (by shooting out nearby lights). Other methods include detonating nearby propane tanks or collapsing concrete slabs onto them.
Boomer
| Casual | Hardcore | Insane |
|---|---|---|
| 1750 HP | 2500 HP | 2500 HP |
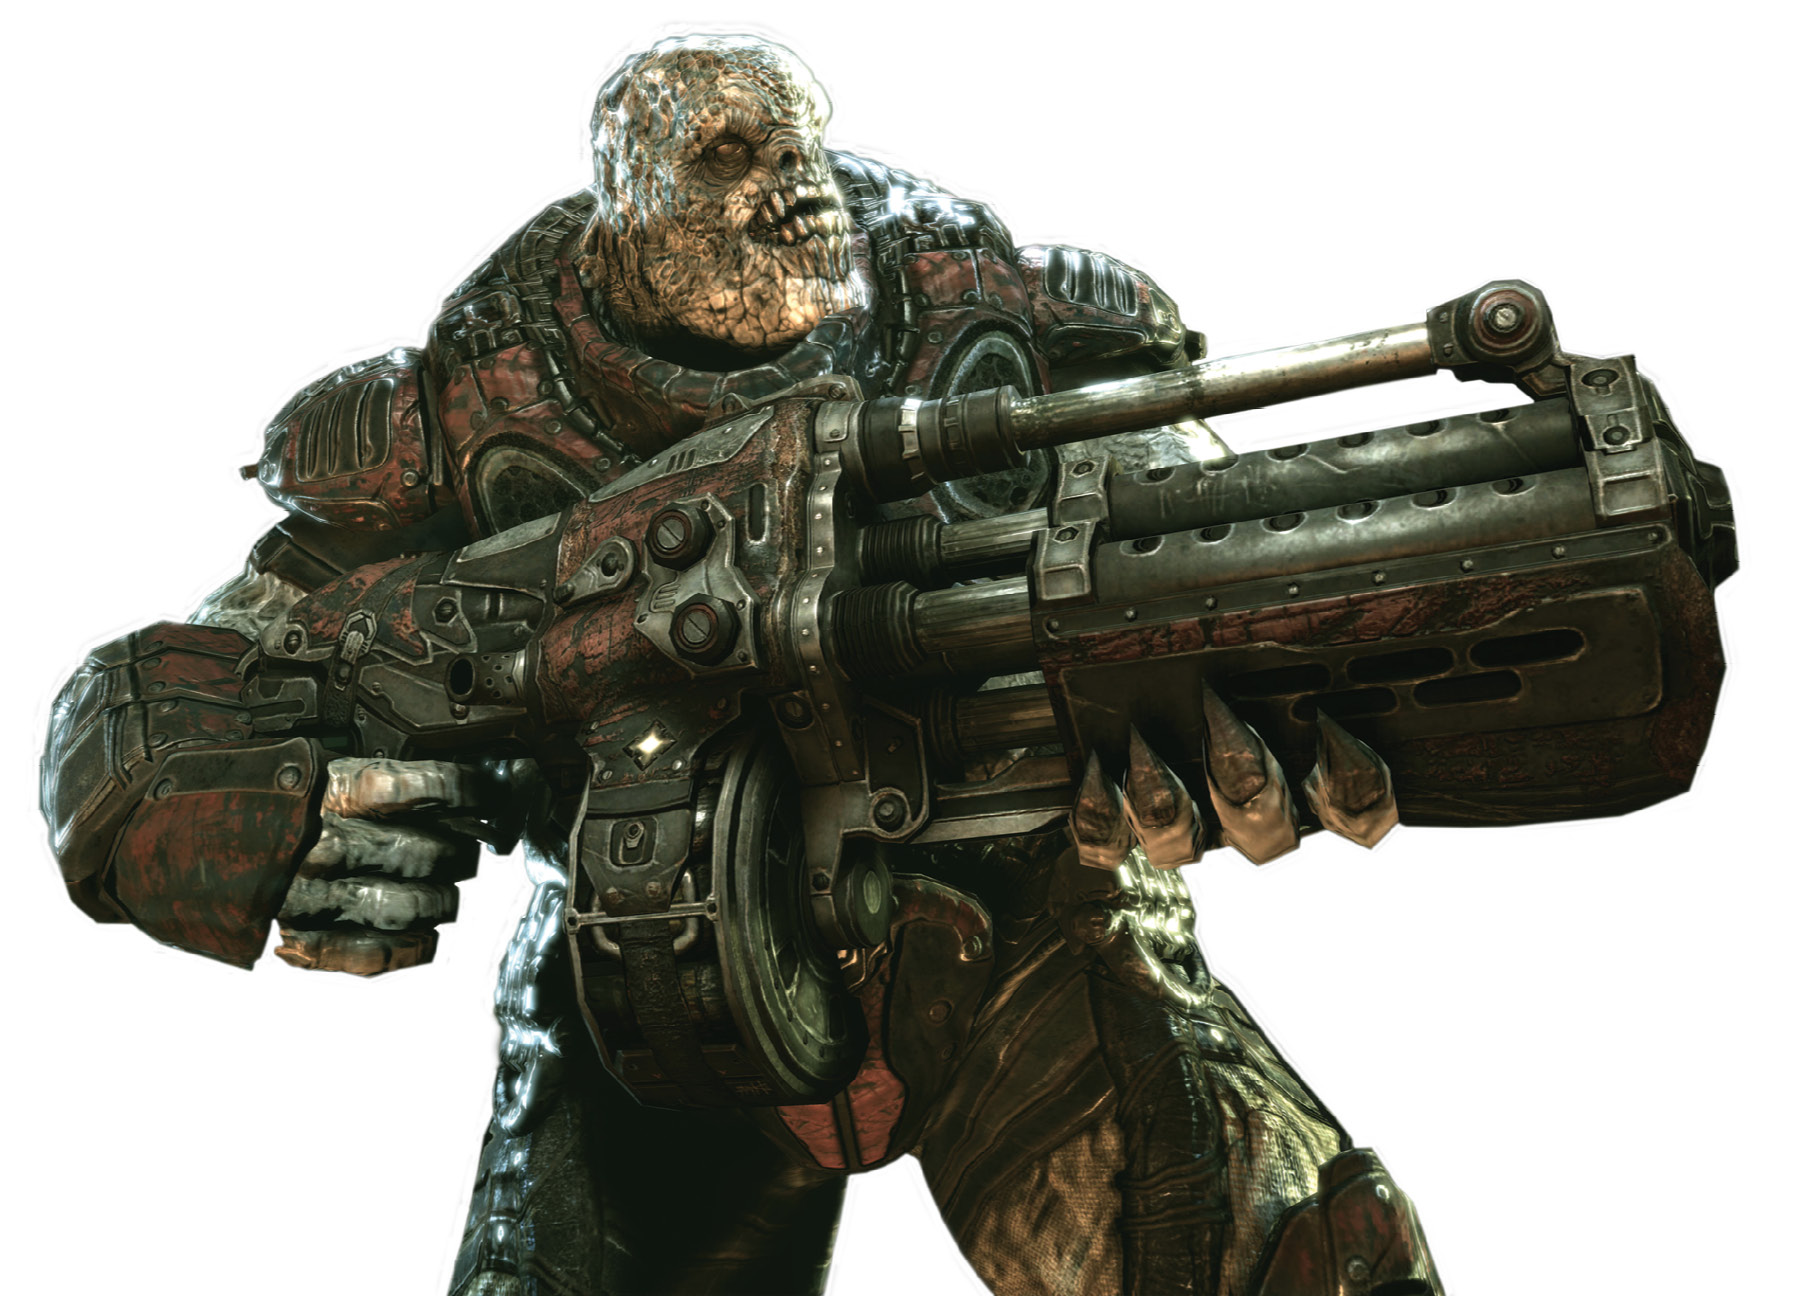
No army is complete without a tank, and the Locust Horde is no exception. Enter the Boomer! The Boomer is a hulking, slow-moving beast with an amazing resistance to damage and firepower befitting its size. But the Boomer is far from invincible. This rather dimwitted creature is unconcerned with cover, and he even prefaces each Boomshot blast by yelling, “Boom!” Fortunately for Marcus and his allies, Boomers rarely appear in groups.
Once you spot a Boomer, take cover immediately. From behind cover, lob a Frag Grenade toward the Boomer to weaken him. Continue attacking until he yells “Boom!” Then duck or dive out of the way—as long as the Boomshot’s projectile doesn’t detonate directly next to Marcus, he should escape without suffering significant splash damage. Focus your team’s firepower on the Boomer to down him as quickly as possible. Lastly, resist the urge to attack the Boomer with a melee attack. The chainsaw bayonet does not work against this massive foe, and getting hit with his crushing blow is almost certain death.
Theron Guard
| Casual | Hardcore | Insane |
|---|---|---|
| 350 HP | 800 HP | 900 HP |
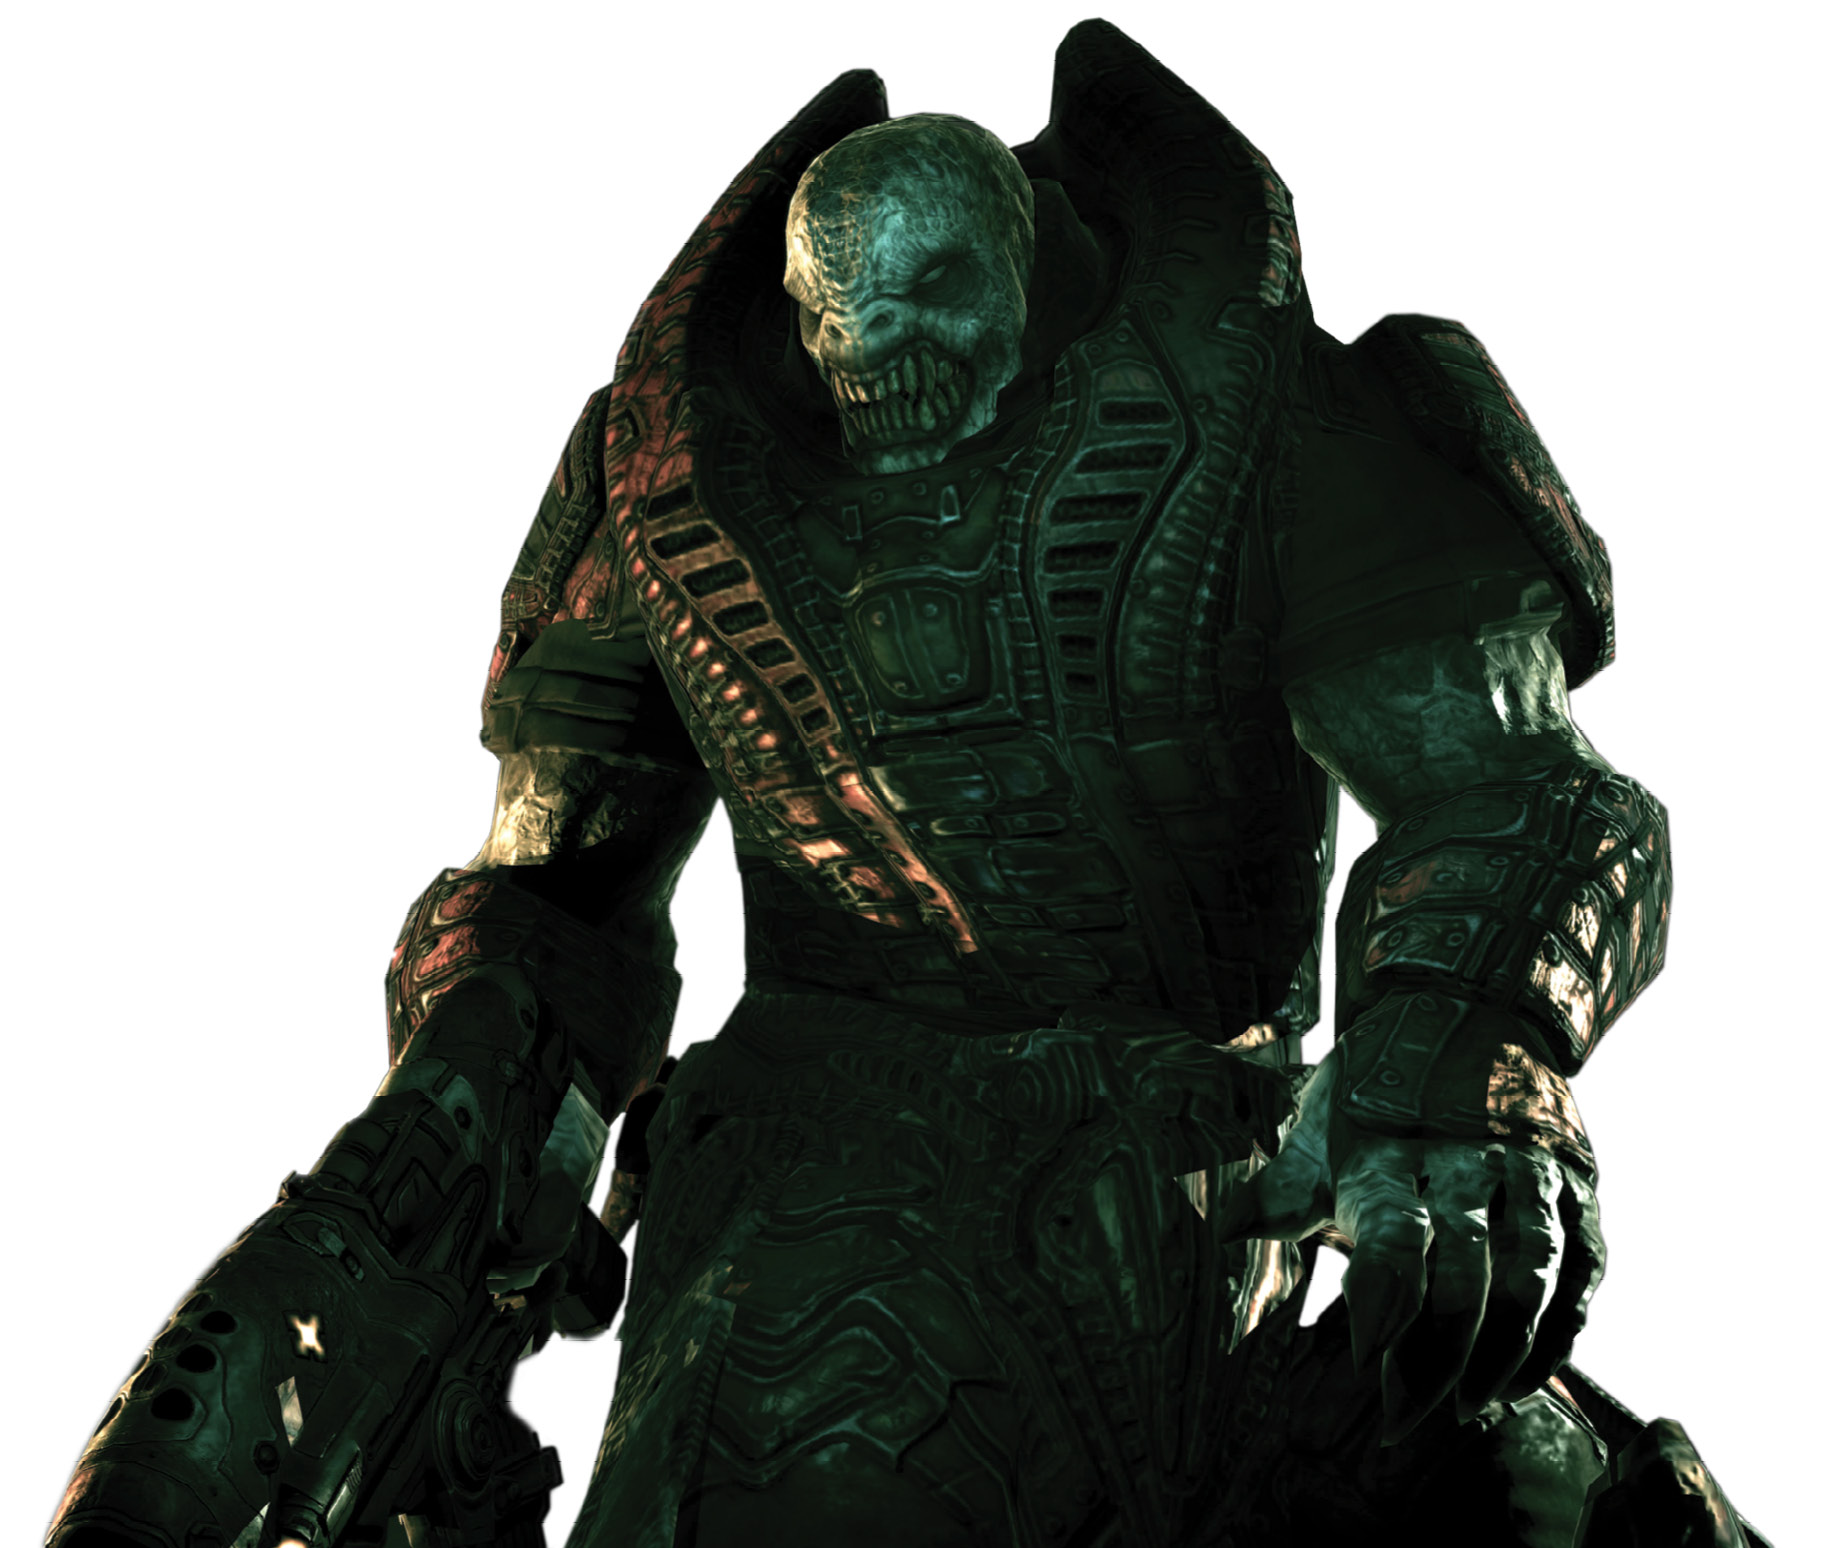
Theron Guards are the Locust Horde’s ultimate foot soldiers. These large, leather-clad units are superior to Drones and Grenadiers in every way, from intelligence to weaponry. They are masterful Torquebow users. They utilize cover effectively and work together to suppress and flank nearby COG units. In addition to being much more cunning on the battlefield and possessing a weapon that can blow a COG to pieces from long distance, Theron Guards are quite resilient against damage. A single head-shot or burst of machinegun fire won’t bring one down.
Approaching a Theron Guard in battle is not something to take lightly or try alone. Use Frag Grenades to draw its attention or flush it out of cover. Allies should provide adequate cover fire for Marcus to move into a flanking position. If they can’t, maintain a safe distance and use the Torquebow or Longshot to put down the foe from afar. But beware their Torquebow arrows! Stay behind cover and look for the orange, glowing arrowhead—this is the telltale sign that the Theron Guard is about to fire in your direction. Duck for cover immediately. If Marcus gets hit with a Torquebow arrow, all is not lost. He might survive the resulting explosion if he performs a roll while the arrow detonates.
Wretch
| Casual | Hardcore | Insane |
|---|---|---|
| 75 HP | 150 HP | 150 HP |
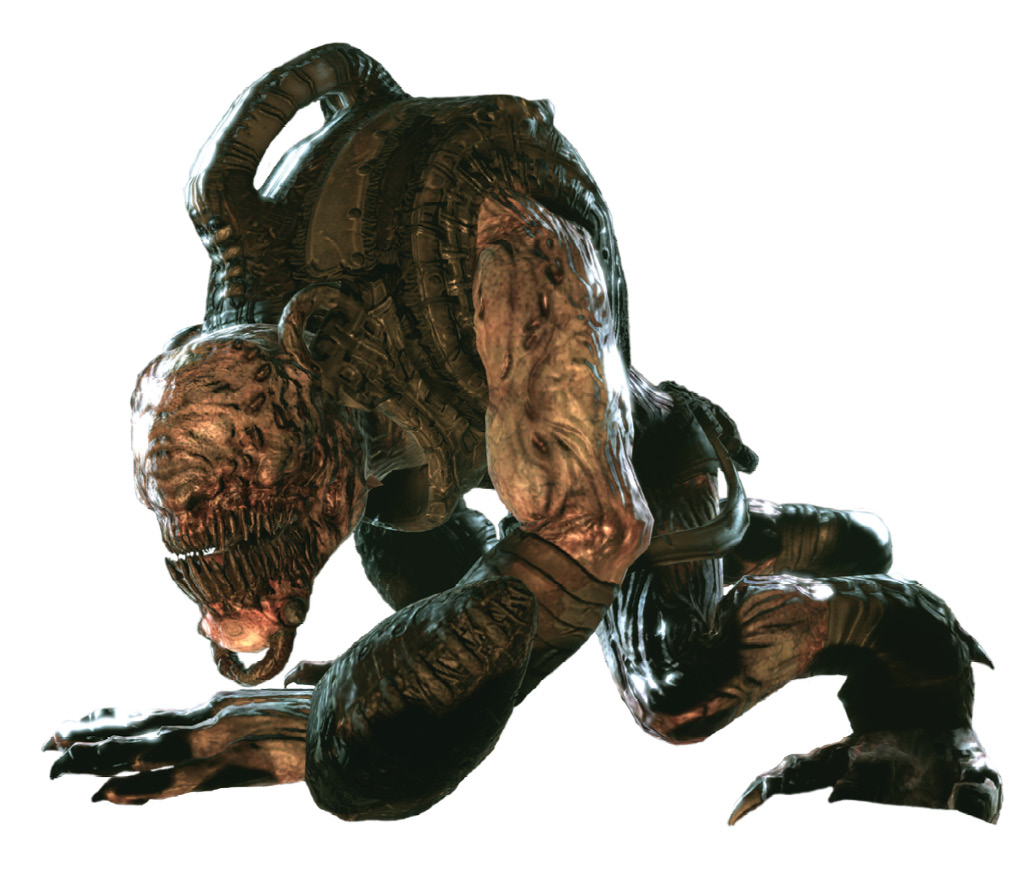
These goblin-like creatures clamber up and down walls and across ceilings just as easily as they hop along the floor. They aren’t tall, and they possess no weaponry other than their claws and teeth. But they are as threatening as their gun-toting brethren. Their vast numbers make them dangerous. A lone Wretch poses very little danger, but they often attack by the dozen and rapidly close in on Marcus, gnawing and clawing through his armor with lightning speed.
It’s definitely to your advantage to avoid looking for cover during a Wretch fight. Instead, keep moving and use the Gnasher to blast the foul beasts as they swarm near. Consider backpedaling in a large circle around the area to keep the Wretches in view. Also, switch to the Lancer or Hammerburst to shoot the Wretches off the ceiling and prevent them from dropping directly on top of you. Lastly, if you find yourself surrounded by Wretches, use your weapon’s melee ability then quickly dive to freedom.
Dark Wretch
| Casual | Hardcore | Insane |
|---|---|---|
| 75 HP | 200 HP | 200 HP |
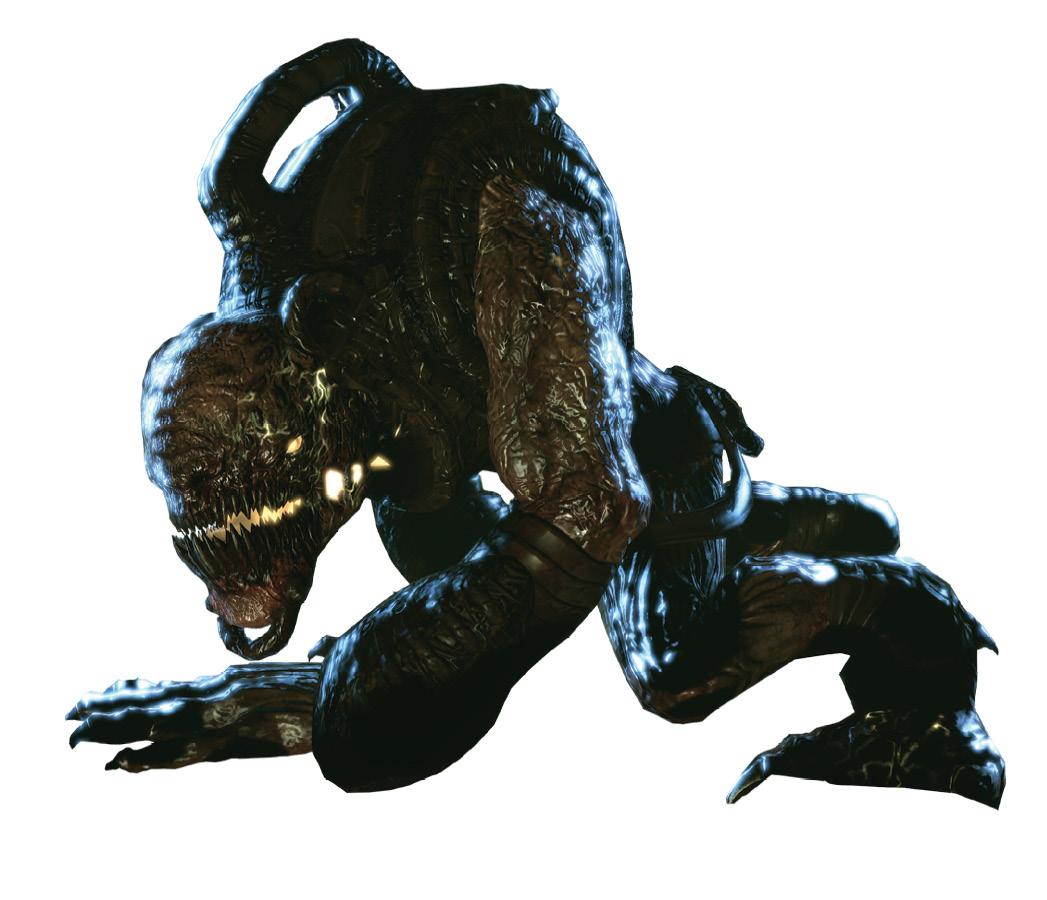
Thanks to their exposure to mass quantities of Imulsion, this breed of Wretches is known to be lambent, which, according to Baird, means that they glow. Dark Wretches are otherwise similar to ordinary Wretches in movement and general behavior. The one big exception: they explode after they’re gunned down. This feature, combined with their increased health (on Hardcore and Insane difficulty modes), makes them far more deadly than standard Wretches.
Dark Wretches nearly always attack in large numbers. Shoot them with the Gnasher as quickly as possible. As with standard Wretches, it’s best to keep moving and backpedal in a large circle as you fire on them. You must repeatedly dive away from the creatures you shoot to avoid getting caught in their blast radii. Although their explosions aren’t particularly large, they are potent enough to kill a character that’s too close.
Nemacyst
| Casual | Hardcore | Insane |
|---|---|---|
| 15 HP | 25 HP | 25 HP |
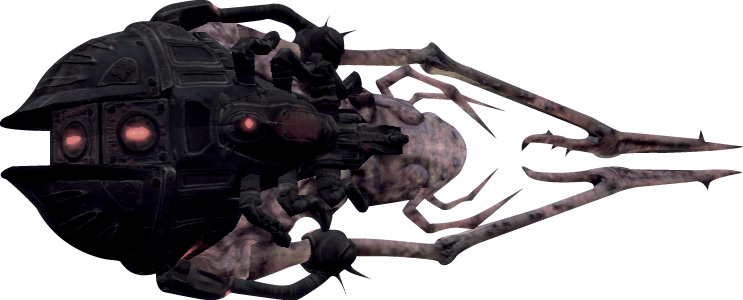
These flying, organic bombs spew forth from Seeders’ tail ends and make a beeline for the nearest COG unit or chopper. Although they seem delicate and harmless upon their initial launch, they soon fix their sights on a target and accelerate. They detonate upon contacting their target and inflict heavy—usually lethal—damage.
The Nemacyst’s ability to fly and maneuver around cover makes them a significant threat that you should never ignore. Use the Lancer or Hammerburst to destroy Nemacysts as soon as you spot them. Often, this occurs while you’re trying to kill the Seeder from whence they came. Alternate your attacks between the Seeder and the Nemacysts. Their low health makes them easy to kill—it takes just a few Lancer bullets to put one down. Obviously, the sooner you kill the Seeder the quicker the Nemacyst threat subsides.
Seeder
| Casual | Hardcore | Insane |
|---|---|---|
| 5000 HP | 5000 HP | 5000 HP |
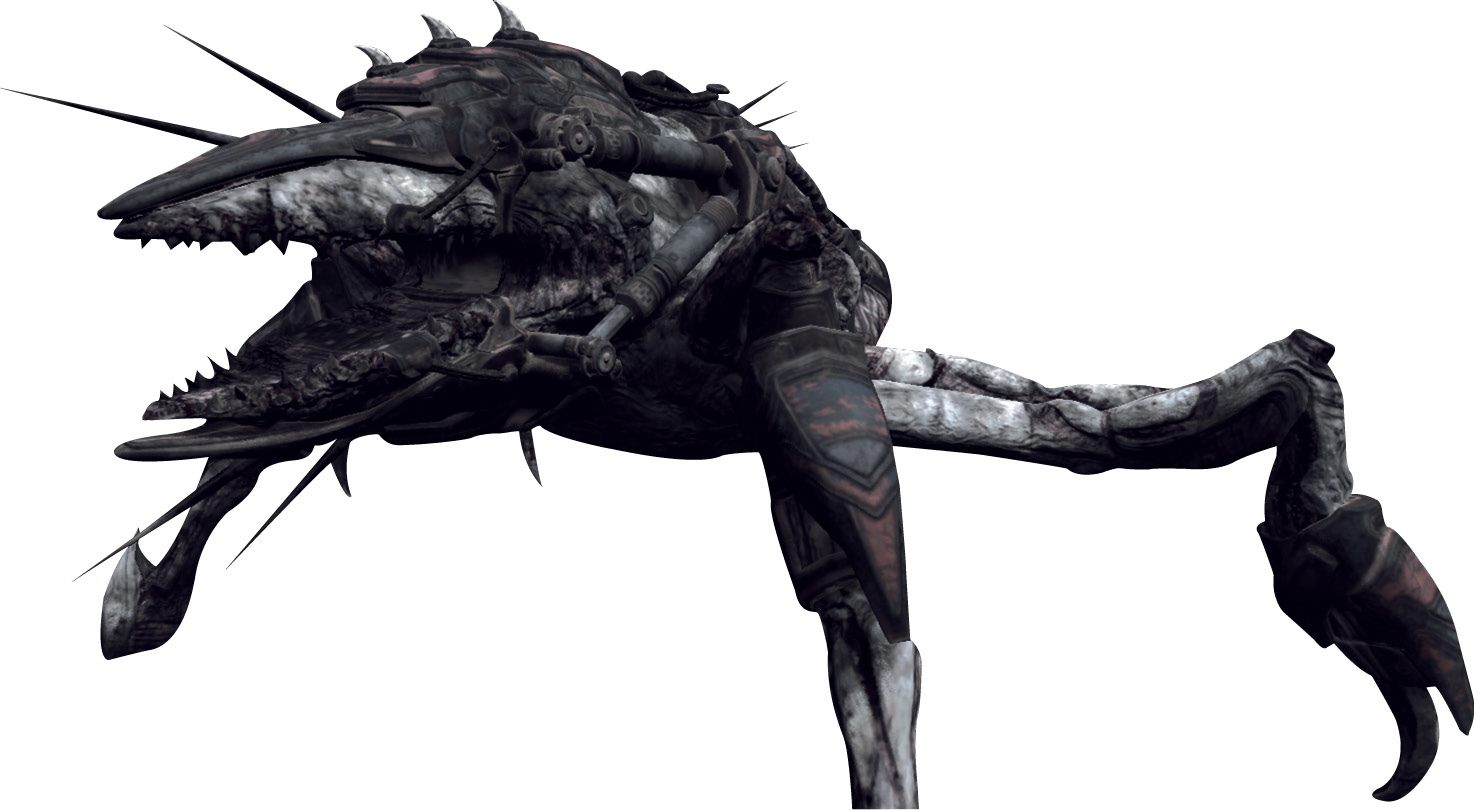
These massive, crab-like creatures burrow through the ground. Their backsides protrude from the holes they create in order to launch Nemacysts into the air. Seeders have no direct attack ability and are oblivious to your presence even if you walk right up to it—talk about burying your head in the sand! It just keeps spewing Nemacysts into the air, letting them do its dirty work.
With most of their body safely hidden beneath the ground, Seeders don’t pose a direct threat other than their Nemacyst spawn. They have an enormous supply of health and an absolute resistance to conventional weaponry. The only way to kill Seeders is to use the Hammer of Dawn. Stand back and fix the targeting reticule on the Seeder’s body, and hold the R Trigger until the satellite’s energy attack dissipates. Quickly retarget the Seeder and repeat the attack to finish it off.
Kryll
| Casual | Hardcore | Insane |
|---|---|---|
| N/A | N/A | N/A |
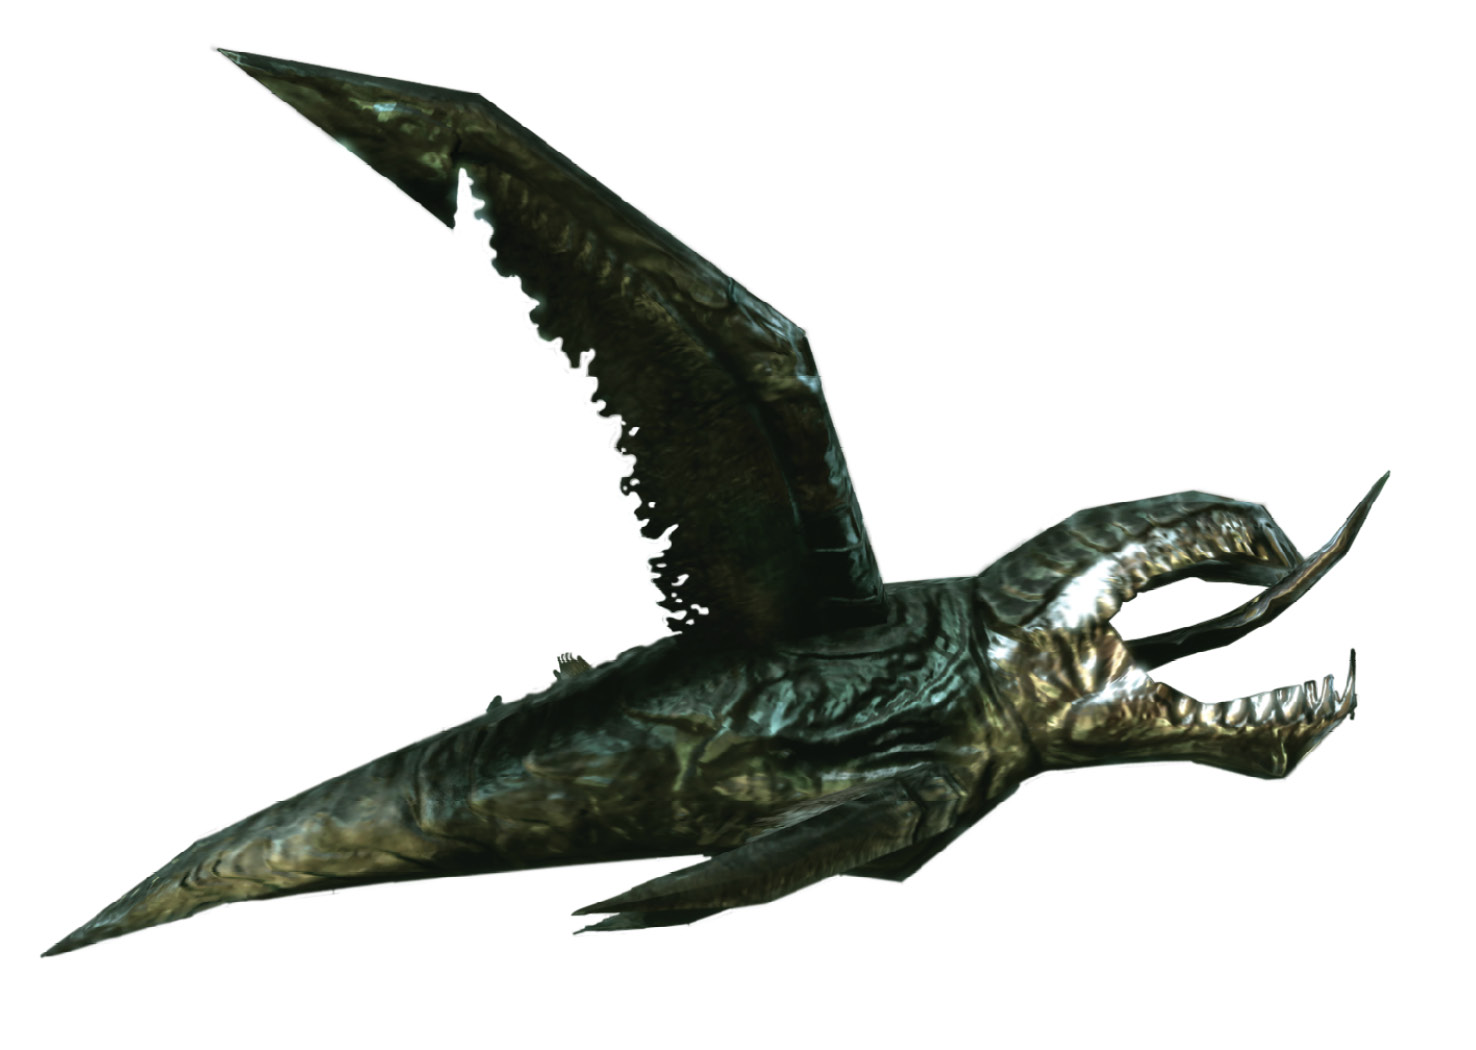
The Kryll are a species of nocturnal, carnivorous, bat-like creatures that attack in large swarms. They’re invincible, thanks to their overwhelming numbers and their ability to devour a human in seconds. Straying into a darkened area after sunset is almost certain suicide, as only the quickest dive back into the light can bring salvation—no amount of firepower can help you!
Aside from the UV Turret (in the chapter titled “Viaducts”), there is no way to defeat the Kryll. Therefore, the only strategy for dealing with them is to stay in the light to avoid encountering them in the first place. However, you can use the Kryll against other Locust enemies! These indiscriminate feasters attack and kill anything caught in the dark—put them to work by shooting out the fluorescent lights near the enemies, and watch as the Kryll do your bidding!
Berserker
| Casual | Hardcore | Insane |
|---|---|---|
| 6500 HP | 8500 HP | 12000 HP |
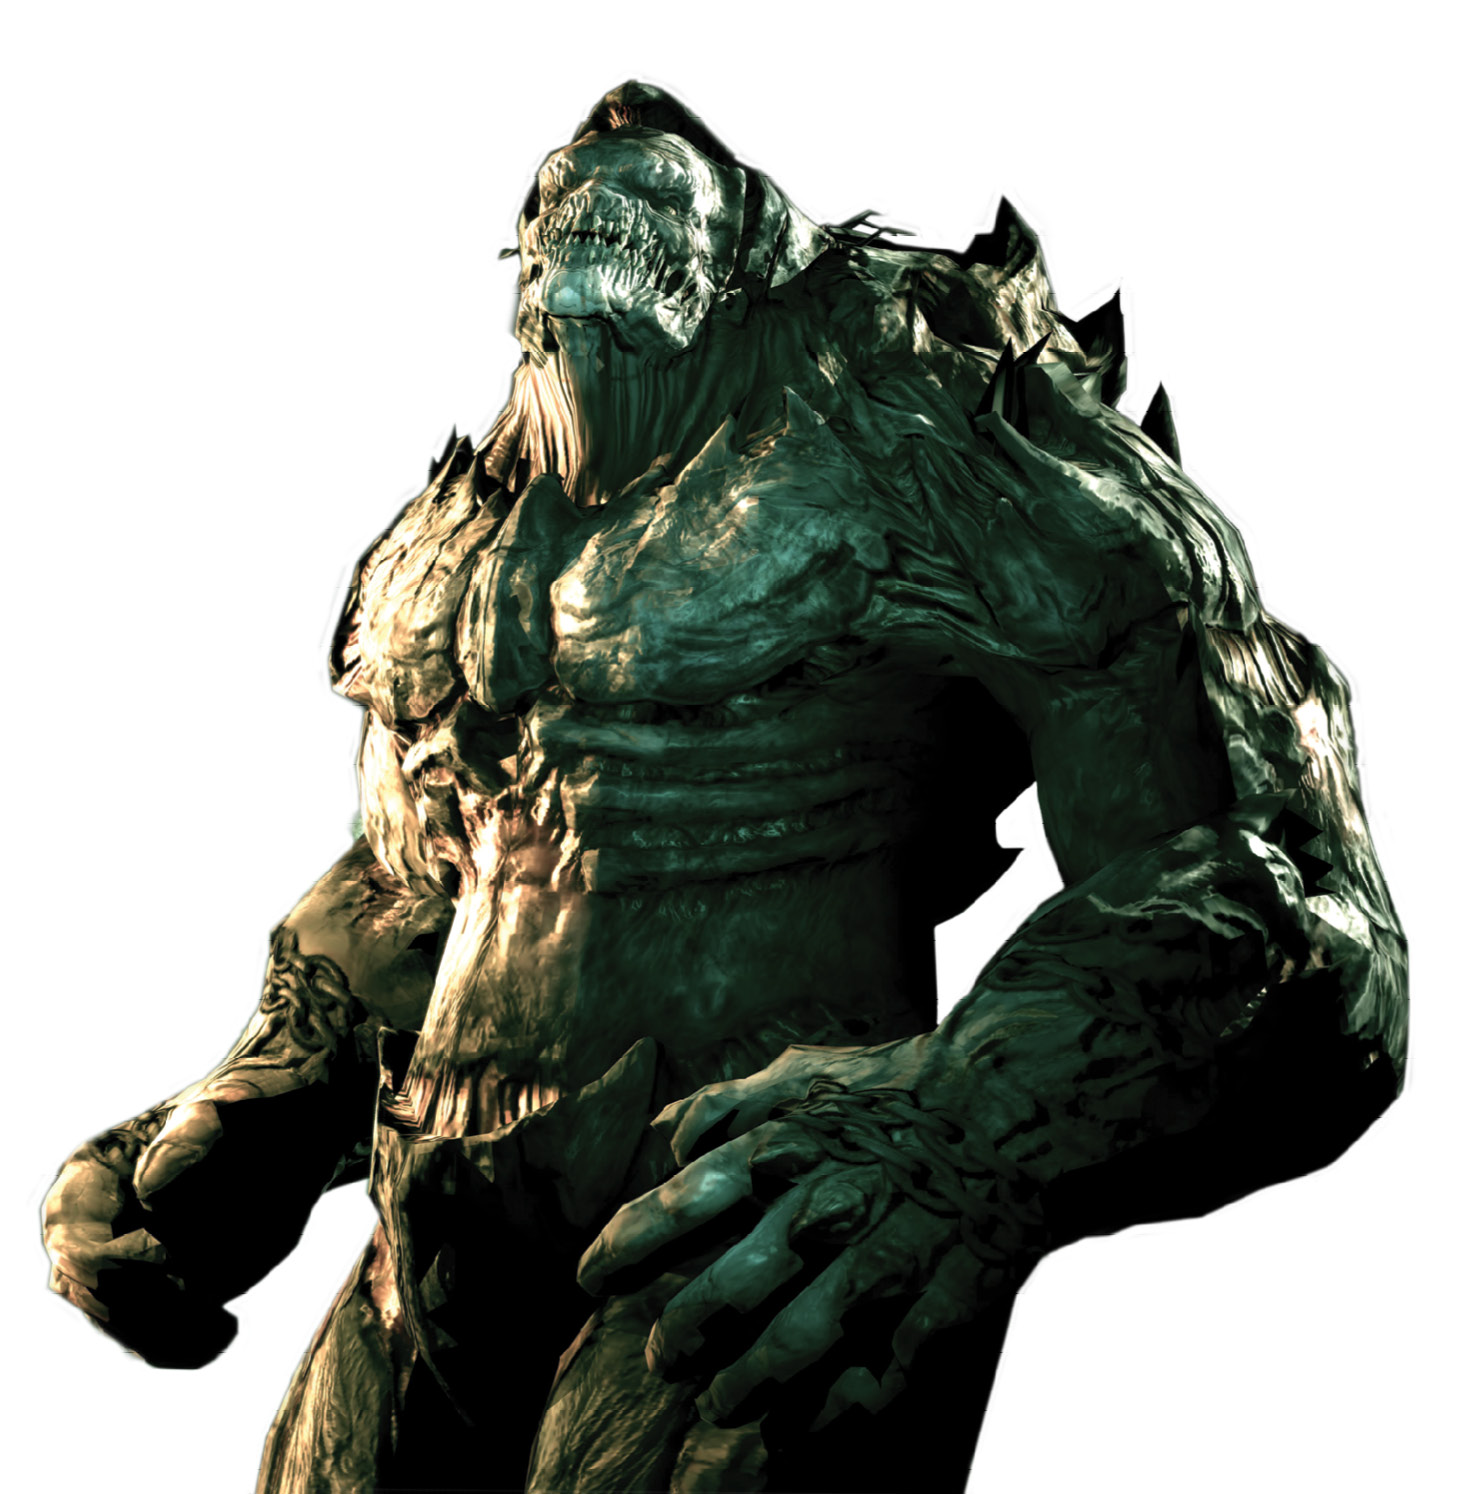
When it comes to sheer size and power, nothing comes close to the Berserker. These she-beasts are incredibly powerful and fast. Unlike other members of the Locust Horde, they can smash through walls and columns with ease. A single Berserker punch delivers instant death. However, all of this power comes at a price; the Berserker is blind. Her lack of sight has given rise to an acute sense of smell and hearing, which she uses to accurately track Marcus’ location. The Berserker turns and charges toward any sound she hears. If she’s lucky enough to catch her prey, the poor victim will never make another sound.
The Hammer of Dawn is the only weapon that can make the Berserker vulnerable, as indicated when she glows red. In her vulnerable state, you can use any weapon to finish her off. However, you must lure her outside to use the Hammer of Dawn. Stand at the desired location and either fire at the Berserker or rev the chainsaw bayonet to get her attention. She homes in on the distraction, taking a direct path to its source and crashing through anything in her path in the process. Quickly dive to the side and watch as she slams through whatever you need her to hit.
Corpser
| Casual | Hardcore | Insane |
|---|---|---|
| 10000 HP | 10000 HP | 10000 HP |
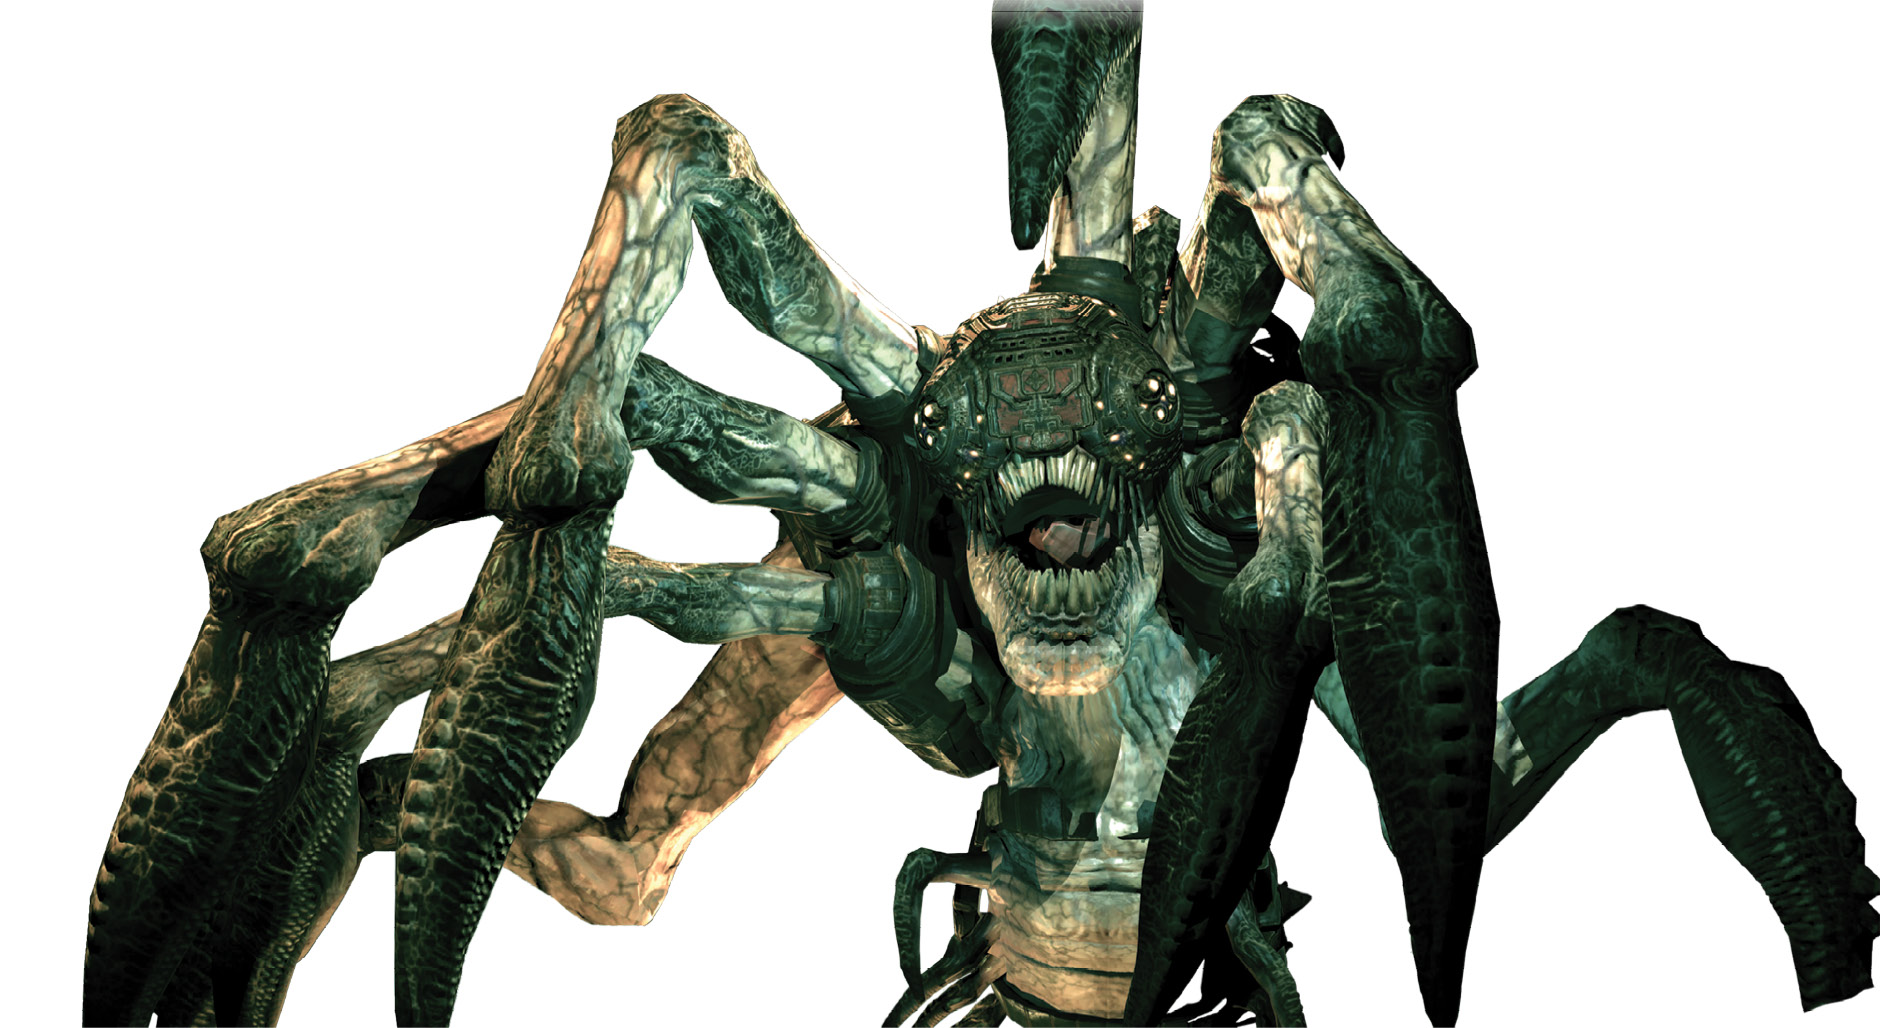
This enormous creature is one of the most formidable members of the Locust Horde. Armed with a number of death-dealing claws, a bulletproof shell, and the girth and strength that all Locust envy, the Corpser is one of the most frightening sights in Sera. The Corpser uses its many claws to attack its prey with either a single-claw pierce or a multi-claw squash. The Corpser can also use its claws to destroy the floating blocks Marcus stands on when they square off, thereby limiting Marcus’ room to maneuver.
There is only one way to defeat the Corpser: one must shoot its soft, unprotected belly to stun it and then follow up with a shot to its mouth as it cries out in pain. Of course, this is easier said than done thanks to its many claws and spontaneous attacks. Only those who find a good position and shoot between its claws will earn the glory of victory.
Reaver
| Casual | Hardcore | Insane |
|---|---|---|
| 750 HP | 1500 HP | 1500 HP |
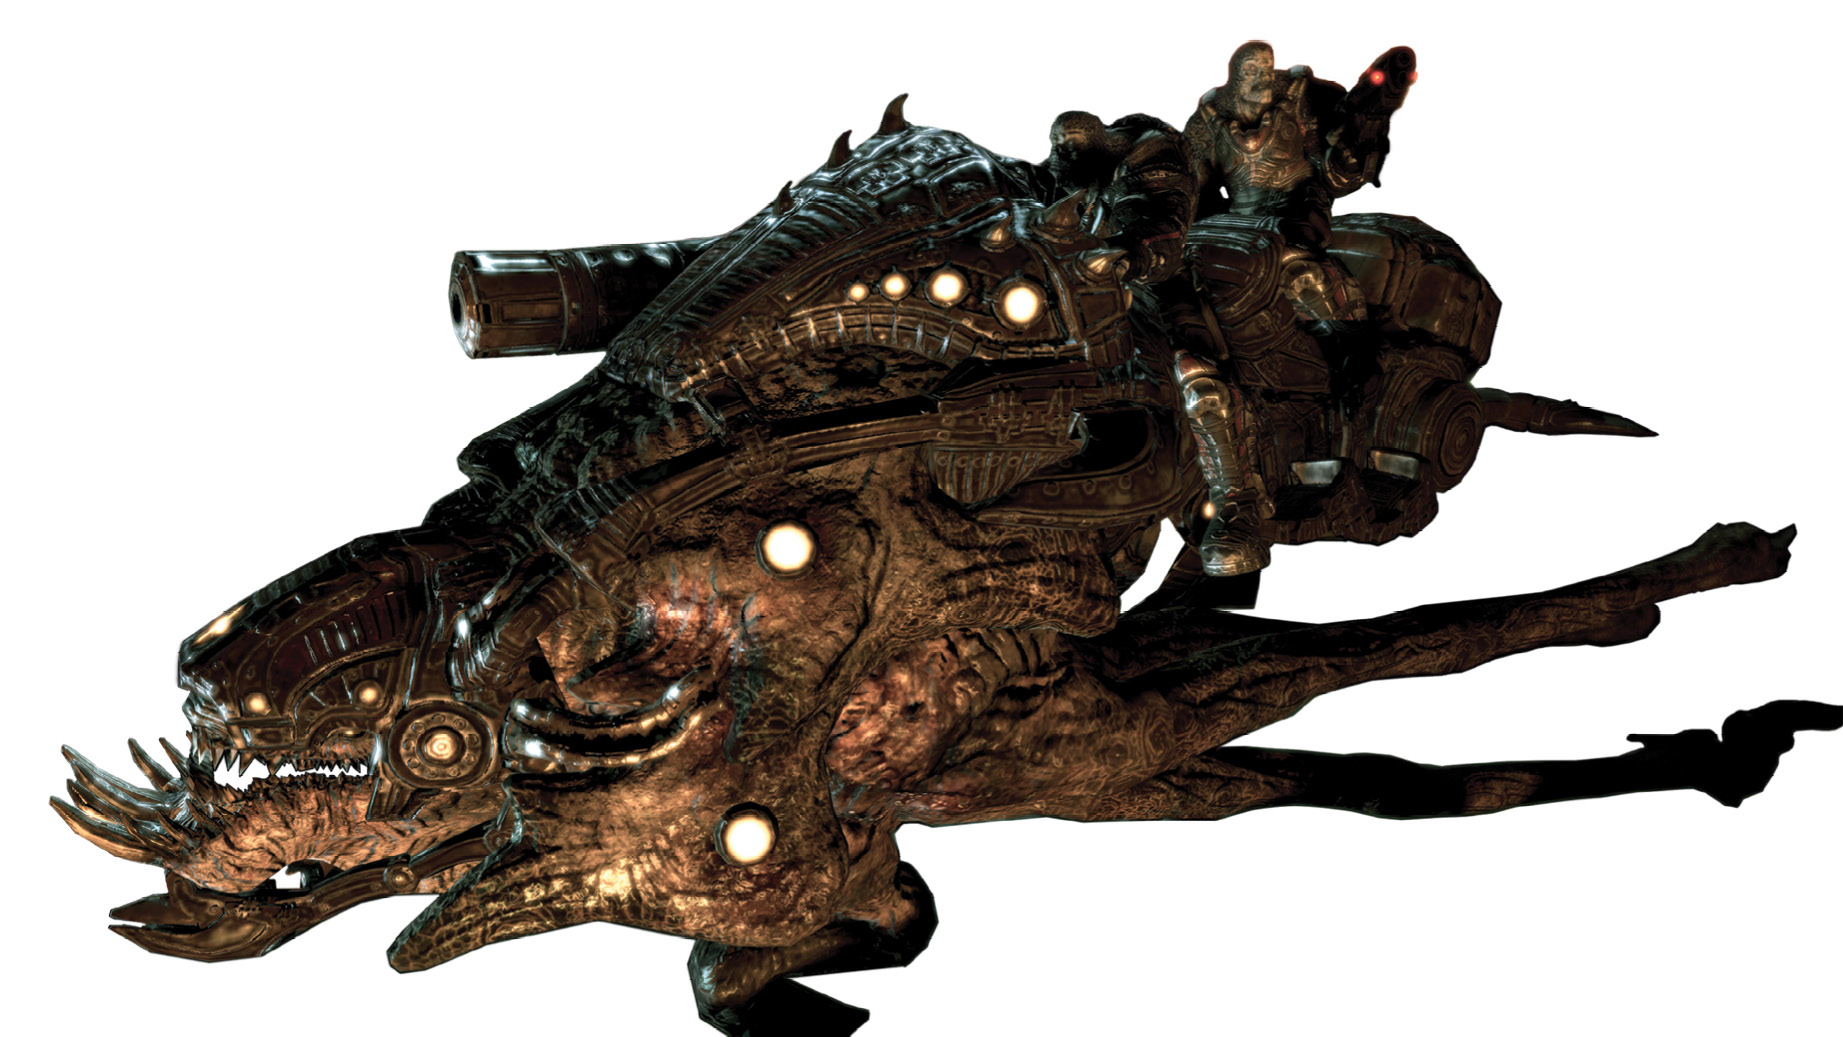
The Reaver is a large, multi-legged creature that can fly. These beasts of burden are the Locust Horde’s principal battlefield conveyance. They can carry a pair of Locust Horde units. All Reavers have a pair of Troikas mounted on their backs. The rear passenger is often a Theron Guard but occasionally is a Drone. Although the Reaver itself is not a threat, its two riders pose a significant risk to Marcus’ life.
Taking cover from the barrage of gunfire and, possibly, Torquebow arrows is crucial when you spot a Reaver. Although one can kill its passengers rather than the Reaver itself, it’s easier to aim for the larger target. Using the Lancer or a Troika, unload into the Reaver’s side, just below the saddle, to shoot it down. The Torquebow can also down a Reaver. A well-aimed arrow can kill a Reaver (and its riders) with a single shot!
RAAM
| Casual | Hardcore | Insane |
|---|---|---|
| 3500 HP | 5500 HP | 7000 HP |
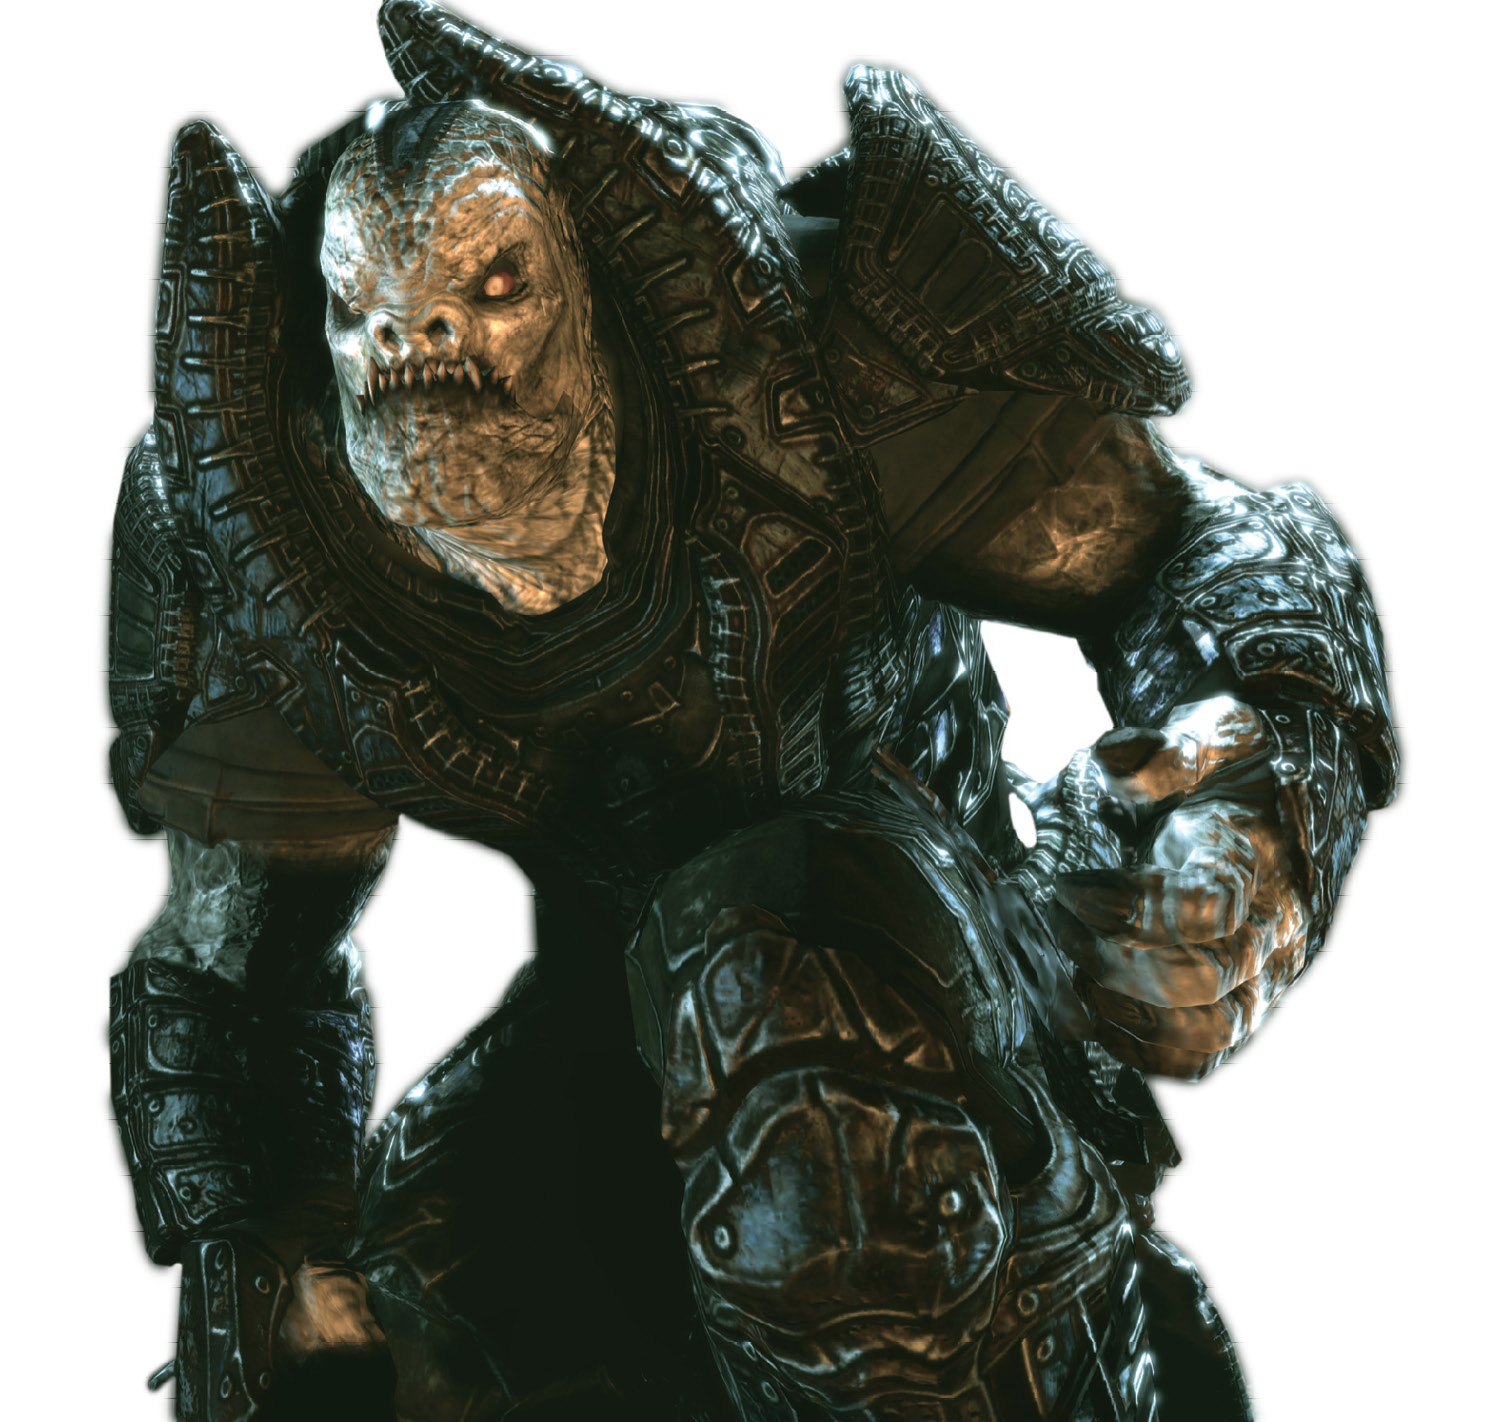
The Locust Horde leader is a hulking beast at one with the Kryll and well protected by an army of Reavers. RAAM’s immense size and strength allow him to rip a Troika from its mount and wield it at will, quickly cutting down any enemy in his path. The flock of Kryll that surrounds him serves as a protective barrier, rendering futile any attempts to shoot RAAM. These traits make him the most lethal foe Marcus will ever face.
Defeating RAAM is no small task. Marcus must make the most of the available cover, use his Frag Grenades to scare off the Kryll, and shoot RAAM’s unprotected head while his gun is lowered. He must do all of this while he avoids the dark, defends himself against Reaver attacks, and dodges RAAM’s mighty chain gun salvos!