
How to Complete Burden of Proof in Starfield
Prepare for a long adventure.
Burden of Proof is one of the longer quests in Starfield and one of the most difficult ones, given that there are 20 pieces of evidence that you need to locate to finish the quest. If you are up for an adventure that will lead you across the entirety of the Starfield universe and get you the Memento Mori legendary pistol, you will definitely need the hints for all Evidence Locations in Burden of Proof that are prepared below.
Here’s how to complete Burden of Proof in Starfield.
How Starfield’s Burden of Proof Quest Works
The Burden of Proof questline will come from UC Sysdef during the Crimson Fleet questline. You’ll need to first join the UC Vanguard and board the UC Vigilance. Once aboard, talk to Commander Kibwe Ikande to be offered the opportunity to become an undercover agent.
Alternatively, you can also get yourself thrown in jail while in UC territory. UC Sysdef will then reach out to you and make you the necessary offer.
Burden of Proof will only be available if you decide to accept the deal Commander Ikande offered you. If you have refused this deal, you should load up a save made before that action. That is, if you find getting the Memento Mori Pistol reward at the end of it all worth it.
For the Burden of Proof Quest, you’ll need to find 20 pieces of Evidence which are scattered around the entire universe. You can see a comprehensive list of their pickup order (for those that must be picked up in order) below.
Some of these evidence pieces can be missed and are not retrievable if you have already completed the related quest.
1. Naeva Meetup Evidence
Naeva Meetup Evidence is the first piece of evidence that you will be able to pick up. It will be on Cydonia (Mars) behind Adler Kemp, with whom you must speak anyway while trying to become a Crimson Fleet pirate.

2. Carter’s Gig Evidence
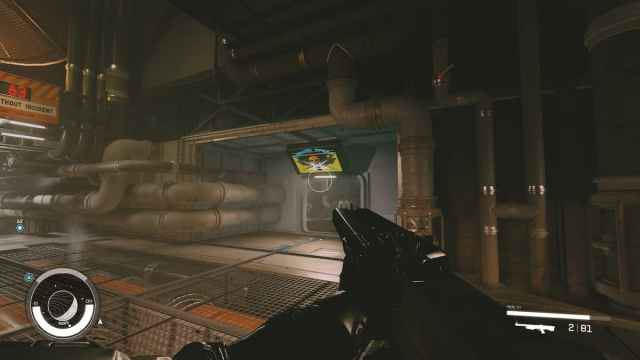
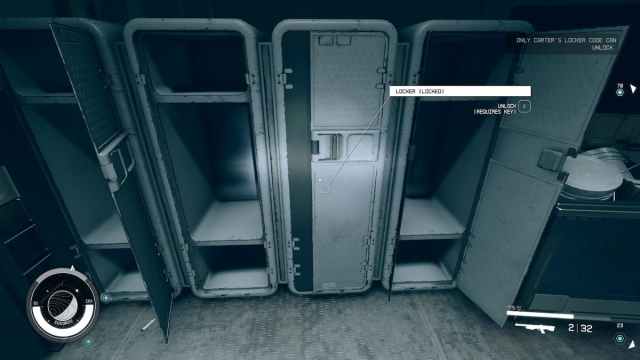
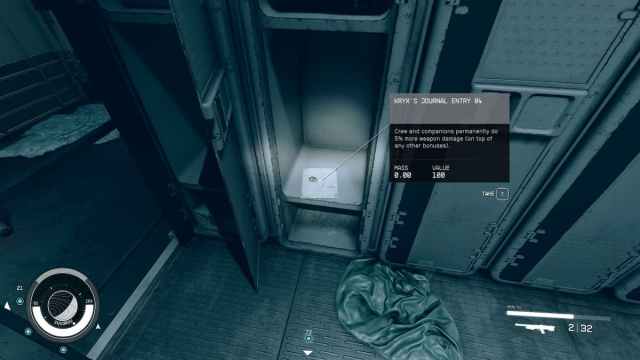
Carter’s Gig Evidence is obtained during the Echoes of the Past Quest. You can’t miss it because it’s hidden in a locker that you will need to open during the quest to proceed.
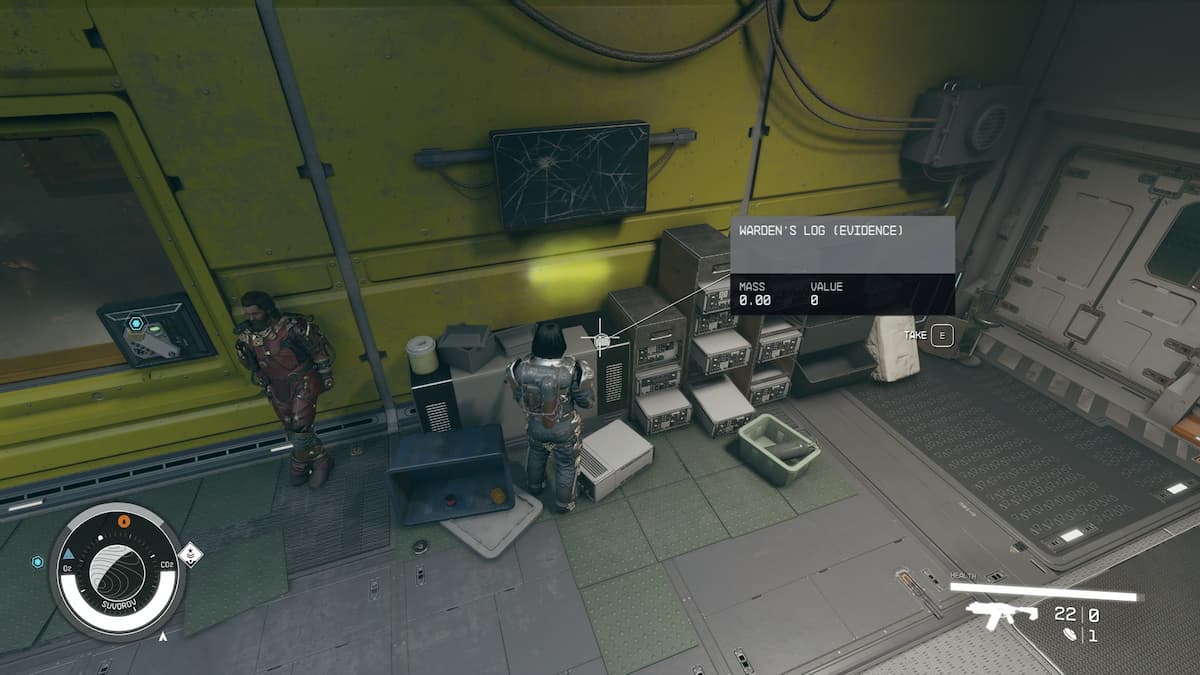
3. Warden’s Log Evidence
During the Echoes of the Past quest, you will wind up in an Intercom room, where you are supposed to use it to progress through the quest. Right next to it, on the pile of drawers, you will spot the Warden’s Log (Evidence). Take it, as it’s unlikely that you can come back for it later.
4. Galbank Plan Evidence
You will get a couple of evidence pieces during the quest Breaking the Bank. Galbank Plan evidence is obtained from Gabriel Vera and can be easy to miss. It is helpful to gain intel while you are aboard this cruise ship, most importantly, from guests in the ballroom (you should dig up dirt on the three subject matters by talking with them until your quest indicator progresses, indicating that you’ve learned the vital gossip), Klaudia Swist, and Sheila Holbrooke. Klaudia will spill the beans on severe misdoings, which you should be able to use against Gabriel Vera when you confront him in his room later during this mission (he won’t be very talkative when everyone’s present).
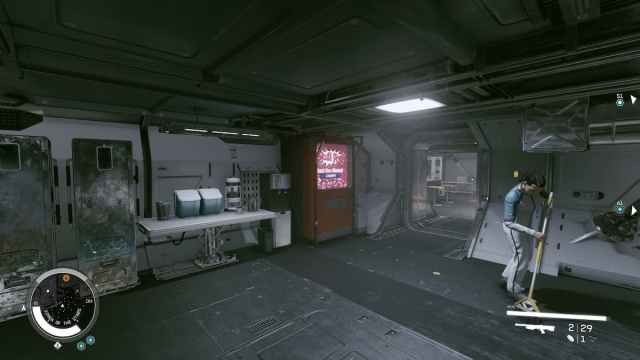
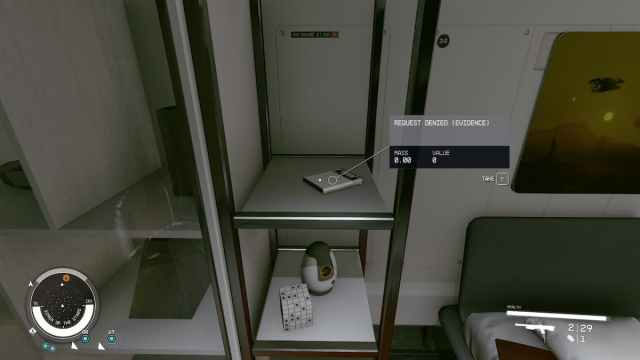
5. Request Denied Evidence
Request Denied Evidence is also obtained during the Breaking the Bank Quest. This evidence piece can be located in the Crew Quarters (through which you enter the ballroom). We have found accessible landmarks for you to spot, which we will point out in two slide shows below. On the top floor of Crew Quarters, you will see a red vending machine (pictures taken from the same position). Go through the door next to this vending machine.
You should spot a small bedroom with red bedsheets on your left. You will find the desired evidence on the shelf in this bedroom, right next to the bed.
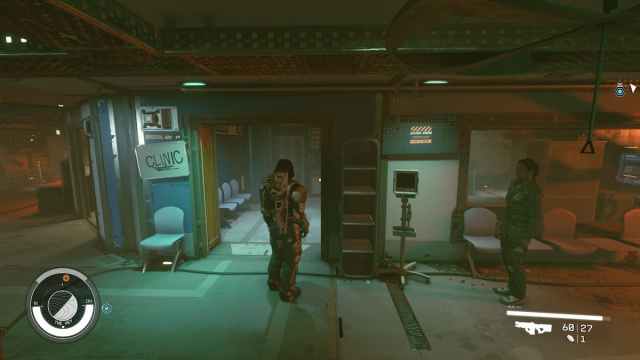
6. Huan’s Talk Evidence
You will go to New Atlantis in the “Best There Is” Quest in Starfield. Perfect time to grab Huan’s Talk Evidence if you ask us. You need to find a place called Kay’s House. Since Starfield has no city maps, we’ll be your guide. The goal is to reach The Well. Here’s how to do it…
Remember the MAST district station in New Atlantis? As soon as you leave the train at that subway stop, turn right and march forward. In the screenshot below, we are looking at the elevator door. And no, you’re not seeing things. That is indeed Supervisor Lin; we have her as our Companion.
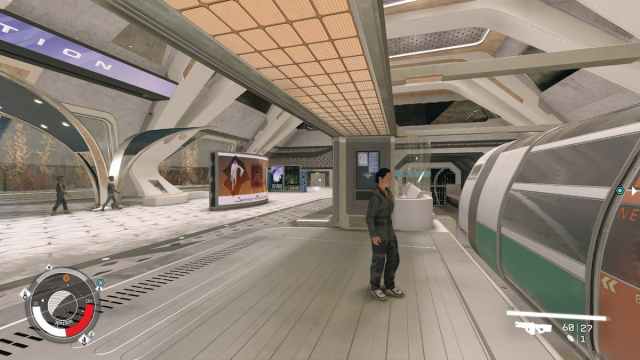
Get into the elevator and go to The Well. Once you make your way there, sprint past the Med Bay which will be a landmark you won’t miss easily. Once you go through a thin corridor, the Kay’s House will be on the left side.

Step right in and go left through the plastic curtains, and next to the fridge on the right, you will see Huan’s Talk Evidence on the counter.

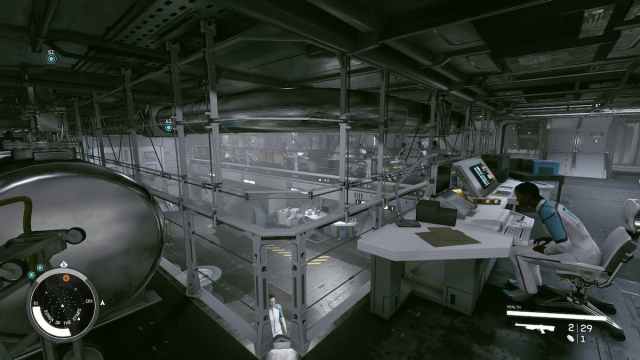
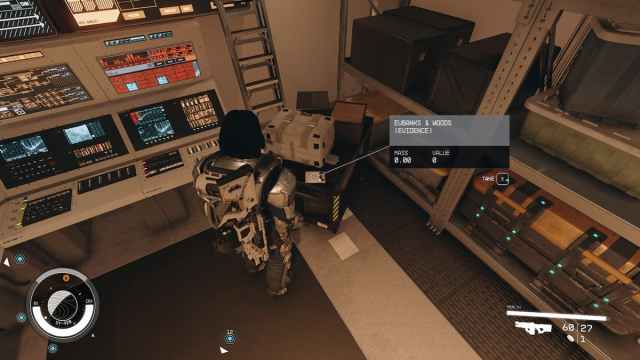
7. Eubanks and Woods Evidence
As you progress through the The Best There Is quest, you will inevitably meet Dr. Gabriel Vogel. You will find the evidence on a crate pointed out below in the laboratory behind him.
8. Gennady Ayton Evidence
The next handful of Evidence pieces are not bound by the main Crimson Fleet story. Still, it is optimal that you get them all before continuing with the Crimson Fleet quests.
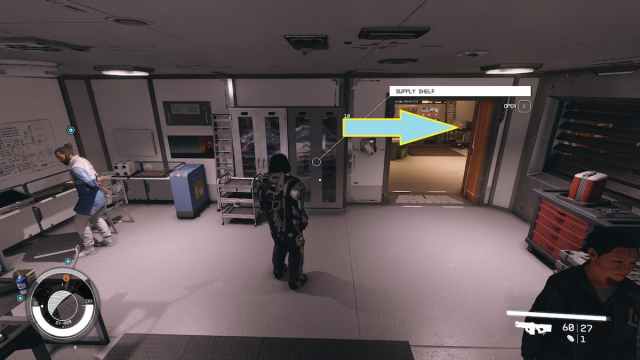
This evidence is obtained by talking to your ship’s doctor, Samina Mizrah. If you present yourself as someone who wants to help her, she will send you on a supply fetch quest called “Doctor’s Orders.”
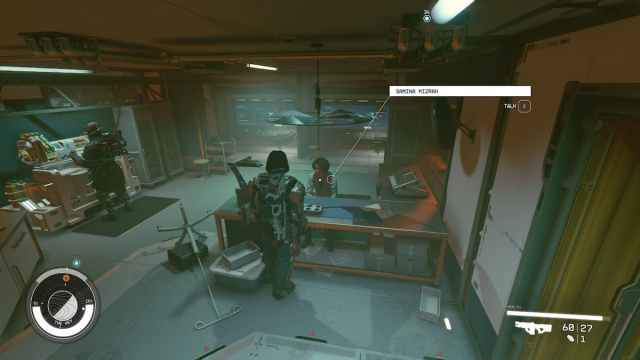
You will talk to a doctor about the supply arrangement during this quest. Behind Doctor Gennady, pictured below, you will see the evidence:

9. Message for Bog Evidence

This is another piece of evidence you will get via a side quest. This side quest is obtained from Bog in The Last Nova bar on The Key. Bog is the bartender and should be easy to spot.
Did you know that the Last Nova’s bar music is from a Luxembourg band called Starfield? Pretty metal, right?
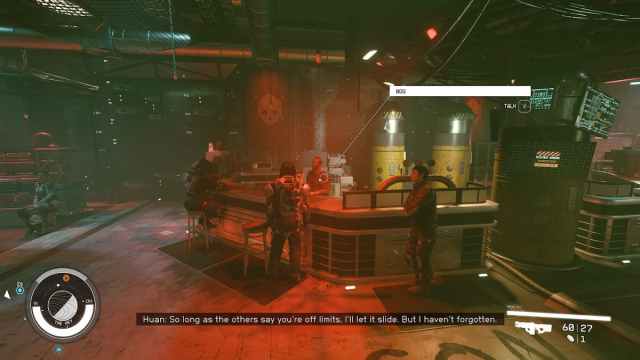
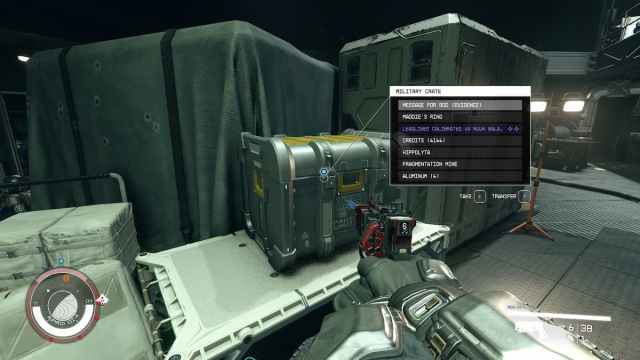
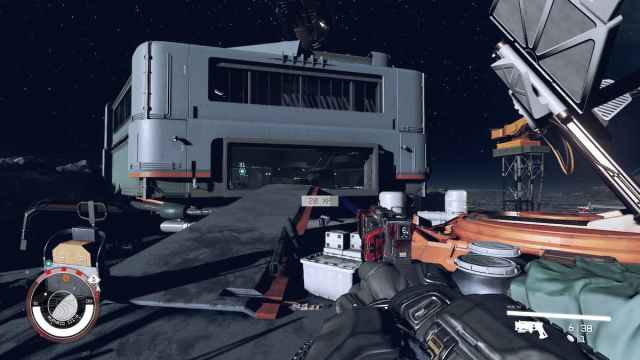
Bog is a hopeless romantic and wants you to fetch a specific ring for him. It won’t be too problematic of a quest if you prepare enough firepower and first aid kits. The questline will lead you directly to the spot, so getting there is straightforward. You will have a chance to get some cool weaponry while on this planet. The evidence is in the crate in the middle of the pictured facility.
10. Chunk’s Heist Evidence
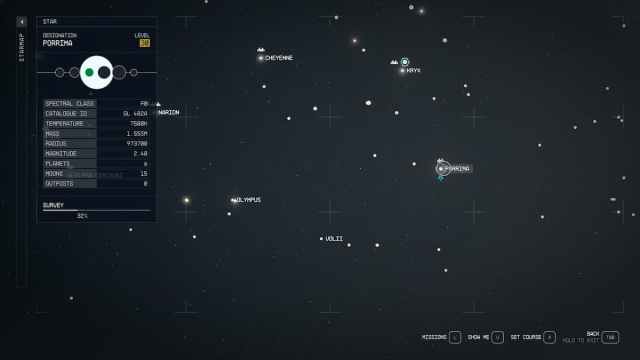
The following evidence piece is located on the Porrima III planet in the Porrima system. If you have no idea where it is, these screenshots should help:

You will see a Red Mile neon sign as soon as you land. Make your way into the bar, turn slightly to the left, and you will end up in the main room. Here’s where you will find Chunk’s Heist Evidence:
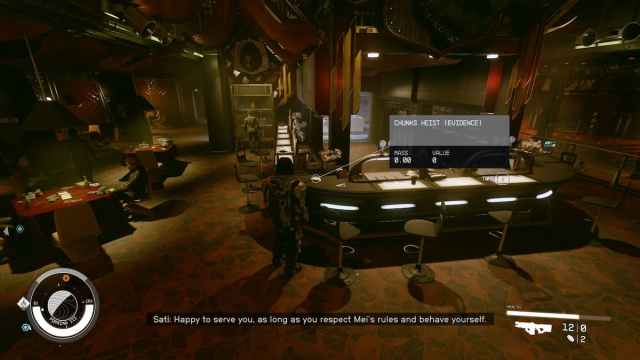
If you are up for some Scooby-doo-like running from monsters, take up the Red Mile Quest while you’re there from the host called Mei. It shouldn’t be hard if you have some Amps (if you take too much, here’s how to remove stimulant addiction in Starfield), and it pays well.
11. Chiroptera Evidence
It’s time for us to visit the Gagarin planet in the Alpha Centauri system…

Lizzy’s Bar is the location we’re after, and we will show you the exact location of it.
As soon as you land on Gagarin’s Landing, go forward until you spot a giant statue that’s the centerpiece of this town. From this statue, you need to look left, and you will spot Lizzy’s Bar (arrow indicates the poster on the wall, which should be a good landmark).
You will see the evidence on the counter when you approach the bar.

12. HopeTown Raid Evidence
More traveling is upon us, dear reader, but fear not; we are near the finish line.
You need to get to the Valo system, which we will point out in a screenshot below to make it easier for you to find it on your map:

After you land on HopeTown, walk straight toward the building right in front of you and enter the Pit Stop bar.

You guessed it, you need to approach the bar, and you will easily set your sights on the evidence.

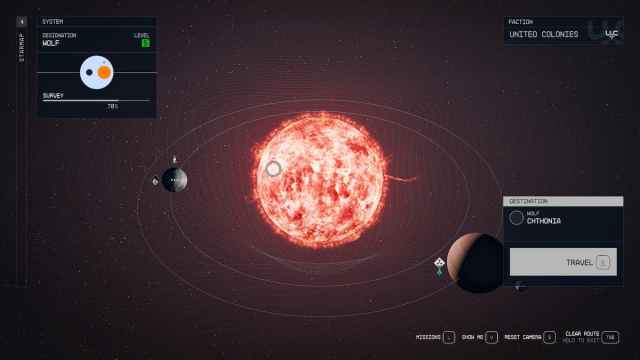
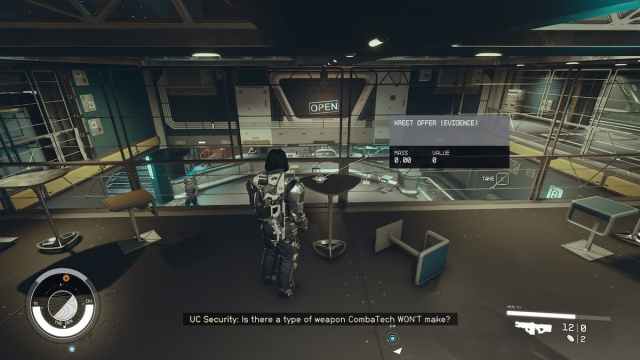
13. Kreet Offer Evidence
Buckle up; we are going to the Wolf System.

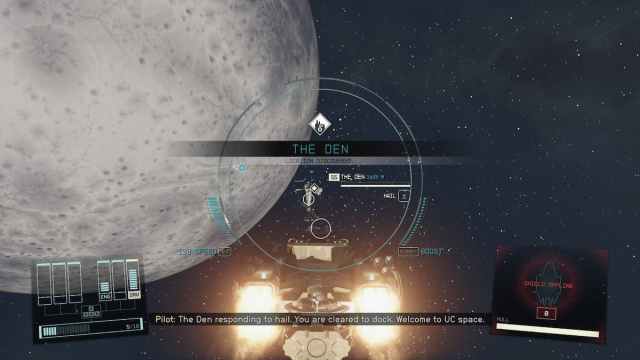
Be mindful that we need to find “The Den” station (and not the Old Den) on planet Chthonia.
As soon as you dock at The Den, move forward until you reach a rail with some bar furniture around, and that’s where you’ll find the Kreet Offer Evidence.
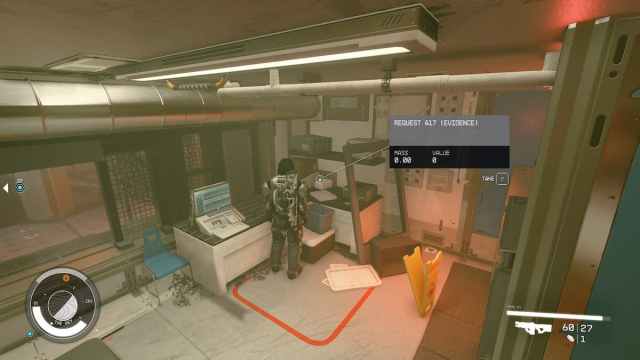
14. Request A17 Evidence
The following three evidence pieces are in The Key; you can wait to pick them up until a later moment. However, do this before finishing the Crimson Fleet questline (do not start progressing the Eye of the Storm Quest) because these pieces might become inaccessible!
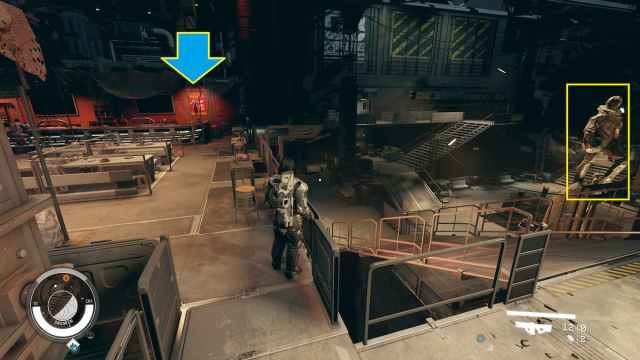
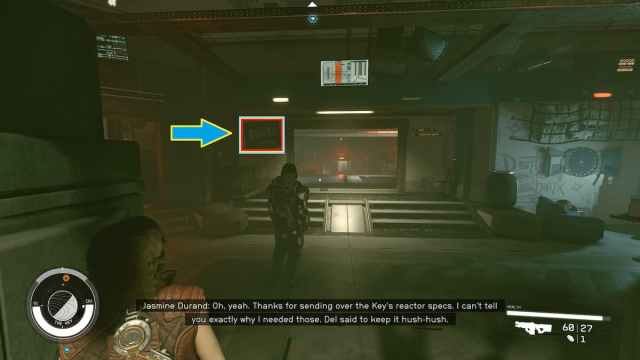
This one is located in the room where Jasmine Durand usually hangs out. When you enter the room where “Reckoner’s Core” is visible (when coming out of Cargo Bay), turn left, and then turn left again until you reach the room pointed out by the arrow on the left edge of the screenshot below.

You will see a red outline on the floor and a computer at the desk in this room. Approach, and you will see Request A17 (Evidence), which you can pick up.
15. Mira’s Demise Evidence
This one is also on The Key, but it might be tricky to locate due to the completely chaotic layout of the rooms on The Key.
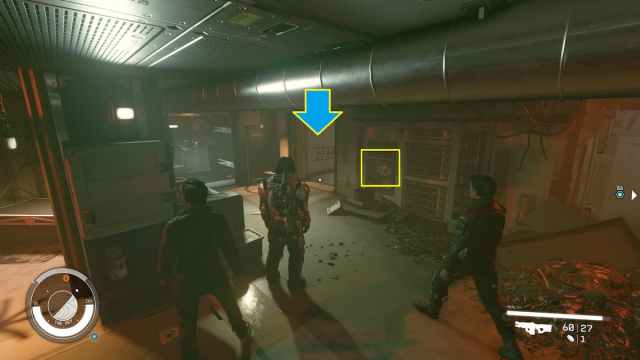
Pass under the Reckoner’s Core sign, go past the pool table, and turn left before the chair room. You will see a Bunks sign on the left, and that’s where we’re headed.
Go forward and keep right past all the tech, rubble, and debris lying around, but keep looking left because you will need to spot a skull symbol on the wall.

You will see barbell weights on the floor, and you will find the Mira’s Demise Evidence in this room.

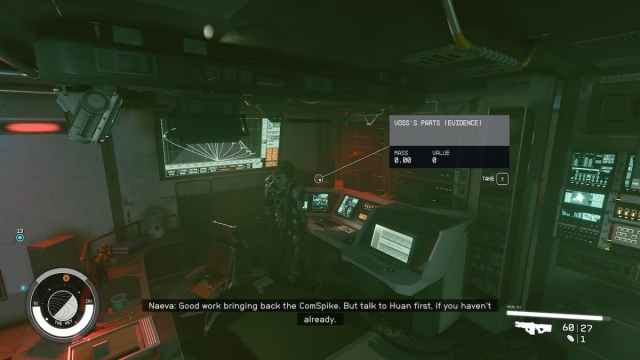
16. Voss’s Parts Evidence
Exit the room where you’ve picked up the last piece of evidence, go slightly to the right, and then turn left. Notice the shiny disco lights on the computer on the wall and some sort of web within the next room. That’s where the staircase is.
Take the stairs up, turn left, and go up the stairs you will see promptly.

Go forward until you enter a big room (Command Center), and then from the middle of the room, turn right and take the stairs up, go right, around the glass window, enter the room, turn left, and find the evidence as pictured below, in the corner of the room.
17. Big Score Evidence
We are resuming the Crimson Fleet questline now.
It’s time to move back to Neon City. You’ve already been to the Volii system, and the quest Absolute Power will lead you back there. If you need help with Absolute Power, we have an in-depth guide about it here.
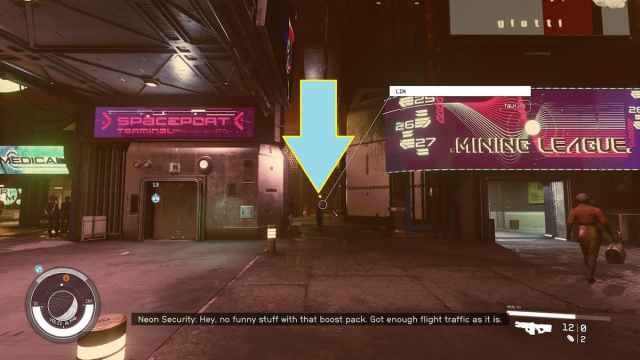
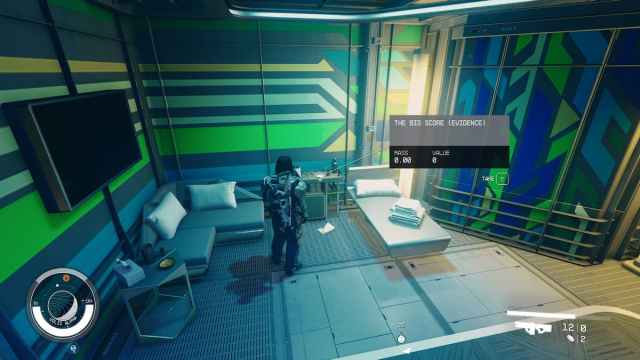
Big Score Evidence is located in the Ebbside part of Neon City, in Madame Sauvage’s Place. If you’ve already completed this part of the quest, here’s how to find it the easiest:
- Place yourself between the Spaceport Terminal elevator and the Mining League store.
- Go between them through the Ebbside door.
- This leads you directly outside Madame Sauvage’s Place.

In Madame Sauvage’s Place, go into the left corner, as indicated in the picture below (behind the bar), and find the Big Score Evidence at the bedside.
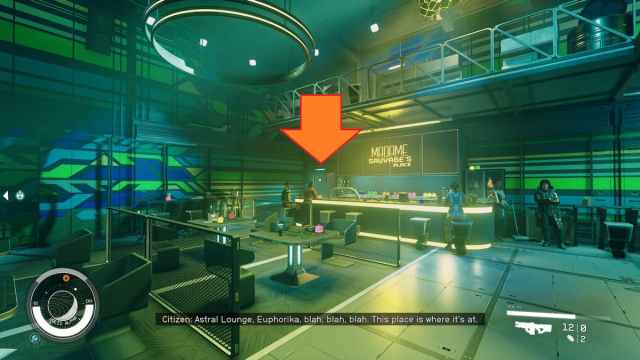
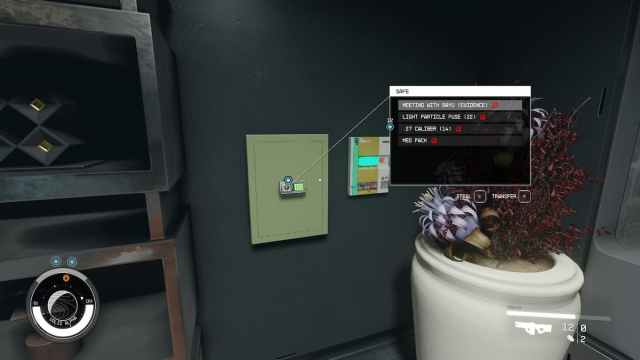
18. Meeting with Bayu Evidence
We are still in the Absolute Power quest line in the Neon City, and we need to reach out to a person called Ji Nashida during the quest. You will find him in the Generdyne offices by entering the elevator near the Astral Lounge.
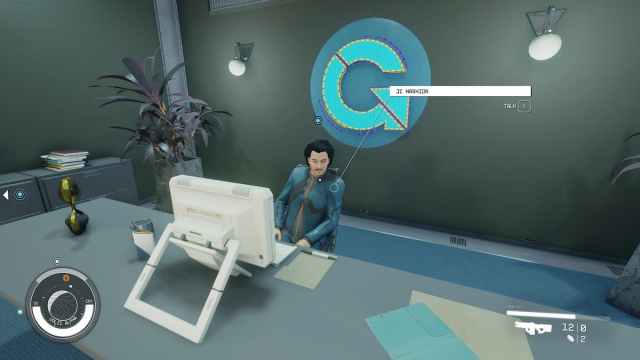
You will have to talk a lot with Ji Nashida, get on his good side, hear his complaints, and offer advice on what he should do next. In the end, you need to convince him to give you the key and let you in, so make sure to save before this interaction in case you fail the persuasion check.
You will find the evidence you need to smuggle out in the safe. Be careful to not be seen taking it.
19. Ayumi’s Offer Evidence
The next part of Absolute Power leads you to speak with Ayumi, but before you do that, you’ll need to talk to Myka (details are in the above-linked quest walkthrough).
Across from where Ayumi is sitting, the 19th piece of evidence can be located behind the bar.

20. GBLR013 Mortem Obire Evidence
You need to finish the Eye of the Storm quest to get the final evidence.
Take all the evidence pieces you missed so far.
Make sure to be well-equipped regarding weapons and first aid kits. Also, make sure you have your strongest ship as a home ship, equip it well, bring a lot of repair kits, etc. It’s going to be rough. Big time.
In the room where you find the late Jasper Kryx, three of his voice recordings and the evidence are on the floor.

To finish the Burden of Proof quest, you must betray the Crimson Fleet.
How to Submit Evidence to Lieutenant Jillian Toft in Starfield
You can submit all evidence to Lieutenant Jillian Toft aboard the UC Vigilance ship. Simply follow the quest in your quest log so that the game will lead you to her. In dialogue with her, keep selecting the evidence submission choices. It will take you some time to pass 20 pieces of evidence to her; there’s no way to automate this.
How to Get the Legendary Memento Mori Pistol from Lt. Toft in Starfield
After you’ve submitted all of the evidence, Lt. Toft will express her gratitude verbally. Still, there’s no Memento Mori given out to you. To get Memento Mori, you need to have a long talk with Lt. Toft about her history. Even though she will be reserved initially, you will soften her up a bit as time passes. After you complete the entire dialogue chain, you’ll get the Memento Mori.

Memento Mori Starfield Stats
Memento Mori is a legendary variant of the Sidestar ballistic pistol that comes with four modifications and three Effects. It has the following stats:
- Base Damage: Phys 27.
- Ammo: .27 Caliber.
- Clip Size: 17.
- Fire Rate: 40.
- Range: 20.
- Accuracy: 69.7%.
- Mass: 0.80.
- Value: 5360 Credits.
- Mod Slots: 7.
Memento Mori’s legendary Effects include:
- Crippling: Deals +30% damage on the next attack after hitting a target’s limbs.
- Cornered: Damage increases as health decreases.
- Demoralizing: Small chance to demoralize a target.
And its four modifications are:
- Explosive Rounds.
- High Powered.
- Laser Sight.
- Tactical Grip.
Thank you for going on this long adventure with us. If you need a cool, big, and powerful ship, check out How to get the Dragonfire II ship in Starfield!