
How to Complete The Red Mile Run in Starfield
Run for your life while the rich bet on your failure
The Red Mile is a special event happening on the distant planet of Porrima III in Starfield. Chances are that the first time you’ll hear about it is when you get an odd job from Vicente in The Well section of New Atlantis. He instructs you not to interact with anyone, but what if you do the opposite and actually win the competition all for yourself?
How to Enter and Win the Red Mile Run in Starfield
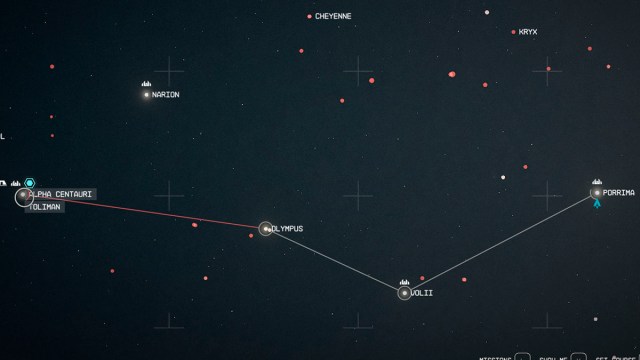
If you’re coming early from Vicente’s mission in New Atlantis, you’ll need to do a few Grav jumps from system to system until you get to Porrima, the system where you can find the Porrima III planet.
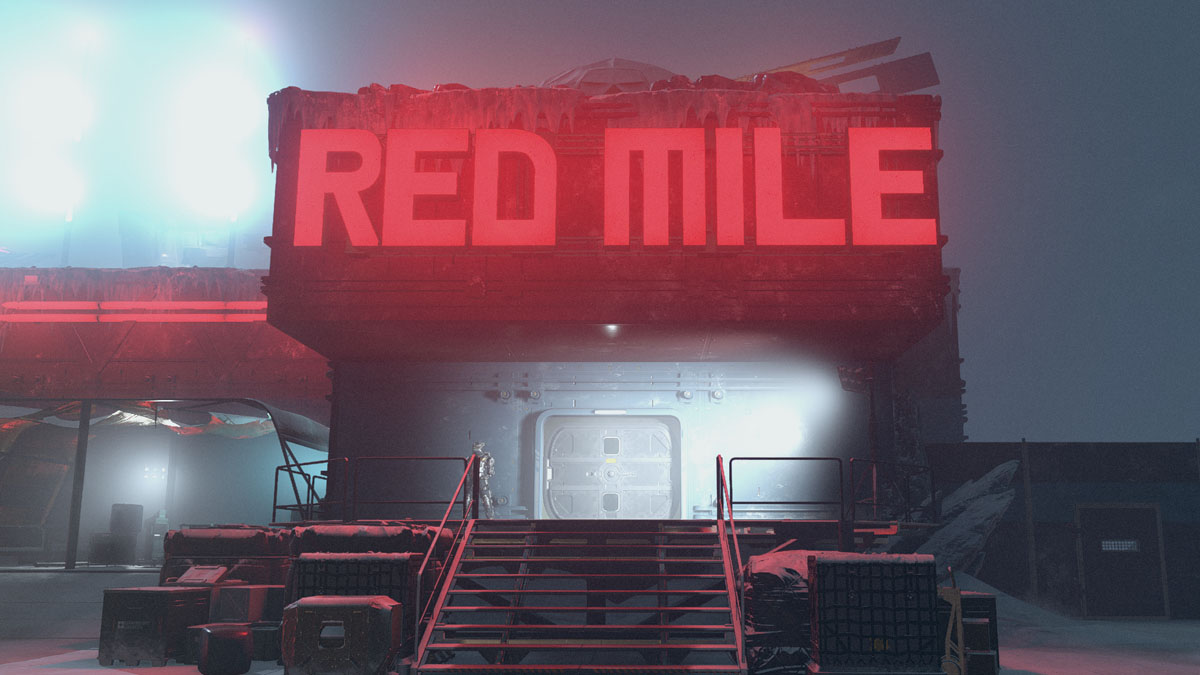
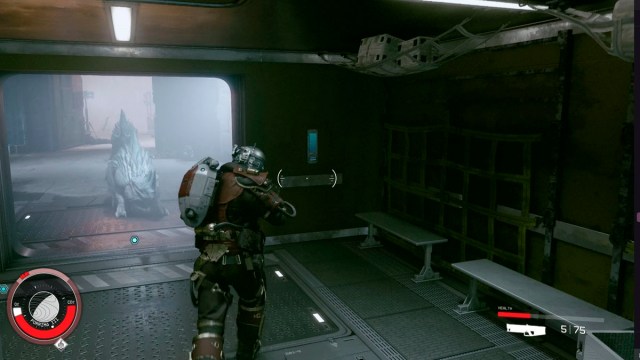
Once you arrive in Porrima III, land at the Red Mile bar and meet Mei, the bar’s owner and creator of the Red Mile Run. She’ll inform you on the Red Mile, and you just cannot let this unique chance pass. The Red Mile Run is a track where you need to reach and touch the beacon in the outer snowy plains and return to the bar alive. Sounds easy enough until you add the Red Mile Maulers into the occasion.
Stock up on medical items and ammo with your best weapons, as you’ll certainly need those. Also, there are a few strategies you can employ to win the Red Mile Run Route in Starfield. You’ll want to avoid the middle, as it’s the hardest path. Stick to either the left or the right paths. Make sure you also quicksave before the start of the mile. Lastly, keep plenty of Amp meds on you, as they’ll help boost your speed.
After agreeing to participate, go through the doors and the various signs of “last chance to not throw your life away” and get ready. Set the mission as your objective to know where you’re headed if it wasn’t automatically set. After setting foot, you may immediately see some of the dreadful Red Mile Maulers.
These enemies are tough and can hit you with explosive projectiles from a certain distance, and the road is packed to the brim with them. Fortunately, your companion is also following you here, and they’ll prove as loyal as they can be in this challenge.
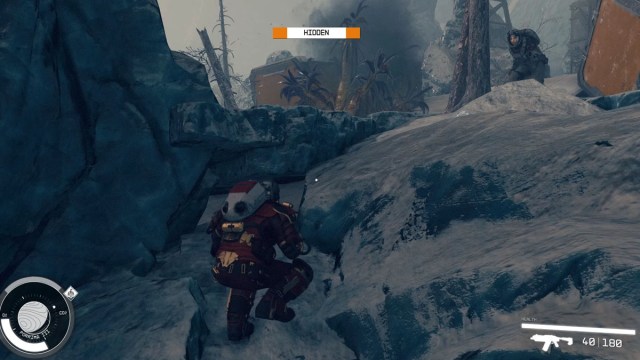
The trick is to avoid direct conflict with the Maulers as much as possible, as they’re extremely hard to bring down and can easily chomp you down to pieces. Sneak your way through the sides and slowly walk towards the beacon. Use the Scan mode to spot them more easily. If you have the Stealth skill, you can use the Stealth bar to see if you’re actually well hidden from them or not.
Fighting a few of them along the way is pretty much inevitable. In our experience, Laser weapons were more effective than pistols or rifles, so use one if you have it. Having a few points in the Lasers Skill helps a lot here.
Keep hiding as much as possible. We found the left side path safer while running it, as it also had a few mountains from which we could use my booster pack to close bigger distances in a single jump. Just be careful with your CO2 gauge here, as it can fill quite fast if you don’t pay attention when running from Maulers.
Once you reach the beacon and touch it, a higher-level Mauler might immediately attack you, but you can easily outrun him if you’re quick enough. This is where things get fun. Our crewmate here was Sarah, and all Maulers turned to her for some reason. So we ran as fast as our O2 allowed me while we left her fighting for her life. Better luck next time, girl.
But she could easily survive the assault, somehow. Having your crew distract the Maulers while you run back to the elevator is the best strategy for the victory lap. So throw them to the beasts and run! Don’t look back, and don’t worry, they’ll be magically right by our side once this is over. As long as you make it out alive, that is.
You can breathe easily once you reach the elevator. Talk with Mei once again, and she’ll congratulate you for finishing your first Red Mile intact (or almost, at least), giving you the Brute Force shotgun, 2500 Credits, some ammo, and 100XP as a reward. Oh, and your allies will be here waiting for you as if nothing happened, don’t worry!
You can attempt to do the race as many times as you want to set the new records. In fact, you’ll need to run it at least once if you’re doing the Freestar Rangers questline. Without spoiling the questline too much, you have to complete The Red Mile Run during the On the Run questline, so get your running shorts ready!
The Reward For Topping The Red Mile Run Leaderboard
If you manage to make it to the top of the Red Mile Run Leaderboard, there is a “reward” in store. Keep in mind that we strongly advise against doing this. Not only is topin very, very tedious and frustrating, but the reward given is one of the most lackluster in the whole game. You’ll get the Desperation rifle in exchange for having the highest score. However, this gun is quite weak, and similar guns like it are commonly found around the world.
Desperation Starfield Stats
Here are the stats for the Desperation rifle:
- Damage: Phys (22).
- Ammo: 11mm Caseless.
- Clip Size: 15.
- Fire Rate: 134.
- Range: 19.
- Accuracy: 71.9%.
- Mass: 3.20.
- Value: 23594.
- Mods: 6/8.
Brute Force Starfield Stats
Here are the stats for the ballistic Pacifier shotgun Brute Force:
- Damage: Phys (204).
- Type: Ballistic.
- Ammo: 15×25 CLL Shotgun Shell.
- Clip Size: 11.
- Fire Rate: 20.
- Range: 11.
- Accuracy: 57.1%.
- Mass: 4.40.
- Value: 20883.
- Mods: 5/6.