
Destiny 2: All Security Drone Locations
The dog is worth this journey from the Hellmouth to Seraph Station
You’ve likely heard about the coveted dog, hidden behind a well-guarded door in Operation: Seraph’s Shield in Destiny 2. But how do you gain access to it? The answer is simple, but the task of actually doing it is monumental. You’ll need to seek out and destroy all 50 Drones scattered throughout the galaxy.
Because it’s such an enormous task, this list is divided up by the most accessible Drones to gather (Drones that can be found visiting planets solo or by completing Lost Sectors) to the hardest, which are the Drones hidden in Heist Battlegrounds.
We’ll end the list on Seraph Station, as we’ll need to be there anyway if we finally want to open that door. So, buckle up, Guardian. We’re in for a long ride.
Destiny 2: All Security Drone Locations
The heading for each drone is like so: number, location, and a secondary number if there is more than one drone in that area. Because there are 50 total, some areas practically swim in these drones.
All Drone Locations on Europa in Destiny 2
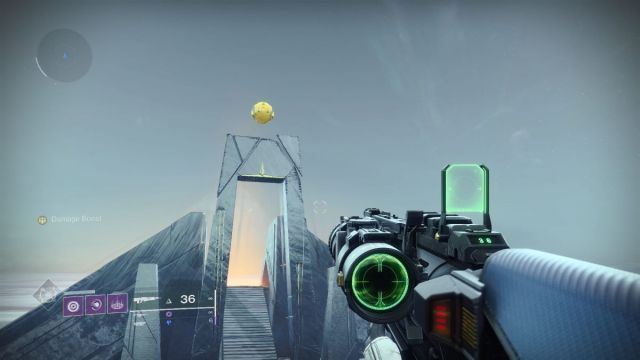
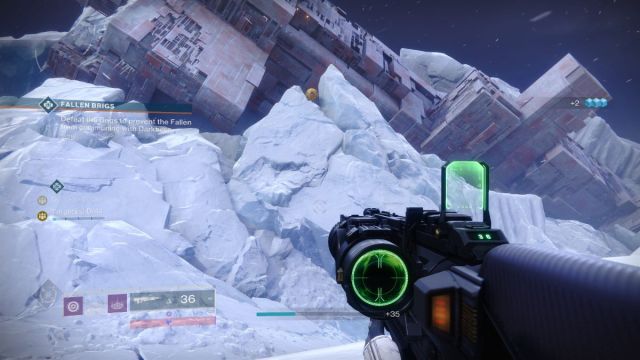
1 – Beyond
Head to Europa and travel to Beyond’s quick travel point, where the Exo Stranger is. From here, turn around and head towards the black pyramid across the snowfields. Our first drone will be on the archway above the pyramid stairs.
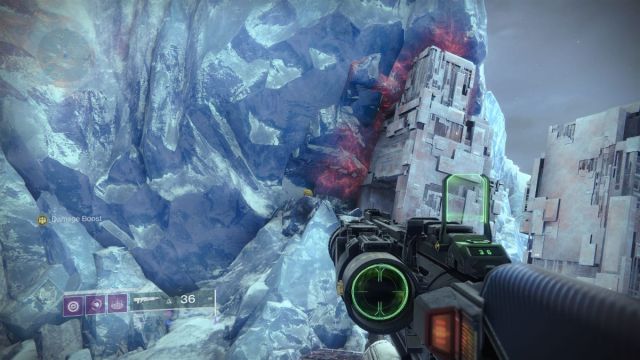
2 – Asterion Abyss 1
From Charon’s Crossing quick travel point, head north toward the Asterion Abyss. Once you enter from the South, head towards the Cadmus Ridge entry point, but don’t actually enter it. The Yellow Drone is against the rock wall, relatively high up, near some of the bismuth-shaped ruins. It can be easy to miss.
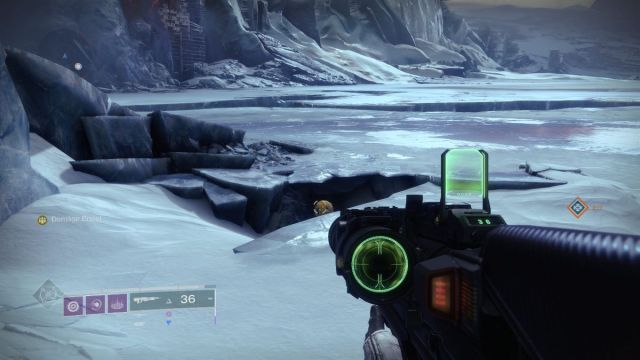
3 – Asterion Abyss 2
While still in the Asterion Abyss, head north toward the Eventide Ruins. There will be several cracks in the ground. Besides the massive rock, hidden in one of these cracks, is the third Yellow Drone.
4 – Asterion Abyss 3 – Lost Sector, Concealed Void
Yep, we’re keeping to the Asterion Abyss, but we’ll need to head into the Lost Sector beneath the ruins. When you reach the platforming section where the bridge is suspended across the lake of white Vex Milk, jump onto the circular platform to your left. From here, you’ll be able to see under the bridge. There, should be Drone 4.
5 – Eventide Ruins 1
Once you load into Eventide Ruins using the quick travel point, you’ll see a red corridor straight ahead of you. Head towards it, then go to the very back of the room. There will be several canisters, and to the right of them will be Drone 5.

6 – Eventide Ruins 2
From the red room, head back toward the center of the map. Here there will be a small room that is completely swarmed with Dregs. Inside, you’ll see there are some railings on either side. If you’re entering through the “main entrance” which will have stairs, turn left. You’ll see the metal platforms, which you can jump on top of. Head to the very highest one. At the end will be Drone 6.
7 – Eventide Ruins 3 – Lost Sector, Bunker E15
In the very same room where you found Drone 6, there will be a Lost Sector. Enter it, and you’ll find yourself in Bunker E15. Free all the Bray Security drones and allow them to go to work on the enemies in the large room. Notice that there are Bray Security drones trapped in this room as well. Right above their cage is a stairwell that leads to another room.
Was this room always here? Or was it opened for the Security Drone? Either way, enter it, and you’ll immediately see Drone 7 on your right.
8 – Cadmus Ridge 1
Head back to Charon’s Crossing, but this time take the path left to Cadmus Ridge. Keep right until you see a large geometric ruin lying on top of an icy mountain. Our next Drone will be between the structure and the ice.
9 – Cadmus Ridge 2
While in Cadmus Ridge, head towards the Clovis Bray facility on the West side of the map. But don’t fully enter. Instead, as you reach the icicle-full entrance of the cave, turn immediately left. There, tucked between the facility and a ruined metal wall, will be Drone 9.
10 – Cadmus Ridge 3 – Lost Sector, Perdition
Head into the Lost Sector in Cadmus Ridge, which you can access by heading towards the ice wall to the north and finding the tunnel that leads to the facility. Unlike the previous two Lost Sectors, you’ll need to complete this one, or almost complete it, to obtain the Drone. Drone 10 will be immediately to the right of the Lost Sector cache.
That’s all 10 Drones on Europa! If you did it correctly and destroyed each one, you should unlock the triumph Drone Destruction I, which will be in the Secrets submenu of Season of the Seraph triumphs. Now we’re off to the moon.
Related: Everything You Need to Know About Iron Banner’s Fortress in Destiny 2
All Drone Locations on the Moon in Destiny 2
11 – Archer’s Line
Head to Sanctuary, then hold left, headed towards Archer’s Line. The moment you hit the railing, get off your Sparrow. You’ll see a large rock, which you can use to jump up onto this railing. From here, follow it down to the end of the line, where you’ll see a rather cinematically placed Drone.
12 – Archer’s Line 2 – Lost Sector, K1 Logistics
From Drone 11, hop down and enter the ruined building. We’ll be heading into the Lost Sector. It’s easy to get a little turned around in this structure, but if you hit a corridor filled with spectral scarlet spooks, you know you’ve found the right one. If it helps, it’s on the far left of the structure.
Continue the Lost Sector as usual until you’re about to enter the arena with the boss, Servitor, who has an impenetrable shield. Before you enter, turn right. There will be a Drone floating peacefully and minding its own business. Destroy it.
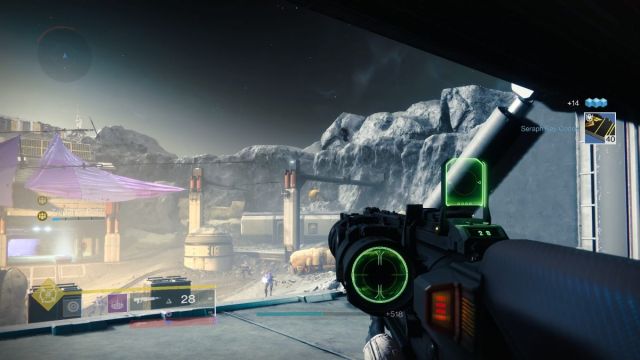
13 – Anchor’s Light
From Sanctuary, take the path right, holding to it until you enter Anchor’s Light. Follow the path left, and you’ll see in the distance a yellow building with a purple tarp, crowned with a large antenna and two satellite dishes. Beside these two satellite dishes will be Drone 13.
14 – Anchor’s Light 2
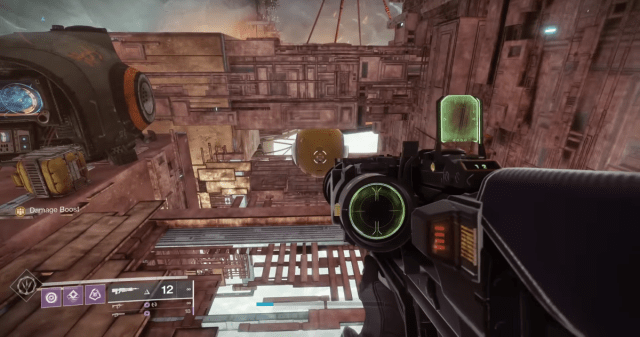
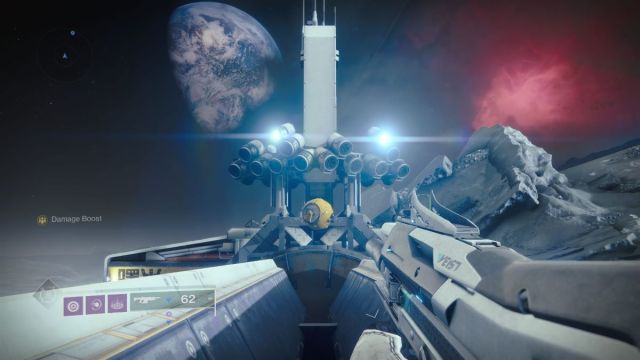
From Drone 14, we’ll be turning around and heading toward the old, ruined spaceship at the very bottom of the map. This drone is thankfully right out in plain view, near the circular opening of the derelict ship.
15 – Hell Mouth 1
From Anchor’s Light, take the right path toward the Hell Mouth. Head north, skirting around the edges of the circular pit. You’ll see a Drone towards the entrance of the Hell Mouth. If you fall into the pit, you will likely be unable to see it.
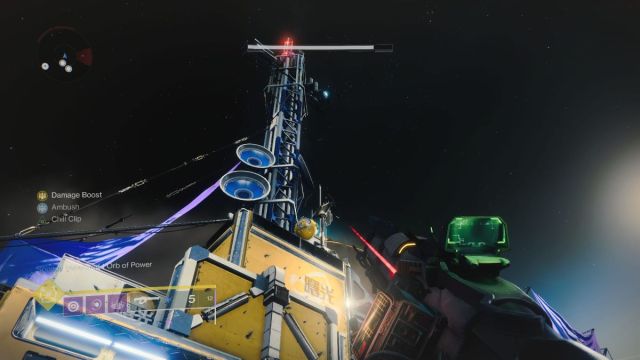
16 – Hell Mouth 2
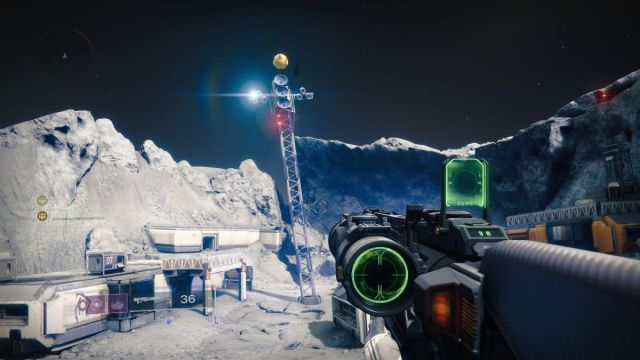
From Drone 15, circle back around the pit, heading towards the K1 Crew Quarters Lost Sector. You’ll know you’re in the right place because you’ll see a smattering of small blocky quarters. In the center of these buildings will be a satellite tower, and at the top of this tower will be the Drone.
17 – Hell Mouth 3 – Lost Sector, K1 Crew Quarters
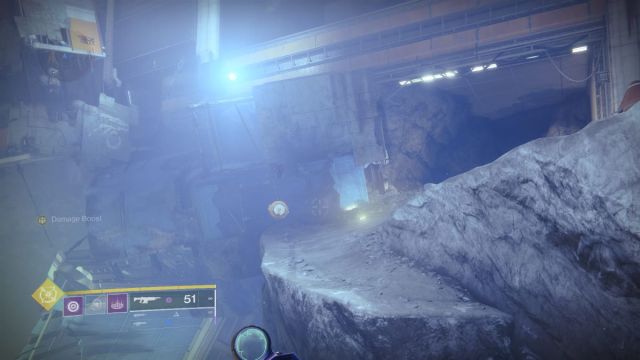
For this one, we’ll conveniently be heading into the nearby K1 Crew Quarters Lost Sector, which can be accessed through one of the backmost buildings. Descend and take out the Dregs and Vandals until you reach a point where you’ll have to jump across a chasm. There, waiting for you, will be a Drone. You’ve gone too far if you hit the giant Nightmare Heavy Shank.
18 – Sorrow’s Harbor
Head to Sorrow’s Harbor using the quick travel point. From this point, go towards the Scarlet Keep’s main entry slope. Look towards the Keep tower, then turn right, towards the crimson pillar in the distance. The next Drone is just to the right of this pillar, in the distance. You can actually shoot the Drone from the entry slope of the Scarlet Keep, and I recommend you do so, as it will make getting to the next Drone easier.

19 – Sorrow’s Harbor 2
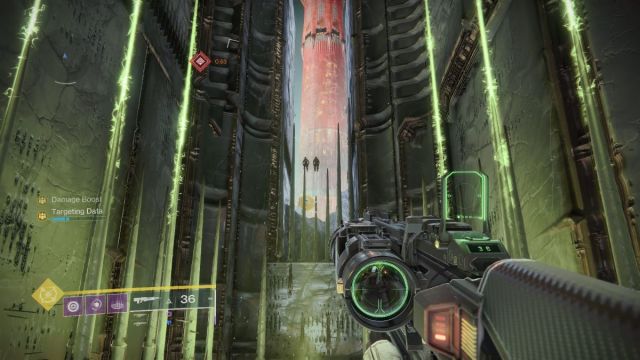
From the entry slope, head towards the Scarlet Keep, entering the narrow corridor just past where you’ll fight the Nightmare Altar boss. The walls will go from red to green. At the end of this narrow corridor is a Hive Ritual Circle but look beyond that towards the two floating spooks. They are floating right above Drone 19. How kind of them to show us where it is.
20 – Sorrow’s Harbor – Lost Sector, K1 Revelation
You might see a trend emerging with where the next Drone is located. We’ll need to head to K1 Revelations Lost Sector, which is in the center of Sorrow’s Harbor. The entryway is a bit of a pain to find, but it’s a hidden cave. So, if you see so rocky outcroppings near where the Lost Sector is marked on the map, investigate them carefully.
Enter the Lost Sector and continue past the first swarm of Acolytes and Knights. You’ll descend a bit and see some platforms you’ll need to jump across to continue into the Lost Sector. Don’t. Instead, turn left and you’ll see the next Drone behind a rope screen. We don’t even have to finish the Lost Sector to nab this one.
Shooting this one will net us the Triumph Drone Destruction III. Unfortunately, from here on out, things get a little more challenging.
All Heist Battleground Drone Locations on Mars
Important to note that you can choose which Battleground you want to take part in by finding the planet it is on and selecting it. No need to leave this up to chance. If possible, get a fireteam that’s patient or also hunting down Drones. If your teammates run ahead, you may be dragged forward, causing you to miss some of these drones. Who in the world wants to repeat a Heist?
21 – Heist Battleground –- First Encounter 1
Once you spawn into Mars, head towards Objective C. You’ll see that before you reach Objective C, there is a long pathway to your left. Head down the path halfway, then turn around. Hidden behind a box will be our first Drone.
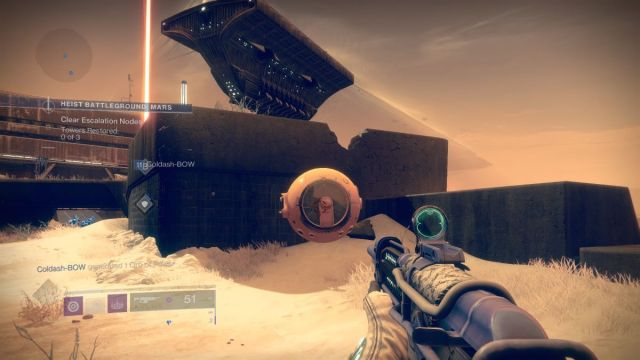
22 – Heist Battleground – First Encounter 2
From Objective C, head all the way to Objective A. Near what looks to be Shrieker bones, there will be another Drone tucked away by the boxes.

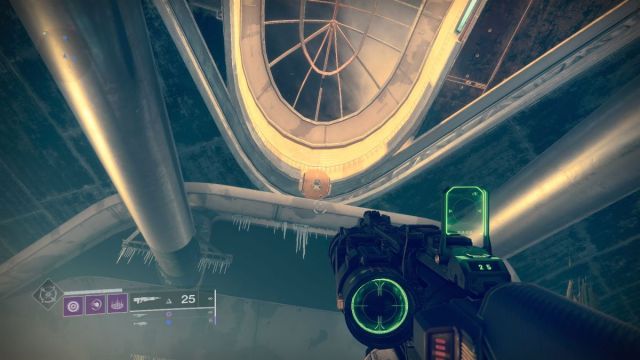
23 – Heist Battleground – Second Encounter
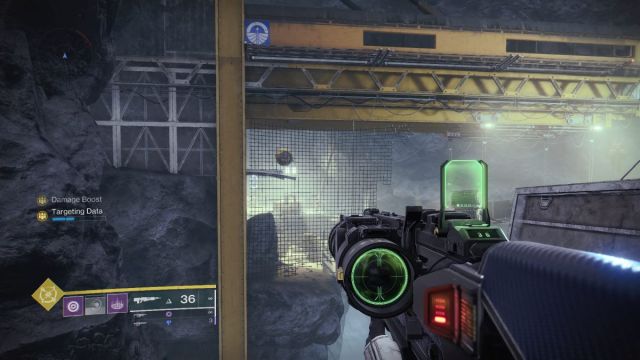
Once all the towers are cleared, and you’re prompted to pick up the charge to clear away the Hive debris, do so. You’ll enter a large room with high ceilings. Immediately look up. There, near the skylights, is a hidden drone. It even blends in with the yellow! How devious.
24 – Heist Battleground – Platforming 1
The following two drones can be obtained once you go outside and you’re confronted with both watch towers and platforming. Run around the side of the building until you reach the first large platform. You might be tempted to climb up the large pile of Hive debris that will lead you to the next platforming area. Don’t. Instead, go to the far right of the pile, down a small flight of stairs. Our next Drone is hidden to the side of them, next to a Hive spawn point.
Related: How to Get the Wolfswood Cloak in Destiny 2
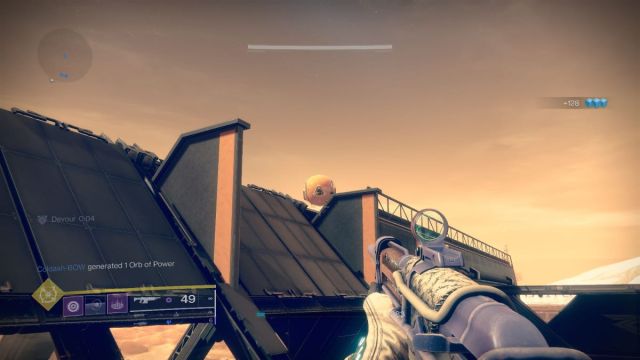
25 – Heist Battleground – Platforming 2
Climb up the pile of Hive debris, then land on the second large platform. The moment you land, turn left and look up at the metal rafters ahead of you. Sitting on the pipes will be Drone 25.

26 – Heist Battleground – Arena
Here’s our last one. Once you’ve finished the platforming section, you’ll pass through a door that opens into an arena. This arena will be absolutely swarmed with Hive. Clear them out, then turn right. You should see what looks to be like solar panels. Examine the area where the solar panels meet the metal wall closely. There, on top, should be a very sneaky Drone.
And that’s it for this Heist Battleground! Finally, you can stop being a detriment to your team. Or was that just me?
Related: How to Find and Complete Iron Banner’s Weekly Challenges in Destiny 2
All Heist Battleground Drone Locations on Europa
Our next stop is the icy Europa. We’ll also have 6 Drones we’ll need to find here.
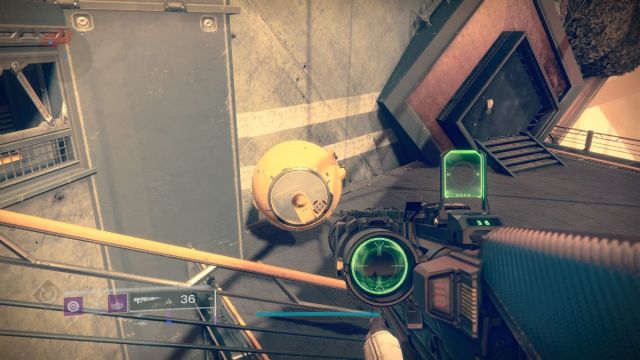
27 – Heist Battleground – Snowfield
Once you spawn in, head straight ahead, and you’ll see a few Vandals standing on a circular metal platform. Go around this platform, and you’ll see that tucked beneath it is Drone 27.

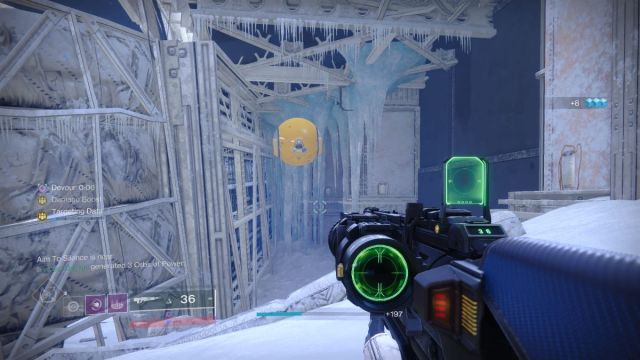
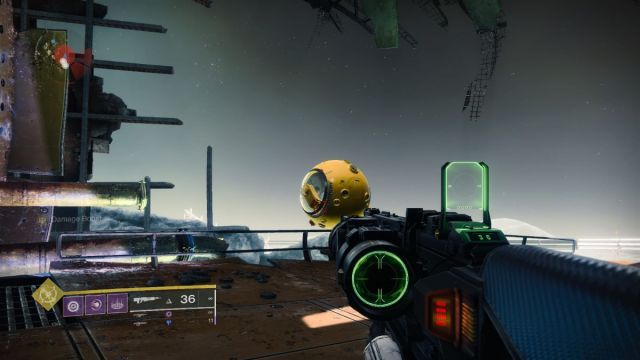
28 – Heist Battleground – Entryway
Once you escape from the snow and the watchtowers, you’ll pass through a doorway and enter a large room with a raised platform at its center. This room is practically swarming with Fallen, but don’t go too far in. Instead, immediately look left. It’s hard to see, but a sliver of the top of the yellow drone can be spotted if you look up toward the giant clear windows near the ceiling. And yet, somehow, that isn’t even the worst drone in the area.
29 – Heist Battleground – Corridor
Once you’ve cleared the room where you found Drone 28, you’ll enter a corridor full of Hive. When the corridor turns left, turn right instead. There, hidden behind a box, is drone 29.
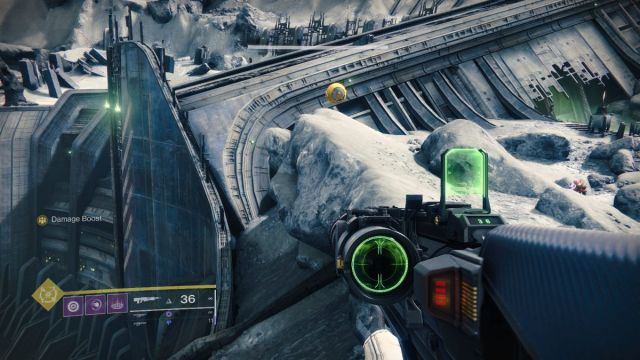
30 – Heist Battleground – Large White Room
You’ll enter a large white room with a large rail tunnel to the right. You’ll know you’re in the right place because there will be approximately 10,000 Hive trying to kill you. Descend to the main floor and turn left to check under the stairs. Beneath it, you’ll find Drone 30.
31 – Heist Battleground – Balcony
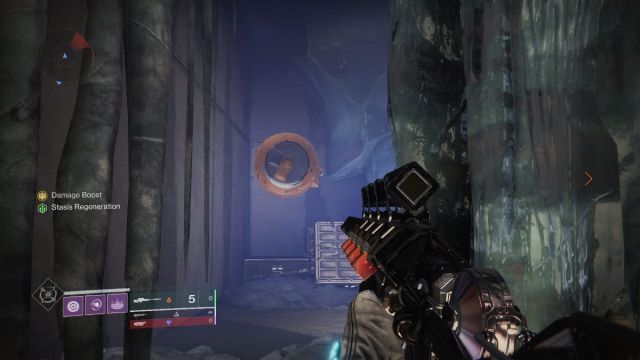
I found this one to be particularly tricky! Once you’ve left the White Room, you’ll enter a balcony area where you can see the many layers of the facility. Descend to the next floor, where a giant hole in the glass skylight will be at your feet. Don’t go through it. Instead, head North from the skylight to the edge of the platform.
Aim down your scope and look left towards the Shriekers (their eyes will be closed). It’s very hard to see because of how dim it is, but there’s a Drone balanced on a Shrieker. The wires may be in your way if you don’t see it. Shift around until you see it.
32 – Heist Battleground – Clovis’ Room
The last one! And it’s fitting that it’s in the room with Clovis’ giant head. Go to the far right of this room, past the Wizard, who will try to set you on fire. There, will be the last Drone for Europa in the corner, balanced on the ledge. Thank the Traveler that’s over. Now, it’s time to return to the moon.

All Heist Battleground Drone Locations on the Moon
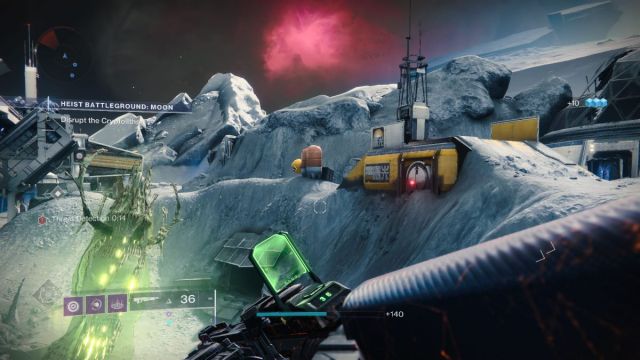
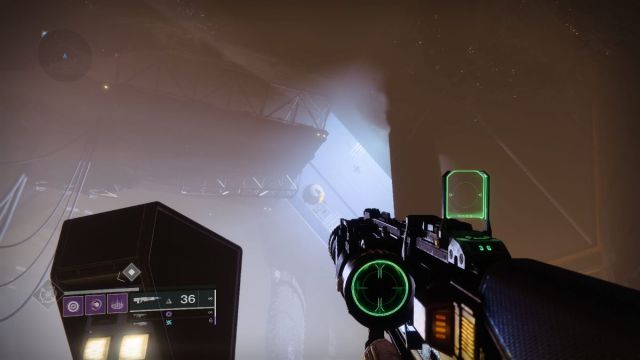
33 – Heist Battleground – Spawn In
You’ll spawn into a familiar place: Anchor’s Light. Head forward immediately, and you’ll see a small building on a ridge to your right. Beside this building are two large orange canisters. And just behind those is our first Drone of the Heist.
34 – Heist Battleground – Slide
This one is particularly easy to miss unless you know what you’re looking for. When you see the pit that you’ll have to slide down, the Drone will be within the slide, just to your left, protected by boxes and debris. Fortunately, you don’t have to worry about hitting it while you’re sliding. When you reach the bottom, turn around and head back to the slide, where you can shoot the Drone.
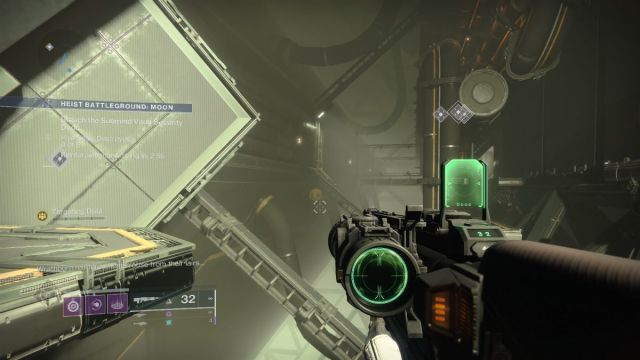
35 – Heist Battleground – Viewing Room
Once you enter the Viewing Room (so-called because of the plexiglass that lets you see into the arena below), head far right. You’ll find the Drone just behind an archaic computer console.
36 – Heist Battleground – Offshoot Room
After the viewing room, you’ll work your way through two narrow corridors. After the second one, you’ll enter a somewhat awkwardly angled room. Immediately to your right, upon entering, is a green-lit alcove full of consoles. You’ll find the Drone behind the consoles in the center.
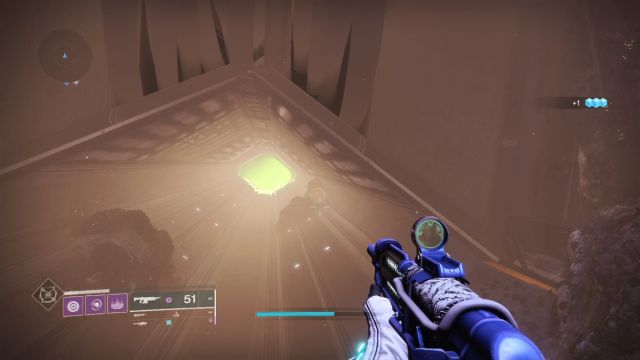
37 – Heist Battleground – Arena
The room adjacent to where you found Drone 36 is the arena we saw through the plexiglass. Usually, you’ll have a boss fight here, but for the Heist, we only need to endure several waves of enemies. But before you head towards the console, look up towards the skylight once you enter the room. There, floating, will be Drone 37.
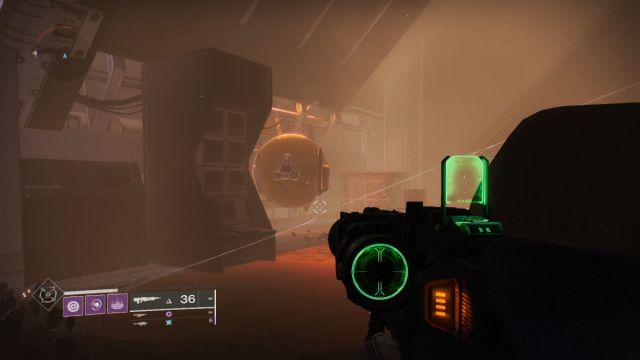
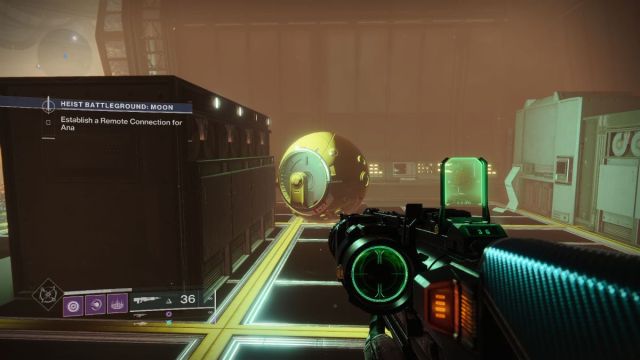
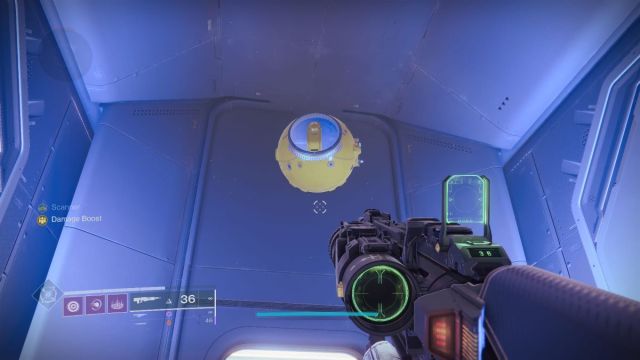
38 – Heist Battleground – Relic Room
The Relic Room is defined by the massive door that’s locked by ruins, which requires you to obtain charges to break. This room is common to all Heists, but it’s only on the moon that this room has a drone.
Look towards the locked door, then turn slightly towards the right. A Drone floating in the grey between the door and the metal platforms with Scorn. Very easy to miss, but it’s also our last one on this Heist! The Triumph Drone Destruction IV should pop.
Related: How to Get Gyrfalcon’s Hauberk in Destiny 2
All Drone Locations in Operation: Seraph’s Shield
Finally, we’re on the home stretch. Seraph Station has 12 Drones, each of which requires the Security Clearance Infiltrator Gear to enter. It’s also ideal to have the tactical armor that helps you resist laser damage, but that isn’t necessary, as you can cheese your way through wires either with Icarus Dash or with the heavy attack of a sword.
So, have both the armor and Security Clearance or Security Clearance and a non-exotic Sword.
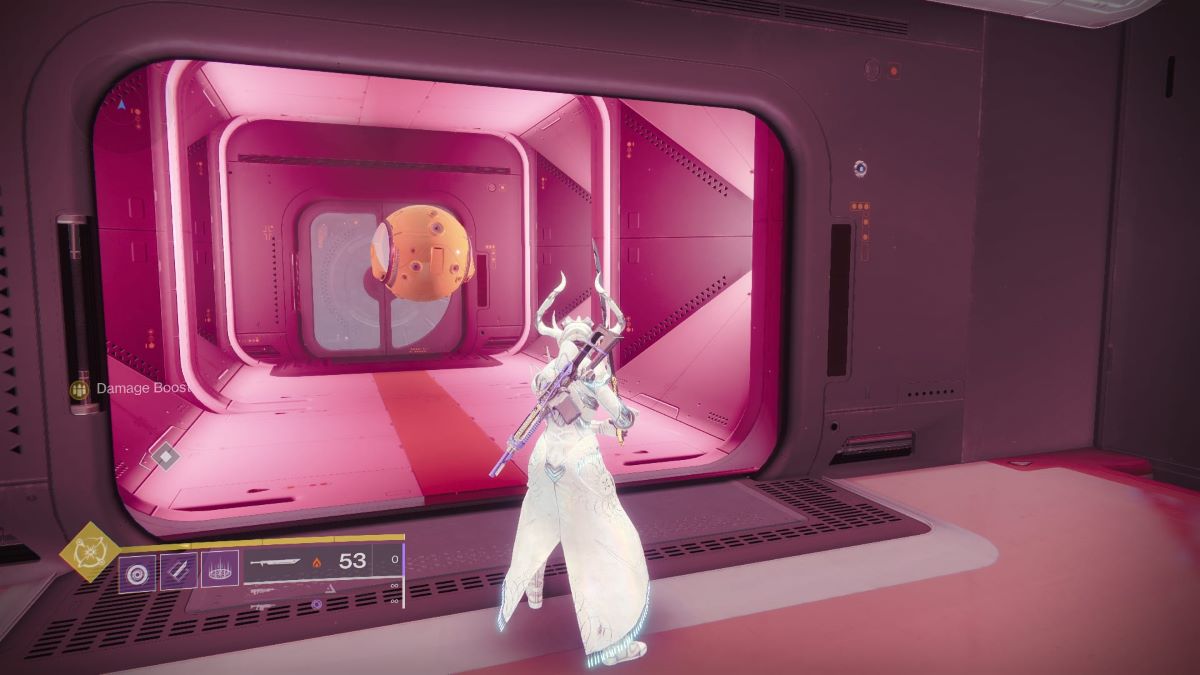
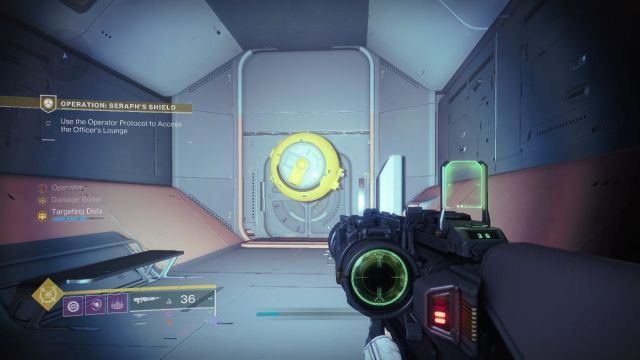
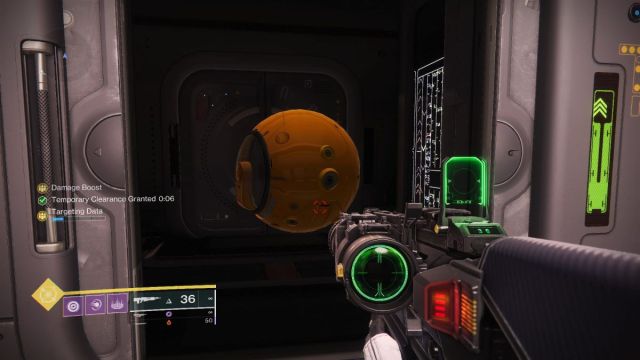
39 – Outside the Facility
Head towards the Facility where the Ogre guards the entrance. On the right side of the platform, the Ogre guards is a pit. But if you jump into this pit and angle yourself just right, you’ll also see there’s an open doorway into a room. Jump into this room. And I do mean jump in. Landing on the ledge will insta-kill you.
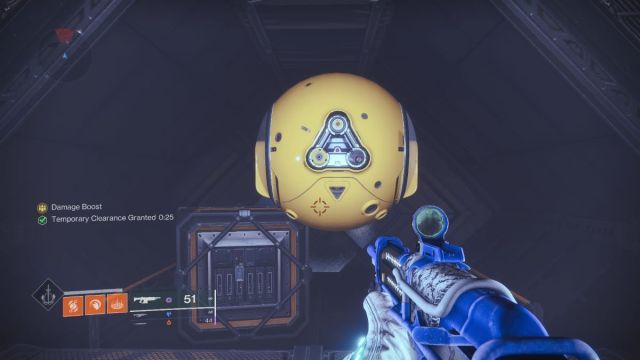
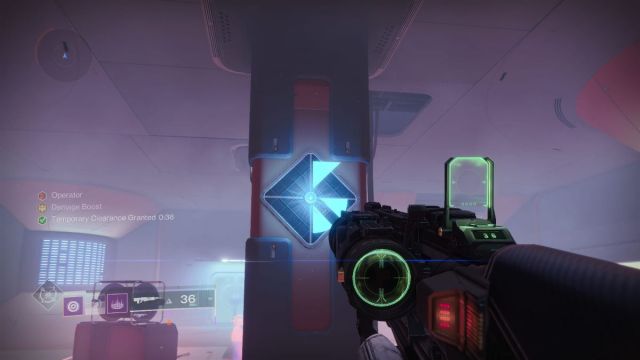
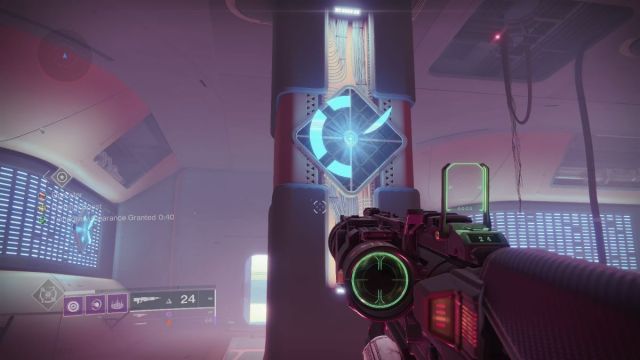
Three panels will then spawn. You will need to hit the panels in the correct order for the door to open. Unfortunately, it seems that the order is randomized. But the first panel will be to the right of the door that we’re trying to open. The second is beside the console panel. To the right of the entryway doors is the third panel.
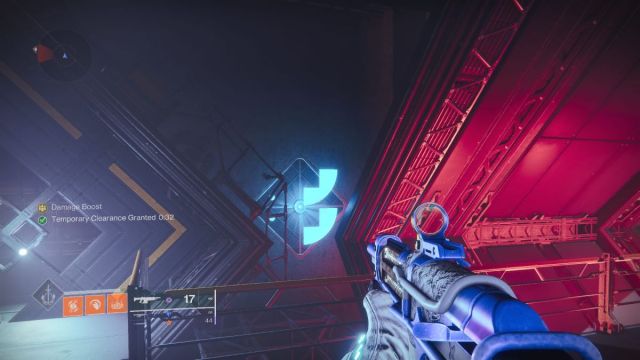
If you look at the symbol projected on the console, you can tell which one to shoot. You’ll want to shoot the one that matches the console.
Hit all three in the correct order, and the door will open, revealing Drone 39.
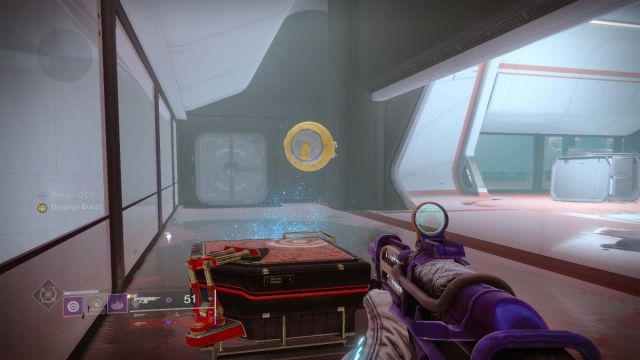
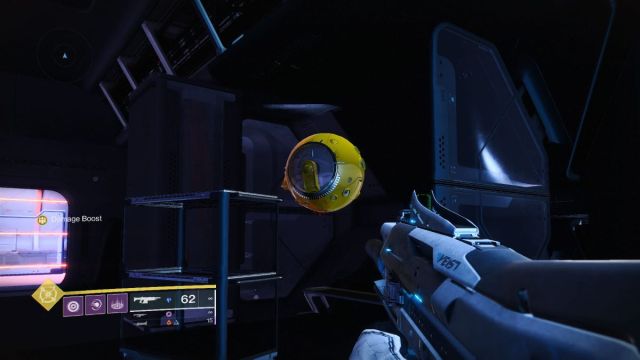
40 – Operator Room with Plexiglass Side Room
After you take the pod into space, you’ll deposit your Scanner Augment and enter a new room. Claim the new Operator Augment, then crawl into the vent and enter the brightly lit side room. There will be a room guarded with lasers. Pass through whatever way you can, then look up. The Drone will be near the ceiling.
Related: How to Unlock Hunter Trace 3 for Revision Zero in Destiny 2
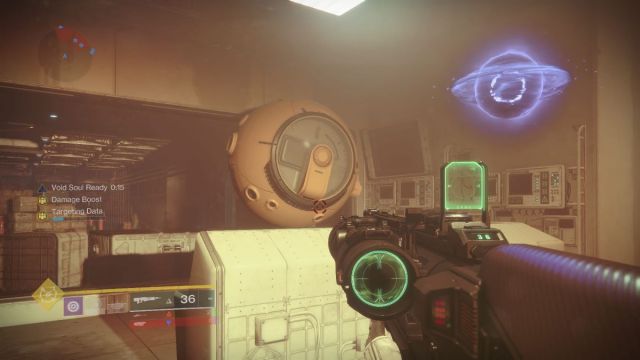
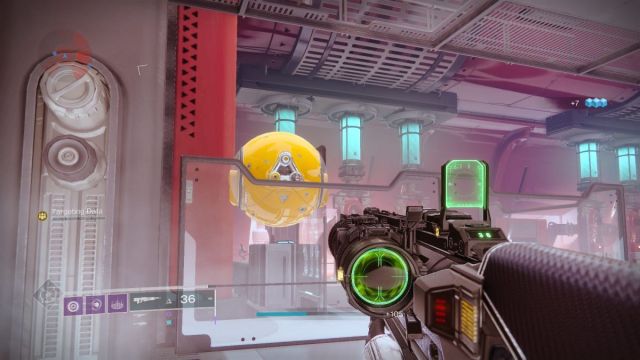
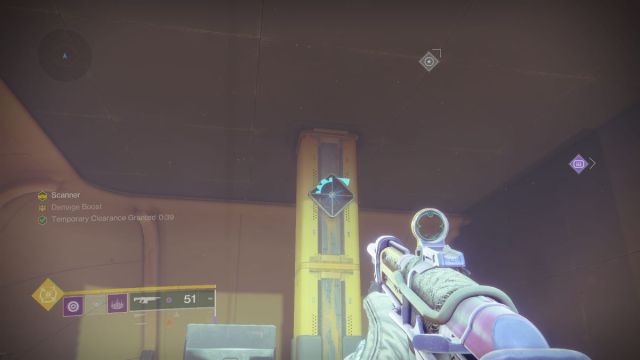
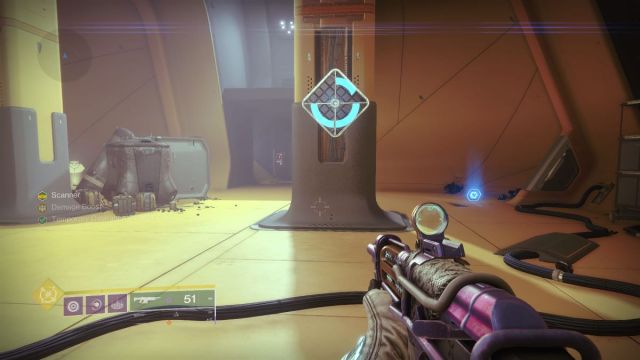
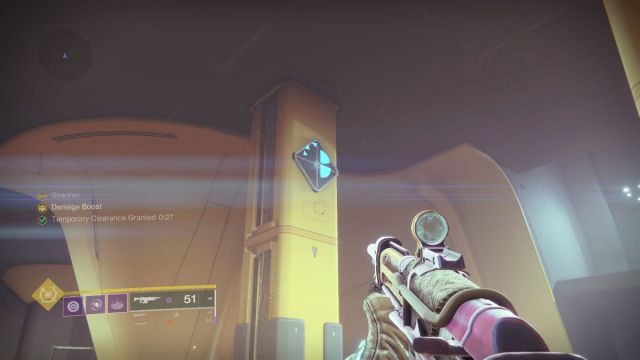
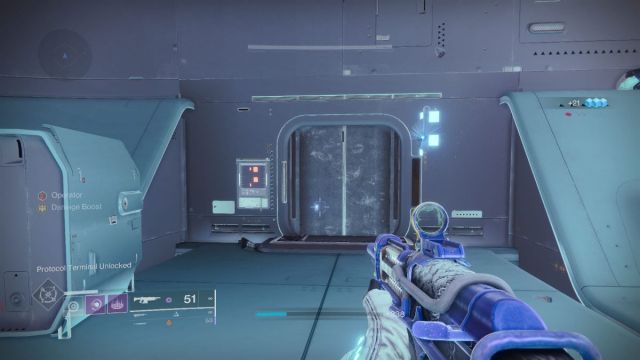
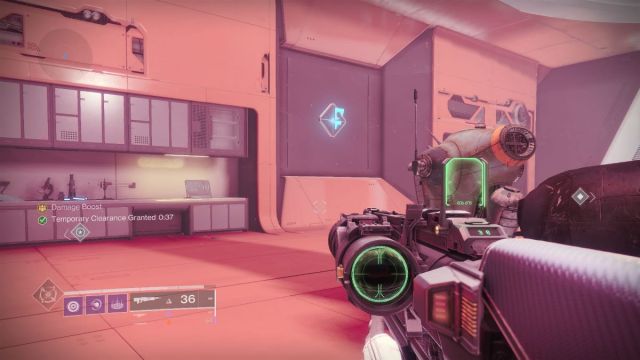
41 – Engineering Sector, Yellow Room
You’ll enter a large yellow room with several Captains and an Operator Vandal. Clear out all the enemies, then head towards the door on the right that requires a security clearance. Head back towards the center of the room, towards the three pillars. Here is where all three of the panels will spawn.
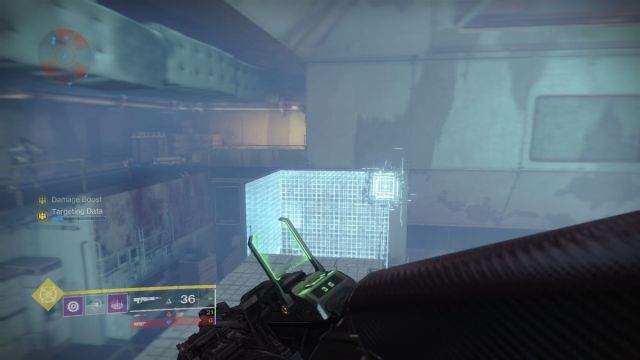
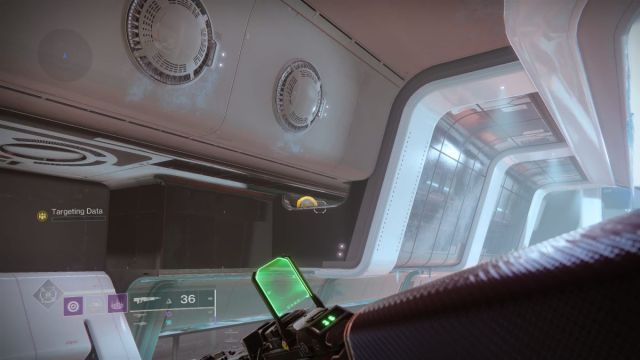
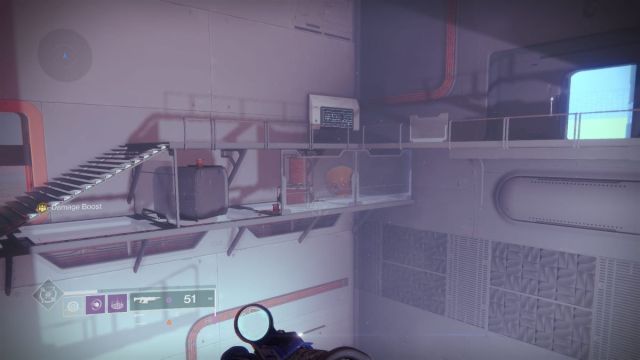
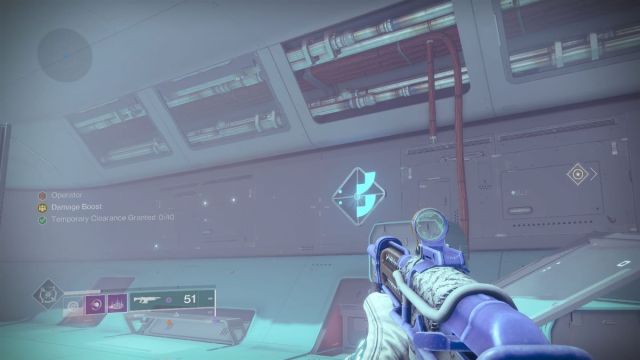
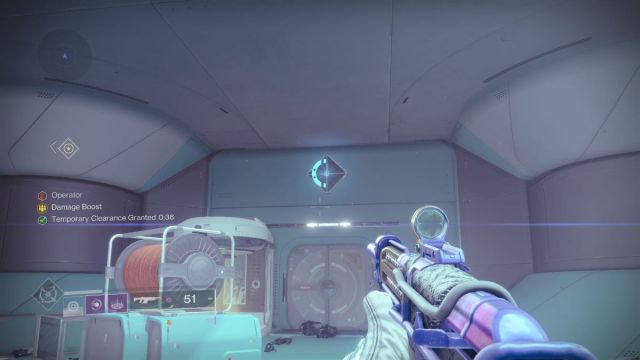
42 – Microwave Room
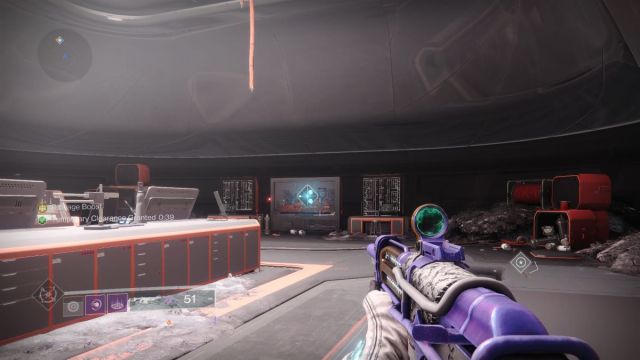
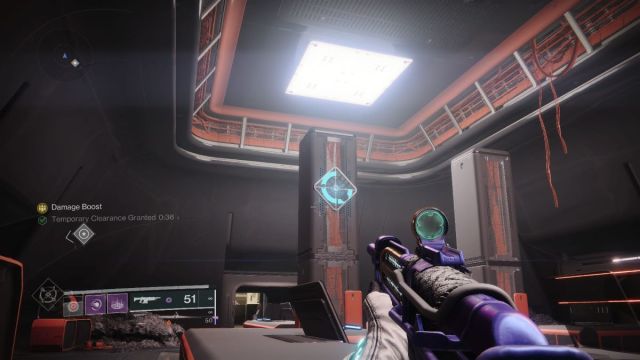
Once you get past the server room full of turrets, you’ll enter the room that allows you to see the path and consoles you’ll need to hack in the Microwave Room. But before you head inside, go to the bottom of the room. Look up above the door that leads into the room full of traps. There, beneath the stairs, is Drone 41. The only way to access it is from the bottom floor, as it’s surrounded by glass save for a small square entryway.
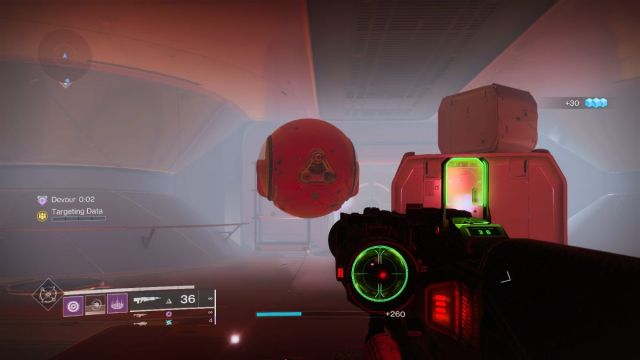
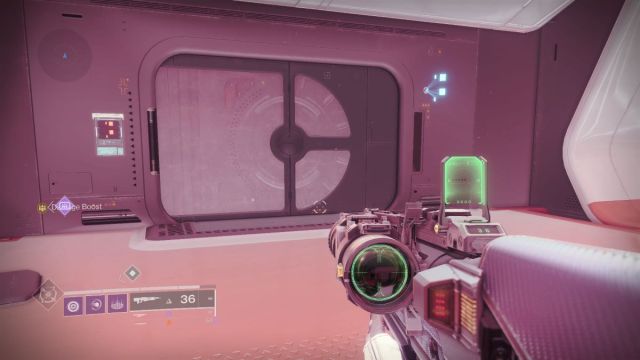
43 – Red Operator Room
Once you complete the trap room, you’ll enter a red-tinged room with a yellow-bar Captain and a Vandal holding an Operator Augment. Clear out these enemies, then turn to the door to the right. Access the console, and you’ll have 45 seconds to complete the puzzle.
Two panels are on the pillars immediately behind the door, but the third one is slippery – it’s on the similarly colored wall beside the locked door.

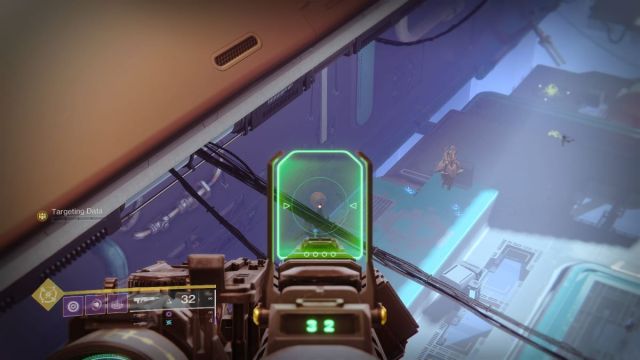
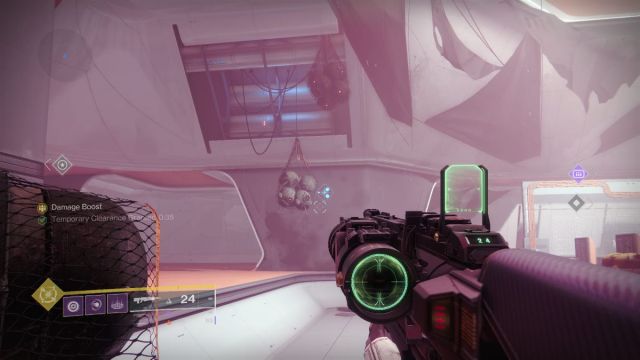
44 – Shrieker Room
Once you’re through the Operator room, you’ll enter the room where you first encounter the Hive. Clear them out, then enter the room with two Knights and two Shriekers. Usually, we crawl through the vents on the left, but this time, we’ll go straight ahead to the back of the room.
Here you’ll see a dark room blocked off by lasers. Go past them, and you’ll find a Hidden Chest to your right. Turn left and follow the corridor, and you’ll find Drone 43.
45 – Turret Room
After you pass through the room with the Knights and Shriekers, you’ll go through a few corridors and enter my least favorite room. This room contains a yellow-bar Captain, holding the key we need, and three turrets. Take out all the enemies and then head right. Look close to the floor, and you’ll find that there’s a small, sealed metal door. Use the access console beside it, then knock out the three panels in the correct order.

46 – First Boss Room
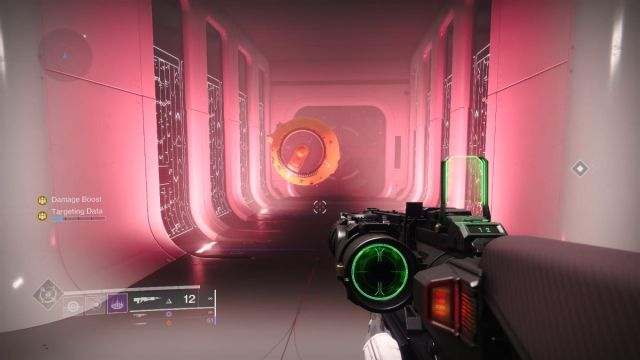
You’ll be told to “Draw attention to yourself,” and you’ll enter the next room to do just that. This is the room where we encounter our first boss. You’ll see a place to put down a rally flag. But instead of putting down a flag, turn left and follow the wall. There, on your left side, will be a door.
Now, this room is relatively large, but the panels are close by. A small kindness on Bungie’s part. Here are all three. Hit them in the right order, and the door will open to a room that really looks like a shot out of 2001: A Space Odyssey. Nice. Hit that drone.

47 – Ogre Room
Right after you finish the space walk, you’ll enter a room with two Ogres and plenty of Acolytes. Defeat the Hive in the room, then examine the room blocked off by lasers on the left wall.
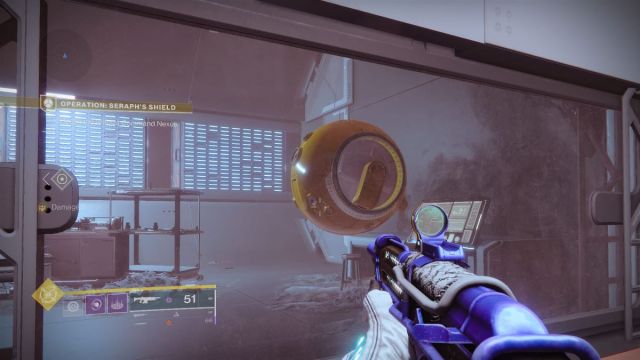
48 – The Room Before the Boss Room
In the room before the final boss, you’ll see the Drone behind a glass window, taunting you. Fortunately, we have Security Clearance. This one’s straightforward as the room is very small, and the panels aren’t hidden anywhere strange. Just check the pillars and the wall directly behind you after you hack the door.
49 – Post-Boss Room 1
Yes, finally. We’ve beaten the boss. We’ve conquered Seraph’s Shield. Now claim your reward and head into the room adjacent to the Boss Room where you’ll be instructed to upload the virus. Don’t do so yet. Instead, enter the room that’s blocked by lasers. There is Drone 49, waiting for us.
50 – Post-Boss Room 2
There is one door in the Post-Boss Room that requires Security Clearance. Access its console, and you’ll need to find the three panels scattered across the room. Knock them all out in the right order, and that’s it.

You’ve done it. We’ve done it. Now, let’s run this mission one more time and get that dog.
Related: How to Complete the Bank Job Quest in Destiny 2 in 2023