
Paper Mario: Sticker Star Guide Essentials Enemies
Enemies
Standard Enemies
Goomba
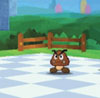 Goombas are among the most common enemies in the game. You won’t need any special tactics to defeat these enemies—any stickers that deal damage will get the job done. The game contains a wide variety of Goombas. Some of these creatures have a healthy supply of HP. As you encounter more powerful variations, consider using more powerful stickers.
Goomba Variations:
- Goomba
- Shiny Goomba
- 2-Fold Goomba
- 2-Fold Shiny Goomba
- 4-Fold Goomba
- 4-Fold Shiny Goomba
- Mural Goomba
Paper-Cone Goomba
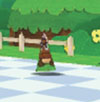 Every so often, a Goomba transforms into a Paper-Cone Goomba. These creatures roll themselves into large spikes, protecting themselves from most Jump-based attacks. Iron Boots still work, but it’s generally best to rely on Hammer attacks and any other stickers that deal damage.
Paper-Cone Goomba Variations:
- Paper-Cone Goomba
- Shiny-Cone Goomba
Paragoomba
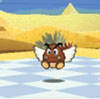 Paragoombas are similar to Goombas, but they use their wings to fly just above the ground. Paragoombas can dodge most Hammer-based attacks, but they’re vulnerable to shock waves produced by Hammer-based stickers used on nearby enemies. These enemies are vulnerable to Shells, Fire Flowers, and Ice Flowers, but Jump-based stickers usually get the job done..
Paragoomba Variations:
- Paragoomba
- Shiny Paragoomba
- 5-Fold Paragoomba
Koopa Troopa
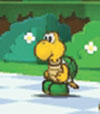 Koopa Troopas aren’t quite as common as Goombas, but they patrol many of the same areas. Koopa Troopas attack by tucking into their shells and sliding toward you. If you stomp a Koopa before the battle begins, however, you can use a Jump sticker to kick it into its allies. If this isn’t possible, virtually any sticker that causes damage will work well.
Koopa Troopa Variations:
- Koopa Troopa
- Shiny Koopa Troopa
- Mural Koopa
Paratroopa
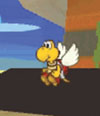 Paratroopas are very similar to Koopa Troopas, but they use their wings to fly high above the ground. Jump stickers are very effective, but any attack that affects airborne enemies can be used. Paratroopa Variations:
- Paratroopa
- Shiny Paratroopa
Buzzy Beetle
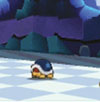 Buzzy Beetles are tough little guys. Their shells protect them from most heat-based attacks, so it’s best to stick to the basics. As with Koopa Troopas, you can stomp Buzzy Beetles outside of battle and kick them into their allies when the fight starts. If that’s not an option, use POW Blocks to flip or crumple these enemies and then finish them off with Jump-based attacks, or just use Shell Stickers or Ice Flowers to clear out entire groups.
Buzzy Beetle Variations:
- Buzzy Beetle
- Shiny Buzzy Beetle
Spike Top
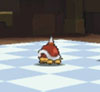 Spike Tops are very similar to Buzzy Beetles. They’re fairly tough, and they’re protected from most heat-based attacks. Additionally, their spikes protect them from most Jump-based stickers. Standard Hammer stickers will get the job done, but powerful Shell stickers or Ice Flowers are usually more effective.
Bony Beetle
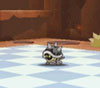 In most ways, Bony Beetles are very similar to Buzzy Beetles and Spike Tops—they’re just a bit tougher. They’re immune to most heat-based attacks, and their retractable spikes can counter most Jump-based attacks. Once again, POW Blocks and Shells are very useful when dealing with these enemies.
Spiny
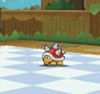 A Spiny’s spikes protect it from most Jump-based stickers, but it’s vulnerable to your other attacks. Use Hammer stickers to take out a single Spiny, or any available multi-target stickers to deal with larger groups.
Bob-omb
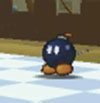 Bob-ombs aren’t the toughest enemies you’ll face, but they tend to attack in groups, and they really pack a punch! Use multi-target stickers to clear out these little guys before they can attack.
Bob-omb Variations:
- Bob-omb
- Shiny Bob-omb
Swoop
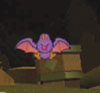 Swoops are high-flying enemies that hide in the shadows until you approach. When a Swoop moves in, jump up and stomp it to initiate the battle. Any attacks that reach airborne targets should be effective, but Jump-based stickers are always a good choice.
Pokey
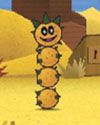
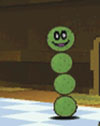
Don’t be fooled by a Pokey’s smile—these enemies can be prickly! Green Pokeys are vulnerable to all attacks, but yellow Pokeys have thick spikes that protect them from most Jump-based stickers.
Dry Bones
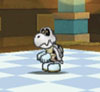 Dry Bones are extremely resilient! Soon after you defeat one, it pulls itself together and resumes the fight. When you first encounter these enemies, Hopslipper stickers are probably your best option. Ice Flowers and Chillhammers also work well. Once you defeat a Dry Bones, leave the area before it recovers.
Dry Bones Variations:
- Dry Bones
- Shiny Dry Bones
The Bros
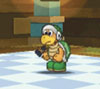
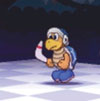
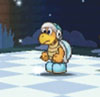
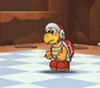
You’ll encounter a variety of Bros as you progress through the game, but their colored shells and chosen weapons make it very easy to identify each type. Hammer Bros are green, Boomerang Bros are blue, Ice Bros are light blue, and Fire Bros are red. Ice Bros are resistant to cold attacks, and Fire Bros are resistant to heat attacks, but your basic stickers will usually prove effective.
Bro Variations:
- Hammer Bro
- Boomerang Bro
- Ice Bro
- Fire Bro
Shy Guy
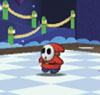
Shy Guys aren’t the toughest foes around, but they rarely attack alone. Lucky, these enemies don’t have any special defenses, so any of your stickers should work well.
Sombrero Guy
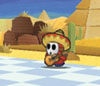
Sombrero Guys won’t attack you on their own, but they’ll take every opportunity jump into existing battles. These enemies use their Sombreros to attack from a distance, but they’re much more dangerous when they play their instruments. A Sombrero Guy’s music can boost the HP and attack power of nearby enemies. Whenever you spot a Sombrero Guy, deal with him before you initiate any other battles.
Sombrero Guy Variations:
- Sombrero Guy
- Maraca Guy
- Accordion Guy
Paint Guy
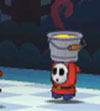
Paint Guys use their buckets to cover the screen in paint, obscuring your view of the action. When a Paint Guy approaches, mash # for a chance to defend against the attack. After a Paint Guy uses his bucket, he becomes a standard Shy Guy. Any stickers that deal damage should prove effective.
Clip Guy
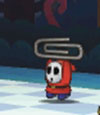
Clip Guys use paperclips to immobilize you for a few turns. When a Clip Guy approaches, mash # for a chance to defend against the attack. After a Clip Guy uses his paperclip, he becomes a standard Shy Guy. Any stickers that deal damage should prove effective.
Spear Guy
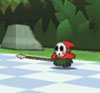
Spear Guys use their spears not only to attack, but to defend against certain attacks. When a Spear Guy’s weapon is pointed upward, it counters most Jump-based attacks. When the spear is pointed at Mario, the Spear Guy is immune to most Hammer-based attacks. As long as you account for the spear’s position, most stickers can be used when battling a Spear Guy.
Snifit
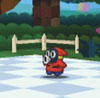
Snifits are similar to Shy Guys in most regards, but they attack by shooting projectiles out of their masks. Despite this difference, any stickers that cause damage can be used against a Snifit.
Spike
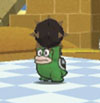
Spikes attack by throwing spiked steel balls. This enemy must first spit a Spike Ball into its hands, and then it holds the weapon above its head until it has a chance to attack. While a Spike is holding a Spike Ball, it can counter most Jump-based attacks. Use Hammers and projectiles to damage this enemy for a chance to knock the Spike Ball out of its hands.
Snow Spike
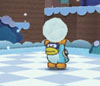
In battle, Snow Spikes behave very much like their warm-weather counterparts, but they throw Snowballs instead of Spike Balls. If you don’t have a sticker capable of finishing a Snow Spike in a single turn, you still have a chance to knock the Snowball out of its hands.
Ninji
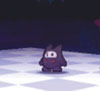
Ninjis are very agile, and they’re capable of dodging multiple attacks. If a Ninji is standing still, it will dodge any Jump-based attacks you attempt. When a Ninji is jumping up and down, it will dodge any Hammer-based attacks you attempt. As long as you keep these limitations in mind, any sticker can be used effectively against a nimble Ninji.
Piranha Plant
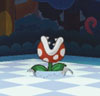
Piranha Plants are fairly tough enemies, and they have a variety of attacks. They have relatively high HP, and their sharp teeth protect them from most Jump-based attacks. These enemies can attack with their jaws or by spitting projectiles, and they sometimes burrow underground to avoid taking damage.
Piranha Plant Variations:
- Piranha Plant
- Fire Piranha
Scuttlebug
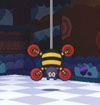
Scuttlebugs are spider-like creatures that are often found suspended above the ground. Depending on a Scuttlebug’s position, it can be considered a ground target, a low-altitude target, or an air target. Any sticker that will reach a Scuttlebug can be used, but Jump-based attacks are always a safe bet.
Poison Blooper
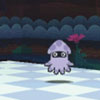
As the name implies, a Poison Blooper’s attack has a chance to poison you. While poisoned, you not only suffer damage, but your attacks have an increased chance to miss. These low-flying enemies are vulnerable to any attacks that can reach them, but Jump-based stickers always work well.
Cheep Cheep
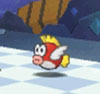
Cheep Cheeps leap out of the water to launch surprise attacks, but they aren’t particularly hard to handle once the battle begins. Use a Shell or any other multi-target attacks to clear groups of Cheep Cheeps with ease.
Scaredy Rat
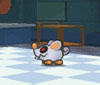
Scaredy Rats often appear in large groups. Each time a Scaredy Rat attacks, there’s a chance it will steal one of your stickers. Luckily, these enemies are vulnerable to all types of damage.
Boo
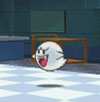
Boos are low-flying enemies with relatively high HP. A Hopslipper is very effective against a single Boo, but they often appear in groups. These sneaky specters can even join forces to create a Boo Stack! Any sticker that can reach low-altitude enemies can be used against a Boo, and most multi-target stickers can be used to defeat them in groups.
Boo Variations:
- Boo
- Boo Stack
Fuzzy
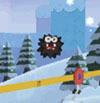
Fuzzies aren’t very effective fighters, but they can certainly slow you down as you move through an area. Don’t bother using your more powerful stickers—when you face one of these jittery creatures, even basic stickers can end the battle quickly.
Rocky Wrench
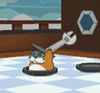
Rocky Wrenches peek out of their hiding spots just long enough to attack. When battling a group of Rocky Wrenches, use multi-target stickers to quickly clear them out. Be warned, though—your attacks won’t have any effect on a Rocky Wrench while it’s hiding.
Broozer
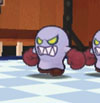
Broozers are excellent fighters, and when these short-tempered creatures get angry, they’re capable of deflecting most attacks. Bombs, Boomerangs, Snowballs, and POW Blocks can break through their defenses, however.
Special Creatures
Wiggler Segment
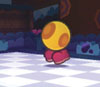
Thanks to Kamek’s magic, Wiggler Segments appear throughout World Three. You must defeat these enemies in battle before returning them to Wiggler’s Tree House.
Whomp
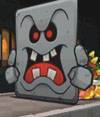
The game’s only Whomp appears as one of Bowser’s allies during the finale. This massive creature can take quite a beating—unless you find its weak spot, that is. Land two hits with an Eekhammer to topple this mighty foe, then use a cutting Thing Sticker to finish it off while its back is exposed.
Lava Bubble
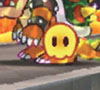
Lava Bubbles only appear in one of the Bowser battles during the game’s finale. Use a cold-based Thing Sticker to freeze them, then sweep them up with a wind-based Thing Sticker to finish them off.
Chain Chomp
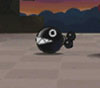
The Chain Chomp only appears as one of Bowser’s allies during the game’s finale. Use a bat-type Thing Sticker to knock this fierce enemy out of the area, or use a Tail Sticker to get the same result when it lunges at you.
Mini-Bosses
Bowser Jr.
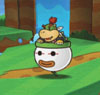
Bowser Jr. pesters you throughout the game, and he learns at least one new trick between each encounter. The first time you meet him, he can only be defeated by the Scissors Thing Sticker. In subsequent encounters, use Jump stickers and thrown weapons to take down this high-flying enemy.
Kamek
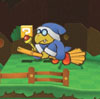
Kamek impedes your progress at multiple points in the game, and like Bowser Jr., he enters each battle with a new trick up his sleeve. The first time you battle Kamek, use Jump-based stickers to defeat him without breaking a sweat. In subsequent battles, however, Kamek transforms all of your stickers into Sandals.
Big Buzzy Beetle
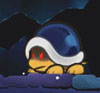
The Big Buzzy Beetle doesn’t have many weaknesses, so it’s essential you bring the proper stickers into battle. Use POW Blocks to flip this oversized enemy, then attack its exposed belly with high-damage stickers.
Big Scuttlebug
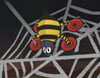
The Big Scuttlebug uses its web to stay out of your attack range.Use Boomerangs, Fire Flowers, or Pow Blocks to destroy the web, then take down the Big Buzzy Beetle with any stickers that deal damage.
Big Cheep Cheep
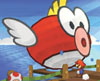
The Big Cheep Cheep uses the ocean to replenish its HP. When you face this crafty creature, make sure you bring a Fishhook Thing Sticker to pull it out of the water.
Big Boo
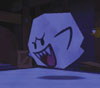
When the Big Boo takes too much damage, it turns invisible to avoid your attacks. Use a spray-type Thing Sticker to reveal the Big Boo, then resume your attacks.
Big Chain Chomp
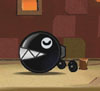
The game contains multiple Big Chain Chomps, but you only have to battle two of them. Although you can’t defeat these powerful enemies, you can trick them into leaving the battlefield. If the Big Chain Chomp is awake, use a Baahammer to put it to sleep, then run from the battle. If the enemy is asleep when you arrive, you can proceed right to the next step. Sneak behind the sleeping Big Chain Chomp and use your Hammer to hit the stake anchoring it to the ground. Battle the Big Chain Chomp until it wakes up and lunges right out of the area.
Bosses
The game contains six bosses, and each one holds one of the six Royal Stickers. Boss battles can be very challenging, and they generally require a good deal of preparation. For details about recommended Battle Stickers, Thing Stickers, and general tactics, please refer to the end of each world’s walkthrough.
Megasparkle Goomba
The Megasparkle Goomba is in the Goomba Fortress at the end of World One.
Tower Power Pokey
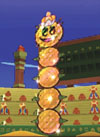
The Tower Power Pokey is in Drybake Stadium at the end of World Two.
Gooper Blooper
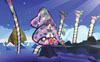
The Gooper Blooper is off the coast of Whitecap Beach at the end of World Three.
Bowser Snow Statue and Mizzter Blizzard
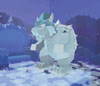
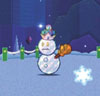
The Bowser Snow Statue and Mizzter Blizzard are perched atop Bowser’s Snow Fort at the end of World Four.
Petey Piranha
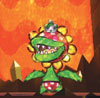
Petey Piranha is inside the Rumble Volcano at the end of World Five.
Bowser
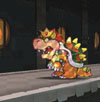
Bowser is waiting inside Bowser’s Sky Castle at the end of World Six.