
All 9 Action Figure Locations in Destiny 2
It's over... finally, the collection is complete.
It’s week three and we finally have all nine action figure locations locked down. Gathering them all will require you to do half a dozen menial tasks, but it’s worth it to get some cool Nimbus merch, right? Here’s how to get all nine action figures in Destiny 2.
All 9 Action Figure Locations in Destiny 2
Radiosonde Action Figure in Destiny 2
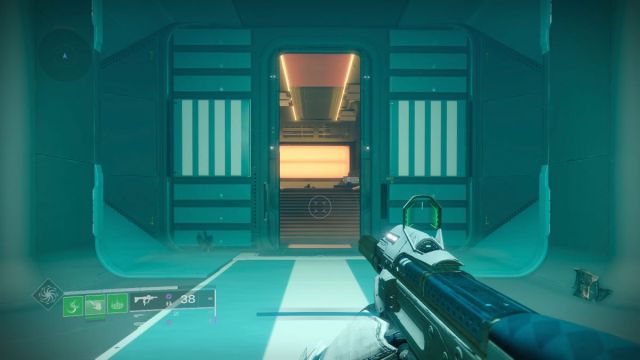
To get to Radiosonde, we’ll need to start at Liming Harbor. Use the quick travel point, then turn left. Once you enter a tunnel, jump off your sparrow and head up the stairs to your left. There will be a blue door.
Take it, and you’ll find a raised platform. Jump onto the raised platform, and then up again into the yellow-tinged room.
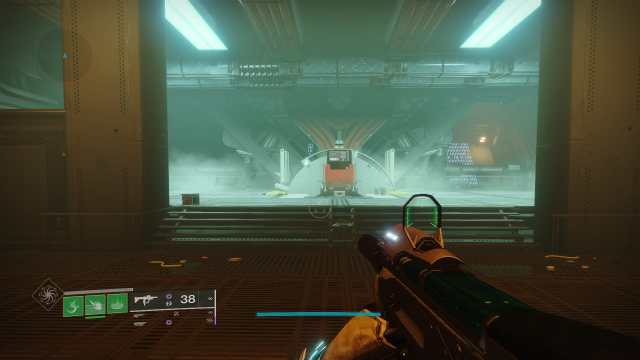
Turn left, then left, then right. You’ll enter a wide open area that will be familiar if you’ve finished the Lightfall campaign. We’ll need to get to the open door on the far right. You can grapple to it or you can jump to the hard to see platform on your right.
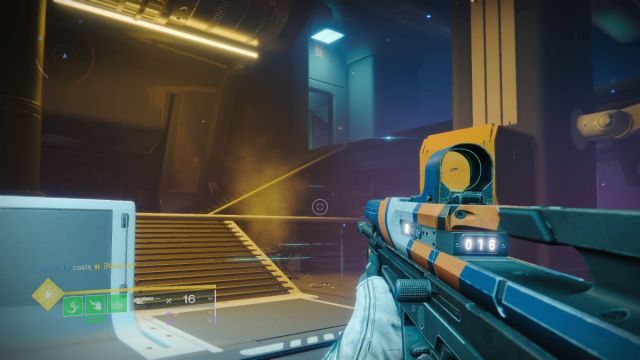
Follow the path and shoot through the glass doors. There will be a lot of Vex, but you essentially just need to keep going straight past all of them, and through the next set of glass doors at the end of the room.
Once you’ve shattered the second set of doors, the big metal door at the end of the hall will open. Fight your way into this room and turn left.

There, in the ceiling, will be a vent we can enter through.
Jump into it, then shoot out the grates. You’ll drop into a new area, full of Harpy. Clear them out to make things a little easier, then walk up the metal stairs.
At the top, you’ll find a Hydra. Kill it and go straight. Eventually, you’ll reach this room.
Activate the red console, then turn around. You’ll see eight canisters and a white symbol that will briefly appear above them.
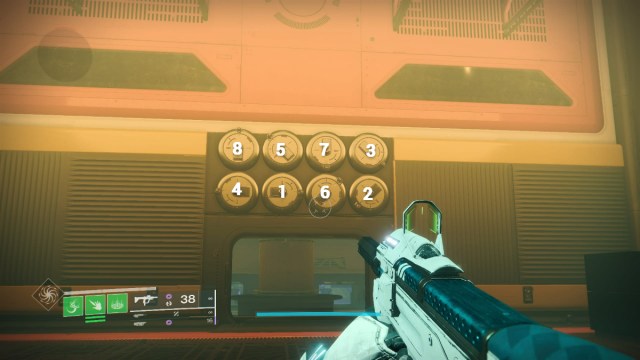
Shoot them in this order and the toy will appear on the console.
Another action figure. And this time, it’s deep within the belly of Calus’s fortress, the Typhon Imperator. Here’s how to find the Typhon Imperator action figure in Destiny 2.
Typhon Imperator Action Figure in Destiny 2
To get to Typhon Imperator, you’re going to have to go to Ahimsa Park. Get there through Strider’s Gate or Liming Harbor, then climb the ramp up to Calus’s fortress.

Take the left path, and once you hit a dead end, turn right and drop to the next floor. There will be Cabal, but you can just run past them and take the balcony entrance to your right.
You’ll drop into another room full of Cabal. Clear them out, then jump up to the narrow ledge on your right side. Follow that ledge to its end, and you’ll see a door.

Enter it, and you’ll be in a room with ledges on either side of you. Our goal is to get to the top left ledge. Use the boxes on the right side to make the jump.
You’ll then enter a room with a large war dog statue. But what we care about is the door to the top right of the room. Climb through and drop.

Look up to the left of the chandelier, and you’ll see a door. Use the metal cubes all around you to jump up to it. Now, we’ll just need to platform our way to the other side.
Note that the door at the end is just a trick. On the last platform, turn right and look slightly up. There is a ridge you can jump up to. But to get there, you’ll need the smaller ridge just to the right of the false door. Jump up to that first.

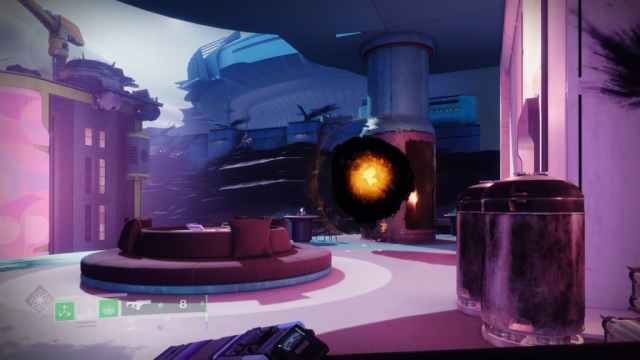
You’ll arrive in a room that’s full of purple jelly and a golden statue of Calus. At the statue’s feet is a portal. Jump through.

You’ll arrive in the arena. Old times, right? Clear out the Cabal, but try not to jump down if you can avoid it. The item we’re going to need to activate is to the right of us, on the shelves full of artifacts.
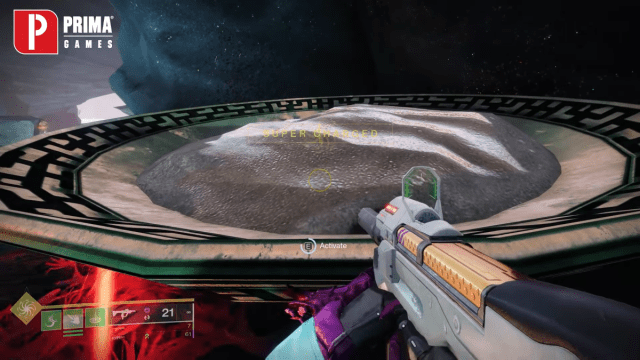
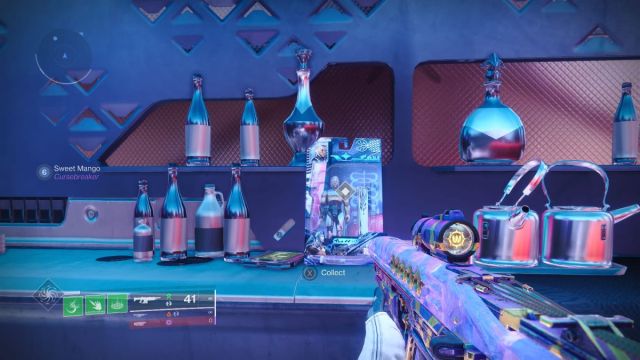
Once the arena is clear, approach the shelve and locate a silver bowl filled with what might be figs. Activate it, then turn around. A Vex cub will appear behind you.
You will need to collect all Vex squares within a time limit. They spawn in a specific order, and when they despawn, they point in the direction you need to go. Collect them all fast enough, and an action figure will be waiting for you at the end of the path.
Strider’s Gate Action Figure in Destiny 2
Zoom into Strider’s Gate, then jump all the way down. For this action figure, we’ll need to go to the yellow house that I suspect is where Nimbus actually lives, just to the right. If you’re confused, it’s where you place the action figures once you’ve got them.
Strider’s Gate is a much larger area than you might think, encompassing the Hall of Heroes, Osiris’s makeshift lab, and the large platform that Nimbus occupies. But the only place with an arcade machine is Nimbus’s home.
Approach the green arcade machine beside the bench press machine, and we’ll have a new prompt that will allow us to activate it. Equip a scout rifle before you do.
Round 1
You’ll be put on a narrow balcony where you can move from side to side. You can technically leave, but don’t. Once here, you’ll notice there are a series of diamonds in the middle of the field that will slowly vanish. This is your countdown.
For the first round, you’ll want to shoot these red canisters. The next canister will appear once the first one has exploded. If the canister hasn’t exploded, the second one will not appear!
These canisters will spawn in set places, so if you miss one or run out of time, it’s easy enough to redo.
Round 2
Round 2 is a little harder. You’ll still need to shoot red canisters, but there will be way more of them this time. To extend your time, you can shoot diamonds that spawn into the field after a certain period. Destroying a diamond will completely reset your timer.
Onto the next new action figure! Let’s head to Liming Harbor and pick up a part-time job. Here’s how to find the Liming Harbor Action Figure in Destiny 2.
Liming Harbor Action Figure in Destiny 2
So, we have a new action figure to hunt down. Let’s see what our clue is. On the bench press set, there’s a new hint. Nimbus really needs to get another table if this is where he intends to store it.
The hint reads: “Liming Harbor: Security needed at the central office to keep out intruders. Check the PDA on the crescent desk.”
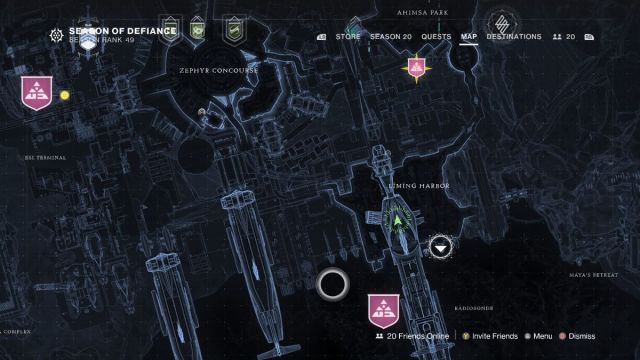
We’ve really worked every type of odd job here in Neomuna, but at least security falls beneath the umbrella of what we’re best at. Killing things. Head to Liming Harbor. The desk the note refers to is in the center of the map, on the first floor.
Related: All Ahimsa Parkway Apogee Repeaters in Destiny 2
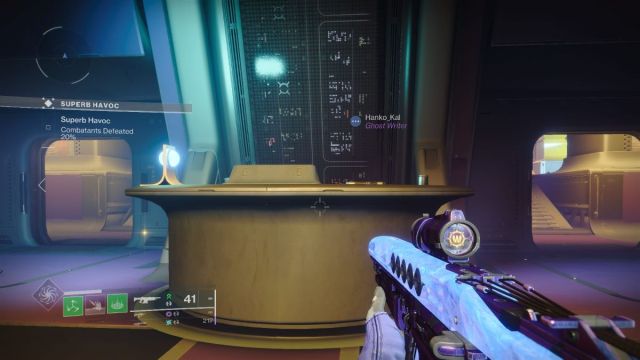
Approach the desk and you’ll find there are quite a few Vex here. You don’t have to do anything special, as far as I can tell. Just stand on or beside the desk and kill the Vex. Once I killed them, I jumped up on the desk expecting to activate it, but the action figure was already waiting for me.
It’s possible your experience will be different. Activate the PDA on the desk and Hobgoblins and Fanatics should spawn, with titles like “Mischievous Miscreant”. Kill them as they filter into the building. Eventually, those Hobgoblin will become Minotaurs. After the Minotaur wave, the action figure will spawn.
Esi Terminal Action Figure in Destiny 2
Before we head off to Esi Terminal, let’s jump down to the yellow house, where we put the action figures to see what our hint is.
“Esi Terminal: A fashionable restaurant with a striking crimson hallway is looking to hire a dishwasher.”
Sure, you might be an immortal space warrior, but you’re not too important to wash dishes. Especially when there’s an exclusive action figure on the line. Head to Zephyr Concourse, then keep right and jump over the stiles. Follow the hall and you’ll be in Esi Terminal.
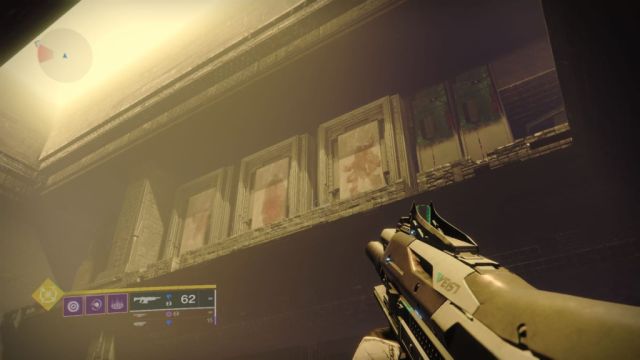
Once you’re in Esi Terminal, turn left, then take your first right at the giant blue eye graffiti. There will be plenty of Cabal resistance. But once you turn right, you’ll see a door in the wall of the short corridor.
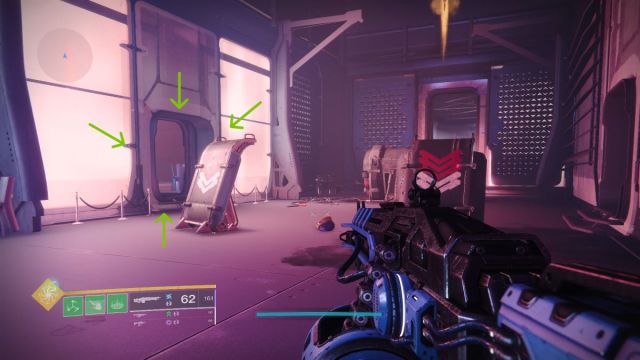
Enter it, and you’ll be in a red-tinted room. This is the restaurant! There’s even a bar to your left. From the restaurant, take the first door on your right and you’ll enter a blue tinged room. This is the kitchen. At the far back will be a sink. Activate it.
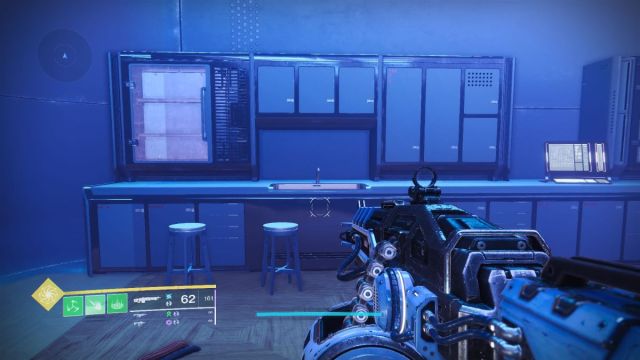
You’ll be told to get the dishes. The dishes are actually orbs, which you’ll need to grab one at a time. Each time you grab one, return to the sink on the right side of the room and deposit it. There will be five “dishes” / blooms to deposit, with two being in the room you start in and three being in the restaurant.
Unfortunately, the restaurant staff doesn’t seem to like letting you do your job. You’ll be beset by Cabal enemies, all Gladiators. They do quite a bit of damage but can’t be killed. The kitchen and restaurant area is essentially a circle. So, if you’re feeling the heat, never double back.
Once all five are deposited, the action figure will appear in the sink. Job well done!
The next one, located in Maya’s Harbor, is a little difficult to find unless you know where to look. Here’s how to find the Maya’s Retreat Action Figure in Destiny 2, They’re Not Dolls.
Maya’s Retreat Action Figure Location Destiny 2
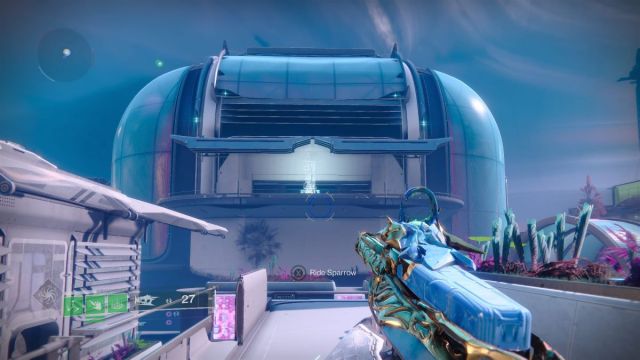
Use the quick travel point in Liming Harbor to load into the map. Once you load in, jump on your Sparrow and take the first available right up a flight of stairs and down a metal bridge that will enter a stone corridor on the east side of the map.
You won’t be able to proceed on your Sparrow, so jump off and run through the tunnel.
You’ll enter Maya’s Retreat. Run over the metal bridge. You’ll encounter some Goblin on this bridge. Kill them if you like. Eventually, the bridge will end, and you’ll encounter some Harpy, Goblin, and a Minotaur. Follow the wall right, and you’ll find another much larger bridge.
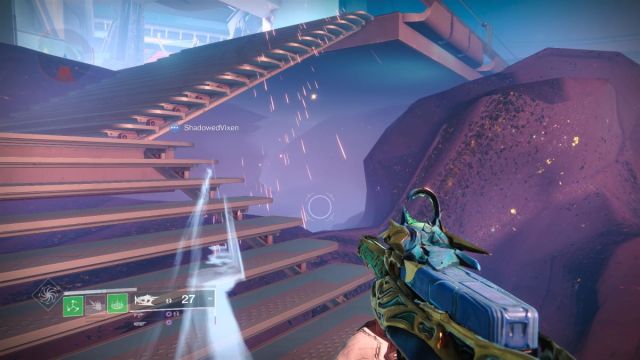
Follow this bridge to its end, climbing the stairs and platforming upward use the stone outcroppings. You’ll arrive in a cave with more Goblin.
On the left side of the cave in the back with be a large plate filled with flammable sand. These plates are large, but they are hidden, so search carefully.
Interact with this brazier to light it, then head back out of the cave. But don’t go onto the bridge!
Instead, drop down to the rock outcropping you used to jump into the cave, but go right. The remaining two braziers we need to light are in hidden rock alcoves that surround the chasm. From the stone outcropping you’re standing on, jump down.

Once you jump, you’ll be able to see a hidden cave. Inside the cave with be a brazier. Light it. Turn around, then jump onto the stone platform.
From your stone platform, use the narrow ridge on the right side of the rock wall to make your way around the chasm. You’ll eventually end up on another stone outcropping with this view. From here, you’ll need to jump across. For this next part, it’s easier if you have Strand and Grapple equipped, but it’s not necessary.
Once you land, just behind the stone column will be the last brazier. Light it and the action figure will materialize.
Zephyr Concourse Action Figure in Destiny 2
Load into Strider’s Gate, then wave a quick hello to Nimbus. It’s a darn shame that we don’t have a quick travel point to Zephyr Concourse, but what can you do? Jump off the platform, then head right.
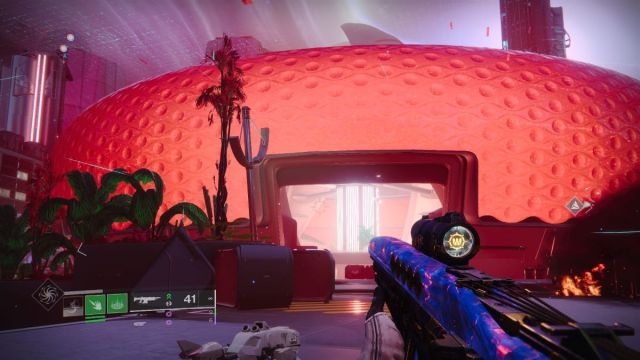
You’ll enter into Zephyr Concourse and see the massive stadium you can’t convince me isn’t modeled after a giant strawberry. Follow the road left, and you’ll wind up at the steps of a bar. Climb up them, then jump over the counter and into the bar itself.
Related: How to Get Izanagi’s Burden in Destiny 2
There, you’ll find a digital clipboard / futuristic iPad. Activate it, and you’ll begin your shift.
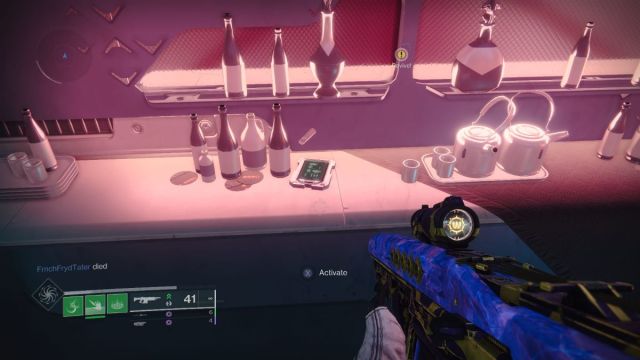
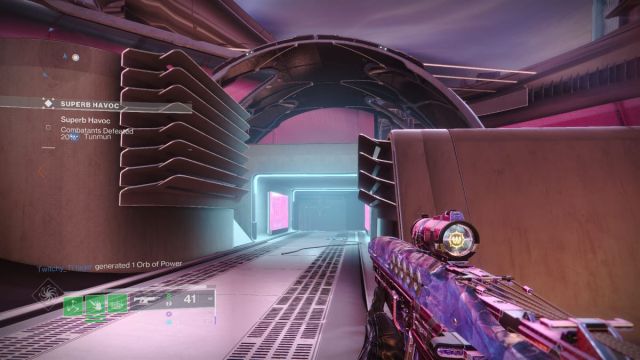
So, here’s where the fun begins. Patrons (Cabal) will spawn one at a time in a set pattern around the bar. If they touch the bar, you’ll be “overwhelmed by the rush.” On top of that, you can’t leave the bar. Doing so will end the activity, as you’ve “abandoned your station,” and you’ll have to interact with the clipboard to start again.
Work your way around the bar, keeping an eye on your radar, and kill the Cabal before they get too close. You’ll want a Solar Powered weapon to knock out the Belligerent Patrons as quickly as possible, as they have Solar shields.
Eventually, you’ll get Last Call as a notification, and you’ll only have to beat four more Belligerent Patrons. Save your Super for the last one, as he’s a Colossus that’s hard to bring down.
Related: How to Get Witherhoard in Destiny 2
Once the big boy is down, your shift ends. A secret will be revealed! Head back to where the clipboard was, and a Nimbus doll will be waiting for you.
Irkalla Complex Action Figure in Destiny 2
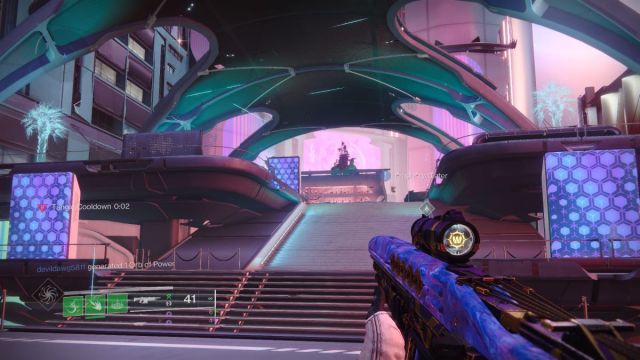
Getting to Irkalla Complex can be a little… complex. Head to Strider’s Gate quick travel point, then go left into Zephyr Concourse. Keep left at the strawberry stadium, taking the ramp up to the turnstiles that lead you to Esi Terminal.
Once you’re in Esi Terminal, turn left and keep going left until you reach a door beside some graffiti of a giant blue eye.
Go through the building until you reach a balcony. You’ll want to jump across and you’ll get a notification that you’re in Irkalla Complex. But you’re not really! Keep going until you see a pink bar in front of you.
Jump down to it, and you’ll see a portal.
Go through it, and you’ll actually be at Irkalla Complex! You’ll be at the base of the broken wall of the complex. Your goal is to jump up to the very top.
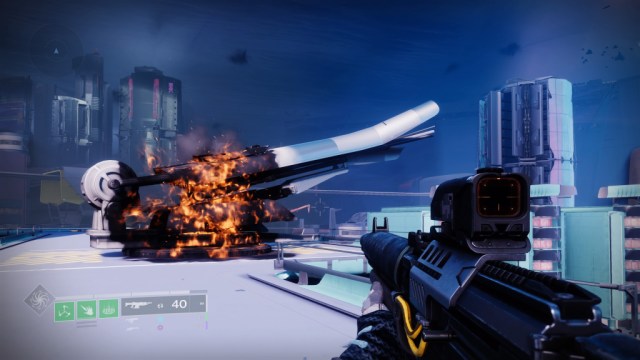
On top of the wall will be three turrets. Pull out a scout rifle, sniper, or pulse rifle. Essentially anything with a scope. You’ll need to walk to the very end of the turret and look down your scope. If you’re at the very tip of the turret, you’ll see a black diamond. Shoot it, then jump onto the next turret.
There are three turrets and three diamonds to snipe. Once all three have been shot the action figure will appear at your feet.
Ahimsa Park Action Figure in Destiny 2
The final action figure is the easiest to find! Head to Ahimsa Park and find this building at the center.
There’s only one ground floor entrance. Find it, then look beneath the stairs. There will be a hole you can wiggle into. There on the ground will be the Ahimsa Park Action figure!
And there you have it. All nine action figures! Go bring your new collection to Nimbus’s house in Strider’s Gate and you’ll be able to unlock the triumph! If you’re not sure how to do that, check out our guide here: Where to Place Nimbus Action Figures in Neomuna in Destiny 2.