
How to Complete the Empty Nest in Starfield
Talk to Sam

If you just picked up the cliche cowboy named Sam Coe in your Constellation crew, then that means it’s time to take on The Empty Nest mission in Starfield. This adventure has more than a few steps and some dialogue checks, but we’re here to help you easily make your way through to progress the main story.
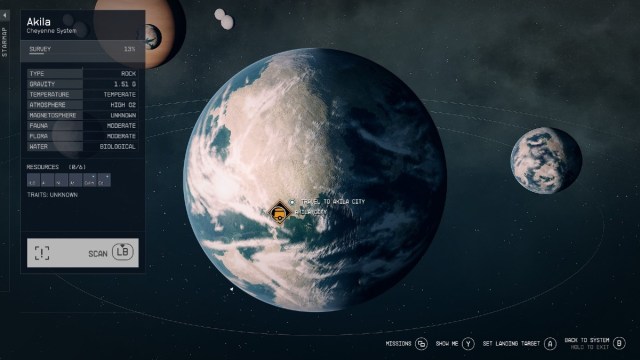
How to Travel to Akila City in Starfield
You can reach Akila City during The Empty Nest mission by traveling to the Cheyenne System and landing on Planet Akila. Landing at Akila City is super easy once you reach the system, and you’ll notice right away that the area is based on an old western frontier. Just make sure you don’t have any contraband on board before entering the system.
Once you land at Akila City and start The Empty Nest, you need to speak to Sam and take him along for the ride. Once you start the mission, he will follow you until it’s complete, so ensure that you want him as a companion or you’re prepared to finish the full questline before getting into the next steps.
How to Complete Job Gone Wrong in Starfield
To complete the Job Gone Wrong mission, you need to persuade the bank robbers in side Galbank to surrender peacefully. Get started by entering Akila City and looking for Galbank on the right-hand side of the main path. At the bank, you will find a standoff between the robbers inside and some of the Freestar Rangers protecting the city.
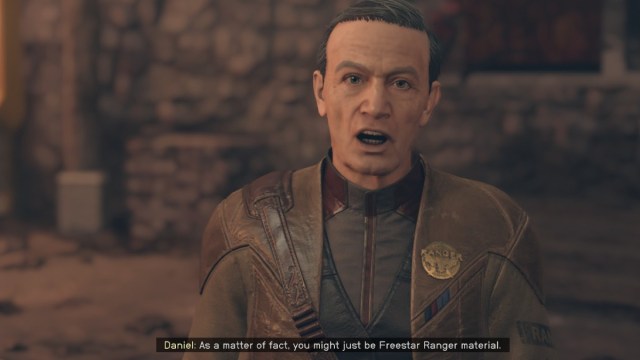
Speak to Daniel who is the Ranger in charge of getting the hostages out safely. He will recognize Sam Coe and subsequently accept your help in getting the robbers to surrender. You can either speak to them from the comms device outside, or you can attempt a stealth mission that doesn’t get everyone killed.
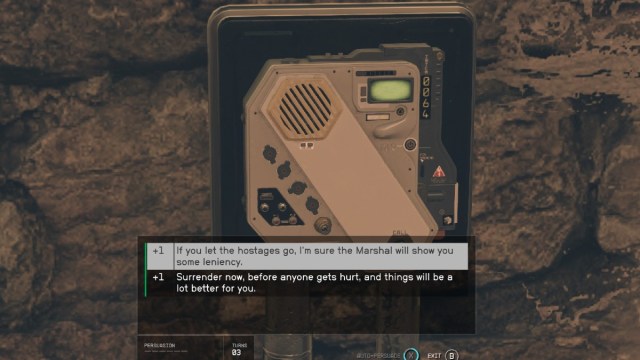
We highly recommend just using persuasion and quicksaving if you really need to. You want to appeal to the bank robbers at Galbank by relating to them and making sure they know they could die. Once the realization of deadly action comes into play, the persuasion check is likely to work and the bank robbers will surrender without any violence needed.
Head into the Galbank Vaults for The Empty Nest in Starfield
With the Job Gone Wrong completed, you can head inside the Galbank Vault, which is on the lower level of the main bank. Simply head into the main entrance and take a left where a staircase leads to the bottom floor.

There are plenty of vault spaces in the room, but you only want to open three with the key that Sam Coe has. The Galbank Vault locker all the way on the left side is the one that contains the documents for The Map. Pick them up and Sam will know that your next objective is to find Jacob Coe.
How to Get the Maps From Jacob Coe in The Empty Nest (Starfield)
To get the maps from Jacob Coe that lead to the Artifact, you have three options: Steal the maps, persuade Jacob to give them up, or use Cora to convince Jacob. The best option is to persuade Jacob, just like the objective to save the Galbank hostages.
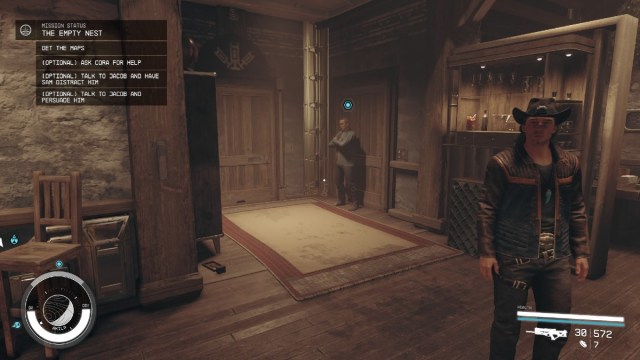
We were able to speak to Jacob Coe in private and tell him that “Constellation just wants to follow up on Solomon’s work.” This was the easiest option and it triggered a critical success. Just like that, Jacob Coe told us we could take the maps from the room behind him and be on our way. There was no need to steal or get Cora involved.
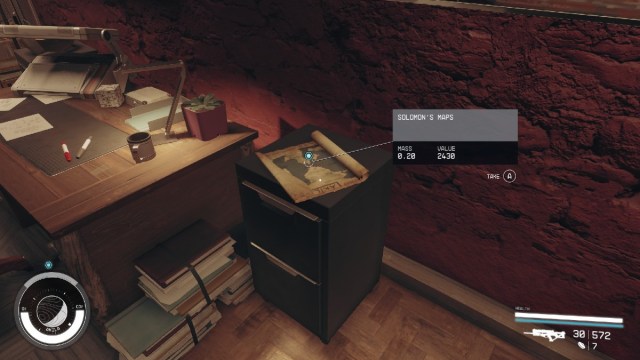
If you decide to steal Solomon’s maps in Starfield, then have Sam Coe distract Jacob. Break into the room he was guarding and take the map from the right side desk. This is all you need to find the location of the Artifact.
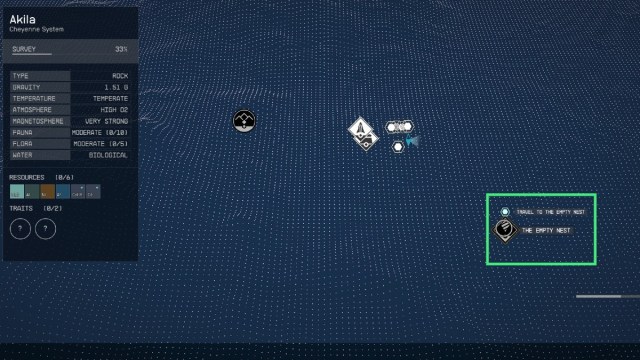
How to Travel to the Empty Nest in Starfield
With the maps in hand, you can find The Empty Nest location to the southeast of Akila City. Once you have Sam Coe read the maps himself, he will put the POI on your map and you can easily follow the marker to the Artifact.
As soon as you get to the Empty Nest, you will find some Ashta enemies and plenty of Shaw Outlaws. Take out every enemy in the area and then head inside the cave. Make your way all the way to the end of the tunnel until you find the next Starfield Artifact. Interact with it per usual and then leave the cave.
Should You Attack or Persuade Shaw in Starfield
Outside The Empty Nest there will be more outlaws and Shaw herself will confront you. She essentially gives you three options at the moment: Pay a fine, persuade her to go peacefully, or get ready for a major fight. We chose to attack Shaw because we wanted more loot and who cares about some more Outlaws? Plus, the Shaw Outlaws are pretty bad for Akila City, and we’d be doing everyone a favor in the process
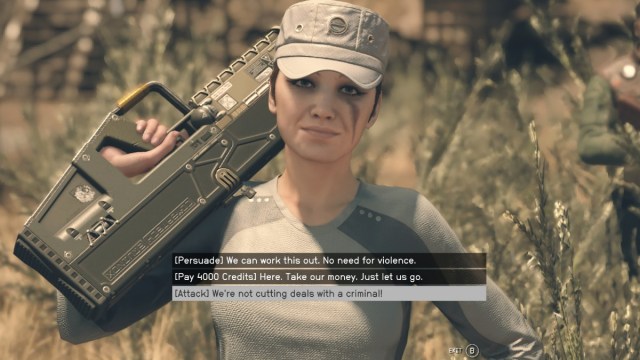
If you don’t want to fight you can always attempt to persuade Shaw, but if that doesn’t work, prepare to use plenty of ammo while taking her out. The persuasion route takes a little elbow grease. You’ll have to deal with both Shaw’s entire gang, but also the pack of Ashta that comes shortly afterward. However, the fight isn’t that bad, so we recommend you do it either way. It’s the best choice, the best reward, and it makes the most sense lore wise.
After the Shaw Outlaws are dealt with for good, you can head back to the Lodge in New Atlantis and complete The Empty Nest quest for Starfield.
All Main Questline Missions
Here is every main questline mission in order down below.
- One Small Step
- The Old Neighborhood
- The Empty Nest
- Back to Vectera
- Into the Unknown
- Power From Beyond
- All That Money Can Buy
- Starborn
- Further Into the Unknown
- Short Sighted
- No Sudden Moves
- High Price to Pay
- Unity
- In Their Footsteps
- Unearthed
- Final Glimpses
- Entangled
- Missed Beyond Measure
- Revelation
- One Giant Leap
While you’re helping the Lodge, make sure to complete Back to Vectera to help out Barrett as well.