
Baldur’s Gate 3: How to Save Everyone and Complete Investigate the Murders
Time to find that murderous dwarf

There’s a murderer on the loose, and we have a list of potential victims and a conspiracy to foil. So, here’s how to complete The Murder Investigation in Baldur’s Gate 3, with all possible victims saved.
Baldur’s Gate 3: Where to Start Investigate the Murders
You’ll first get this sub-quest when you begin Get Orin’s Netherstone in Act III. The NPC Orin the Red will give you this quest after you speak to Enver Gortash. The quest Get Orin’s Netherstone is given to you automatically when you enter Wyrm’s Rock Fortress for the first time, followed by long-resting. You can also activate it by going into the sewers.
Baldur’s Gate 3: How to Complete Investigate the Murders (BG3)
If you completed the Open Hand Temple Murder Investigation, you’ll have in hand a whole list of potential victims. And, more importantly, free reign by flying elephant detective Valeria to stick your nose into the conspiracy unraveling in Lower City.
If you don’t yet have the victim list, you can find it in the secret room within Fraygo’s Flophouse in Rivington across from Sharess’ Caress. You’ll want to head to the second floor, up the ladder into the attic (X:-12 Y:87), and to the red wardrobe (X:-17 Y:82).
This wardrobe can be opened with the Flowery Key found on Zomm’s corpse in the Under Temple Cave Area during the Open Hand Temple Murder Investigation, lockpicked with a DC25 Sleight of Hand check, or with the spell Knock. However you open the wardrobe, you should then be able to pass through it to enter the secret room functioning as the killer’s hideout.
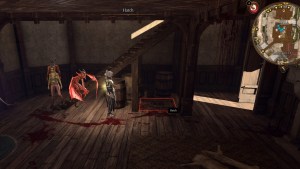
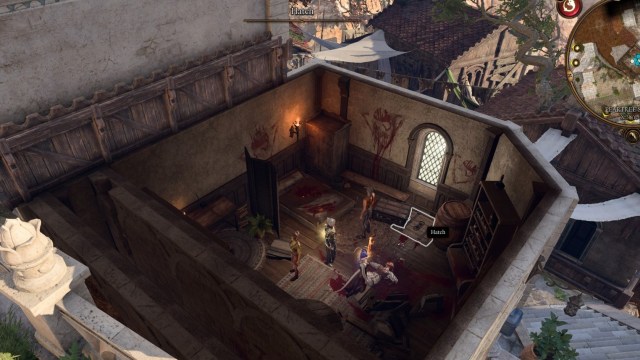
On the floor, you’ll find Ffion Goldgrind’s corpse, which you can use Speak with Dead on to learn the identity of the killer. Near her, to the right of the room’s entrance, is a table with a Bloodstained Parchment on it. This parchment is the list of murder victims, which include
- Cora Highberry (living).
- Figaro Pennygood (living).
- Chef Roveer (living).
- Nesha Leesha (living).
- Father Lorgan (deceased).
- Duke Belynne Stelmane (deceased).
- Alexander Rainforest (deceased).
- Franc Peartree (deceased).
To complete the Investigate the Murders quest, you’ll need to locate the victims on this list to find and catch the murderer.
I’ve crafted the table of contents based on the order you should complete this quest if you want to experience the quest fully. You can preemptively end this quest by going straight to the murderer and stopping him in the act. This will give you everything you need to move on the Temple of Bhaal and meet the Murder Tribunal.
If that sounds ideal, skip to the “Save Cora Highberry” section.
But if you want to walk through the full quest, you’ll want to start by taking the list of murder victims to Devella Fountainhead, who has a little more information to share with you.
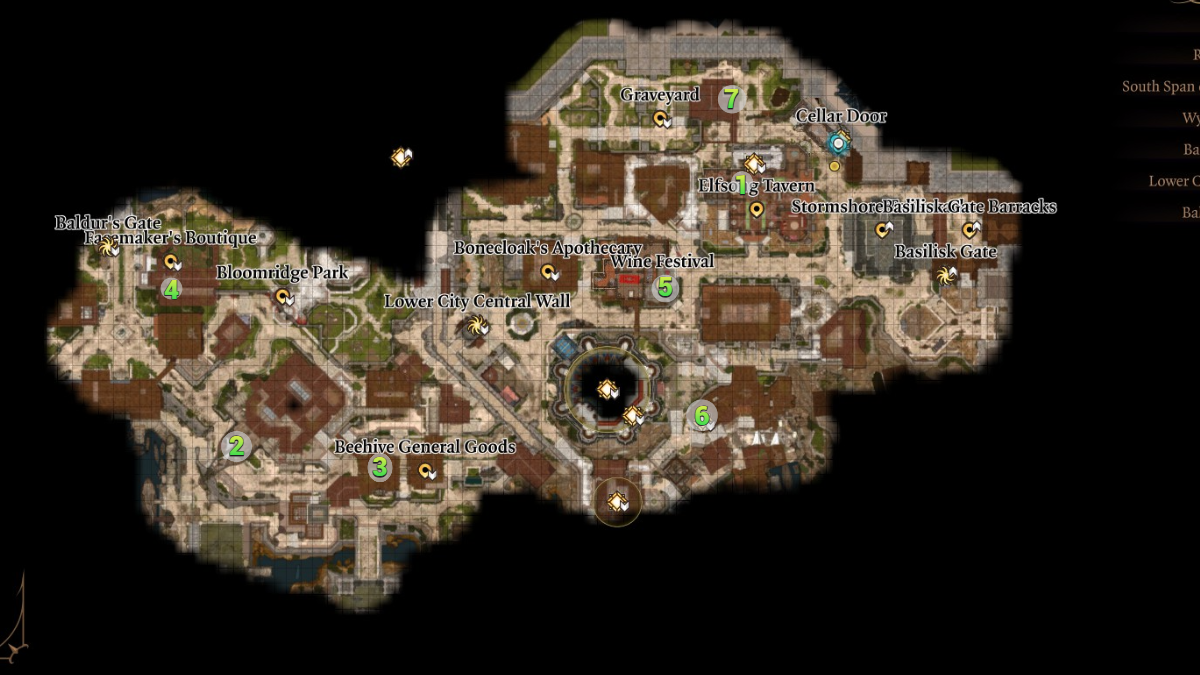
Map Key
- Chef Roveer / Devella
- Nesha Leesha
- Alexander Rainforest
- Figaro Pennygood
- Cora Highberry
- Franc Peachtree
- Tombstone Store / Tribunal Entrance
How to Find Devella in Balurd’s Gate 3
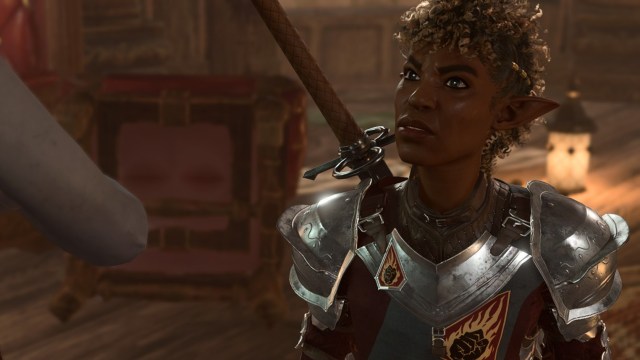
First things first. We’ll need to find the one person who’s also convinced there’s a grand murderous conspiracy afoot. And that’s Devella, who’s located at the Elfsong Tavern in the Lower City. She also happens to be very close to our first murder target, Chef Roveer.
To find Devella, turn right upon entering Elfsong Tavern. You’ll see two Fists guarding the stairs. Speak to them and tell them that Valeria sent you to speak to Devella. They’ll give you the nod, and you’re free to enter the crime scene upstairs.
But before you go, save. Act 3 is, in general, pretty buggy. And there’s a good chance Gauntlet Devella won’t be there at all. If she isn’t, reload your save, and with luck, she’ll make her appearance.
When entering the crime scene and speaking to Devella, tell her about the list. Otherwise, you can lock Devella out of your quest.
Once you’ve told Devella about the quest, she’ll leave to protect the richer folk. It’s now up to us to inform the Lower City targets. But before you go, inspect the wine rack in the corner of the room. If you pass a perception check, you’ll see that one of the wine bottles is strange.
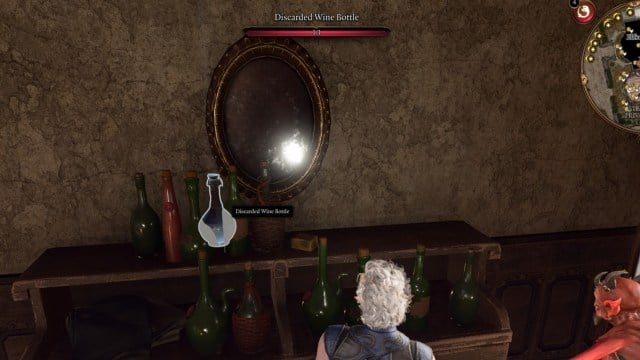
Pass a medicine check, and you’ll realize it’s been poisoned. The name will change to Master Metzil’s Karabasan Gift. This doesn’t update anything in your journal, but it’s foreshadowing.
How to Save Chef Roveer
Our next stop is the target, who’s in this very tavern. Head to the main floor of the Elfsong Tavern and you’ll find Chef Roveer in the kitchen (X:64 Y:8). The kitchen is right beside the stairs.
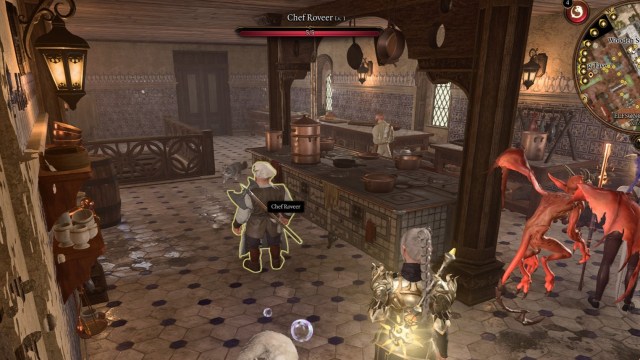
Try to warn him about the upcoming murder attempt and he simply won’t care. All he cares about are the rats in the basement.
Head into the basement through the stairs and you’ll find quite a few rats. They all have 1 HP, and this is a really fun place to use any of your area of effect attacks. I had Shadowheart jump in with her Spirit Guardians and stand there. You can also use the Wall of Fire spell across the basement’s entrance and all the rats will run into it, killing themselves on the spot.
Go upstairs and report the news to Roveer, and he’s much nicer now. He’ll hand you 300~ gold and tell you that he’ll keep his dwarven eyes peeled for any murderers.
Note that while you’re down there, you can also get the Emperor’s stash. It’s behind the wine cellar wall. The button to this hideout is on the far left, amongst the wine racks. But going in too far can trigger one of the steps in the main quests, so be cautious. Personally, I’m saving it until I complete all the other side quests.
How to Save Nesha Leesha
Nesha is next on the list, and she’s quite easy to convince. Head south and you’ll find there’s a tavern (X:-153 Y:-90) with its porch made out of the bow of a boat. Nesha should be in front of the tavern, looking a little too much like a waitress. Speak to her and warn her.
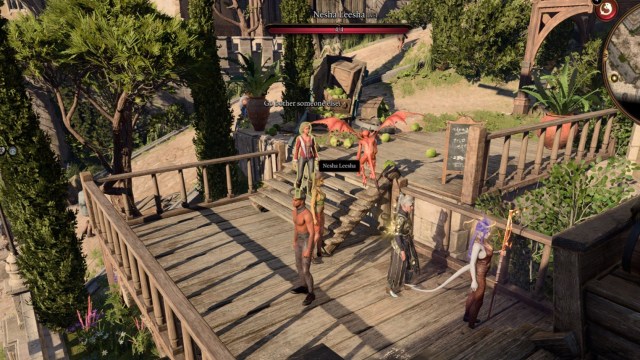
She won’t believe you, and you’ll have to pass a Persuasion roll of 15 or better to convince her. Succeed on that, and she’ll hightail out of there. Good for you, Nesha.
Investigate Alexander Rainforest
Next on our list is Alexander at his house, Rainforest’s Home (X:-95 Y:-114). Spoilers, he’s already dead, and there’s nothing to save. But it’s worth forcing your way into his house for the Dribble the Clown quest. I chose to lockpick the front door, and when someone got mad at me, I used the spell Dominate Person to get them to shut up. Polymorph or Banishment would have probably worked too. I then waited for Dominate Person to wear off so they wouldn’t follow me into Alexander’s house.
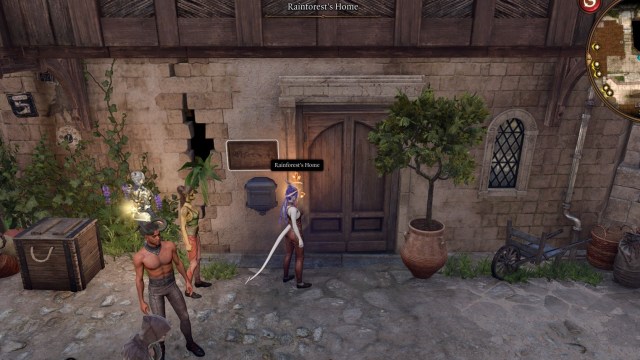
Another possible option is to Misty Step or Fly your way into Alexander’s backyard. It’s fenced off but the door there is unlocked. Once you’re inside, you’ll find Alexander’s body upstairs. Speak to the rat, and he’ll tell you a dwarf in red clothes killed him.
The real meat of this house is actually on the first floor, in the hatch beneath the stairs. Go into this basement and you’ll find two bodies. The body on the right has a Severed Clown Foot, which belongs to Dribbles!
How to Save Figaro Pennygood
Figaro is our local tastemaker, and he’s in the Facemaker’s Boutique shop (X:-182 Y:-31) across from the Baldur’s Gate waypoint. You’ll need to speak to him twice to get the prompt to tell him he’s a murder target. If you don’t get the prompt the second time, buy something from him.
He doesn’t require anything else.
How to Save Cora Highberry
Head to the Wine Festival just southwest of the Elfsong Tavern (X:22 Y:-38). You’ll see Cora with another gnome and dwarf outside, preparing to have wine. And the dwarf happens to be wearing red clothes. Hmmm.
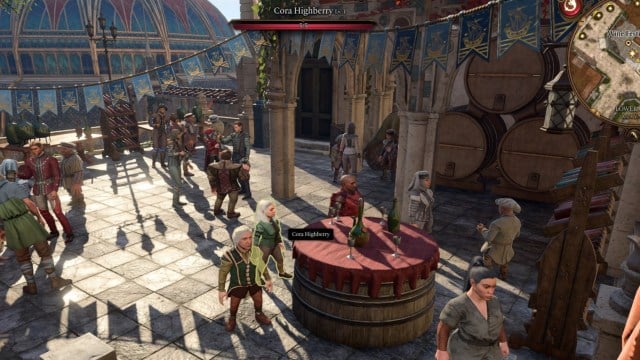
Speak to Cora, and you’ll see she’s in bad company. The dwarf’s last name is Metzi. And as you speak to her, you get a medicine check, which will reveal that the wine is poisoned. Pretty sure we’ve seen this modus operandi before.
But Cora can die if you choose the wrong dialogue choice. The only choice you should select is the first one, which is telling her that she’s being targeted by a poisoner.
If you investigated everything leading up to the murderer, including speaking with Ffion Goldgrind’s corpse, then you’ll know exactly who this dwarf is, and you’ll want to make the following dialogue choices:
- “Cora Highberry, your life is in danger. A serial Killer is after you.”
- “I would love a glass, Master Meztil.”
- “I’m afraid I must decline, but I hope you enjoy your wine.”
- “I think it’s only polite that we let Master Meztil drink first, or should I say…Dolor?”
- Attack the poisoner.
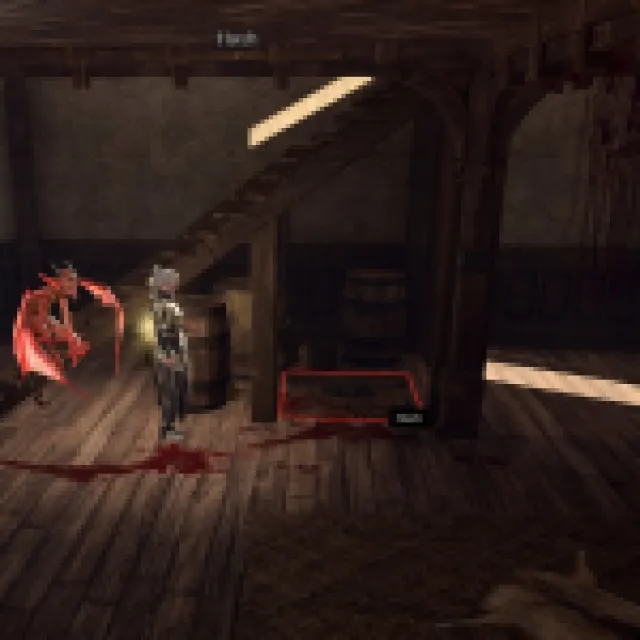
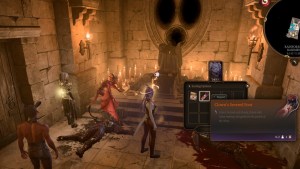
This will make Cora Highberry an “unclean” kill and Metzil will lose his damn mind. He’ll attack you, creating multiple copies of himself and paralyzing part of your party.
If you can cure paralysis, this is a great time to do so, because he’ll abuse Advantage attacks.

Once Metzil and the string of doppelgangers is dead, be sure to inspect each body. You want the Tombstone Key and the Hand Bag, as both will help you get into the Tribunal. You’ll also want to read the notes on his body, as it will give you the password to the Tribunal door.
Investigate Franc Peachtree in Balurd’s Gate 3
Franc’s house is the next closest (X:42 Y:-96). And, despite being dead, it’s well worth investigating.
You’ll have to batter your way through the sealed door. Next, you’ll get two perception checks. The one that really matters is the planks beside the bed. If you fail this perception check, you’ll miss out on the Peachtree Chest key.
Otherwise, open the bookshelf next to the desk to find the Peachtree Hatch key. The hatch is cleverly hidden beneath the Traveler’s Chest in the corner of the room. You can drag the chest off the hatch to interact with it.
If you didn’t get the Solve the Murders quest from Valeria, the floating yellow elephant, passing the perception check for the bloodied note should give you the quest and victim locations.
Now, into the hatch!
Inside, you’ll quickly encounter another body. This body has Dribble’s arm. Yay! If you completed the Open Hand Temple murder guide with me, then you should now have three body parts. We’re getting there, Dribbles!

There’s also a safebox in the adjoining room, which contains a rare shortsword and two Soul Coins. This can only be opened with the key you obtained by passing the perception check upstairs.
Getting Into the Tribunal
Now that we have the keys, the passcode, and the hands, we can access the Murder Tribunal we need to infiltrate to get to the temple of Bhaal. The Murder Tribunal is accessed through the Candulhallow’s Tombstones store in the very north section of the map (X:74 Y:25). Go inside into the very back room. There, you’ll find the painting the note spoke of. Pull it off and you’ll find a button.
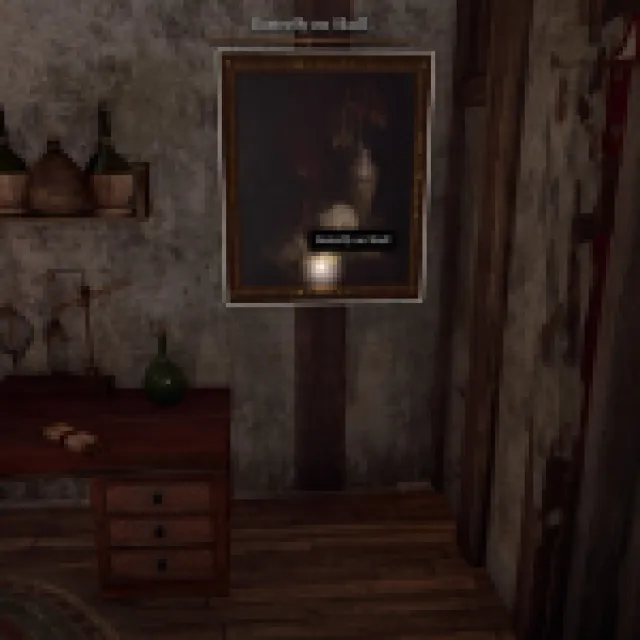
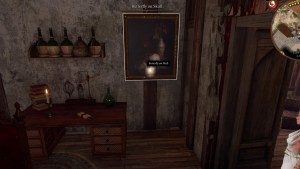
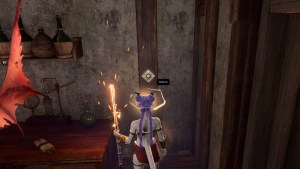
Press the button and a door on the opposite wall will reveal itself. Speak the password, and then you can descend.
Expect an encounter below (unless you want to pledge yourself to Bhaal, I guess). But more than that, expect this next section to move quite a few quests forward. Personally, I waited until I had finished a few side quests before tackling this next section.
If you haven’t saved Florrick, and you intend to do a few long rests, now might be a good time to break her out of jail.